
How to Add a Custom Domain Name
Brand your store with a custom URL
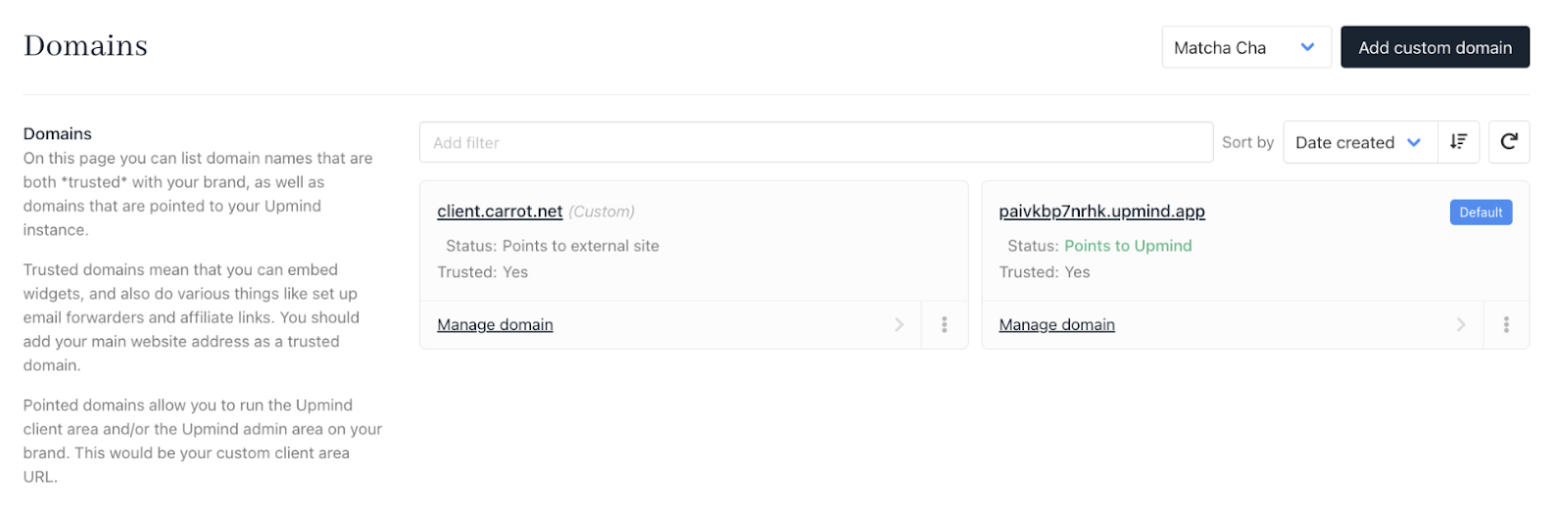
Every Upmind brand comes with a unique subdomain (randomID.upmind.app) for client login and staff admin access (randomID.upmind.app/admin).
To reflect your brand more professionally, we recommend that you add your own custom domain (like subdomain.yourdomain.com or clients.yourdomain.com).
Steps to add a custom domain
- Log in to the Upmind dashboard.
- Go to Settings > Domains under Branding and customisation.

Settings > Branding and customisation > Domains
- Click Add custom domain.
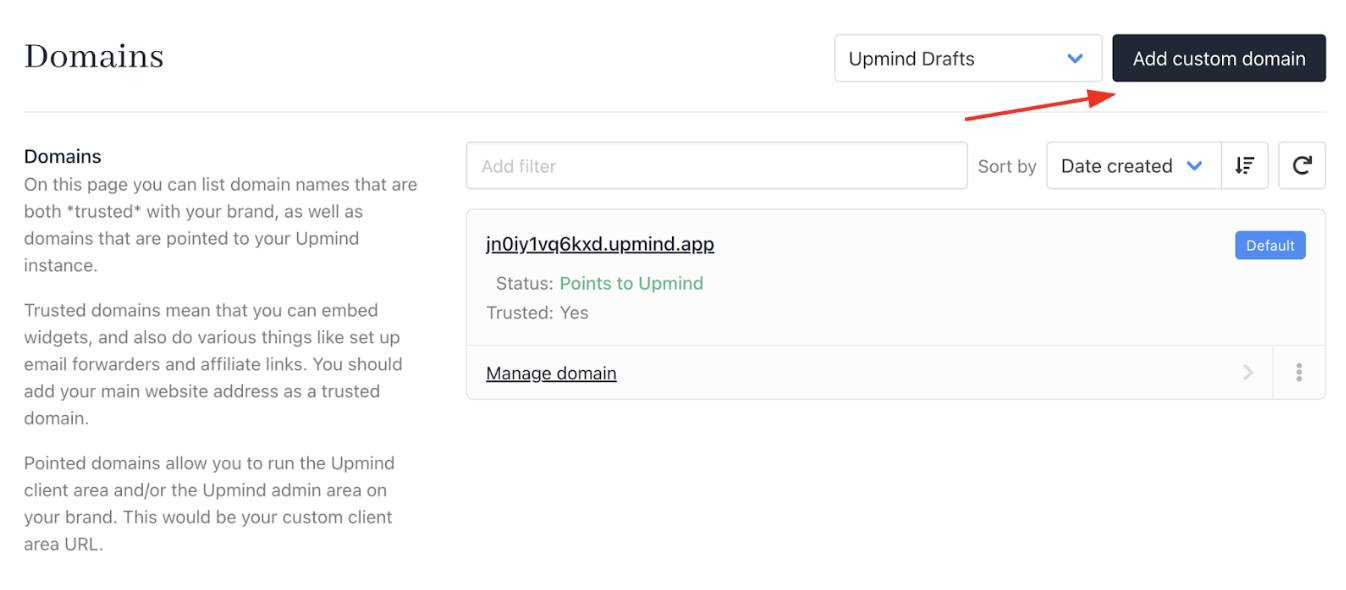
Add custom domain
Do not include
https://. Use the format example.yourdomain.com.
- Use toggles to enable admin login, client login, or both. By default, both options are disabled.
You will be prompted to add a CNAME. This needs to be done with your domain registrar.
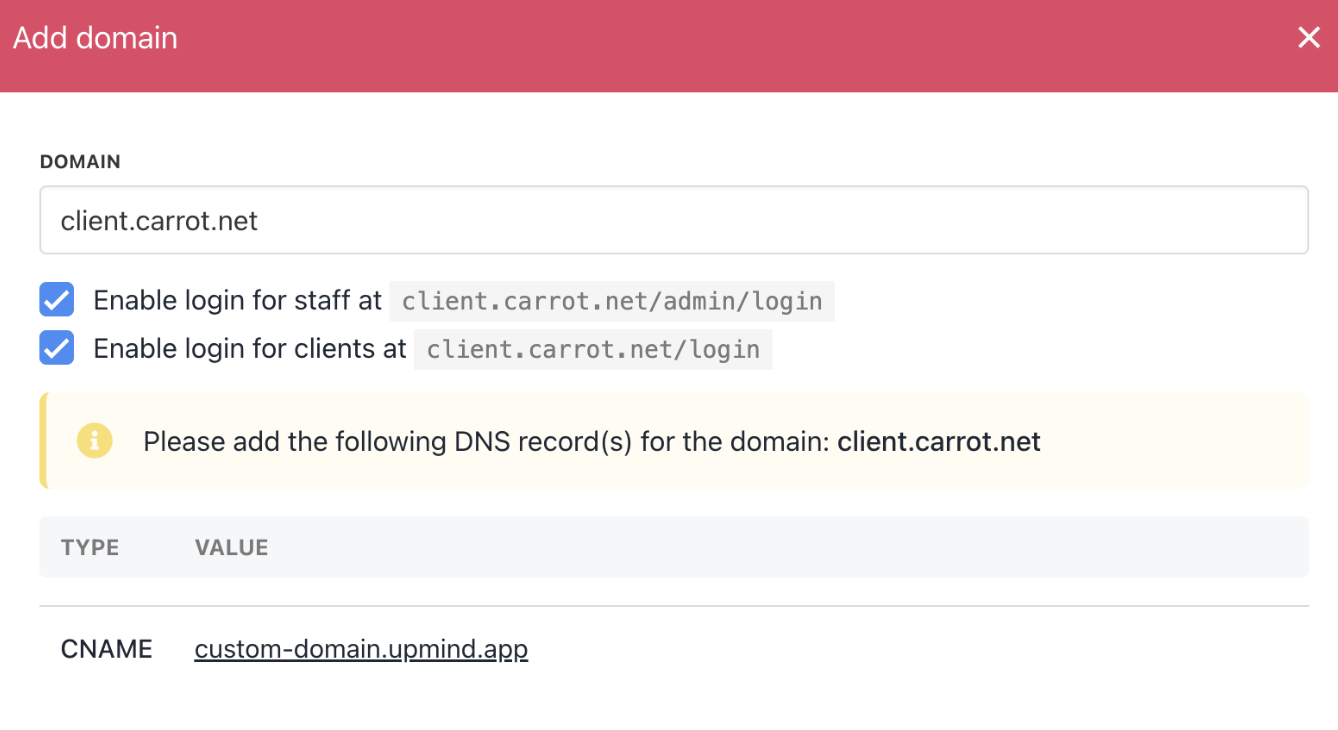
Click and copy records
- Click Save. The domain will appear as unverified on the list.
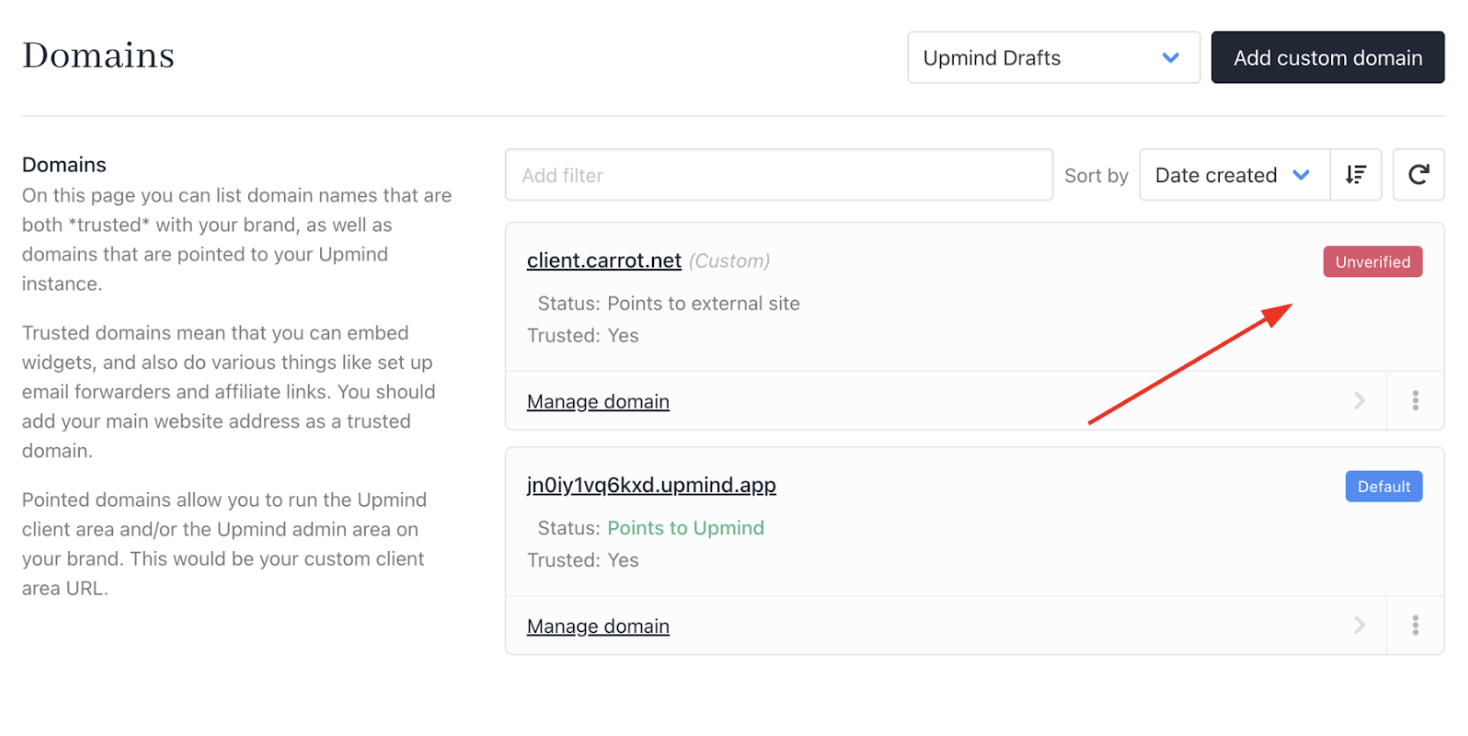
Upmind adds unverified tag
Configuring CNAME record
Before you can verify a URL, direct your current domain name to your Upmind URL with a new CNAME.
- Log in to your domain registrar.
- Create a new CNAME Record.
- Paste the code into the field.
- Wait about 10 minutes for DNS propagation.
Watch this YouTube video to learn how to update domains to use CNAME.
For cPanel users
If you're using cPanel, please ensure that you add the CNAME in the Zone Editor.
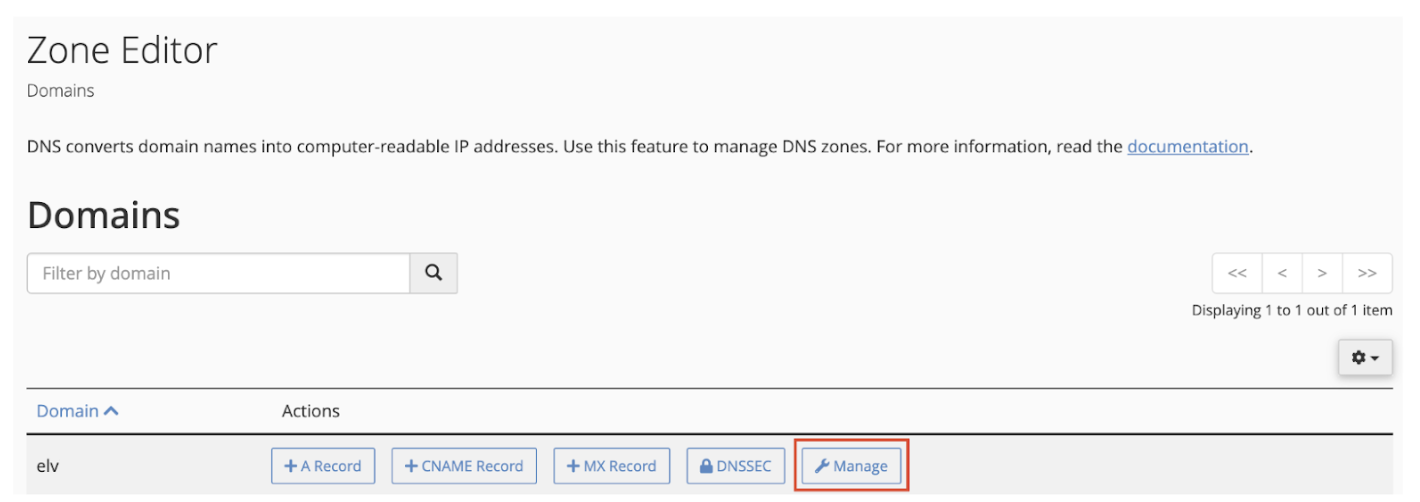
DNS Zone Manager > Choose the Domain > Manage
For Cloudflare users
We recommend disabling Proxied (set Proxy status to DNS only) to ensure proper connection to Upmind.
If you have MX records on the same subdomain, you can enable proxy, which allows Cloudflare to convert CNAME records to A records, letting you use both CNAME and MX records, something that is normally not possible.

Make sure the Type is CNAME and paste Upmind CNAME to the Record
Verifying the domain
Domain verification may take a few hours.
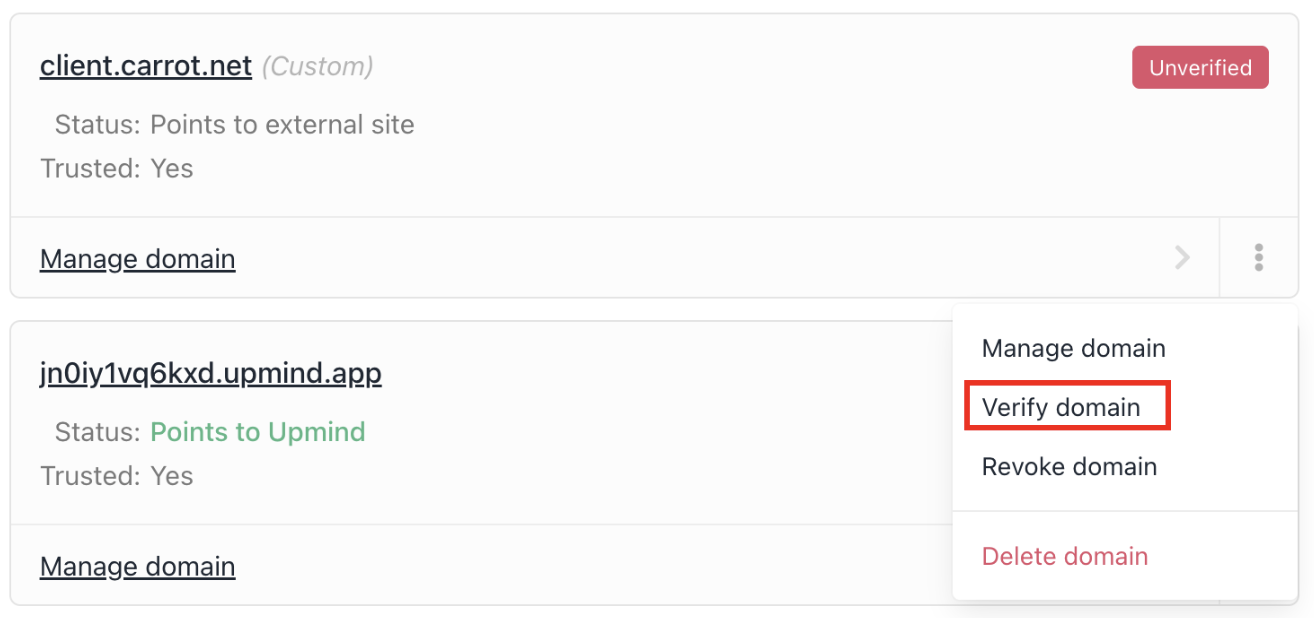
- Return to the Upmind Domains page.
- Click the three-dots icon on your new domain.
- Click Verify.
- After verification, SSL certificates are auto-installed for a secure connection.
Verify account
This is what it looks like when your custom domain has been successfully verified.
The tag is removed
How to use your custom domain
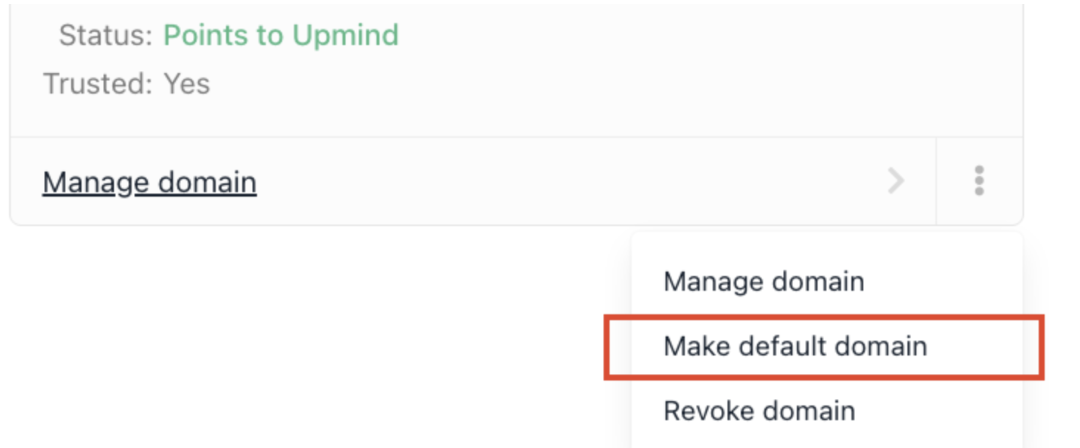
To set the domain as default, click the three-dot menu and select Make Default Domain.
Make default domain
The Client URL login path is designated as /login.

Client interface login
The Admin URL path is set as /admin.
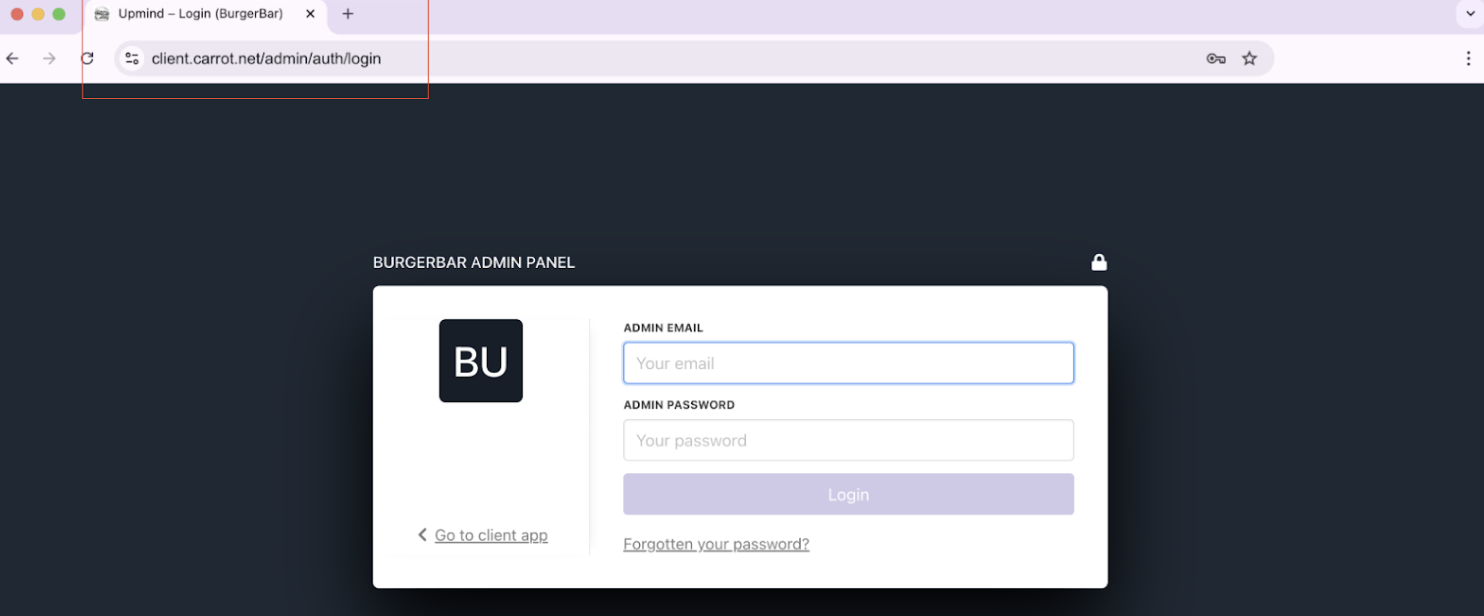
Admin interface login
Updated 15 days ago