
Creating a quick invoice
From the client profile
-
Go to the
Clientssection. - Select the client you wish to invoice.
- On the client overview page, click the three dots next to the client’s name and select Add Quick Invoice.

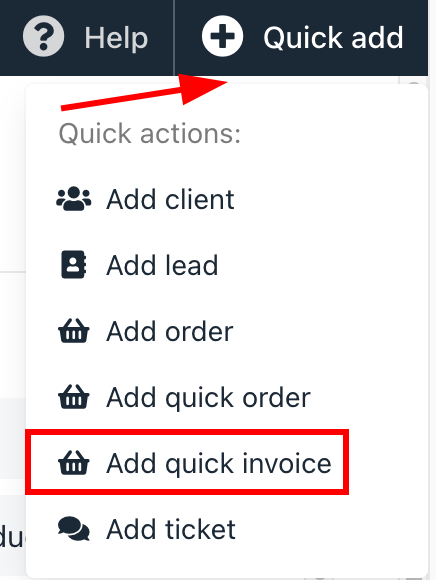
From quick add
- Click the Quick add button in the top right corner.
- Select Add quick invoice.
- Choose the client and proceed with the prompts.
Add invoice details
You can configure the following details:- Currency: Choose the billing currency for the invoice from the dropdown.
- Address: Confirm or enter the client’s billing address.
-
Products:
- Select Existing: Search and select products from your catalogue.
- Add New: Enter details for a new product or service
- Billing Terms: Set one-time or recurring billing as needed.
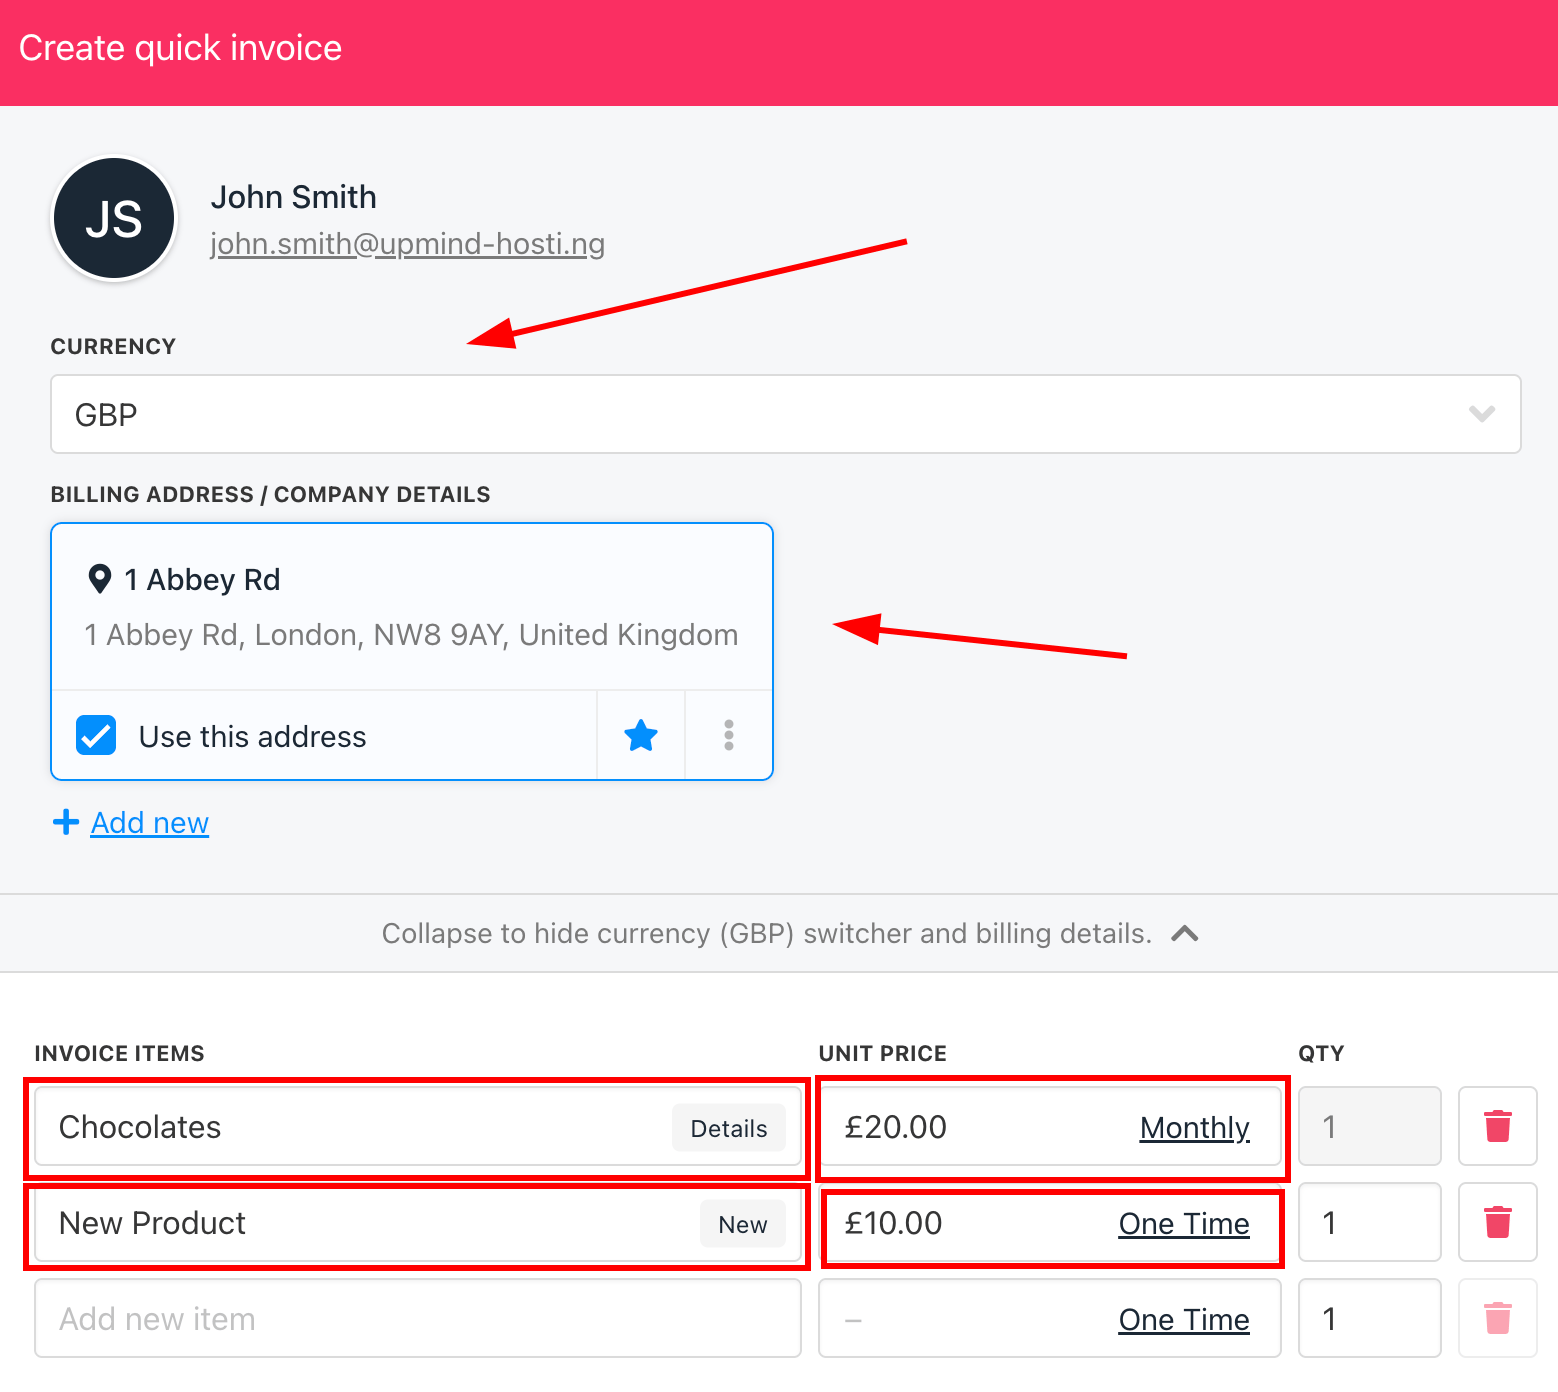
- Review the invoice details, save, and send it directly to the client.
Automated Product CreationIf a product isn’t found in your search, entering a new product name will automatically create that product in your catalogue once the invoice is generated. These products remain hidden from your storefront unless you choose to publish them.