
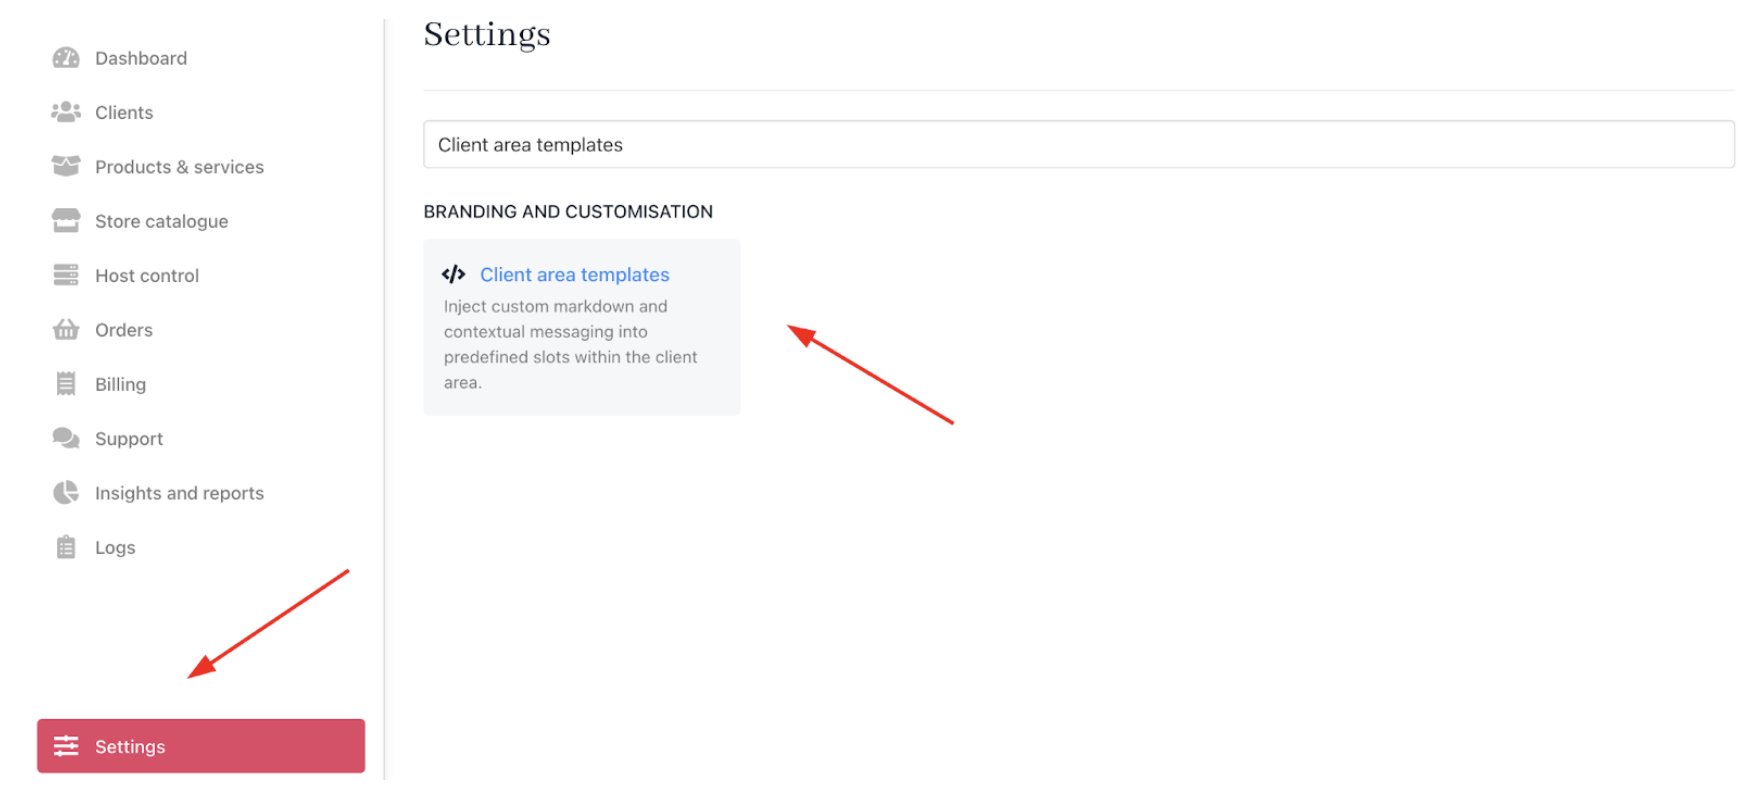
Accessing client area templates
- Sign in to your Upmind Admin account.
- Go to Settings > Client Area Templates under Branding and Customisation.
Settings > Branding and customisation > Client area templates
Creating a new template and mapping it to a slot
Choose this option to create a new template and assign it to a slot with both creation and mapping in one unified workflow.- On the
Client area templates page, select a slot and click Add template.
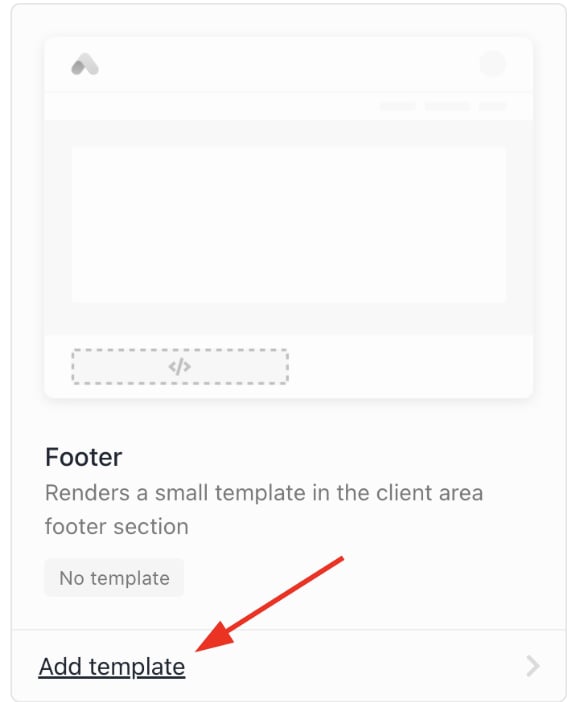
Add template
- In the side panel, choose Create new template.
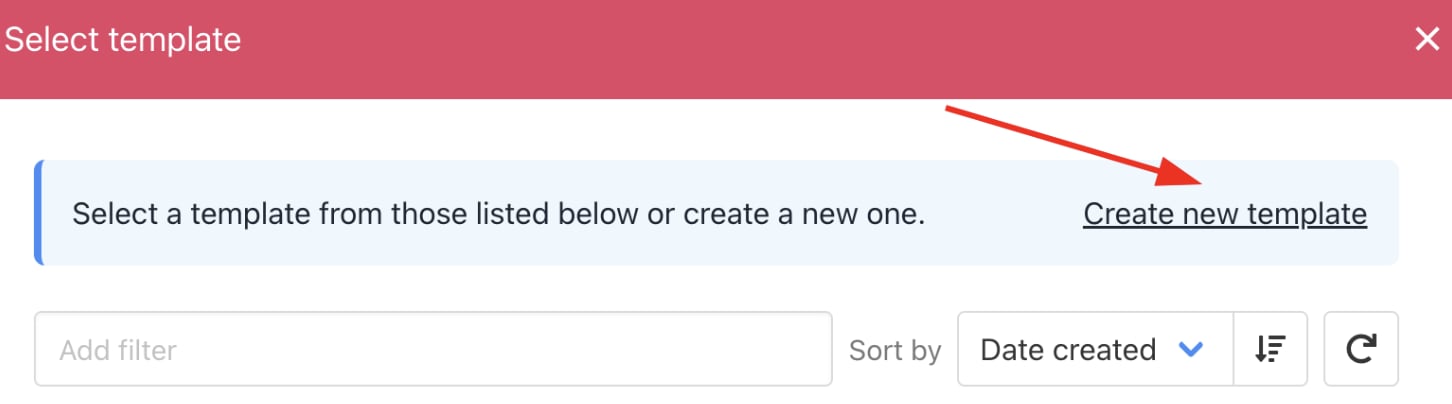
Create new template
- You can also go to the
Templatessection and click Create New Template. This way, you can choose your category.
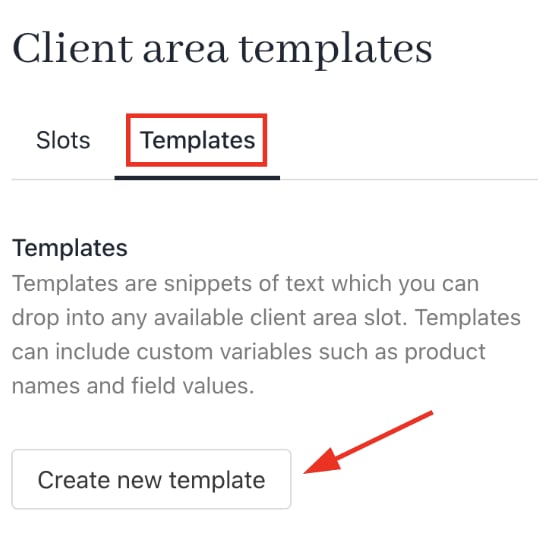
Templates > Create new template
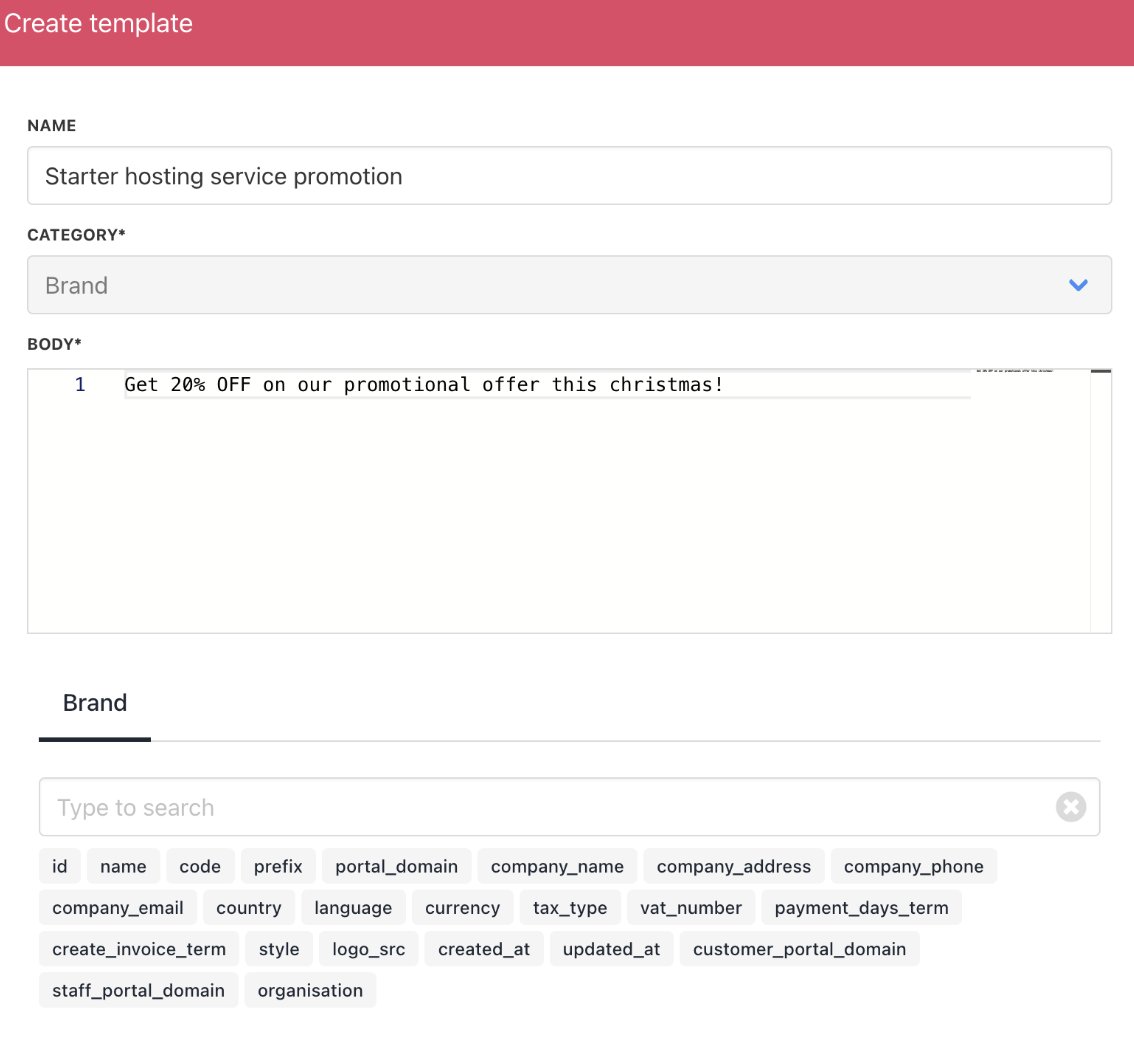
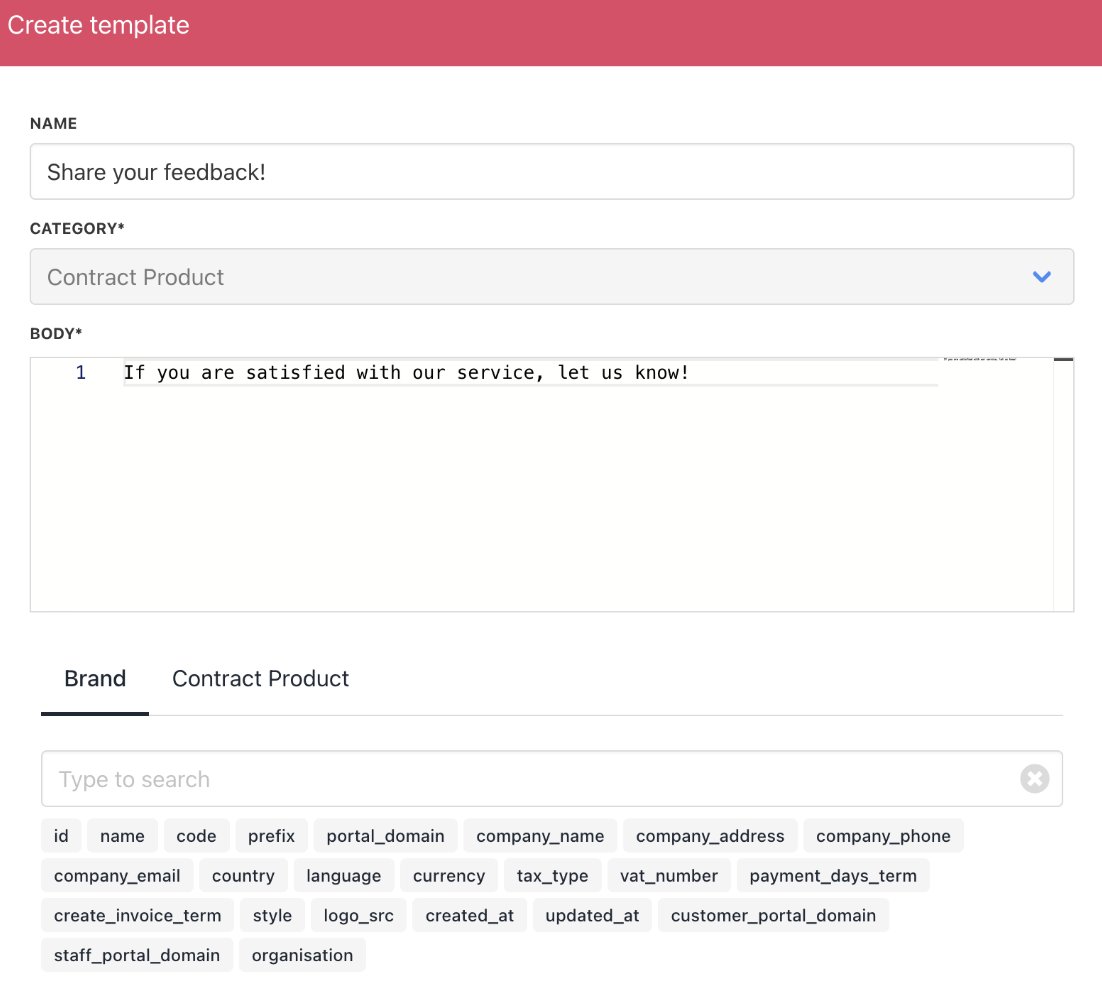
- Enter a unique template name (not visible to clients).
- In the Body field, write your message. You may use HTML and Twig syntax for styling and dynamic content.
Fill in the details
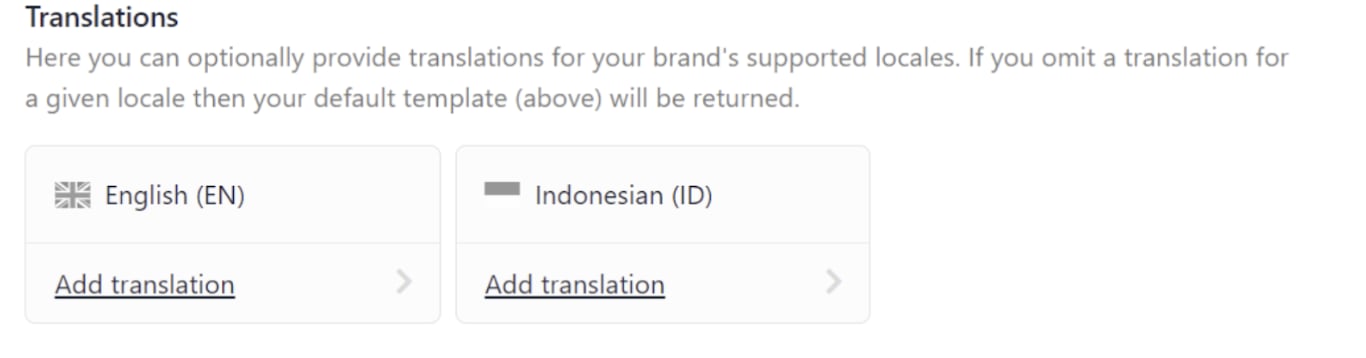
- Add translations for multilingual support. (optional)
Translations
- Save the template.
Not sure about Twig syntax? Learn more.
- Assign the created template to the chosen slot by confirming the selection and mapping it.

Select template
- The template name will now appear listed under the slot on the templates page.
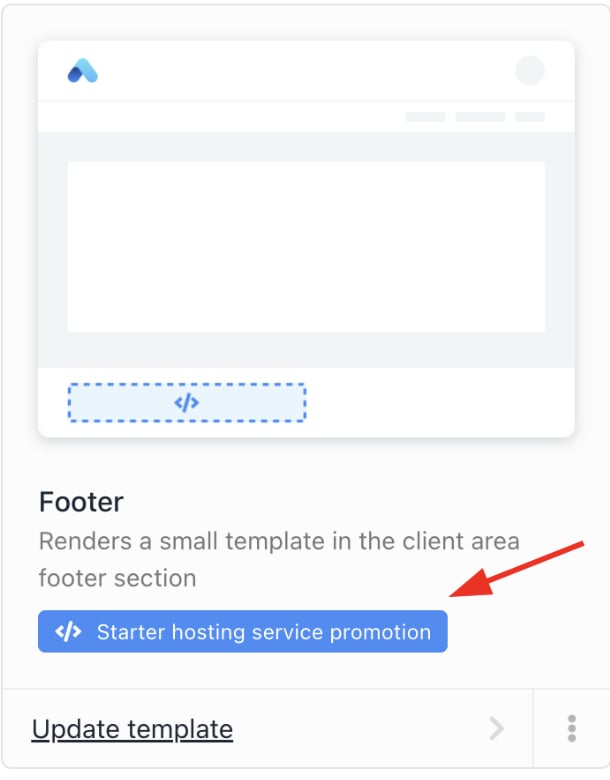
Mapped template

Template on display
Creating templates for specific products
Choose this option to create a template for a certain product that highlights key promotional messages and onboarding details.- Go to Settings > Product Catalogue under Products and Promotions or click on Store Catalogue.

Settings > Products and promotions > Product catalogue
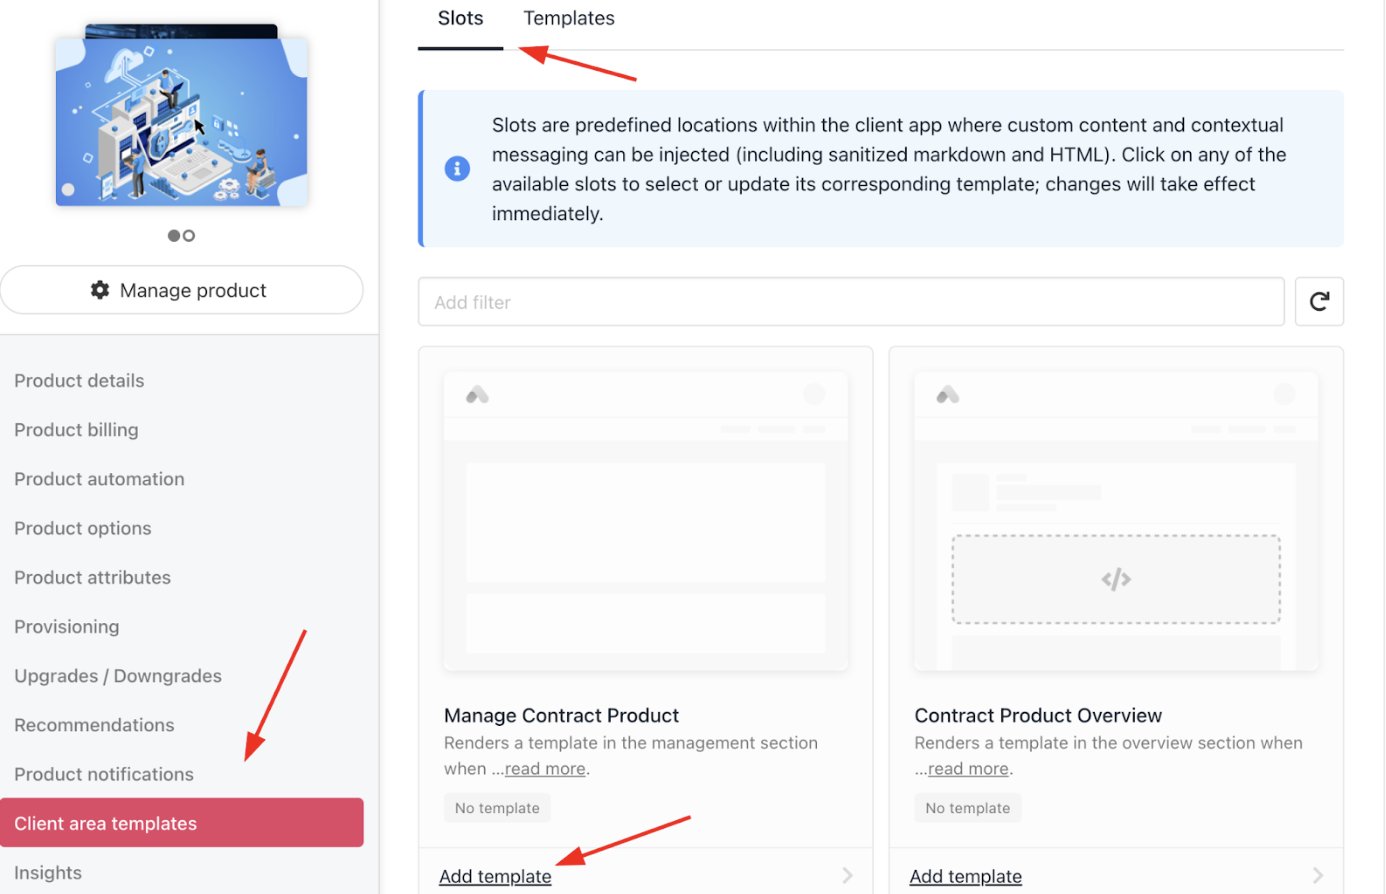
- Select a product.
- Scroll to Client Area Templates and click it.
- Make sure Slots is selected.
Add template
- Click Add template, then Create new template.

Create new template
- Provide a name and compose a message with optional HTML/Twig.
- Save and confirm the selection.
Fill in the details
Active products & services on client overview pages.
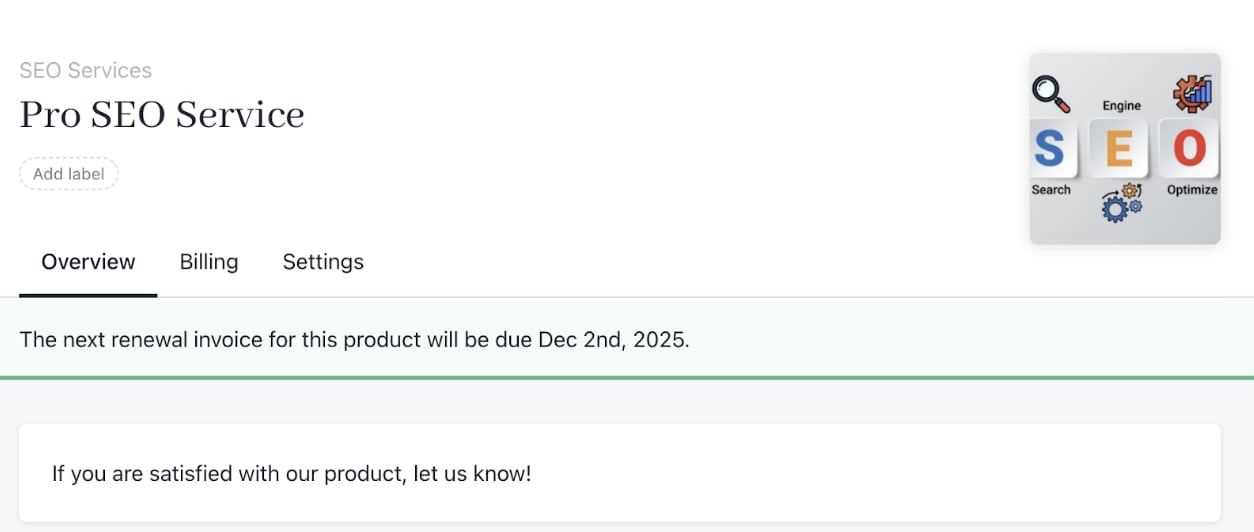
Template on display