How to Send a Test Notification
Preview results while creating a message
Testing while creating is a time-saving feature we've added to the Upmind Notification page.
In a previous article, we showed you how to create automated notifications with triggers. This article adds a feature to that tool and shows you how to send a test notification. You can send a test message for an existing notification or a new one that you are creating now.
NoteThe Send test feature is a work in progress. It's available for many triggers but not all. We aim to expand the feature ASAP.
Opening an existing automation
Follow these steps to open an existing automation for testing.
- Log in to your Upmind account.
- Click Settings.
- Click the Actions tile.
- Locate the name of an existing action, click the gear icon, and select View.
Sending a test message
Scroll down to the Send email heading in the side panel and click the Send test email button. (If you don't see the Send test email button, the test feature is not yet available.)
To select a test email account:
- Go to the side panel.
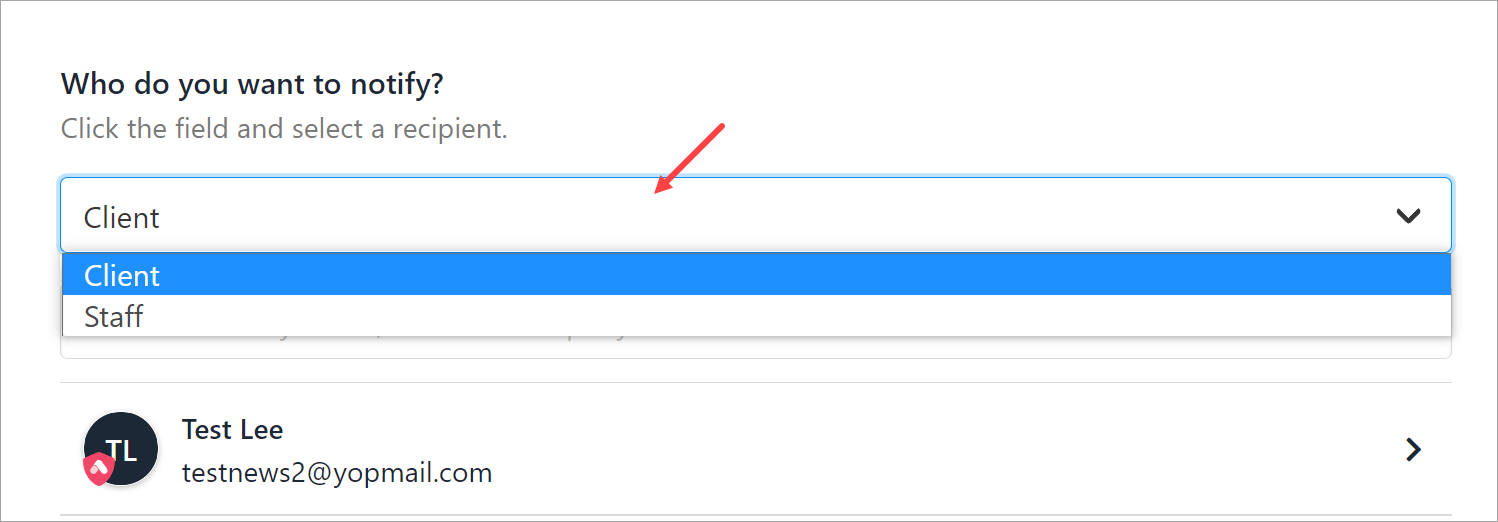
- Click the field and select a user category (client or staff).
- Scroll through the list and click a user name.

Click the user name again on the next panel. On the confirmation pop-up, click Send test email. Open your test email account and review the results.
That's it.
Testing a new automation
To send a test notification for a new automation, follow the steps above with a couple of changes.
- Create a draft notification.
- Switch off the enable toggle at the top of the page.
- Click Save.
- Click the Back to previous link at the top of the page.
- Locate the draft notification, click the gear icon, and select View.
- Follow the above steps to send a test email message.
- Once the draft message is final, switch on the enable toggle.
That's it.
Updated 9 months ago