
How to add Virtualizor products
Configure Virtualizor products and automate provisioning and basic management of virtual servers
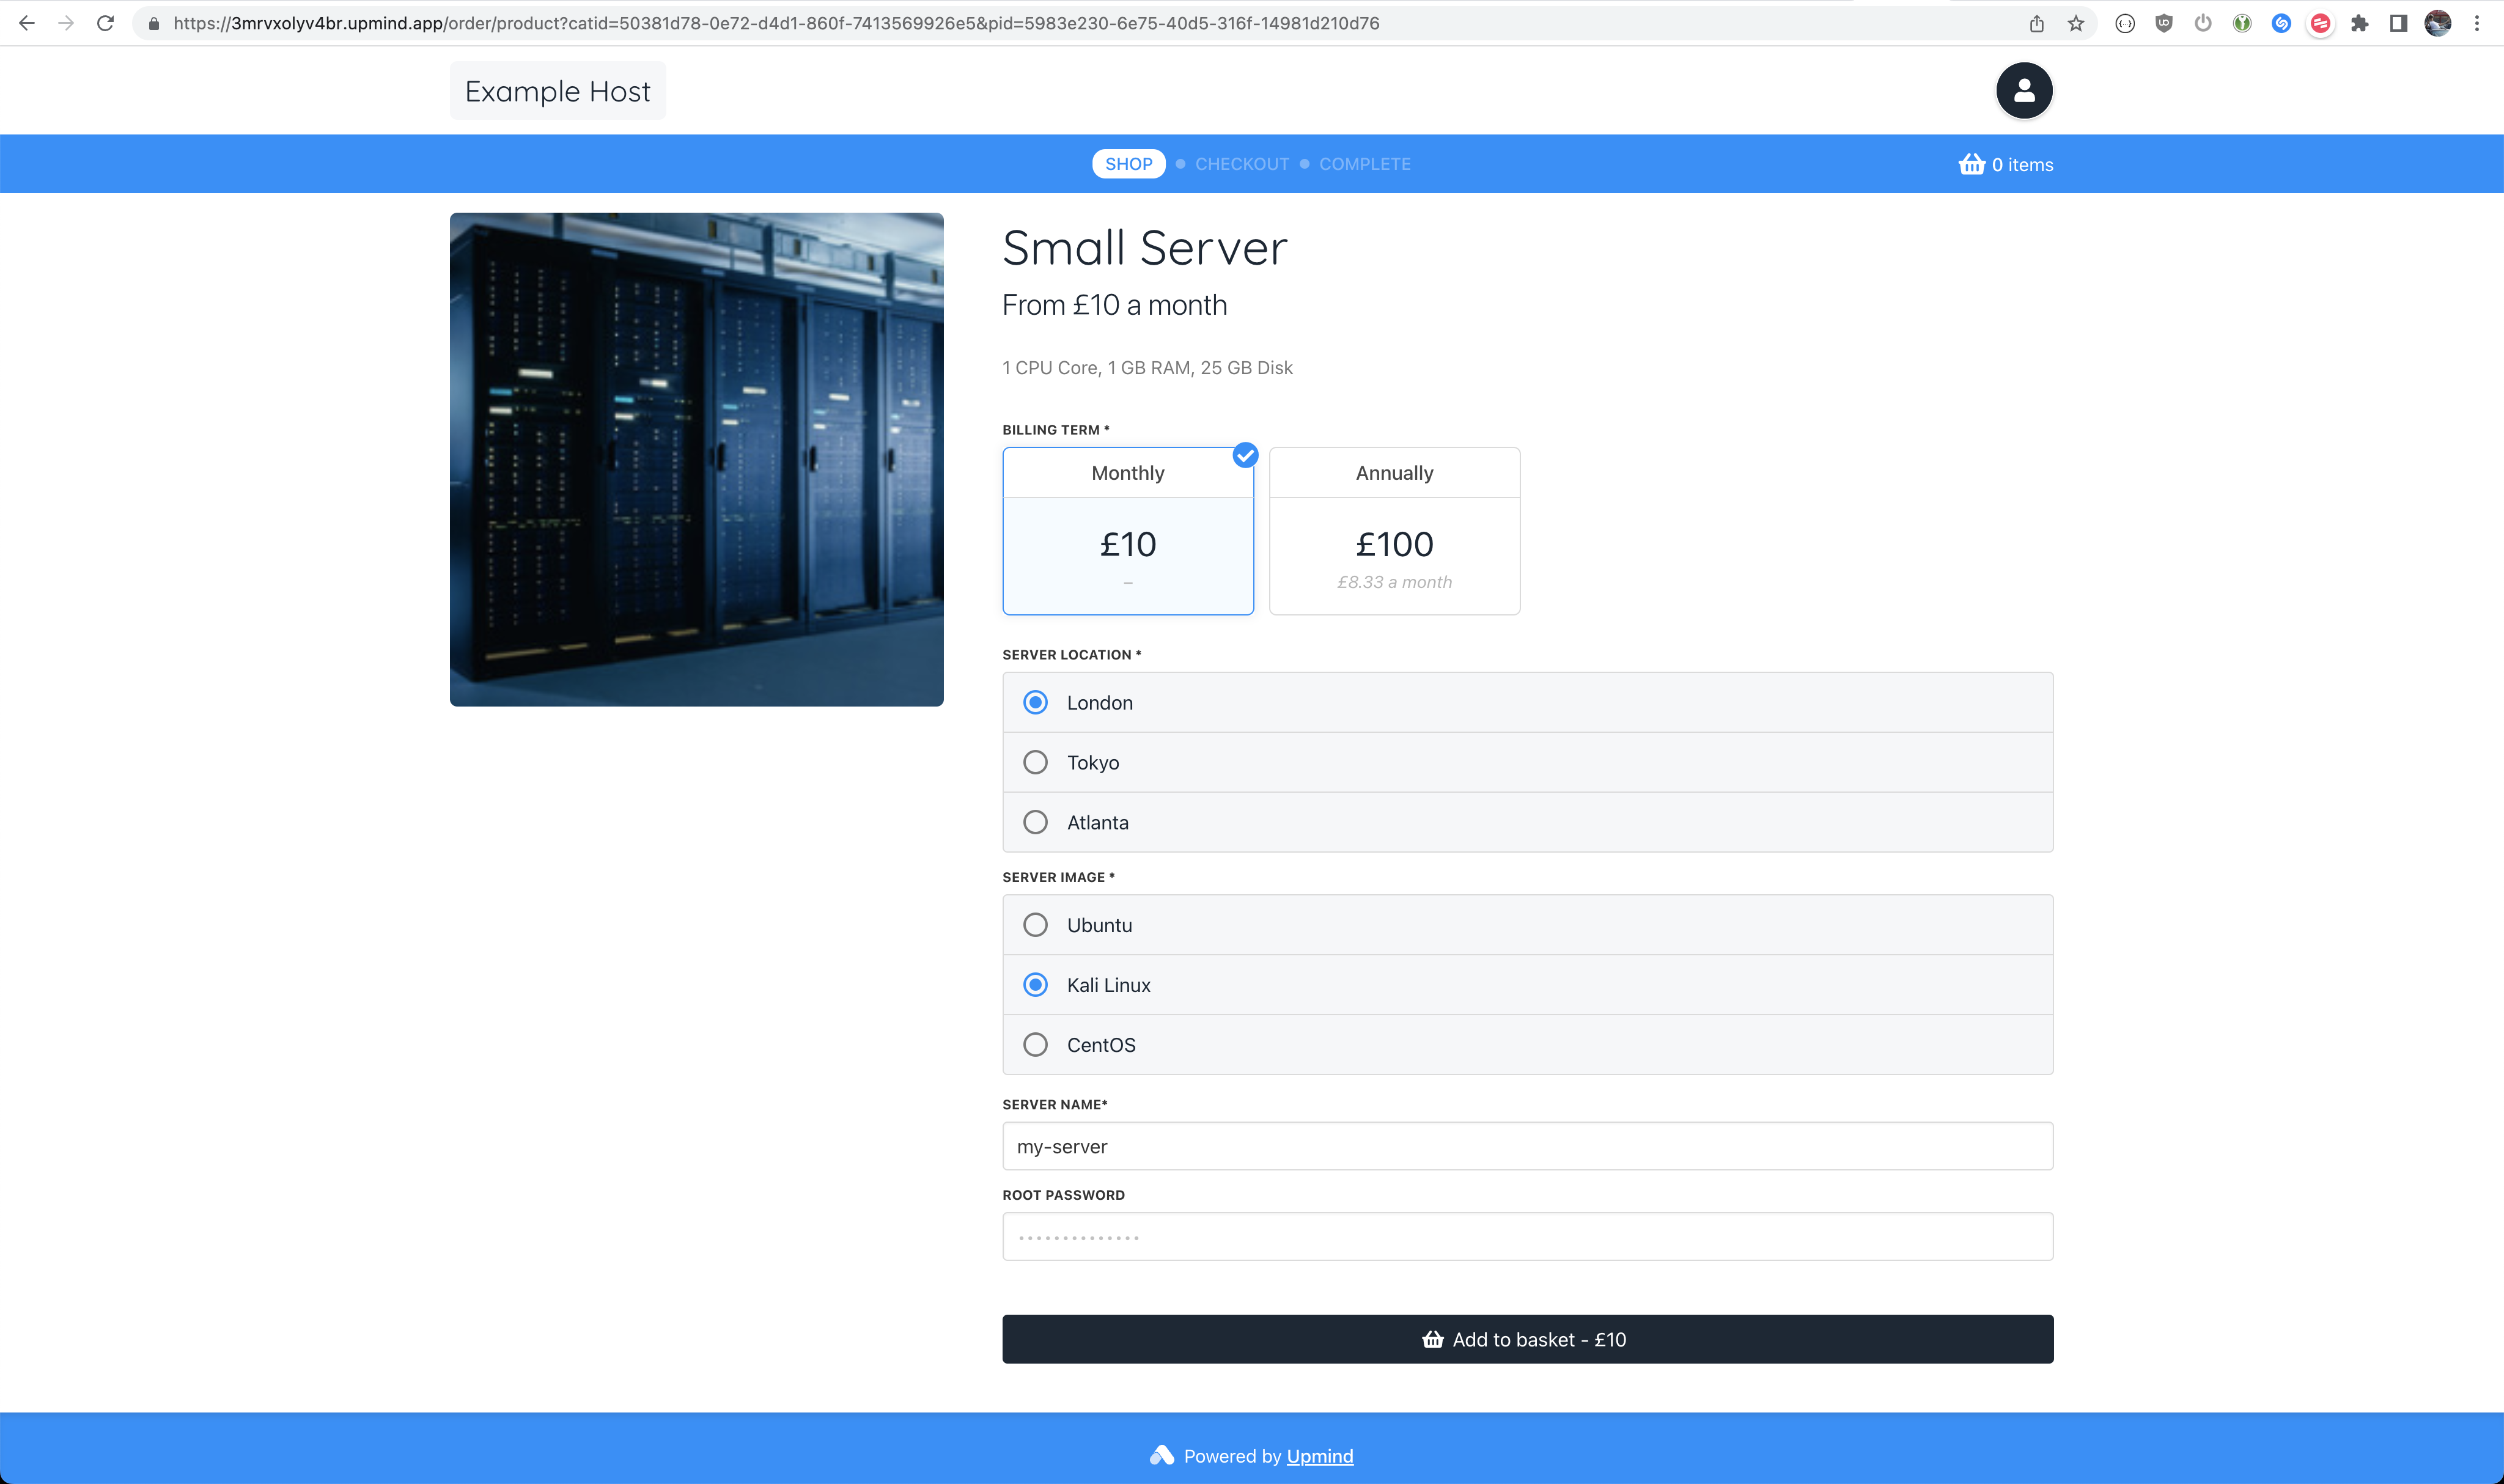
Customer Server Configuration View
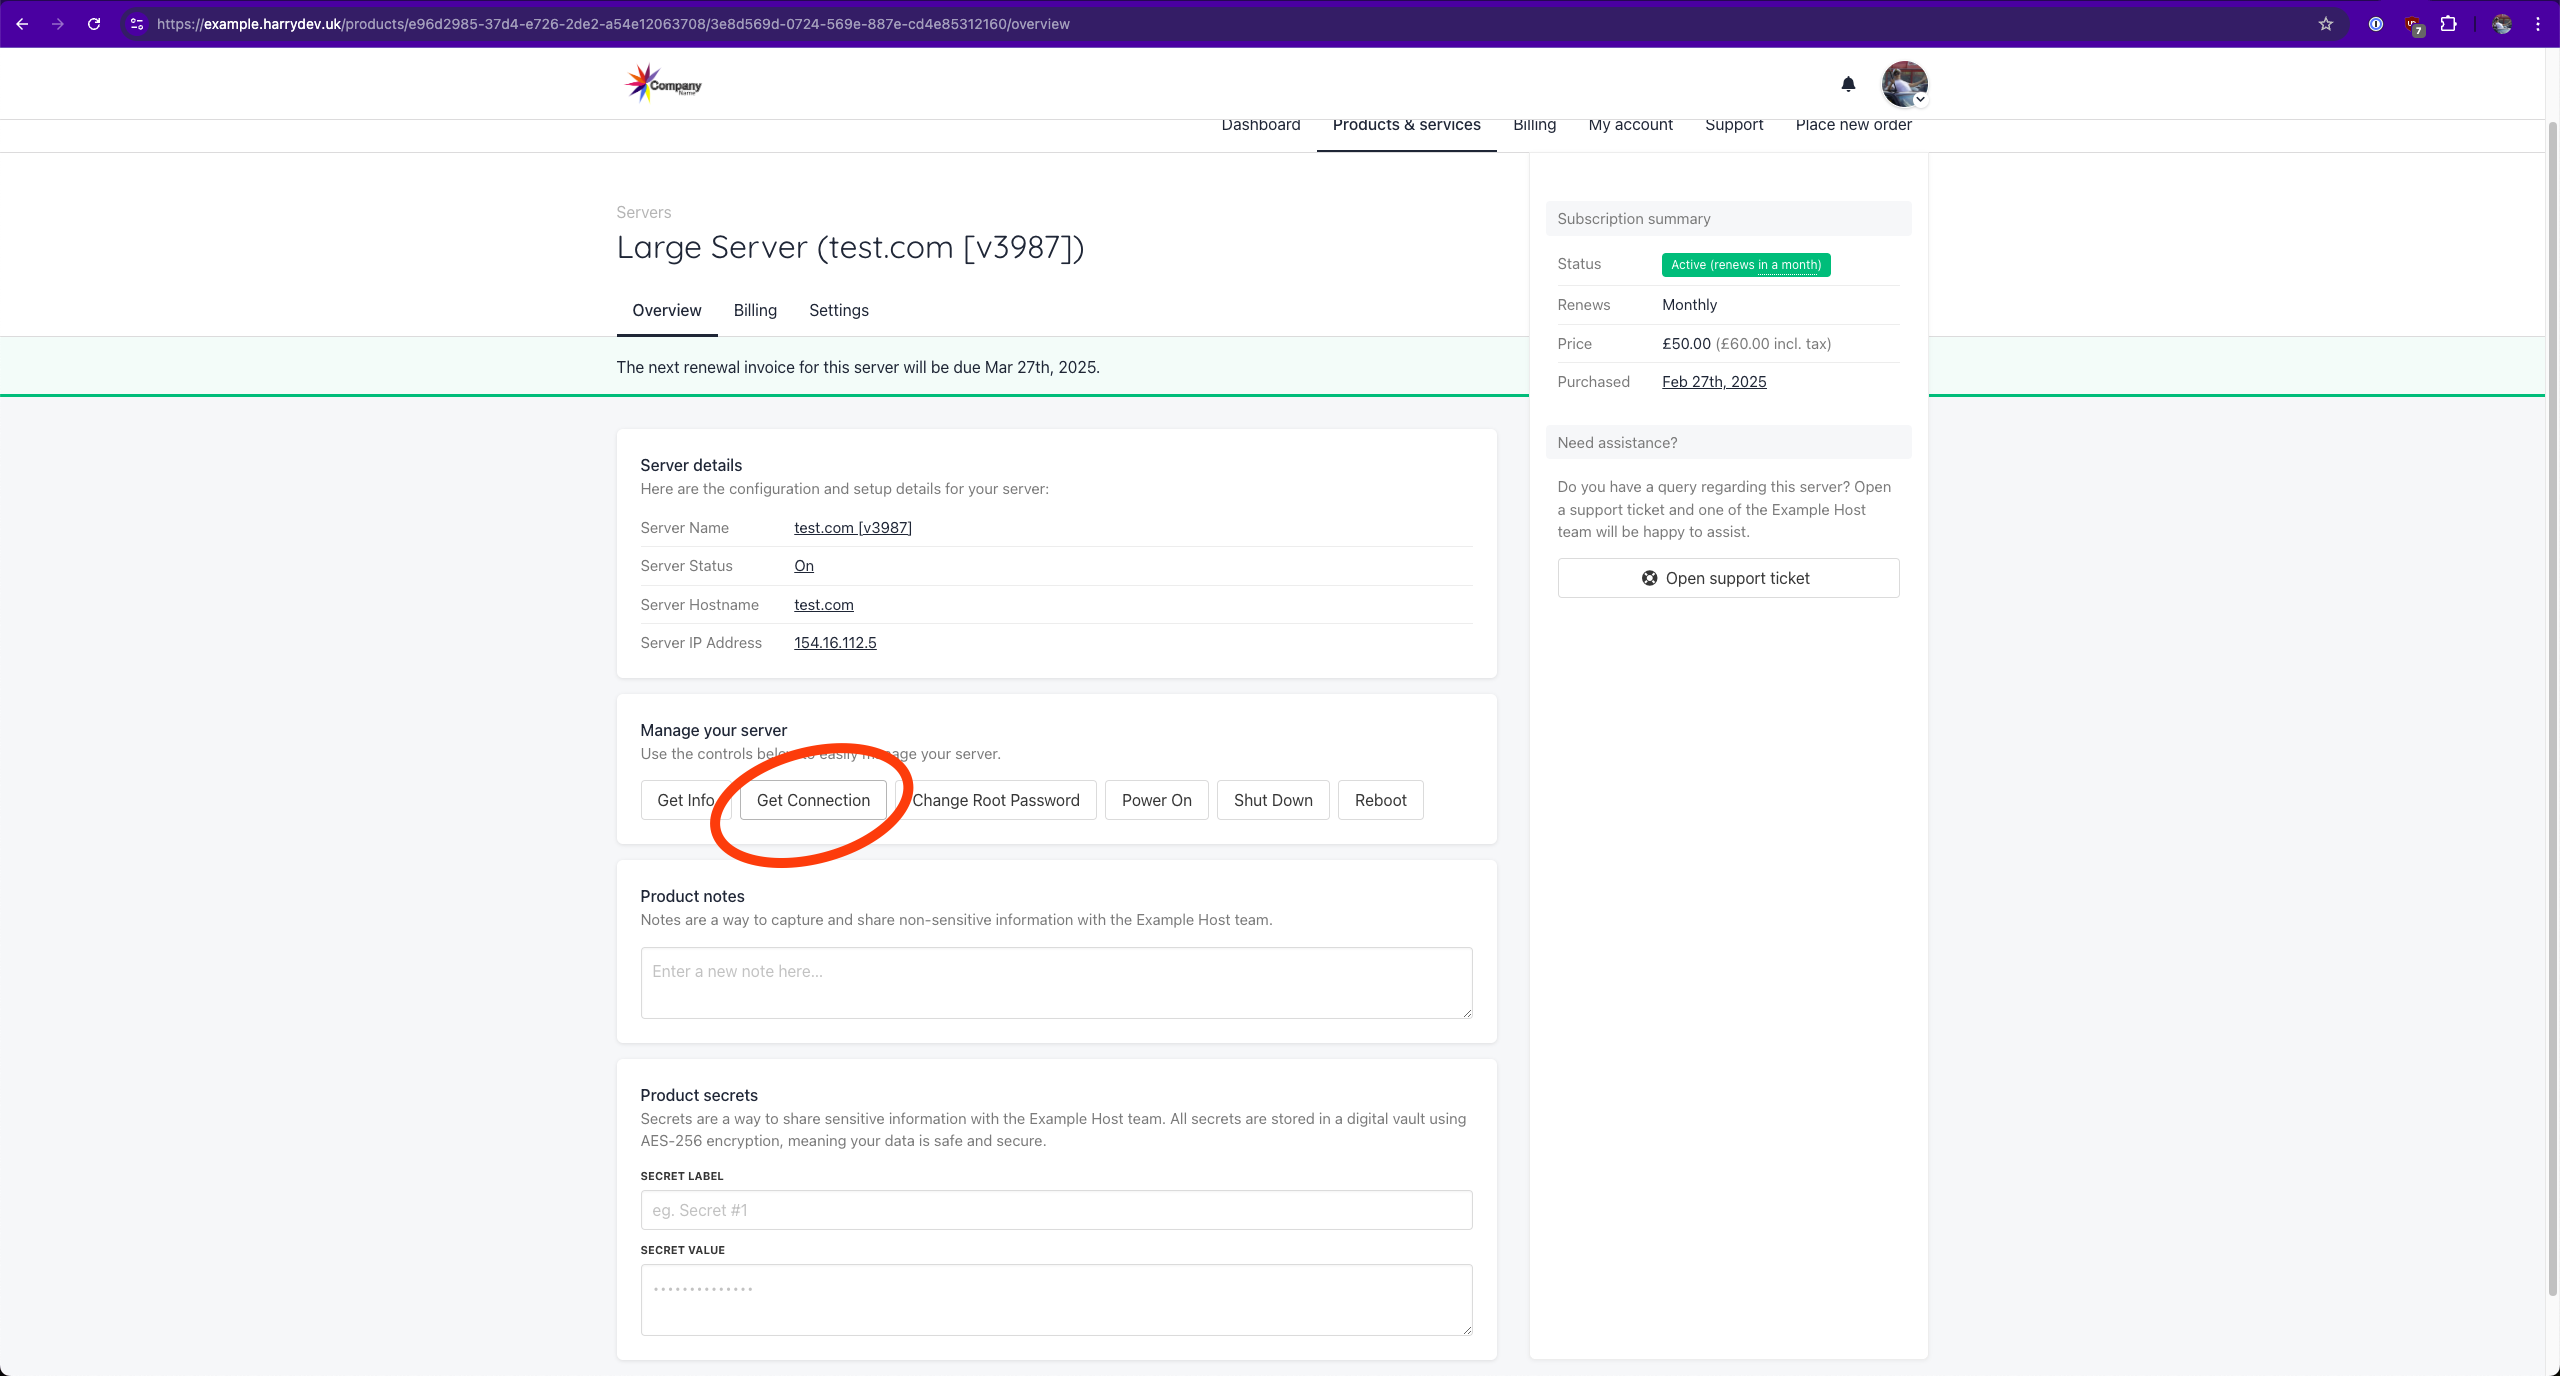
Customer Server Management View with SSO Login for Virtualizor
This guide explains how to configure Virtualizor server products on Upmind.
Create a Provision Configuration
First, you should create a Provision Configuration in your Upmind settings. You will need to create an API/access token in your Virtualizor dashboard to do this.
Create an API Token in Virtualizor
- Log in to Virtualizor
- Navigate to API Credentials
- Select an admin user then Check all Actions
- Scroll to the bottom and click Generate

Create API Credential for an Admin User with access to all Actions
- Return to the API Credential List and make note of your
API KeyandAPI Password
Create a Provision Configuration in Upmind
- Go to Settings -> Provision configurations
- Click to Add new configuration with the following options:
- Name of your choice
- Provision Category: Servers
- Provider: Virtualizor
- Hostname: Your Virtualizor master hostname
- API Key: (Paste your API Key)
- API Password: (Paste your API Password)
- Location Type: Geographic (Allows server placement by location e.g., "US")
- Default Virtualization Type: KVM (This is the most common virtualization type)
- Click Create and now you're ready to create Virtualizor products in Upmind
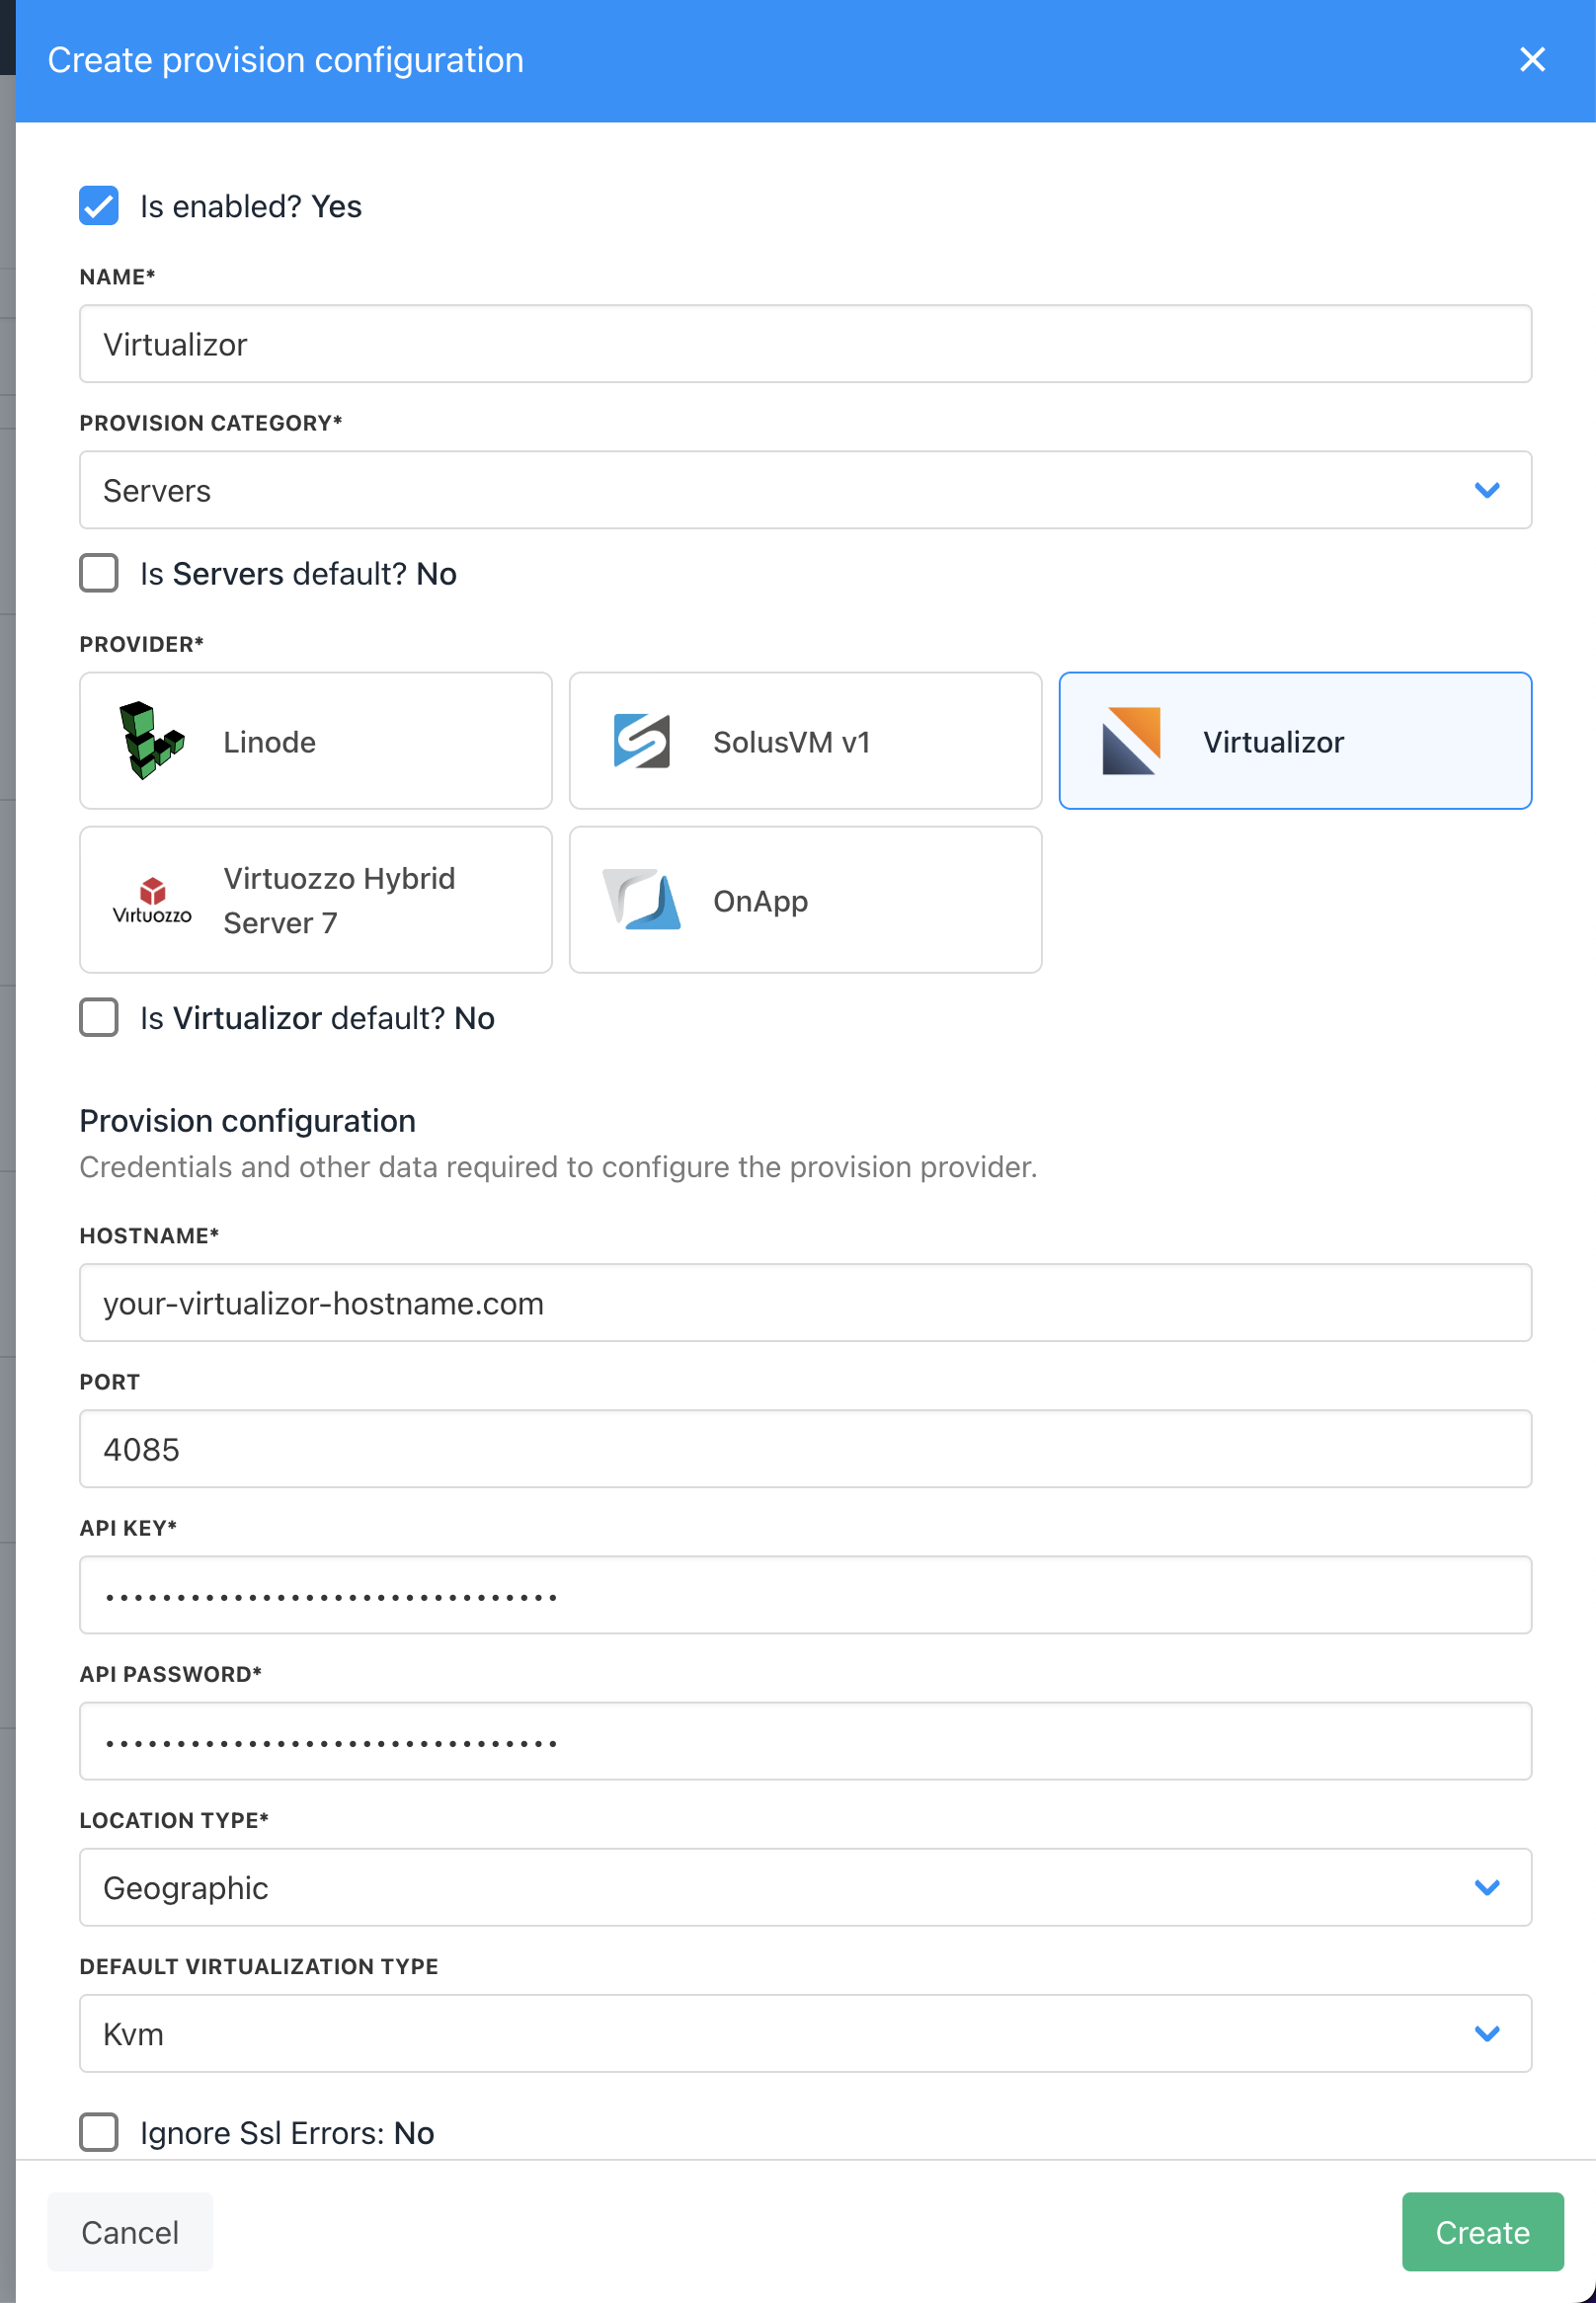
Create provision configuration
Create a Product
This guide will cover how to configure the Provisioning section on your Upmind Products to automate the provisioning of Virtualizor servers. For more information on configuring Products in general, please refer to How to Create Products.
- Go to Settings -> Product catalogue
- Add new or edit an existing Product
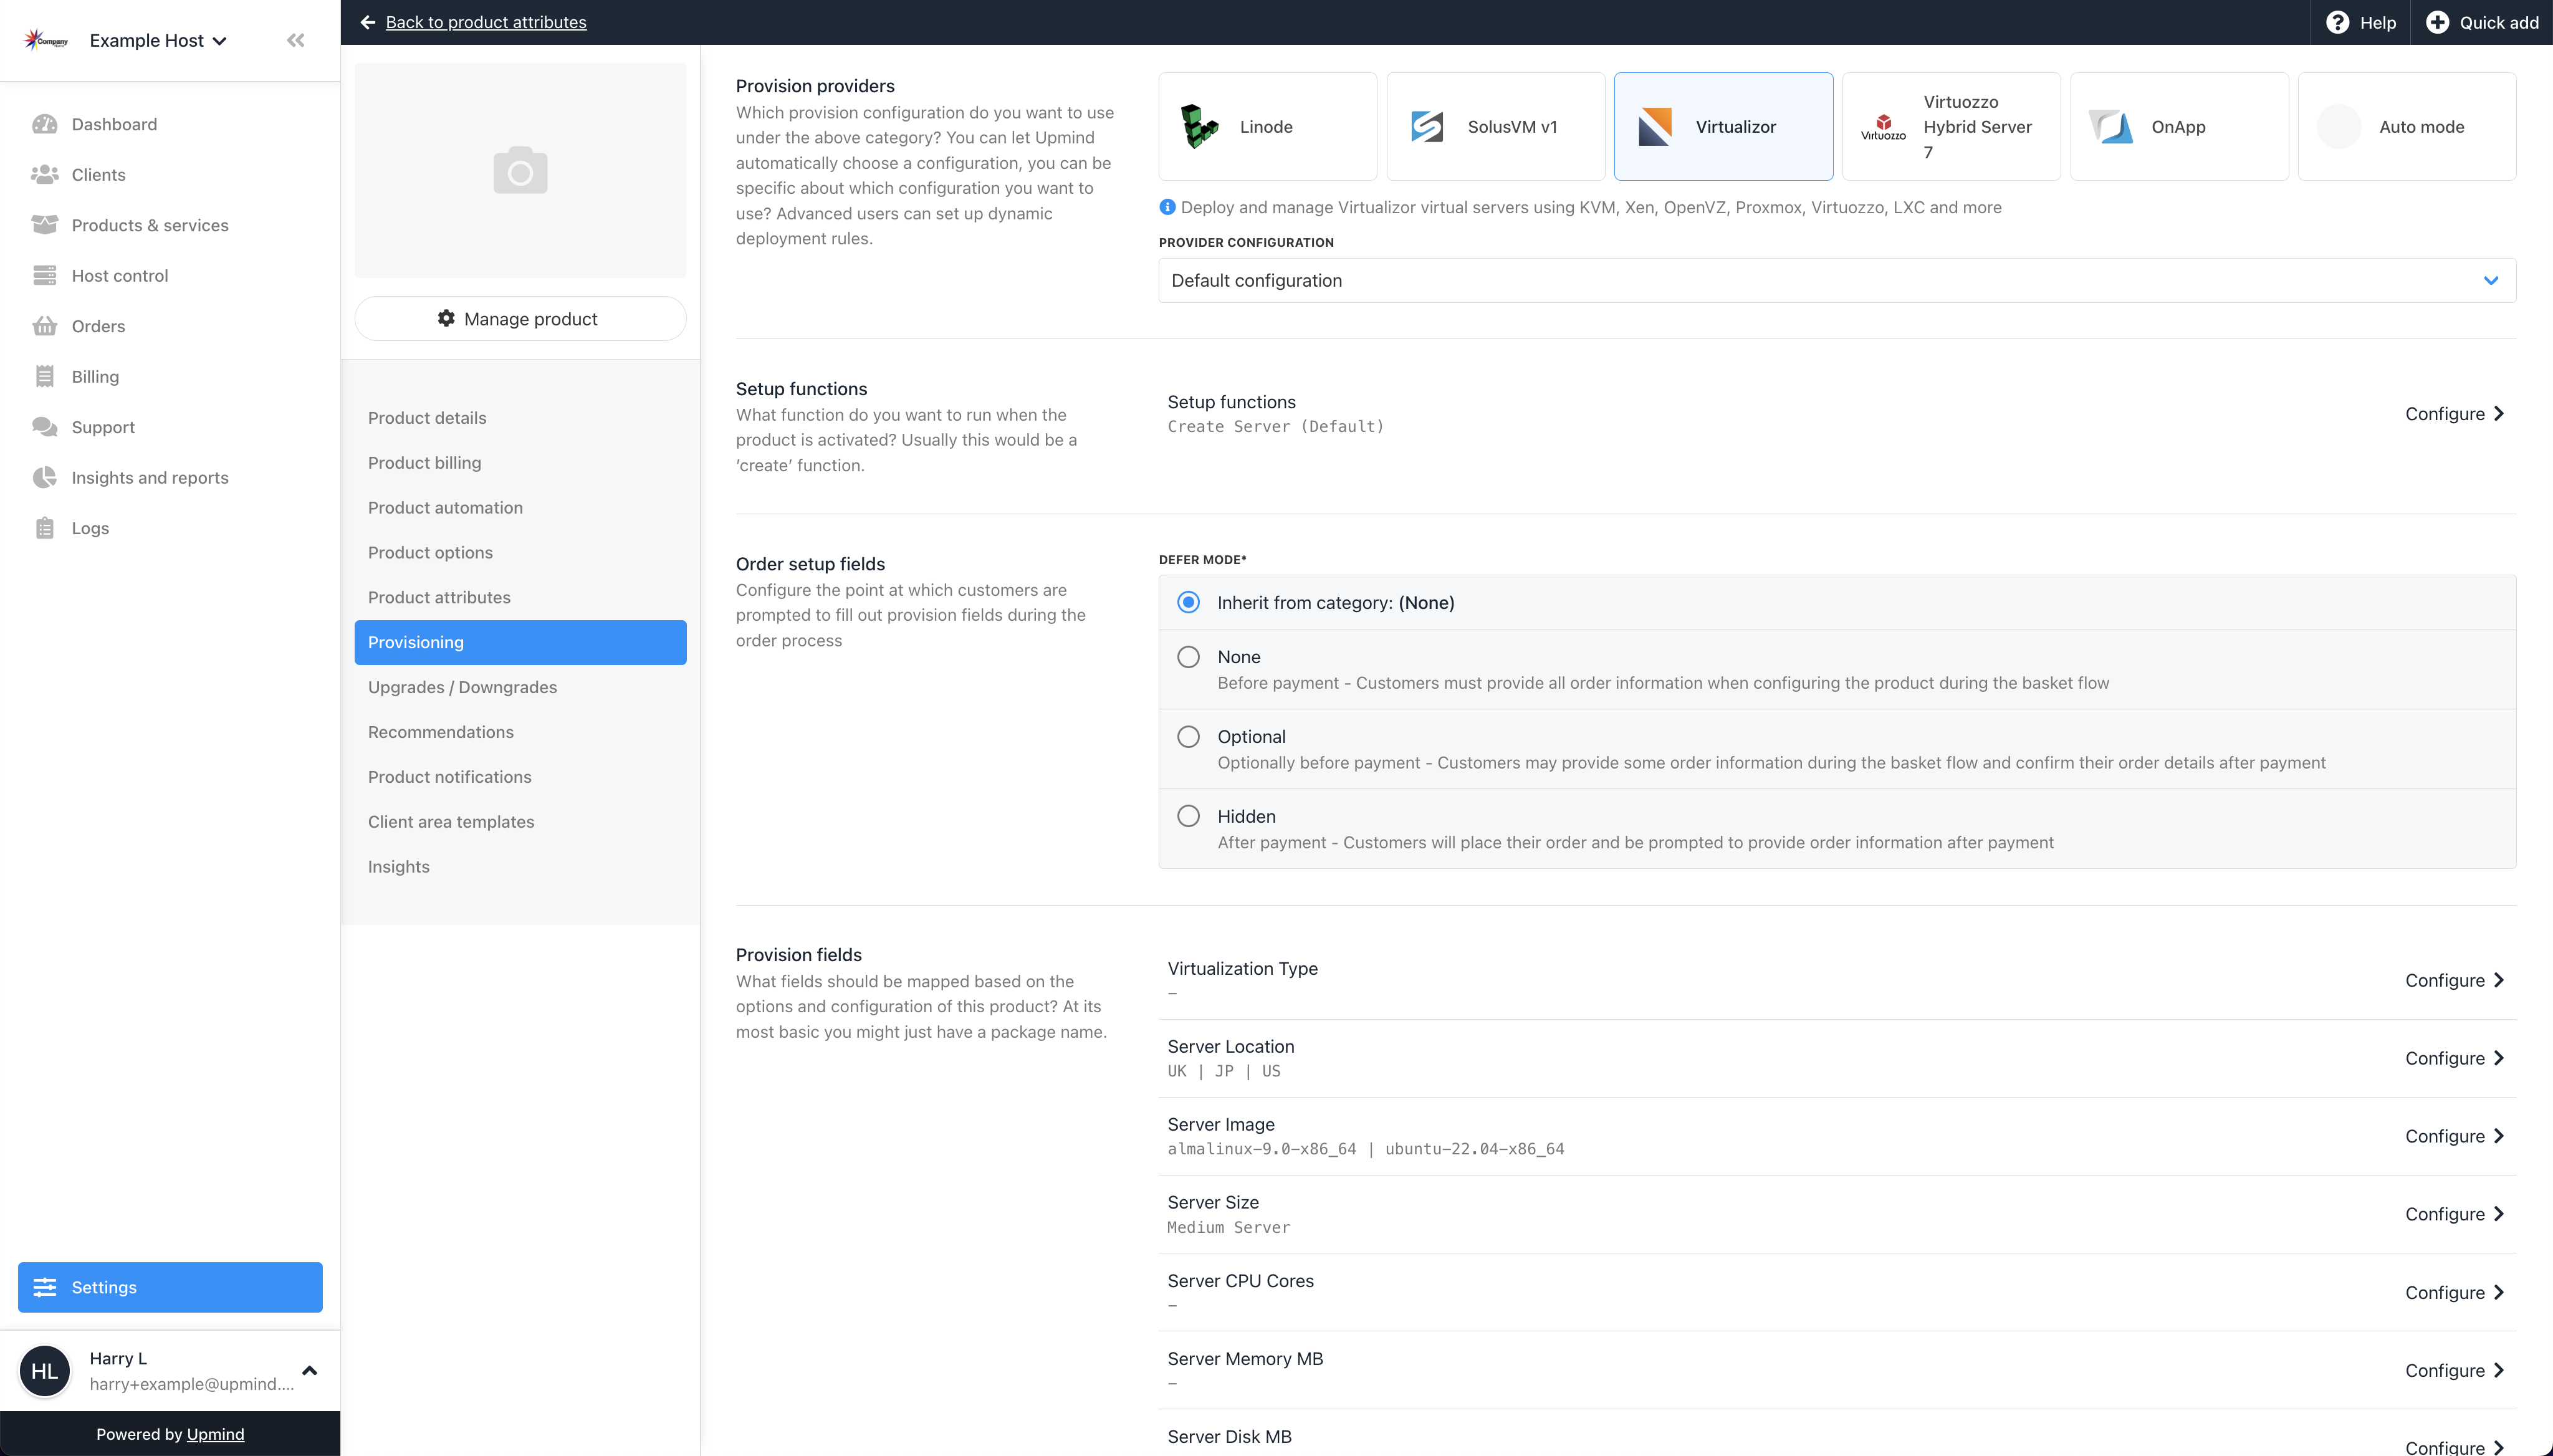
- Go to the Provisioning section and select the following options:
- Provision Blueprint: Servers
- Provision Provider:
- Any Provider: No
- Select Virtualizor
- Provider Configuration: (Select the provision configuration you created earlier)
- Click save
- Scroll down to Provision fields and configure the Server Location, Server Image & Server Size (explained below)
Provision Fields
You may wish to create Product Options or Product Attributes to allow customers to select the Location and Image of their server so you only need one main product for each Size (Virtualizor Plan name) you want to sell. Refer to the sections below for what to type for Server Location, Server Image and Server Size.
Dynamic Product Provision Fields (Using Product Attributes)
Server Location
This field configures which server VMs will be provisioned on. The value you should enter in this provision field depends on your provision configuration's Location Type:
- Geographic: You should enter a value corresponding to your Virtualizor servers' geographic location
- Server: You should enter the name of the specific server you want to provision new VMs on
- Server Group: You should enter the name of the server group you want to provision new VMs on
Server Image
This field configures which OS Template (operating system / version) is used to create new Virtualizor VMs. You should use the Virtualizor OS Template name in Upmind.
Server Size
This field configures which Virtualizor Plan is used when creating new VMs. You should use the Virtualizor Plan name in Upmind.