
Create a Product
By using the “Servers (Manual)” provision blueprint, new orders will remain in the “Awaiting Activation” status after their initial invoice payment, until a staff member manually activates them. This allows you to provision the server manually, and then update the order with details such as the hostname, IP address and any other information that the customer might need.- Under
Settings>Product catalogueclick to create a new product - On the
Provisioningpage, set the Provision Blueprint to “Servers (Manual)” and click Save
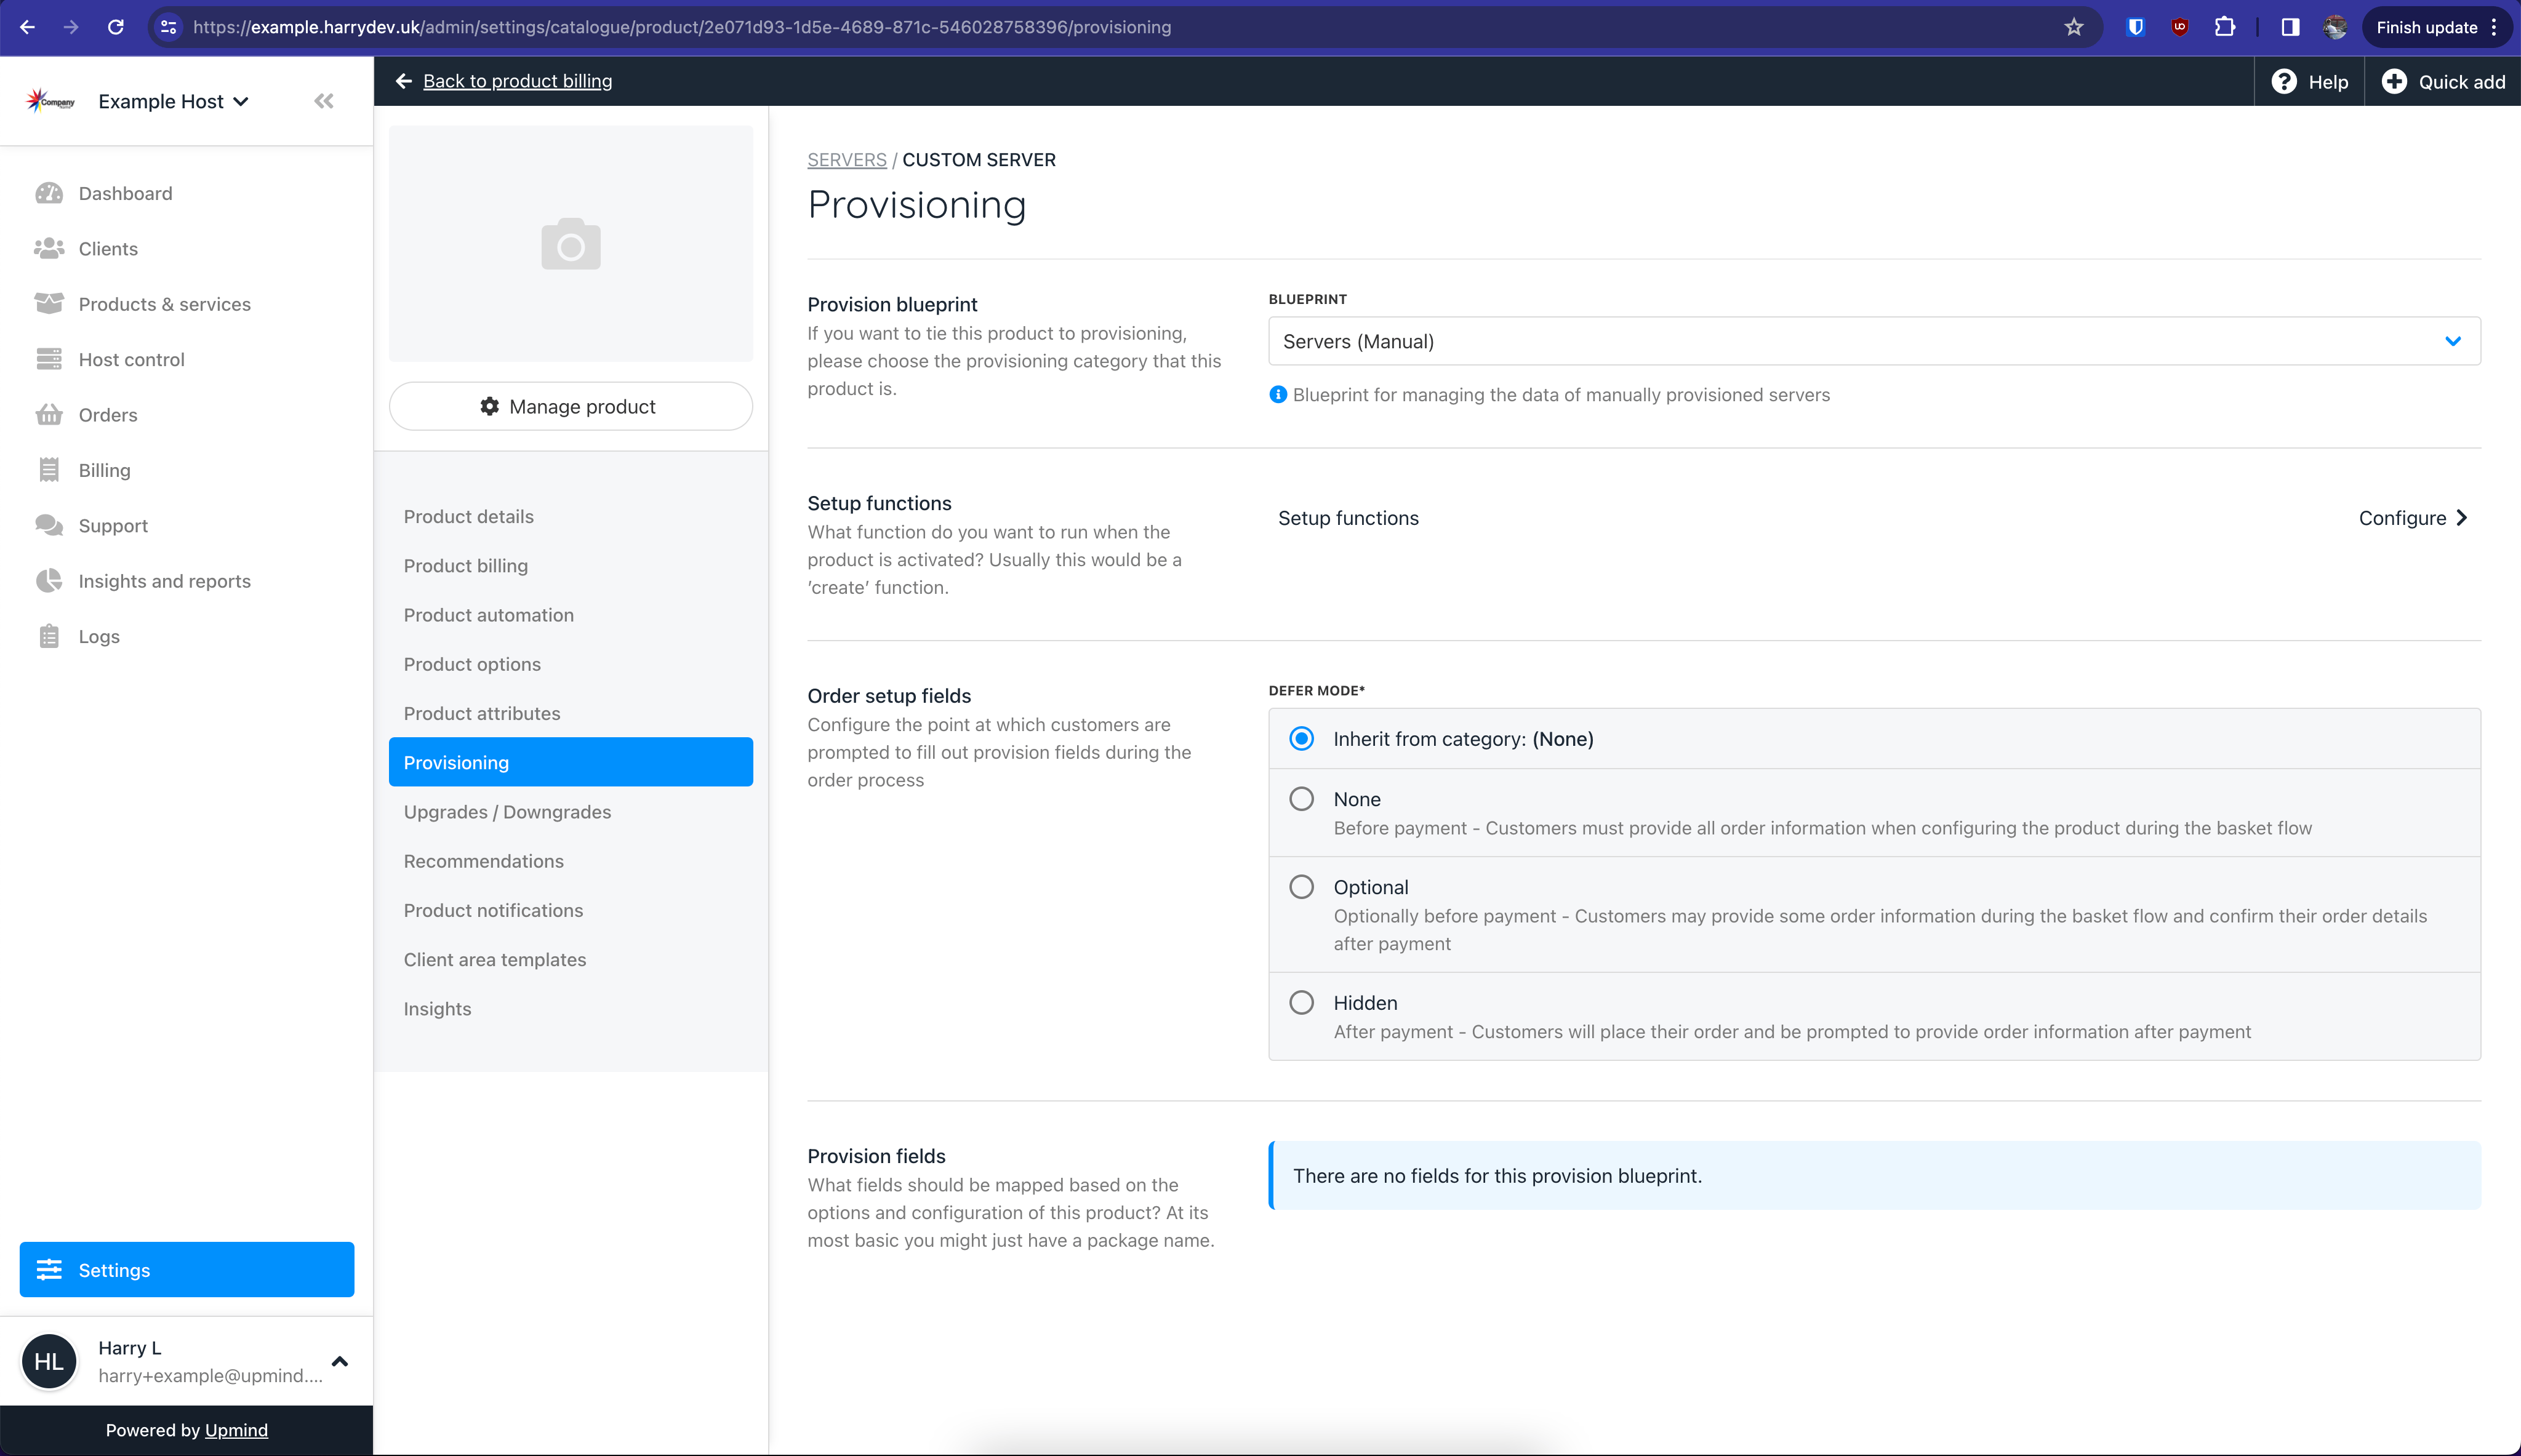
Set the Provision blueprint to "Servers (Manual)"
Managing Orders
When a customer places and pays for an order for a manually provisioned server, you will need to activate it manually.Activating orders
- Under
Products & Servicesfind a new order that needs to be activated - On the
Overviewtab, the Status should display “Awaiting activation” if the customer has paid their initial order invoice - Click the link to manually activate the order, which will commence recurring billing
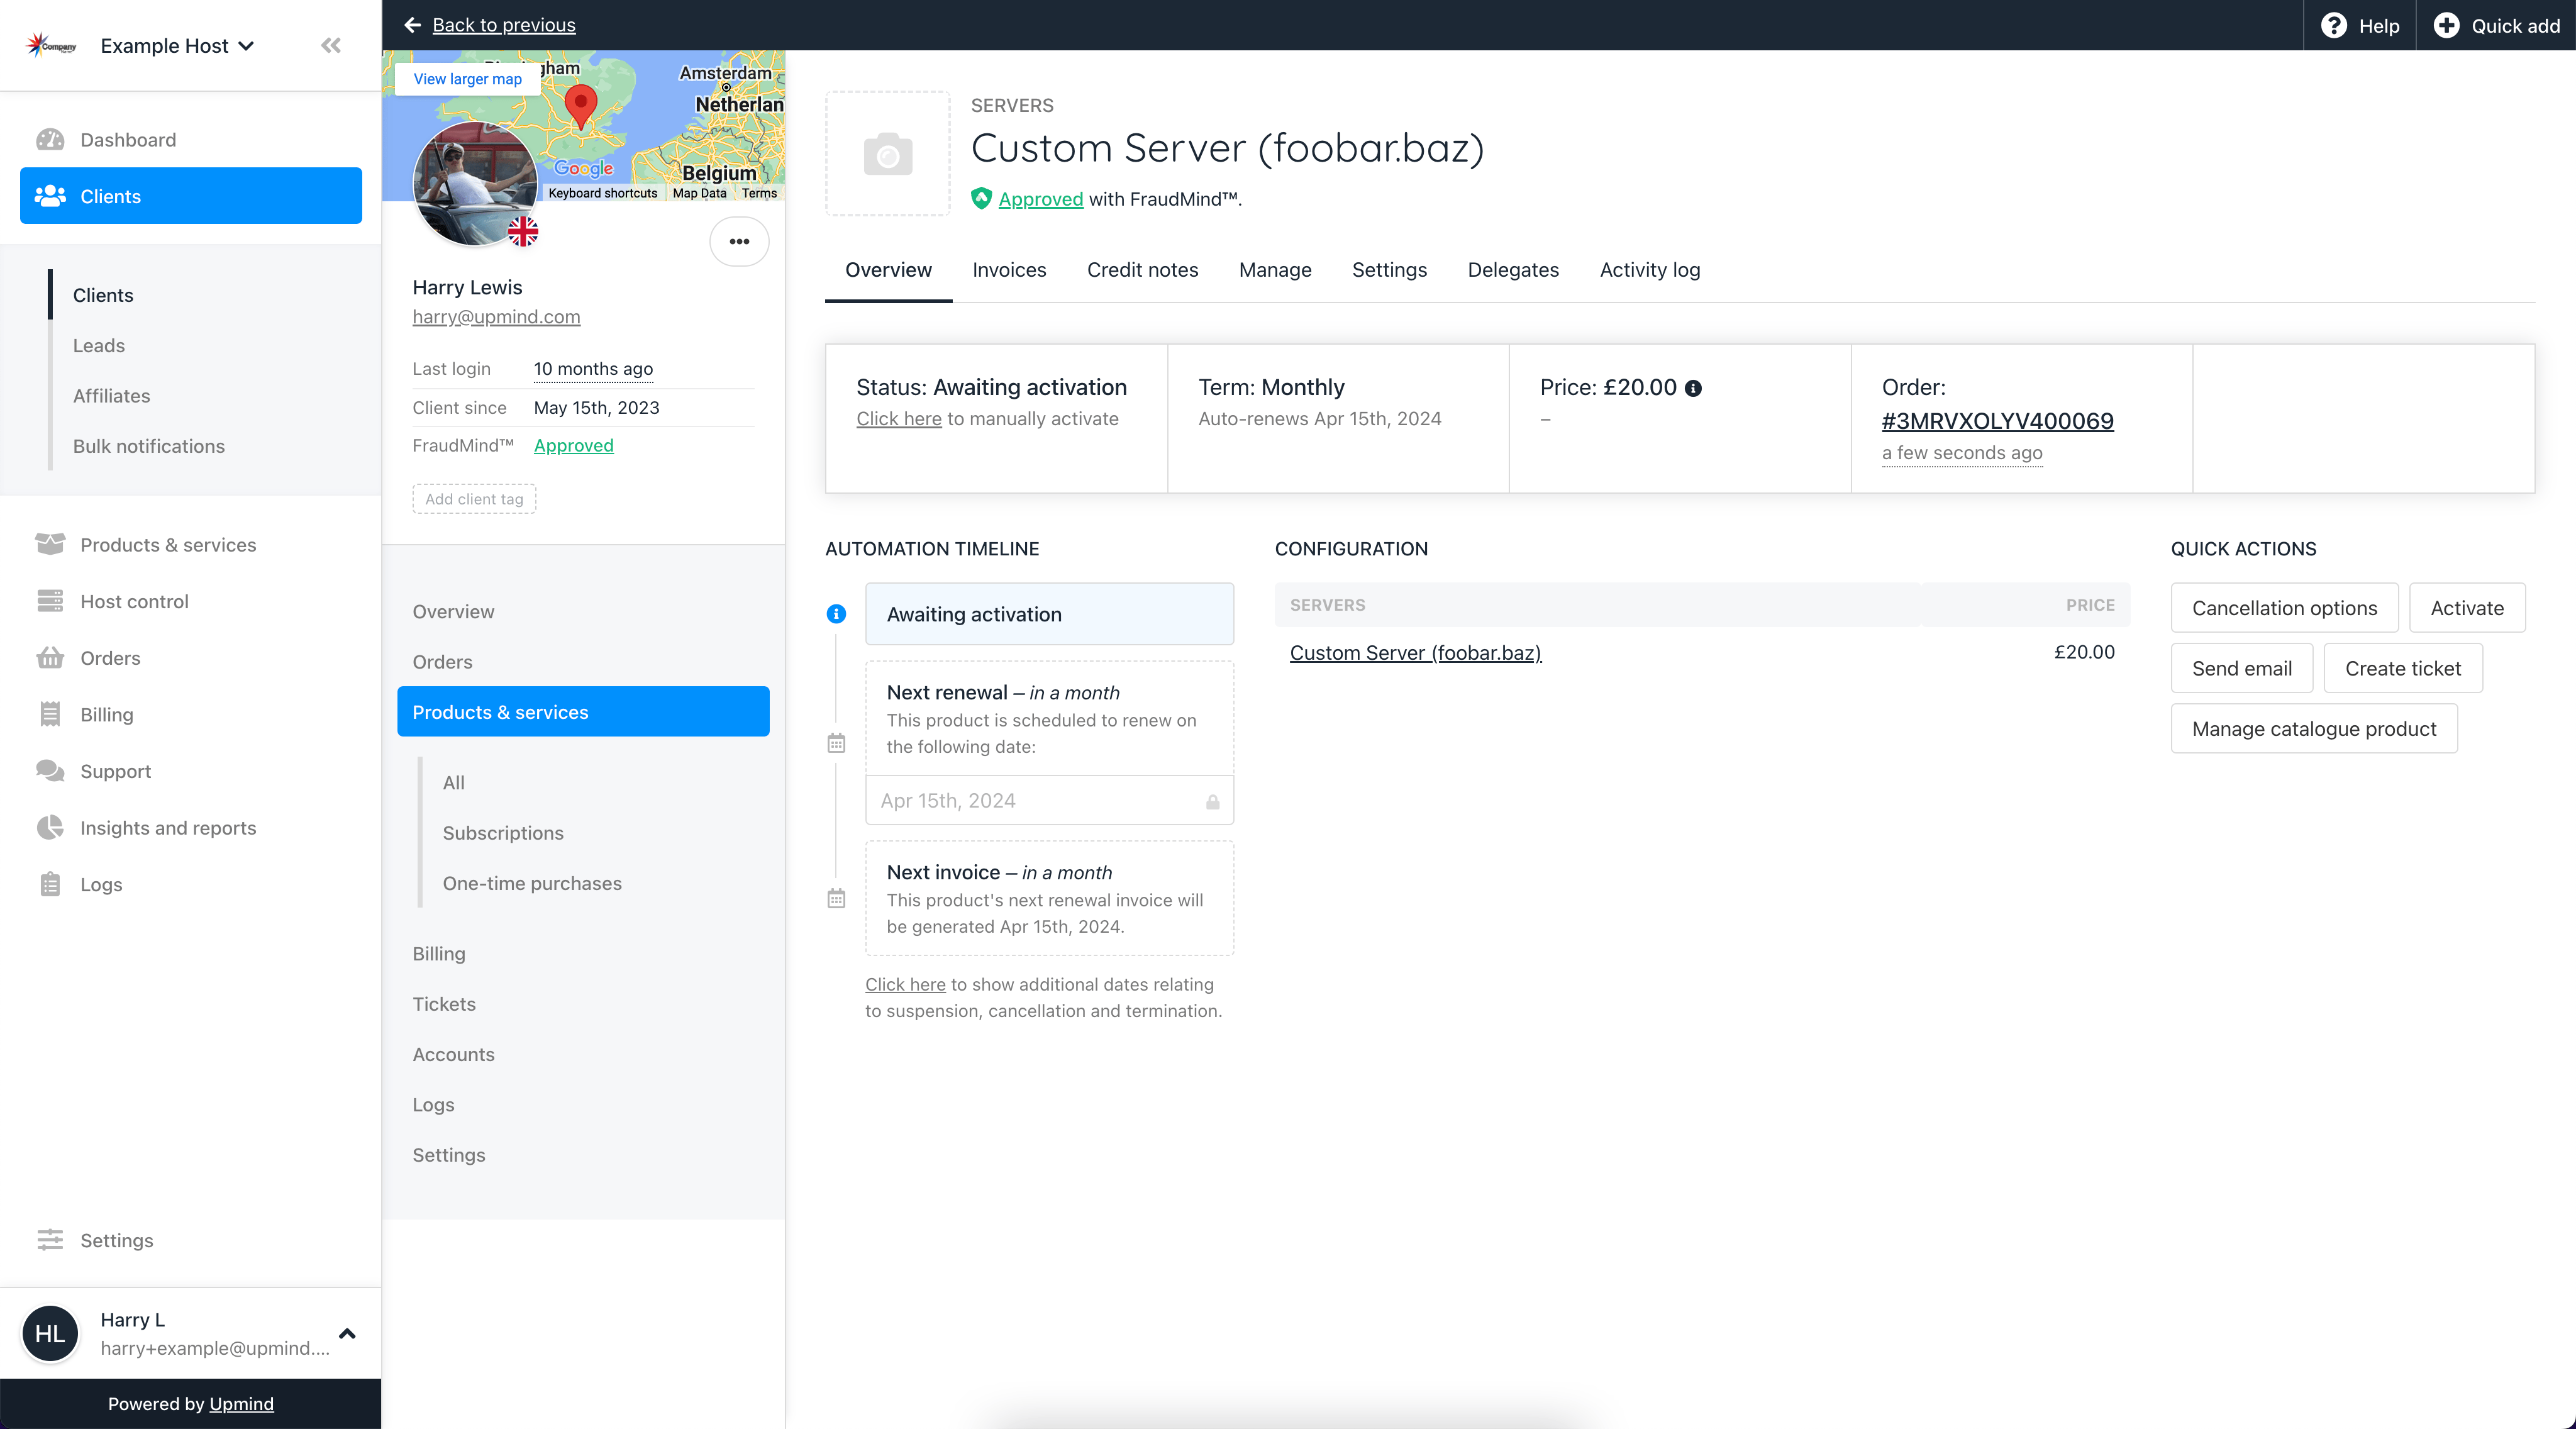
Beneath where it shows "Status: Awaiting activation" click to manually activate the order
Sharing server details
The “Servers (Manual)” provision blueprint adds a couple of fields to theManage tab of a server order. Here you can set the server hostname (which also acts as the service identifier for the order) and the IP address. You can share other information such as server credentials via the Notes and secrets tab. These can then be viewed by the customer in their client area.
- Go to the
Managetab of the newly activated server order - Enter a Hostname and/or IP address and click save
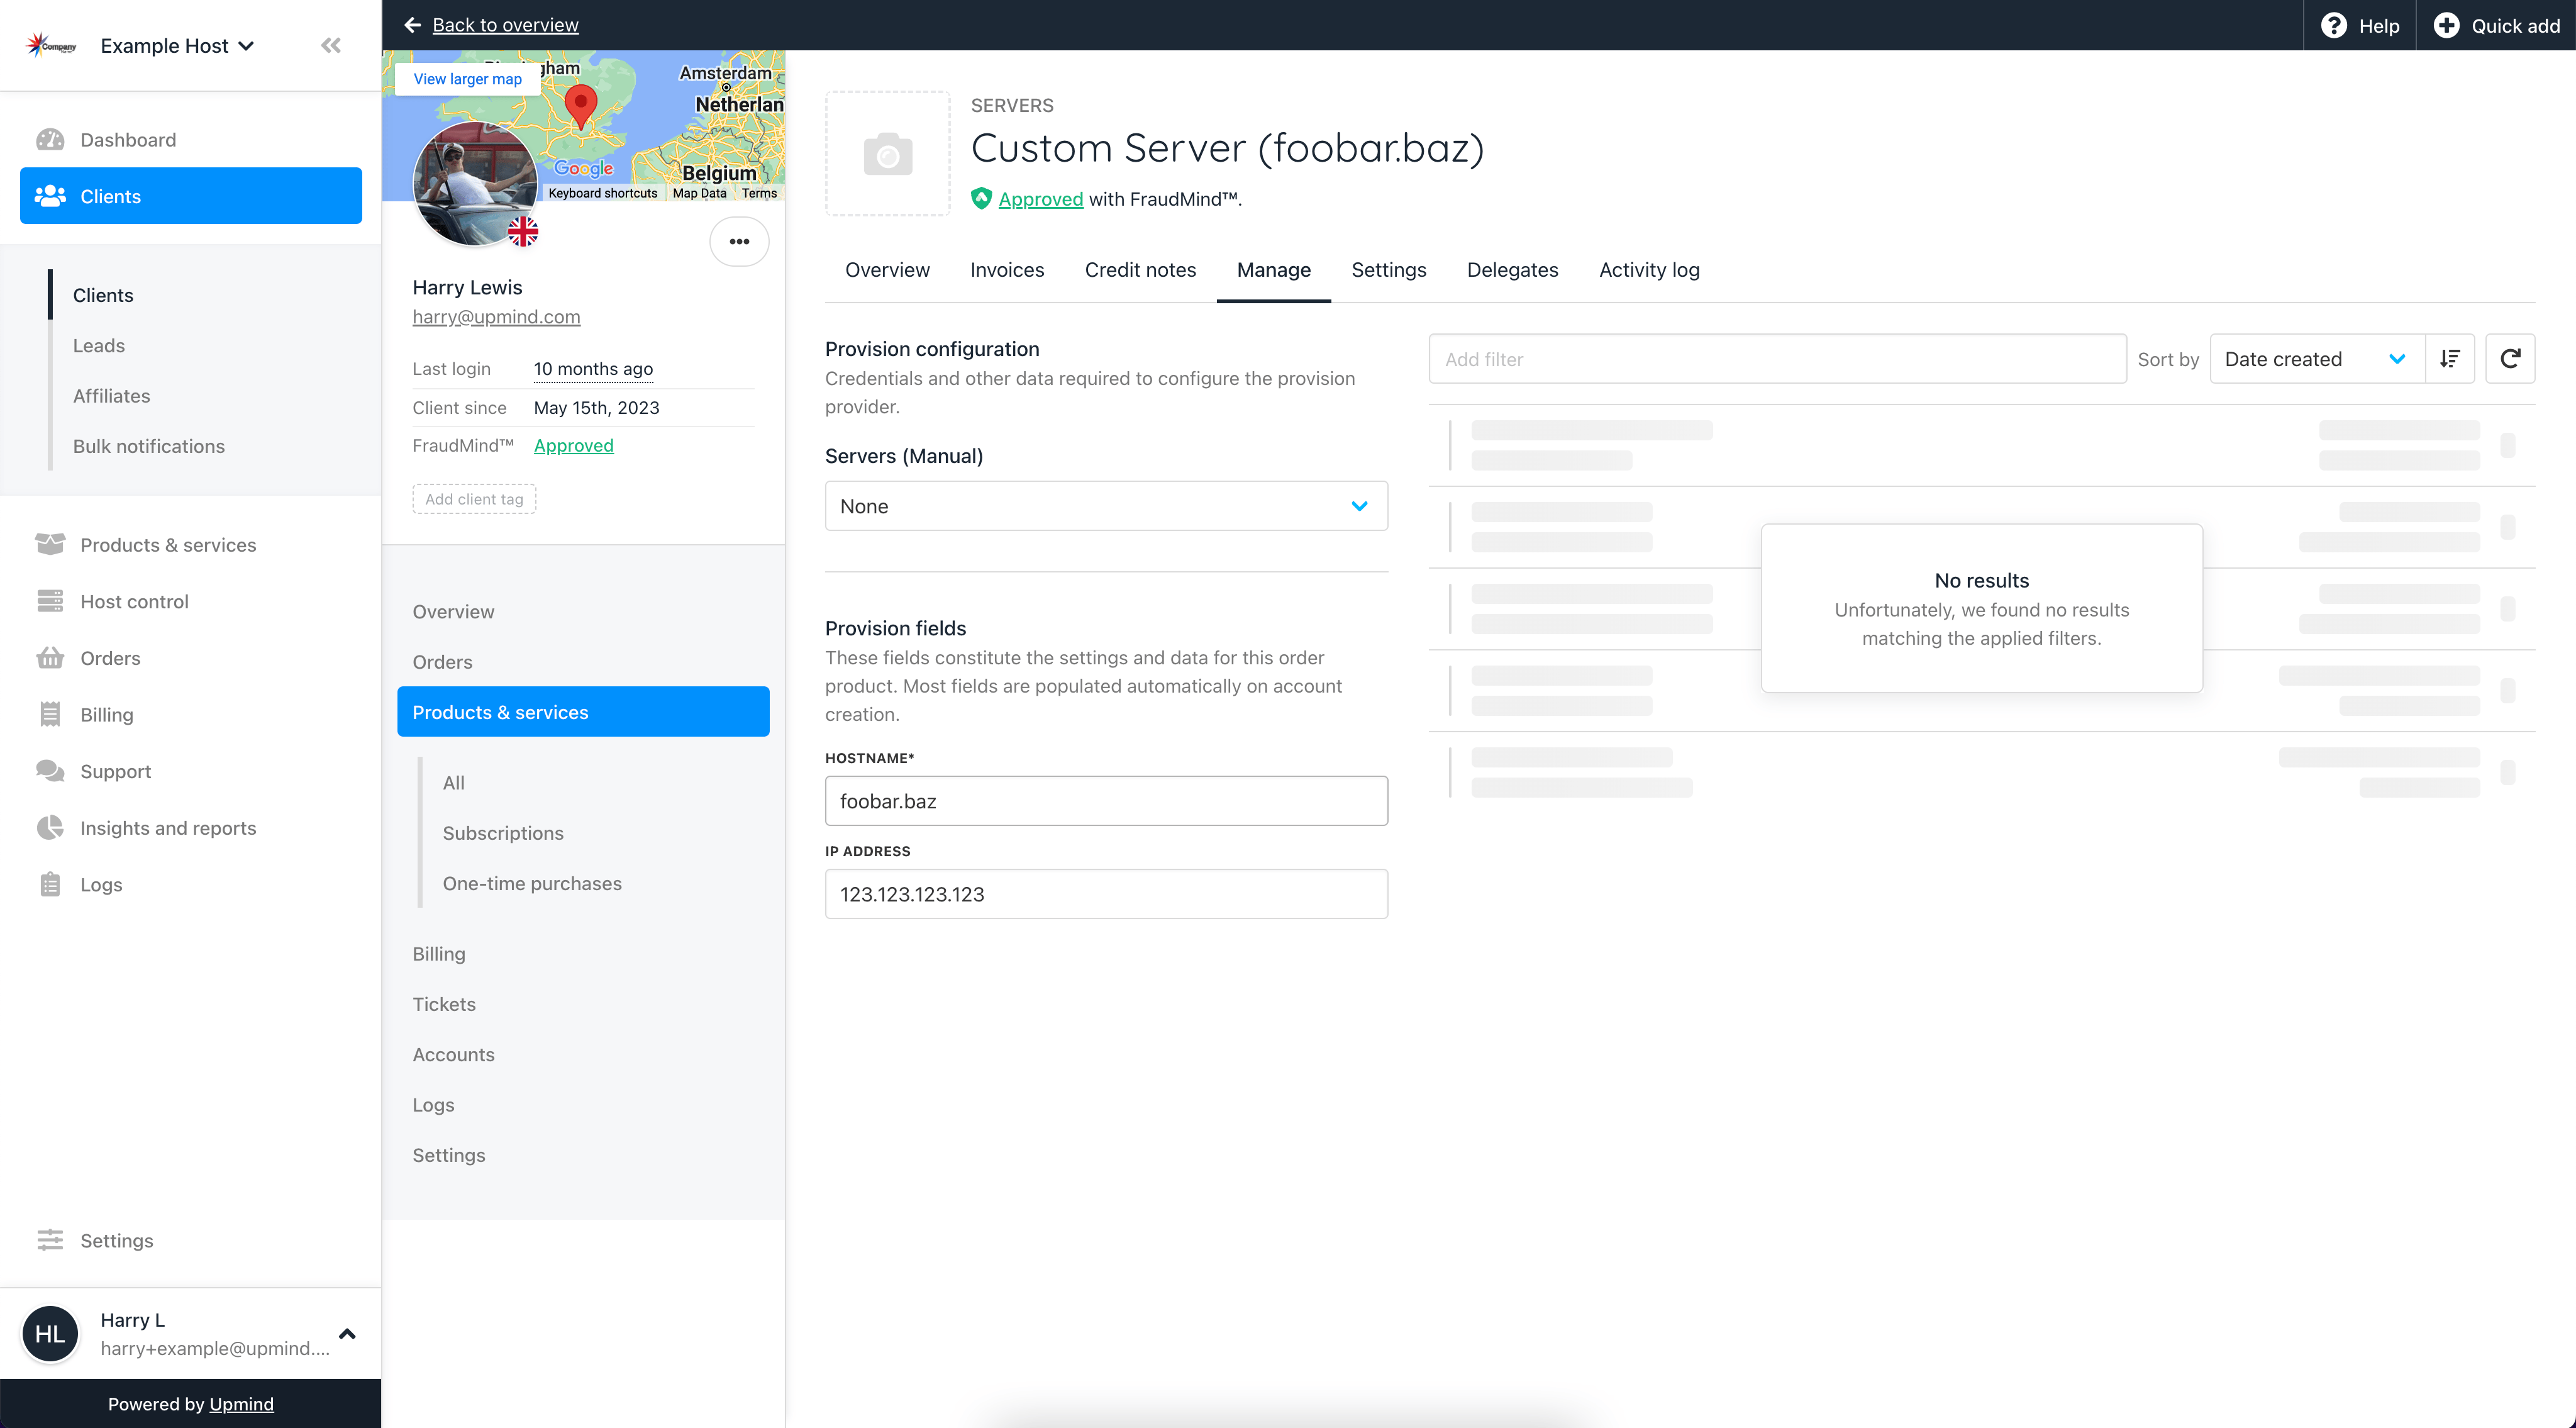
On the Manage tab, enter the Hostname or IP address then click Save
- On the
Notes and secretstab, provide any additional information such as server credentials and untick the checkbox to display these in the client area

On the Notes and secrets tab, enter any other information such as log on credentials and click Save
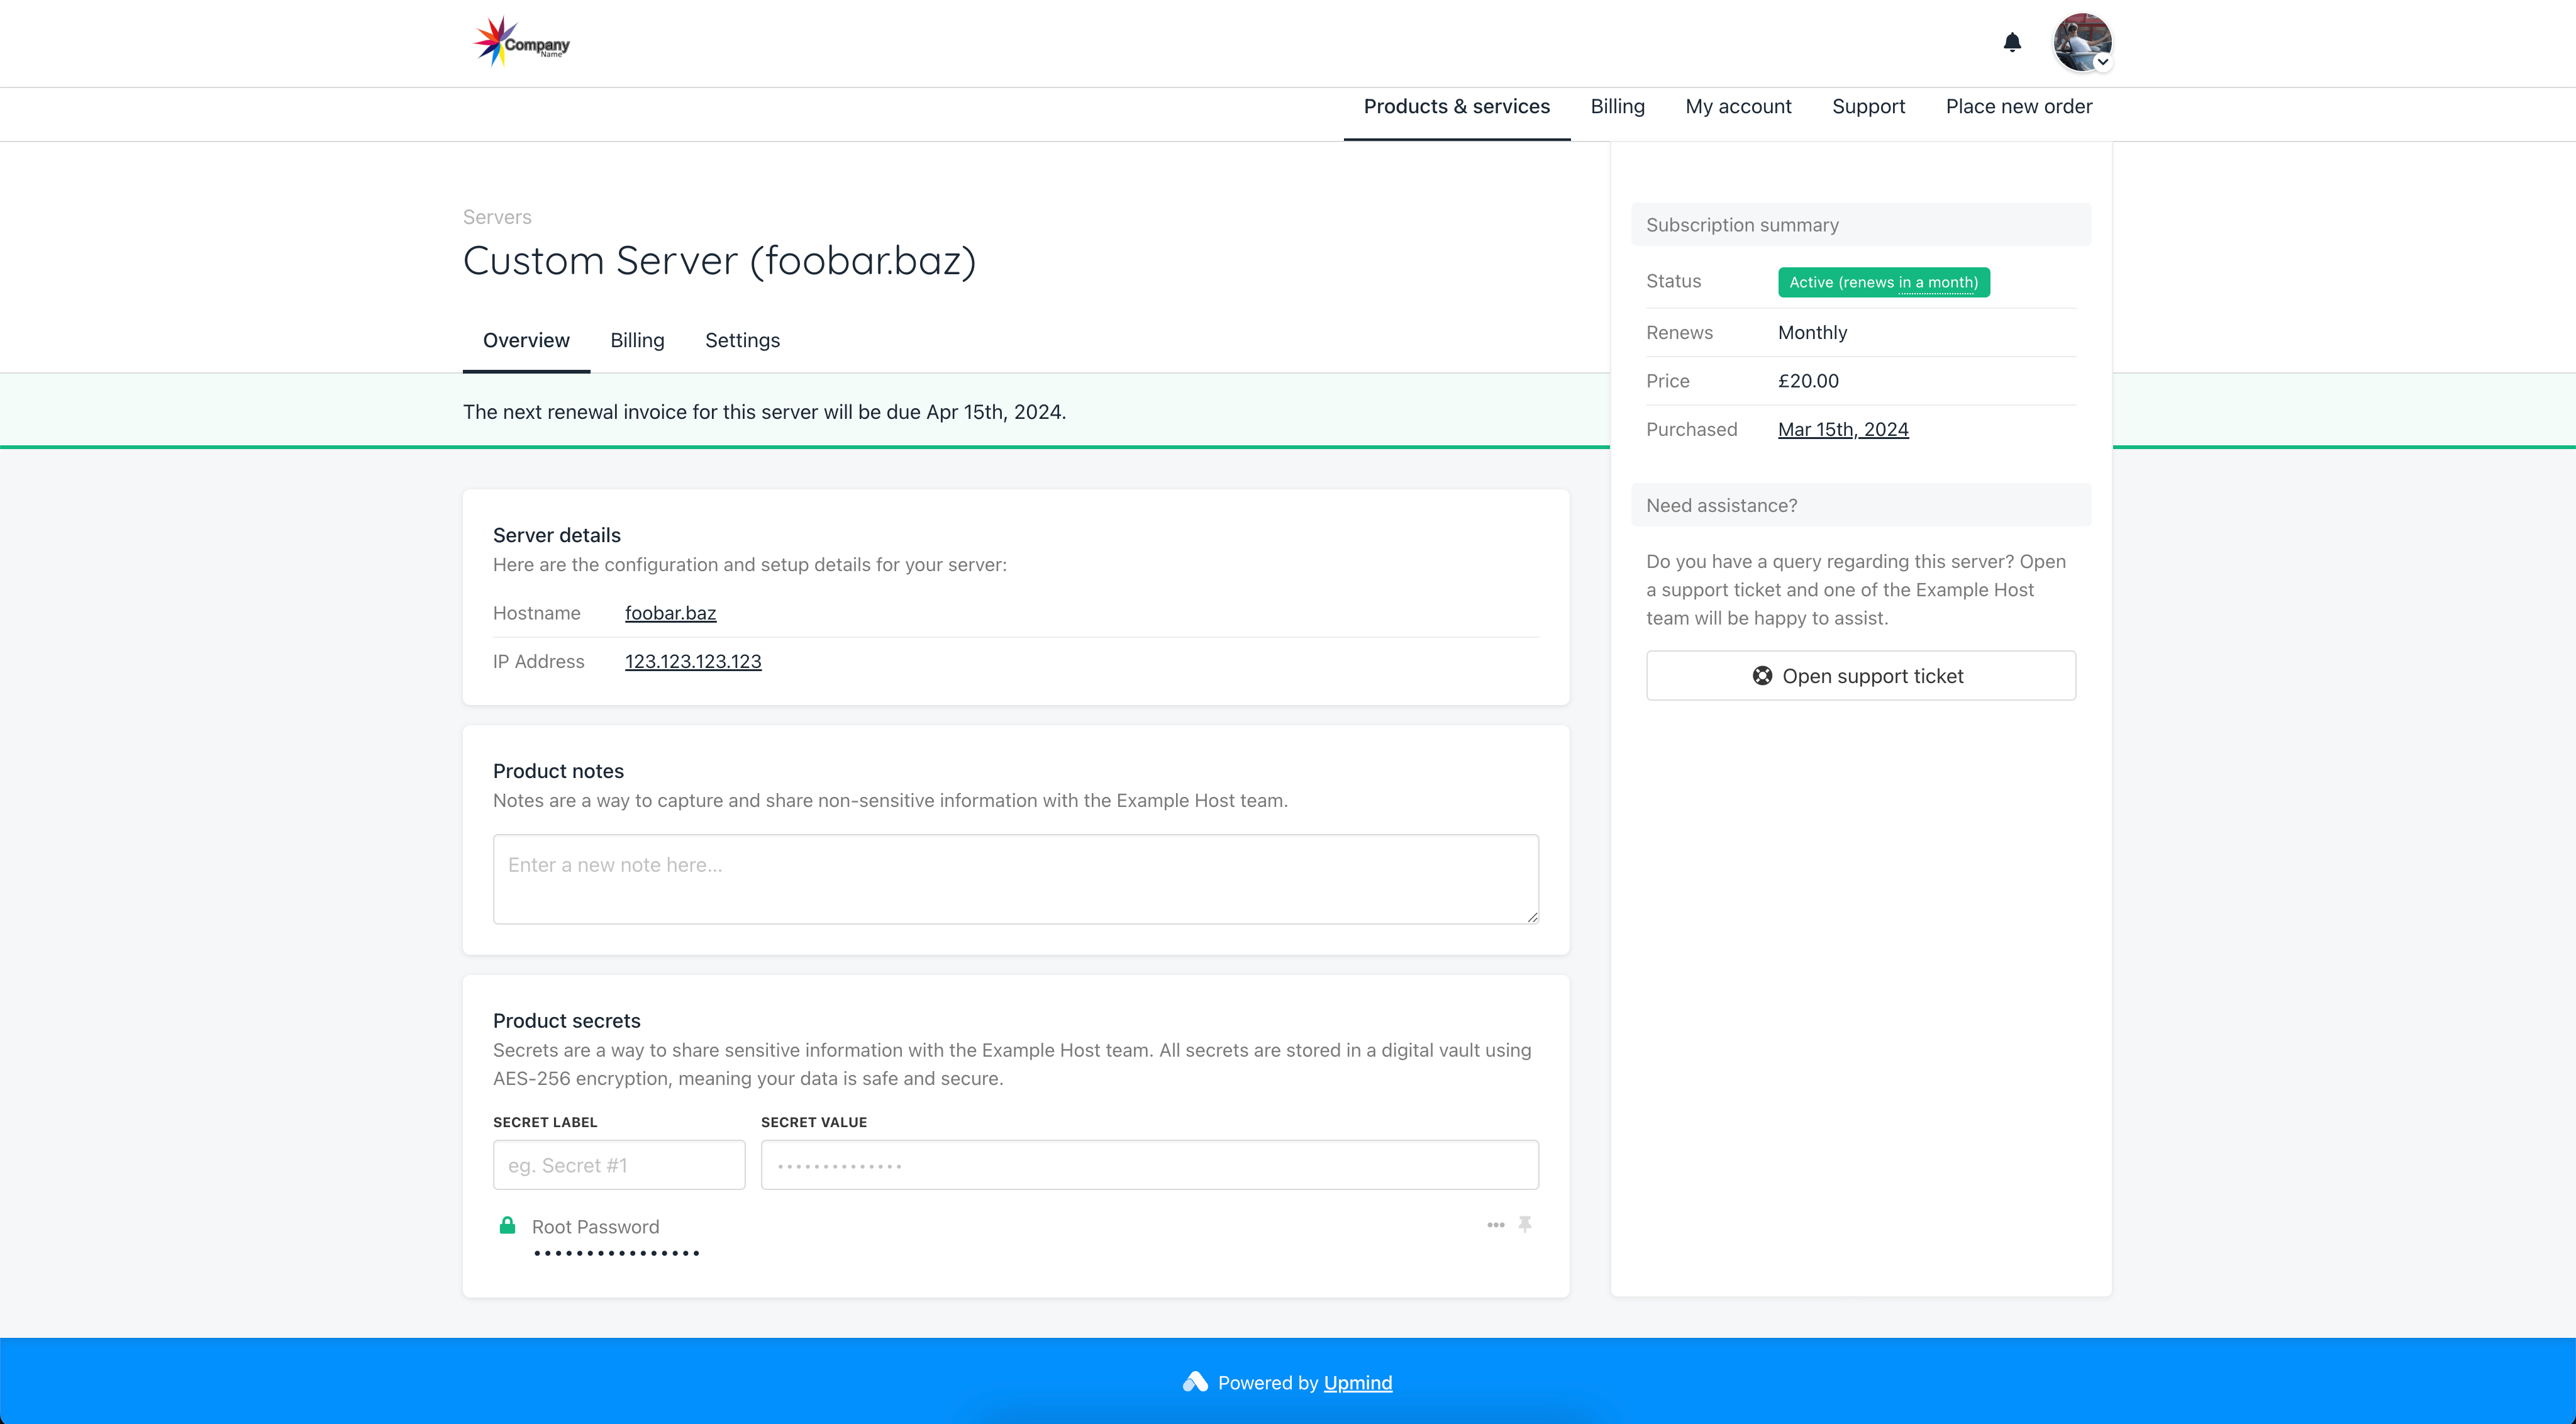
The customer will see the Hostname, IP Address and any other notes and secrets you provided
Enable Notes and Secrets
If you don’t see a tab forNotes and secrets you simply need to enable it in your brand settings.
- Go to
Settings>User interface - In the
Client Areasection, Tick the boxEnable client notes & vaultand click Save - You may need to refresh the page for the
Notes and secretstab to appear under your customers’ orders
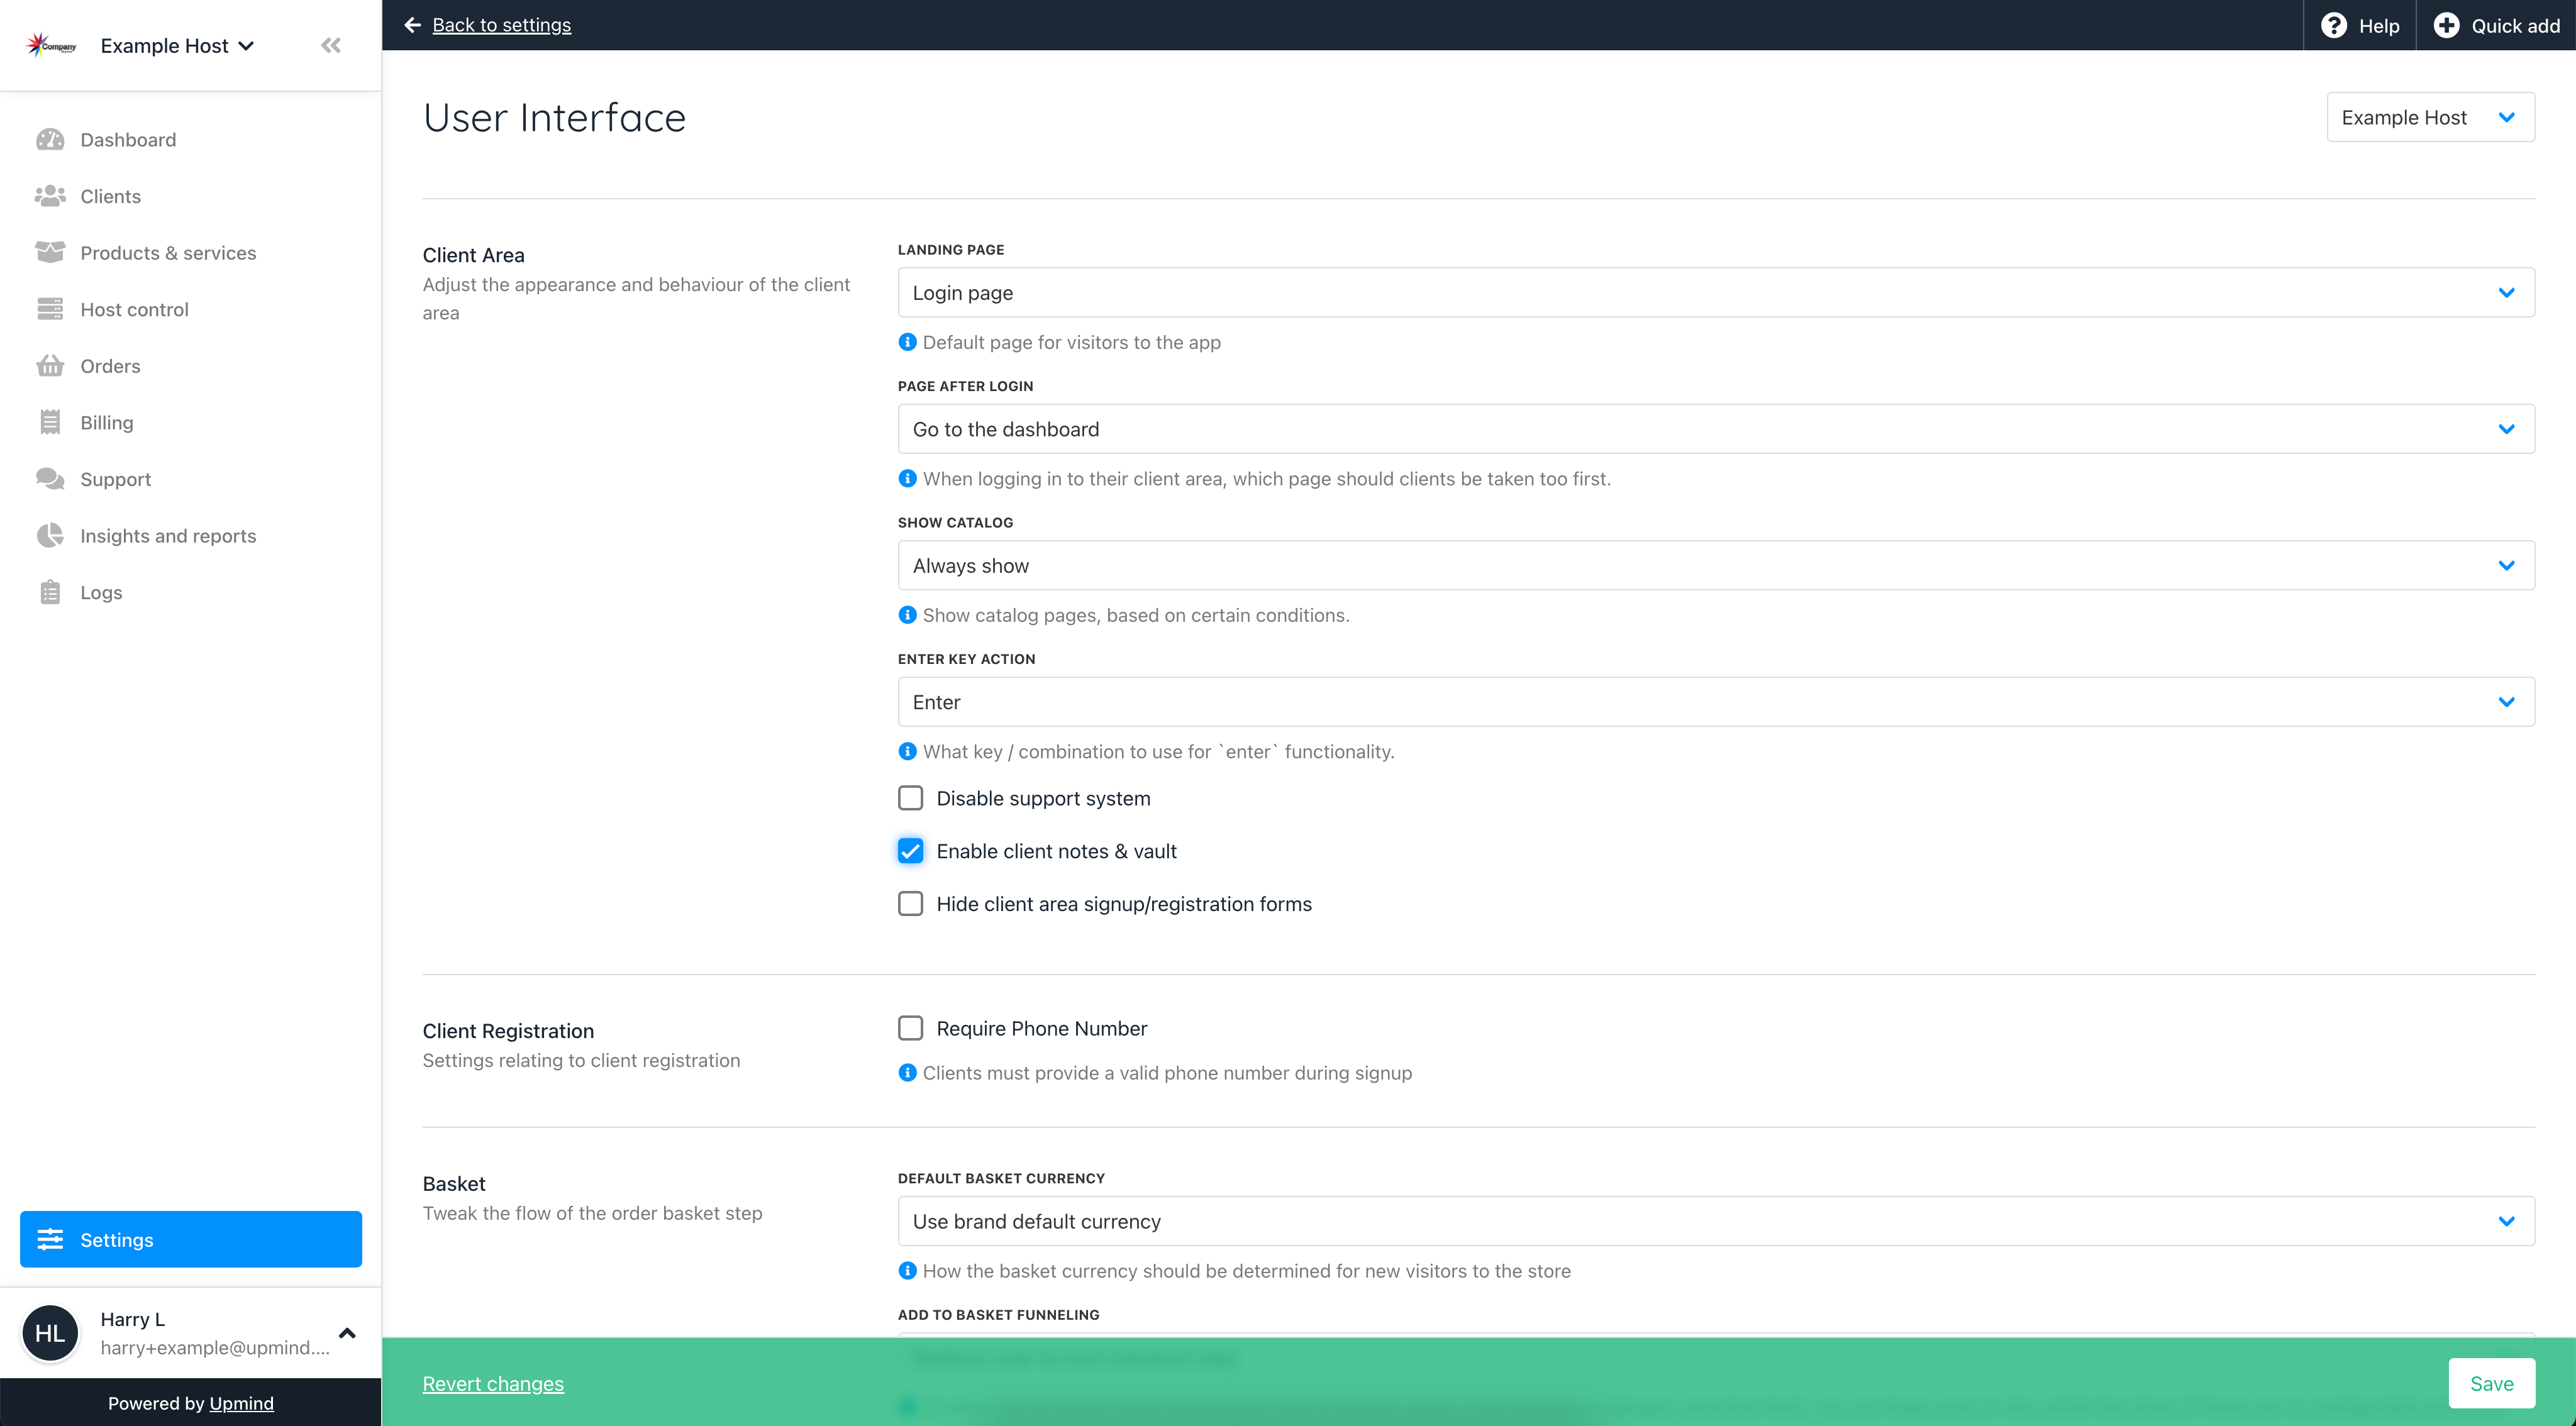
Tick the checkbox for Enable client notes & vault