How to Schedule a Ticket in Admin Area
To schedule a ticket in admin area, follow these steps:- Go to Support page.
- Select the ticket you want to schedule.
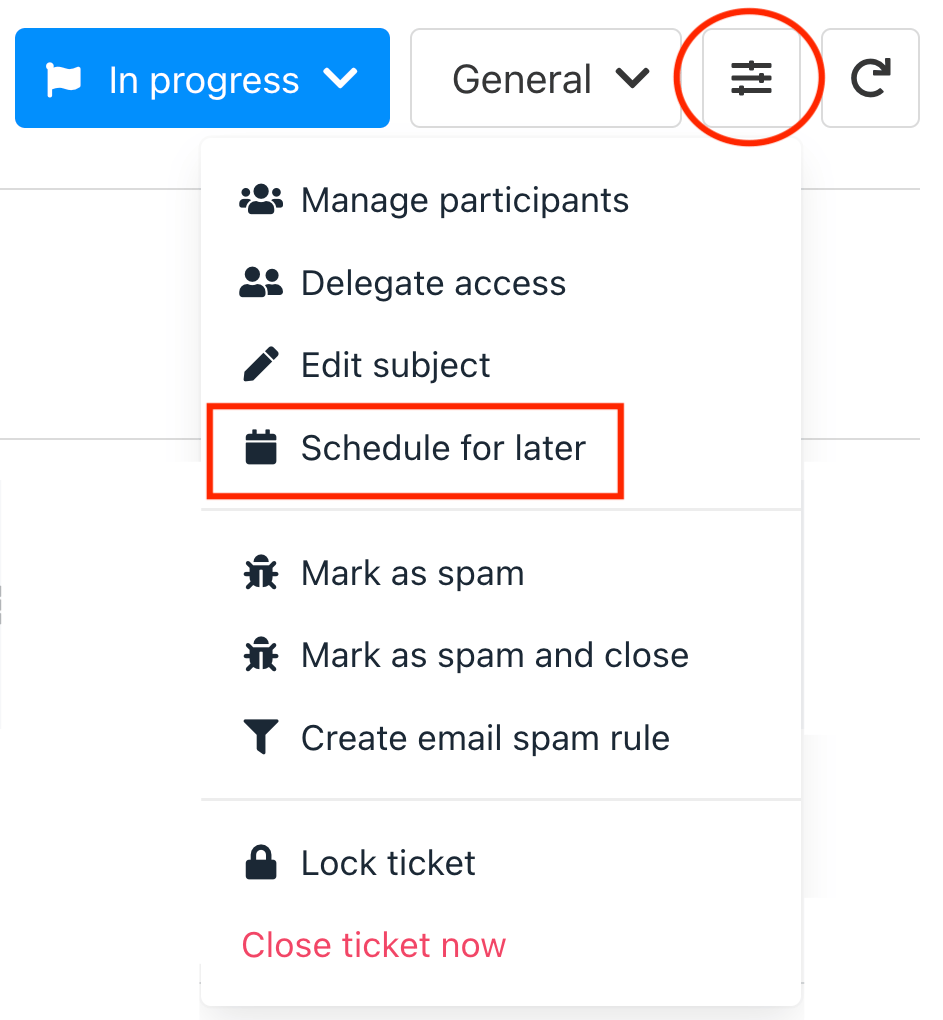
- Click the three-line icon and select Schedule for later.
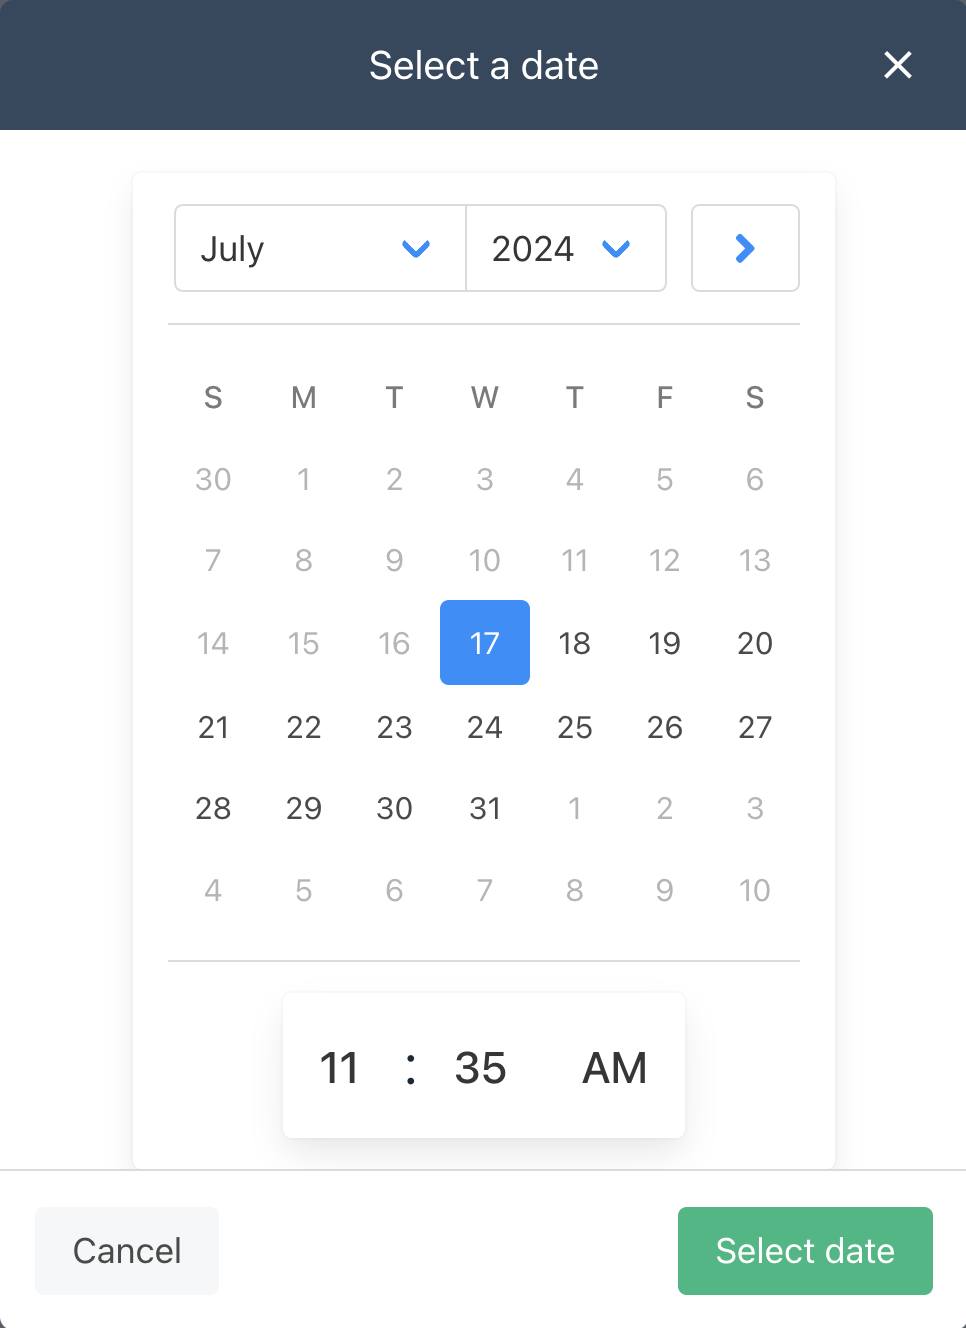
- Choose your preferred date and time, then click Select date.
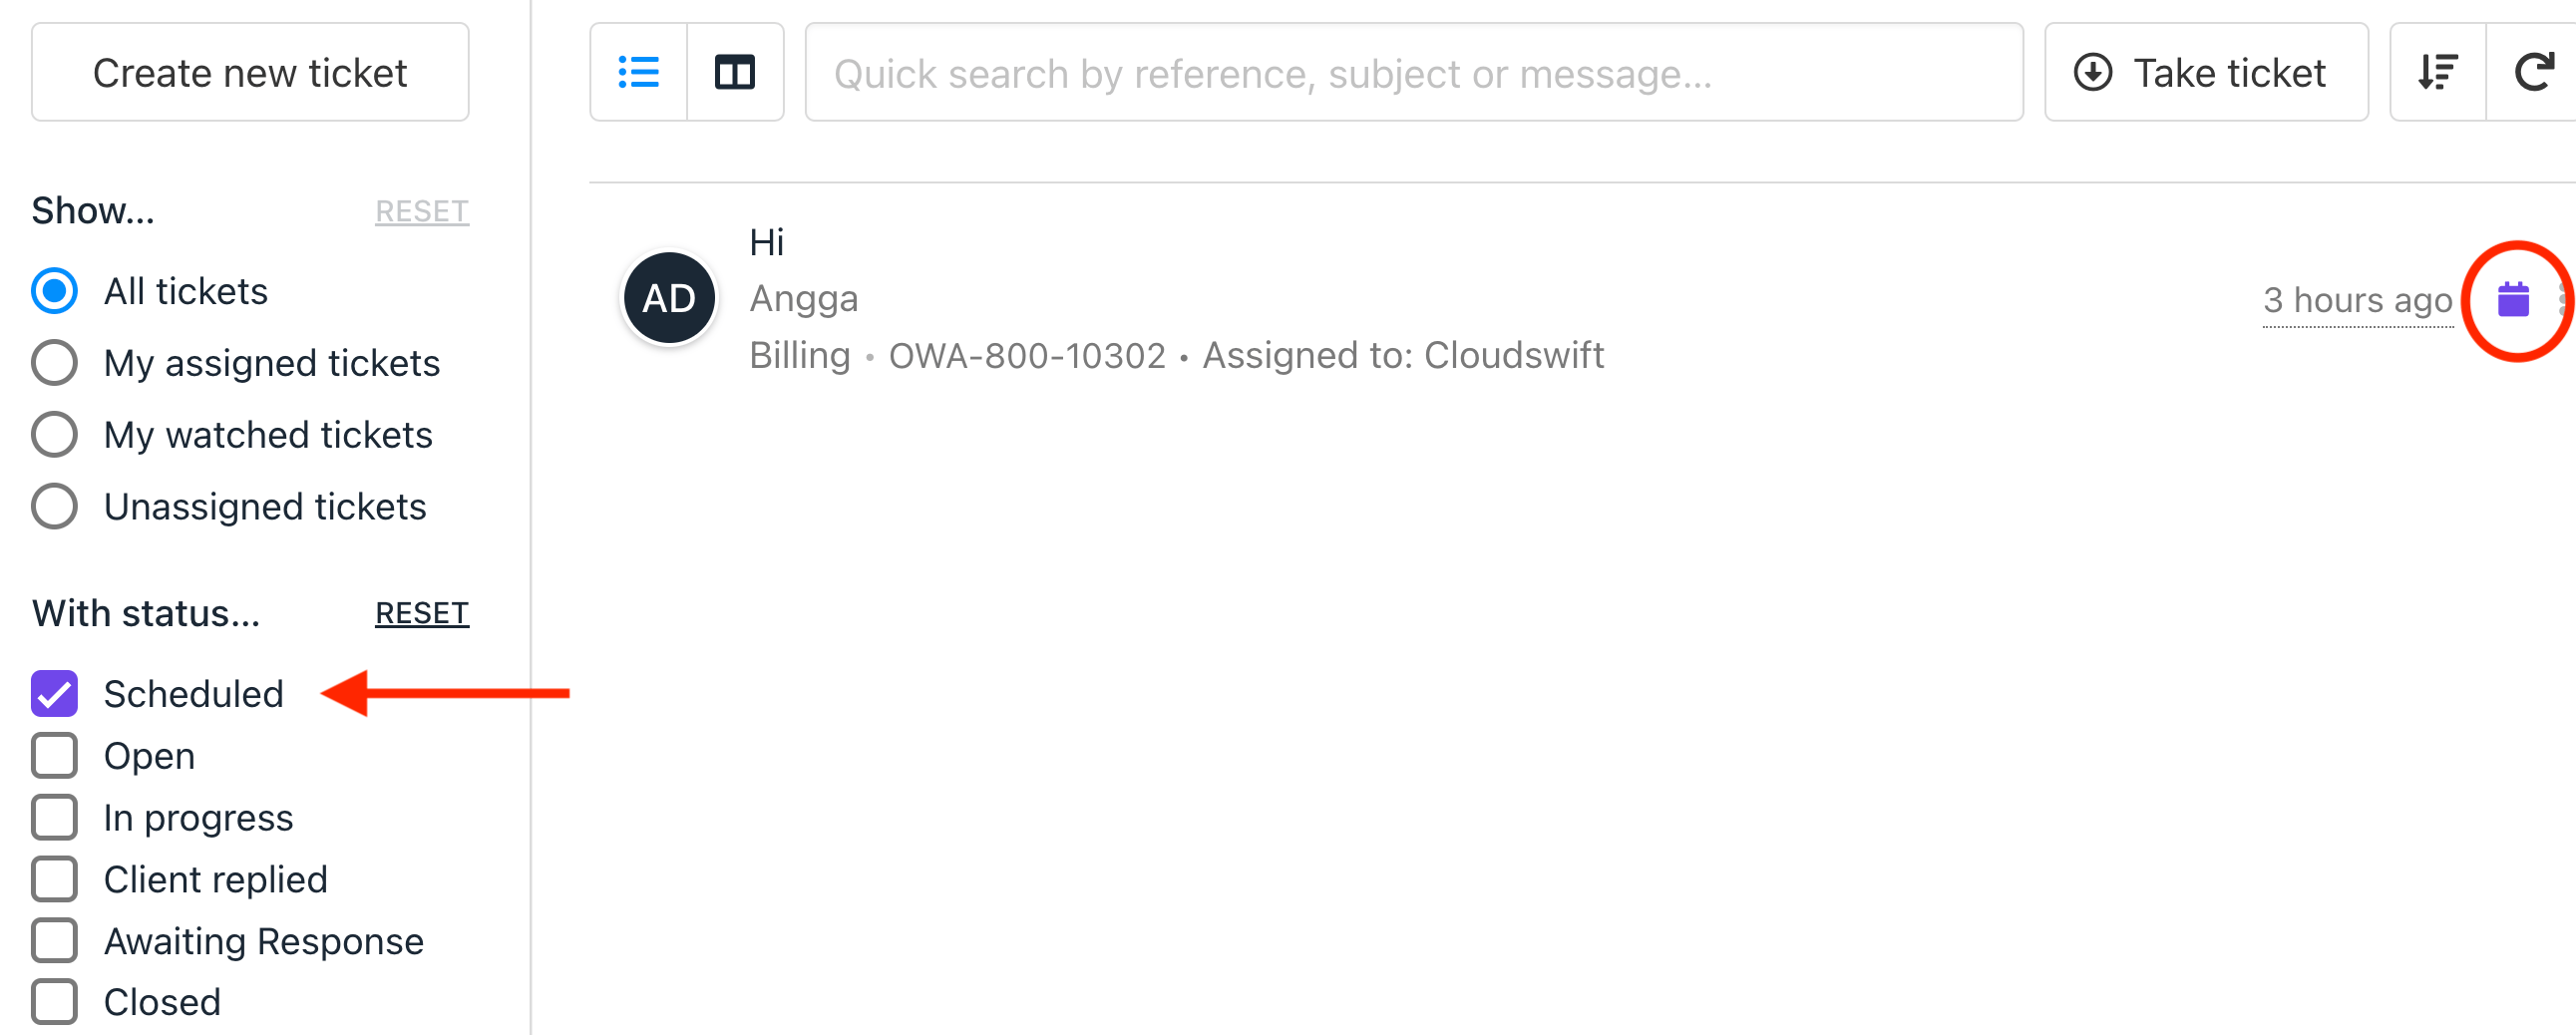
- Then, your ticket will be scheduled based on the selected date and time.
Allowing Your Clients to Schedule Tickets
As an admin, you can enable clients to schedule messages in the client area by following these steps:- Go to Settings and find Service Desk.
- In the Tickets section, tick the box for Let clients schedule tickets to allow clients to schedule tickets for your store.

How Your Clients Can Schedule Tickets
- On the client area, go to Support tab.
- Click Open a new ticket
- Your client can fill in the subject, department, and message.
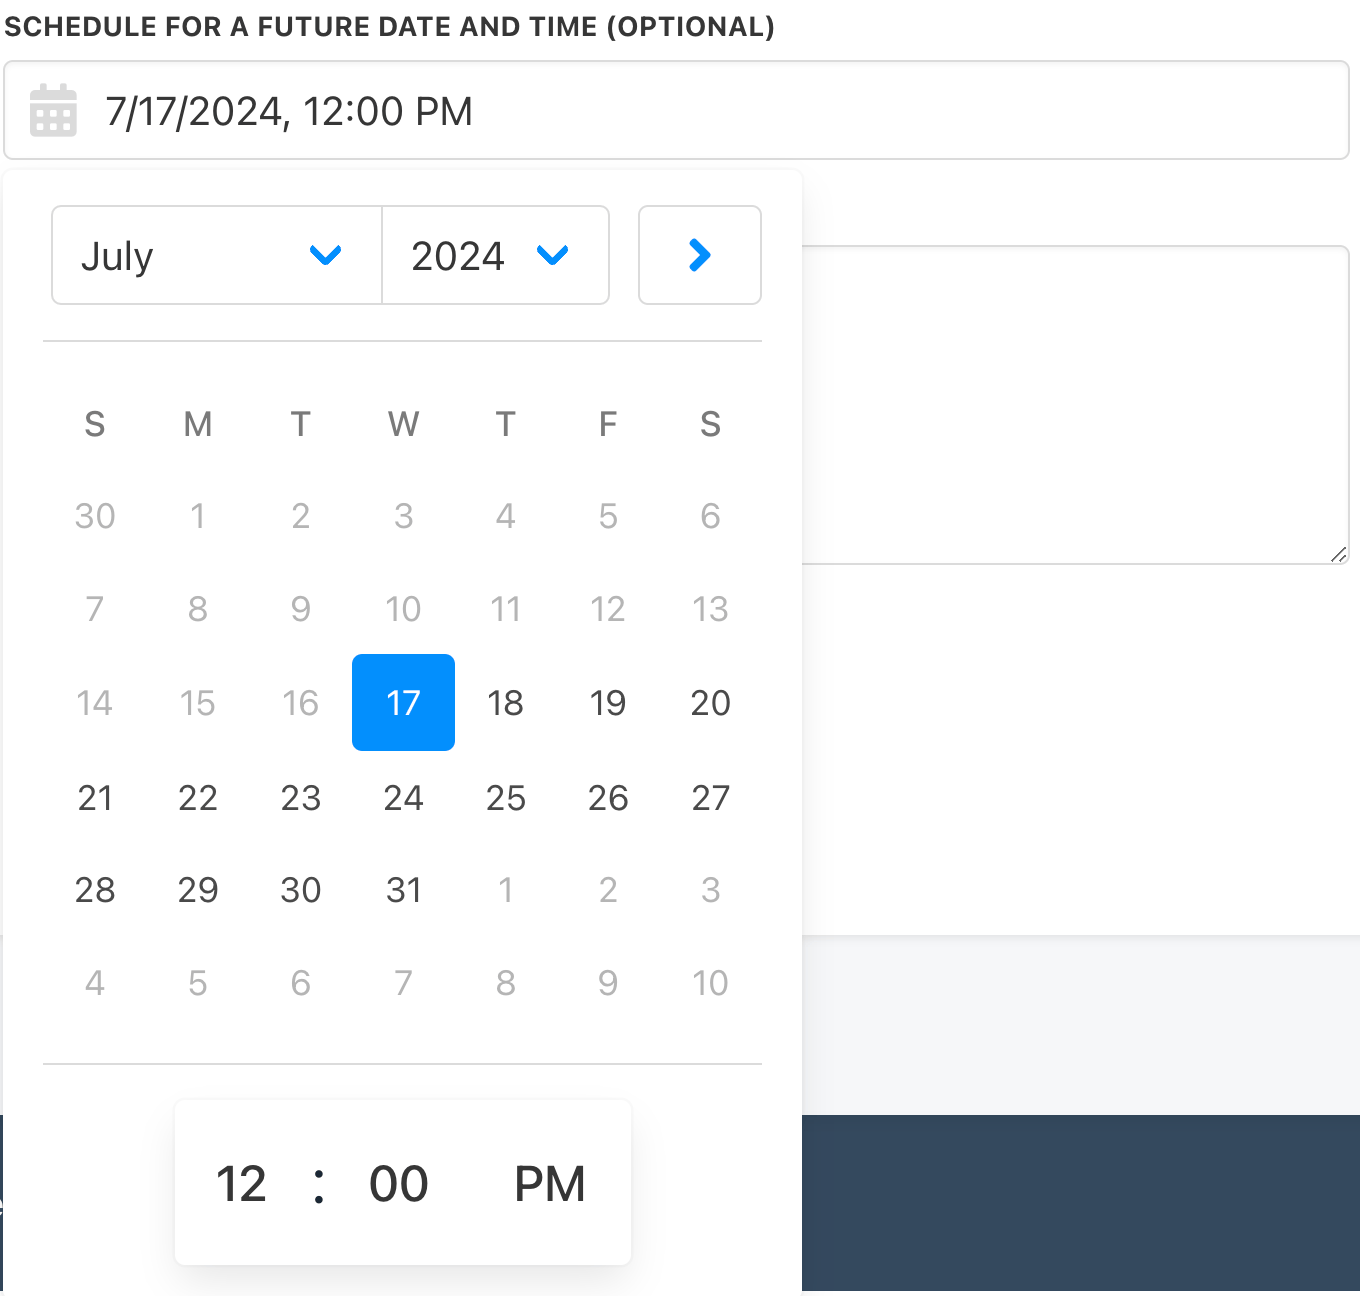
- There will be an optional field for Schedule for a future date and time. Once selected, your client can choose the date and time to send the ticket.