How to Add Delegates in Your Admin and Client Area
Before diving into this guide, we previously provided comprehensive information about how delegates work and how your clients can create contract delegates. In this guide, we will explain how to add delegates to your admin and client areas for a specific contract product.
Delegation allows you to grant other brand clients read-only access to this product. This is beneficial if you need to share access with a colleague or third party without disclosing your own credentials. Please note that delegates must have their own brand account to be added. You can revoke access at any time, ensuring you maintain full control.
How to Add Delegates from Your Admin Area
If your client needs assistance adding their delegates, you can do this through your admin area. Follow these steps:
- Go to the client's profile > Navigate to Product & Service > Click the Product.
- Go to the Delegates section > Add Delegates
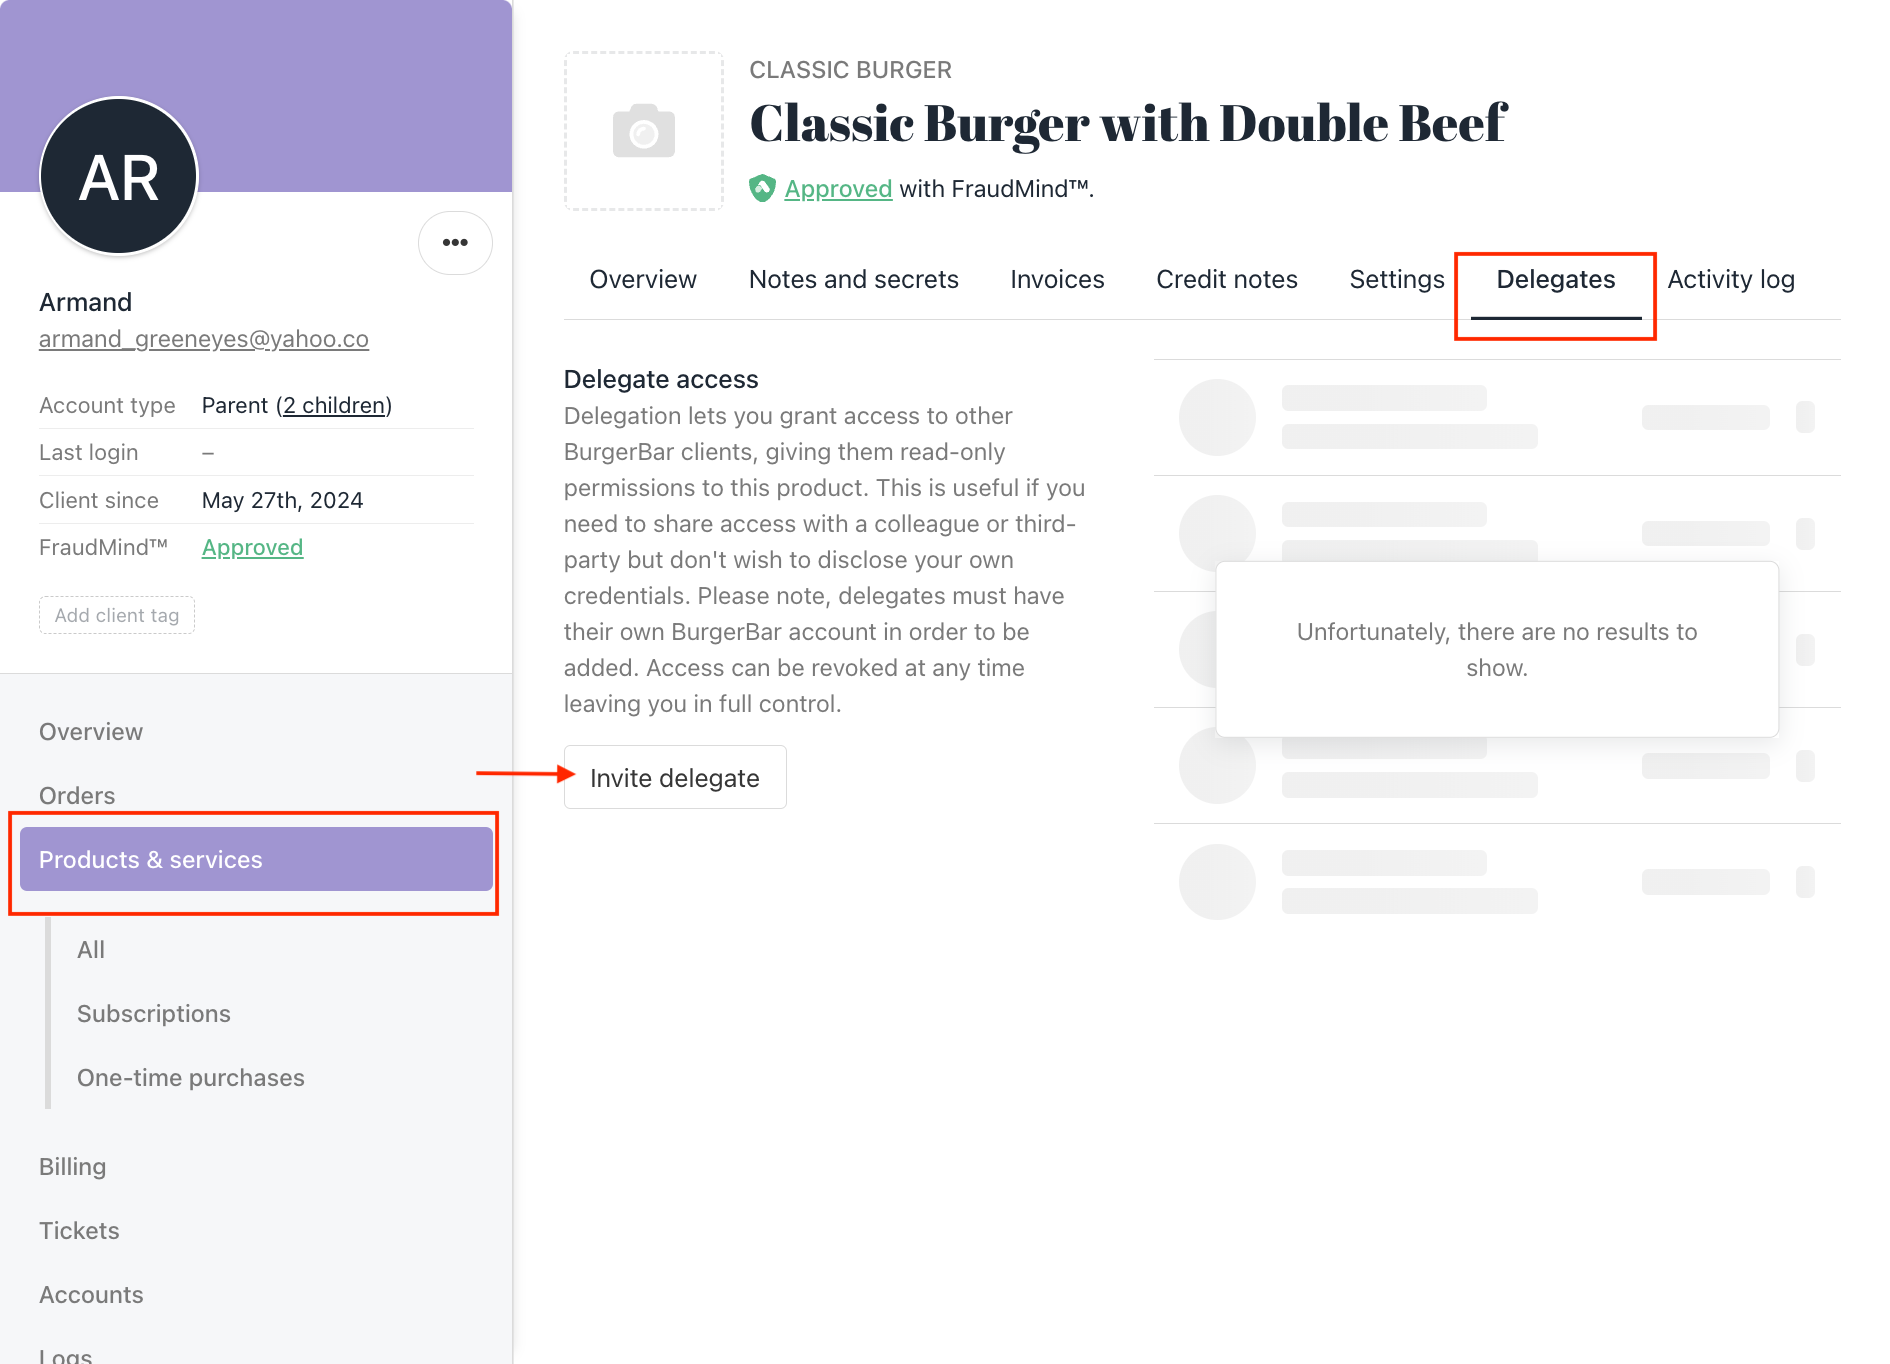
Client's profile > select product > invite delegates
How to Add Delegates from Your Client Area
If your client wants to add their delegates themselves, they can do it through their client area. Follow these steps:
-
From your client area, go to the Active Product > choose the Product
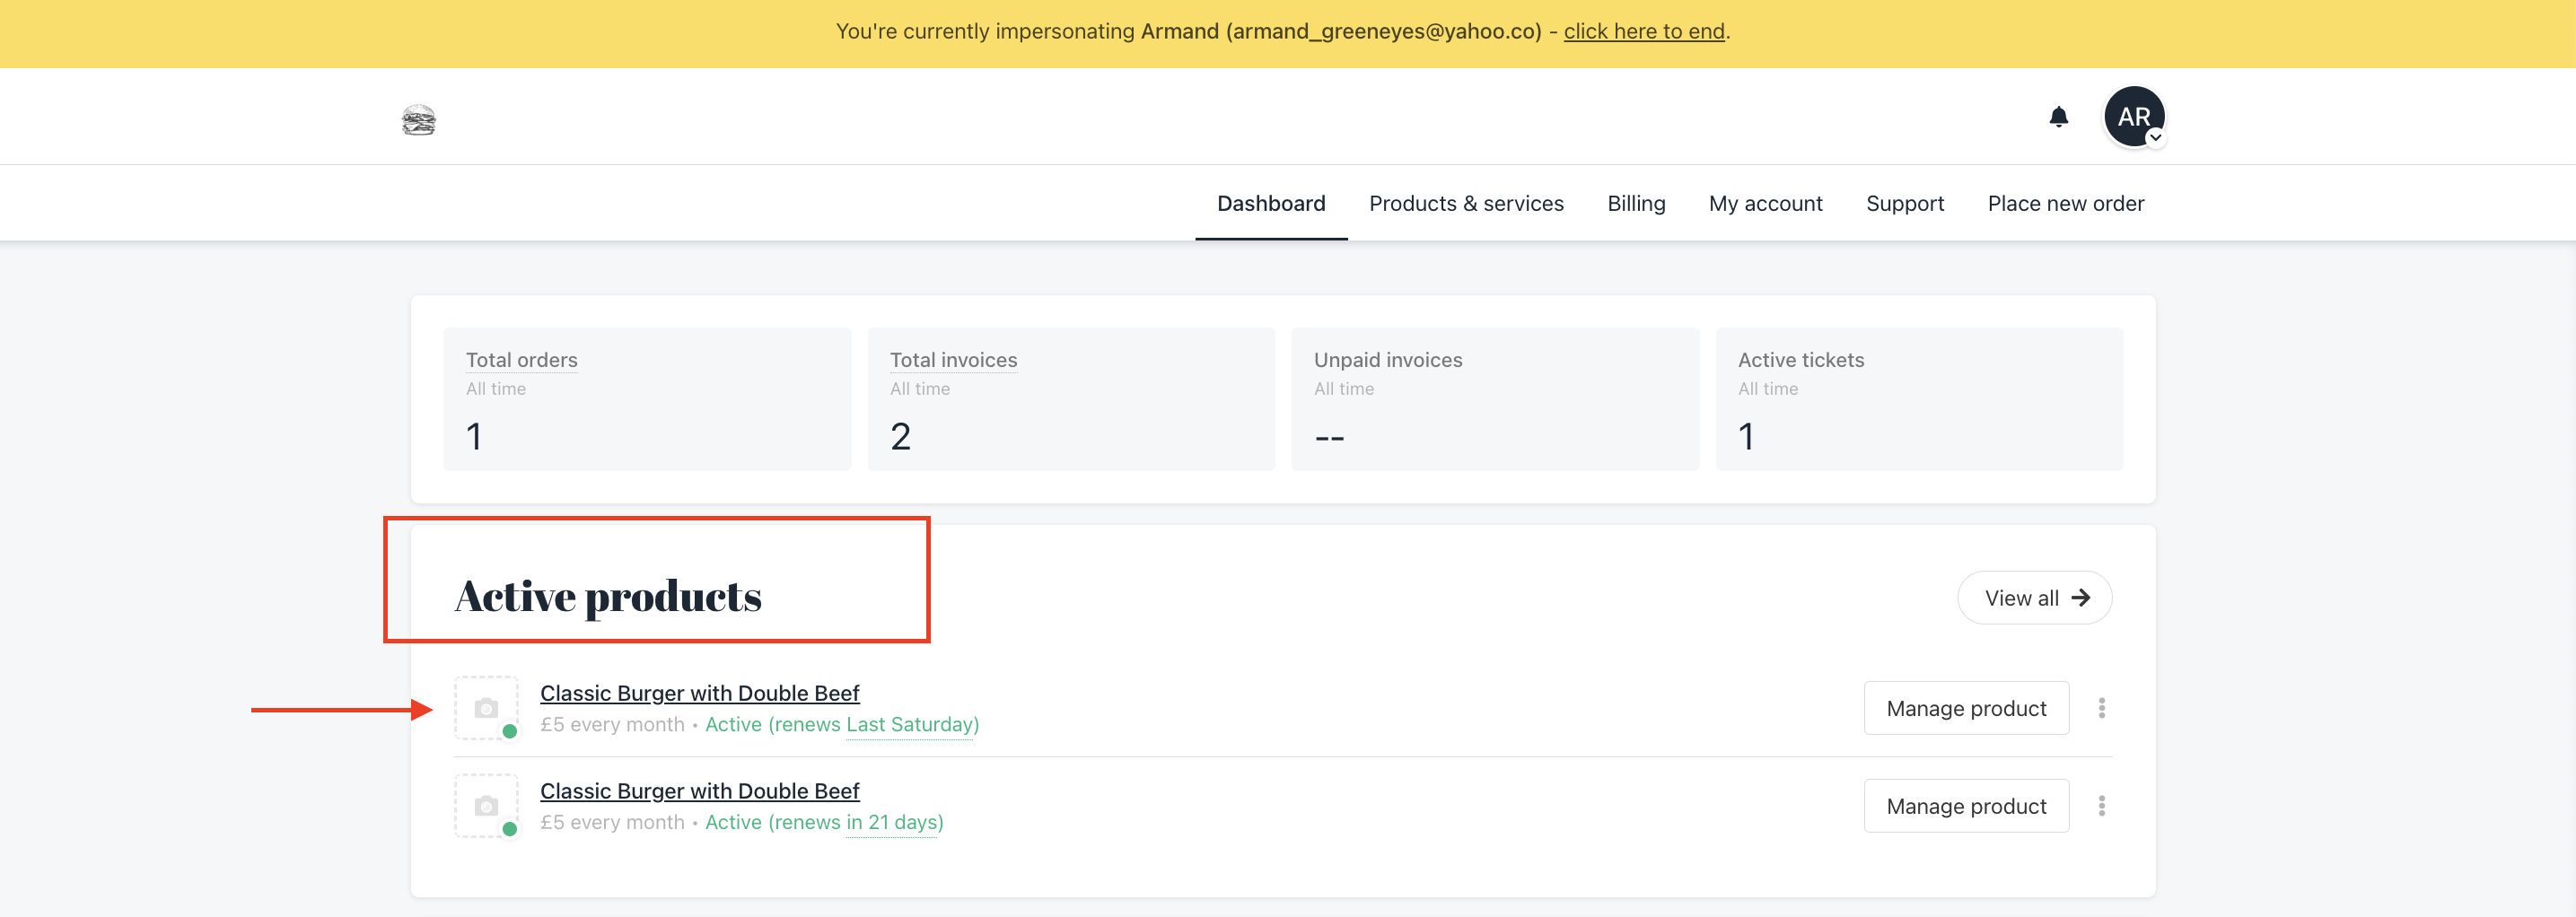
-
Click the Setting section > Navigate to the Delegates section > Click Add Delegates.
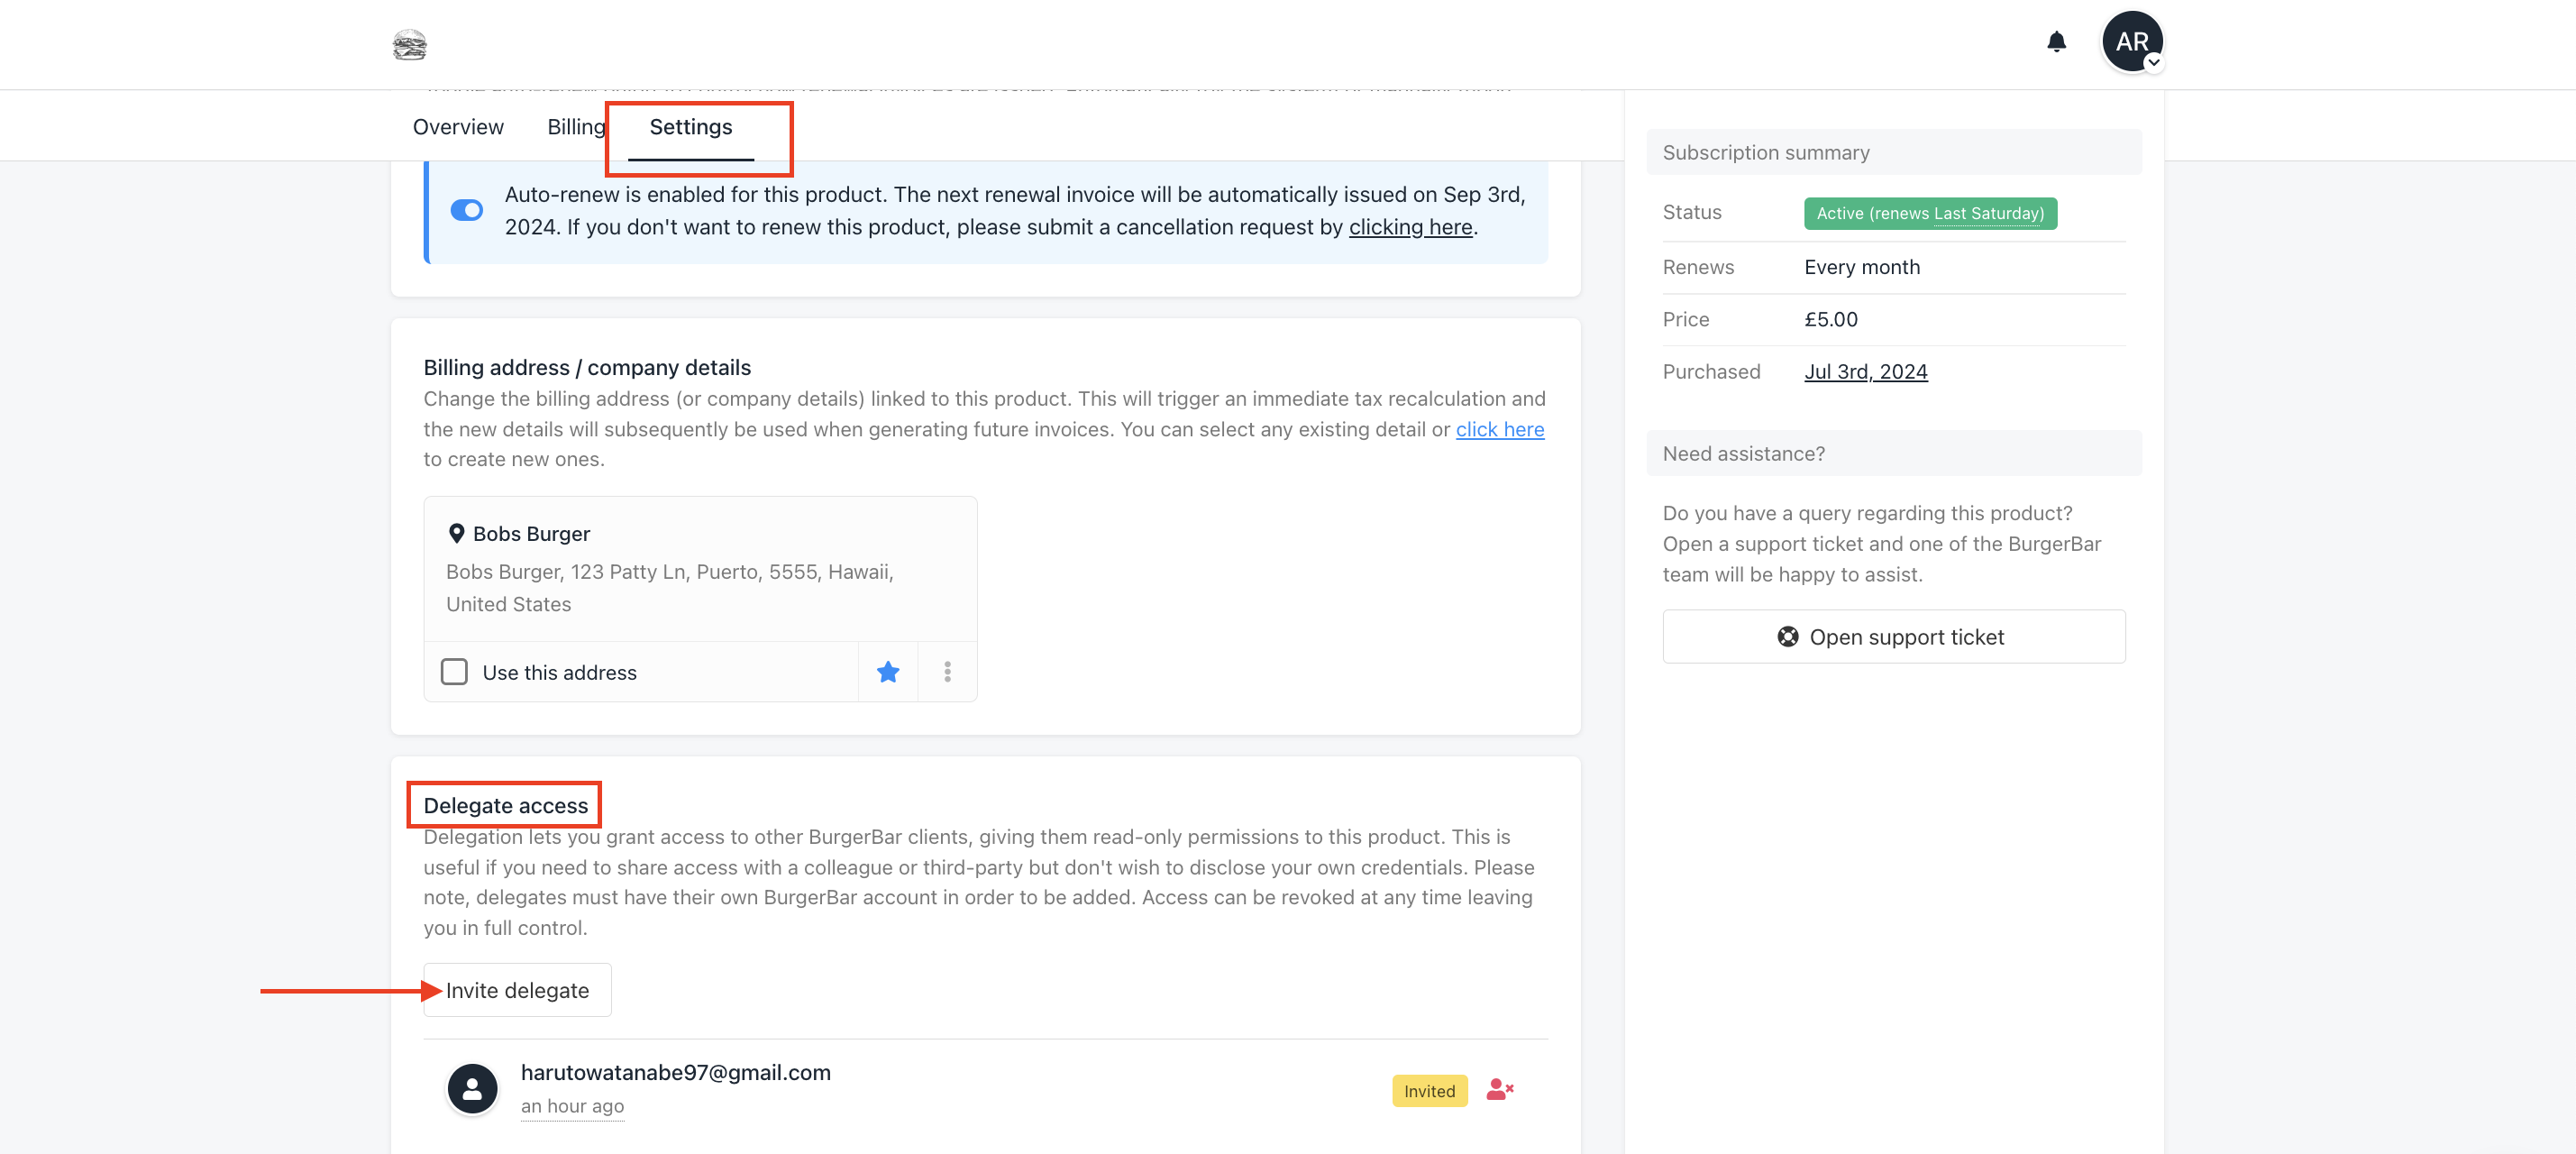
Setting section > Delegates section > Invite delegates
The email invitation that the delegates will get looks like this:
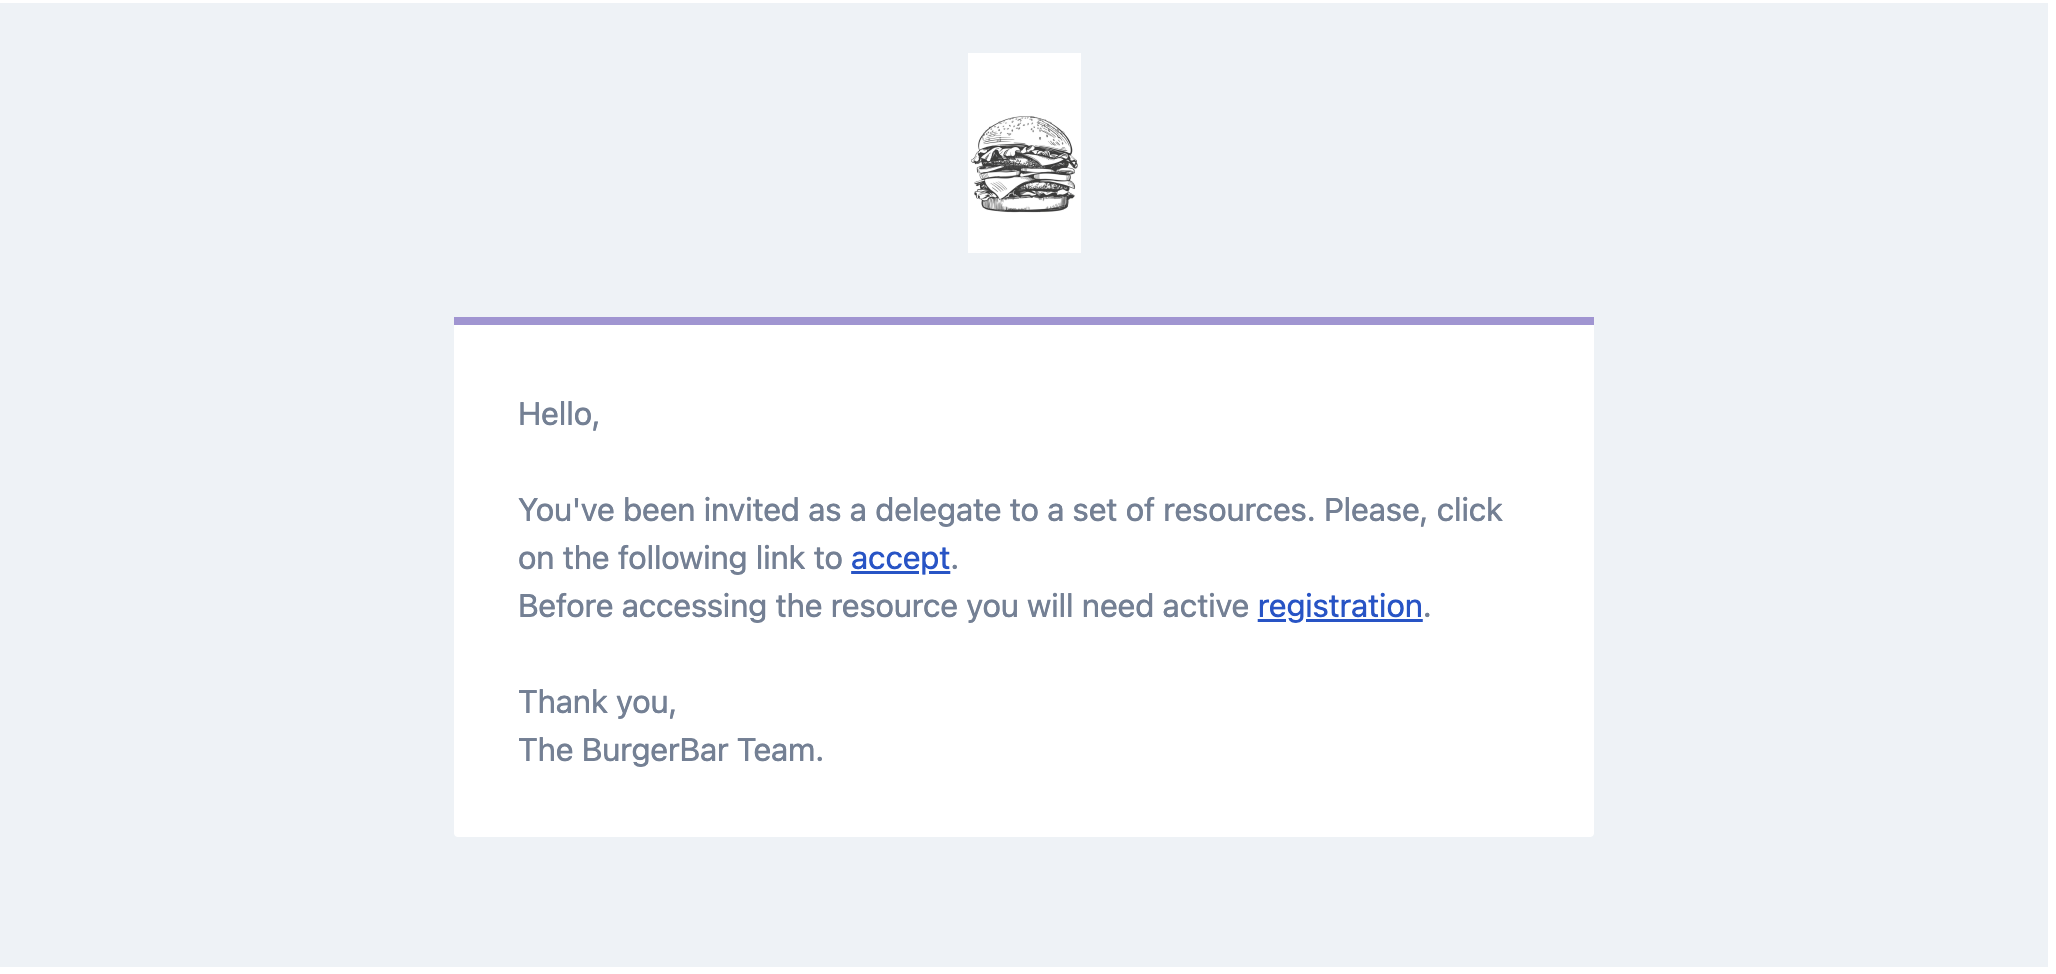
Delegate Access Invitation
How to Remove Delegates
If you need to remove delegates, you can do so from either your admin area or client area. Follow these steps:
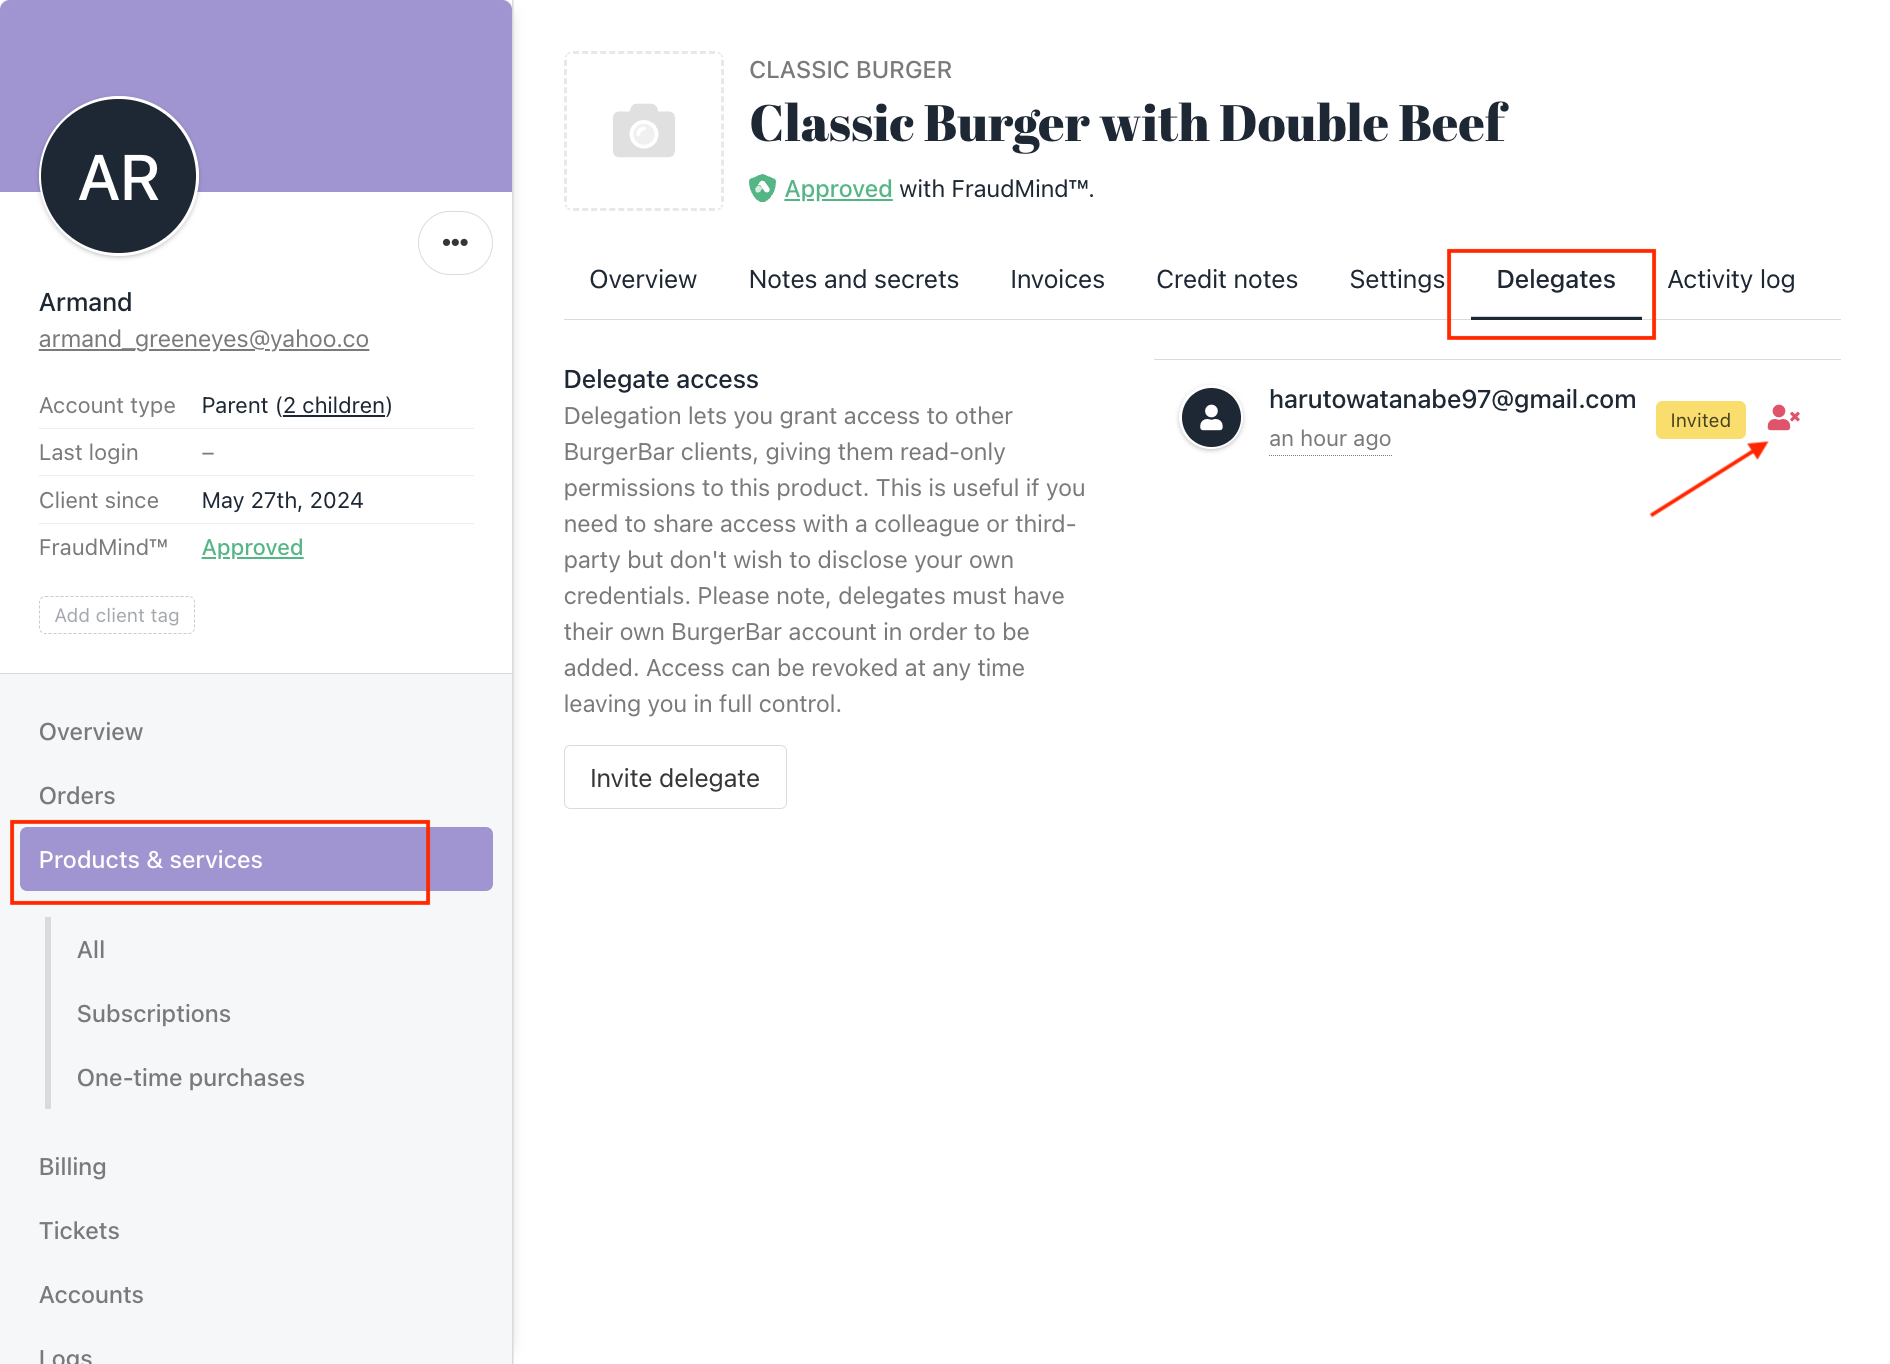
From your admin area:
- Go to the client's profile > Navigate to Product & Service > Click the Product.
- Go to the Delegates section > Click the delegates > Click revoke
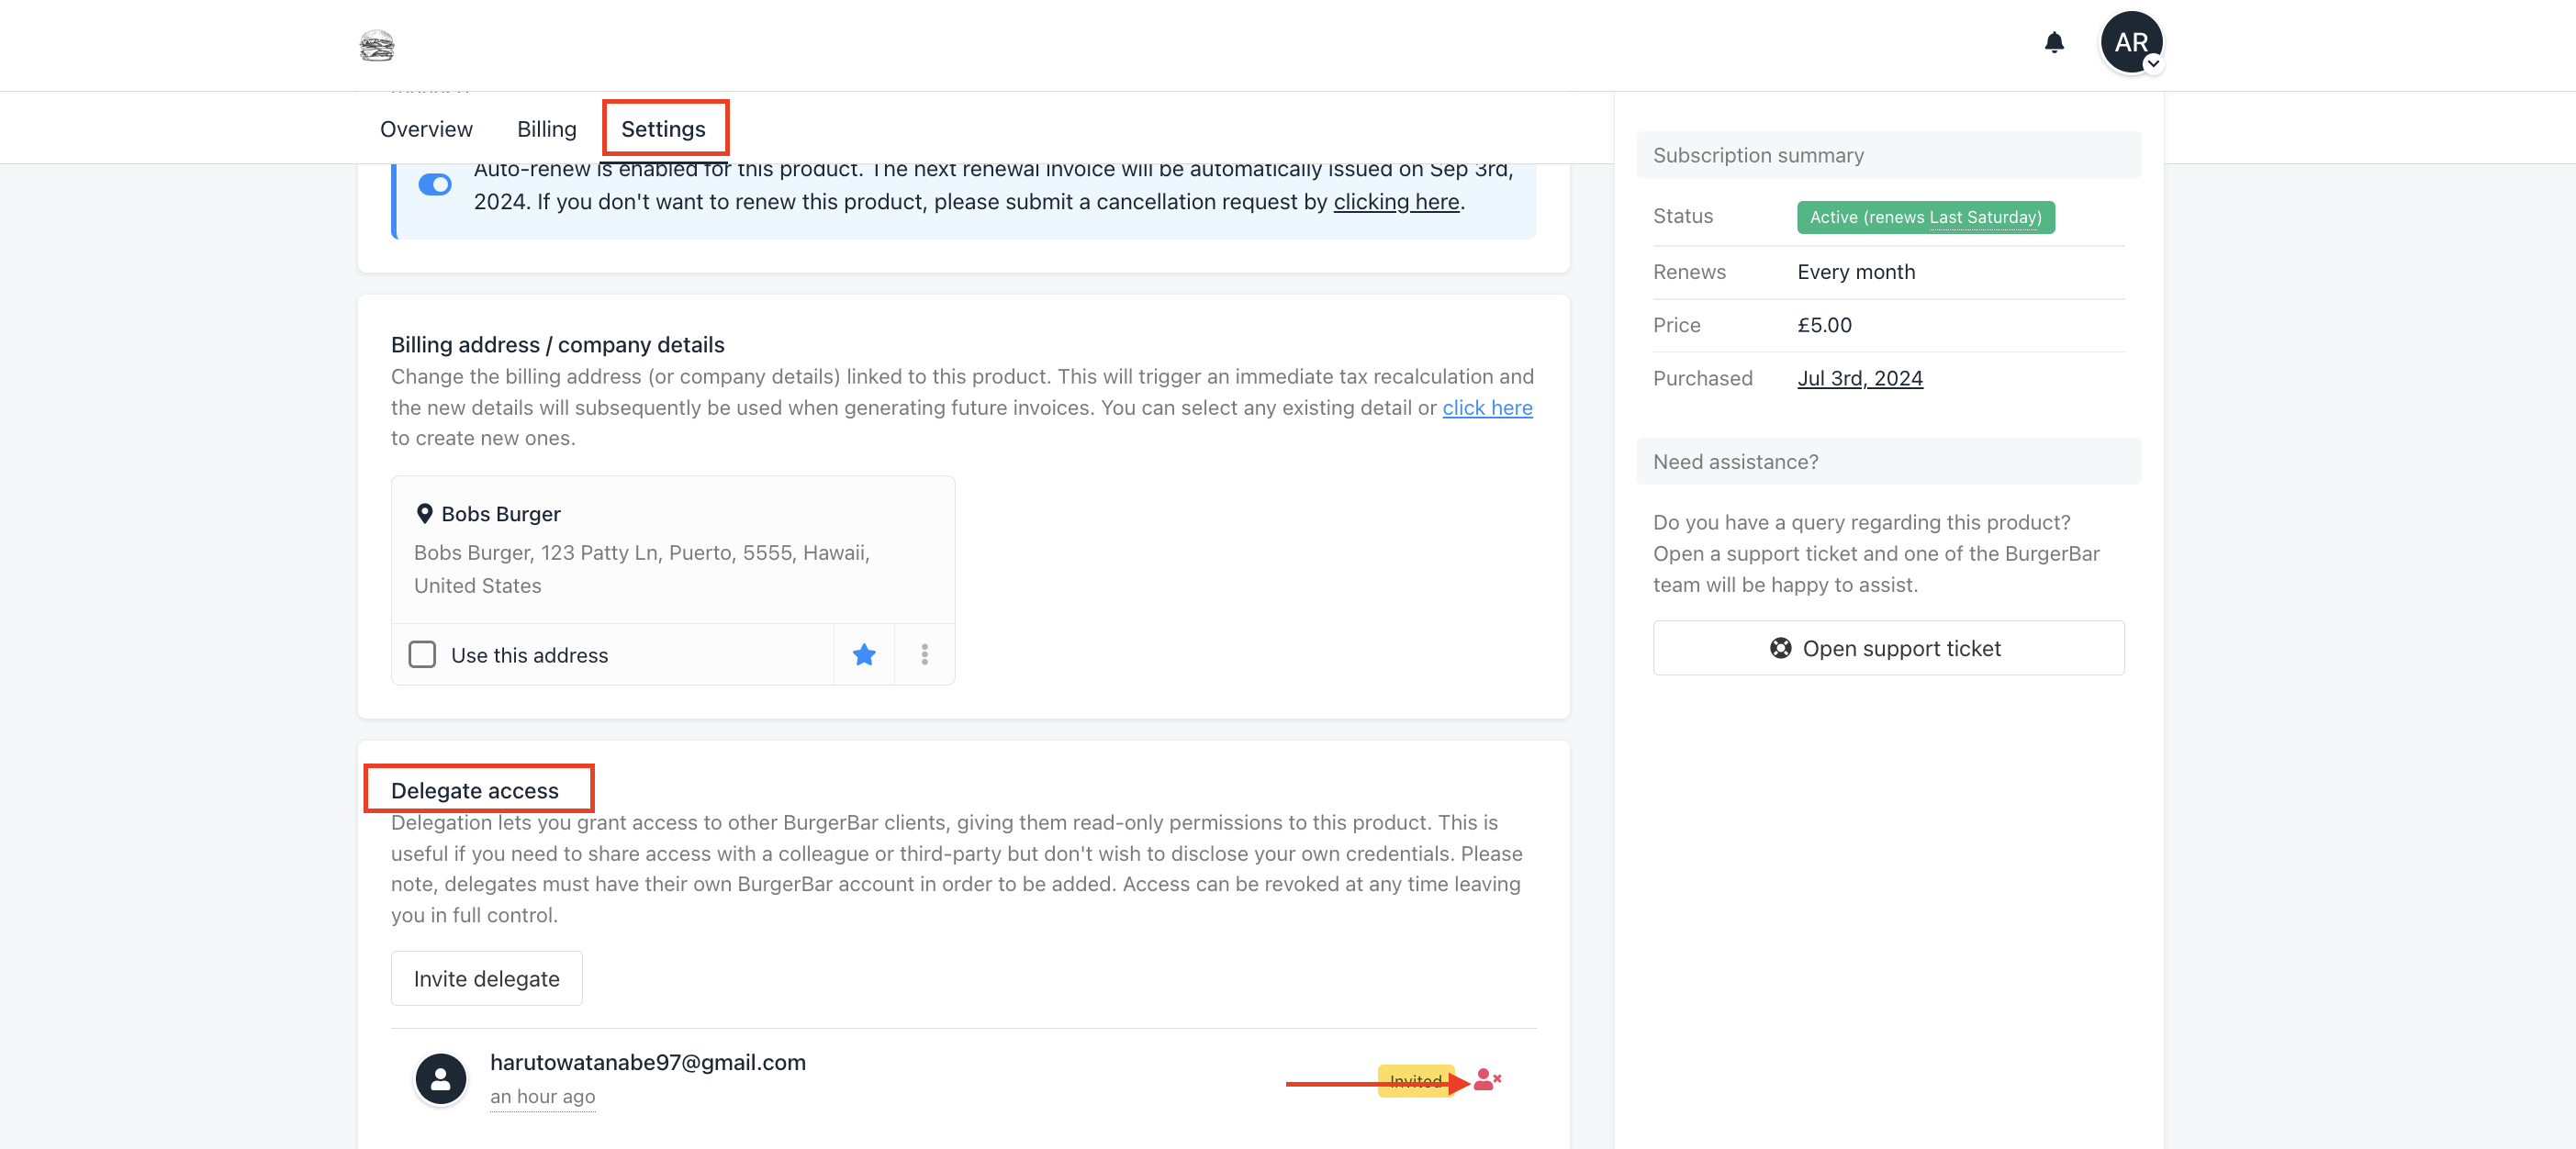
From your client area:
- Go to the product and click the Settings section.
- Navigate to the Delegates section > Find the delegate you want to remove > Click Remove.
Updated 10 months ago