How to Add Product Options
Set up different price options for products
Product options represent choices that typically affect the product’s price, such as size, quality level, or support tier, unlike product attributes.
Adding product options is a three-step process:
- Create a list of choices on the
Product Optionspage. - Link those choices on the
Product Detailspage. - Enter unique billing info, including price, for each option.
Access product options
- Log in to the Upmind dashboard.
- Access it from the dashboard by clicking on Store Catalogue.
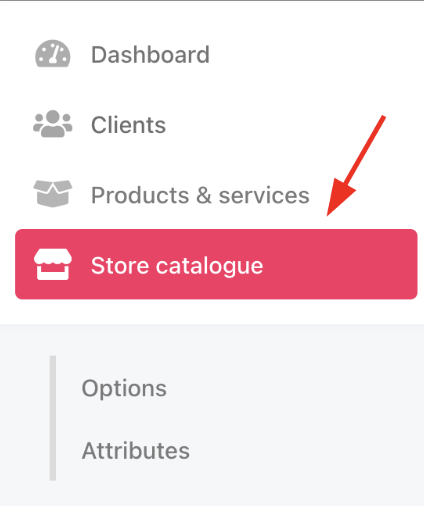
Store catalogue
- You can also click Settings and select the Product Catalogue tile under Products and Promotions.
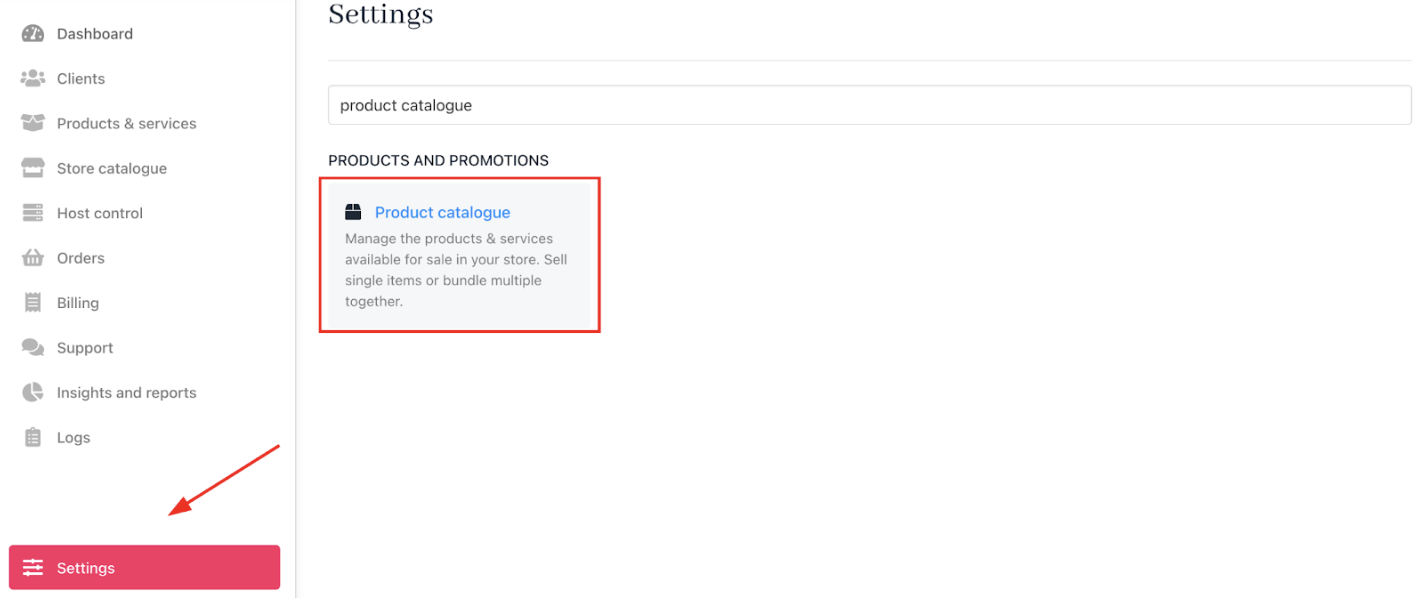
Settings > Products and Promotions > Product Catalogue
- Open the
Product optionstab.

Product options
Creating option categories
- Create categories to group related options.
- Click Add New > Product options category.
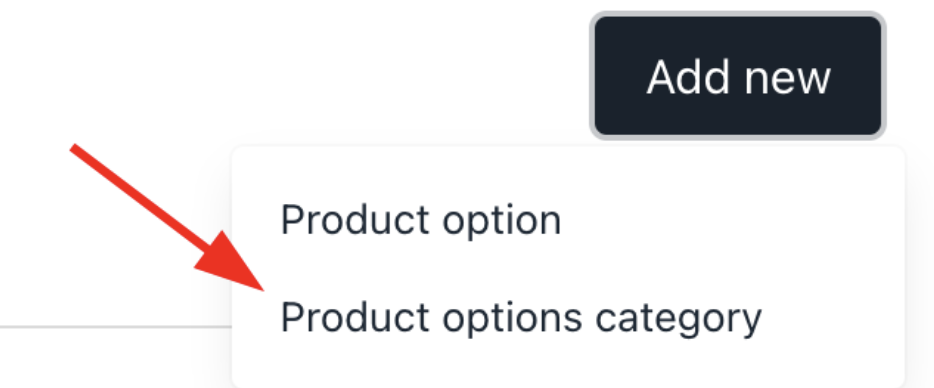
Products category
- Provide a unique category name.
- Enable subcategories. (Optional)
- Add internal descriptions (hidden from customers).
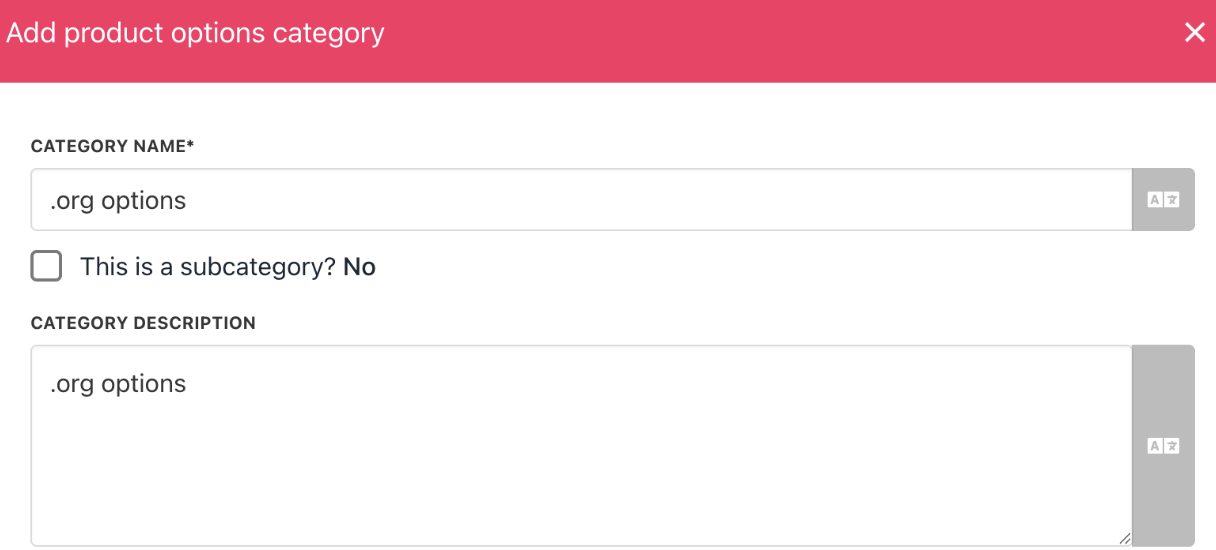
Enter a description
- Choose whether to allow customers to select multiple options at once.

Purchase multiple options
- Click Create.
Adding product options
- Select the options category.
- Open the three-dot menu > Add product option.

Select add product option
- Verify or change the category.
- Check boxes to keep visibility checked for staff and customers.
- Enter option name and description.
- Click Create.
- Repeat to add additional options.
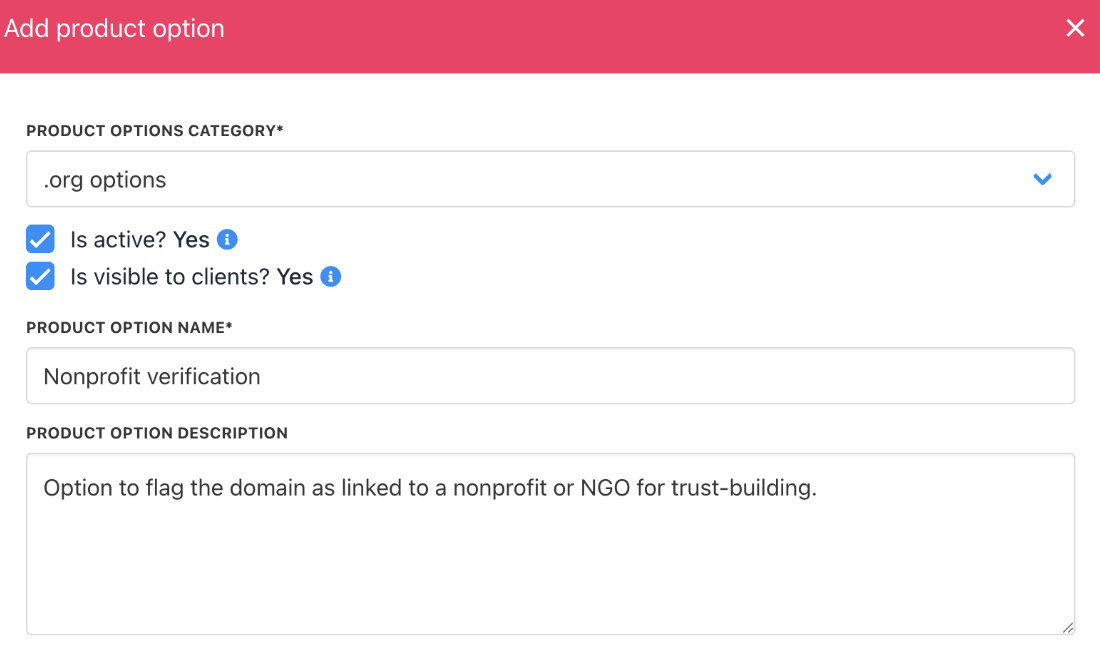
Review details
Editing options
- Go to the
Product Optionstab and select a category. - View the options within that category.
- Click the three-dot icon to edit or delete an option.

Edit or delete product option
Limit order quantity for options
This setting controls the maximum quantity a client can buy per product option. By default, there’s no limit, but enabling it lets you set a purchase cap.

Limit order quantity
Setting bulk order permissions for product options
By default, customers cannot change order quantities for product options. To enable bulk orders:
- Select Yes to allow quantity changes on the order page.

Enable bulk orders

Change the quantity
- Select Yes, in multiples of and enter a number to set the minimum order quantity and increment steps. (Optional)

Minimum order quantity
On the order page, customers must order at least the minimum quantity, adjusting quantities up (▲) or down (▼) in the specified increments, using the arrows.

Bulk order setting
- Click Save after making changes.
Setting billing for options
- Go to a product option and click the three-dot menu > Edit.

Edit product option
- On the option detail page, select
Product optionbilling. - Enter price, currency, and term.
- Save changes.
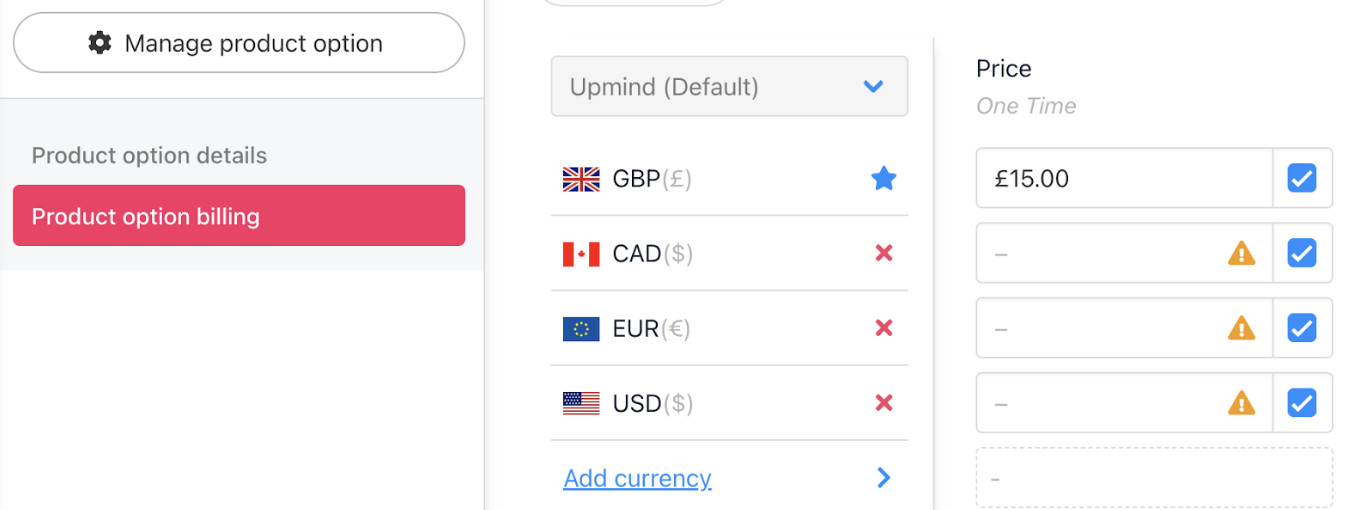
Add price
- Repeat for other options.
Linking options to products
You can link product options to an existing product on the Product details page.
- Navigate to
Productstab. - Expand the category and select the product.
- Click the three-dot menu > Edit to open product details.

Click edit
Edit the current product price
When adding options to a product, make sure its base price is set correctly. This prevents pricing errors in the client’s basket.
Once options are added, the product itself becomes just a placeholder. Its price should be set to zero, otherwise clients may see the wrong total at checkout.
- On the
Product Detailspage, click Product Billing. - Check the price.
- If it’s not zero, change it to zero and click Save.
- Once the price is zero, proceed to the next step.

Change number to zero and click save
Add options
- Click the
Product Optionsmenu link.
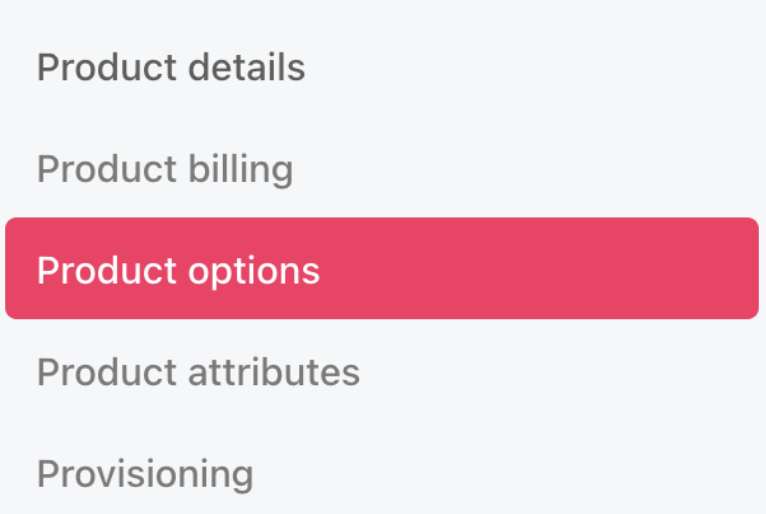
Product options
- Click Manage.
- Select the category with the options you want to add.
- Check the boxes next to the desired product options.
- Click Save at the bottom.
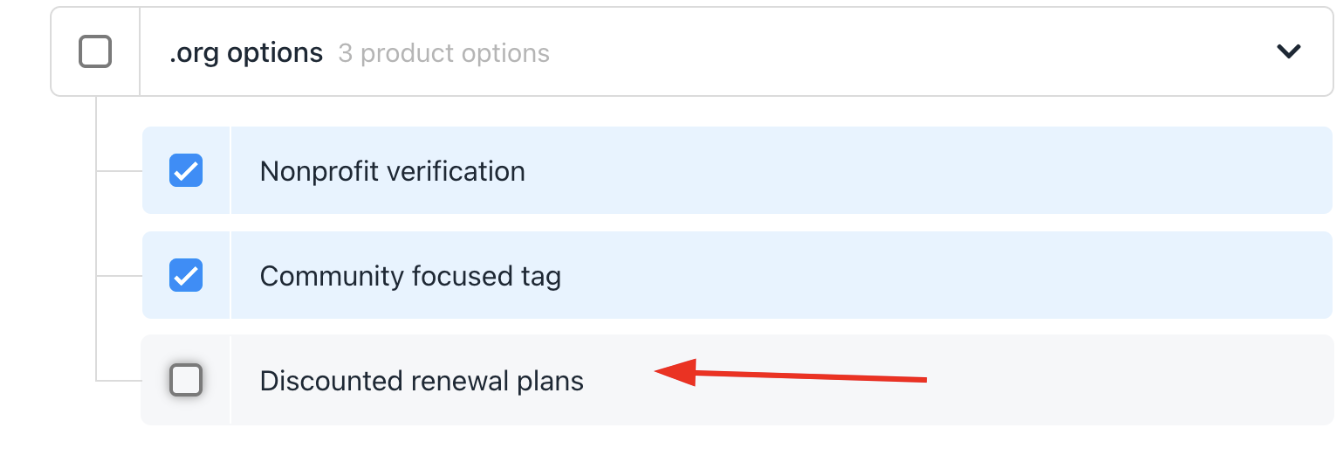
Choose which product options to display
To edit or remove options
- Click Manage.
- Click the red circle to remove an option.
- Click Save.
Upmind will then display the options on the product options page.
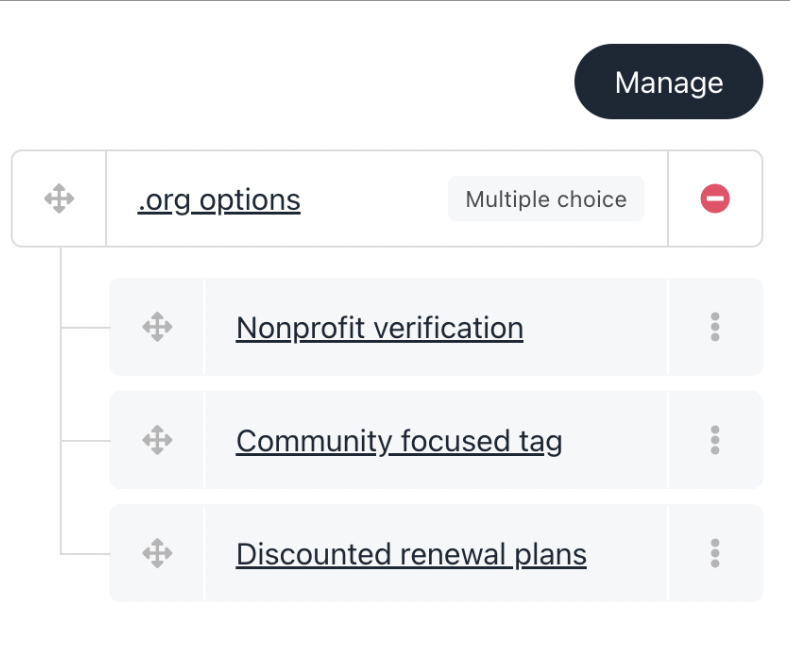
Click manage to edit
Customer view
The customer page shows each product option with its price, plus the placeholder price (zero).
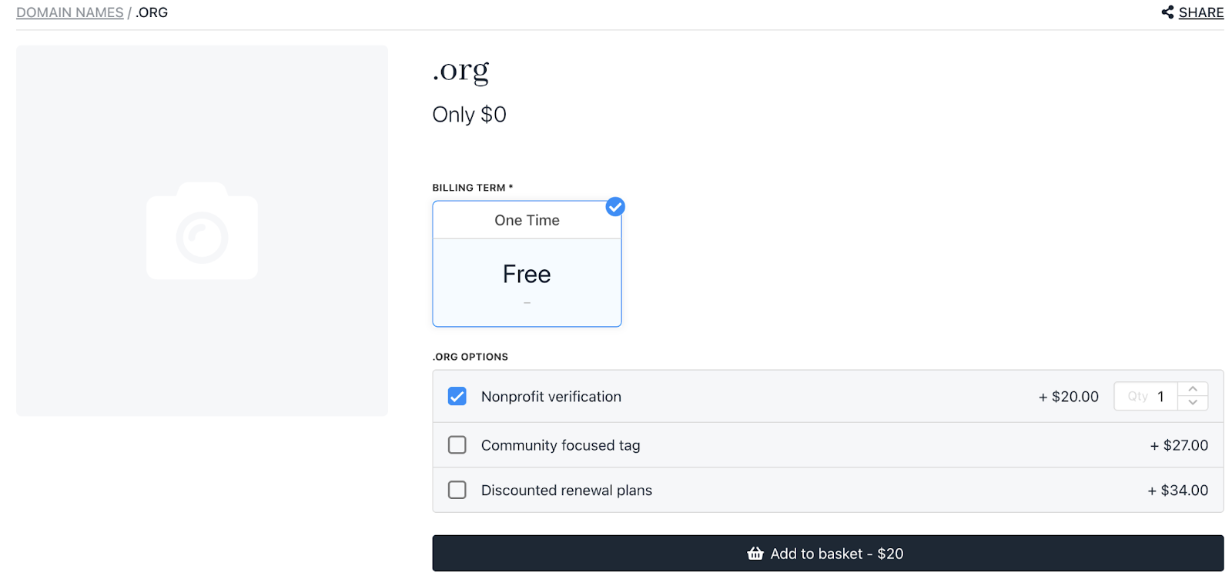
Original products and prices
On the Basket page, customers can:
- Click Details to view the chosen product option.
- Click Edit to change the product option.

Customer can access product information
Updated 5 months ago