
How Does Provisioning Work?
Step-by-step guide to provisioning in Upmind
From this guide, you will learn:
- How to Create a Web Server.
- How to Create a Hosting Package.
- How to Purchase the Hosting Package as a Client.
How to create a web server
- First, create an account on any web hosting service such as Plesk.
- You can create and provision a Web Hosting service on Host Control > Web Hosting from the
Admin Dashboardor Settings > Provision Configurations.
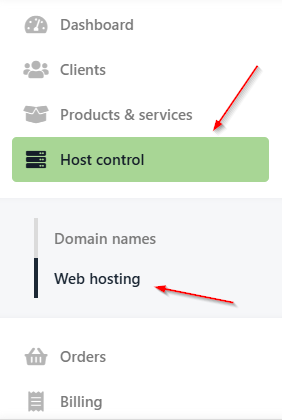
Host control > Web hosting
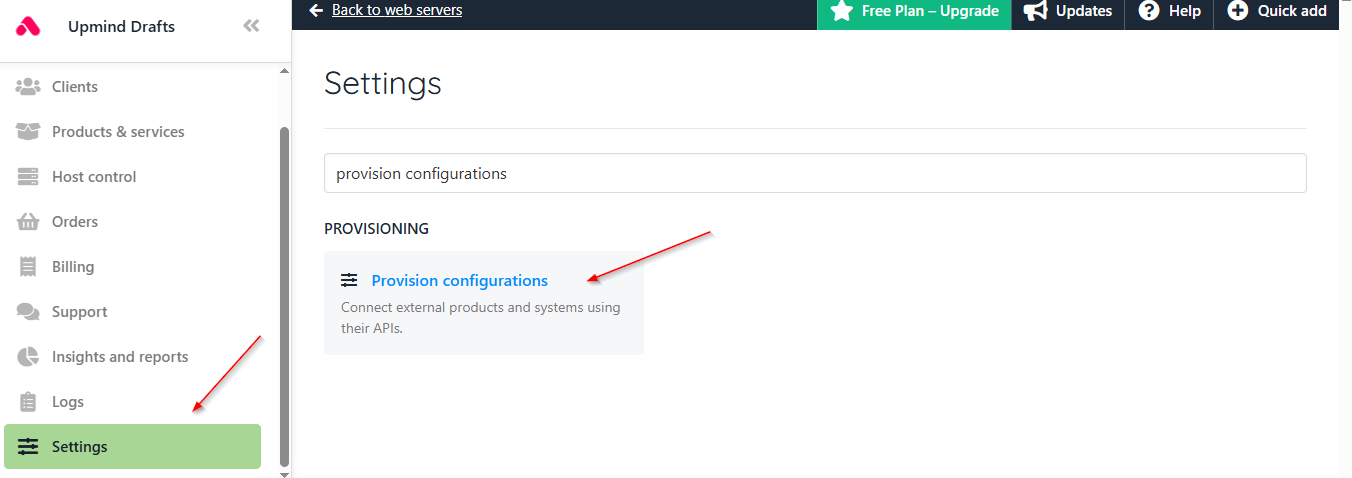
Settings > Provision configurations
For this example, we will go in from the host control.
- Click on Add New and select
Web Server.

Select web server
- Type your Web Hosting service name and choose Plesk.
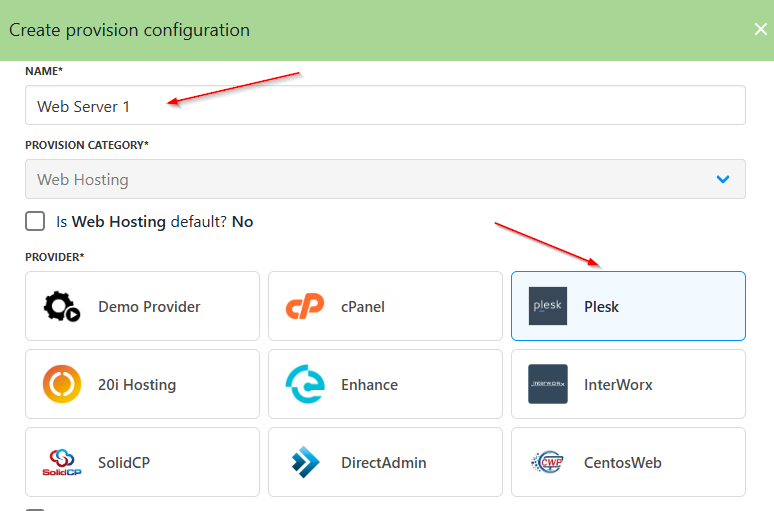
Add the web server name and choose a provider
- Add all the necessary Provision Configurations, such as Host Name, Admin User Name, and Admin Password. All of the information can be found on your panel.

Add provision configurations
- Afterwards, choose your operating system, fill in the optional configuration attributes, and then click Create.
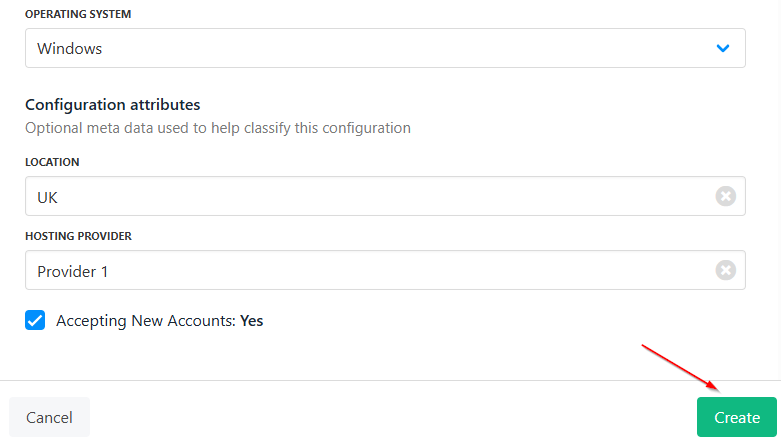
Add configuration attributes and click create
How to create a hosting package
- Go to the Hosting Packages tab, then click on Add New, and select
Hosting Package.

Select hosting package
- Create a Product Category.
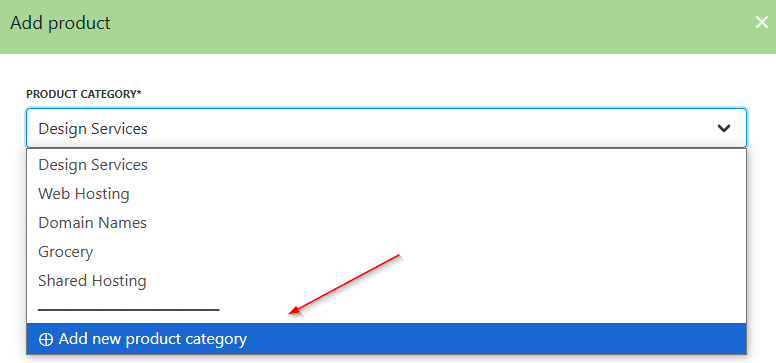
Add product category
- Write your
Product Nameand then click Create.
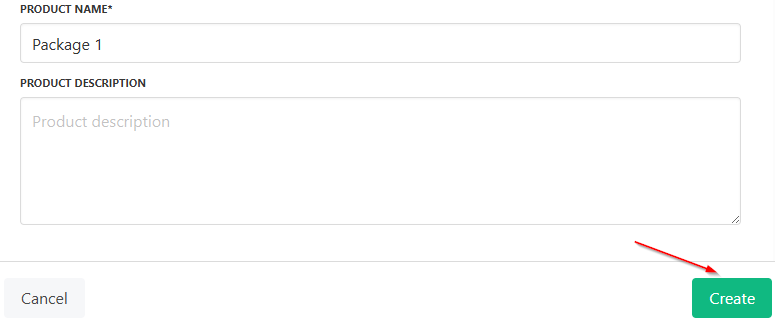
Click create
- Click Manage Product, go to Product Billing, and under Purchase Type, you can make it a Recurring Payment.
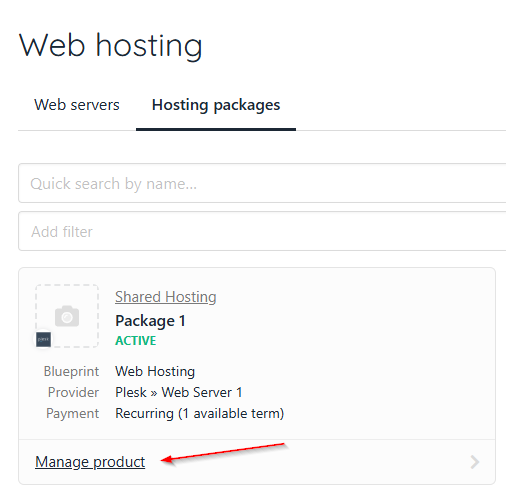
Click manage product
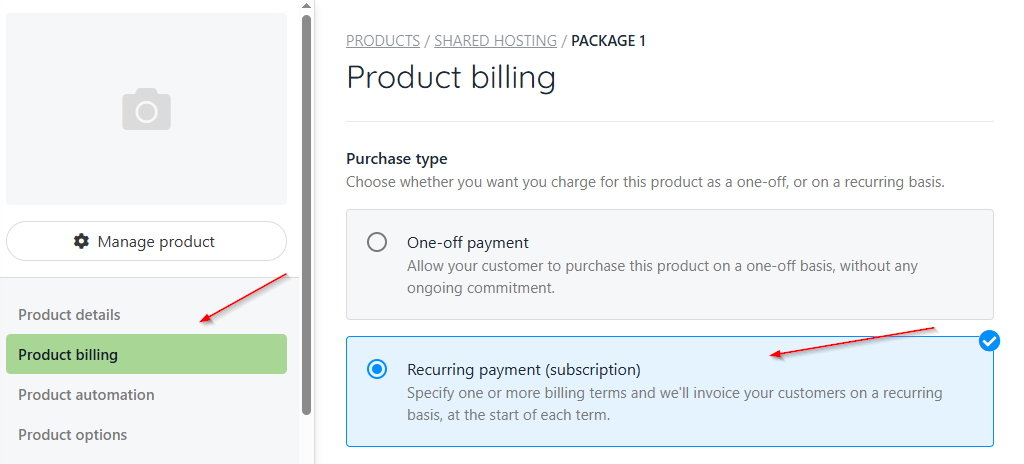
Make it a recurring payment
- Under
Subscription Terms, type in an amount and choose the currency.
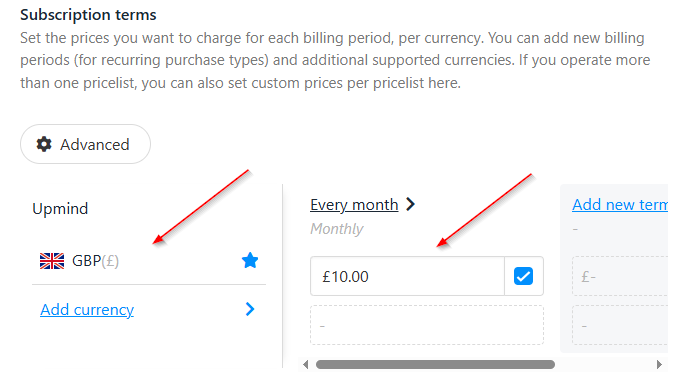
Choose amount and currency
- You can update the
Multi-currency options.
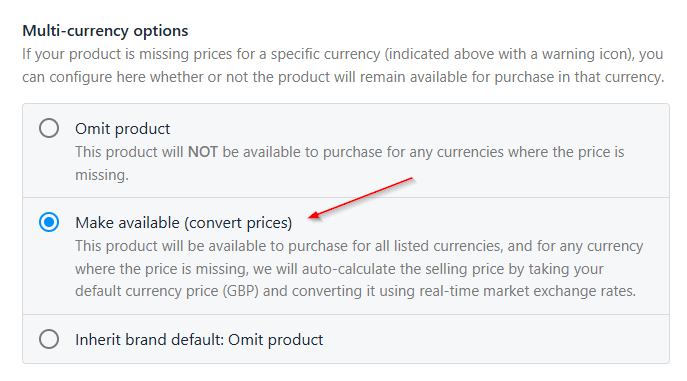
Select multi-currency option
- You can also go to
Provisioningto choose your Provision Blueprint and Provider.
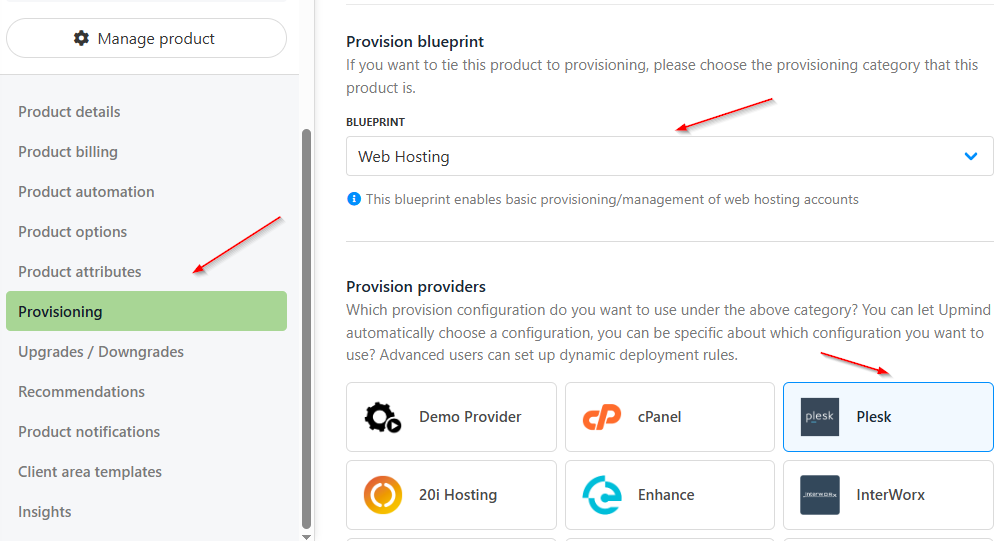
Choose the provision blueprint and provider
- Select the
Configuration Modeand choose yourProvider Configuration(the Web Hosting that you created).

Select configuration mode and provider configuration
- You can keep the
Setup Functionsas Default, andOrder Setup Fieldsas Inherit from category.
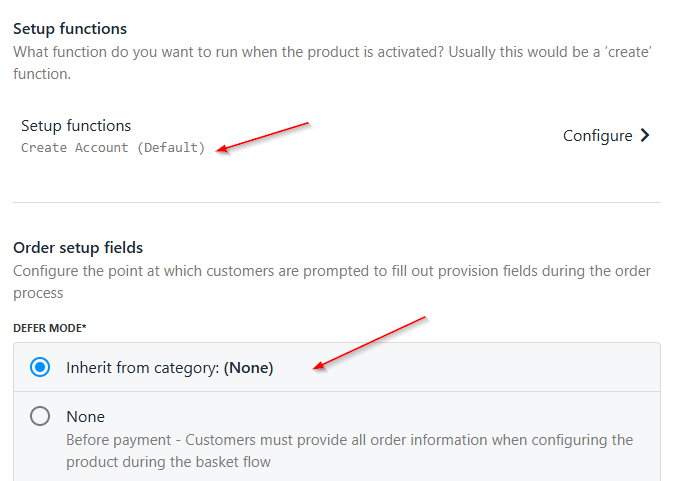
Choose setup functions and order setup fields
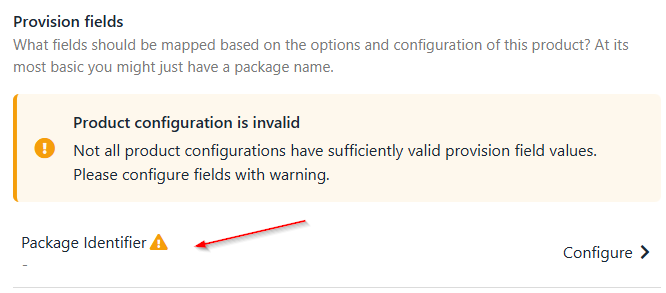
- Under
Provision Fields, you need to configure your Package Identifier.
Configure package identifier
- You can create the Package with all the details (for example, disk space, monthly bandwidth limit, etc.) from your panel. Add the Package Name to the
Package Identifier.
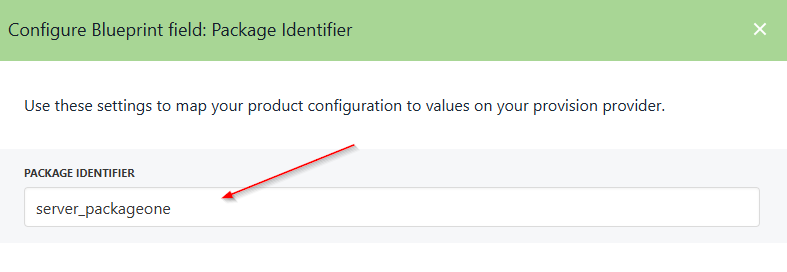
Add package identifier name
The product should now be set up and live.
How to purchase the hosting package as a client
- A Client can purchase the Hosting Package by first going to
Place New Orderfrom the Client Dashboard.

Select place new order
- Select the Category and click Add to basket.
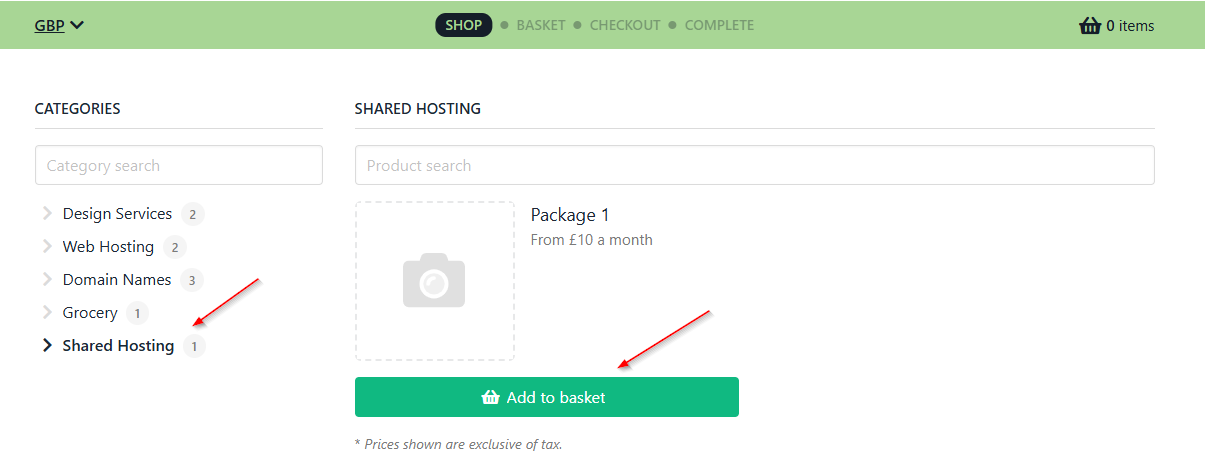
Add to basket
- Add a
Domain Nameand click Add to basket.
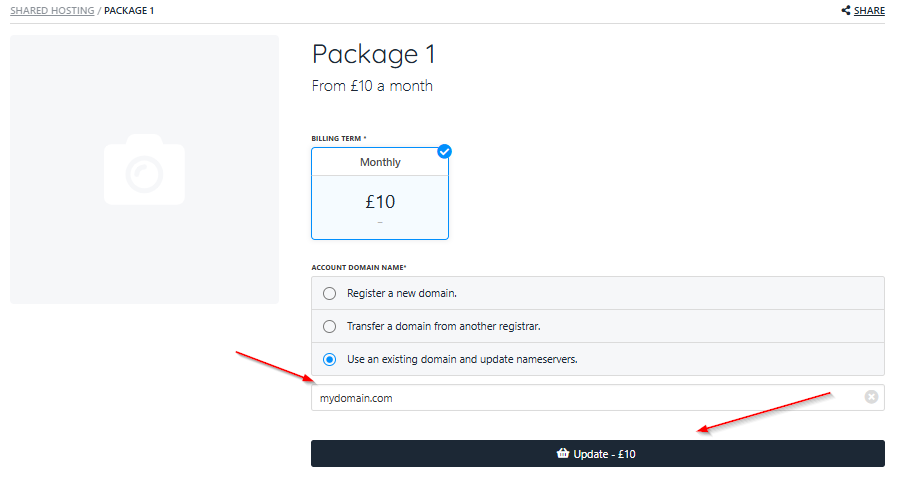
Add domain name
- Click Continue to
Checkout.
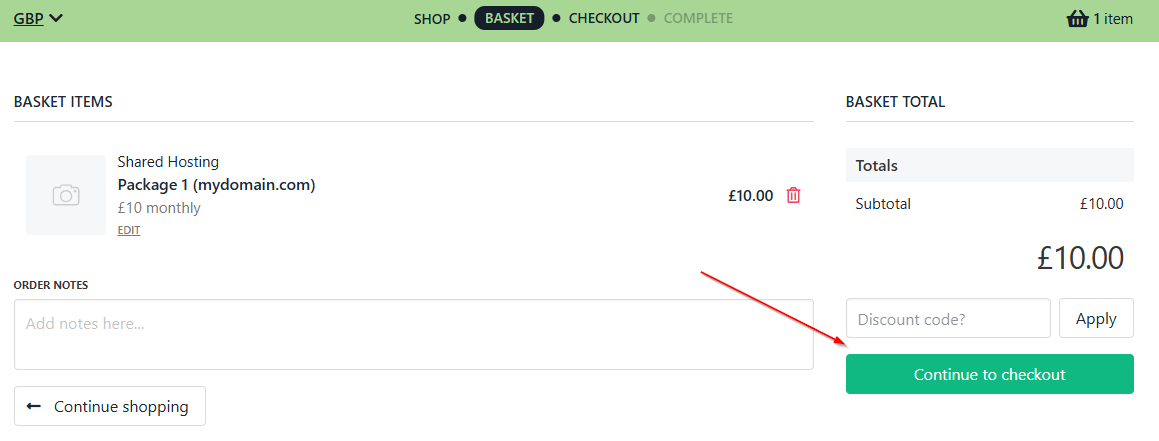
Continue to checkout
- Select
Pay Laterand click on Place Order and Pay.
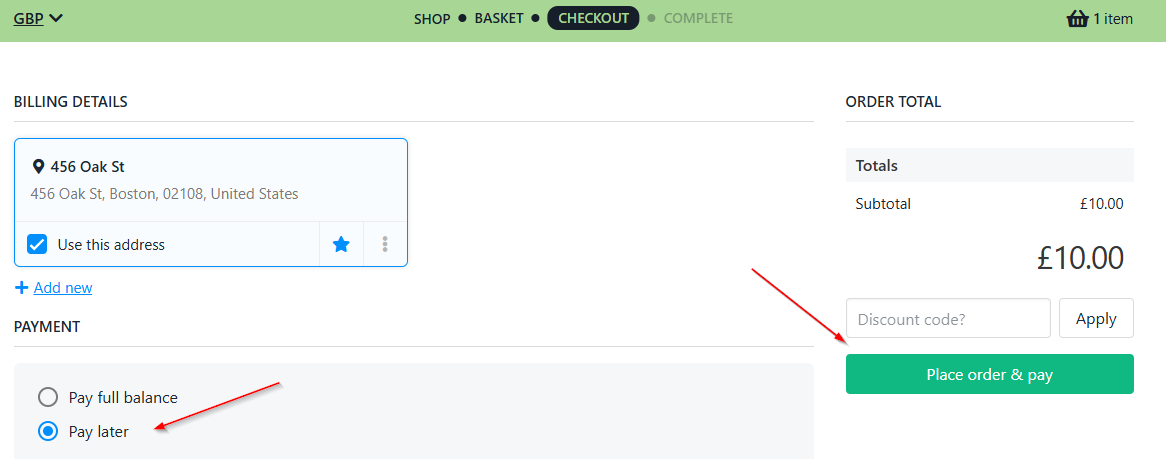
Place order and pay
- Your Order will be complete.
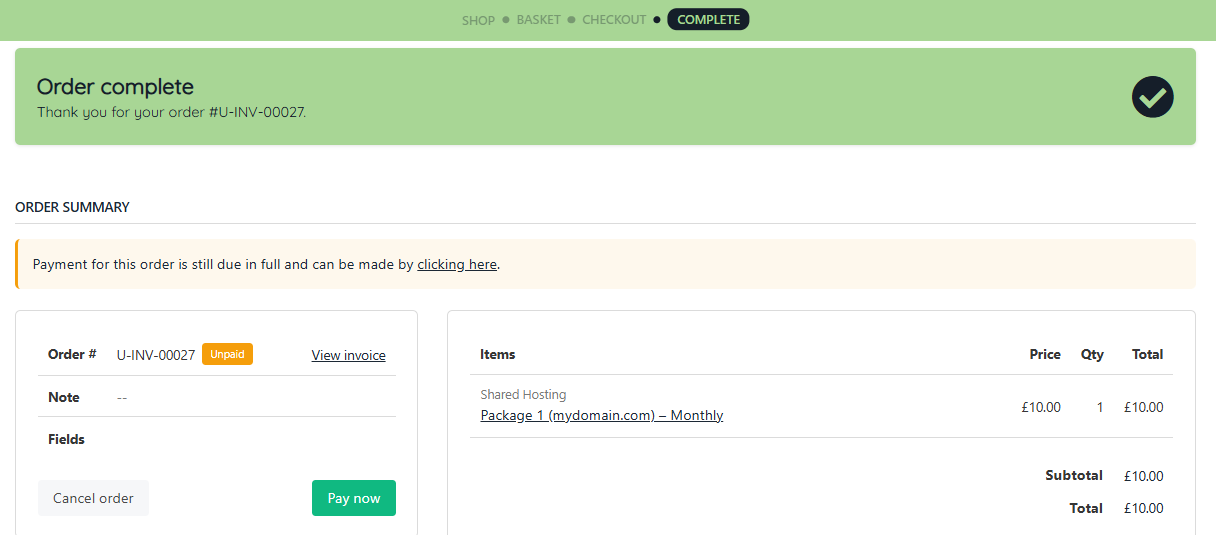
Completed order
- If you go to
Ordersfrom theAdmin Dashboard, you can find the order. Click on it.

Find the order from admin panel
- You can Review the order with FraudMind.
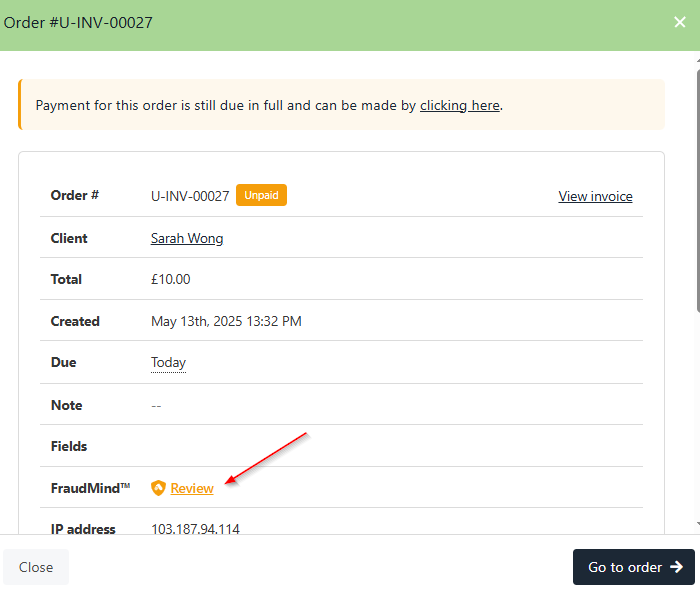
Review order
- Approve it.
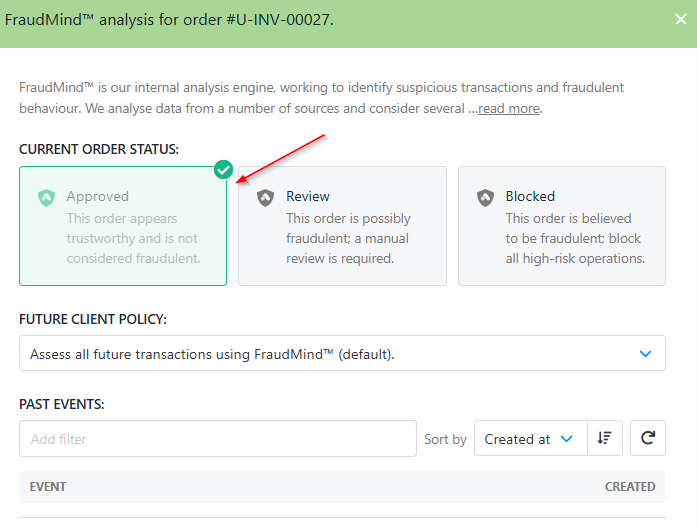
Approve order
- Select Go to Order.
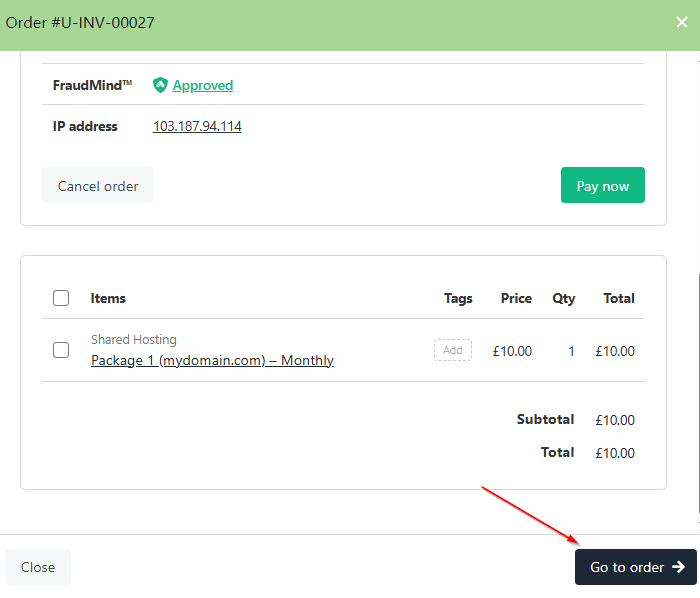
Go to order
- Select
Invoicesand click on the Order.

Select invoice and the order
- Click on Pay Now.
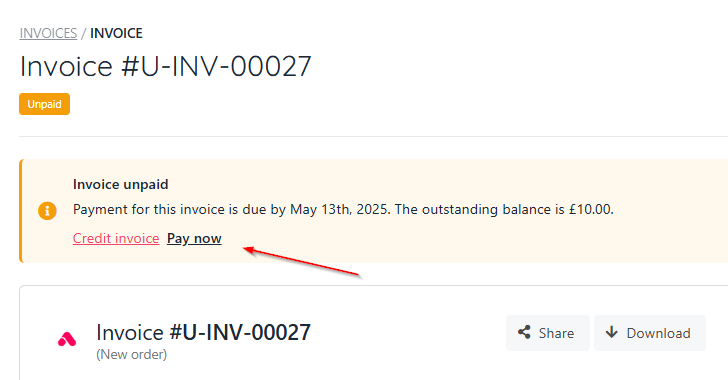
Select pay now
- Make the Manual Payment.
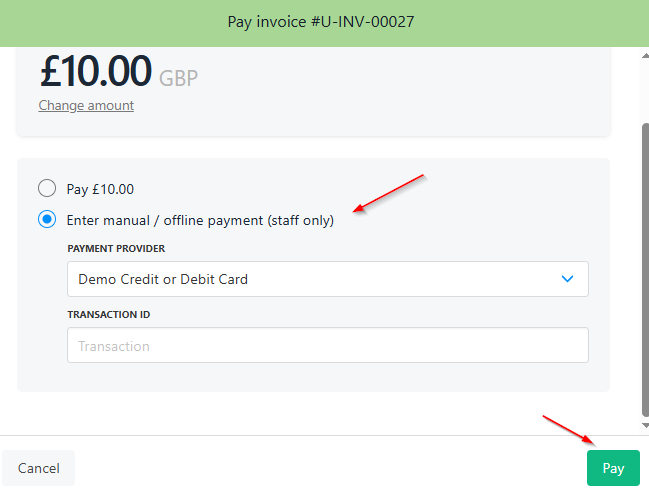
Manual payment
- It will mark it as paid. Click on the Product.
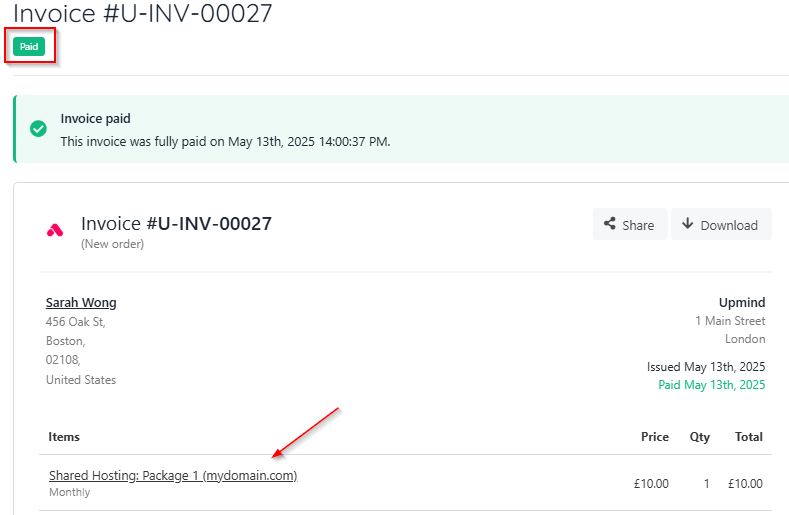
Select the product
- In the back end of the
Managetab, it will trigger the system to run a Create Command.
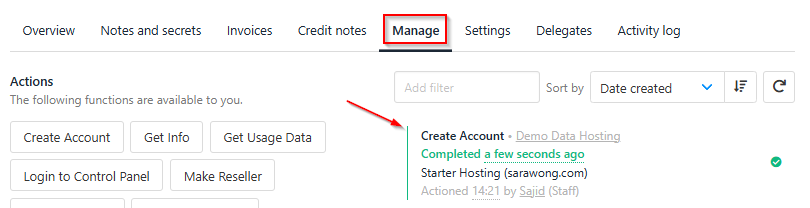
Manage tab
- You can also see the
Activity log.
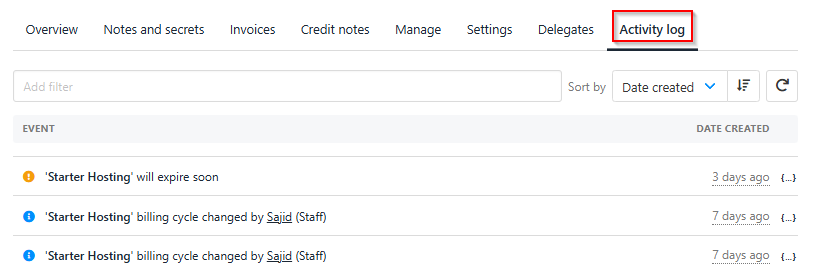
Activity log
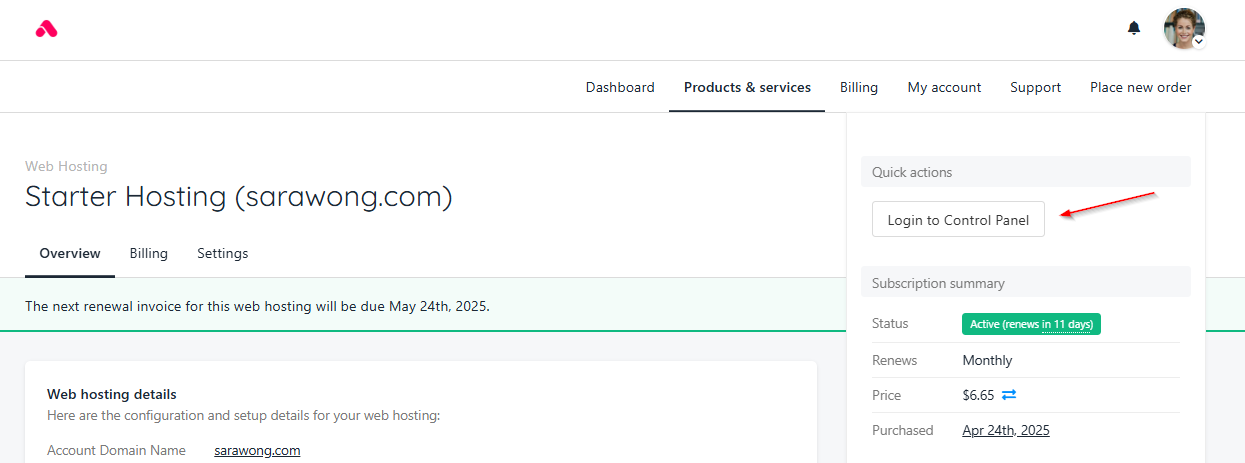
- You can log in to the
Control Panelnow as the Admin.

Admin control panel login
- You can also log in as a Client.
Client control panel login