

- Automation intervals - Let the system handle suspension, cancellation, and termination automatically based on your configured timers.
- Manual status changes - Override the status on a specific contract product yourself and manage the lifecycle by hand until the invoice is paid.
Using automation intervals
Upmind lets you configure automation intervals at three levels. Each level overrides the one above it, giving you fine-grained control over individual products or even specific client subscriptions. The level hierarchySetting the brand-level automation interval
This is your global default. Every product and client falls under these settings unless a lower level overrides them.- Go to Settings > Subscription Options under Branding & Customisation.
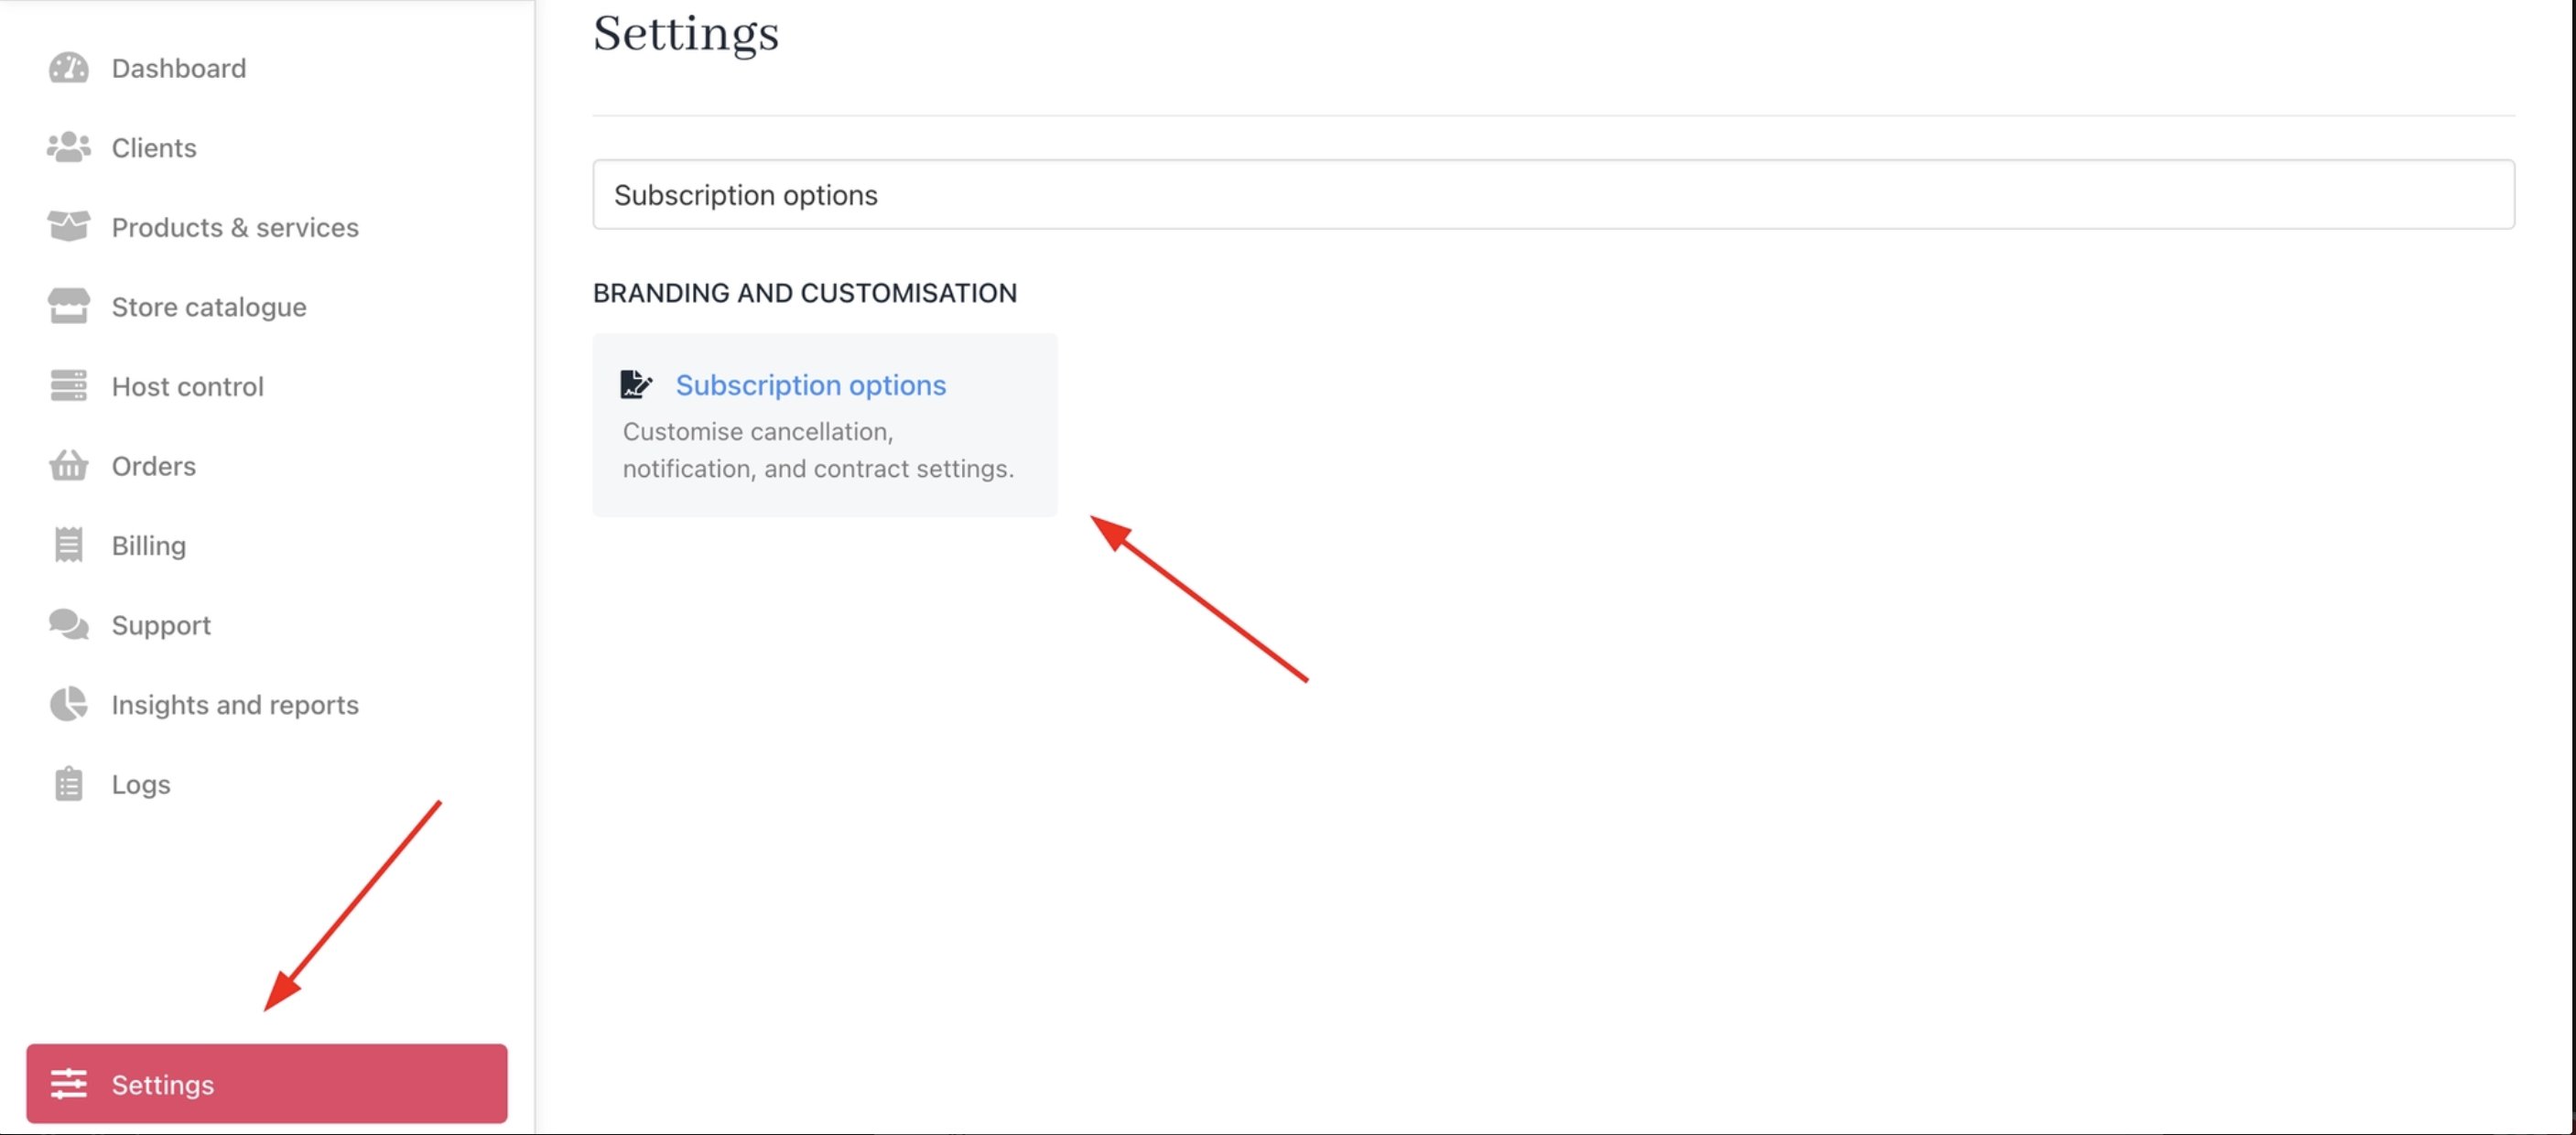
Settings > Branding & Customisation > Subscription Options
- Locate the automation interval fields under Contract Settings (Suspension, Cancellation, and Termination).
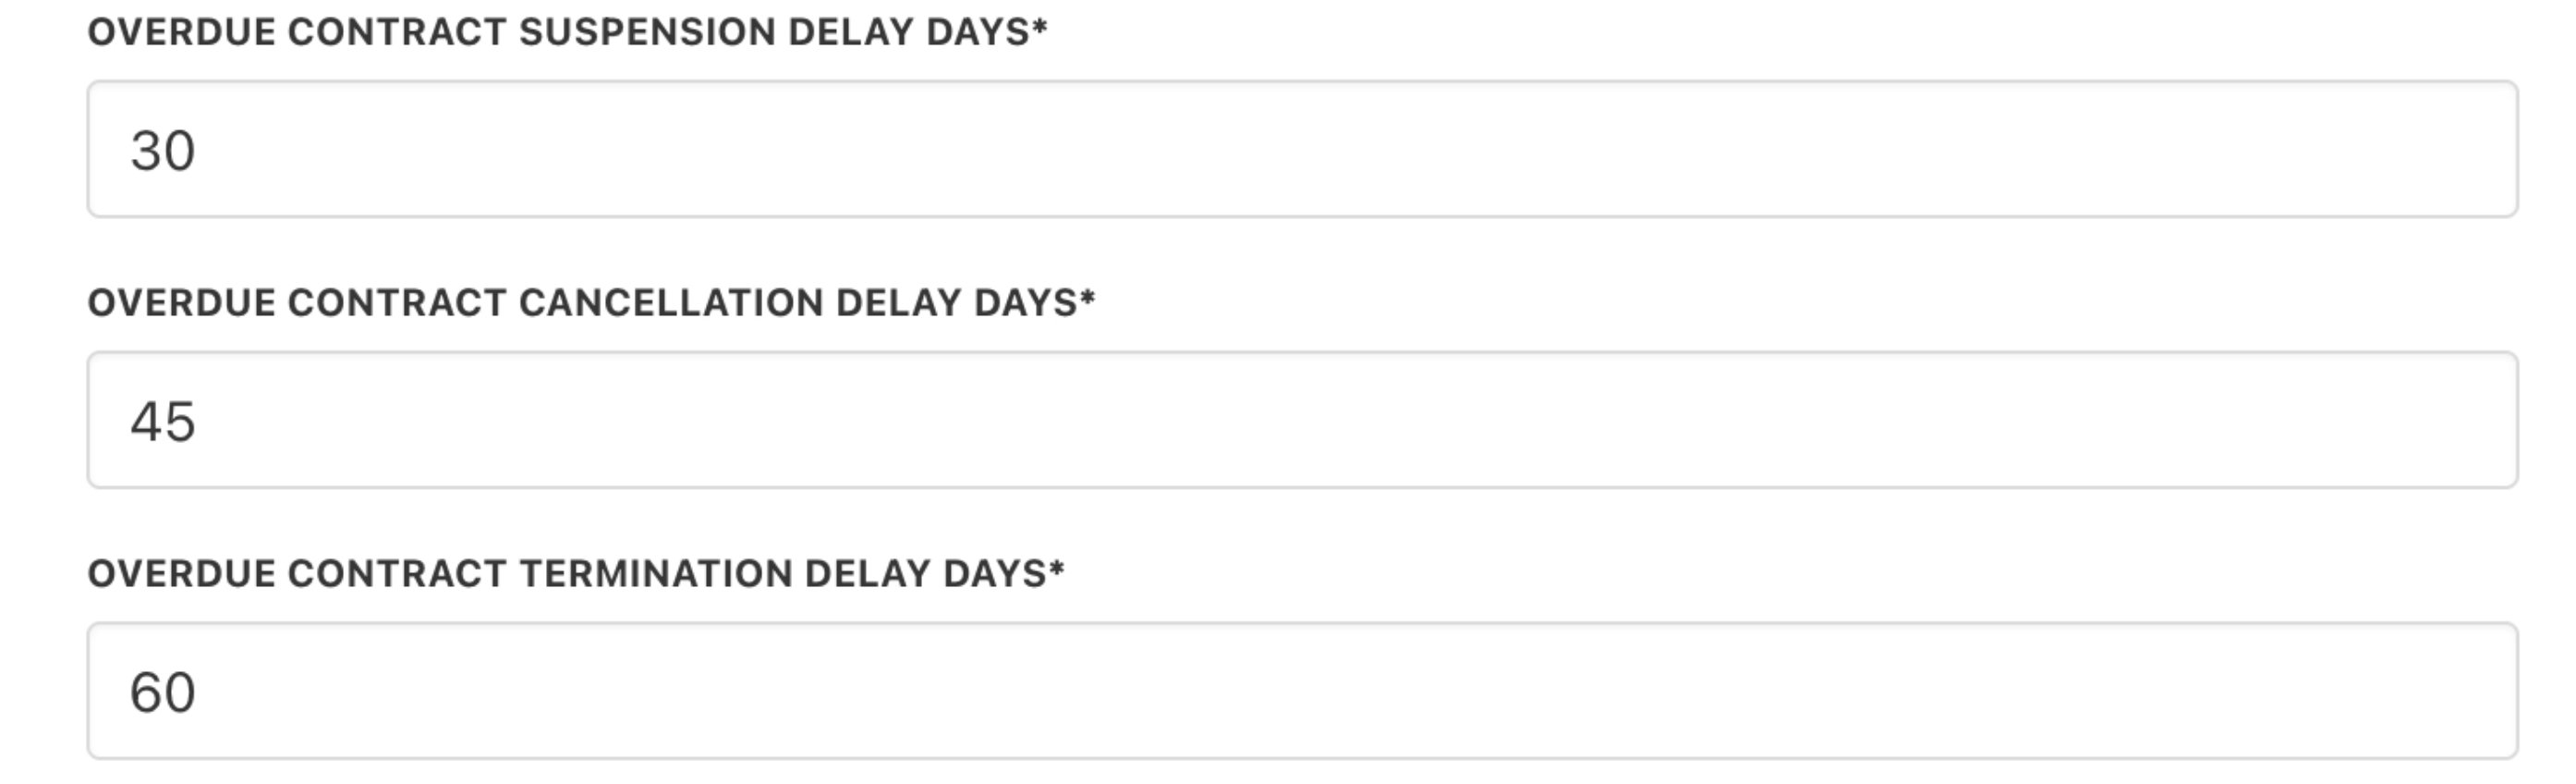
Automation intervals
- Set the number of days after the invoice due date for each action to trigger.
- Click Save.
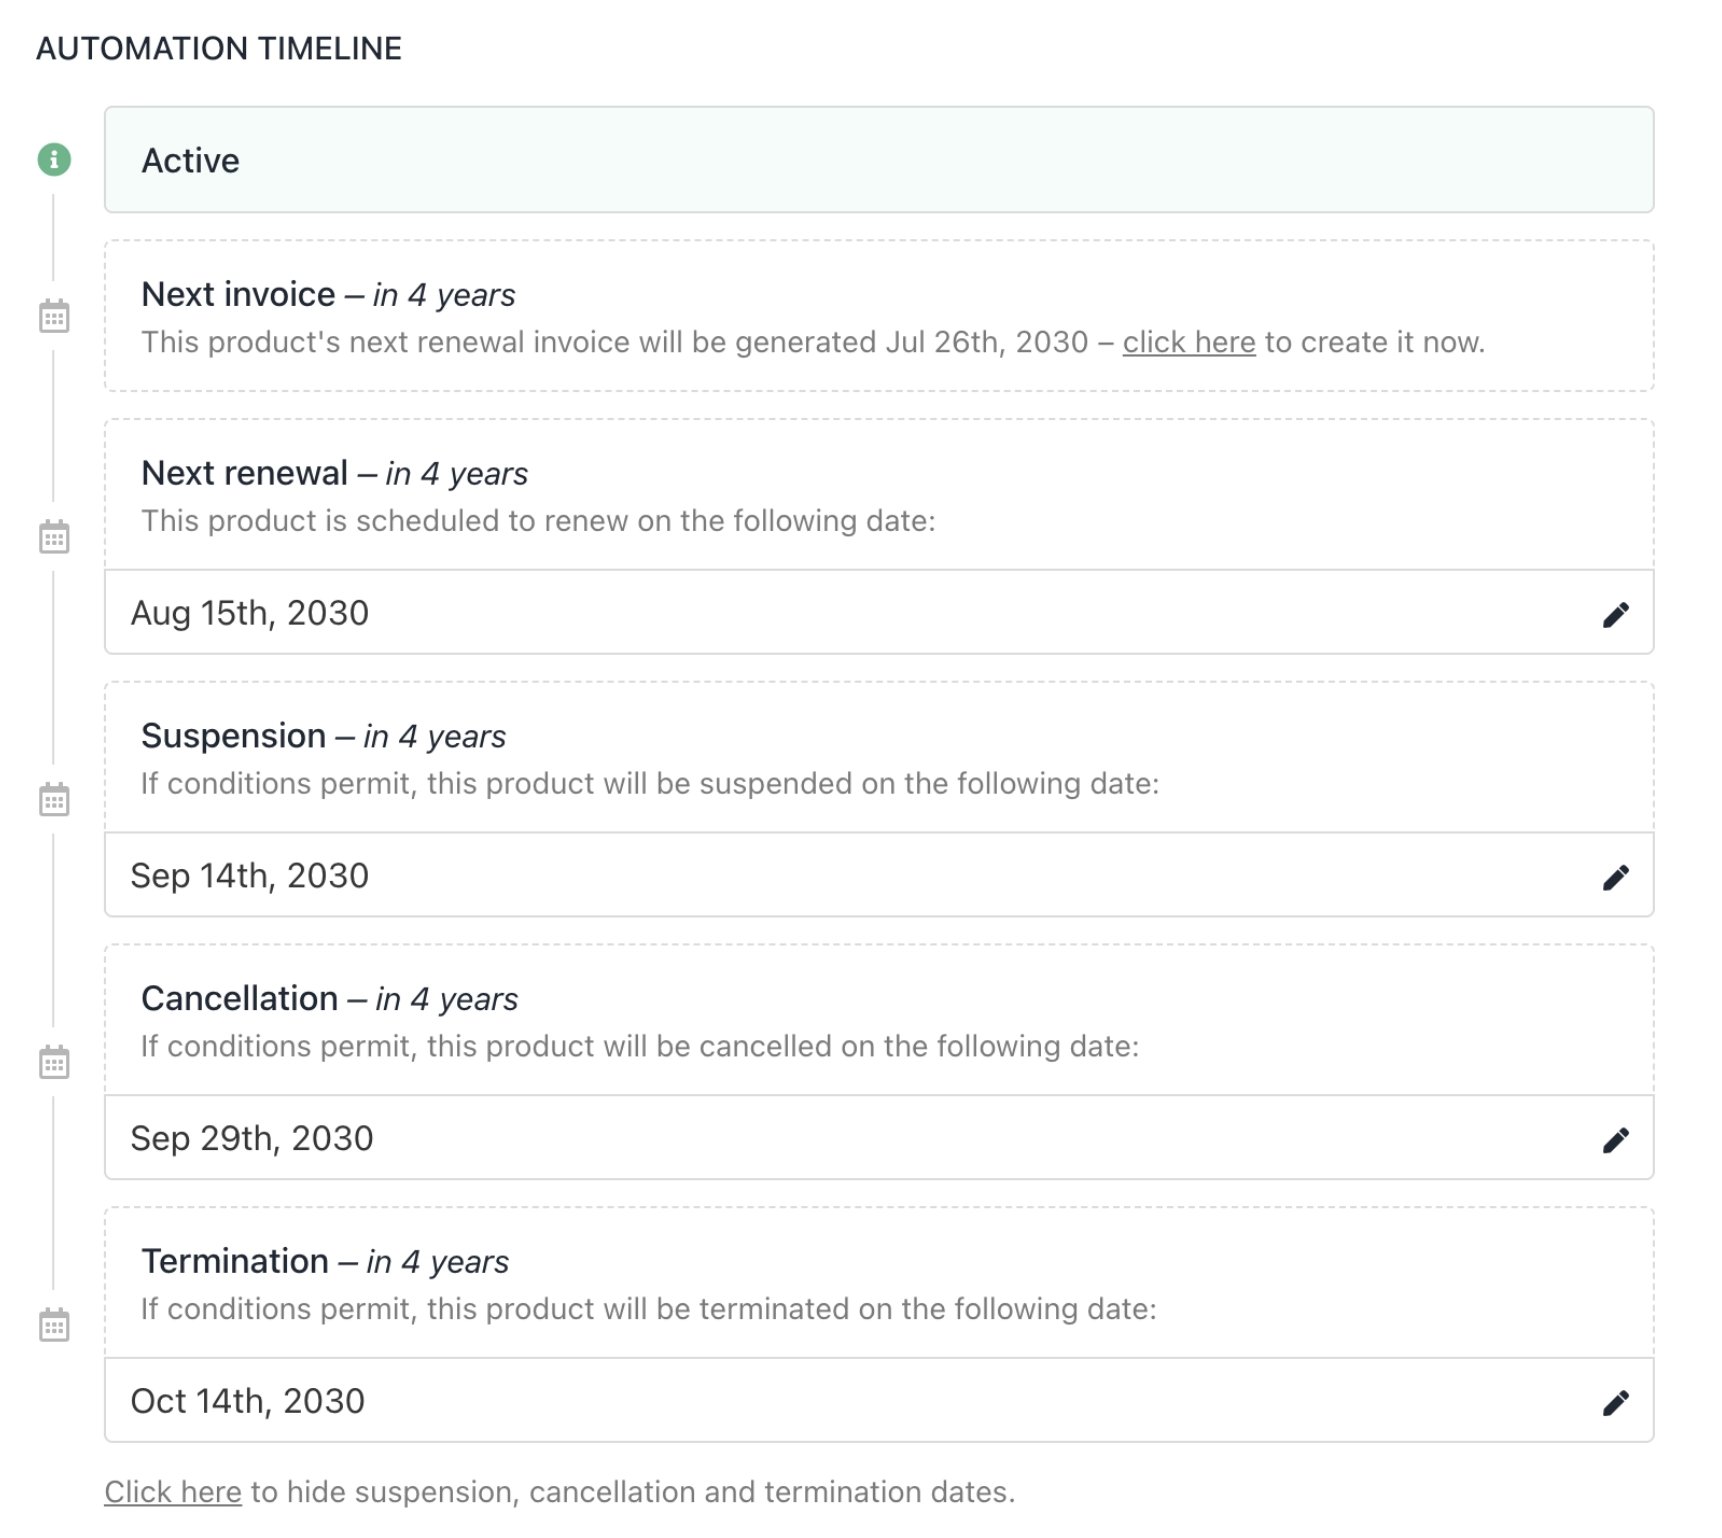
Product automation intervals
Setting the product-level automation interval
Use this when you want a specific product to behave differently from your brand default. A common use case is domain names, which often require longer grace periods than hosting products.- Go to Settings > Product Catalogue under Products and Promotions, or open the product directly from the Store Catalogue.
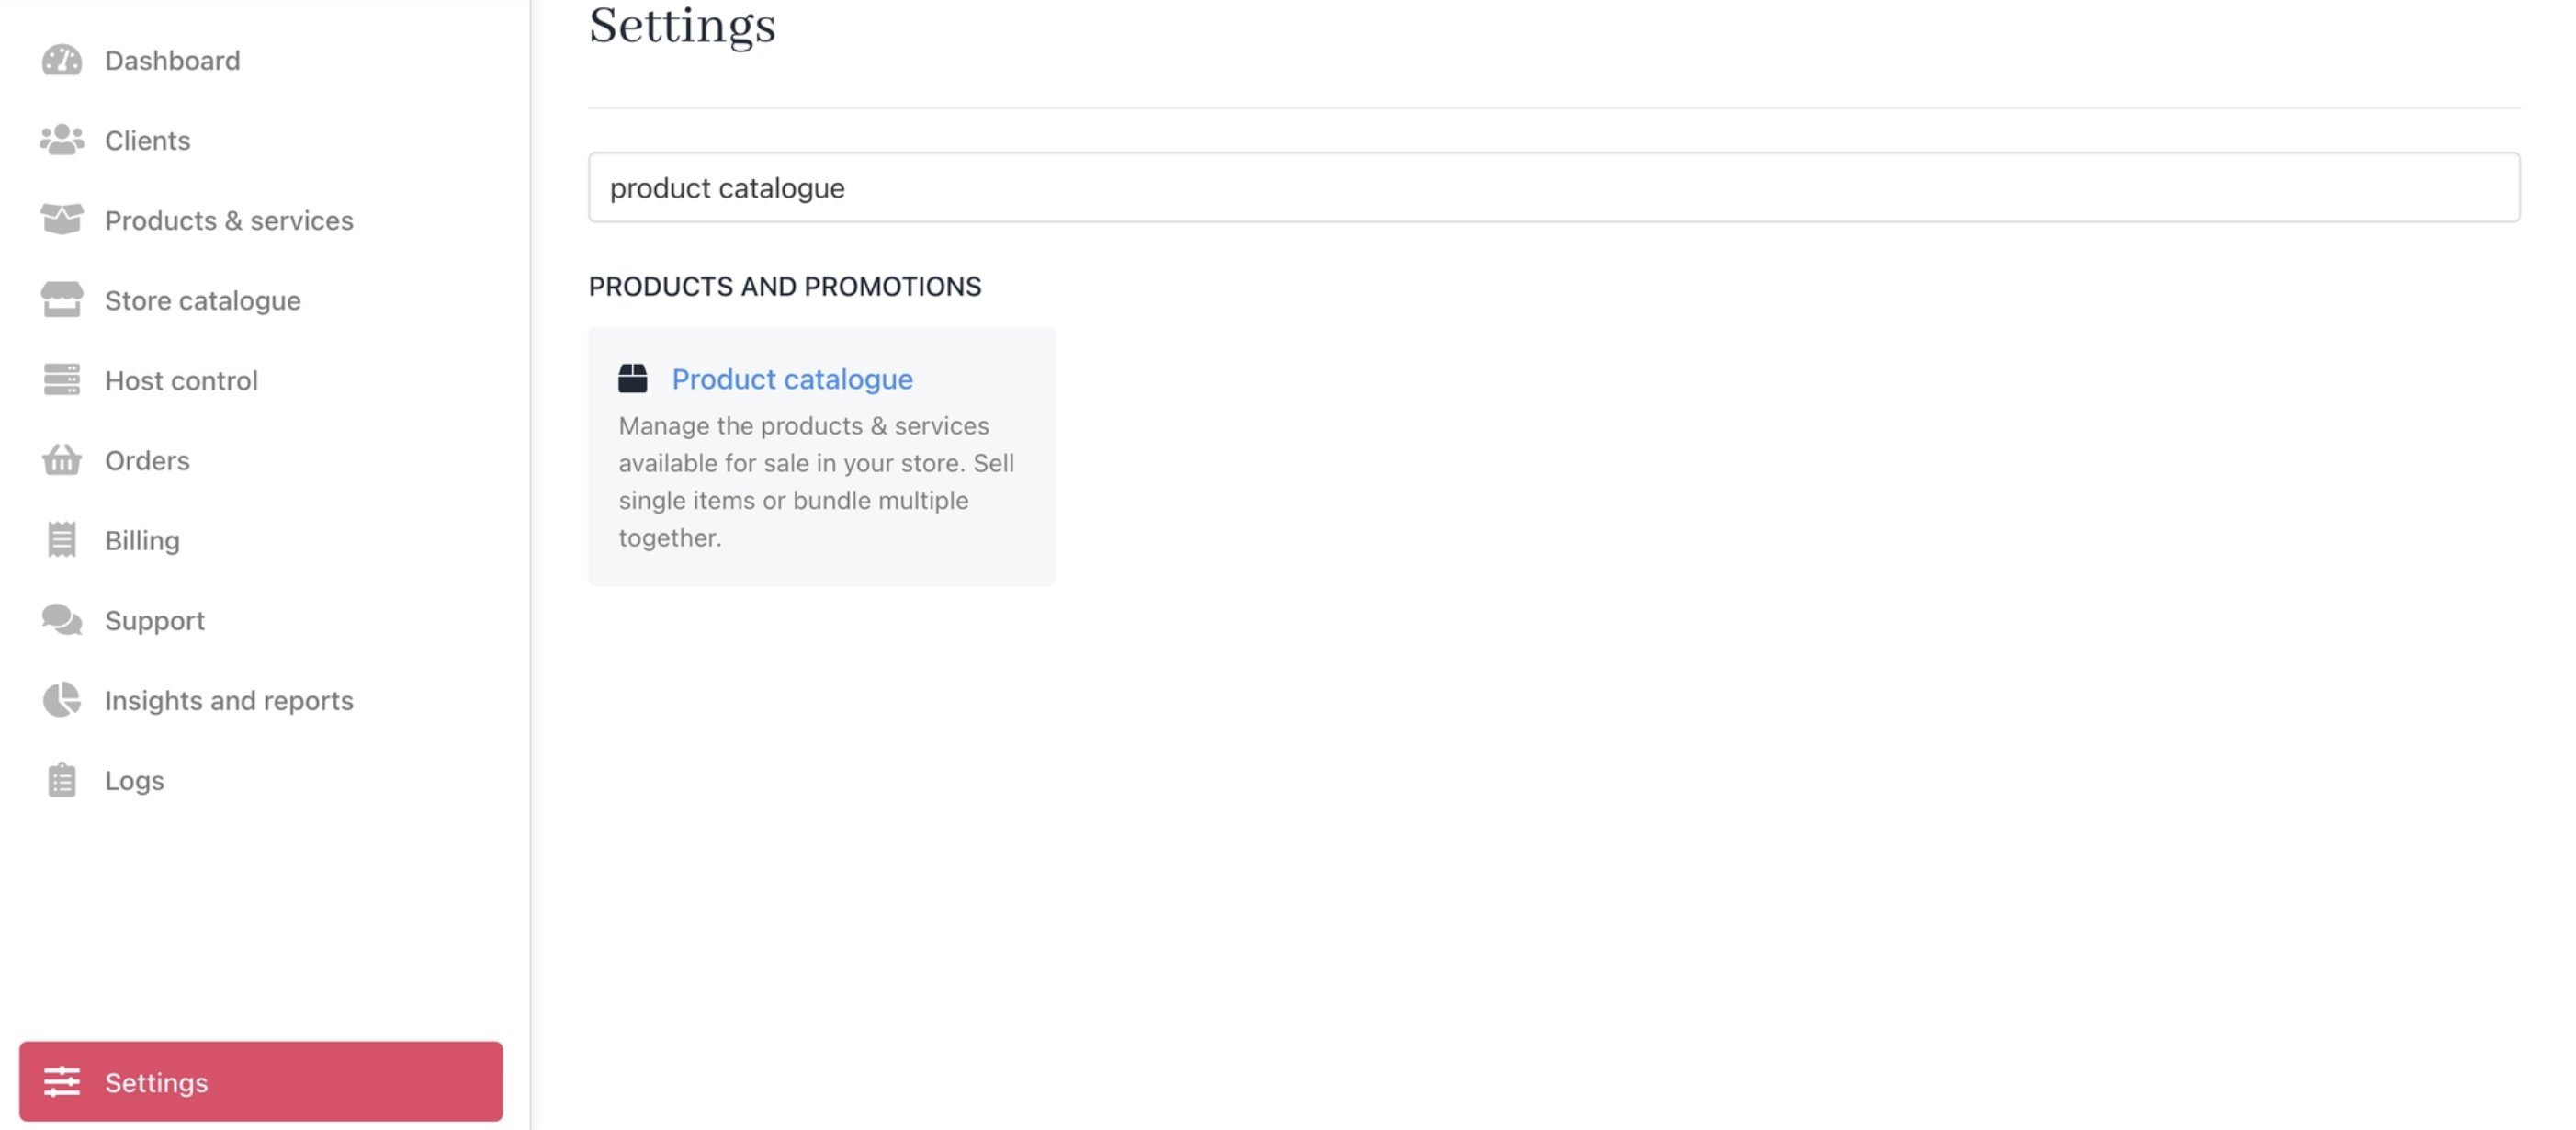
Settings > Products and Promotions > Product Catalogue
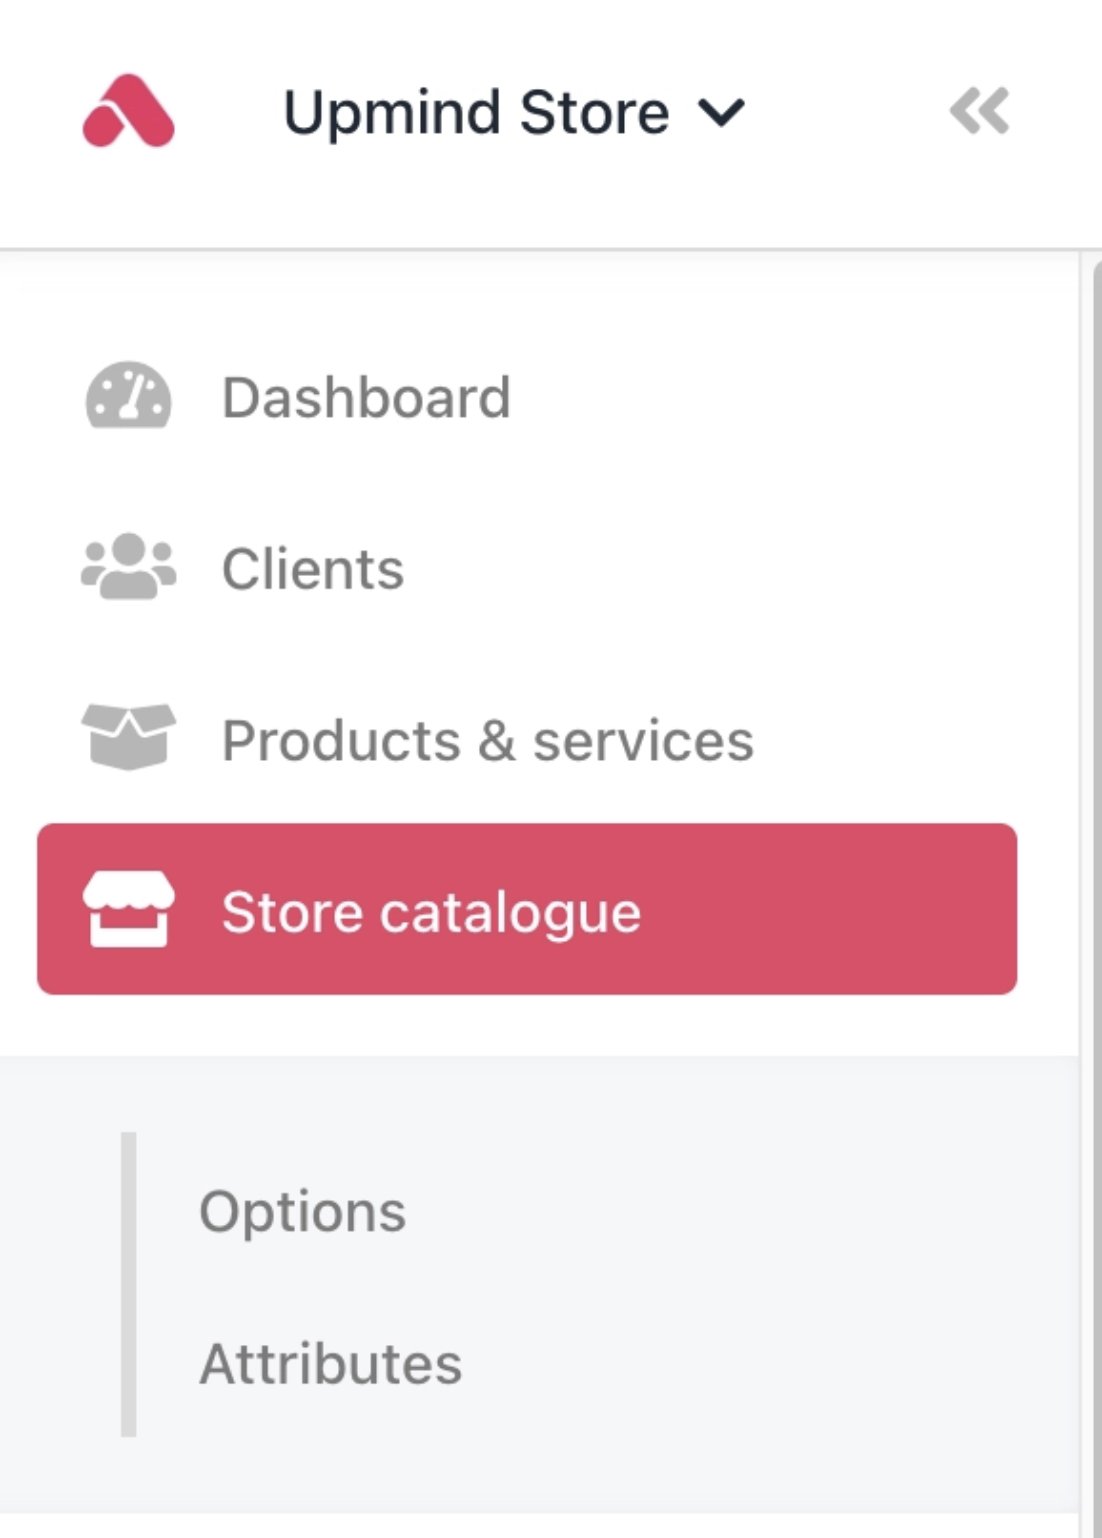
Dashboard > Store Catalogue
- Select the product you want to configure.
- Open the Product Automation tab.
- Adjust the Suspend, Cancel, and Close intervals to override the brand defaults.
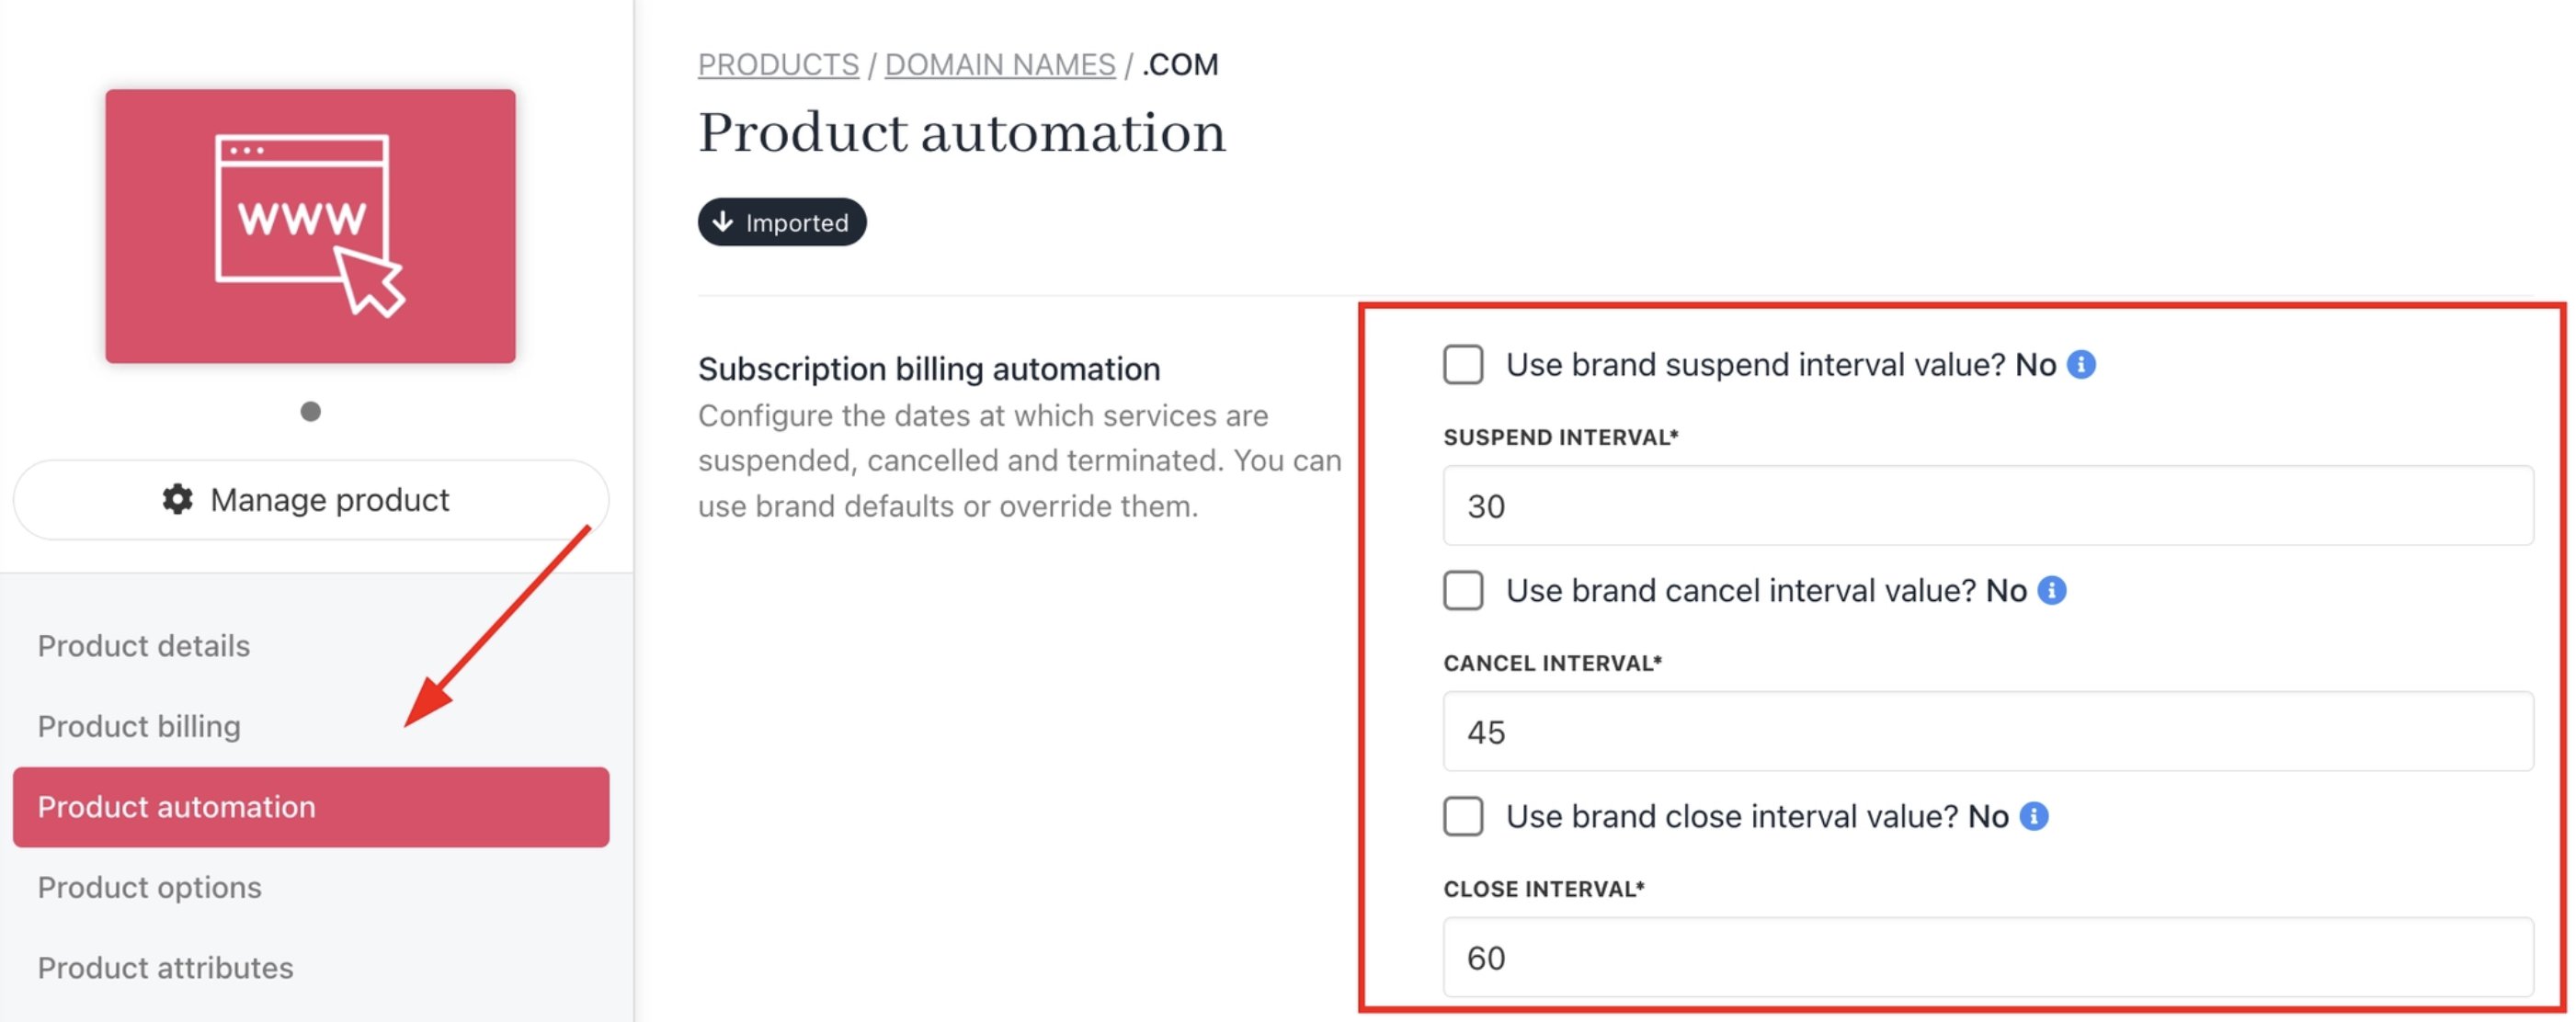
Product automation
- You can also set it to follow the interval values of the brand settings.
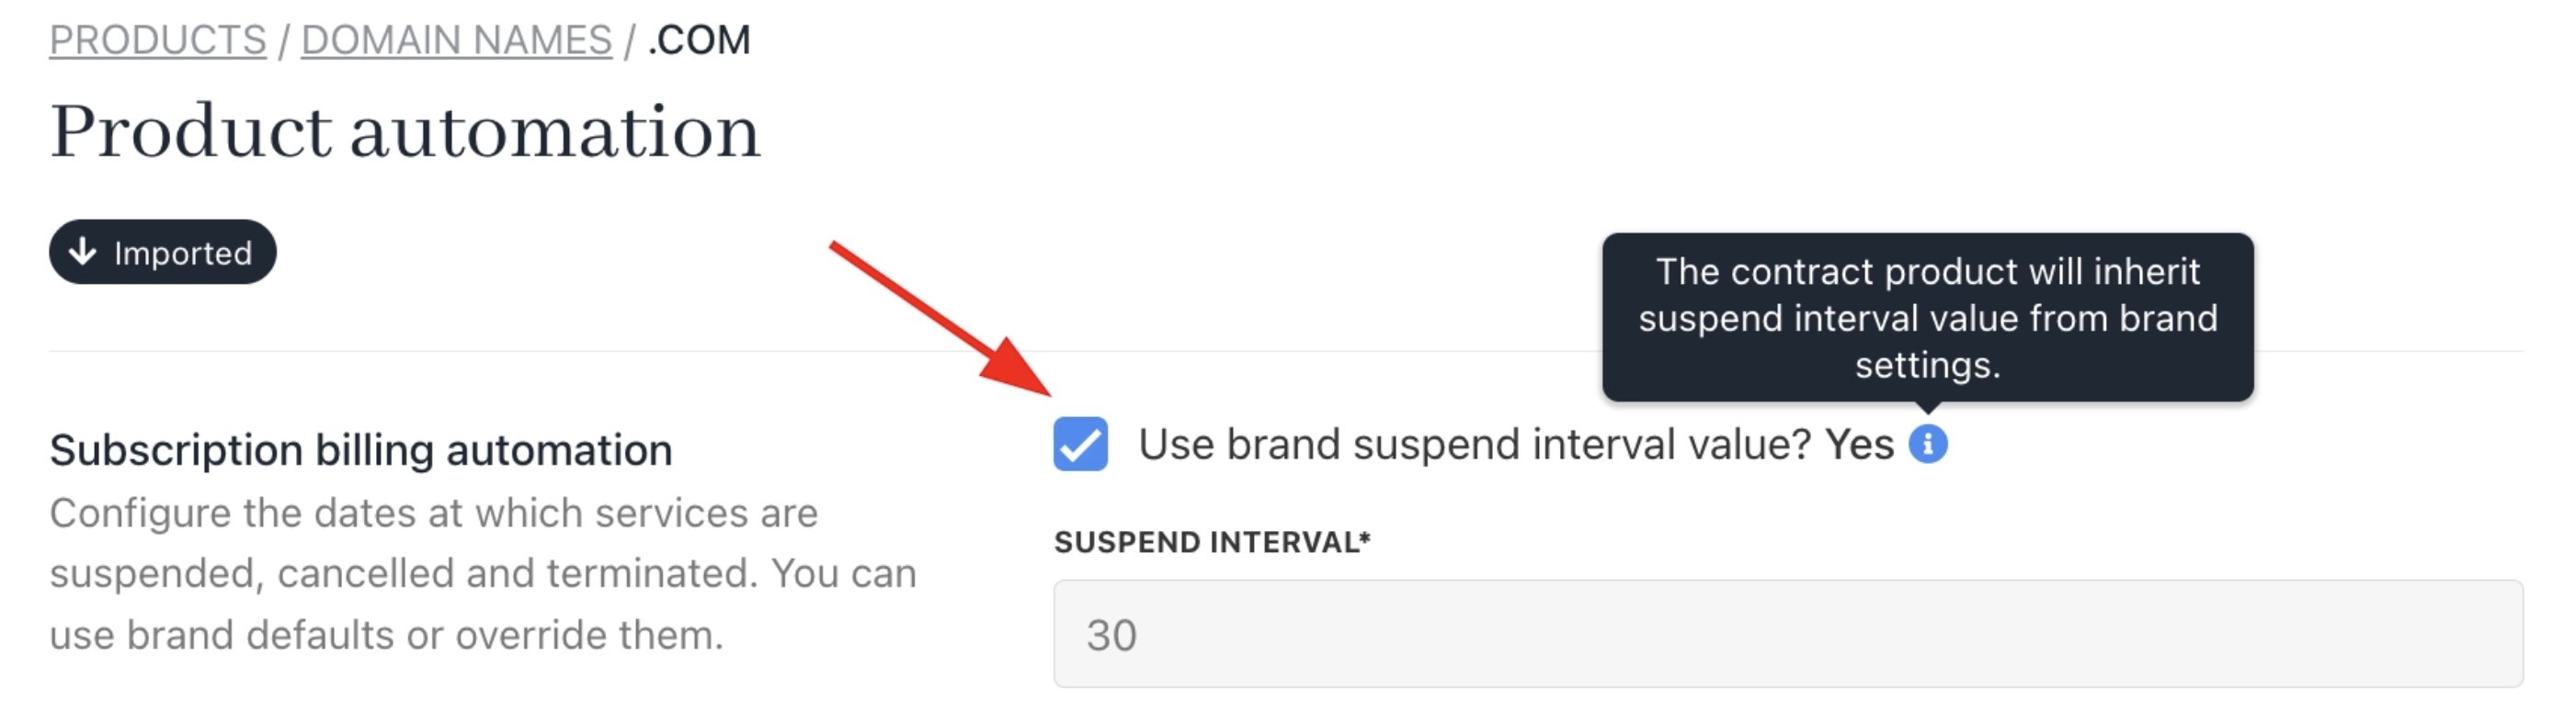
Inherit brand values
- Click Save.
Setting the contract product-level automation interval
This gives you the most granular control. Use it when you need a custom grace period for a single client’s specific service, without changing the product settings for everyone else.- Go to Clients and open the relevant client account.
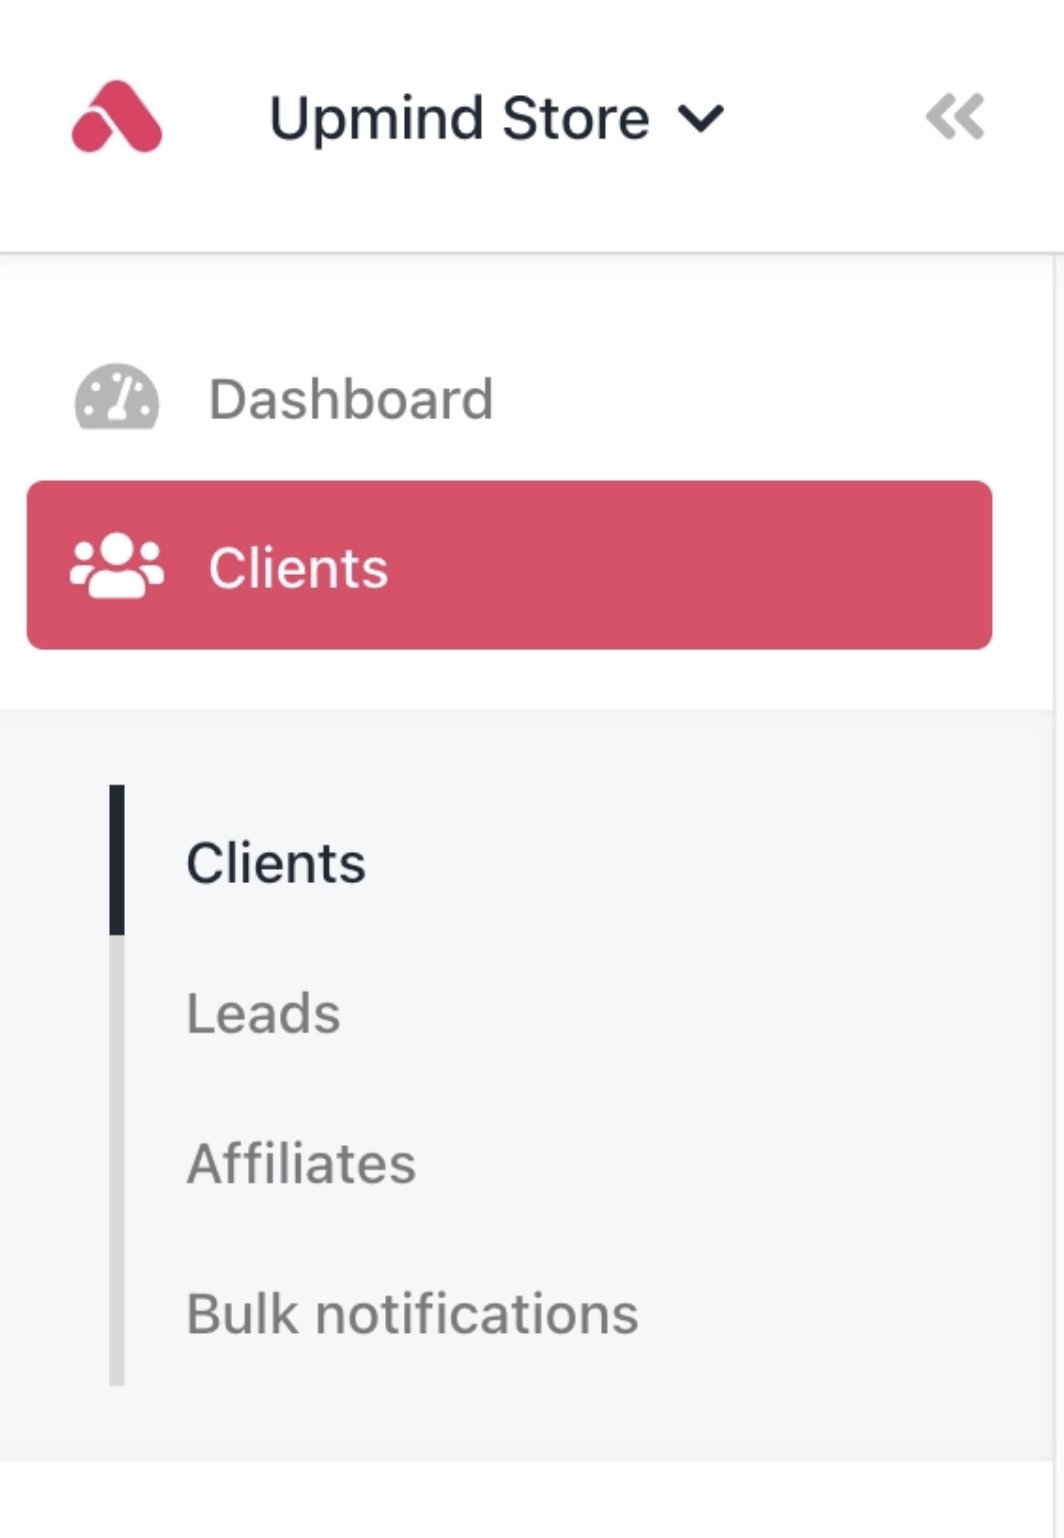
Dashboard > Clients
- Under Products & Services, find the contract product you want to adjust.
- Open the Settings tab of that contract product.
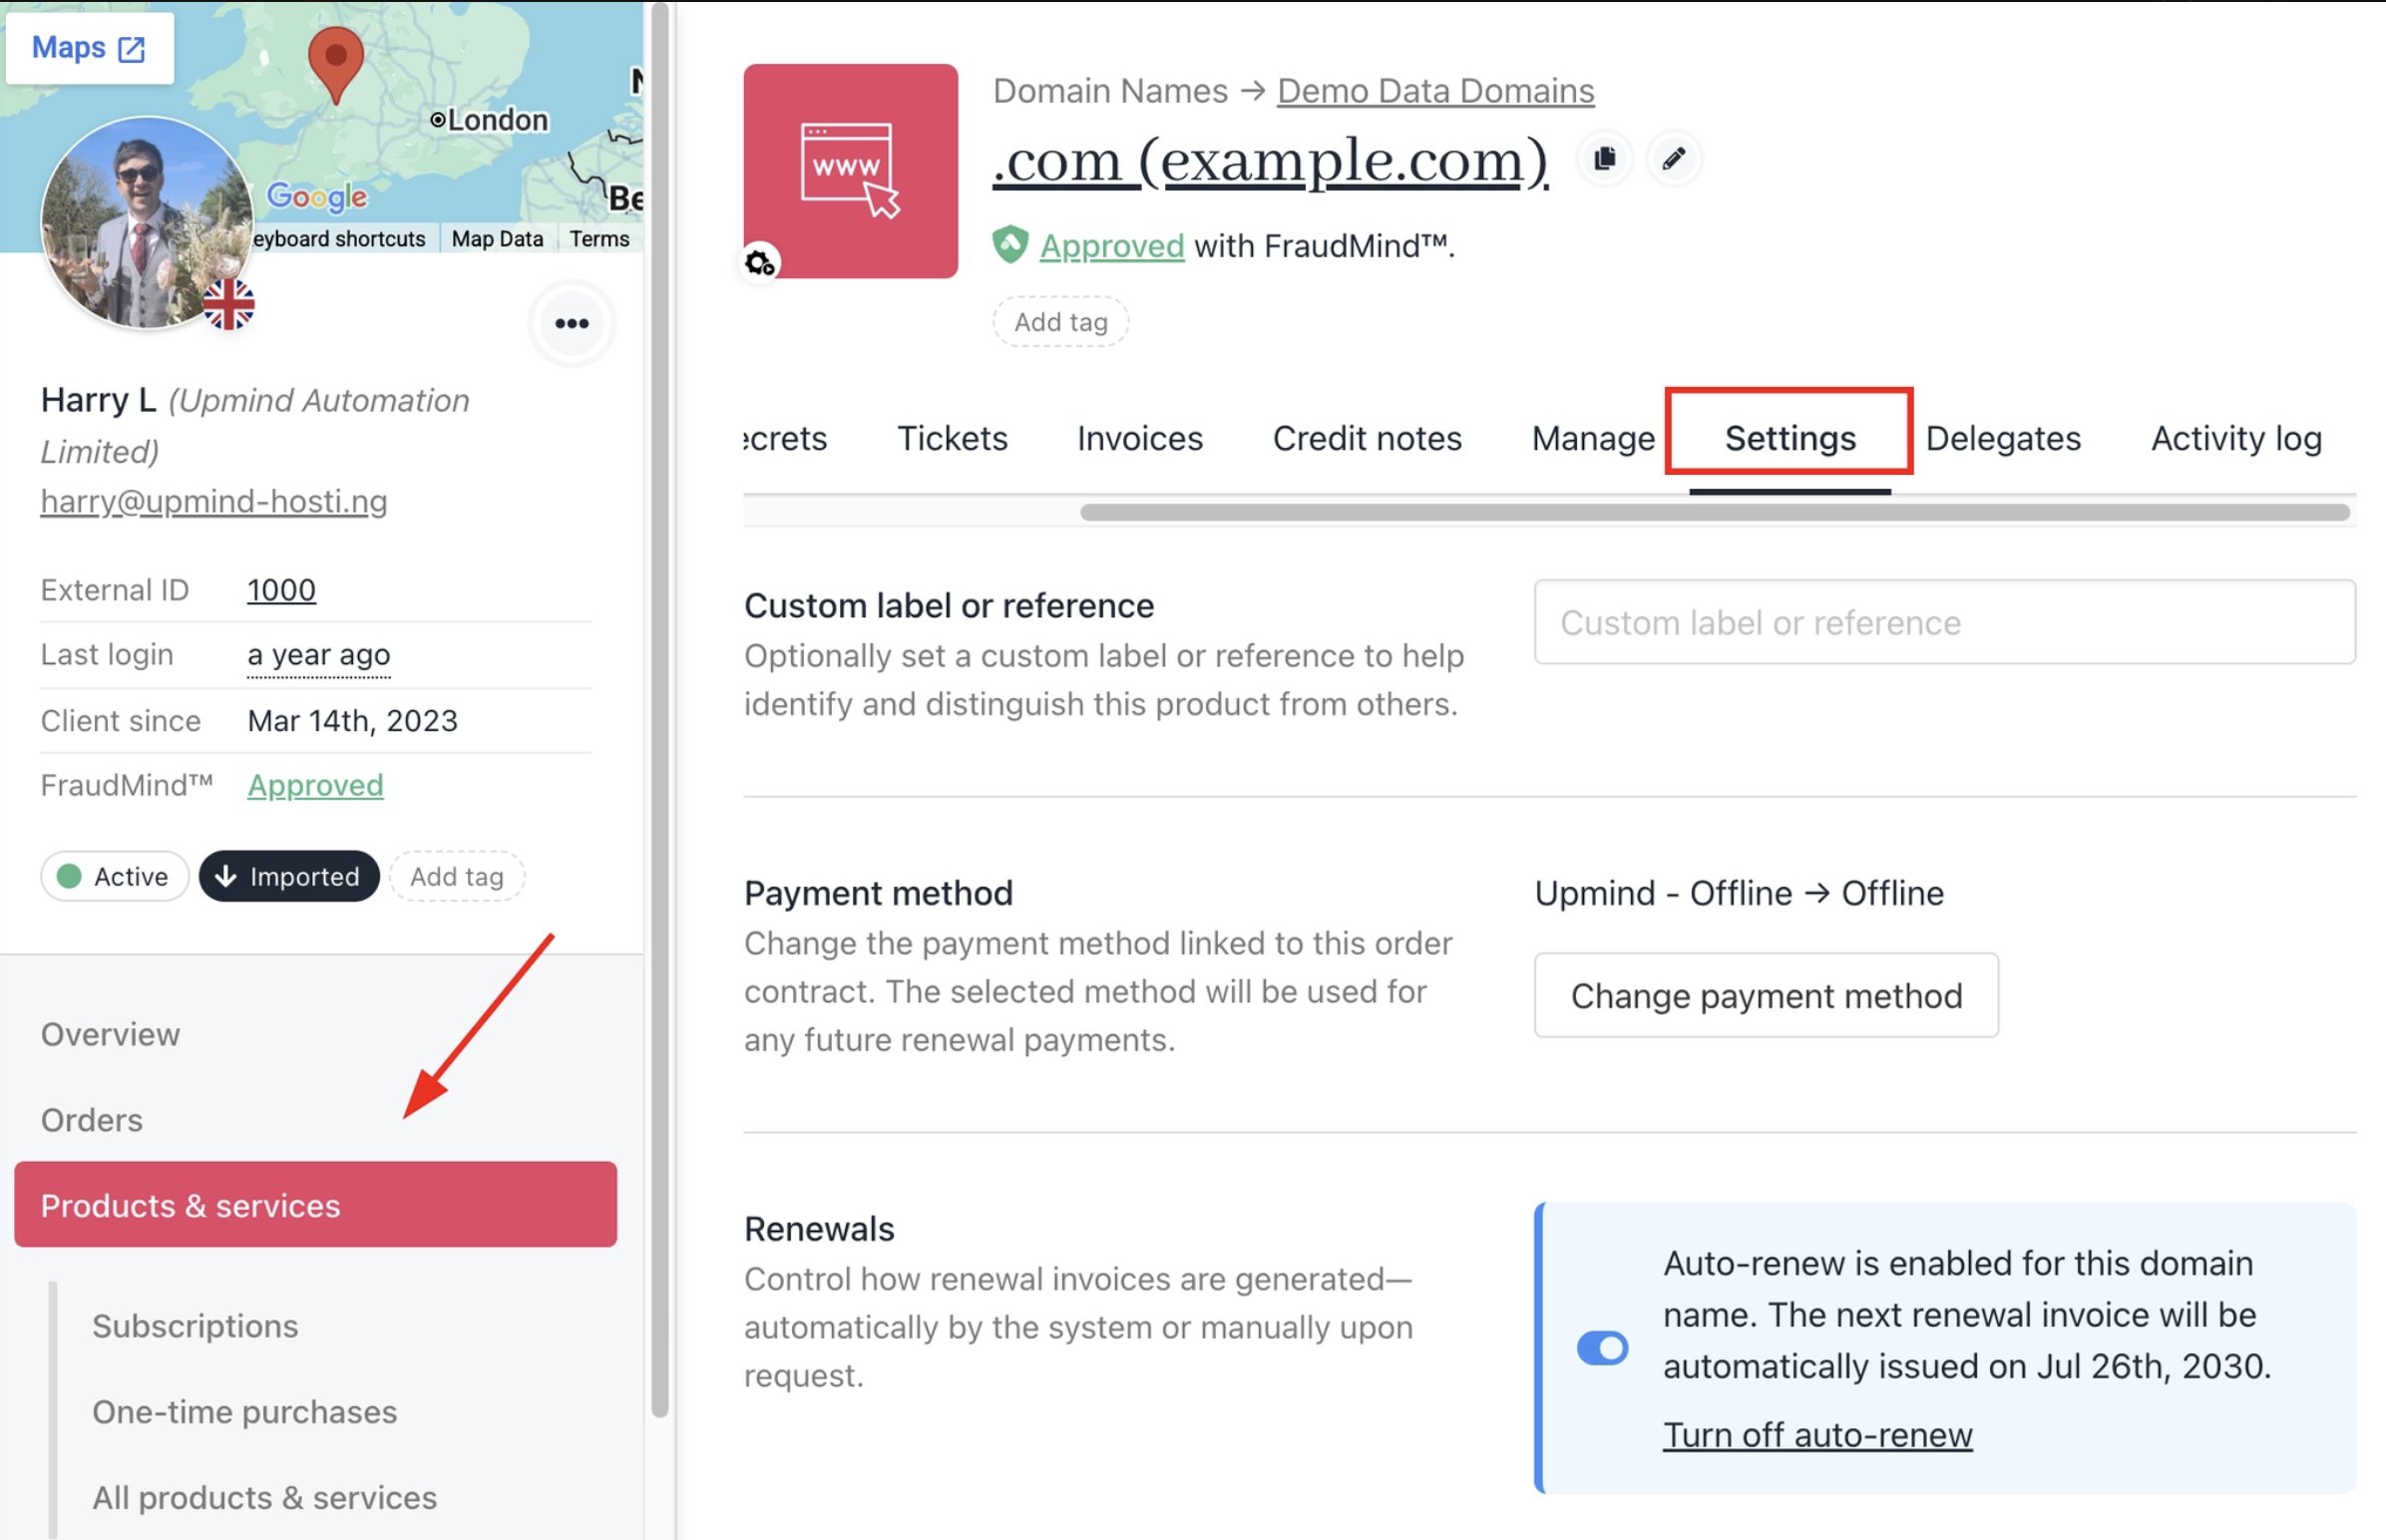
Products & Services > Settings tab
- Override the Suspend, Cancel, and Close intervals as needed.
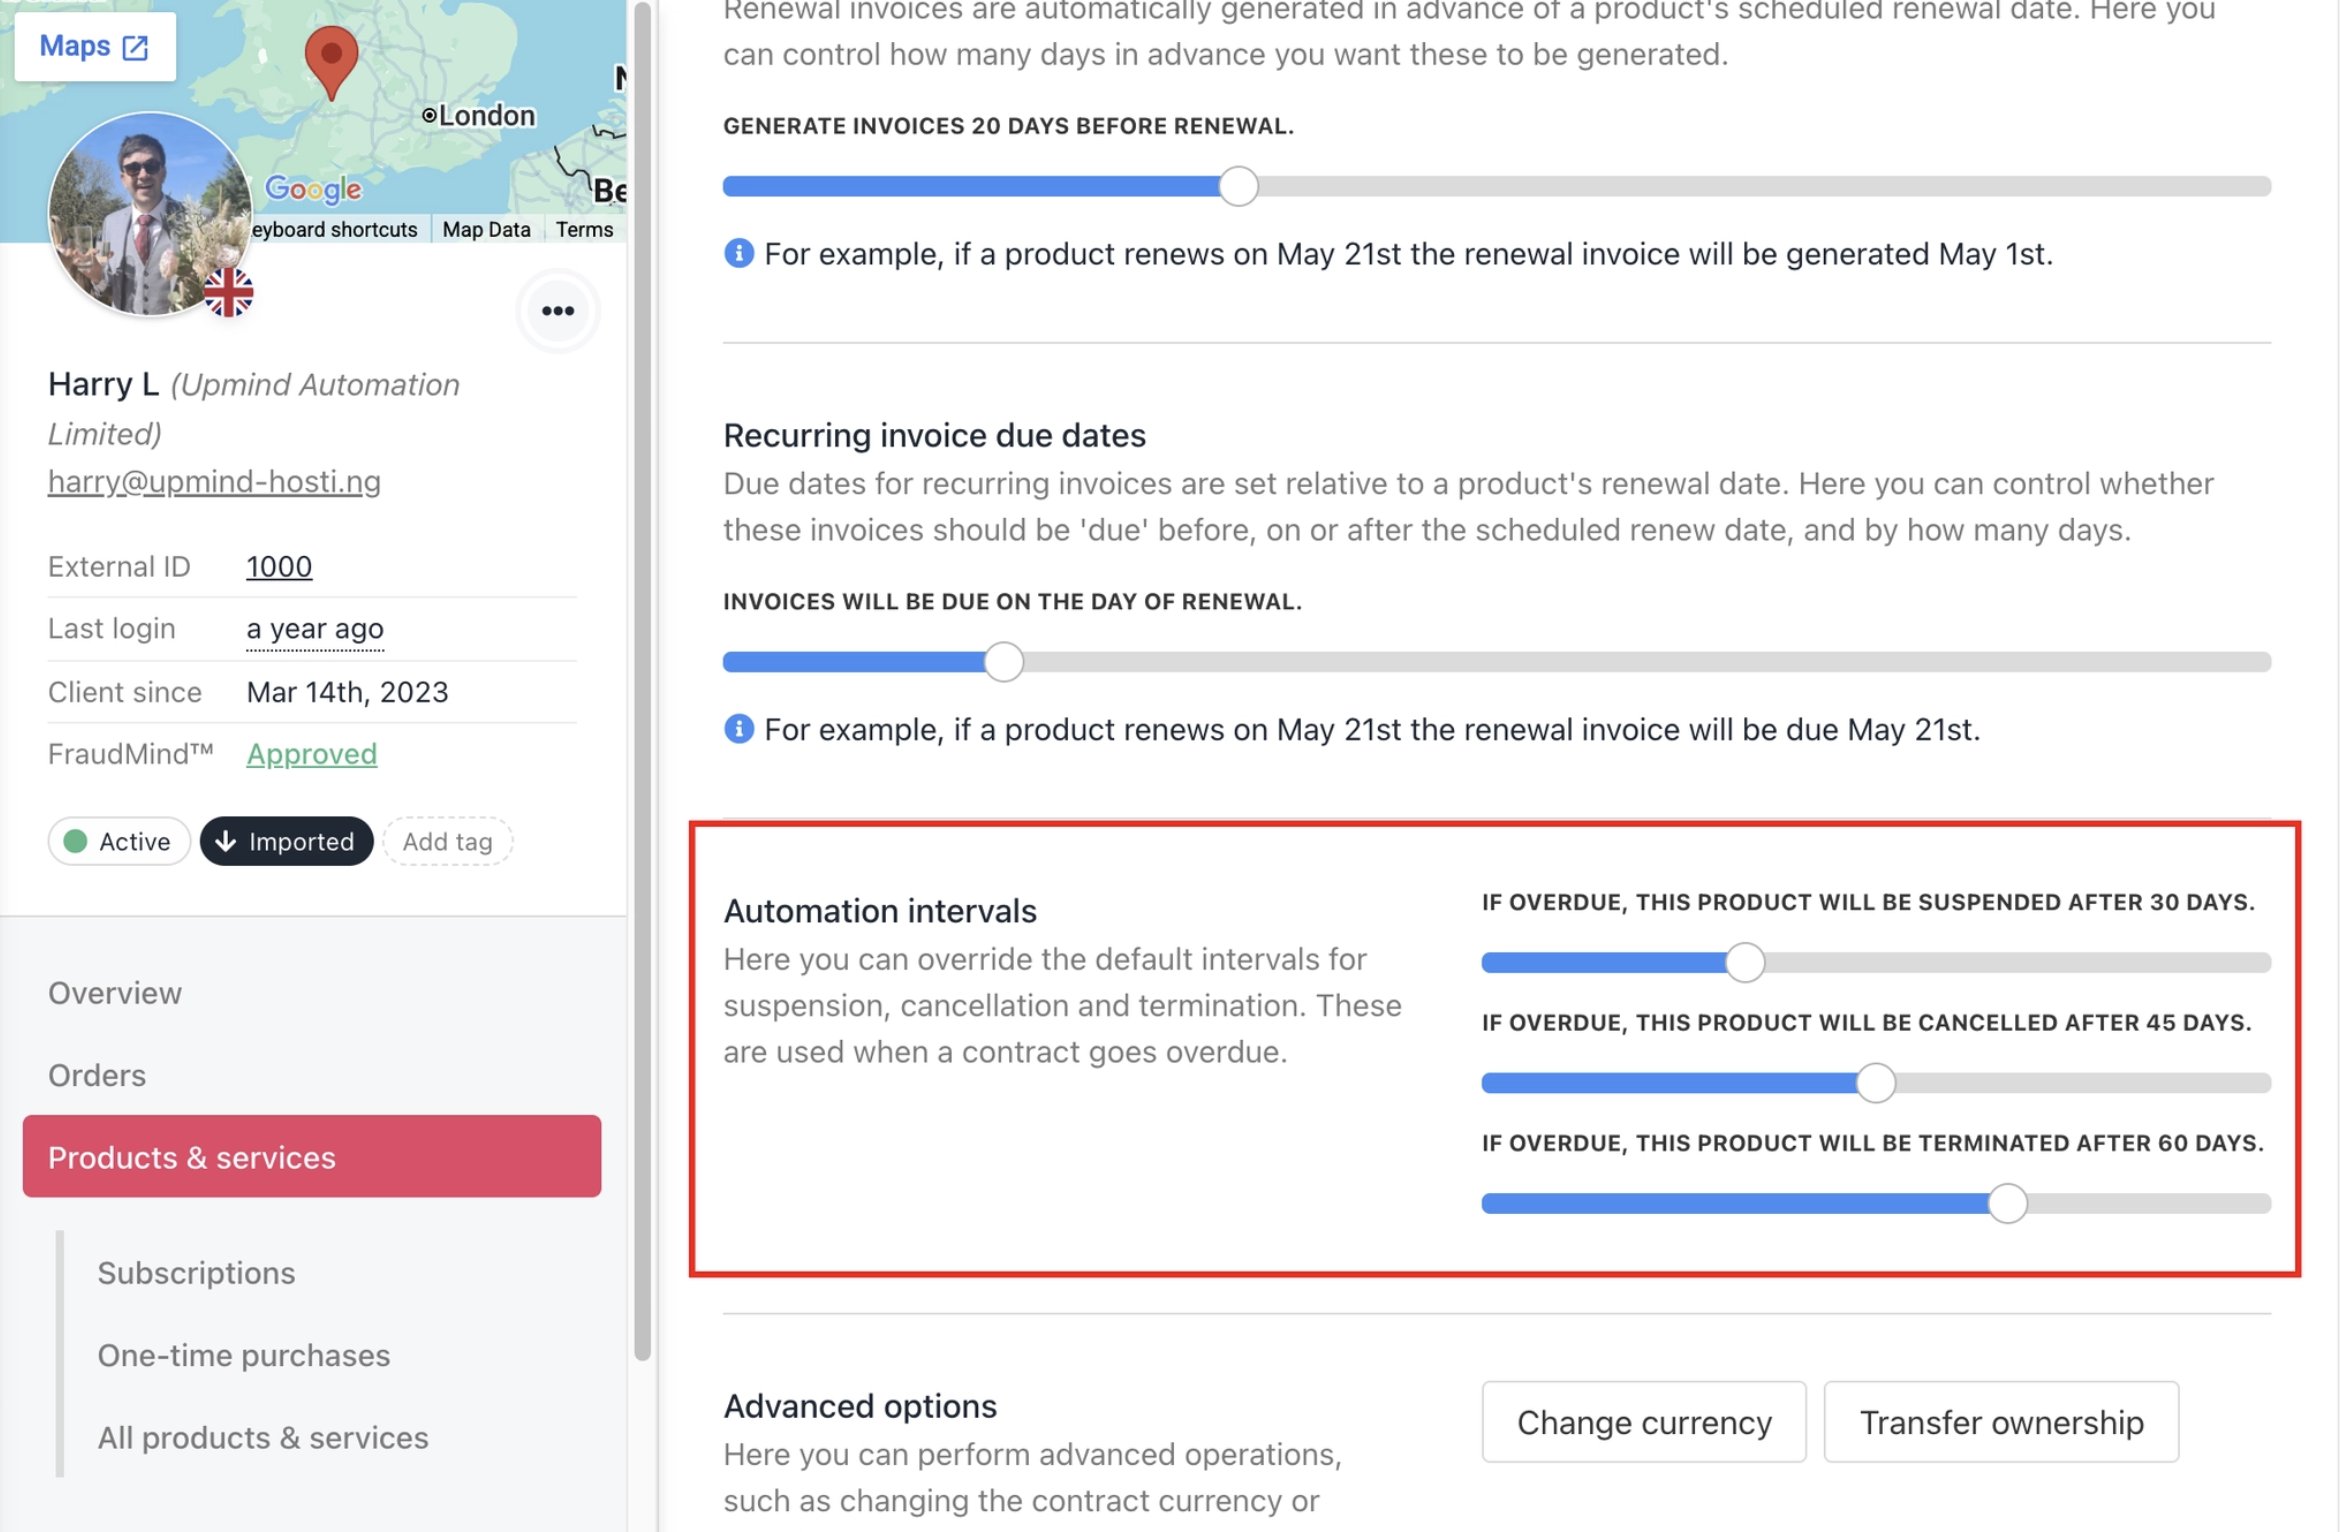
Override automation intervals
- Click Save.
Manually changing contract product status
If you want to hold off on suspension or cancellation for a specific client while waiting for payment, you can manually set the contract product status. This immediately overrides automation. The system will not run any automated suspend, cancel, or close actions while a manual status is in place.How to manually change a contract product status
- Go to Clients and open the client’s account.
- Under Products & Services, select the contract product.
- On the Overview tab, locate the current status field.
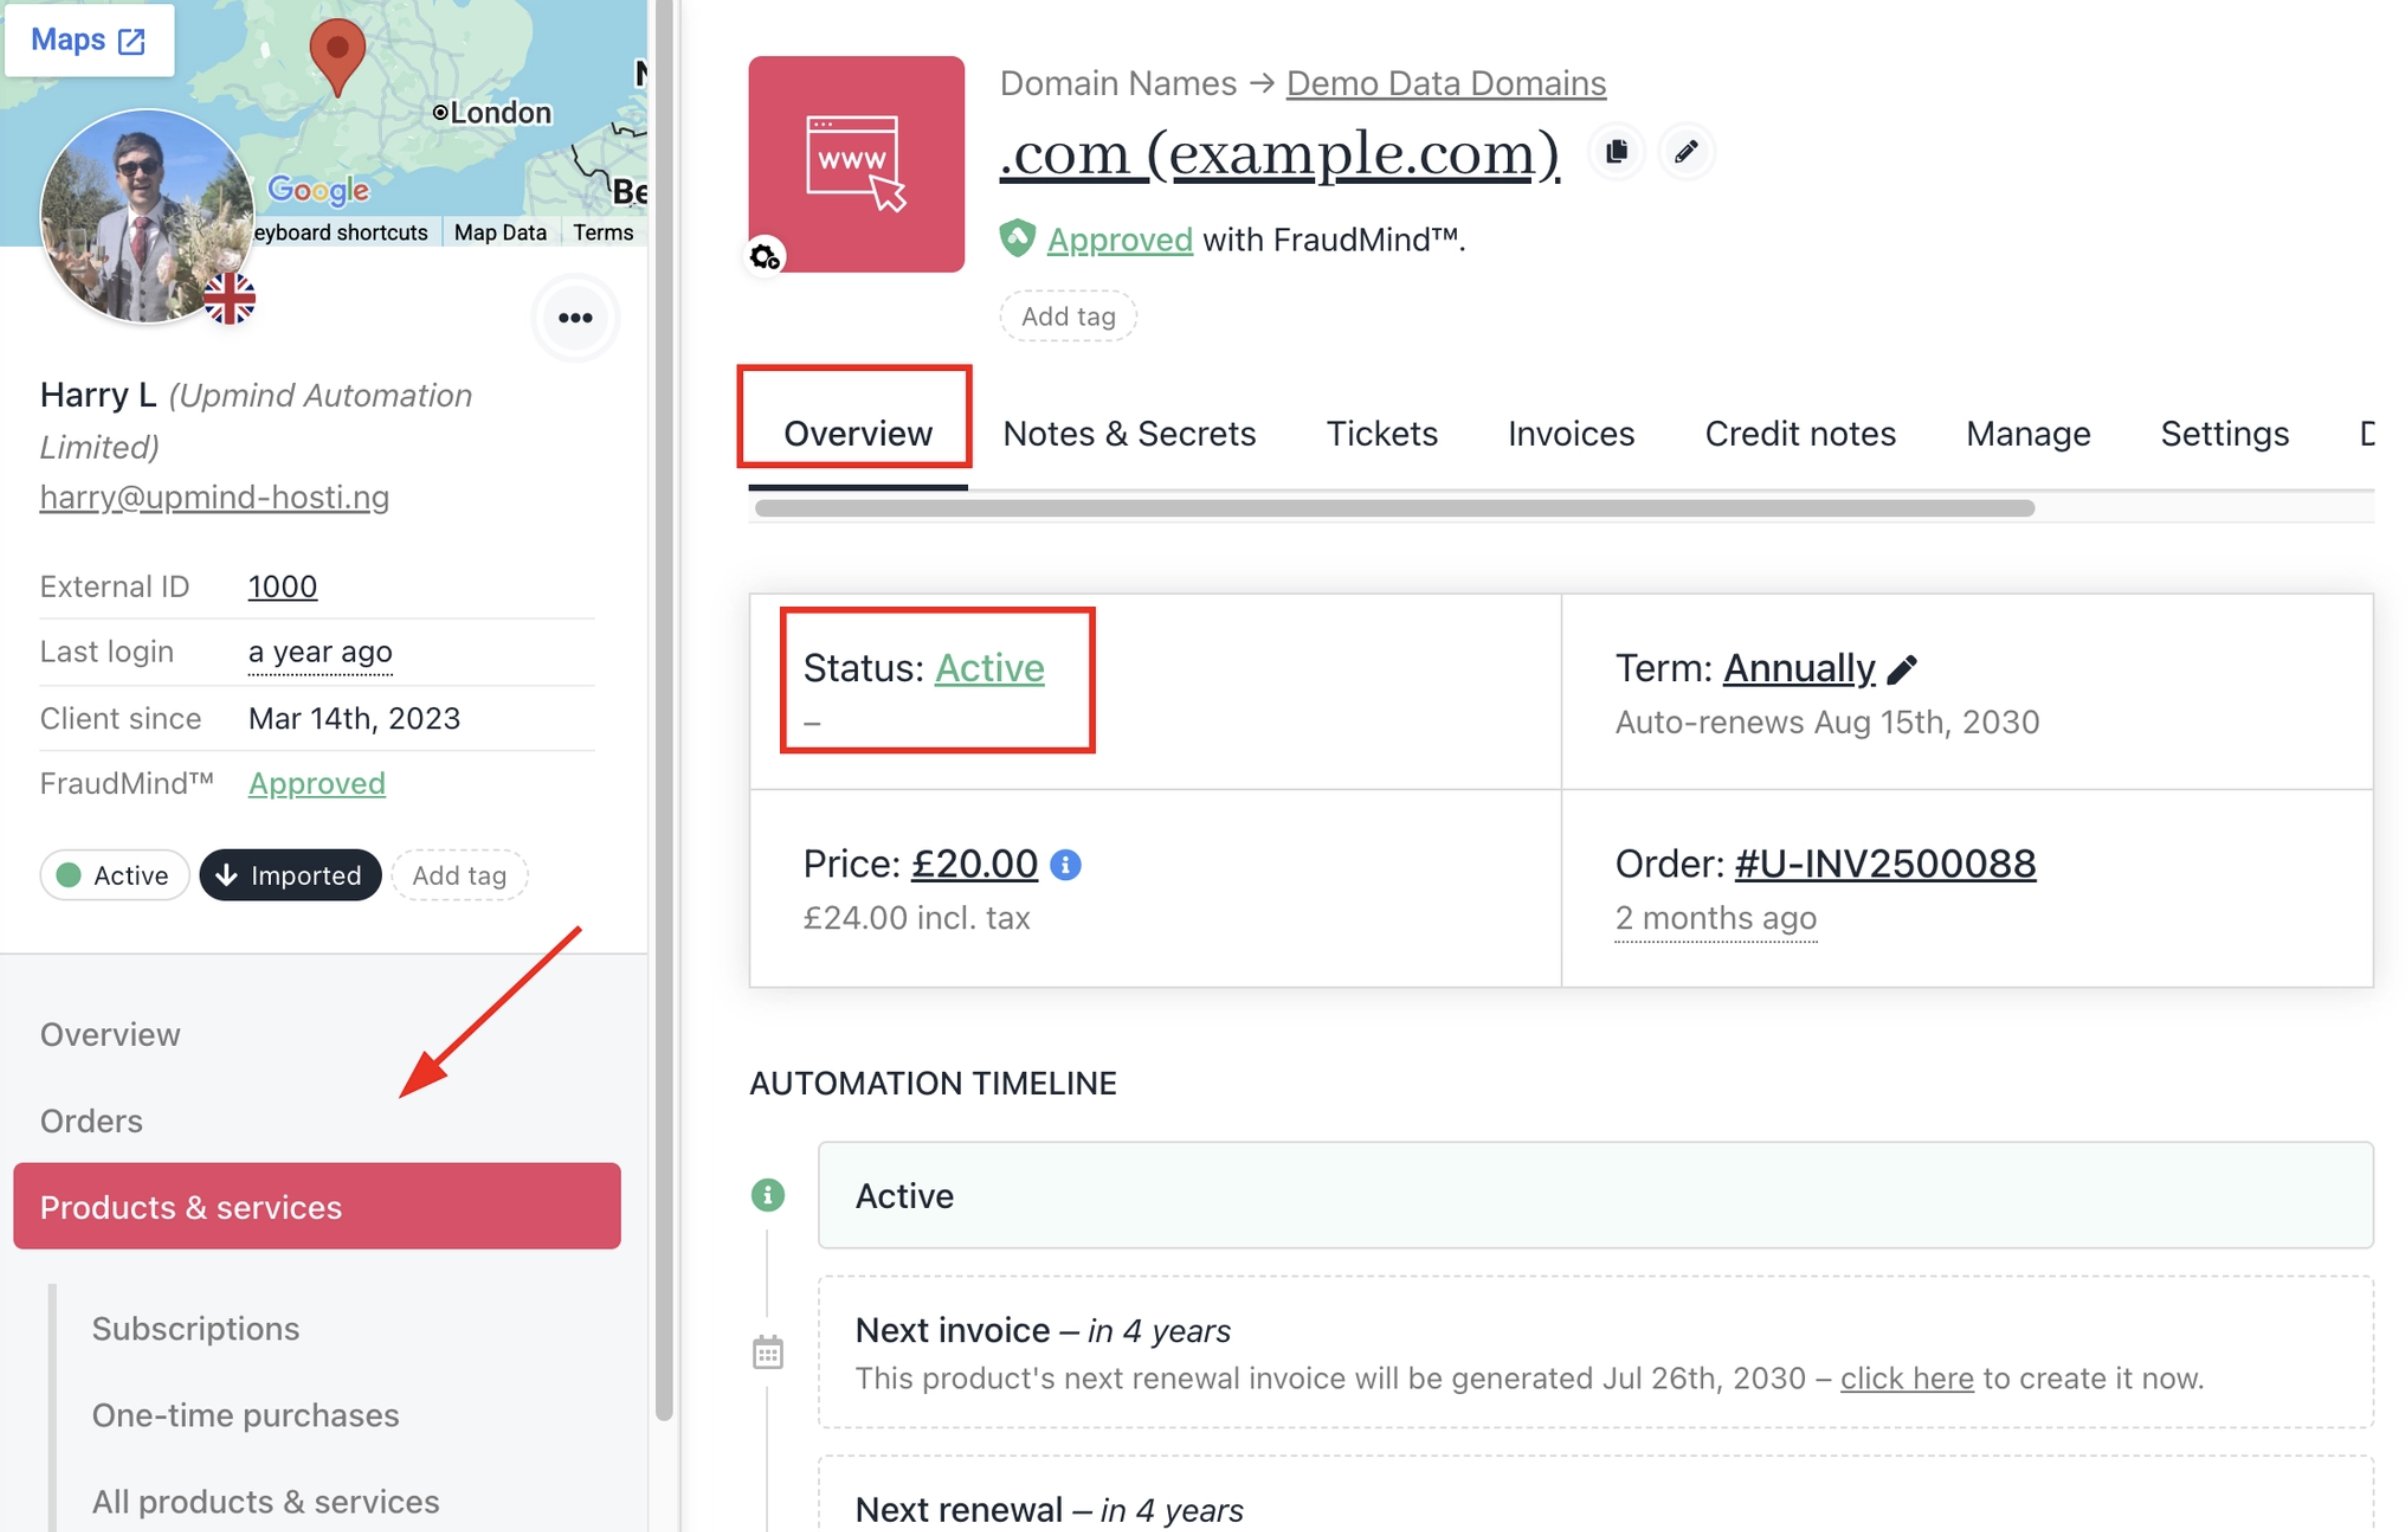
Clients > Products & Services > Overview tab
- Click the status and select the new status from the dropdown.
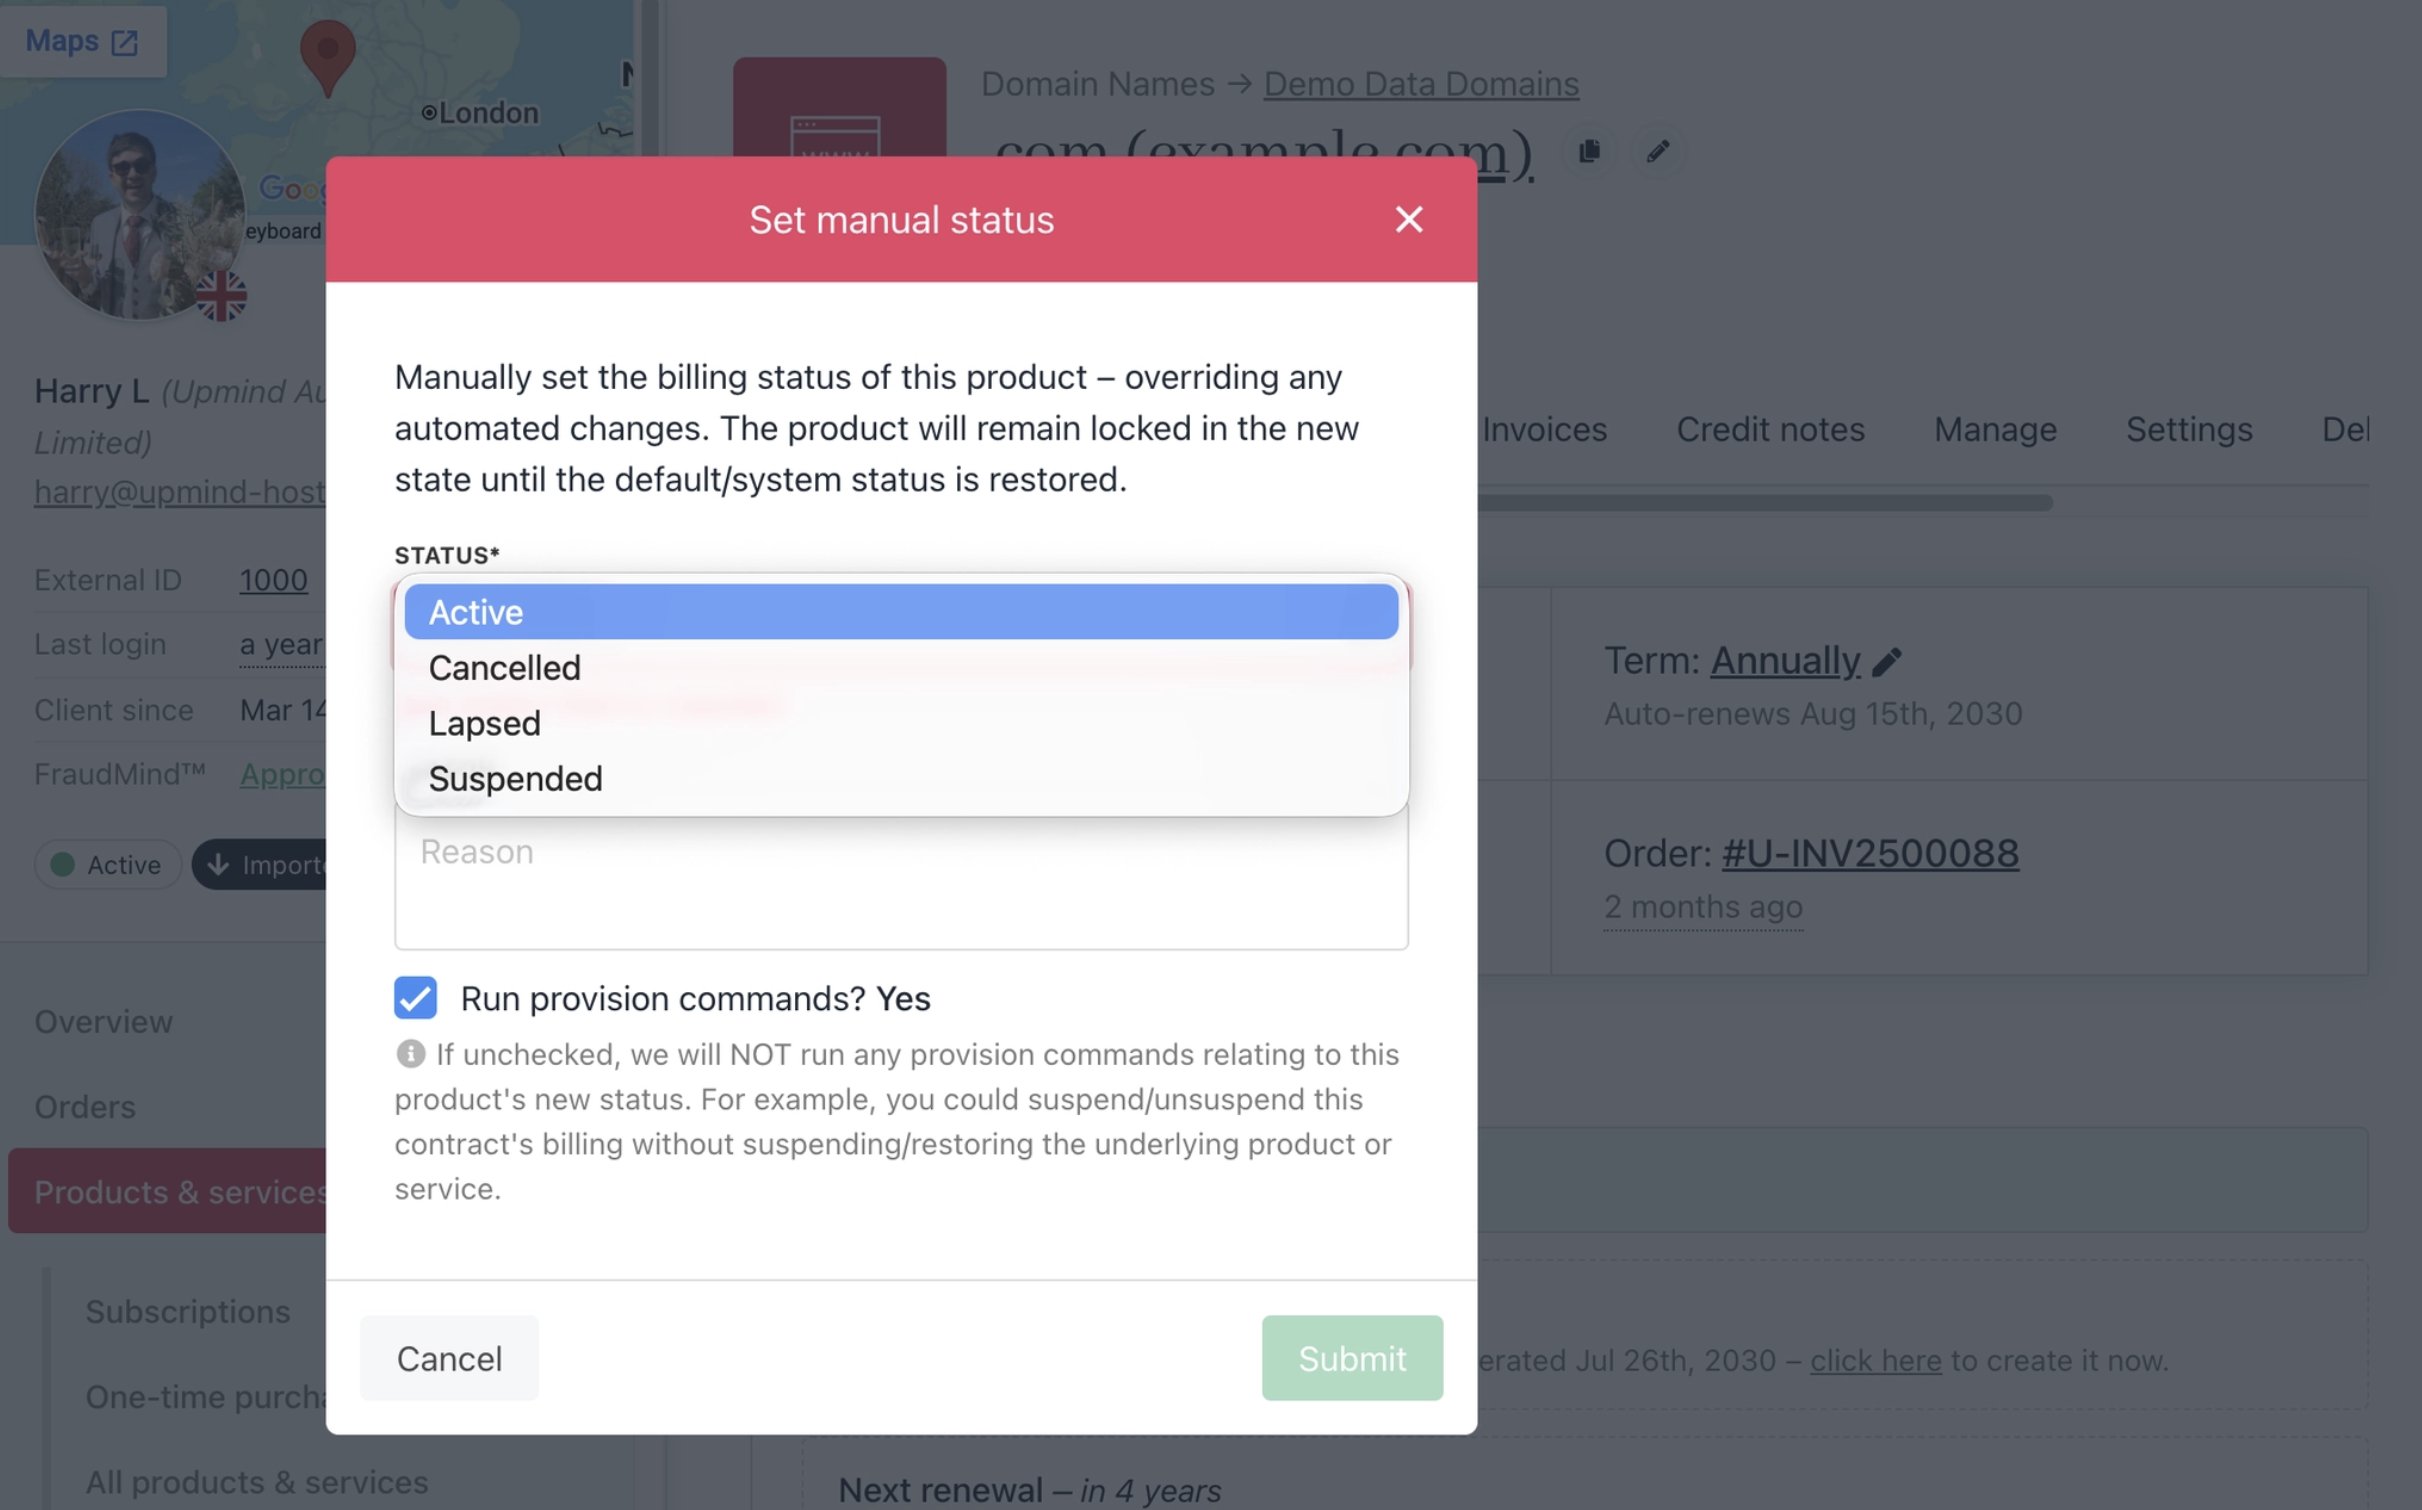
Set manual status
- Active - Service is live and accessible.
- Suspended - Service is restricted but recoverable.
- Lapsed - Service has expired. This is often used for domains past their renewal date.
- Cancelled - Service is marked as cancelled.
- Confirm the change.
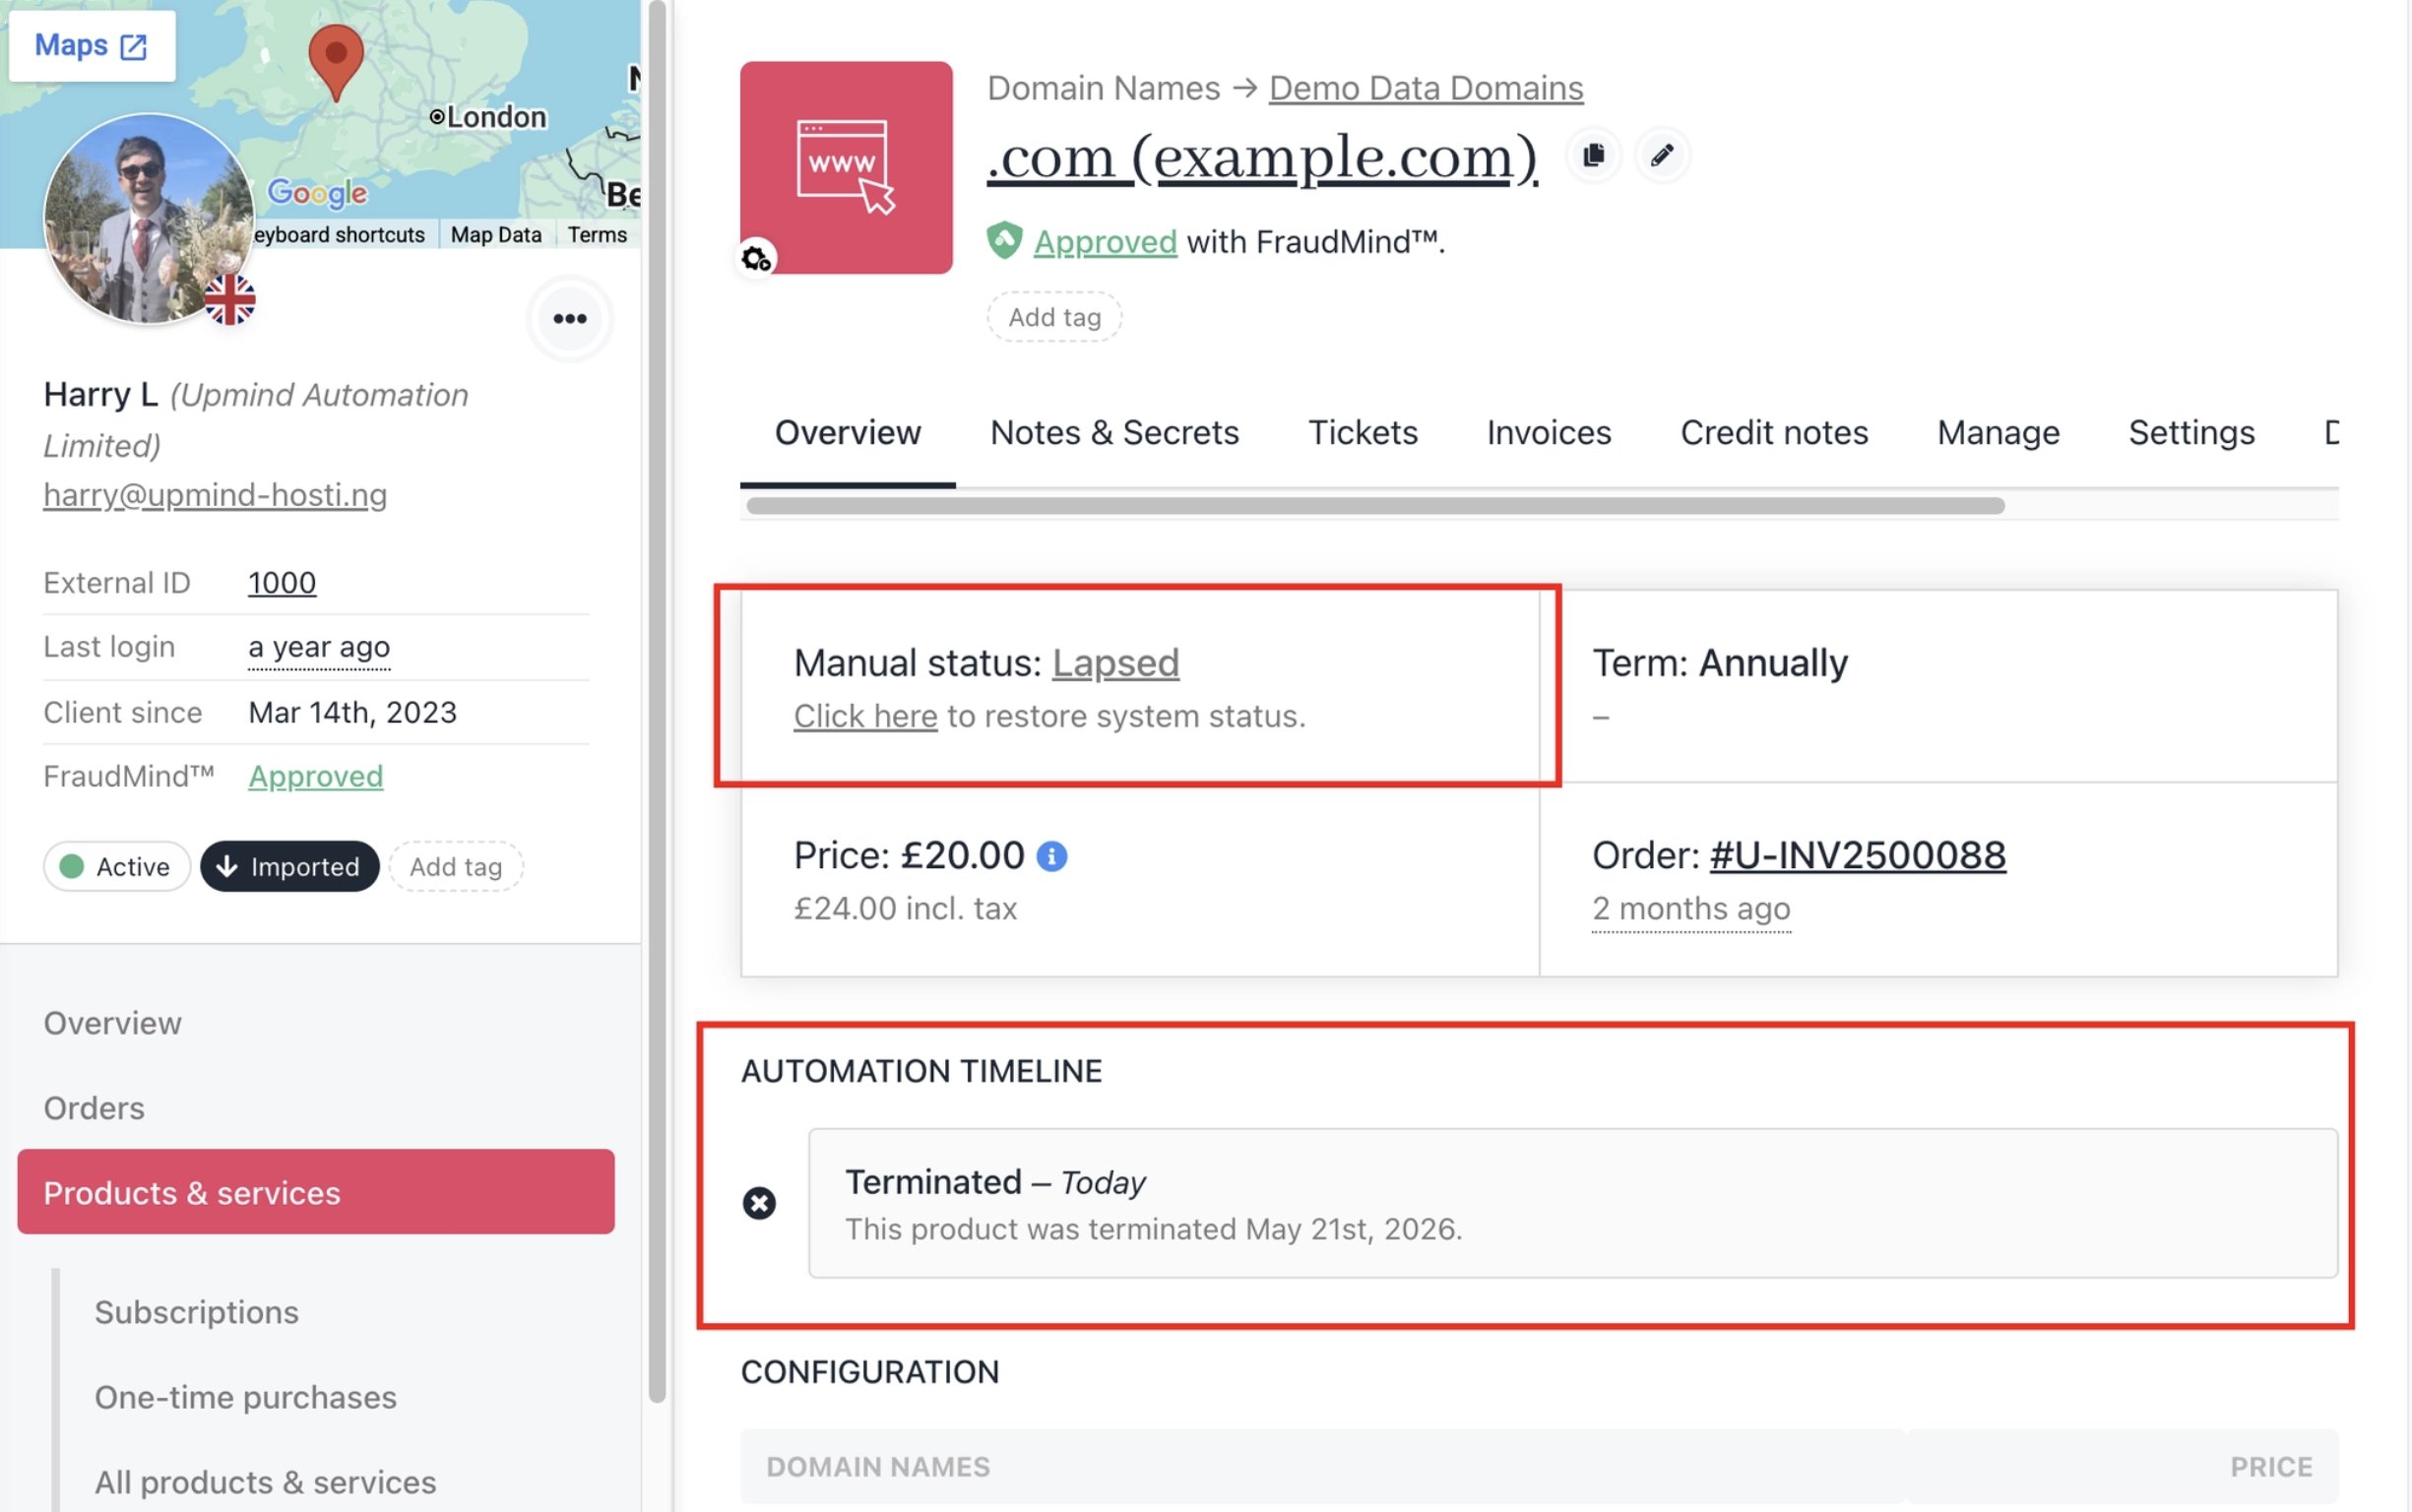
Updated manual status
Switching back to system status after payment
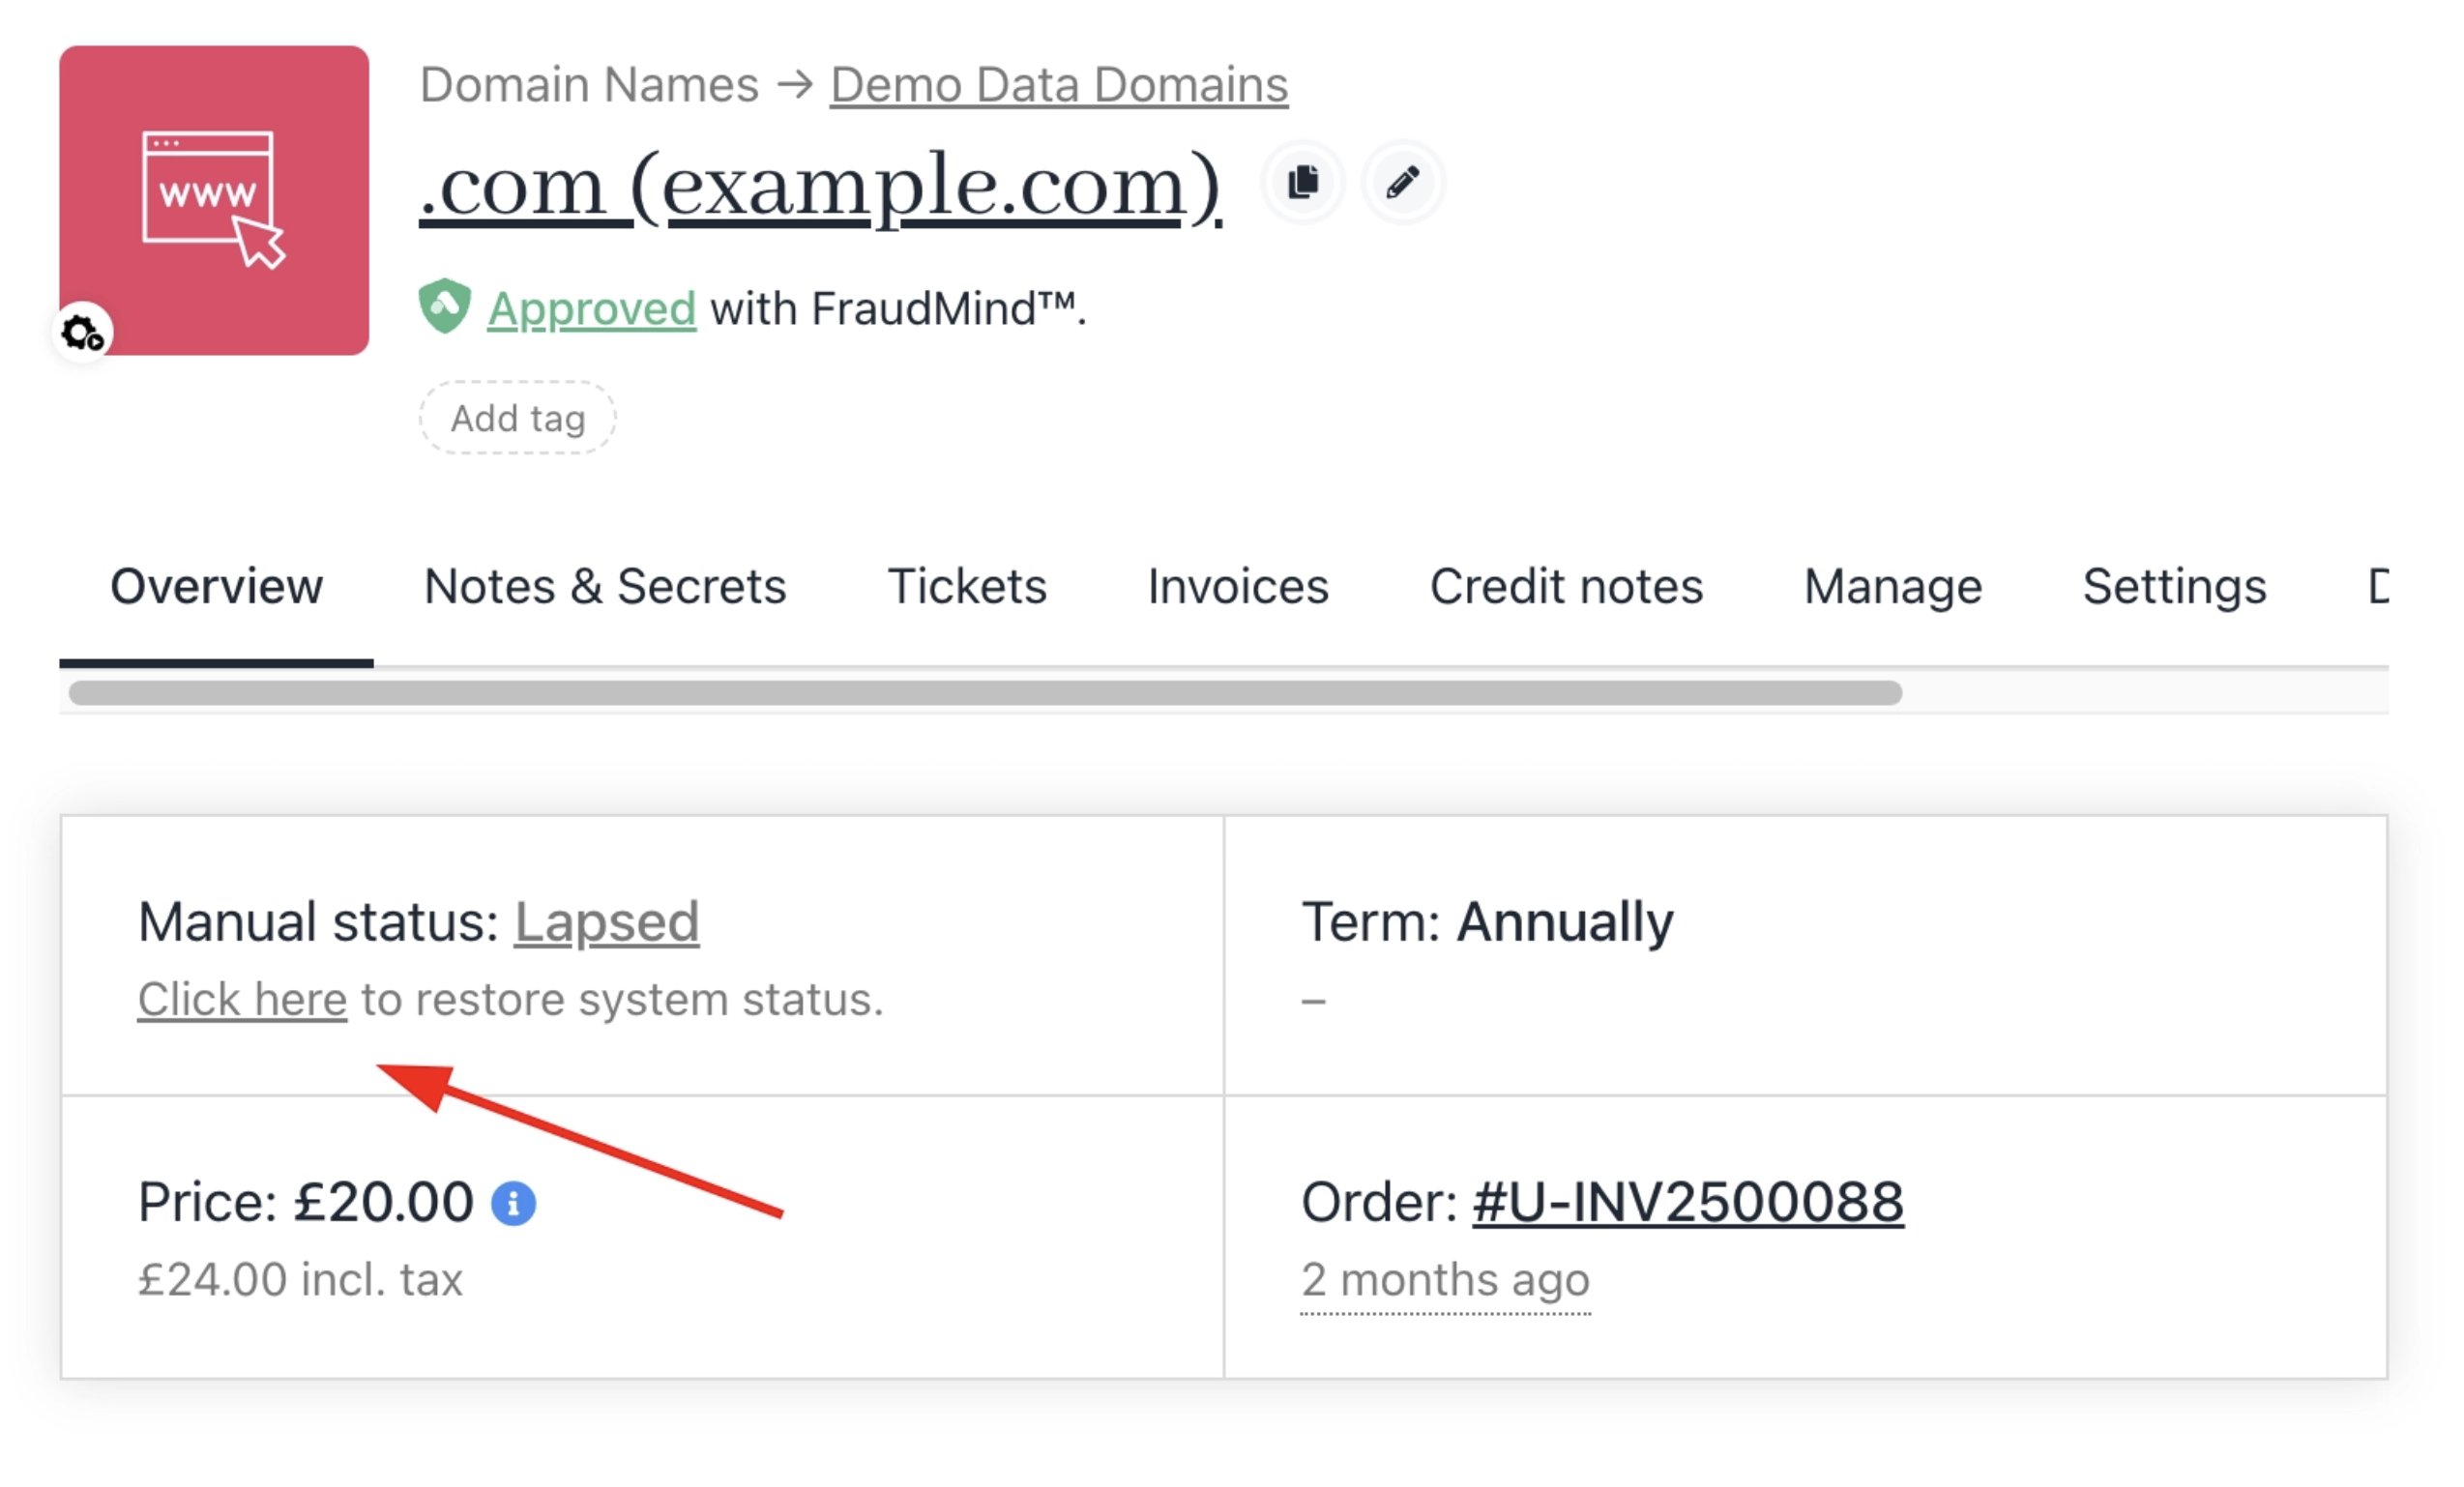
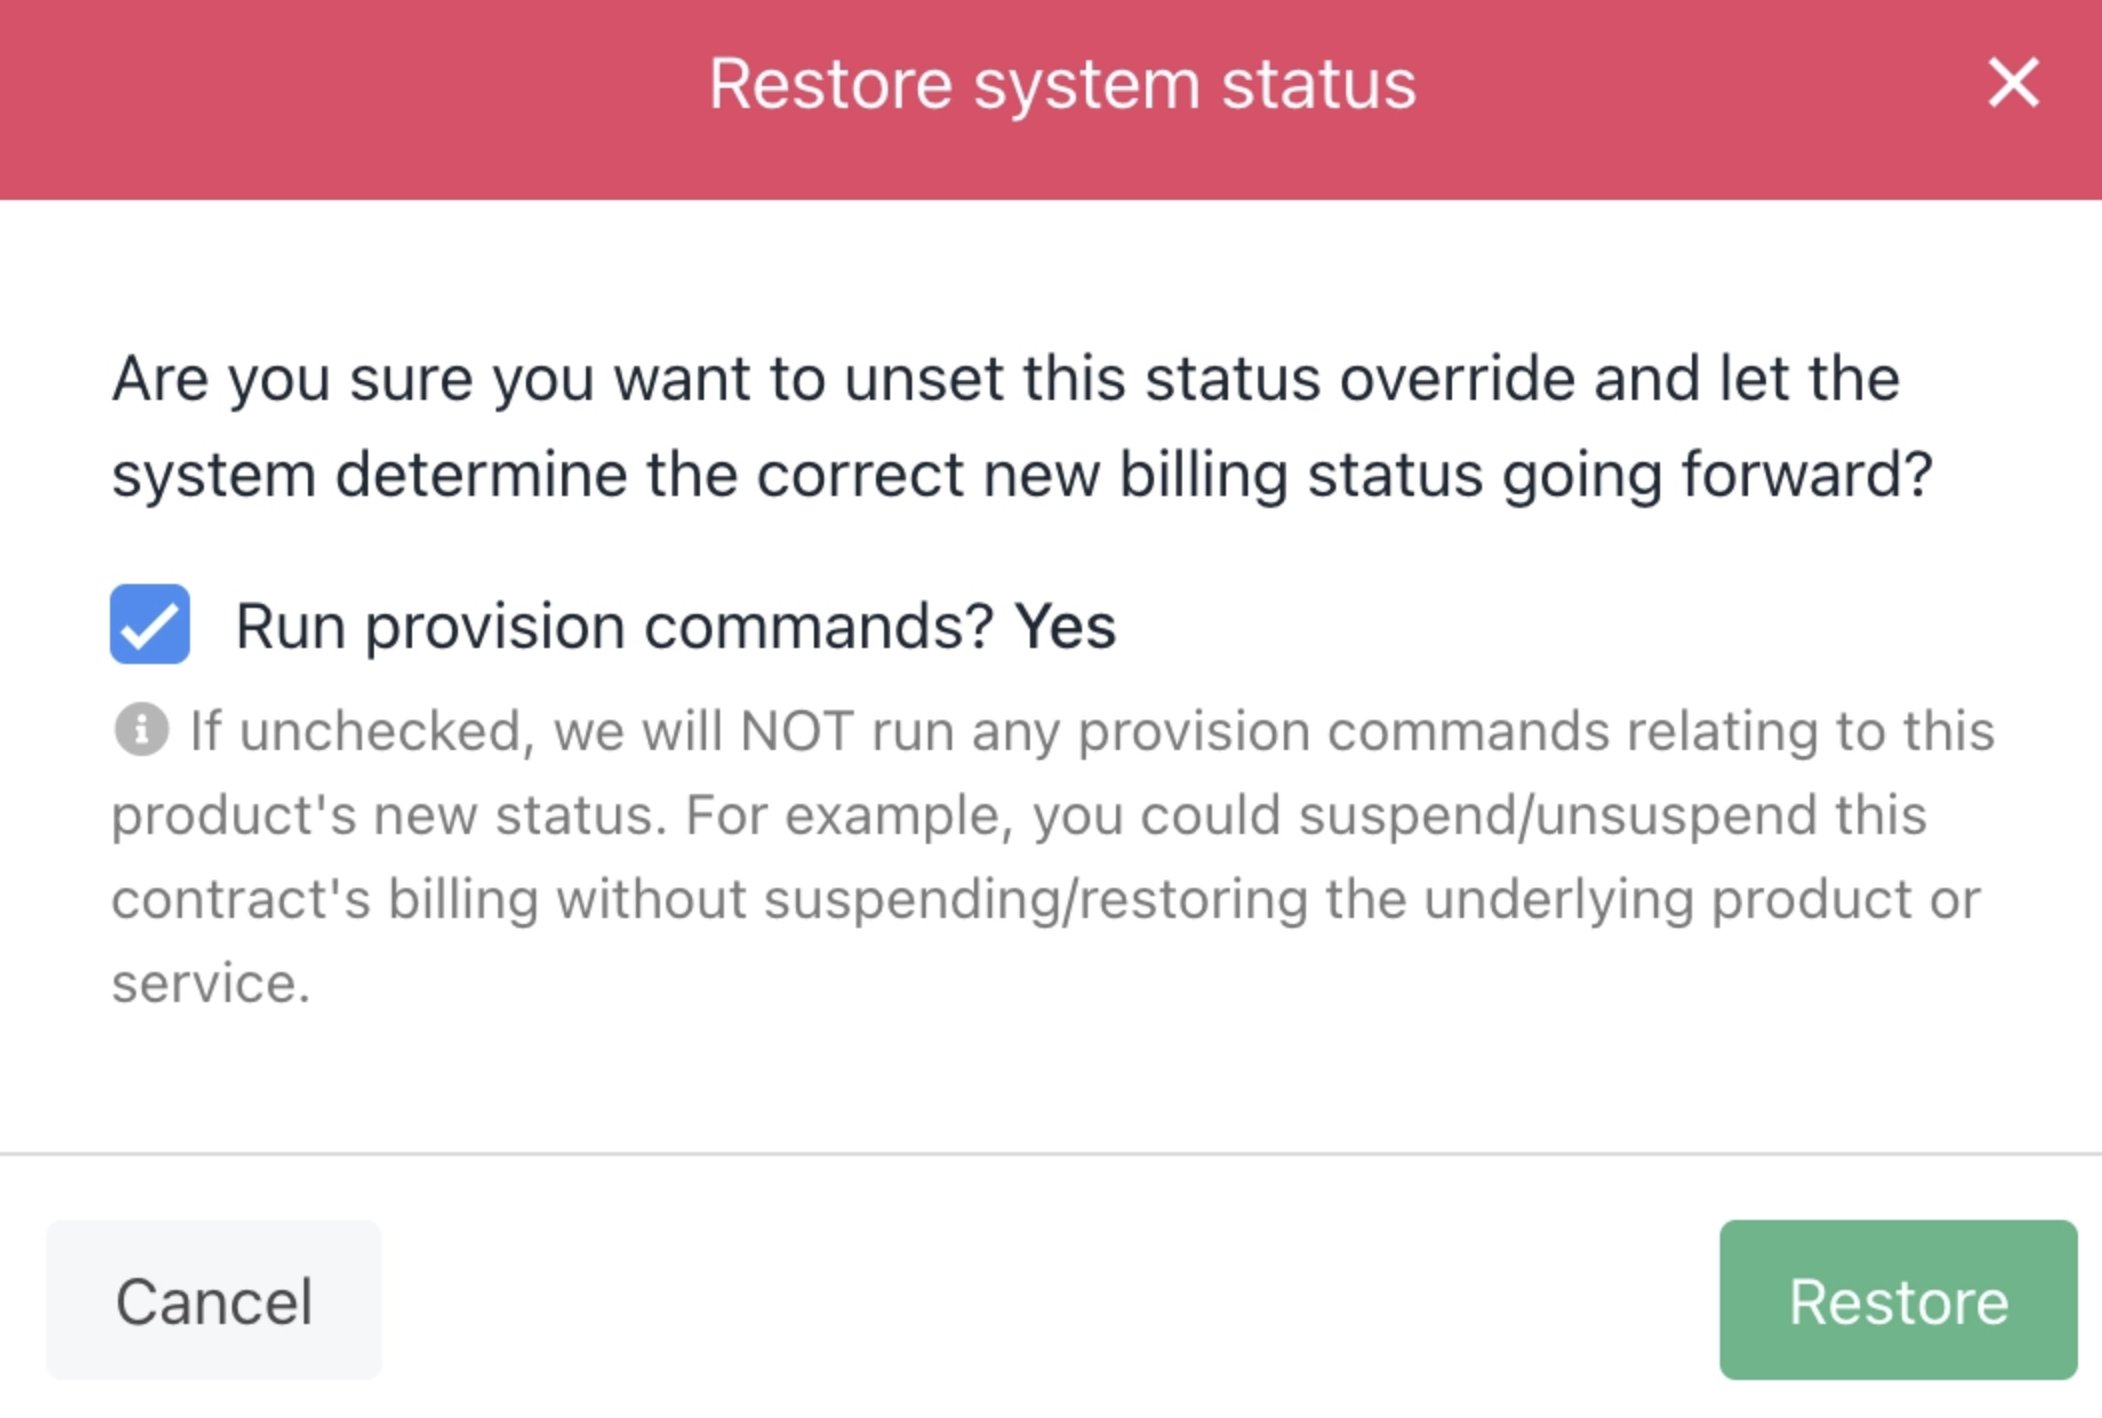
This step is easy to miss. Once a manual status is applied, Upmind will not resume automated actions on its own. After the client pays their invoice, a staff member must manually return the contract product to system-controlled status. After payment is confirmed:- Open the client’s account and navigate to the contract product.
- On the Overview tab, restore the system status to Active (or the appropriate status).
Restore system status
Click to restore
- If you want automation to resume normally, make sure the status reflects the system state, not a manual override.
Set a reminder or internal note when applying a manual status. Without a follow-up step, the service could remain frozen even after payment is received.