

- Create and configure your Upmind account
- Verify your account
- Log into the admin panel
- Configure your domain
- Change the organisation name display
- Set store currency
- Define products and services
- Create categories
- Create products
- Add product details
- Upload images
- Configure billing
- Set up billing and payment processing
- Configure provisioning
- Manage client accounts and support
- Launch your online store
- Use analytics and reporting to optimise your business
Create and configure your Upmind account
- Go to Upmind.com.
- Click on Start for free.

Start for free
- Enter your email and sign up.
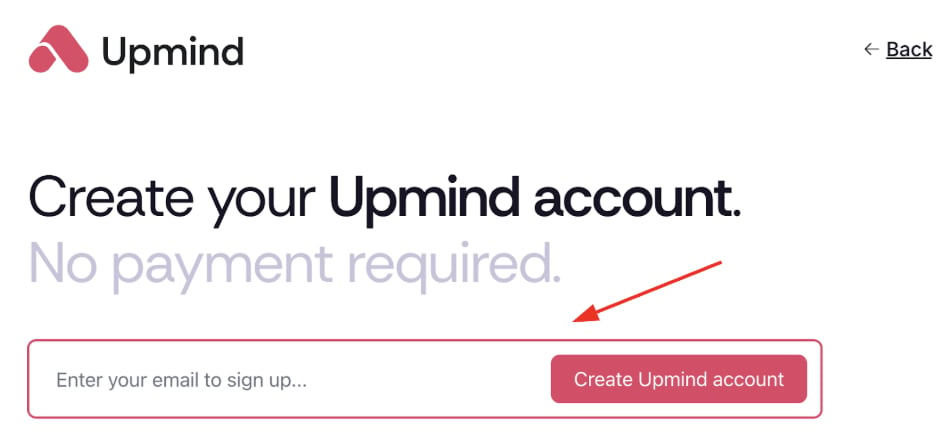
Sign up
Verify your account
- Check your email (and spam) for Upmind’s verification link within 5 minutes.
- Click the link to open your organisation’s admin dashboard. Your account is now live.
Log into the admin panel
- Visit your
Admin Panellogin page at https://my.upmind.com/login. - Enter your credentials to log in.
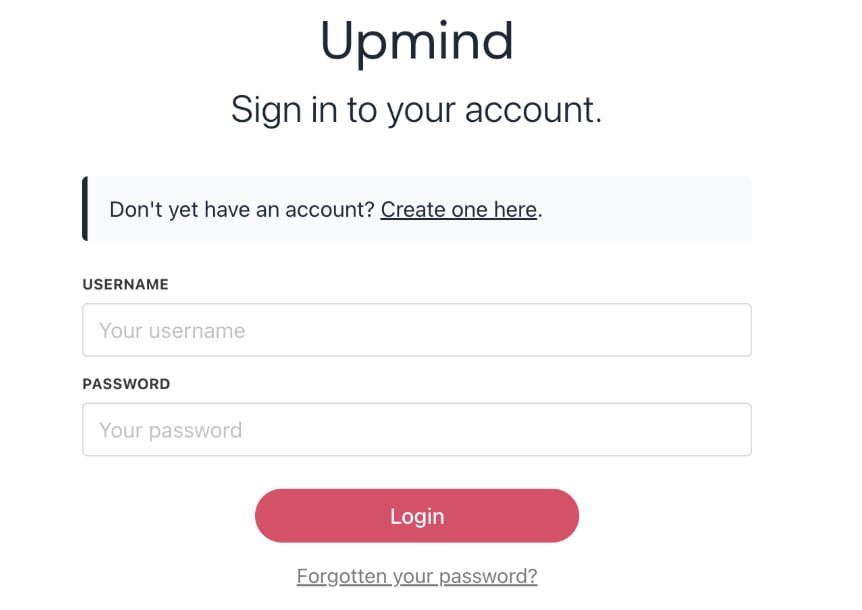
Log in panel
Configure your domain
- Upmind creates a unique subdomain for your store ending with
.upmind.app. - After setup, configure your own domain (e.g.,
yourdomain.comorclientarea.yourdomain.com).
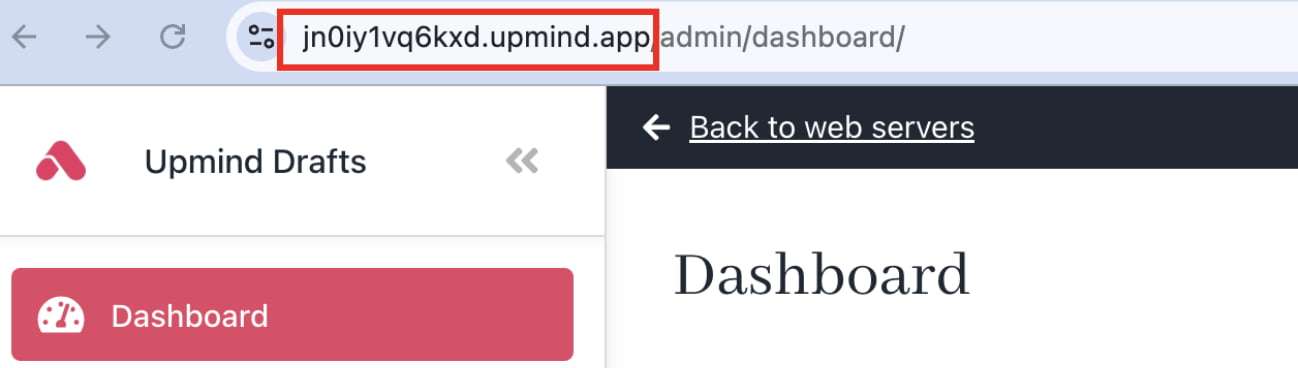
Unique subdomain
Change the organisation name display
- Go to Settings > Brand Settings under Branding and Customisation.
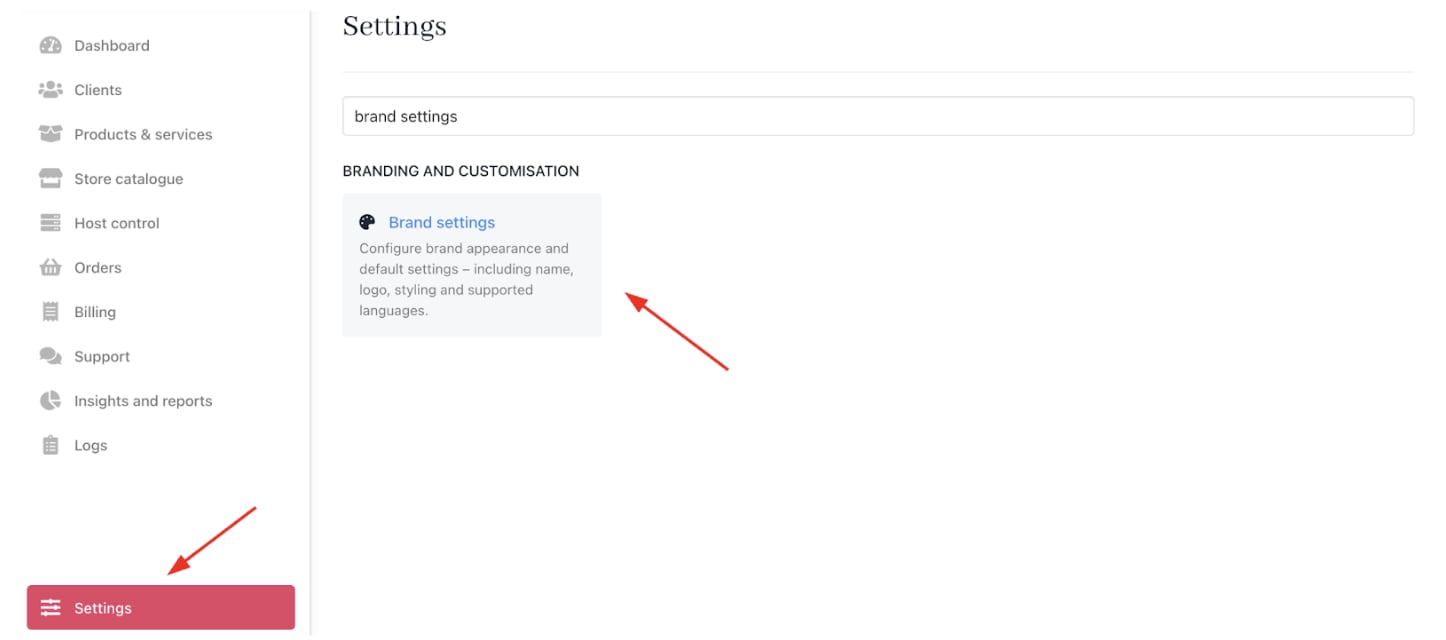
Settings > Branding and Customisation > Brand Settings
- Enter a new name and click Save.
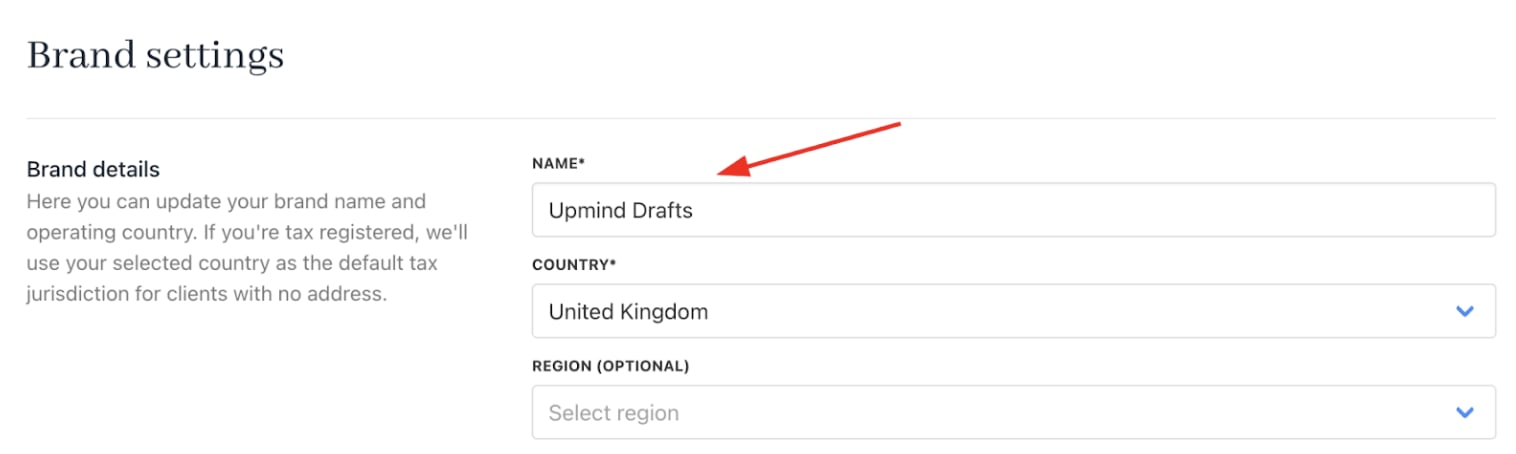
New brand name
Set store currency
- Go to Settings > Business Settings under E-commerce Settings.
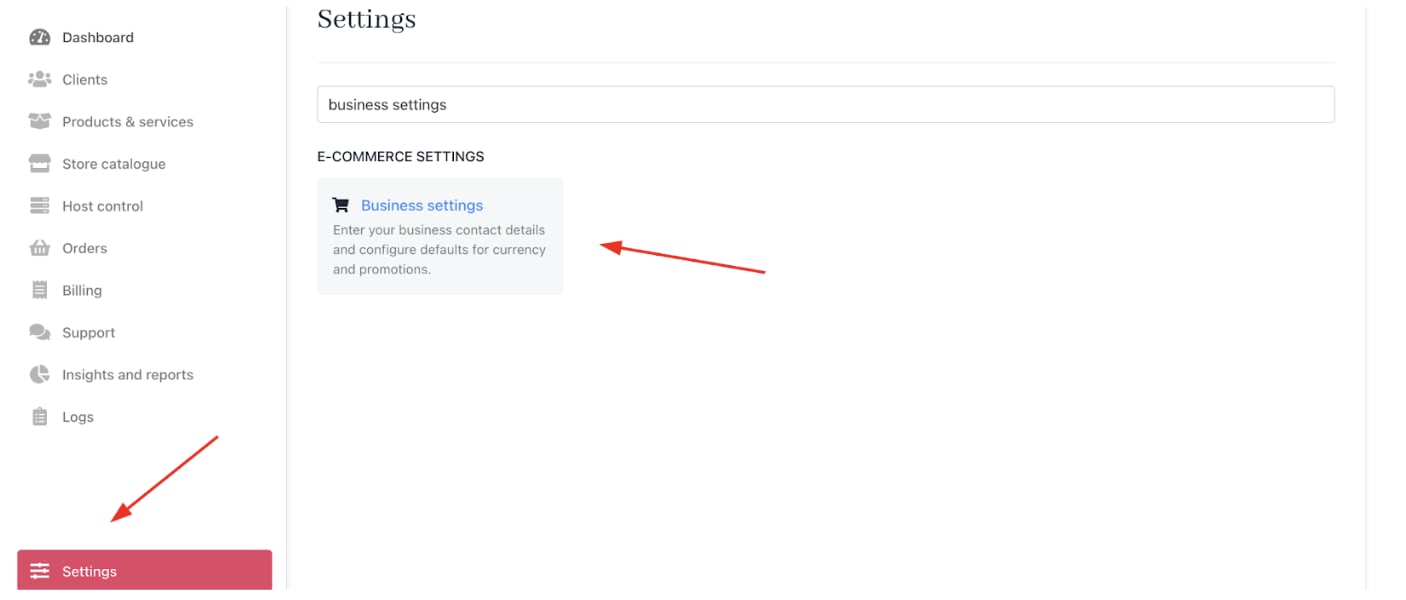
Settings > E-commerce Settings > Business Settings
- Set your Store Currency, which will be the primary currency.
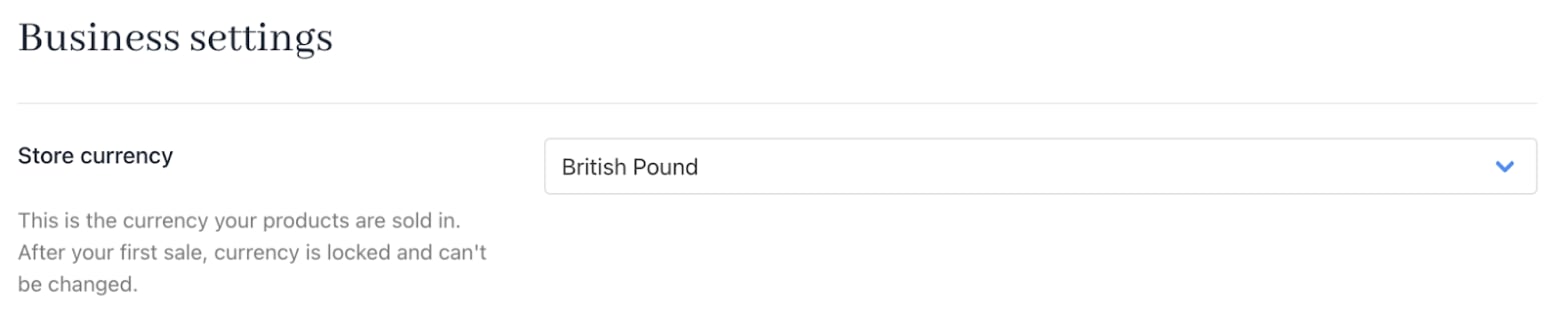
Store currency
Define products and services
- Access it
Store Cataloguefrom the dashboard by clicking on Store Catalogue.
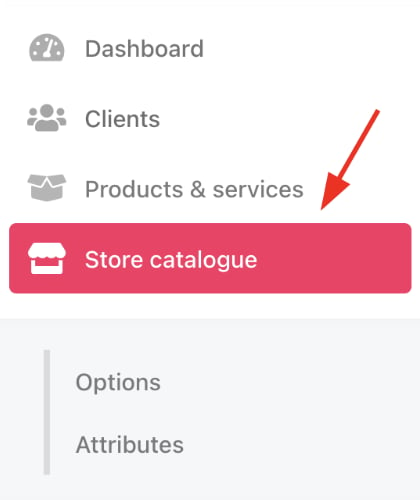
Store catalogue
- You can also click Settings and select the Product Catalogue tile under Products and Promotions.
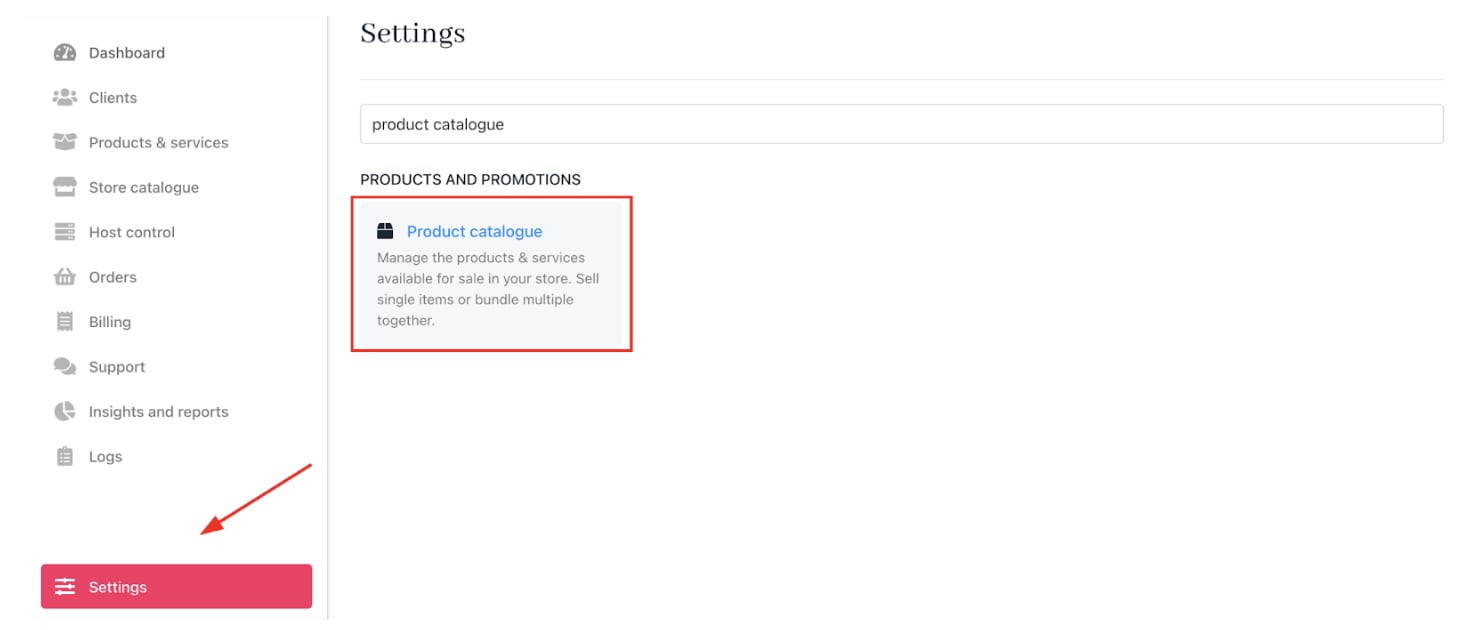
Settings > Products and Promotions > Product Catalogue
Create categories
Categories help you organise your products and can be edited at any time.Add a new category
- On the
Product Cataloguepage, click Add New. - Choose the Products category.
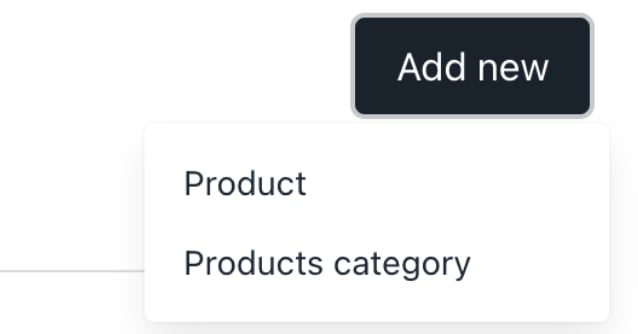
Add new product category
- Enter a unique category name.
- Add a category description (visible to website visitors).
- Click Create.
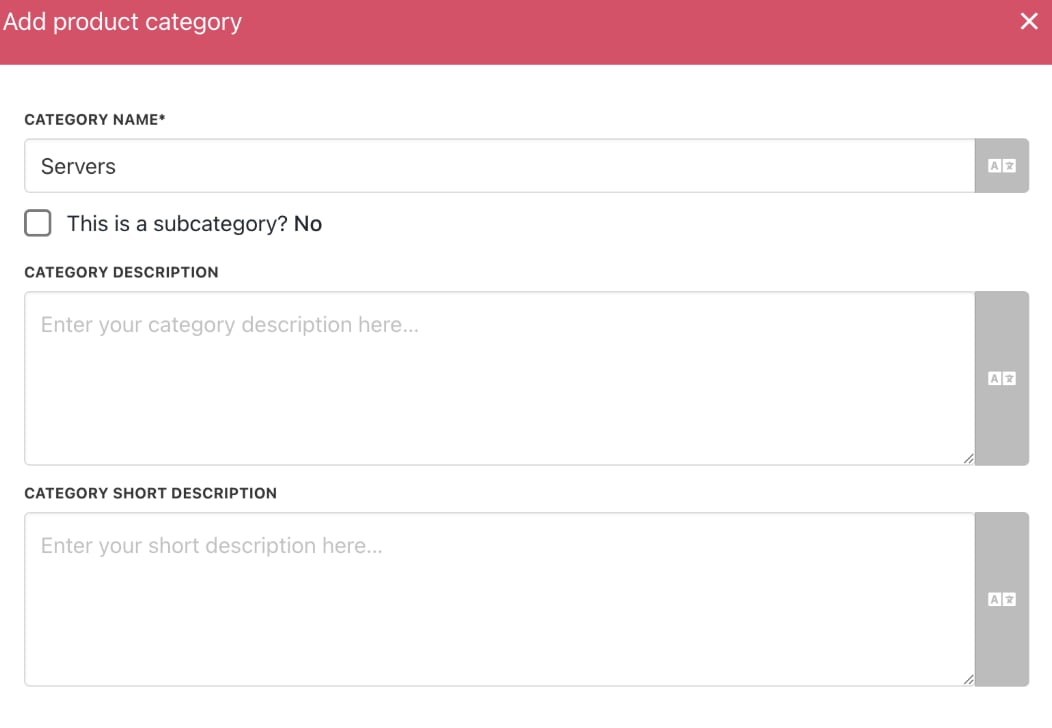
Create product category
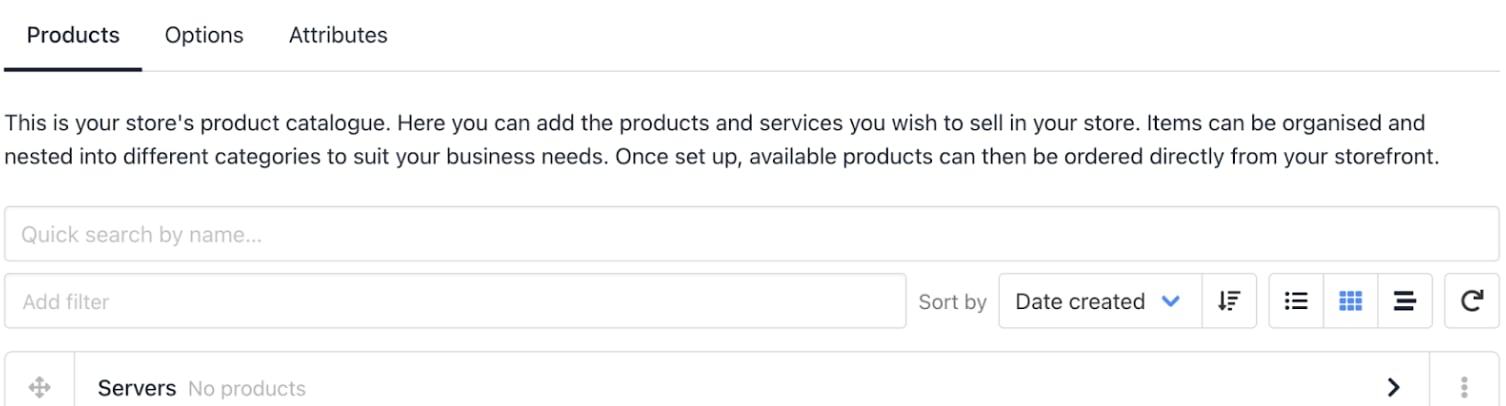
New category in the catalogue
Create products
You can add products in two ways:- Click Add New > Product on the
Product Cataloguepage. - Or, click the three-dot menu next to a category and select Add product.

Add product
- Choose Single product (default) or Product bundle.
- Complete the product fields (name, descriptions, etc.).
- Click Create.
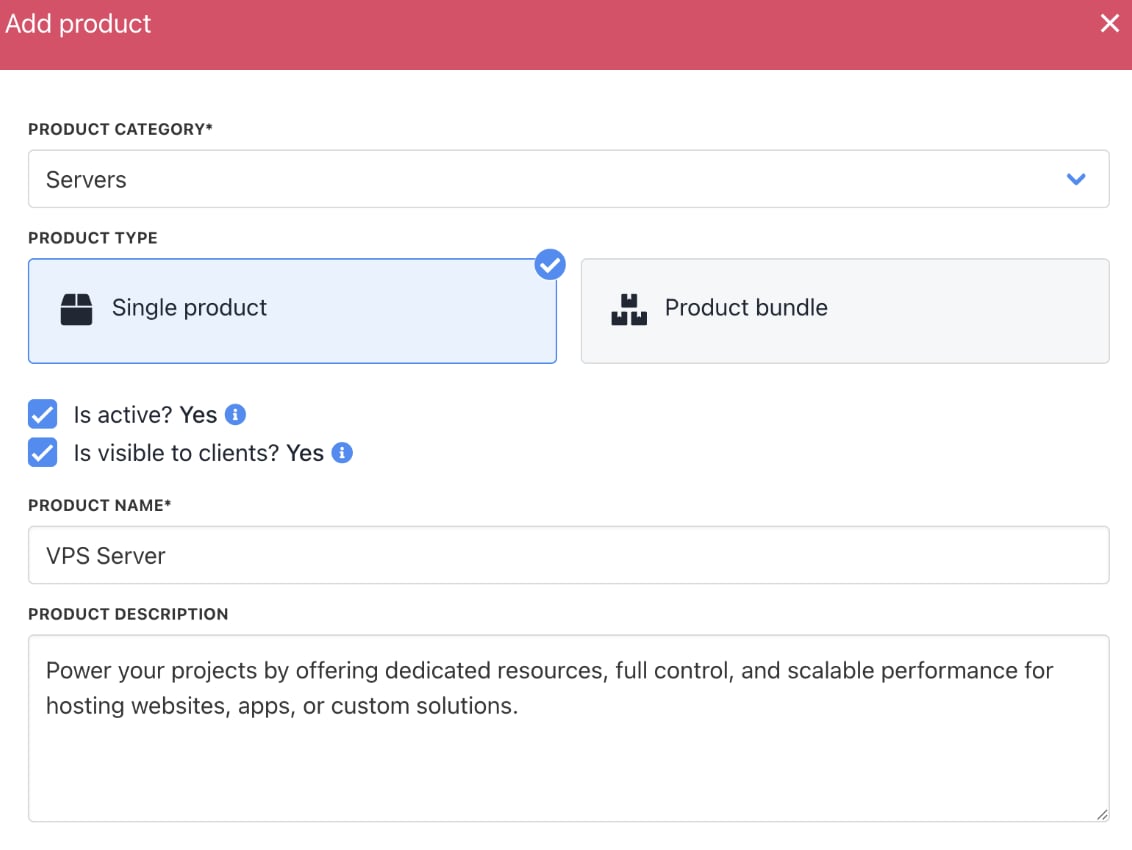
Single product option

Click the product
Product Details page displays the category and product name.

Category and product name
Add product details
On theProduct Details page, you can add or edit product info:
- Product Description: Detailed information about the product, such as features and benefits. Longer text supported.
- Product Short Description: A concise description of up to 130 characters to grab attention.
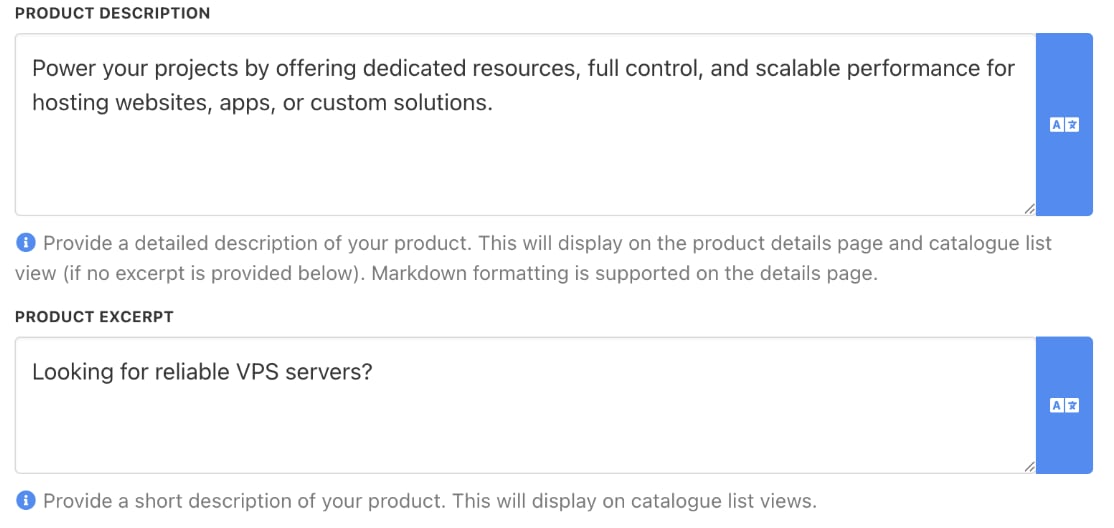
Product description & product excerpt
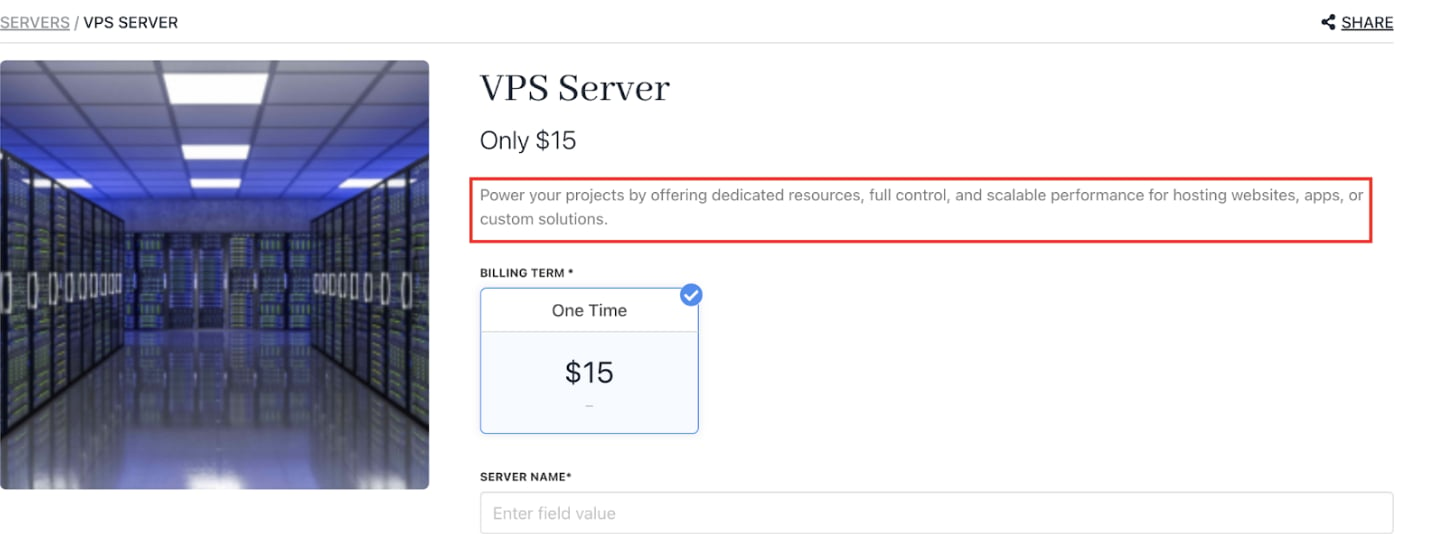
Product description displays
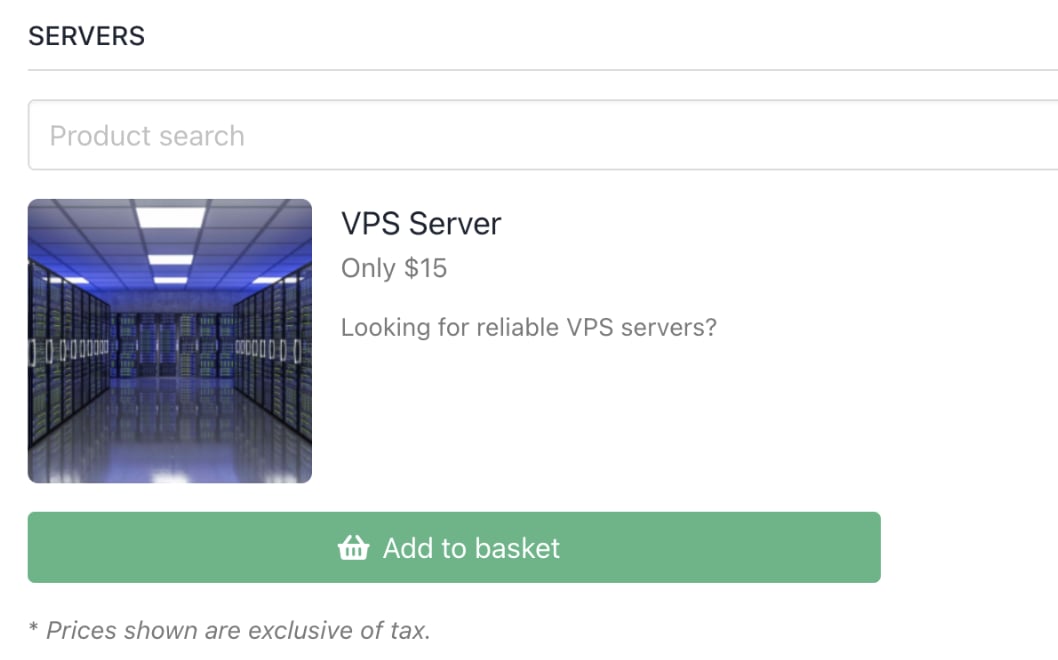
Product excerpt
Upload images
You can add up to 10 images per product to enhance its presentation. Click the upload area to select images. The first uploaded image becomes the default. You can also change the default image by hovering over the thumbnail and clicking the star.
Click a square to upload image
Configure billing
- Select
Product billingfrom the menu.
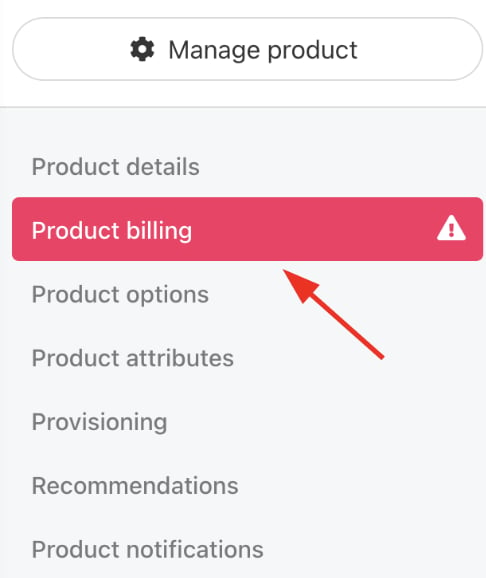
Choose Product billing
Create a one-off payment price
- Click the One-off payment tile.

One-off payment tile
- Enter the price for your default currency.
- Add prices for additional currencies. (Optional)
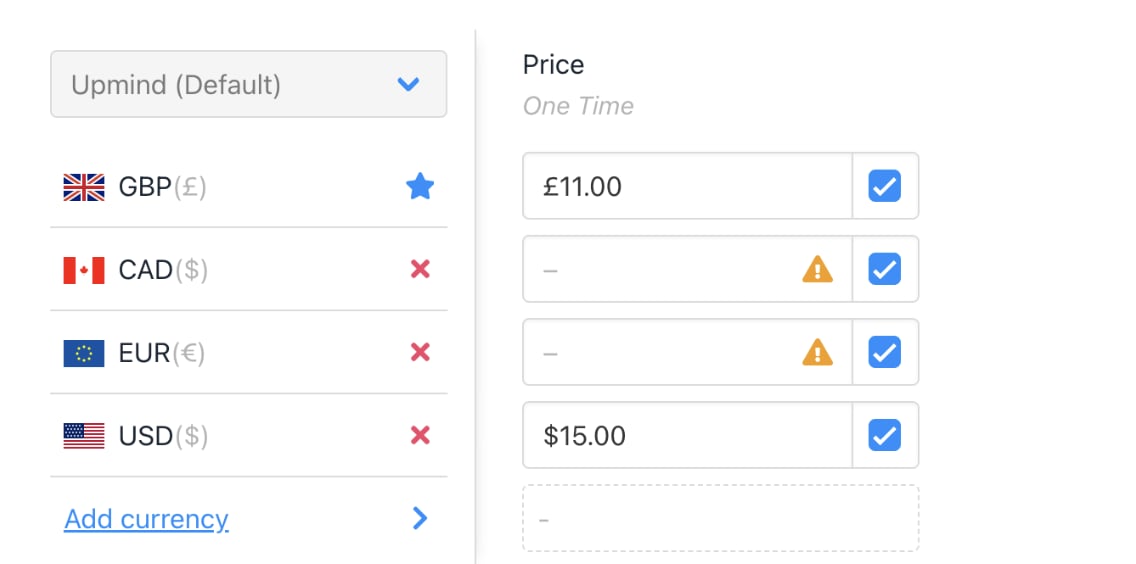
Add price for default currency
- Click Save.
Configure the multi-currency option
If a product doesn’t have a set price in a specific currency (for example, it’s only priced in your primary currency), you can control how Upmind handles it. By default, it follows your brand’s multi-currency settings, but you can override this per product by choosing one of three options.- Omit product: Product unavailable in that currency.
- Make available: Automatically convert price using current exchange rates.
- Inherit brand default: Use your brand’s global multi-currency setting.
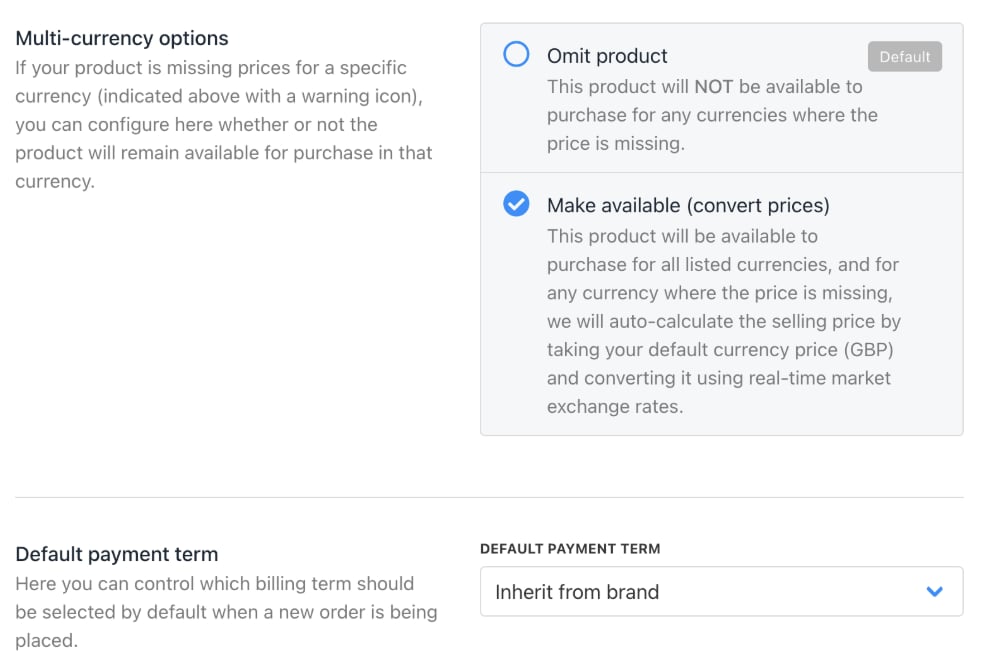
Choose make available
Set up recurring payments
- Click the Recurring payment tile.
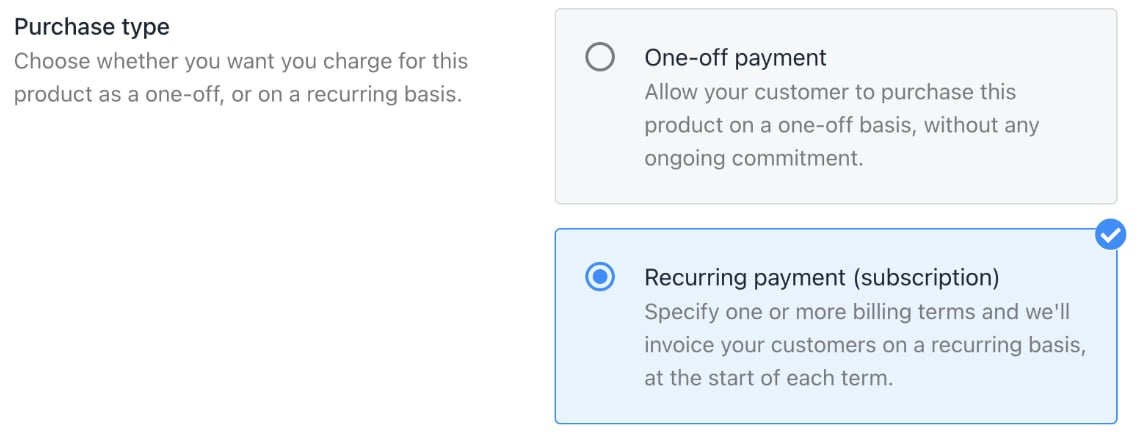
Recurring payment tile
- Scroll to the pricing section and click Add new term.
- Choose a billing term from the dropdown menu (monthly, yearly, etc.).
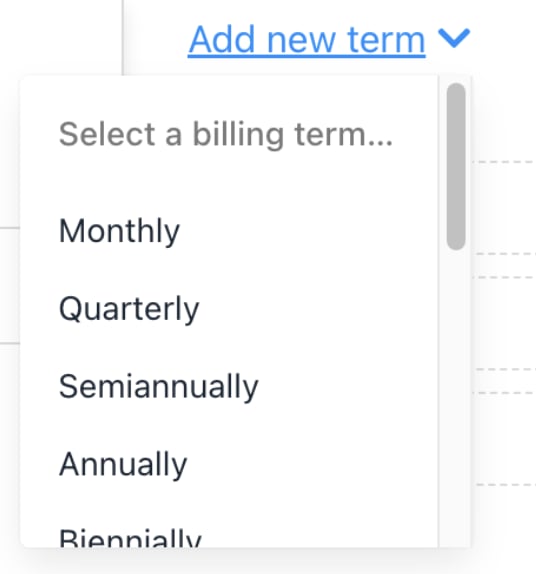
Select option on drop-down menu
- If a customer chooses Package A with a monthly term, the next payment will be charged the following month.
- If a customer chooses Package B with an annual term, a single payment covers the full year, and the next payment will be charged on the renewal date the following year.
- For custom plans, select Custom and enter the number of months.
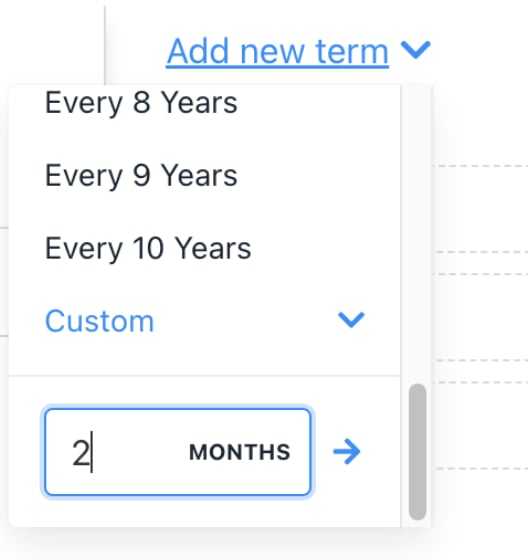
Enter number of months
- Add prices for each currency accordingly.
- Add more terms if needed.
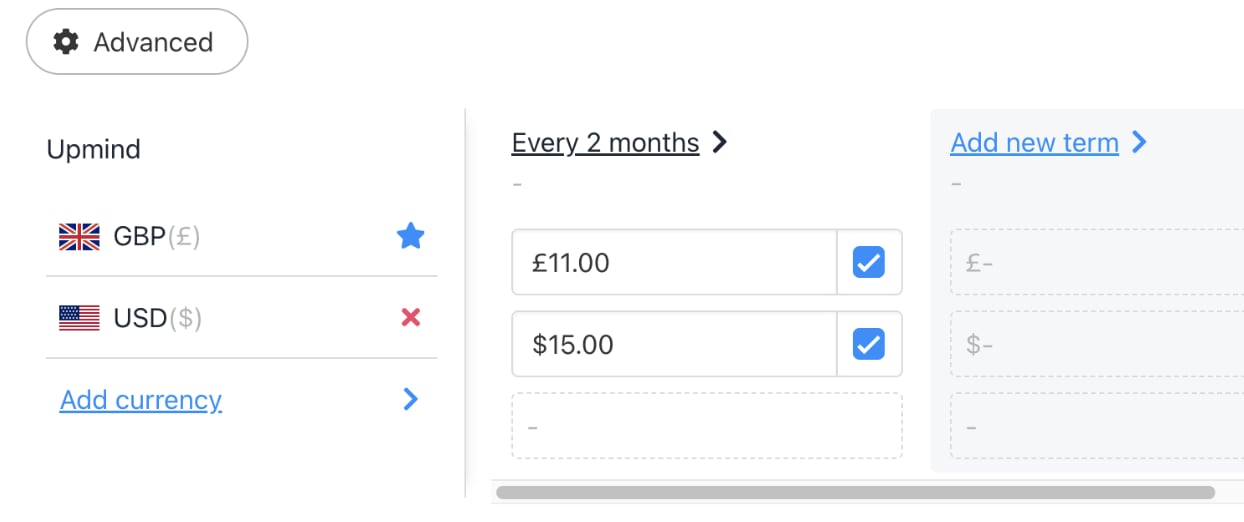
Enter price for each currency
- To delete a term, click Delete next to it.
- Click Save.
Select the default payment term
When multiple subscription options exist, you can set which term displays by default to customers. At the bottom of the billing page, select the default.
Select an option
Set up billing and payment processing
- Go to Settings > Payment Providers under E-commerce Settings.
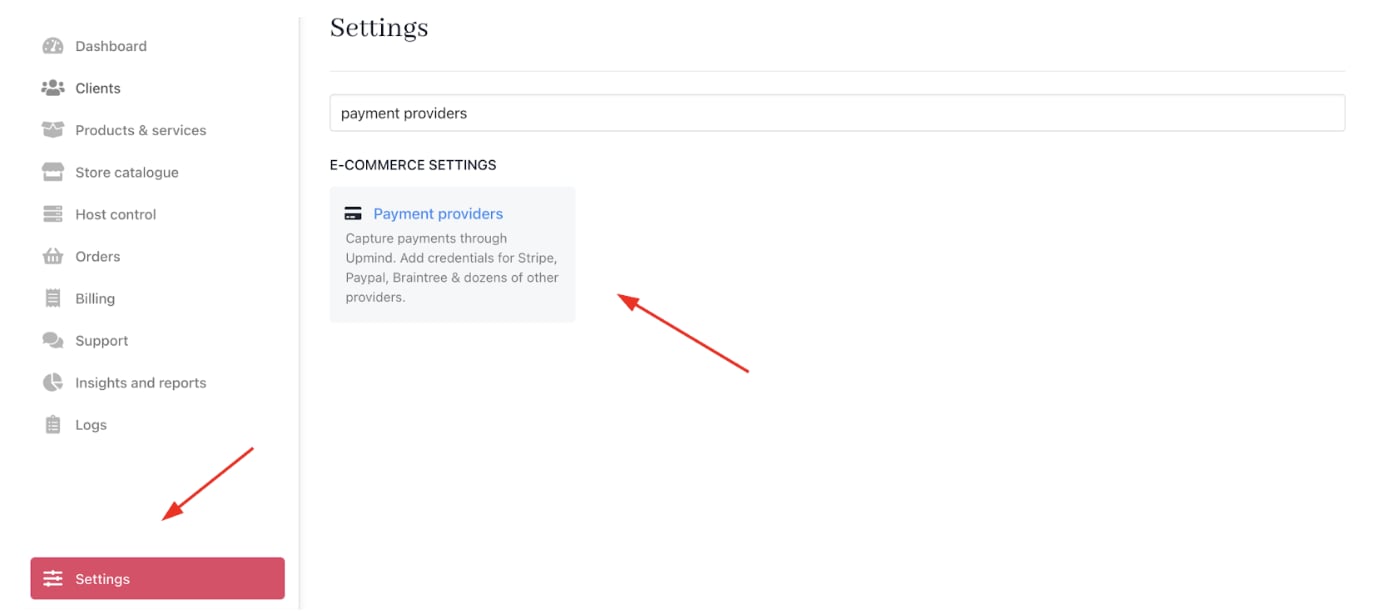
Settings > E-commerce Settings > Payment Providers
- Click Add payment provider and configure payment gateways like Stripe, PayPal, or offline payment methods.

Add payment provider
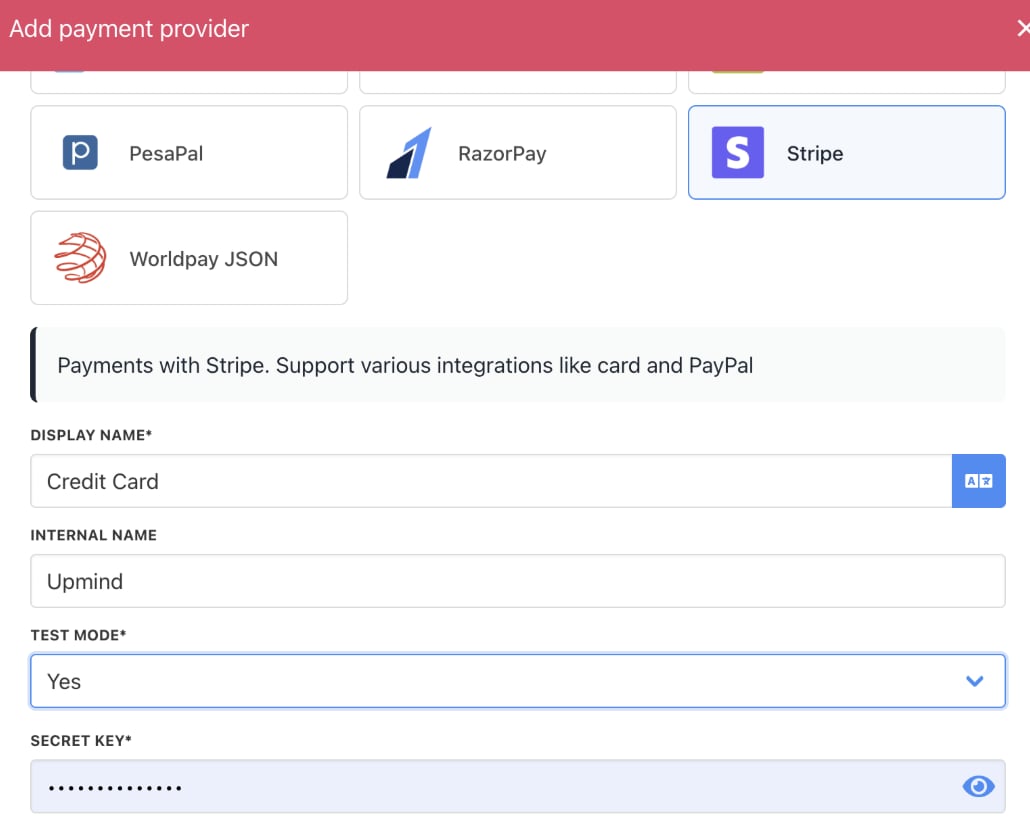
Enter payment provider details
Configure provisioning
Here, we will use Servers with Virtualizor provisioning as an example.- Go to Settings > Provision Configurations under Provisioning.
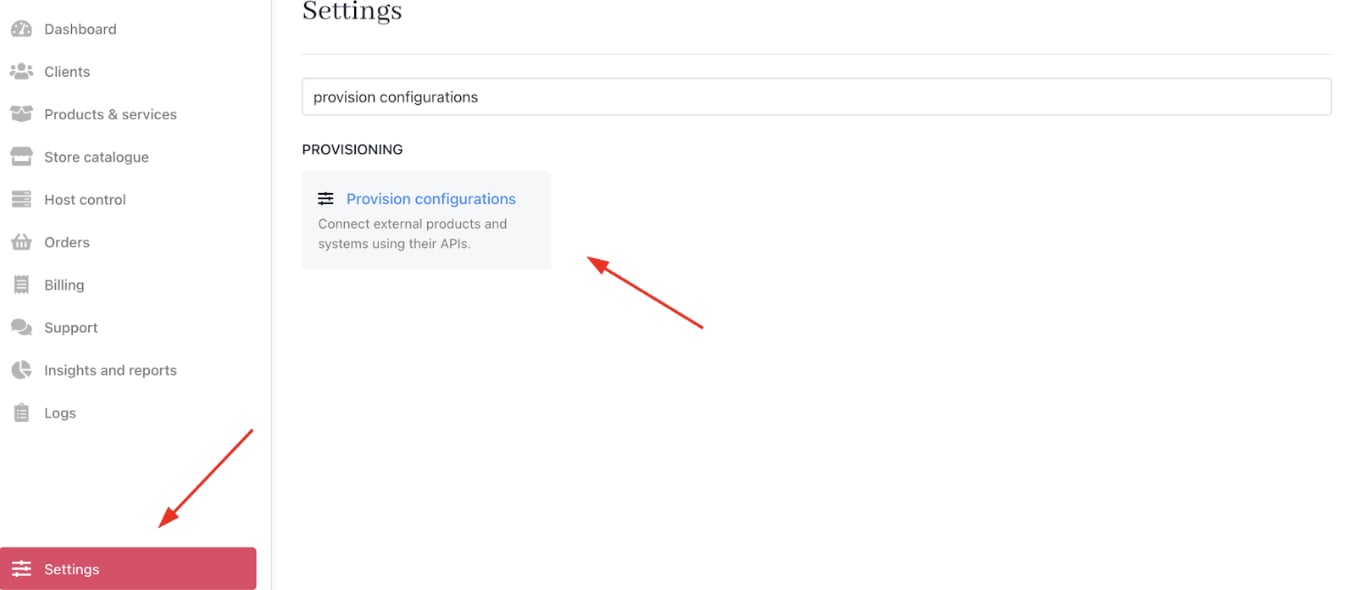
Settings > Provisioning > Provision Configurations
- Click on Add New Configuration.

Add new configuration
- Select Servers from the dropdown and choose Virtualizor.
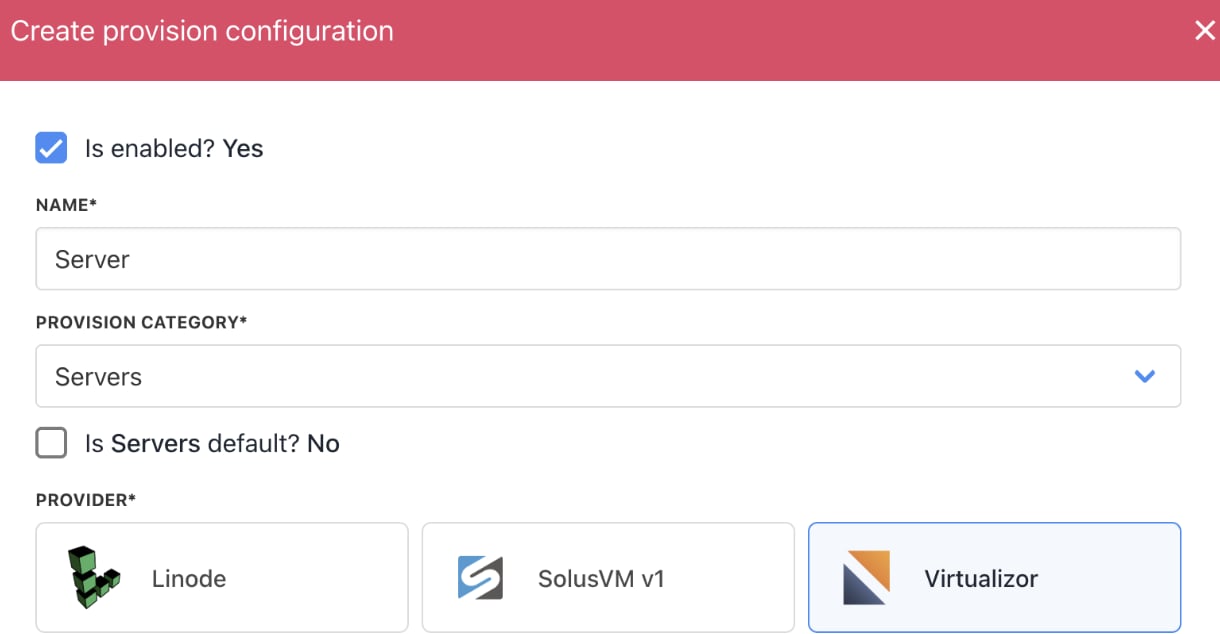
Select server
- Fill in the details (Hostname, Port, API Key, API Password, Location type).
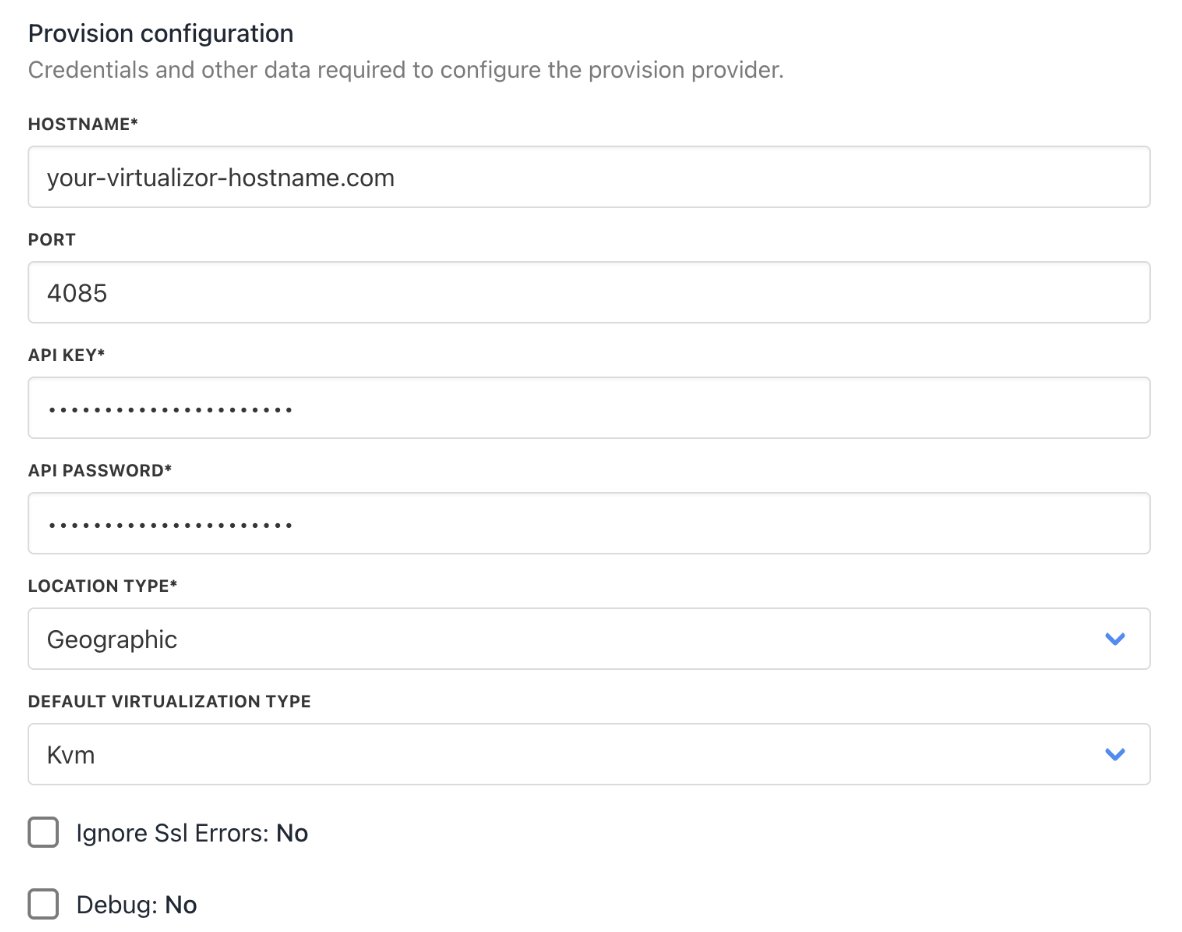
Add details
- Select
Provisioningfrom the menu of your product.
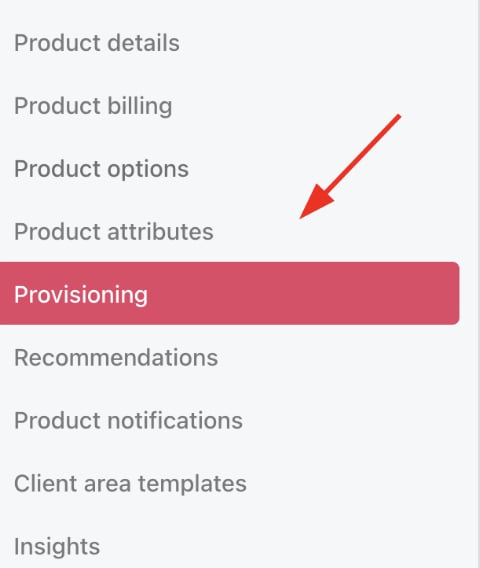
Choose provisioning
- Select Server as your blueprint and choose Virtualizor.
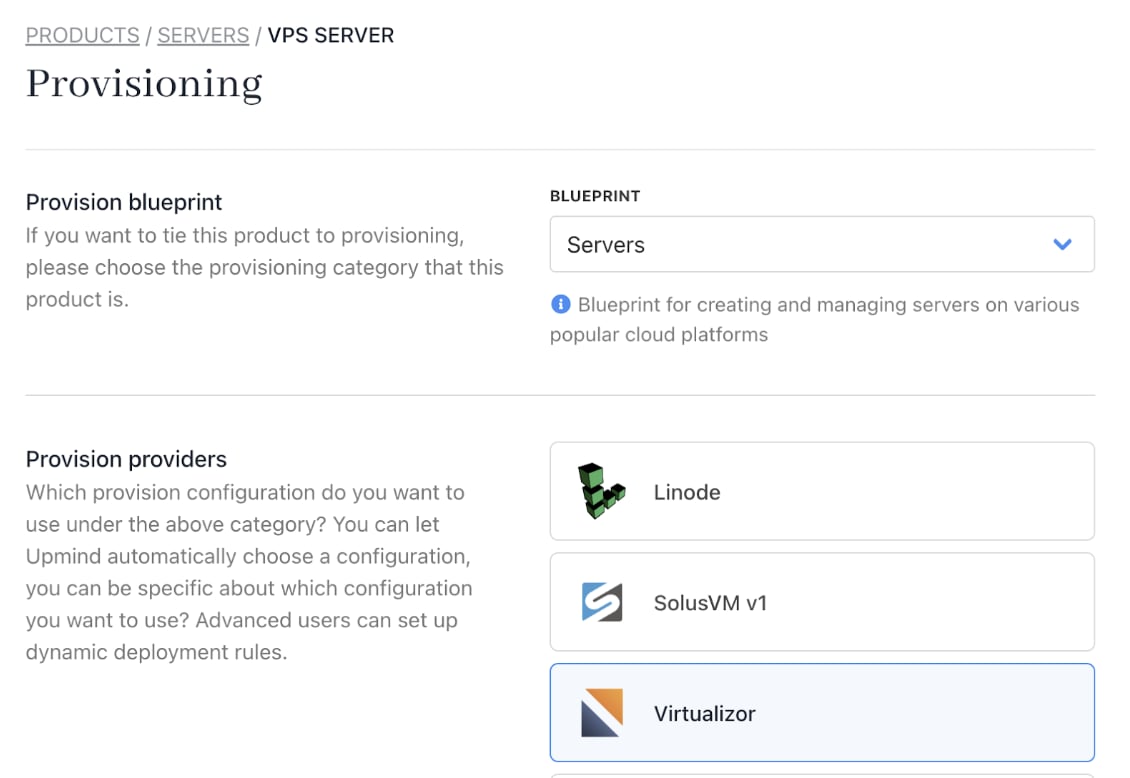
Select Virtualizor
- Choose your Provider Configuration.
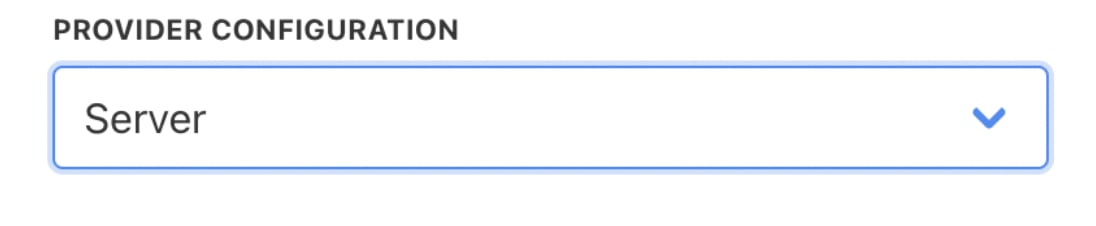
Choose configuration mode
- You can keep the
Setup Functionsas Default, andOrder Setup Fieldsas Inherit from Category.
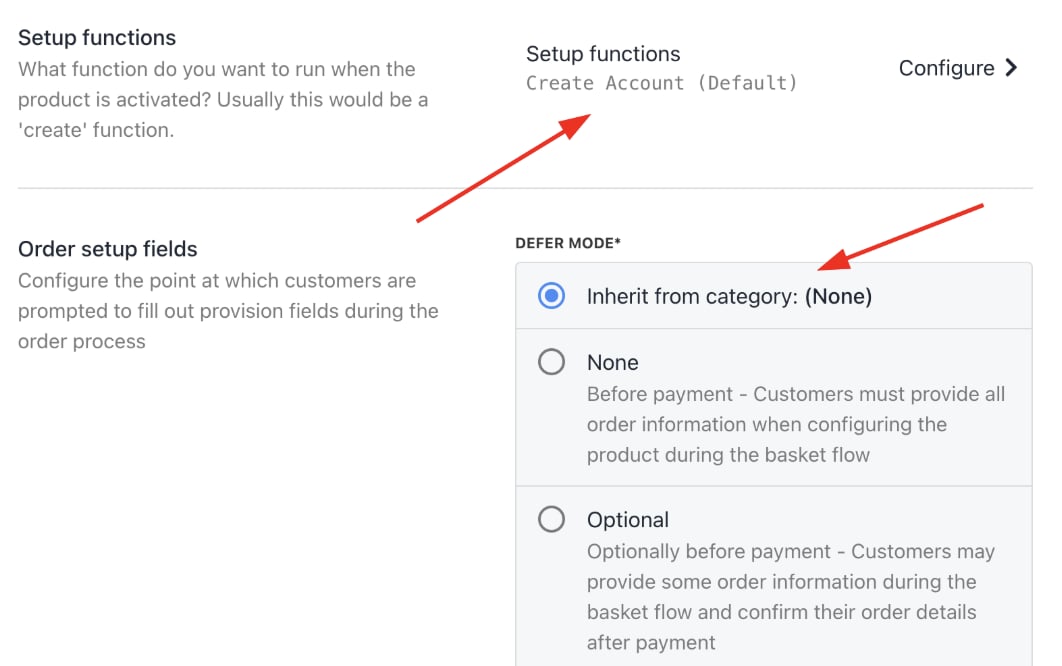
Setup functions and order setup fields
- Under
Provision Fields, you need to configure your Virtualization Type, Server Location, Server Image, Server Size, Server CPU Cores, Server Memory MB, and Server Disk MB. You can get all the details (for example, disk space, monthly bandwidth limit, etc.) from your panel.
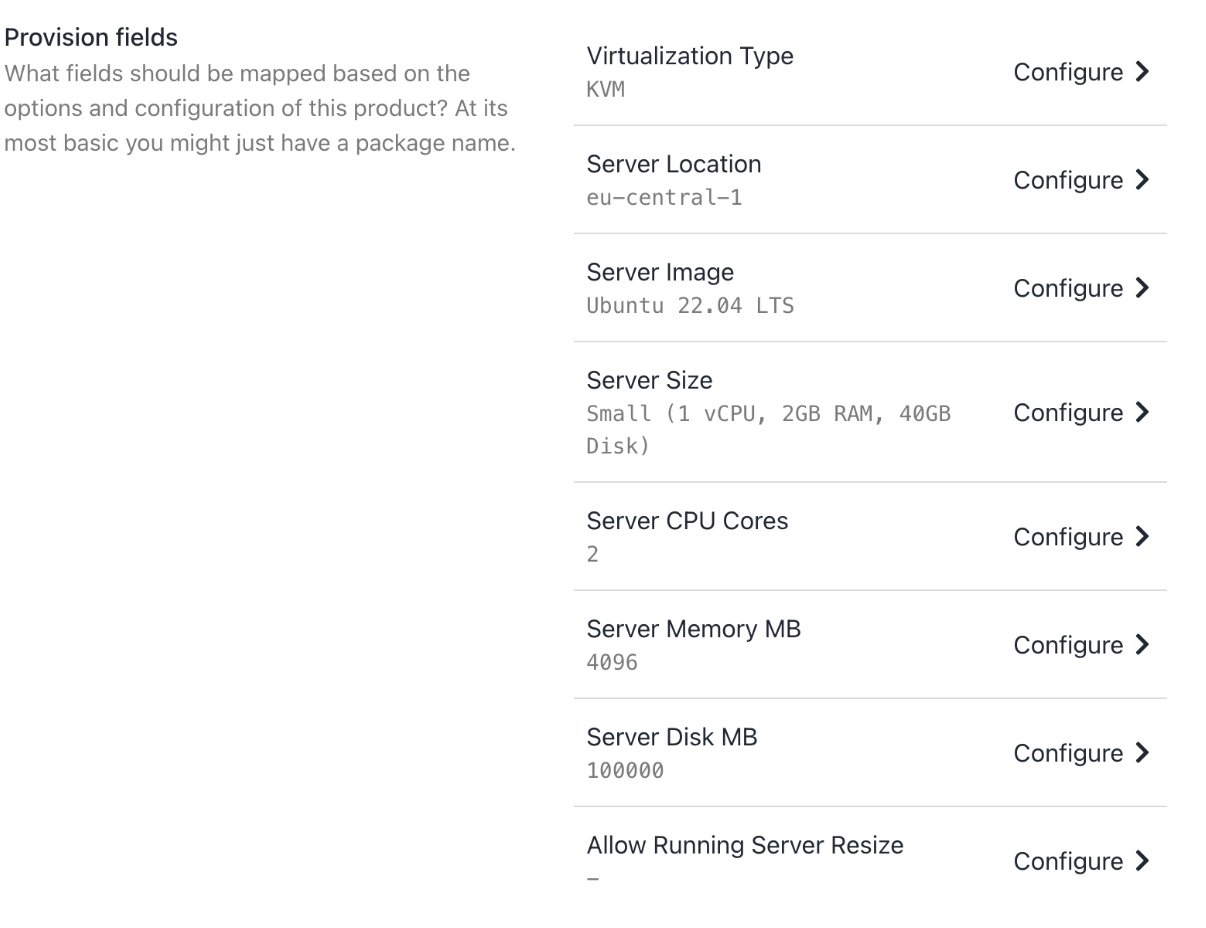
Provision fields
Manage client accounts and support
- Add clients manually under Clients > Add New.

Clients > Add New
- Associate clients with hosting packages and contracts to trigger correct billing and provisioning.
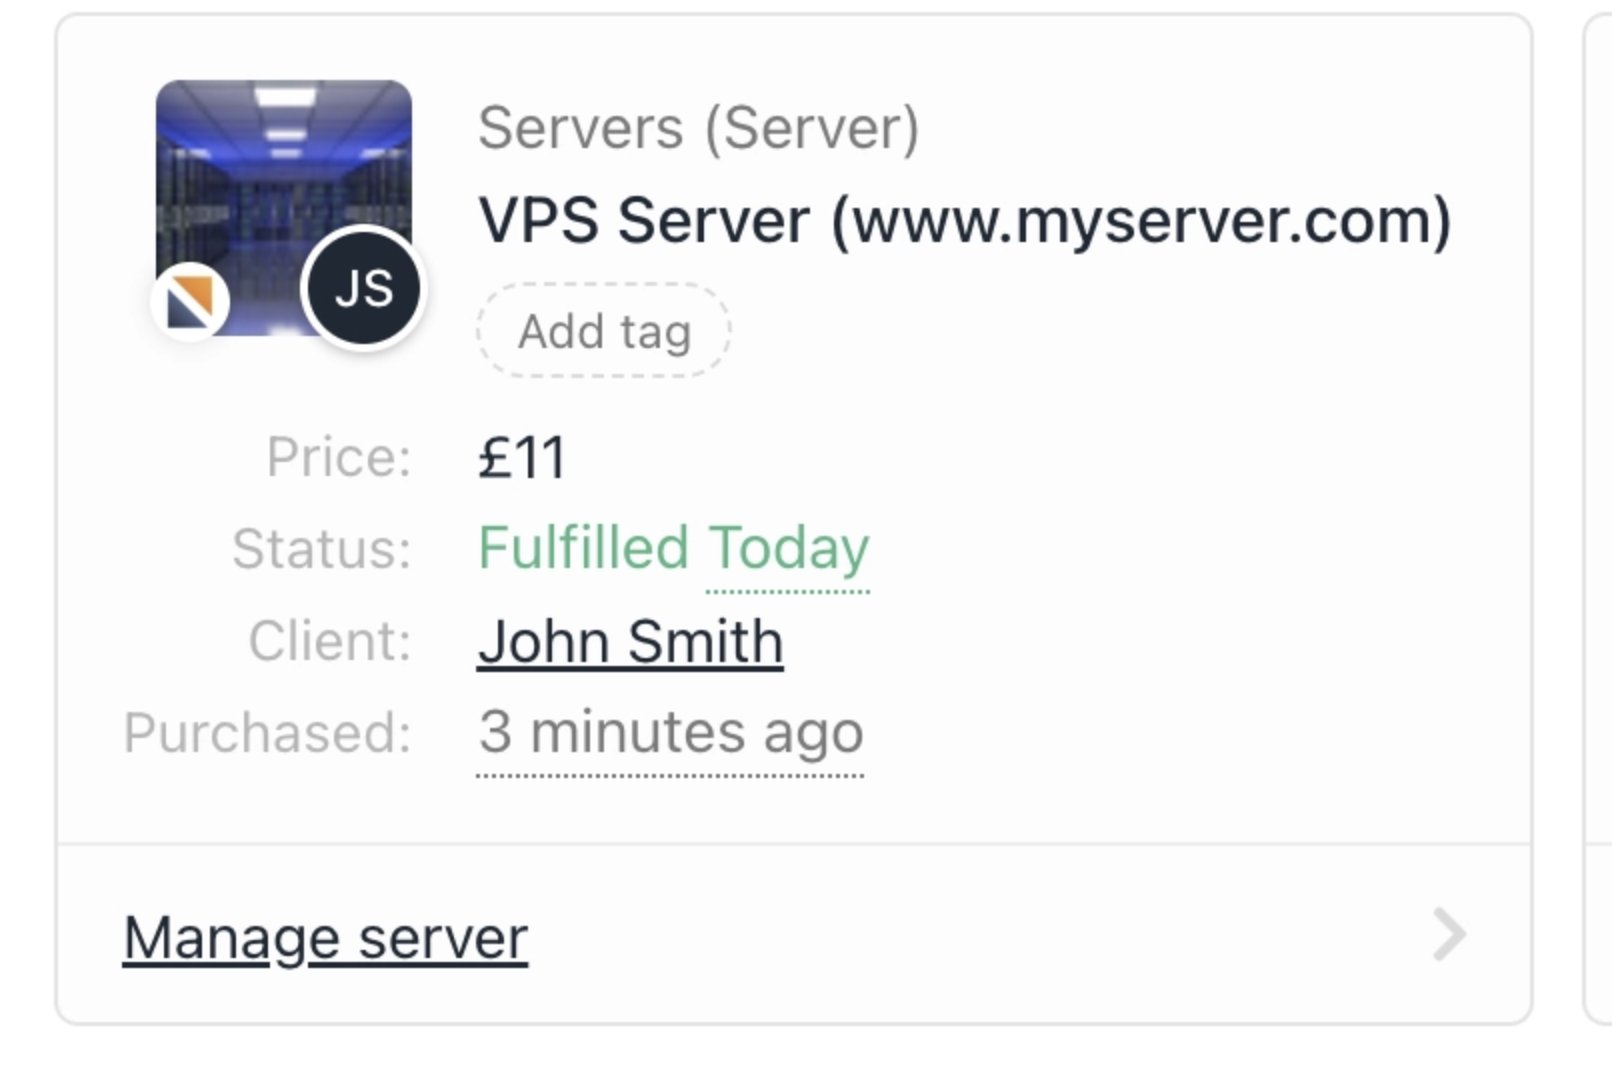
Client association
- You can configure email piping for support tickets by going to Settings > Support Departments under Branding and Customisation.
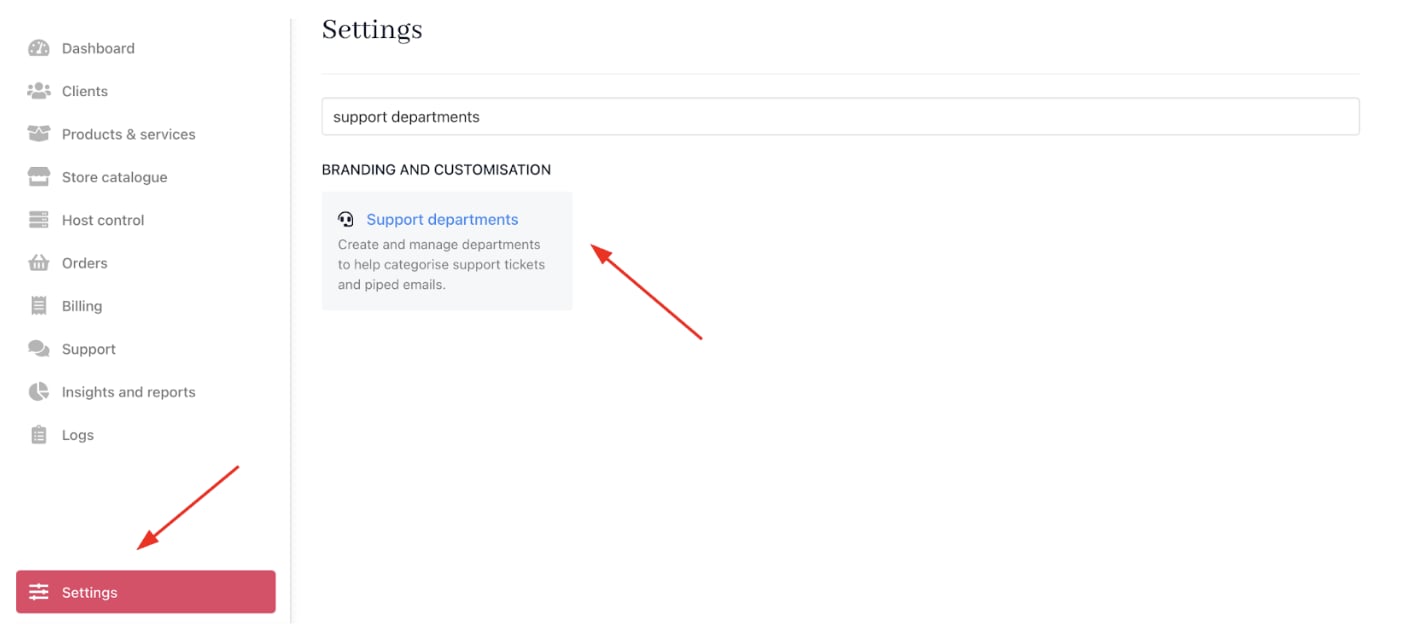
Settings > Branding and Customisation > Support Departments
- You can also implement Upmind’s built-in ticketing system to handle customer enquiries or technical support. Tickets link to client records for holistic case management.
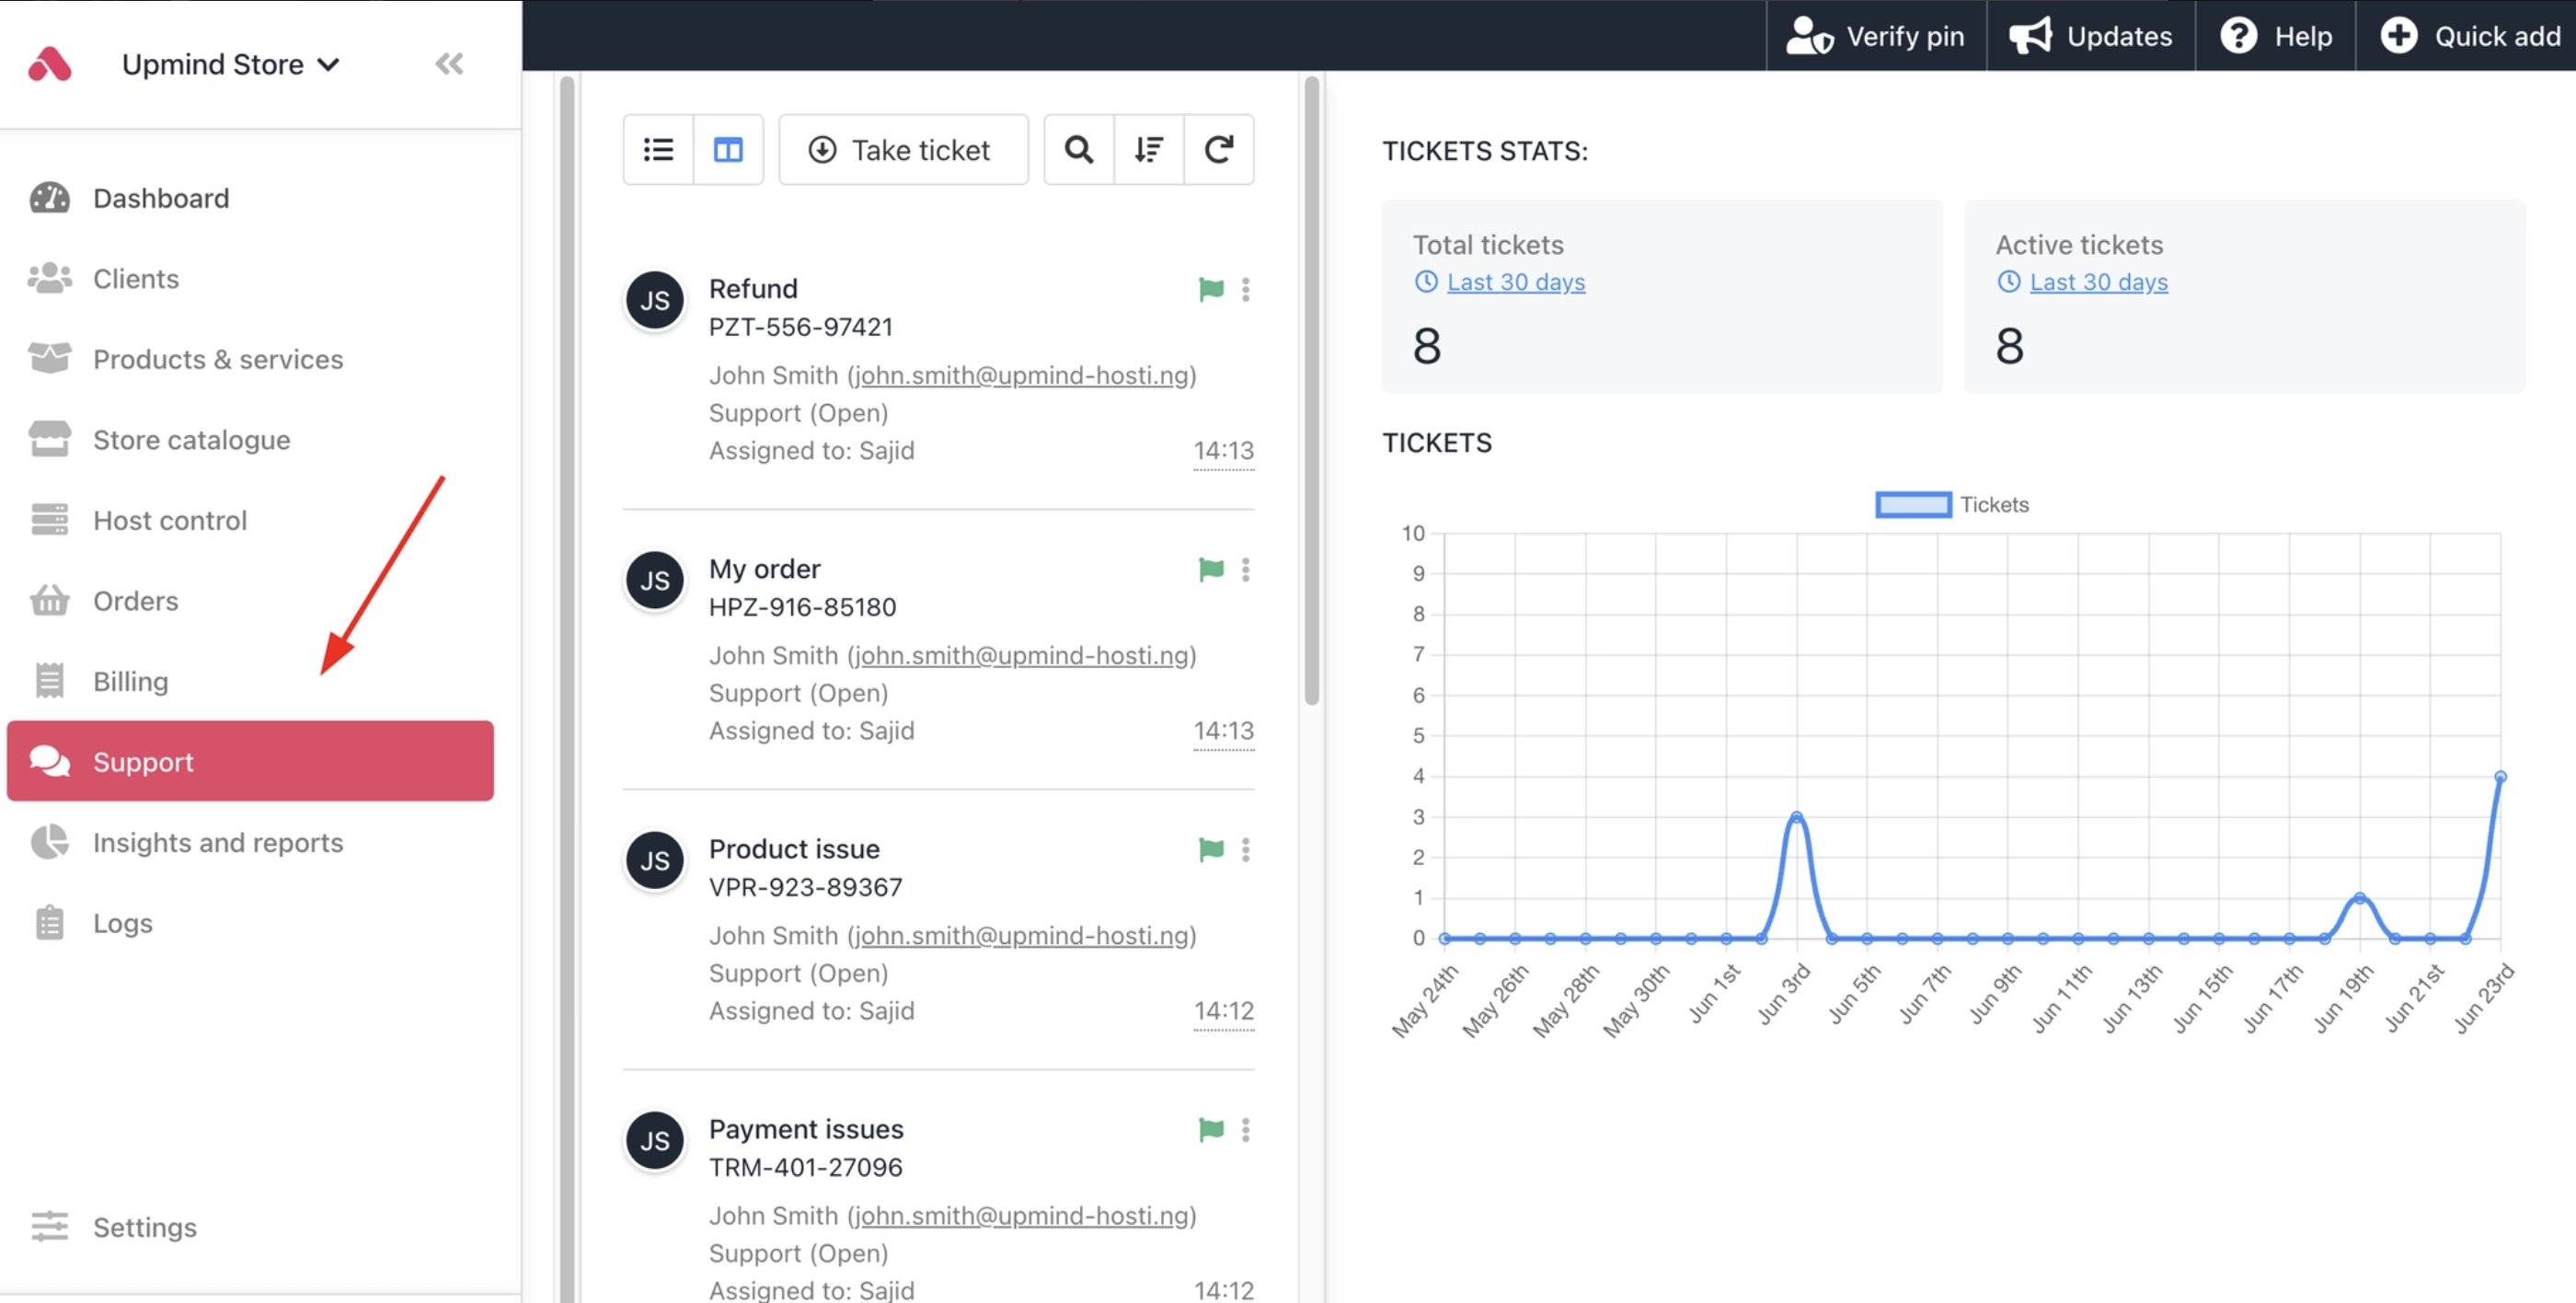
Support tickets
Launch your online store
- List hosting packages and additional services for customer self-service ordering.
- Customise pricing, offers, and promotions to attract new customers.
- Configure checkout flow, payment options, and communication templates.
- You can check the customer journey by impersonating a client and seeing the purchase process.
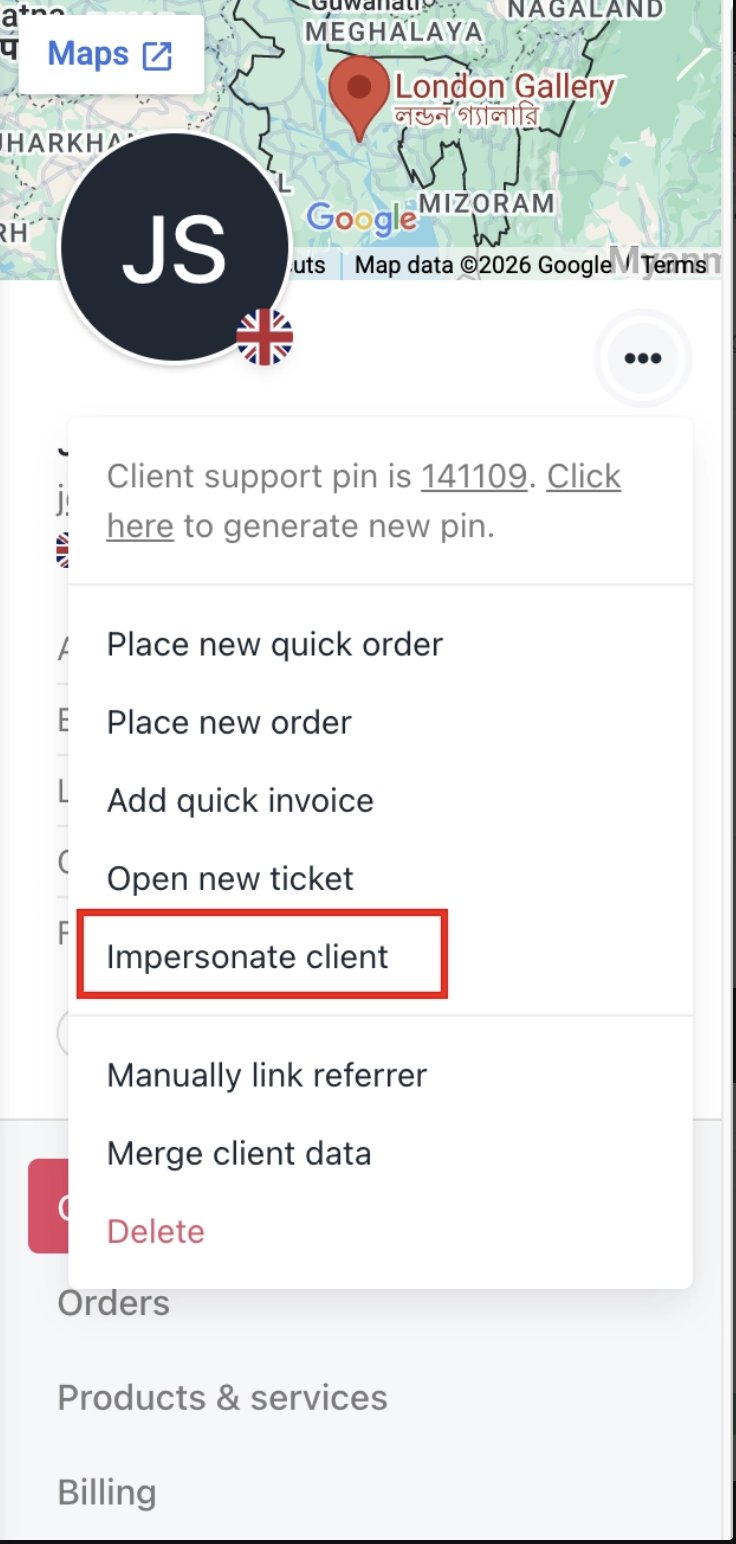
Impersonate clients
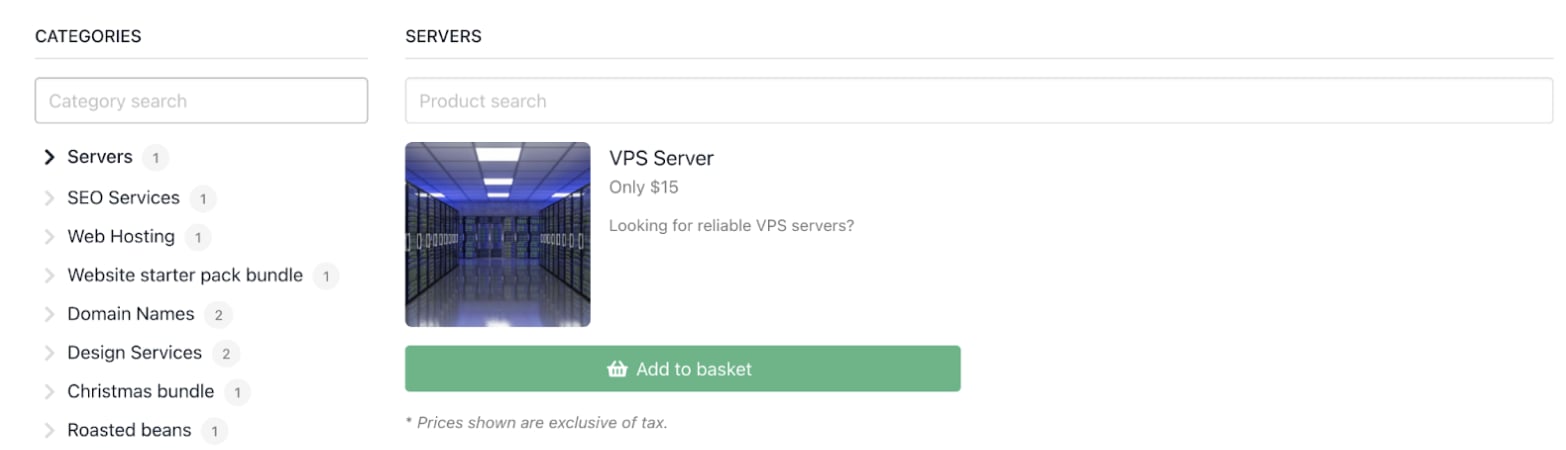
Customer journey
Use analytics and reporting to optimise your business
- Review Insights and Reports to track sales, client growth, revenue by product, churn, and LTV.
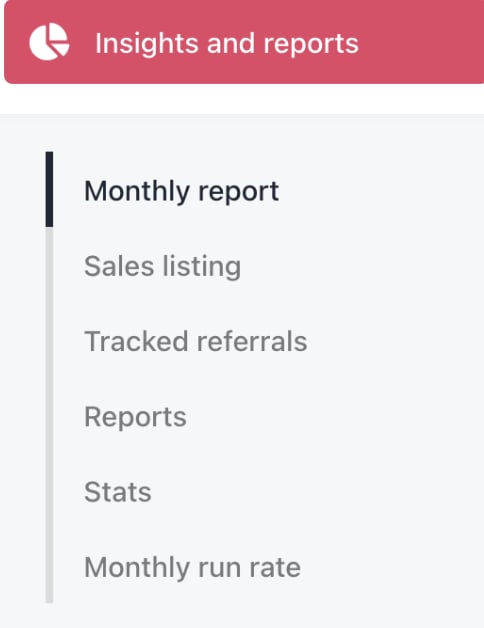
Insights and reports
- Monitor billing performance and customer payment behaviour from the Admin Dashboard.
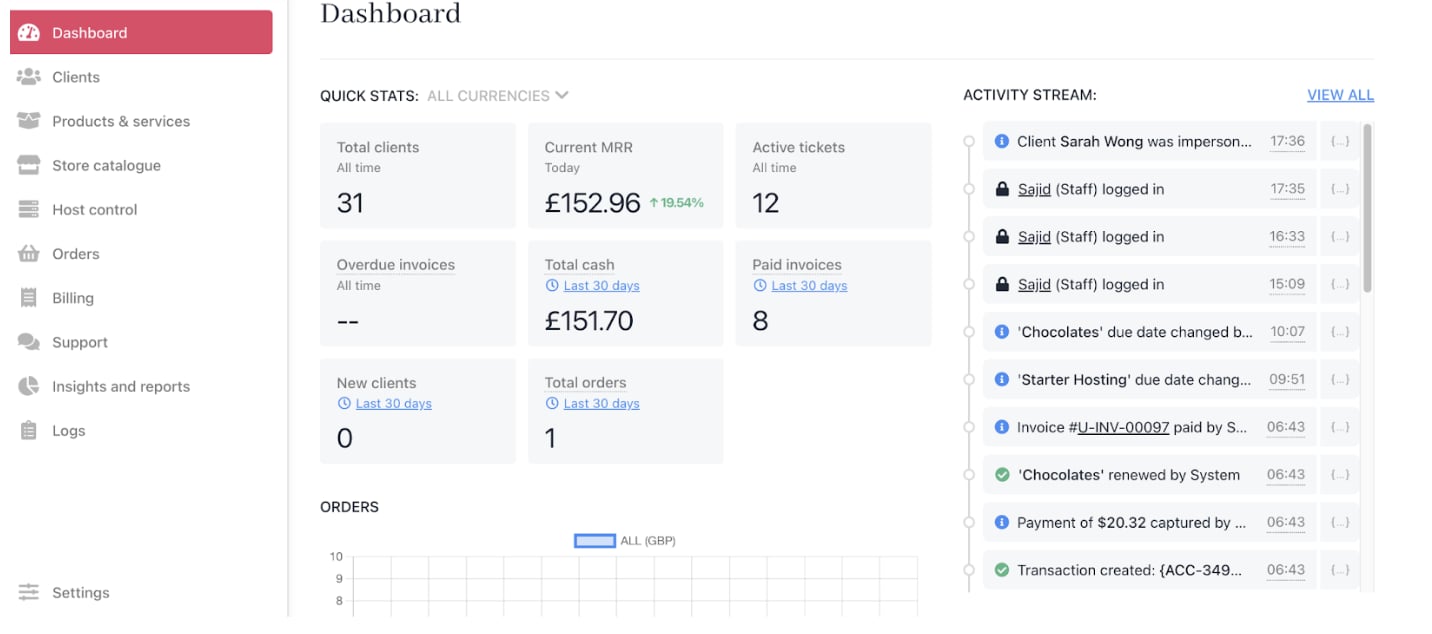
Admin dashboard
- Use Google Analytics and Tag Manager integrations to gain website and portal insights.
- Adjust pricing, marketing, or support strategies based on data.