

Managing notifications per email address
You can assign specific notification preferences to each email address on a client’s account, so the right updates go to the right contact. To set this up:- Go to Clients and open the client’s record.
- Navigate to Settings > Emails.
- Add a new email address. The address must be verified before notification preferences can be configured.
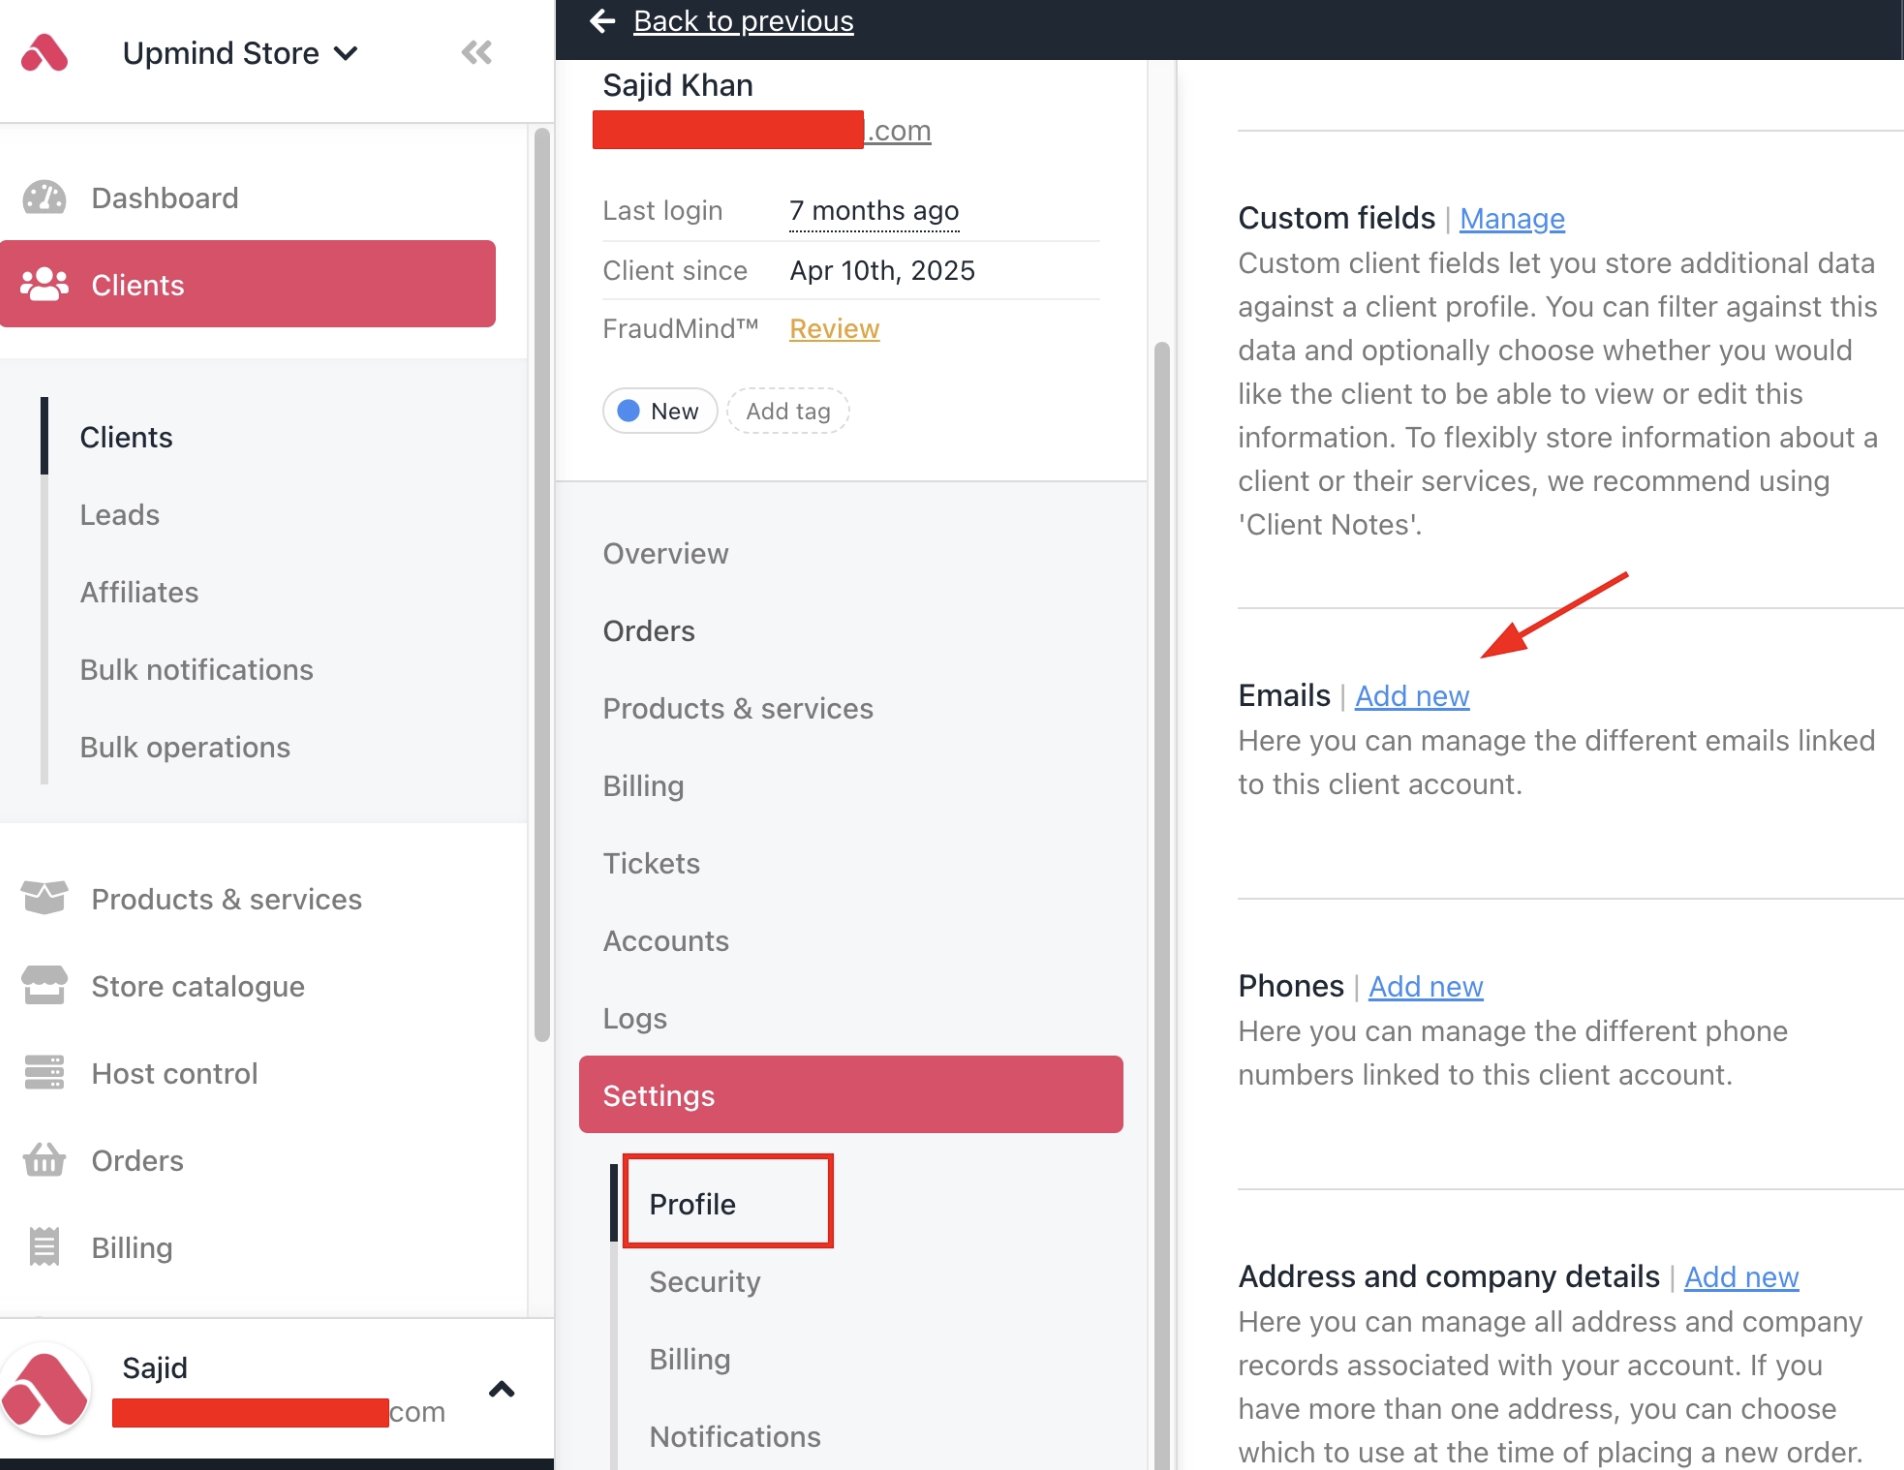
Settings > Emails > Add new
- Once verified, click the three dots next to the email address and select Manage Notifications.
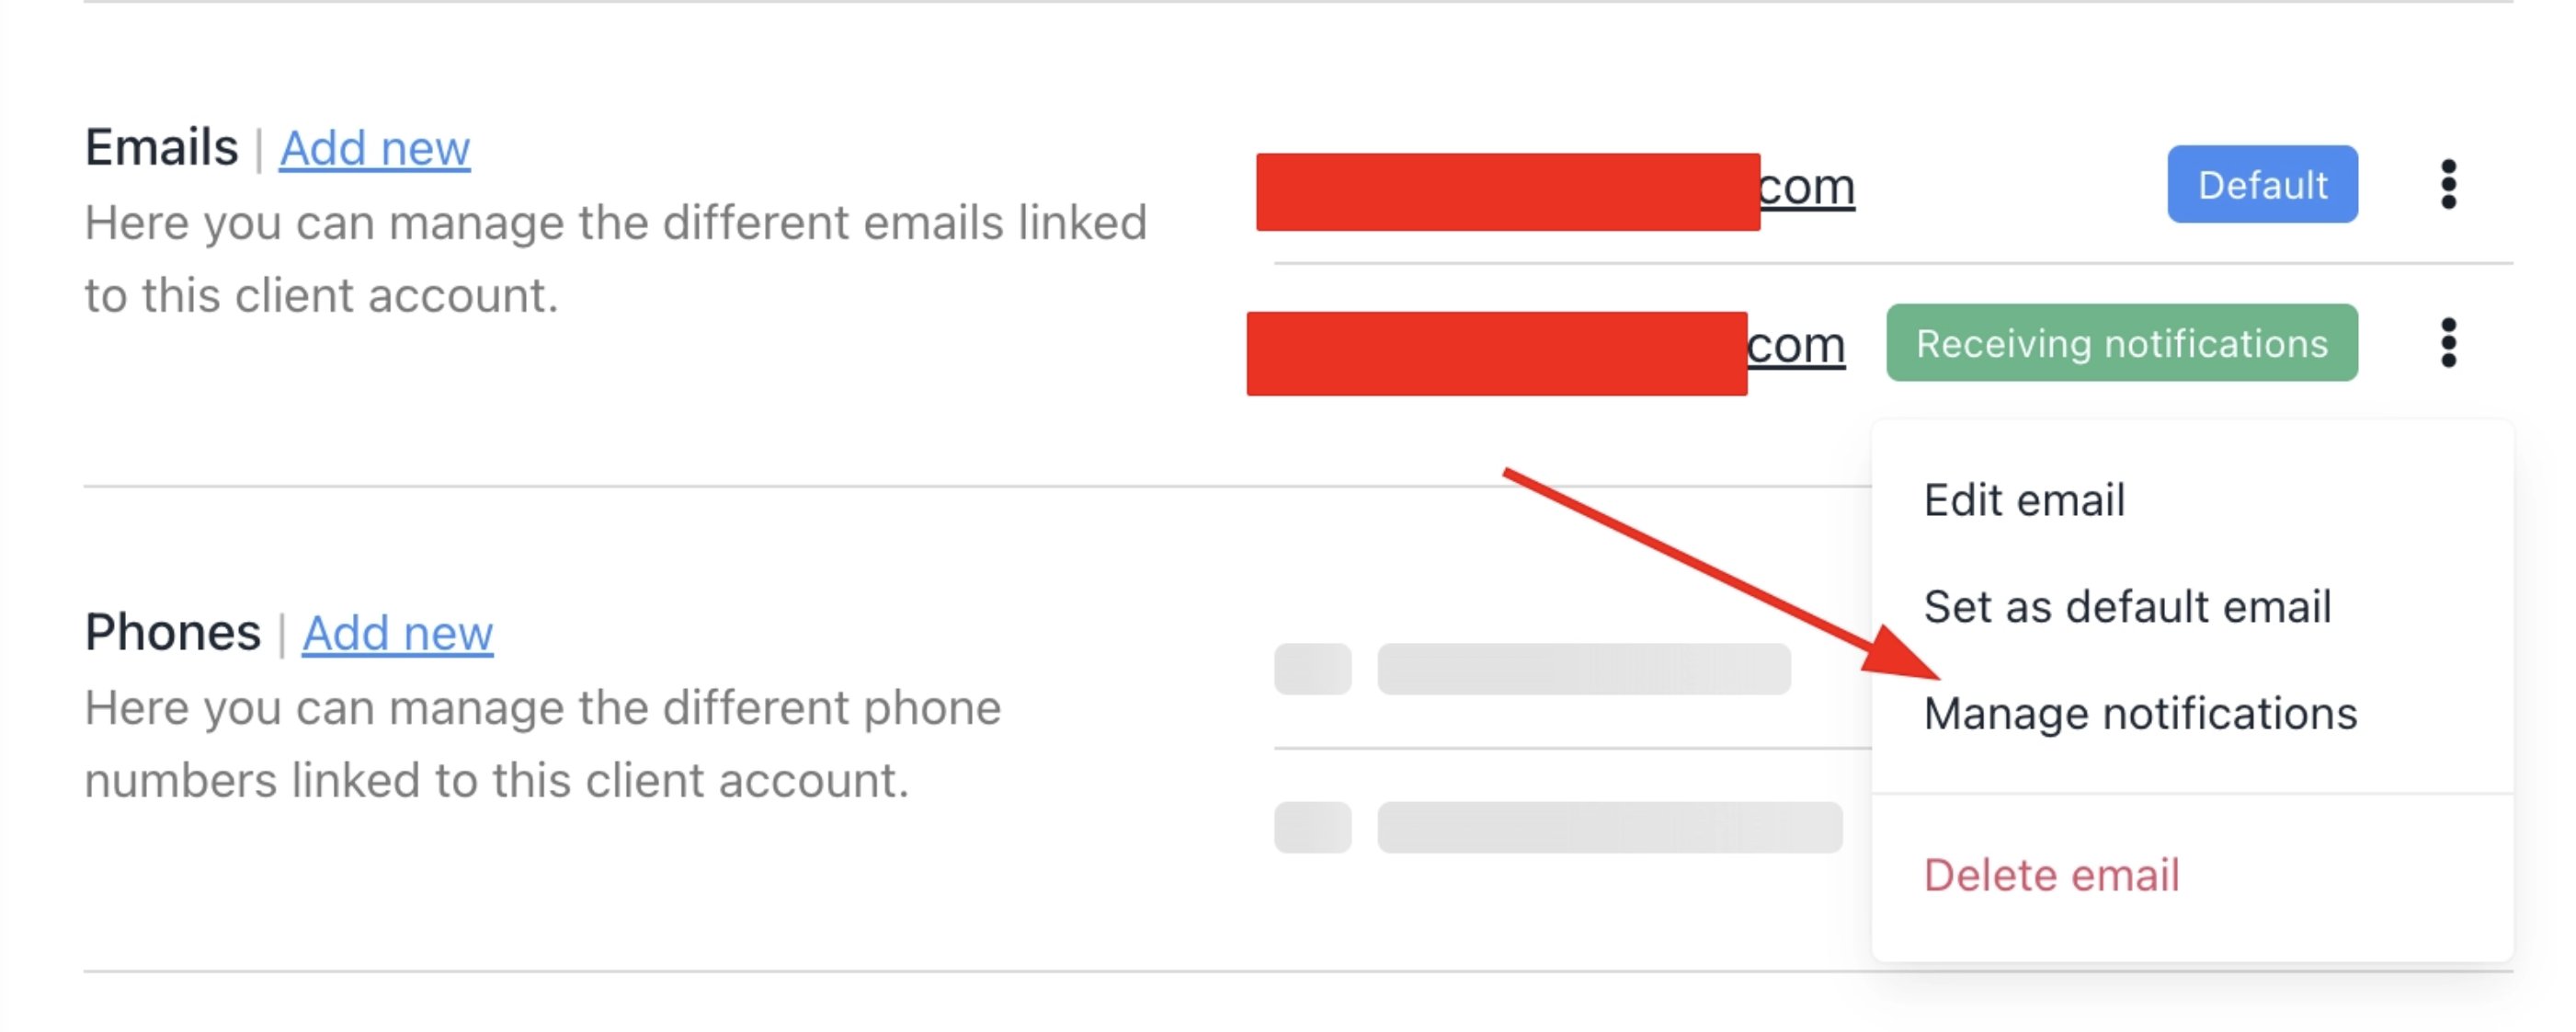
Click manage notifications
- Choose which notifications that address should receive across the following categories:
- Billing — Invoices, payment confirmations, and reminders.
- Marketing — Promotional and product updates.
- Support — Ticket activity and responses.
- Service Updates — Subscription and provisioning notifications.
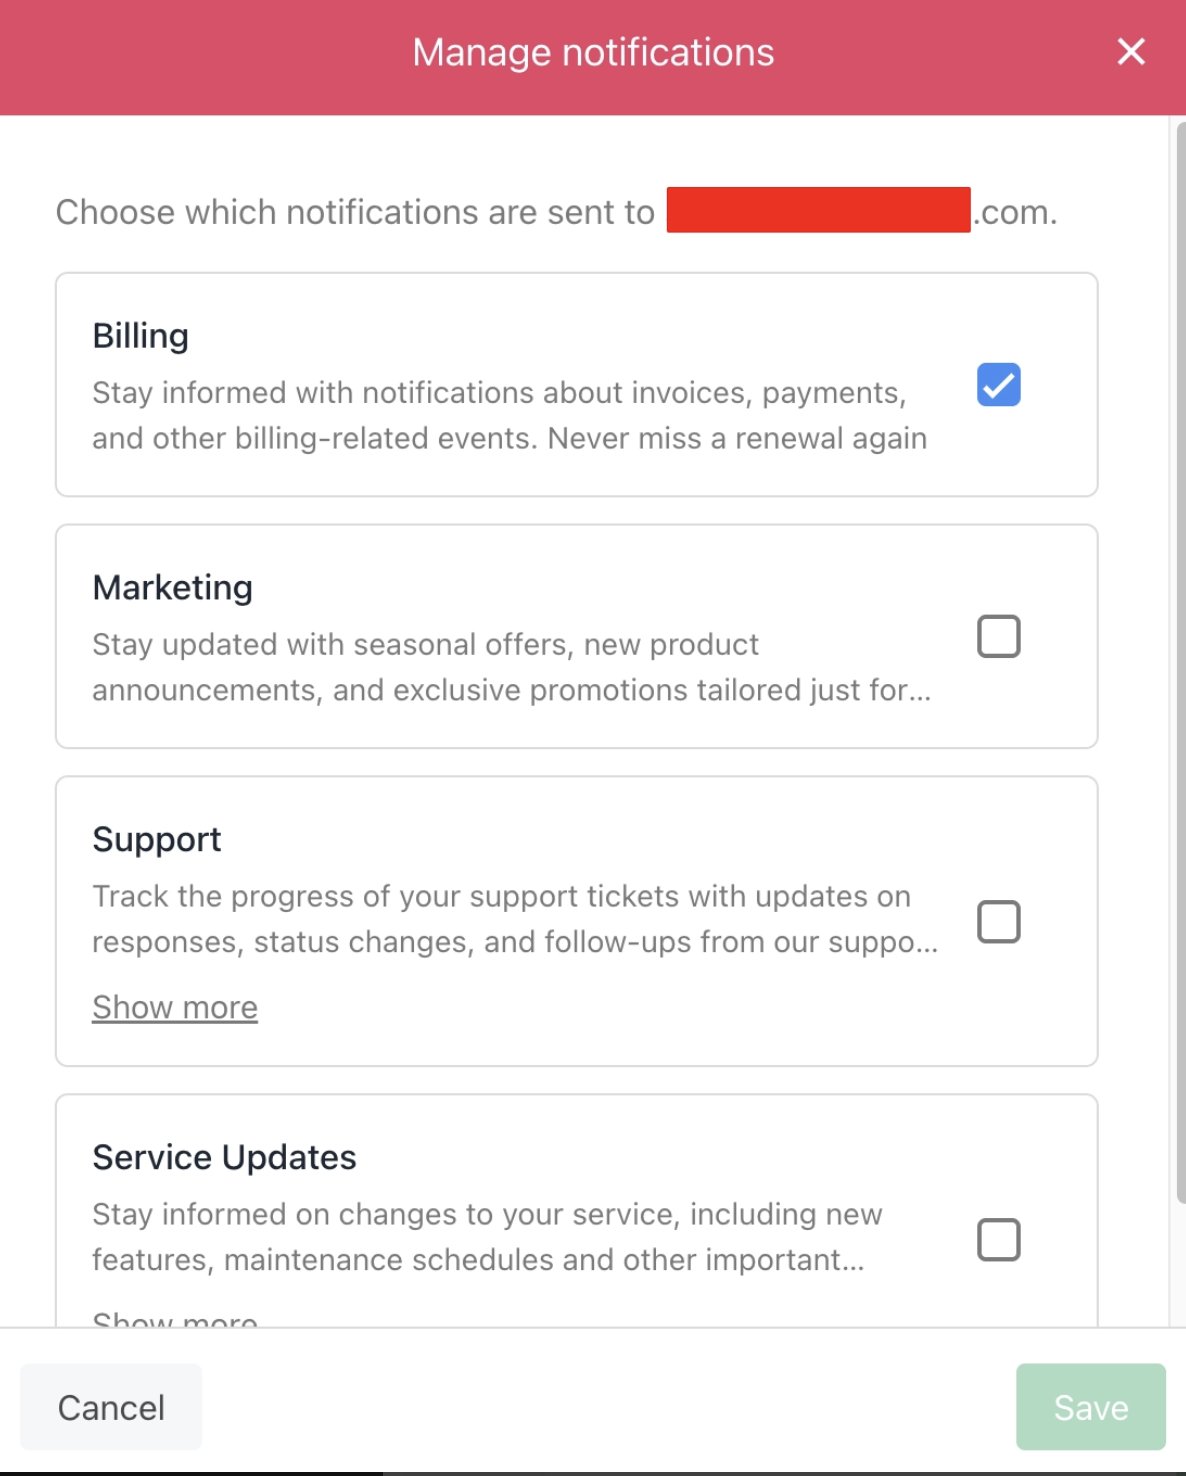
Manage notifications
Client area
From the client panel, go to My Account > Profile > Add new to add a new email.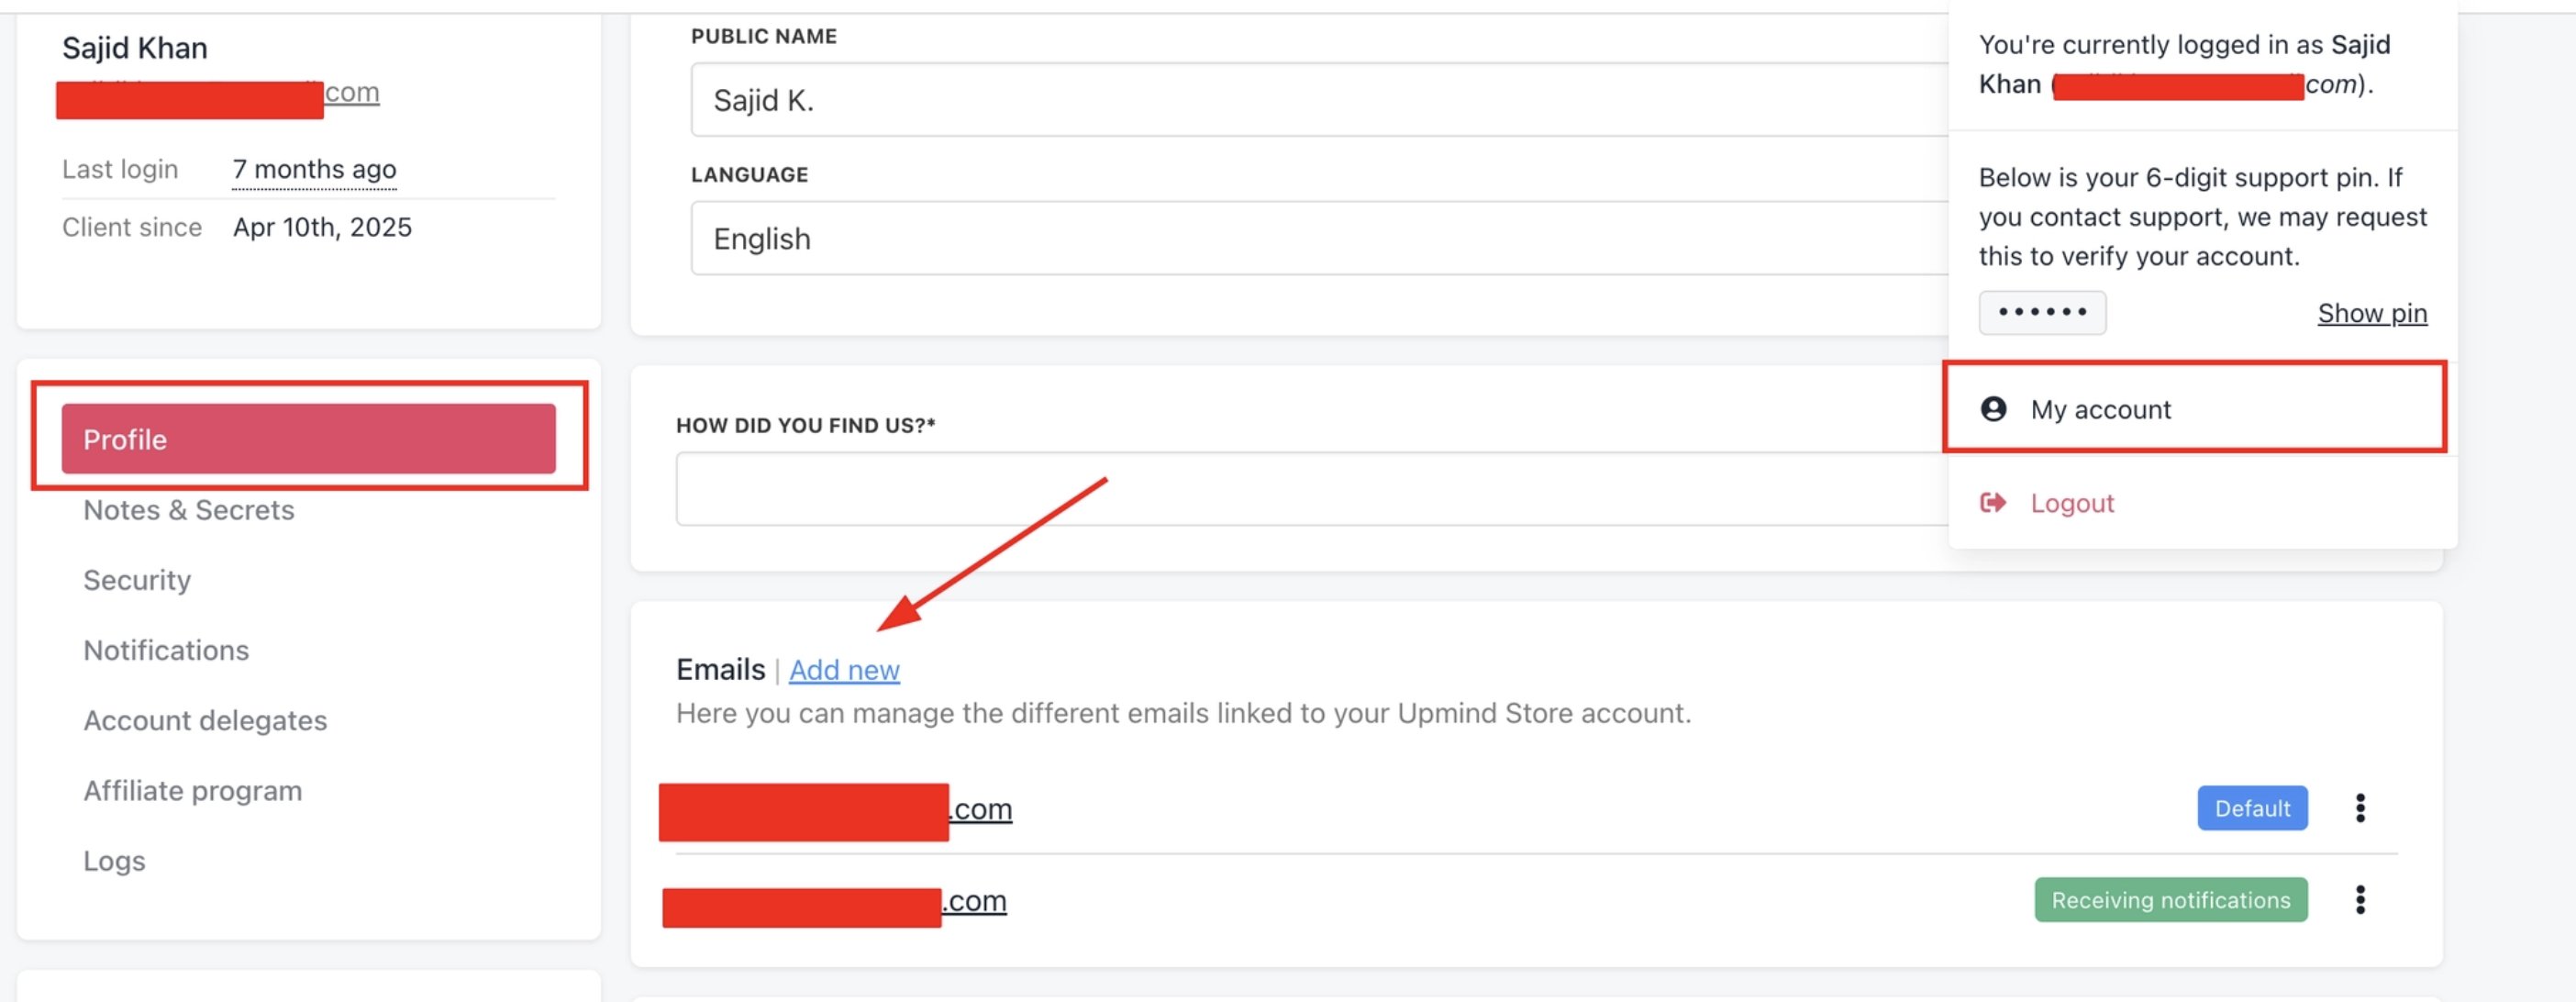
My Account > Profile > Add new
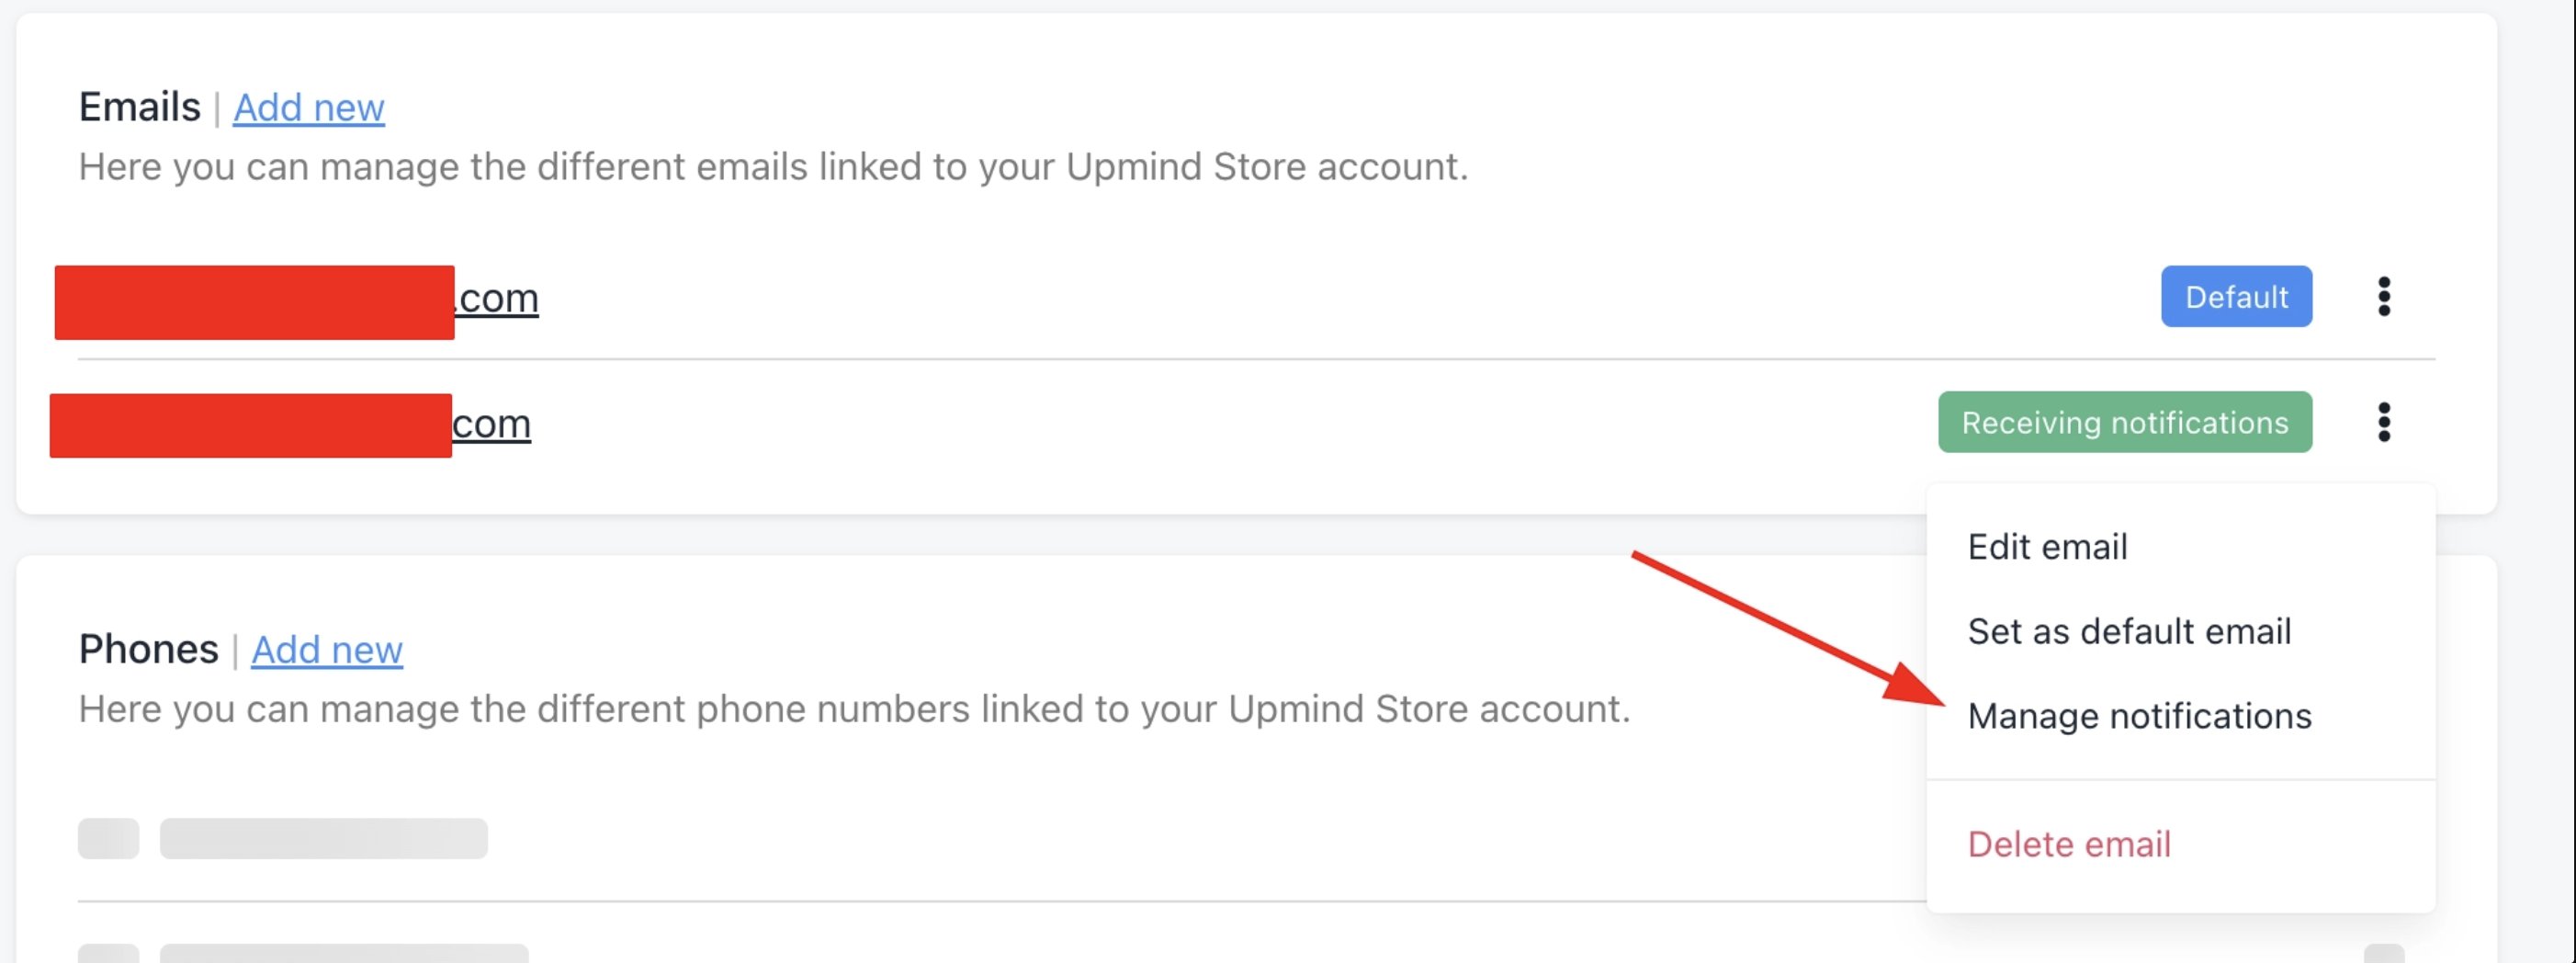
Manage notifications
Managing notifications from an email link
Notification recipients can manage their preferences or unsubscribe directly from a link included in any notification email, without needing to log in.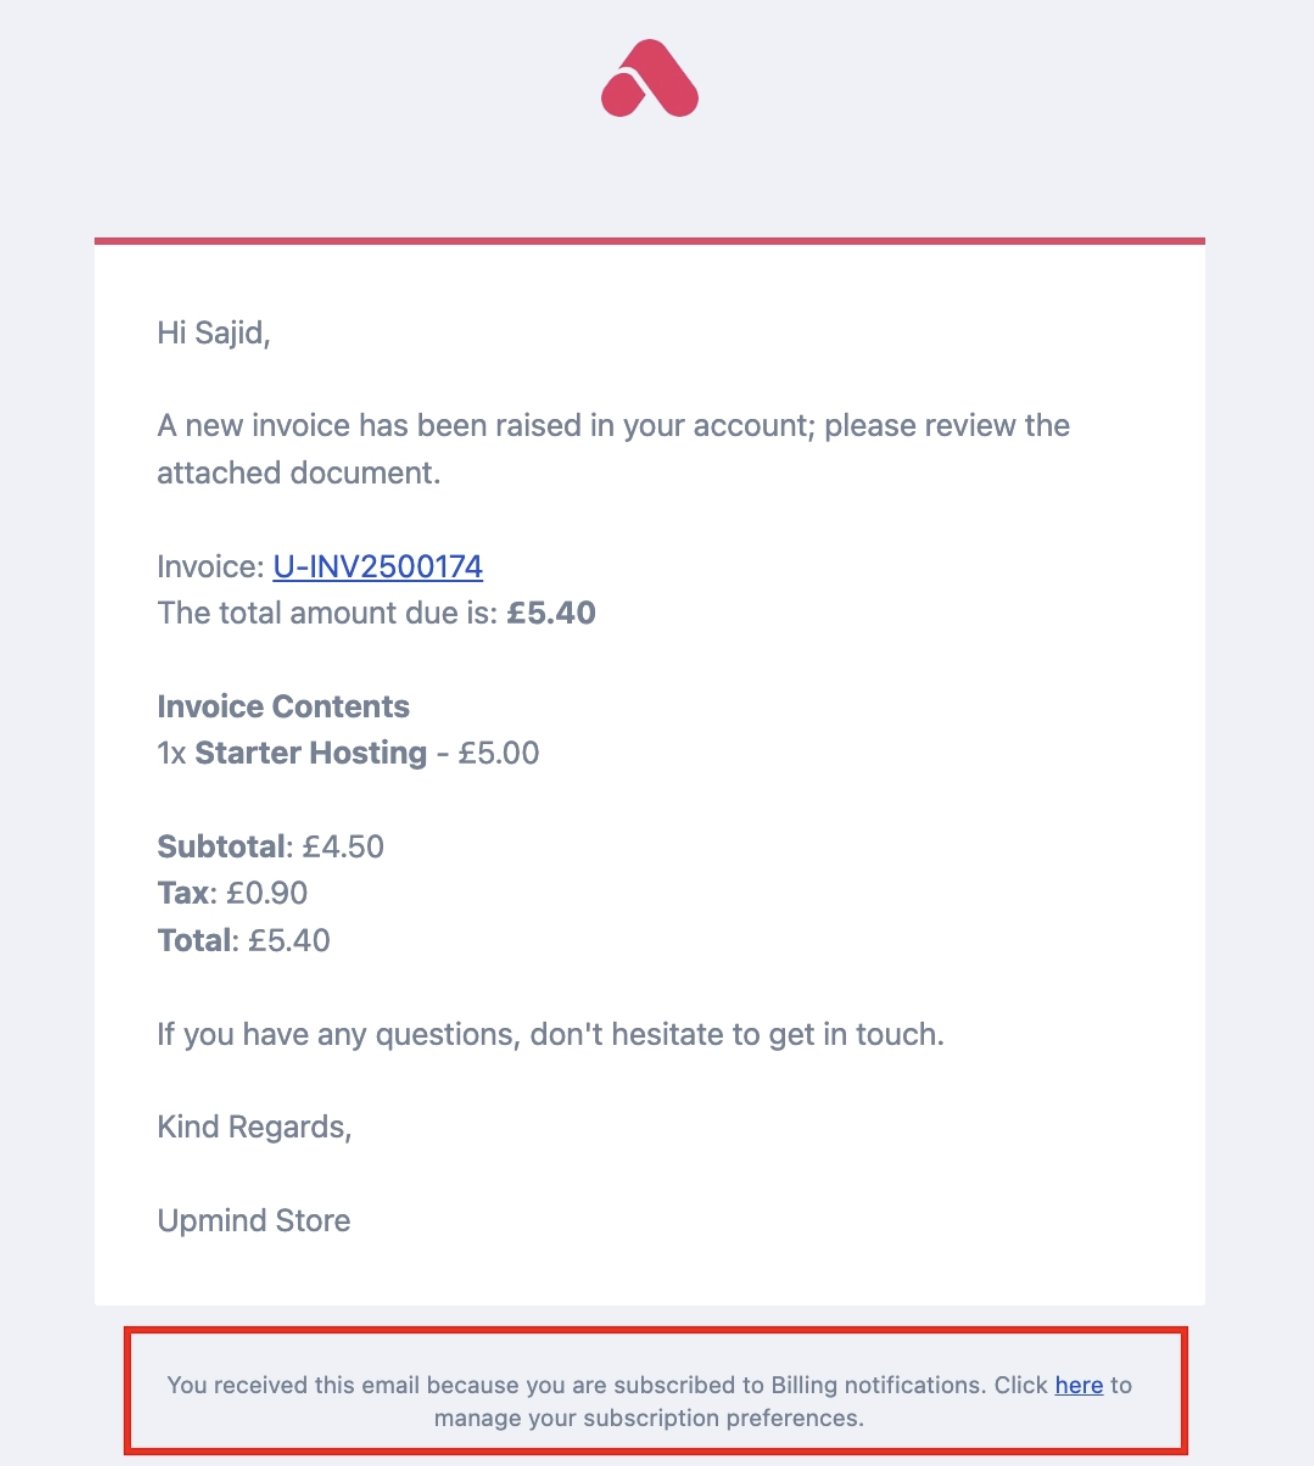
Manage subscription notifications
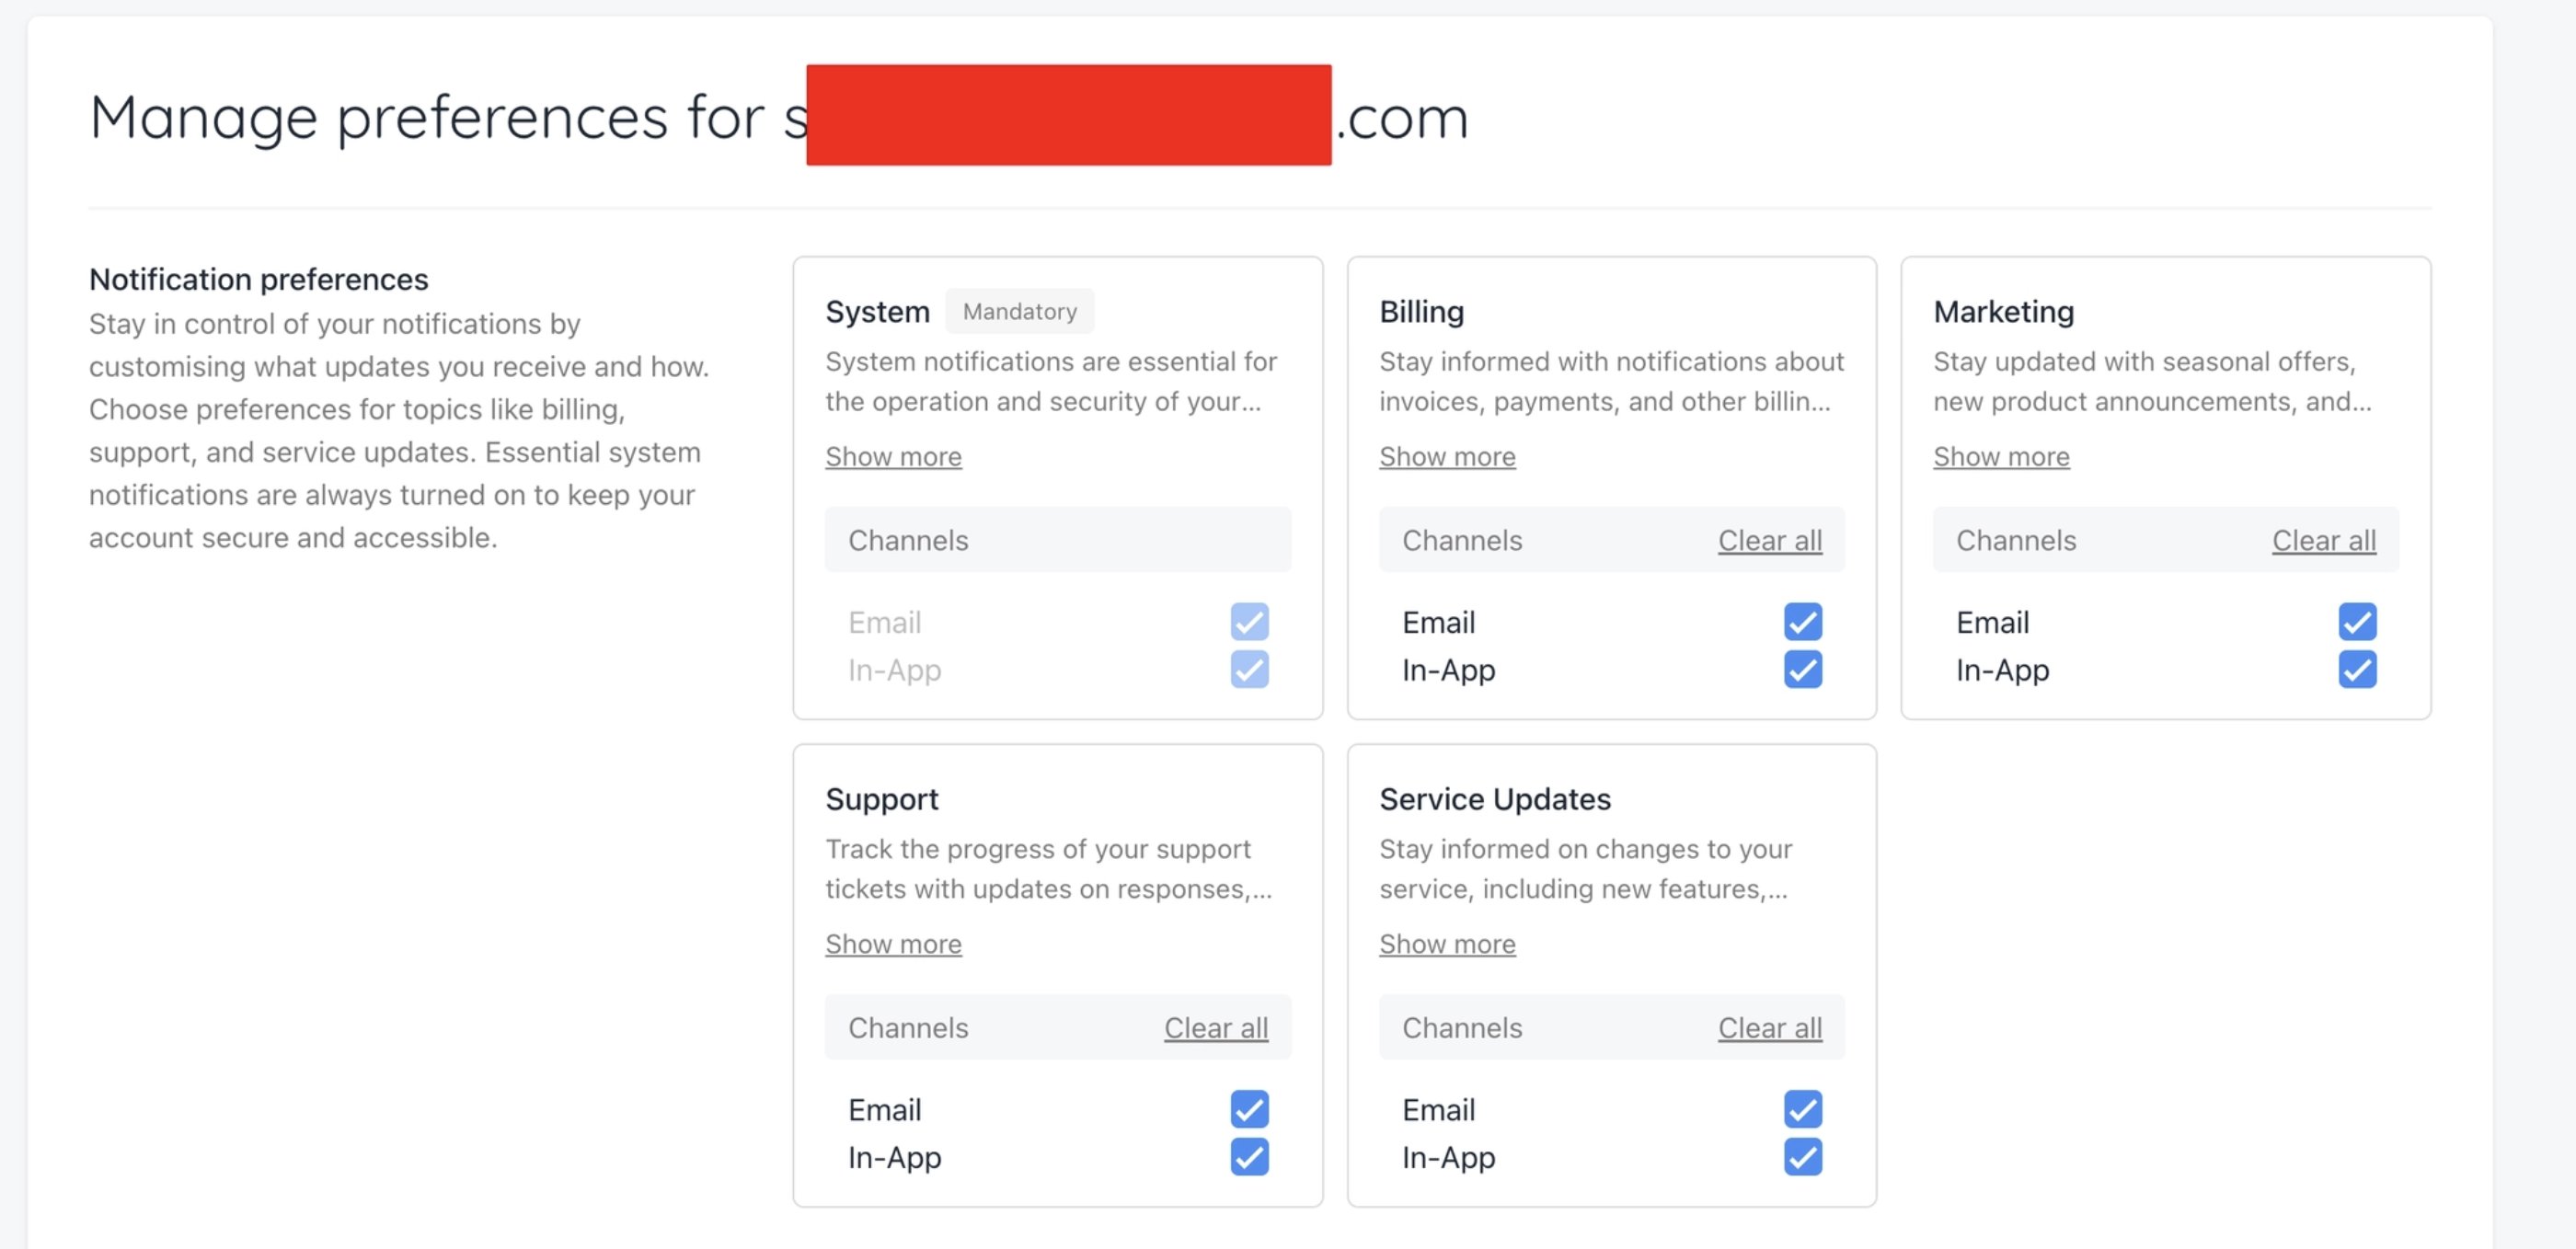
Notification preferences