Enabling the Support PIN
In a world of spoofing, phishing, spam, and bots, it makes sense to add a layer of security to your support system. That’s why we brought a support PIN to Upmind. With a few clicks, you can protect your clients, reduce time spent on dead-end support requests, and allocate scarce resources to real clients who need help. This article explains how to enable and use this feature.Enabling the support PIN
- Log in to your admin account.
- Click Settings.
- On the Settings page, click the Service desk tile.
- Scroll down the Service desk page to the Support heading.
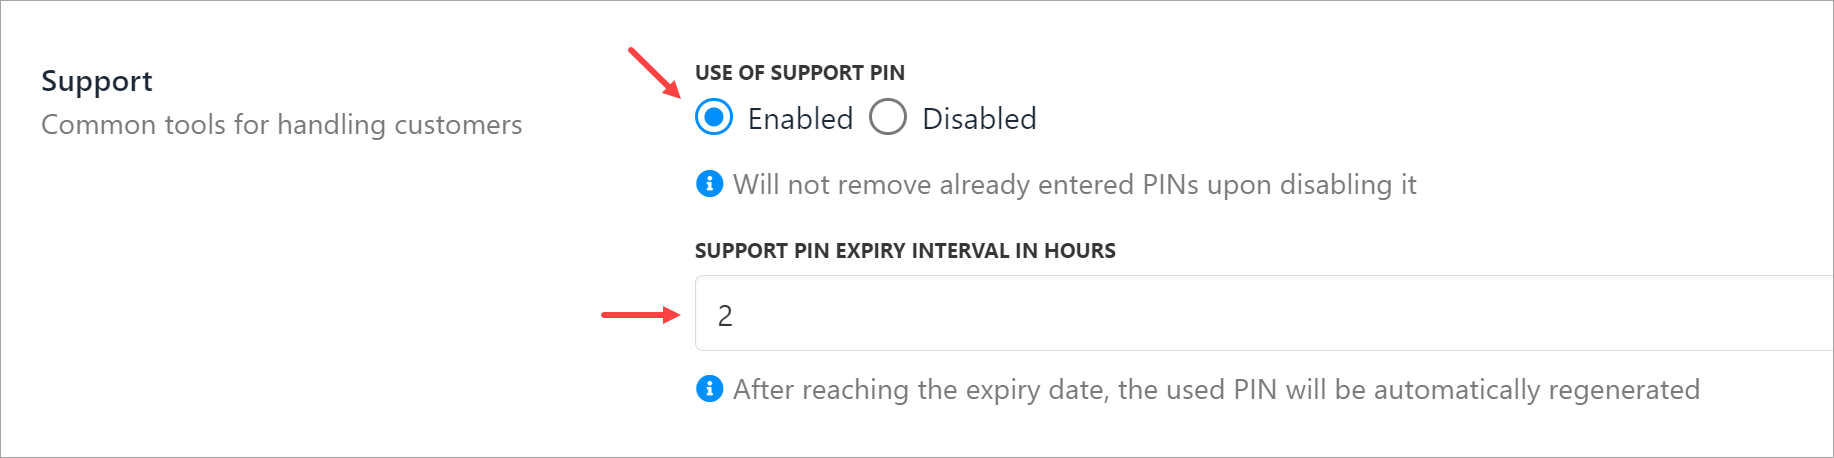
- Switch on the USE OF SUPPORT PIN toggle.
- Enter a number in the interval field (in hours) to auto-generate a new PIN.
- Click Save.
UI changes
After you click Save, Upmind implements two UI changes. On the admin side, Upmind adds a Verify pin tab to the top menu bar. Click this tab when you want to verify a client PIN.
Verifying a PIN
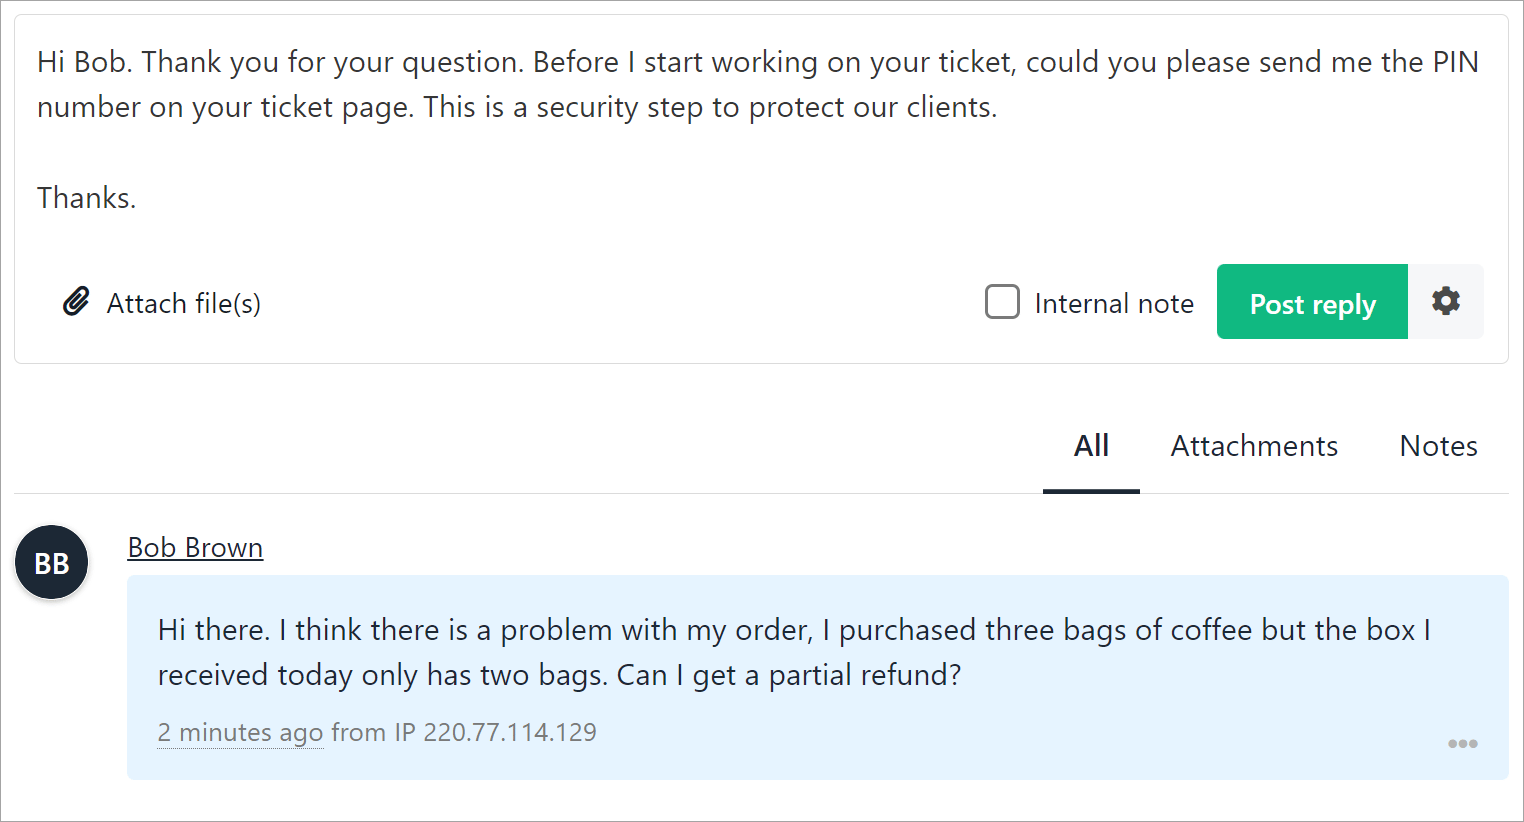
There are many ways to verify a client with the support PIN. You could use it during a live chat, when handling a support ticket, or even during a live phone call. The use case below demonstrates the communication flow in response to a client ticket.- The admin (or user) opens a ticket and asks the client to send the PIN.
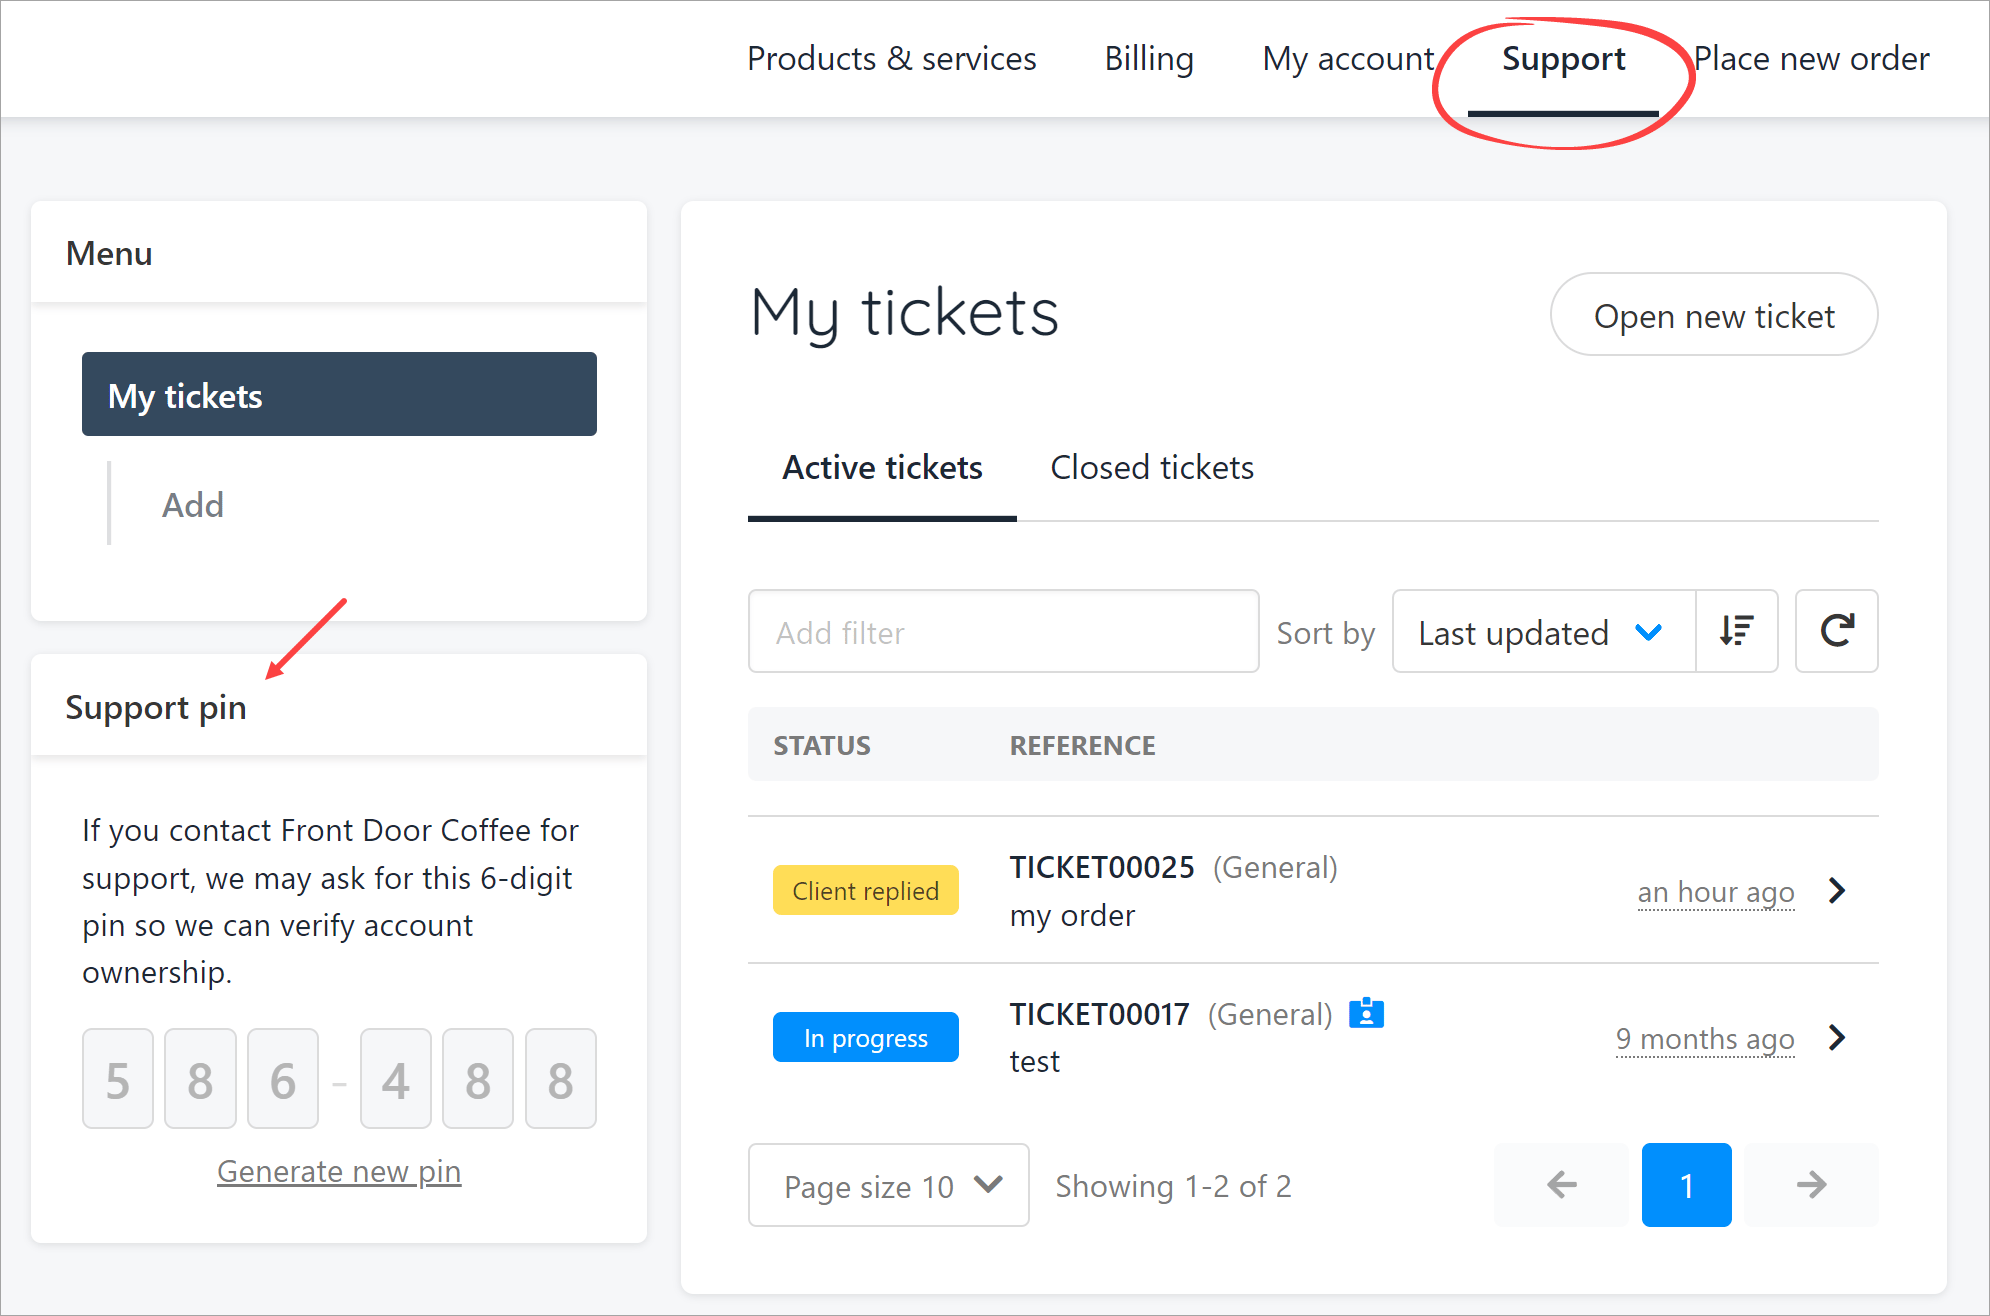
- The client locates the number and sends the PIN in a response post.
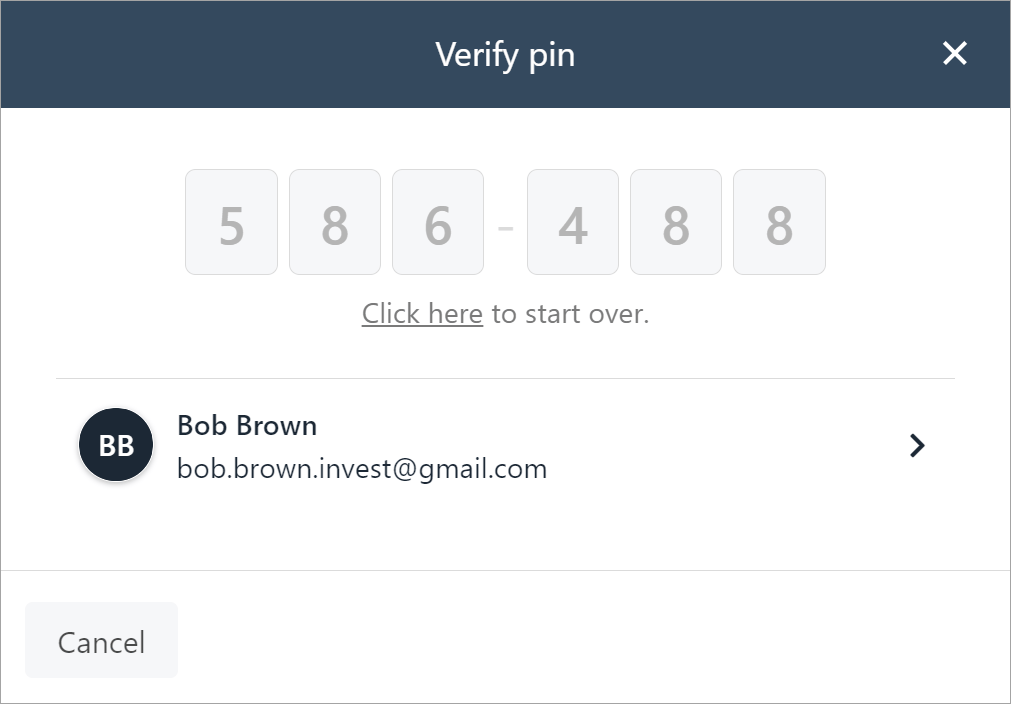
- The admin copies the number, clicks the Verify Pin tab, and pastes the six digits into the box.
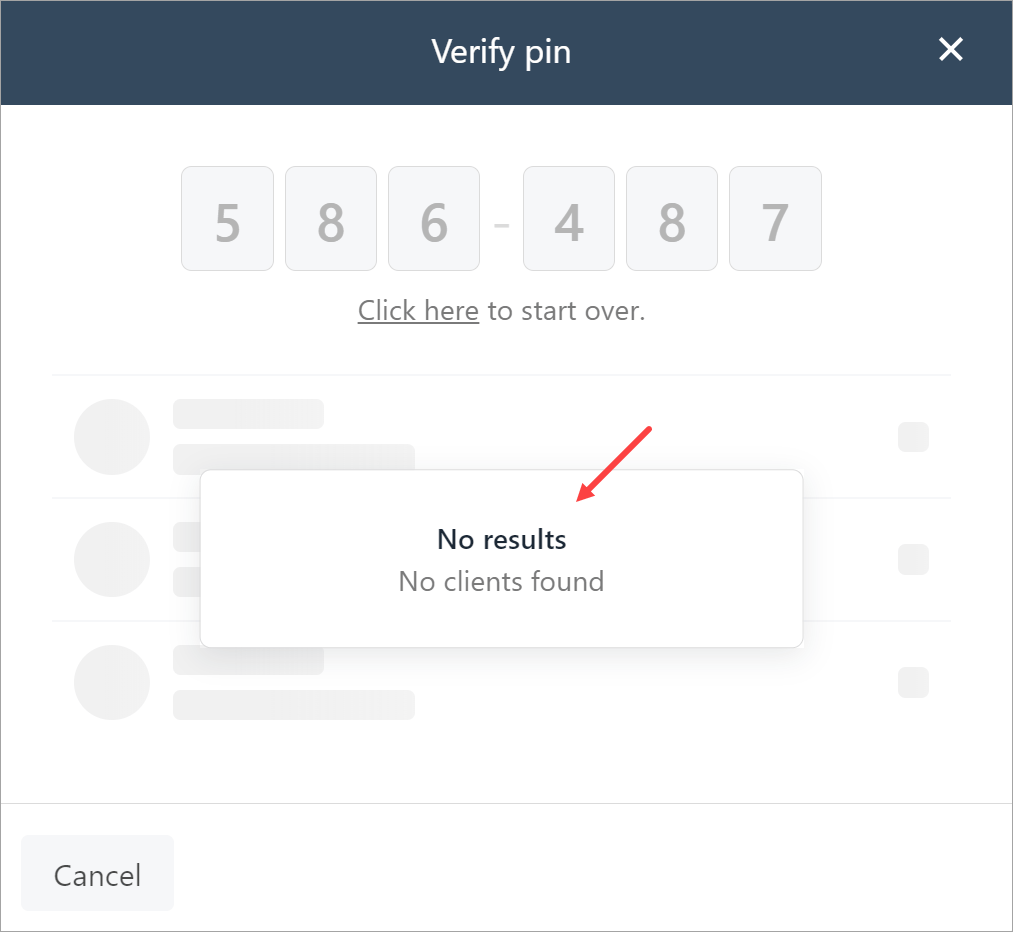
Failed verification
If the PIN verification fails, Upmind displays a No results window. At this point, you could ask the client to re-generate the PIN and try again. One more failure likely means the client is not an account holder and does not require support resources.