> ## Documentation Index
> Fetch the complete documentation index at: https://docs.upmind.com/llms.txt
> Use this file to discover all available pages before exploring further.
# How to Create Products
> Learn how to add products or services to your e-commerce Upmind store. You can also upload product images and set bulk order settings. Check Now!
Creating products or services allows customers to purchase them.
**Example**: A hosting company might sell starter hosting services.
Creating a product involves five key steps:
1. Build a category hierarchy.
2. Add products within categories.
3. Set [product billing](/using-upmind/product-management/how-to-add-product-billing#/).
4. Customise [product options](/using-upmind/product-management/how-to-add-product-options#/).
5. Set [product attributes](/using-upmind/product-management/how-to-add-product-attributes#/).
## Access the product catalogue
1. Log in to the Upmind dashboard.
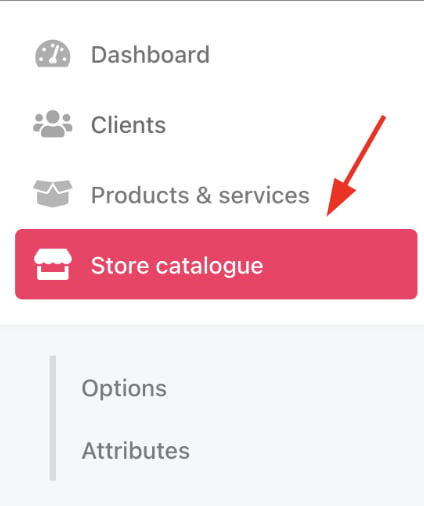
2. Access it from the dashboard by clicking on **Store Catalogue**.
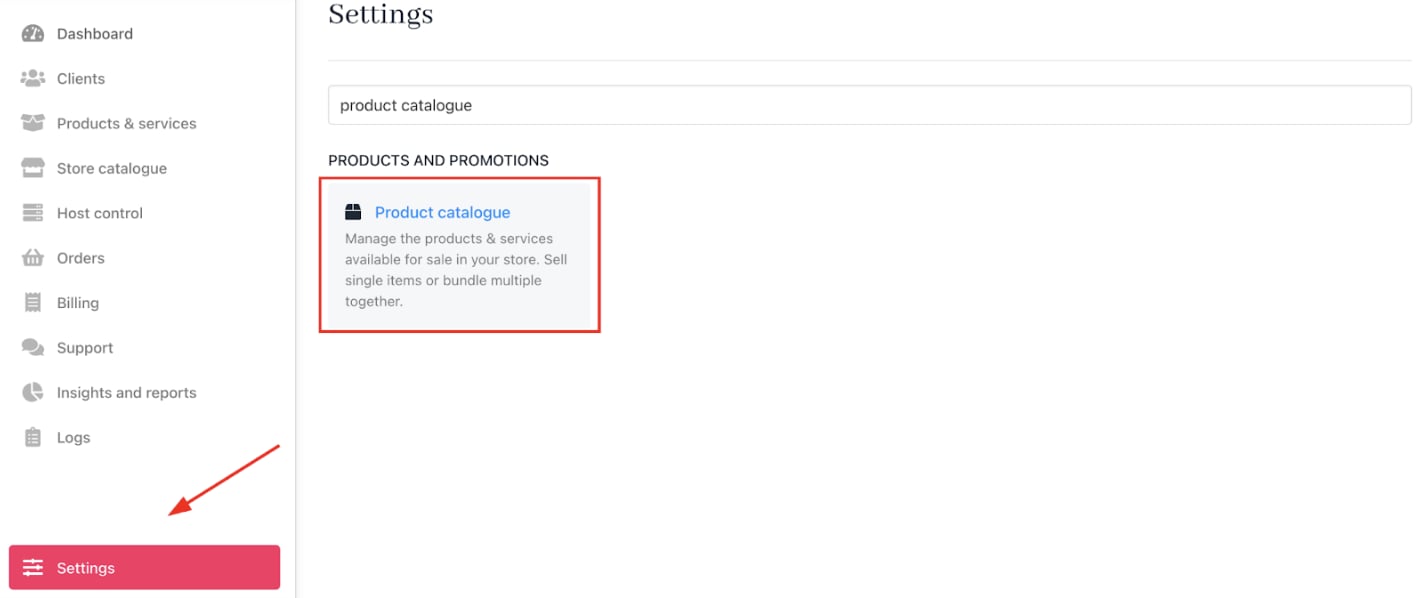
 3. You can also click **Settings** and select the **Product Catalogue** tile under **Products and Promotions**.
 ## Creating categories
Categories help you organise your products and can be edited at any time.
### Add a new category
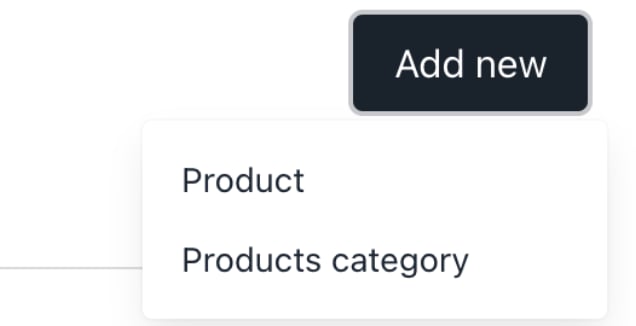
1. On the Product Catalogue page, click **Add New**.
2. Choose **Products category**.
## Creating categories
Categories help you organise your products and can be edited at any time.
### Add a new category
1. On the Product Catalogue page, click **Add New**.
2. Choose **Products category**.
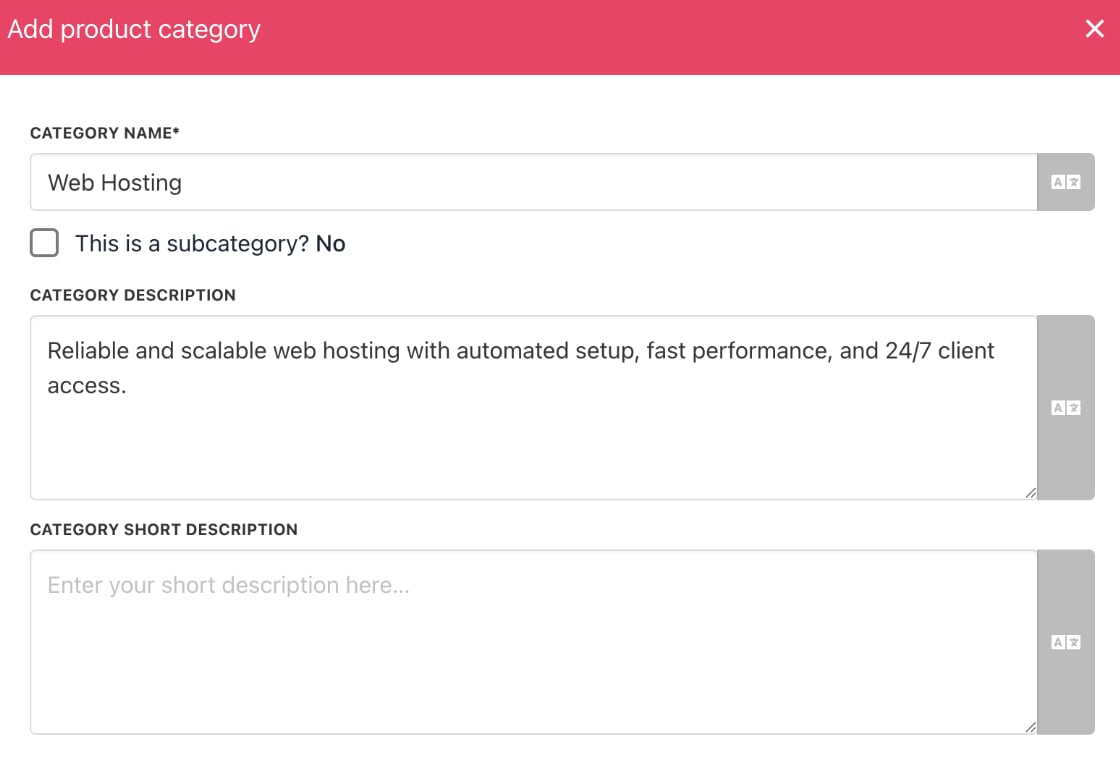
 3. Enter a unique category name.
4. Add a category description (visible to website visitors).
5. Click **Create**.
3. Enter a unique category name.
4. Add a category description (visible to website visitors).
5. Click **Create**.
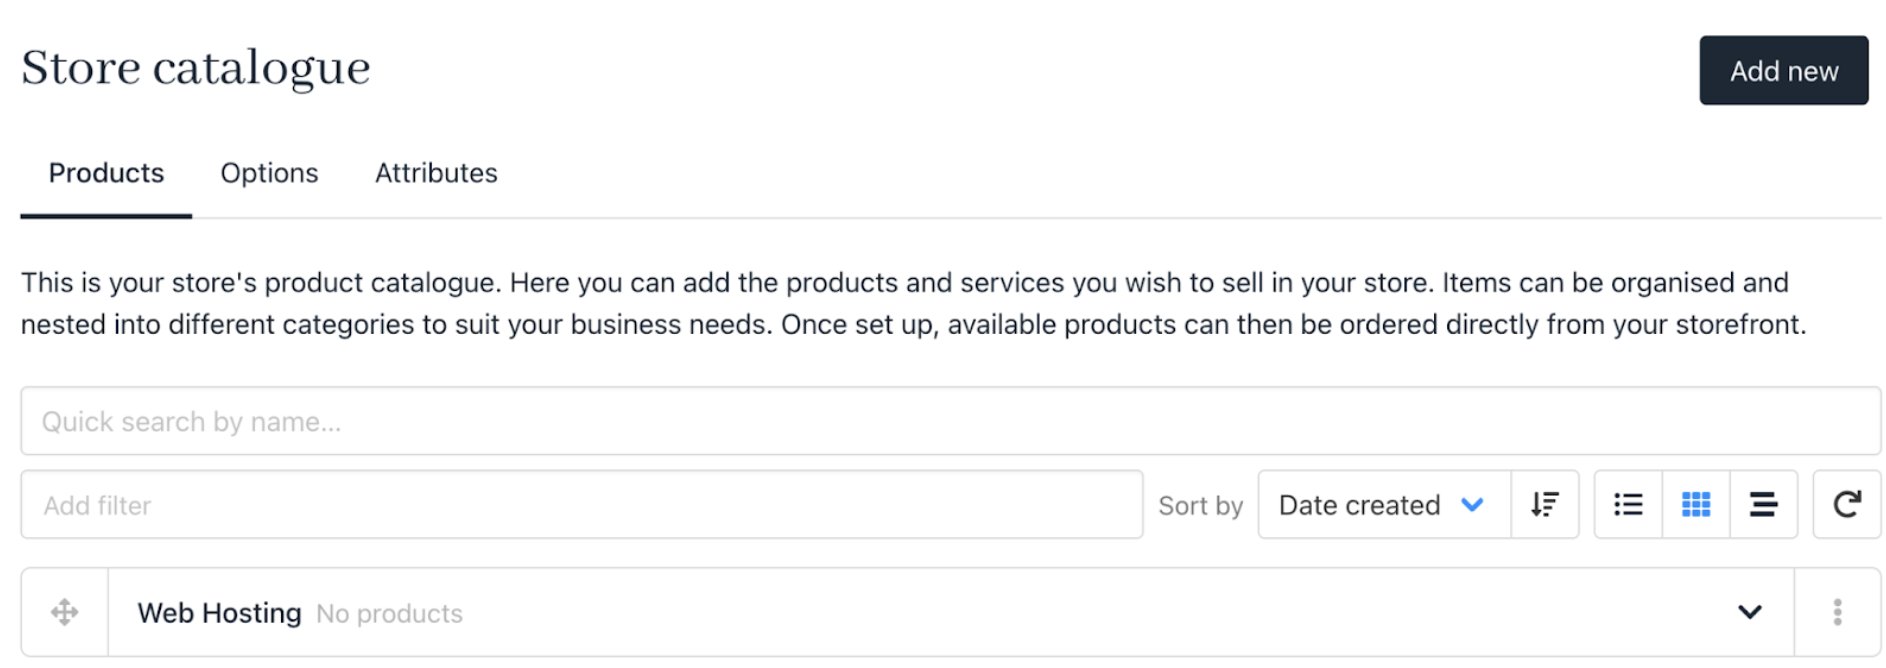
 The new category appears in the catalogue.
 ## Create subcategories (Optional)
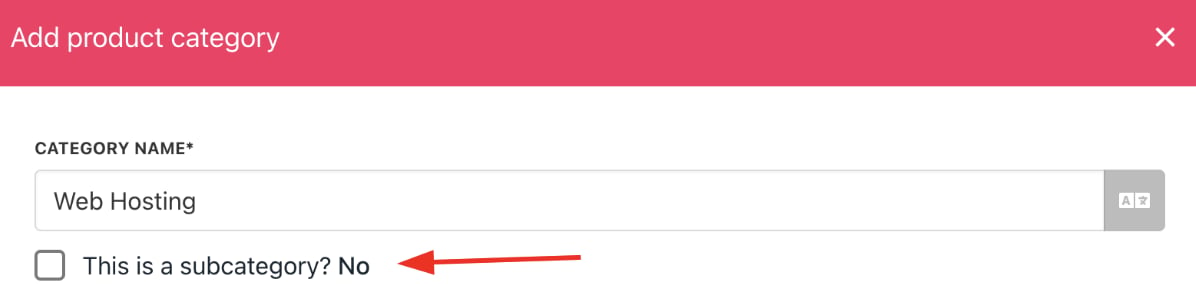
When adding a category, check the `Subcategory` box to create a nested category.
The default setting is **do not** create a standalone category (box unchecked). Keep it as is to avoid creating a subcategory.
## Create subcategories (Optional)
When adding a category, check the `Subcategory` box to create a nested category.
The default setting is **do not** create a standalone category (box unchecked). Keep it as is to avoid creating a subcategory.
 **To create a subcategory:**
1. Select a parent category from the dropdown or create a new one.
2. Add a description.
3. Click **Create**.
**To create a subcategory:**
1. Select a parent category from the dropdown or create a new one.
2. Add a description.
3. Click **Create**.
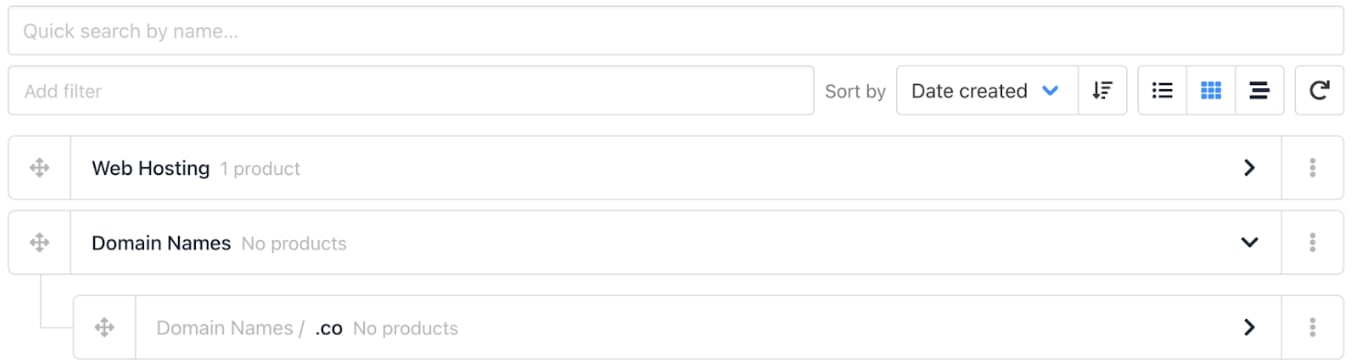
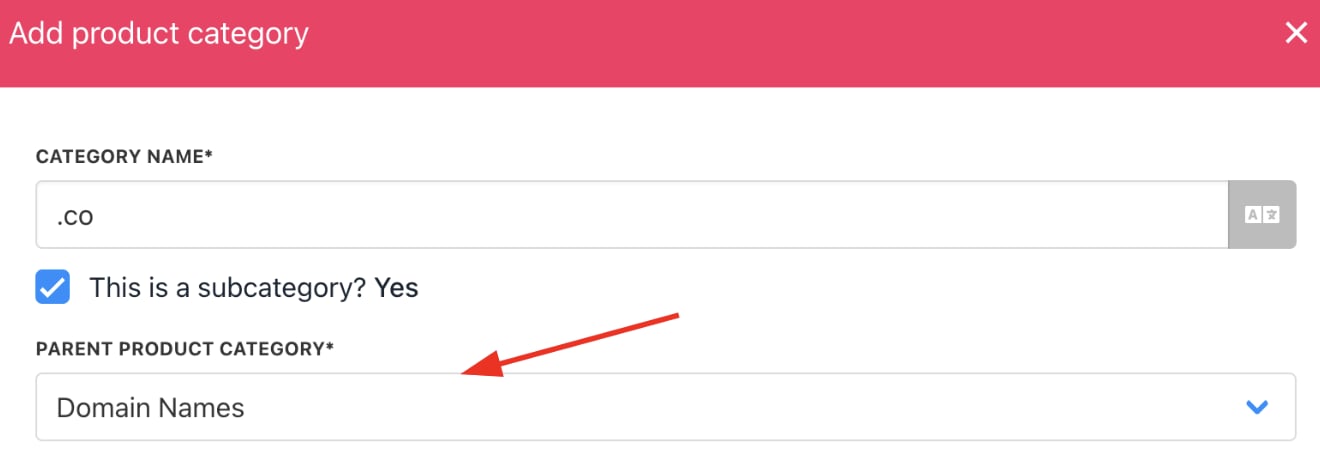 The catalogue shows the category hierarchy.
 ## Creating products
You can add products in two ways:
1. Click **Add New** > **Product** on the `Product Catalogue` page.
2. Or, click the three-dot menu next to a category and select **Add product**.
## Creating products
You can add products in two ways:
1. Click **Add New** > **Product** on the `Product Catalogue` page.
2. Or, click the three-dot menu next to a category and select **Add product**.
 3. Choose **Single** product (default) or **Product** bundle.
4. Complete the product fields (name, descriptions, etc.).
5. Click **Create**.
3. Choose **Single** product (default) or **Product** bundle.
4. Complete the product fields (name, descriptions, etc.).
5. Click **Create**.
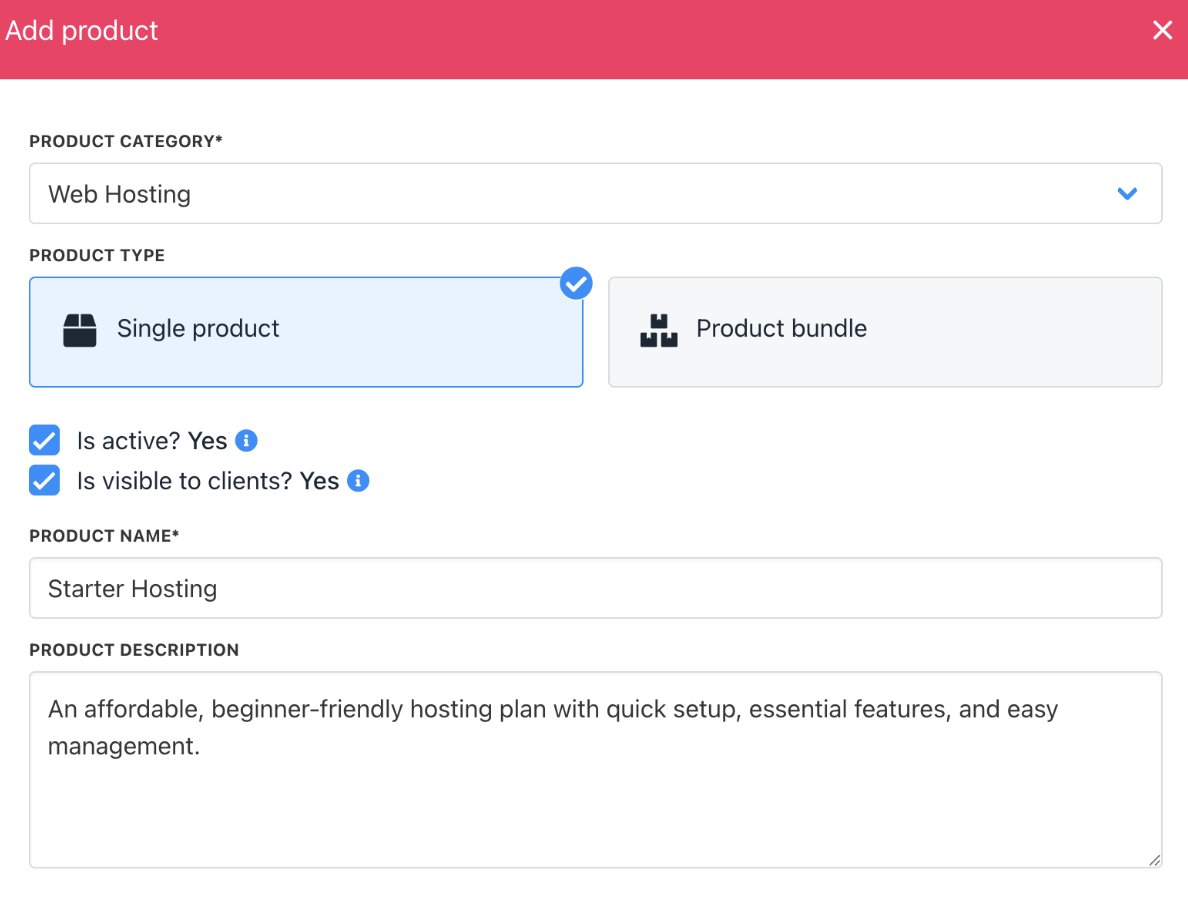
 The `Product Details` page displays the category and product name.
 ## Adding product details
On the Product Details page, you can add or edit product info:
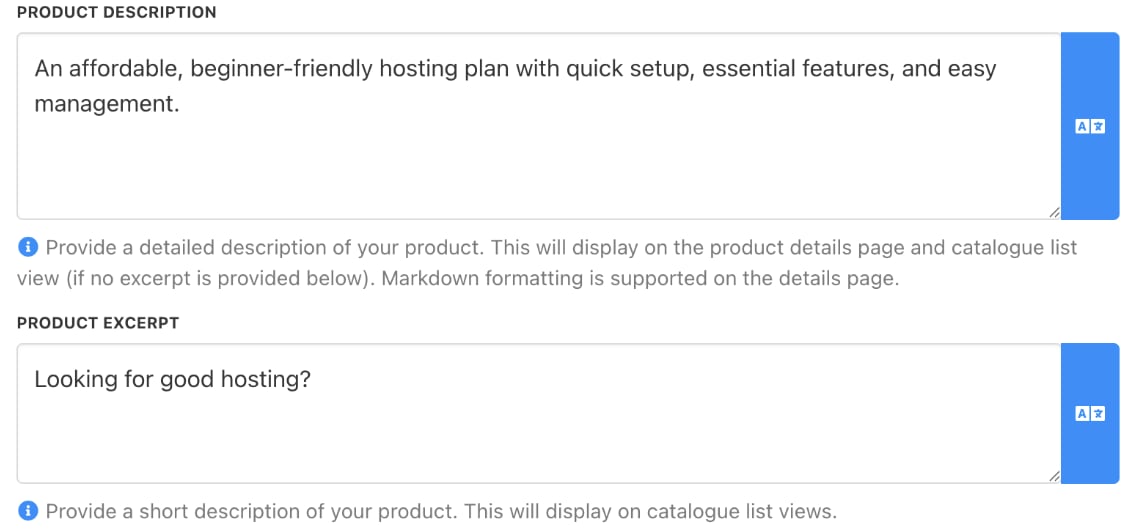
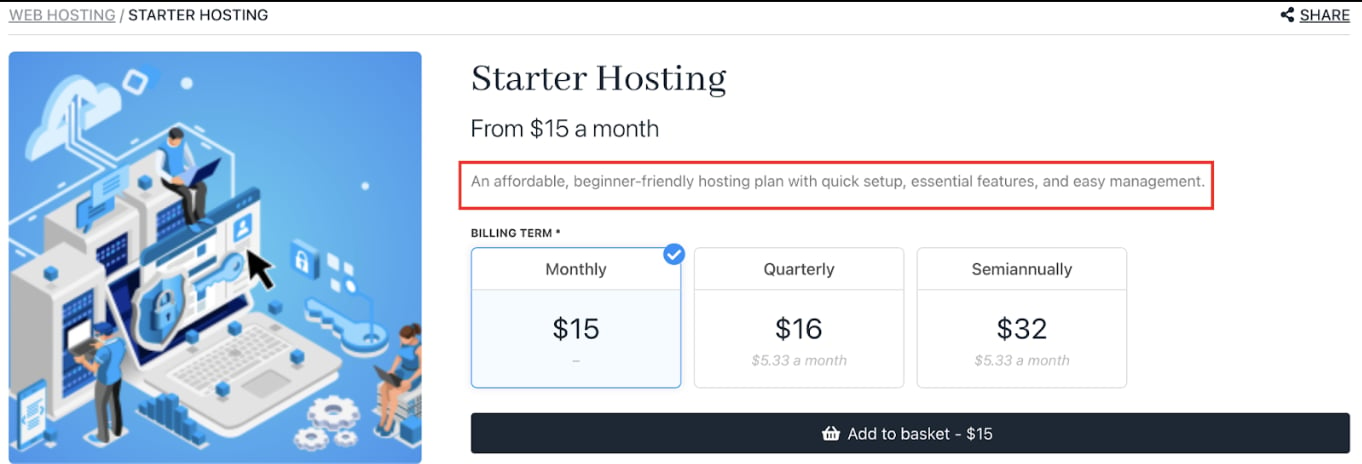
* **Product Description**: Detailed information about the product, such as features and benefits. Longer text supported.
* **Product Short Description**: A concise description up to 130 characters to grab attention.
## Adding product details
On the Product Details page, you can add or edit product info:
* **Product Description**: Detailed information about the product, such as features and benefits. Longer text supported.
* **Product Short Description**: A concise description up to 130 characters to grab attention.
 ## Uploading images
You can add up to 10 images per product to enhance its presentation. Click the upload area to select images. The first uploaded image becomes the default.
You can also change the default image by hovering over the thumbnail and clicking the star.
Learn about [suggested image sizes](/setup-and-configuration/other-setup-items/what-is-the-best-image-size-for-my-pictures#/).
## Uploading images
You can add up to 10 images per product to enhance its presentation. Click the upload area to select images. The first uploaded image becomes the default.
You can also change the default image by hovering over the thumbnail and clicking the star.
Learn about [suggested image sizes](/setup-and-configuration/other-setup-items/what-is-the-best-image-size-for-my-pictures#/).
 ## Uploading icons
You can also upload icons to catalogue products and categories.
## Uploading icons
You can also upload icons to catalogue products and categories.
 ## Bulk order permissions
You can customise bulk order settings. By default, bulk ordering is disabled, so customers must add items individually to order multiples.
To allow bulk orders, choose an option and click **Save**.
1. Click **Yes** to enable bulk orders.
## Bulk order permissions
You can customise bulk order settings. By default, bulk ordering is disabled, so customers must add items individually to order multiples.
To allow bulk orders, choose an option and click **Save**.
1. Click **Yes** to enable bulk orders.
 * If you select **Yes**, customers can adjust quantities on the order page.
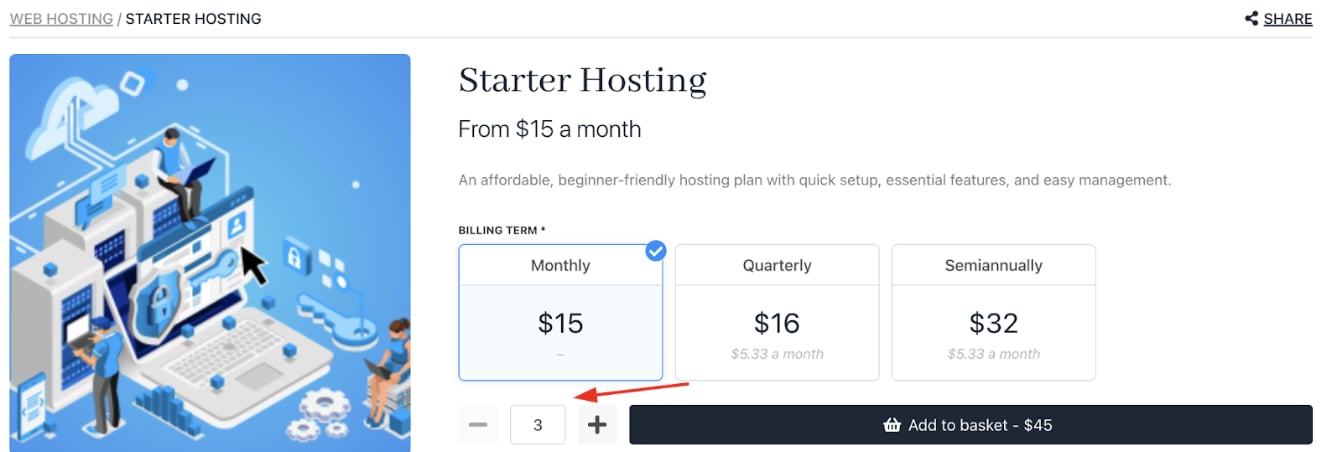
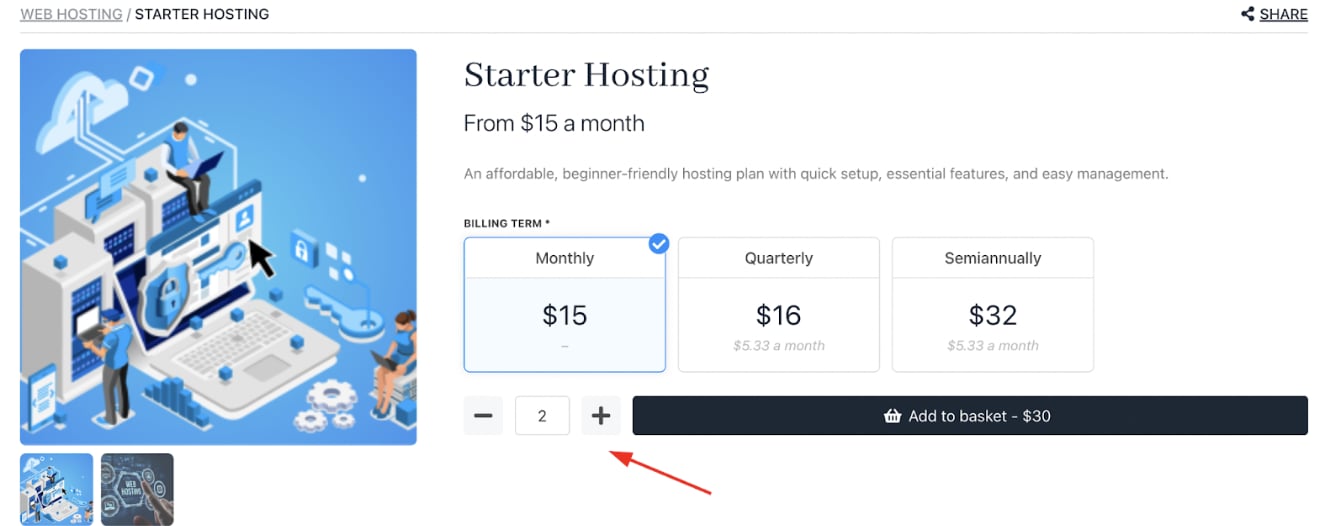 2. Optionally, click **Yes** and set a *multiples* of number to define the minimum order and rate of change.
 On the order page, the minimum quantity reflects this setting, and quantities increase or decrease by these increments when customers use the plus (+) or minus (-) buttons.
 ## Limit order quantity
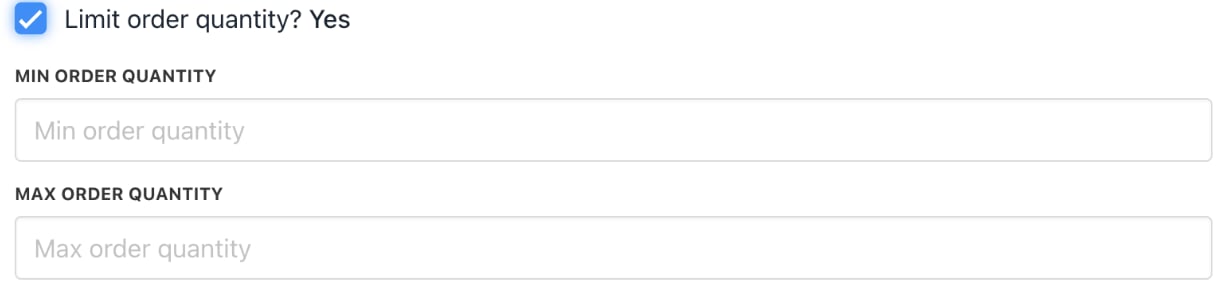
This setting controls the maximum quantity a client can purchase. By default, there’s no limit, but you can enable it to set a purchase cap.
## Limit order quantity
This setting controls the maximum quantity a client can purchase. By default, there’s no limit, but you can enable it to set a purchase cap.
 ## Product store link
Upmind generates a shareable product store link:
1. You can find it in the `Admin Area` under `Product Details`.
## Product store link
Upmind generates a shareable product store link:
1. You can find it in the `Admin Area` under `Product Details`.
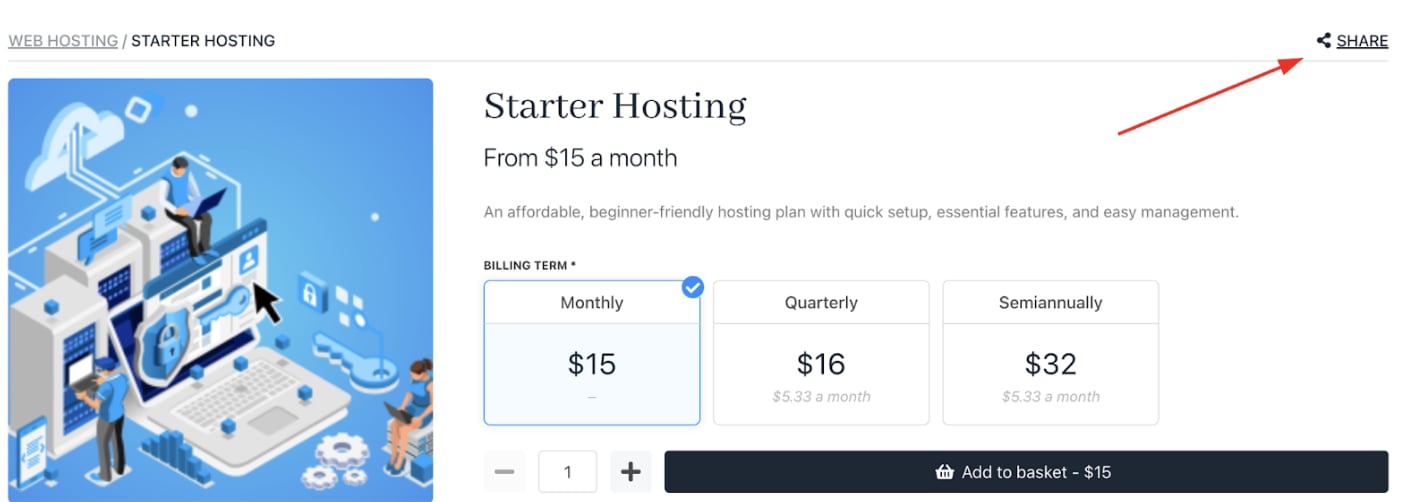
 2. Customers can generate a link to the product with the **Share button** in the `Client Area`.
 ## Product codes
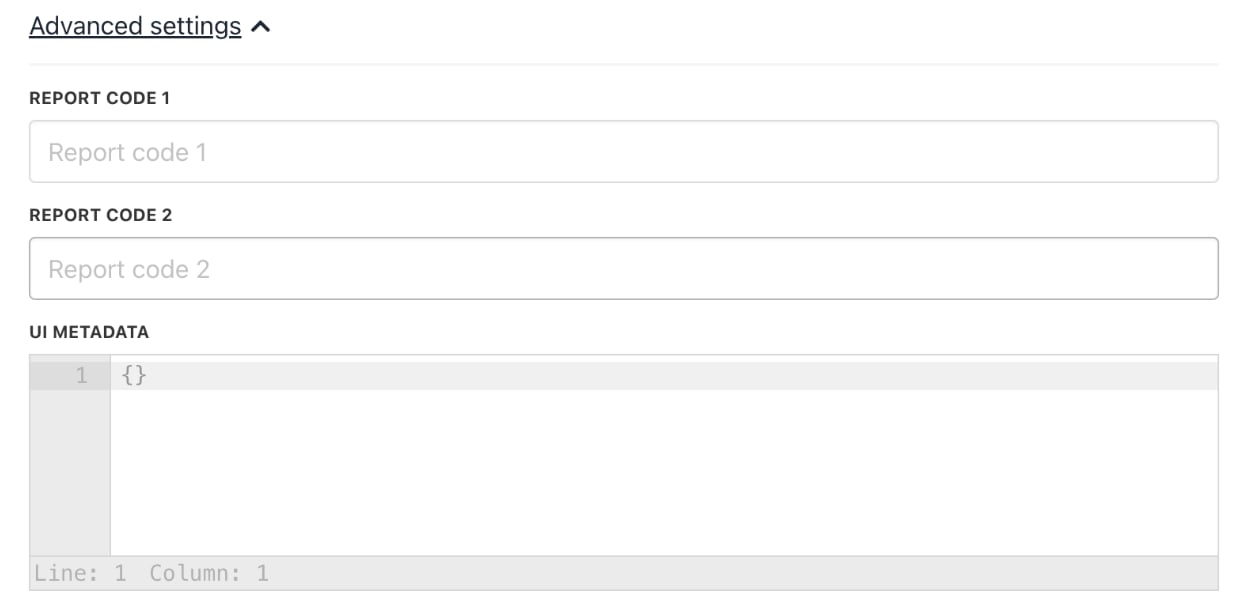
Assign product codes in **Product Details** > **Advanced Settings** for reporting and easy identification. Codes are free-form.
## Product codes
Assign product codes in **Product Details** > **Advanced Settings** for reporting and easy identification. Codes are free-form.