> ## Documentation Index
> Fetch the complete documentation index at: https://docs.upmind.com/llms.txt
> Use this file to discover all available pages before exploring further.
# How to Add Stripe as a Payment Method
> Set up Stripe to take payments in Upmind
[Stripe](https://stripe.com/) is a popular payment method that enables fast, secure credit and debit card payments. Upmind’s integration is easy, letting clients enter card data directly on your site (not redirected to Stripe).
A token is stored in Upmind along with card details (last four digits, card type, and expiry date). The full card information is never stored.
## Getting Stripe API credentials
1. Log in to your Stripe account.
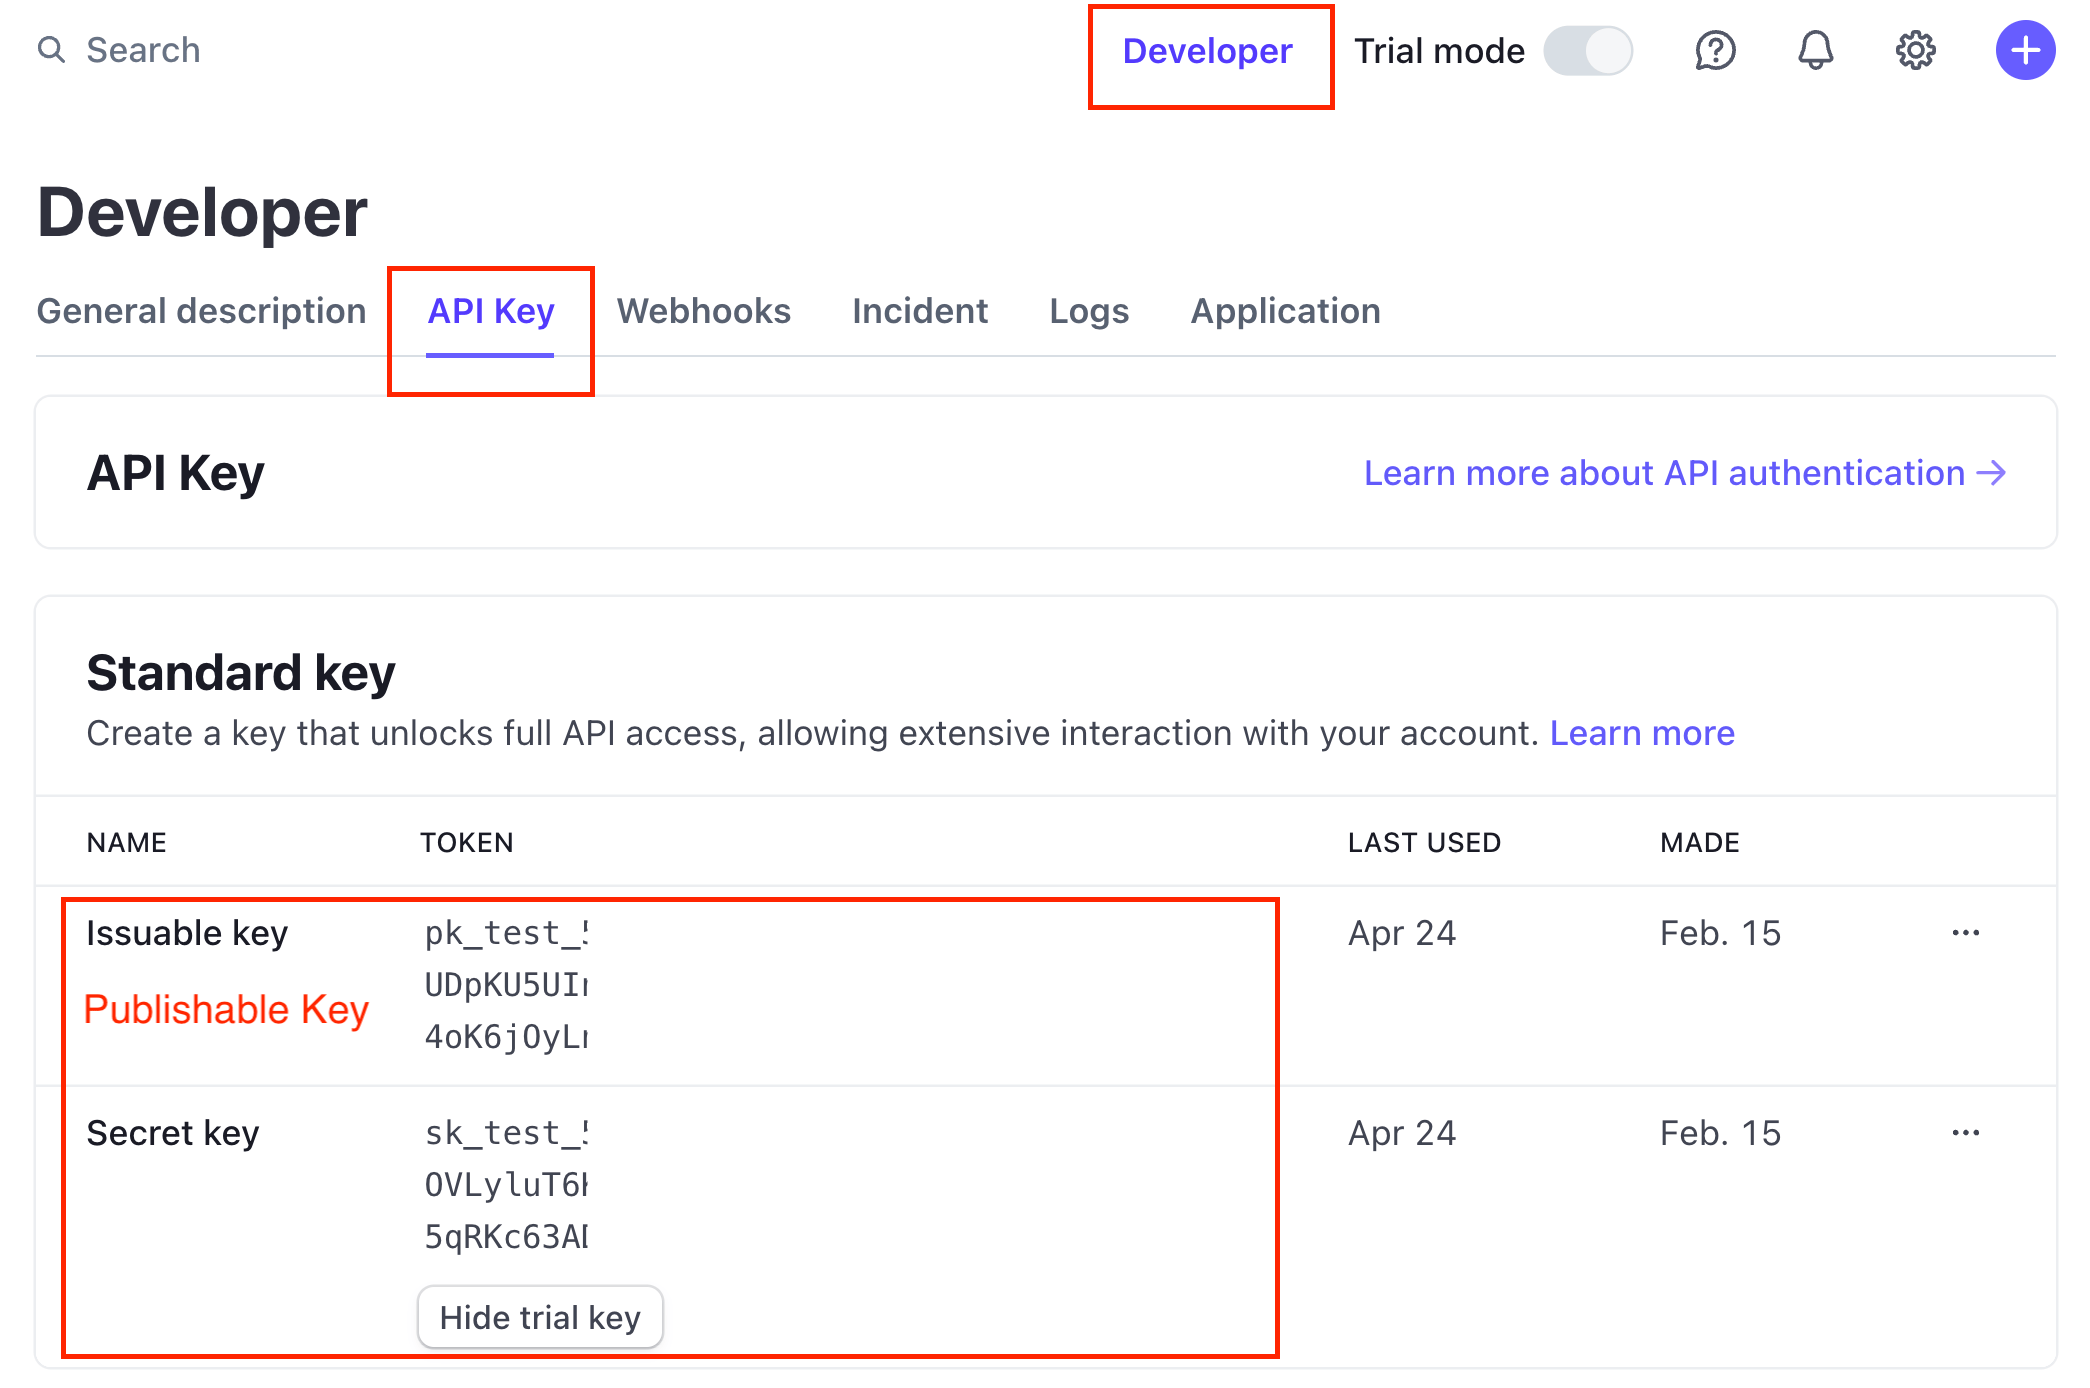
2. Go to Developers > API Keys.
3. Copy your Secret Key (for Upmind’s API Key field) and Publishable Key (for Upmind’s Public Key field).
4. Optionally, generate a Restricted Key with write access to:
1. PaymentIntents
2. Customers
3. PaymentMethods
4. Prices
5. SetupIntents
6. Charges
 ## Adding Stripe as a payment provider
1. Go to **Settings** > **Payment Providers** in Upmind.
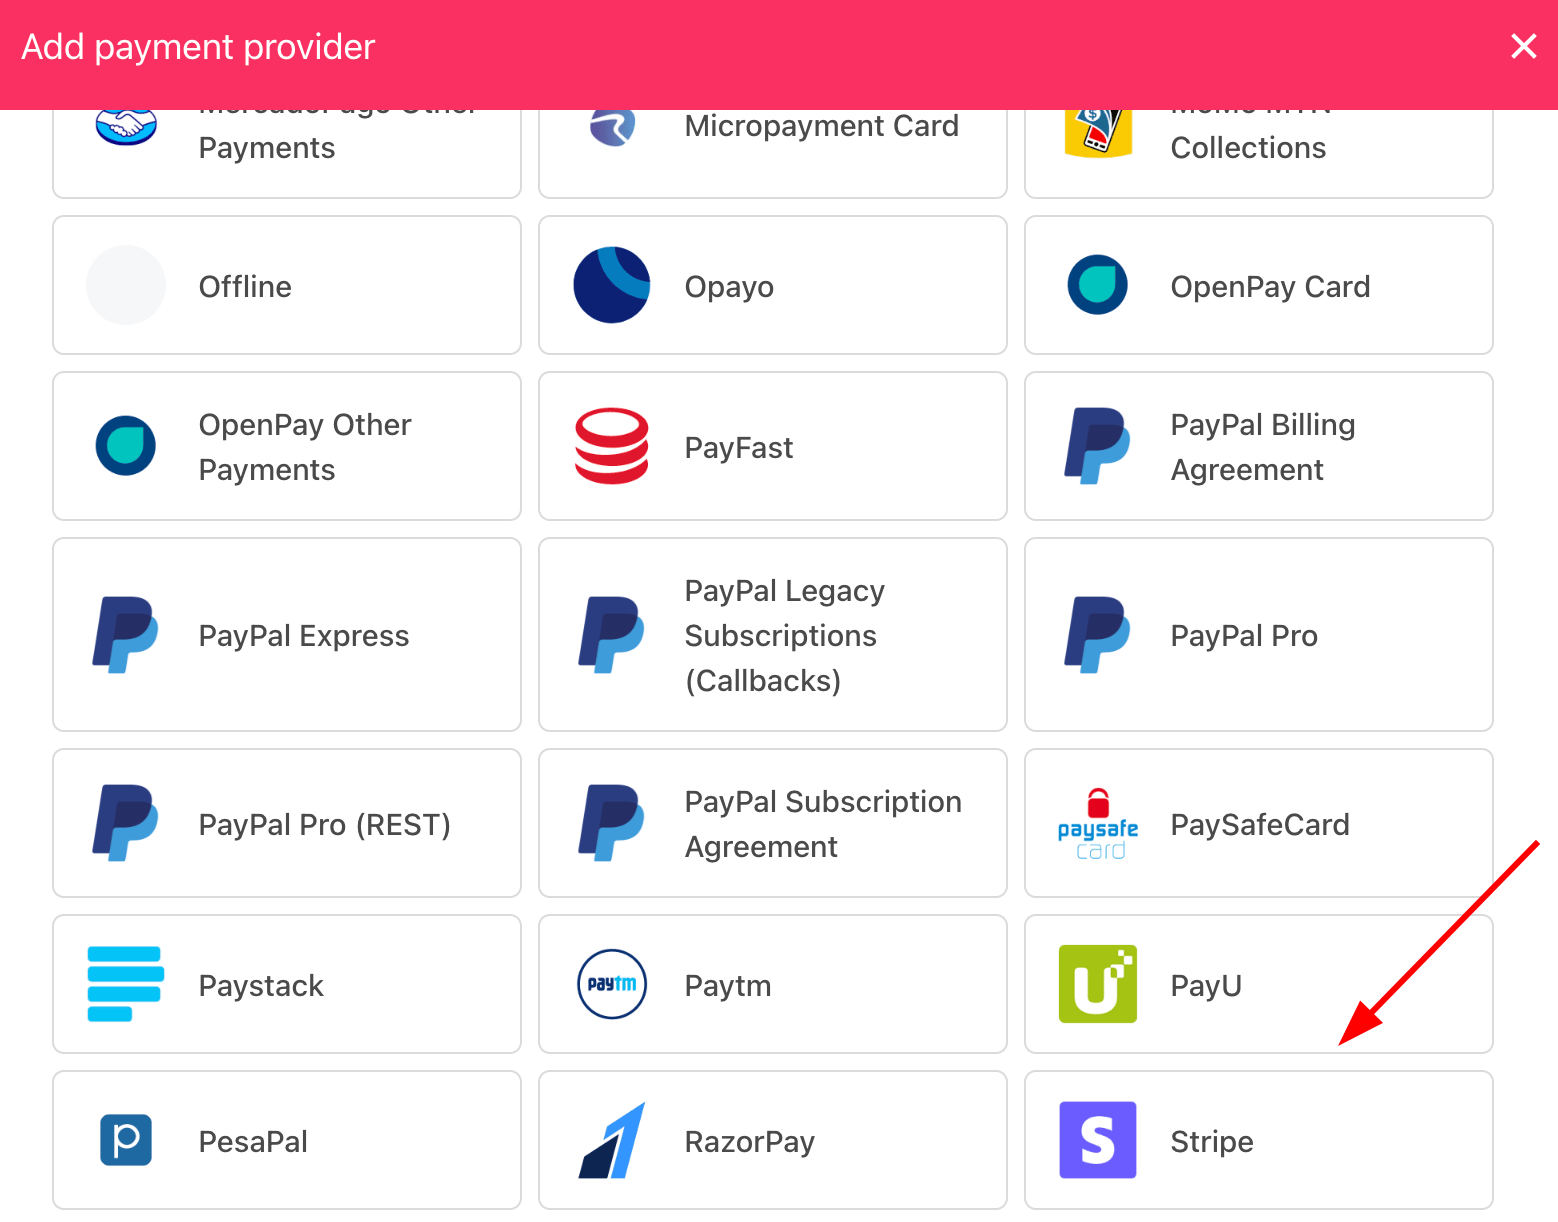
2. Click **Add Payment Provider** and select **Stripe**.
## Adding Stripe as a payment provider
1. Go to **Settings** > **Payment Providers** in Upmind.
2. Click **Add Payment Provider** and select **Stripe**.
 ## Configuring details
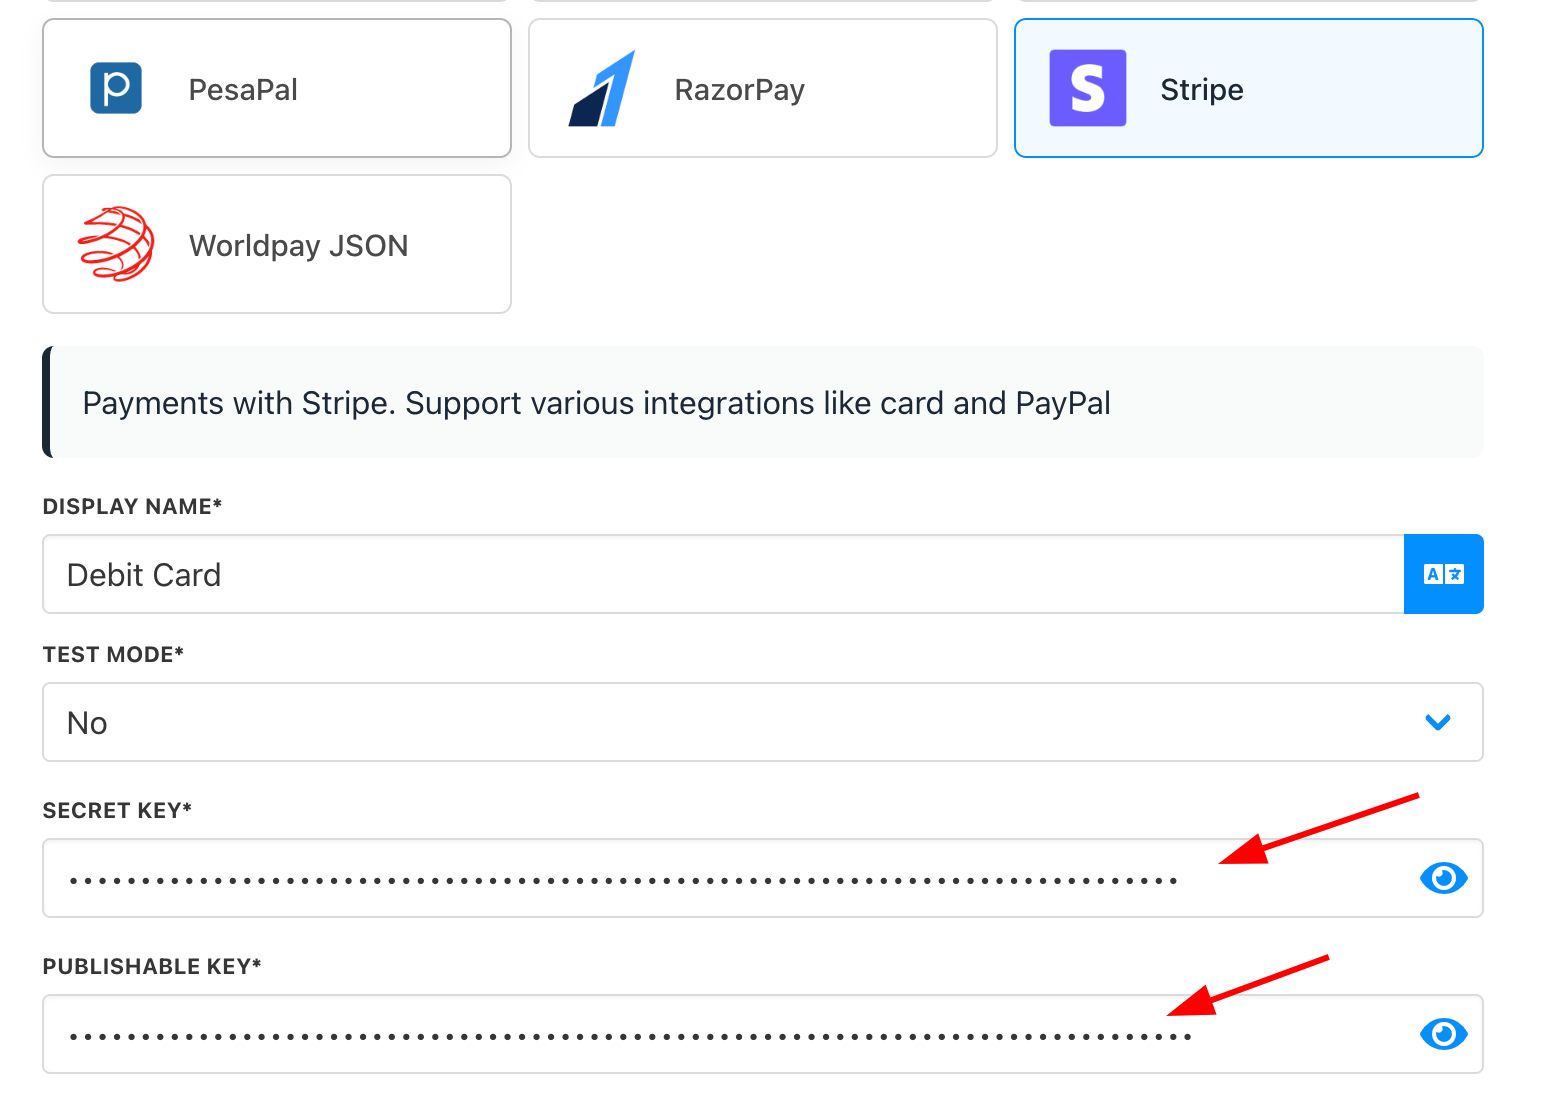
1. Enter a display name. We suggest **Credit** or **Debit Card**.
2. Set **Test Mode** to *No* for live payments.
3. Enter your **Secret Key** and **Publishable Key**.
4. Choose whether to allow stored cards (for subscriptions/recurring) or one-time payments.
5. Click **Test Credentials** to verify.
6. Toggle accepted card types as needed.
7. (Optional) Add supported currencies and payment instructions.
8. Click **Create**.
### Stripe.js options
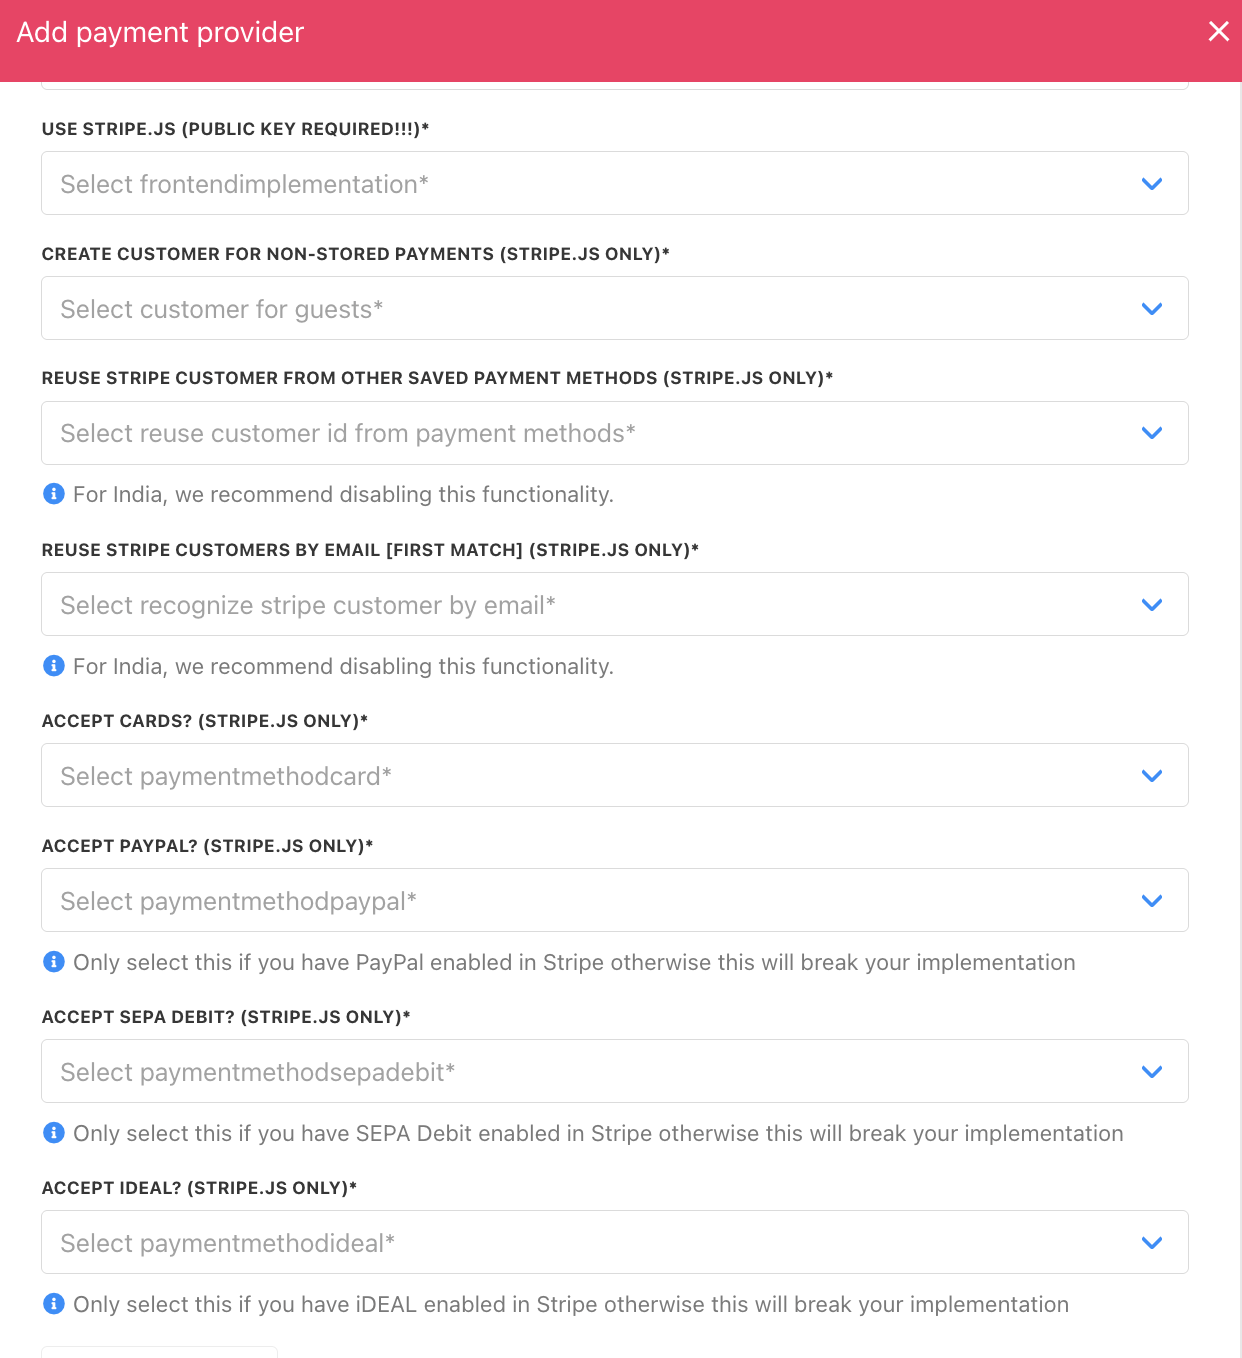
After entering your Stripe information, the next step is to add the Stripe JS. To do this, you will need a public key. This [guide](https://support.stripe.com/questions/what-are-stripe-api-keys-and-how-to-find-them) explains how to obtain it.
For each question, you can choose either yes or no. Choose options that match your business needs and the payment methods you want to support through Stripe.js on your website.
Below is a detailed explanation to help you decide:
1. **Create Customer for Non-Stored Payments**: Select yes to create a customer record for each payment without storing payment details for future transactions. Recommended: **YES**.
2. **Reuse Stripe Customer from Other Saved Methods**: Select yes to use saved payment methods linked to a customer's Stripe account for Stripe.js payments. Recommended: **YES**.
3. **Reuse Stripe Customers by Email**: Select yes to link customer payments by email in Stripe for Stripe.js transactions. Recommended: **YES**.
4. **Accept Cards?**: Choose yes to accept card payments using Stripe.js on your website. Recommended: **YES**.
5. **Accept PayPal?**: Select yes to accept PayPal payments through Stripe.js integration. For setup, see this [article](https://docs.stripe.com/payments/paypal/activate). Recommended: **YES**.
6. **Accept SEPA Debit**: Select yes only if SEPA Debit is active in your Stripe account. Otherwise, it will fail. Recommended: **NO** unless enabled.
7. **Accept iDEAL**: Enable only if iDEAL is active in your Stripe account. Otherwise, it will fail. Recommended: **NO** unless enabled.
## Configuring details
1. Enter a display name. We suggest **Credit** or **Debit Card**.
2. Set **Test Mode** to *No* for live payments.
3. Enter your **Secret Key** and **Publishable Key**.
4. Choose whether to allow stored cards (for subscriptions/recurring) or one-time payments.
5. Click **Test Credentials** to verify.
6. Toggle accepted card types as needed.
7. (Optional) Add supported currencies and payment instructions.
8. Click **Create**.
### Stripe.js options
After entering your Stripe information, the next step is to add the Stripe JS. To do this, you will need a public key. This [guide](https://support.stripe.com/questions/what-are-stripe-api-keys-and-how-to-find-them) explains how to obtain it.
For each question, you can choose either yes or no. Choose options that match your business needs and the payment methods you want to support through Stripe.js on your website.
Below is a detailed explanation to help you decide:
1. **Create Customer for Non-Stored Payments**: Select yes to create a customer record for each payment without storing payment details for future transactions. Recommended: **YES**.
2. **Reuse Stripe Customer from Other Saved Methods**: Select yes to use saved payment methods linked to a customer's Stripe account for Stripe.js payments. Recommended: **YES**.
3. **Reuse Stripe Customers by Email**: Select yes to link customer payments by email in Stripe for Stripe.js transactions. Recommended: **YES**.
4. **Accept Cards?**: Choose yes to accept card payments using Stripe.js on your website. Recommended: **YES**.
5. **Accept PayPal?**: Select yes to accept PayPal payments through Stripe.js integration. For setup, see this [article](https://docs.stripe.com/payments/paypal/activate). Recommended: **YES**.
6. **Accept SEPA Debit**: Select yes only if SEPA Debit is active in your Stripe account. Otherwise, it will fail. Recommended: **NO** unless enabled.
7. **Accept iDEAL**: Enable only if iDEAL is active in your Stripe account. Otherwise, it will fail. Recommended: **NO** unless enabled.
 If your client is using either **iDEAL** or **SEPA**, please note the following:
1. iDEAL is a one-time payment method, which means each payment must be authenticated by the customer.
2. While Stripe can save the IBAN from an iDEAL payment as a SEPA Direct Debit method, in Upmind this does not happen automatically.
3. To use SEPA for future payments in Upmind, your client needs to manually add SEPA as a payment method in their account. [See the guide here](/client-self-service/client-area/how-do-my-clients-add-a-payment-method).
### Changing the Stripe statement description
You can change this under **Settings** > **Payment Options** > **Gateway Settings** > **Statement Description**.
## Indian Stripe customers
For Stripe customers in India, only INR is supported for non-sole traders due to Stripe’s regulations. The error is as follows:
As per Indian regulations, only registered Indian businesses (i.e., sole proprietorships, limited liability partnerships, and companies, but not individuals) can accept international payments. More info [here](https://docs.stripe.com/india-accept-international-payments).
## Editing the payment method
Go to **Settings** > **Payment Providers**, click the three dots next to `Stripe`, and select **Edit**.
## Configure Stripe webhook
Configuring Stripe webhooks allows your Stripe account to notify Upmind when key payment and billing events occur.
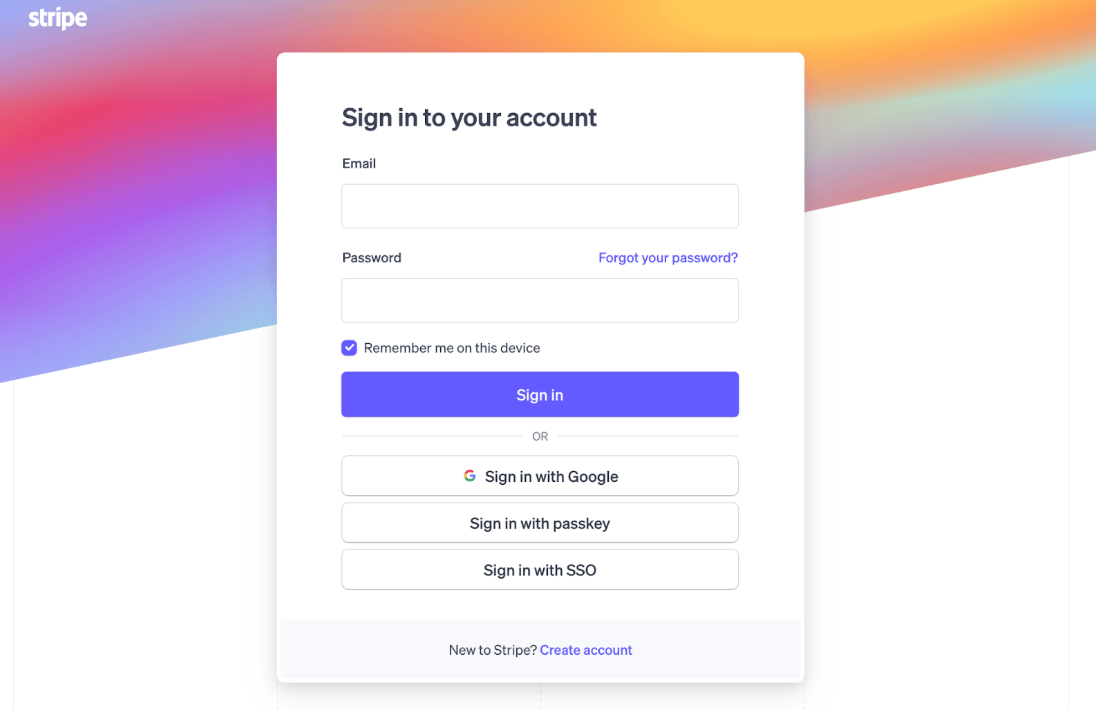
1. Log in to `Stripe Dashboard` ([https://dashboard.stripe.com](https://dashboard.stripe.com))
If your client is using either **iDEAL** or **SEPA**, please note the following:
1. iDEAL is a one-time payment method, which means each payment must be authenticated by the customer.
2. While Stripe can save the IBAN from an iDEAL payment as a SEPA Direct Debit method, in Upmind this does not happen automatically.
3. To use SEPA for future payments in Upmind, your client needs to manually add SEPA as a payment method in their account. [See the guide here](/client-self-service/client-area/how-do-my-clients-add-a-payment-method).
### Changing the Stripe statement description
You can change this under **Settings** > **Payment Options** > **Gateway Settings** > **Statement Description**.
## Indian Stripe customers
For Stripe customers in India, only INR is supported for non-sole traders due to Stripe’s regulations. The error is as follows:
As per Indian regulations, only registered Indian businesses (i.e., sole proprietorships, limited liability partnerships, and companies, but not individuals) can accept international payments. More info [here](https://docs.stripe.com/india-accept-international-payments).
## Editing the payment method
Go to **Settings** > **Payment Providers**, click the three dots next to `Stripe`, and select **Edit**.
## Configure Stripe webhook
Configuring Stripe webhooks allows your Stripe account to notify Upmind when key payment and billing events occur.
1. Log in to `Stripe Dashboard` ([https://dashboard.stripe.com](https://dashboard.stripe.com))
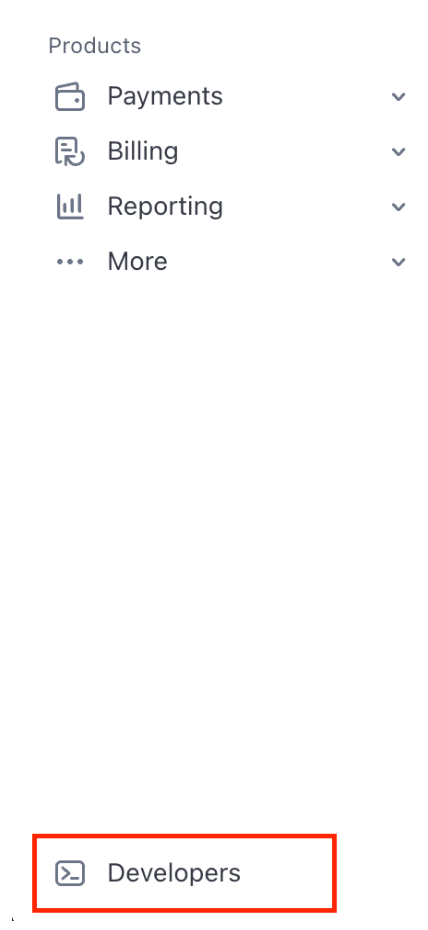
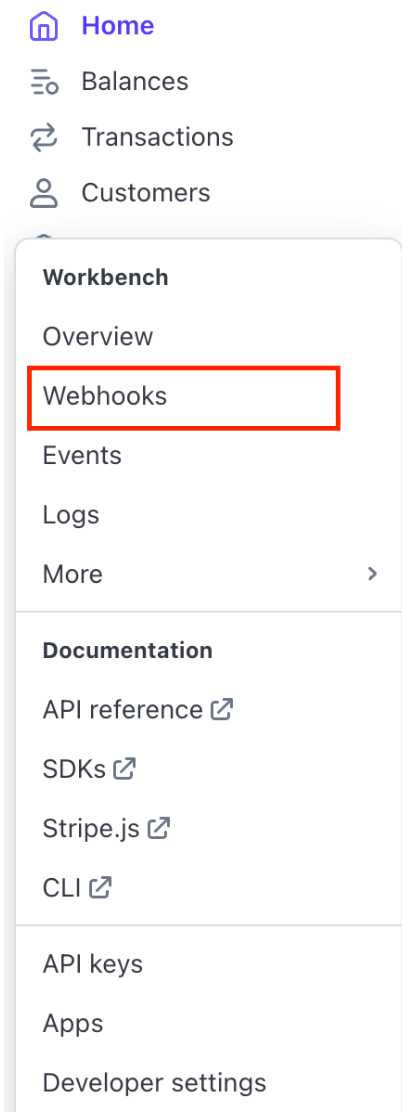
 2. In the left sidebar, click **Developers**. Under the Developers section, select **Webhooks**.
 3. Click the **+ Add destination** button to add webhooks.
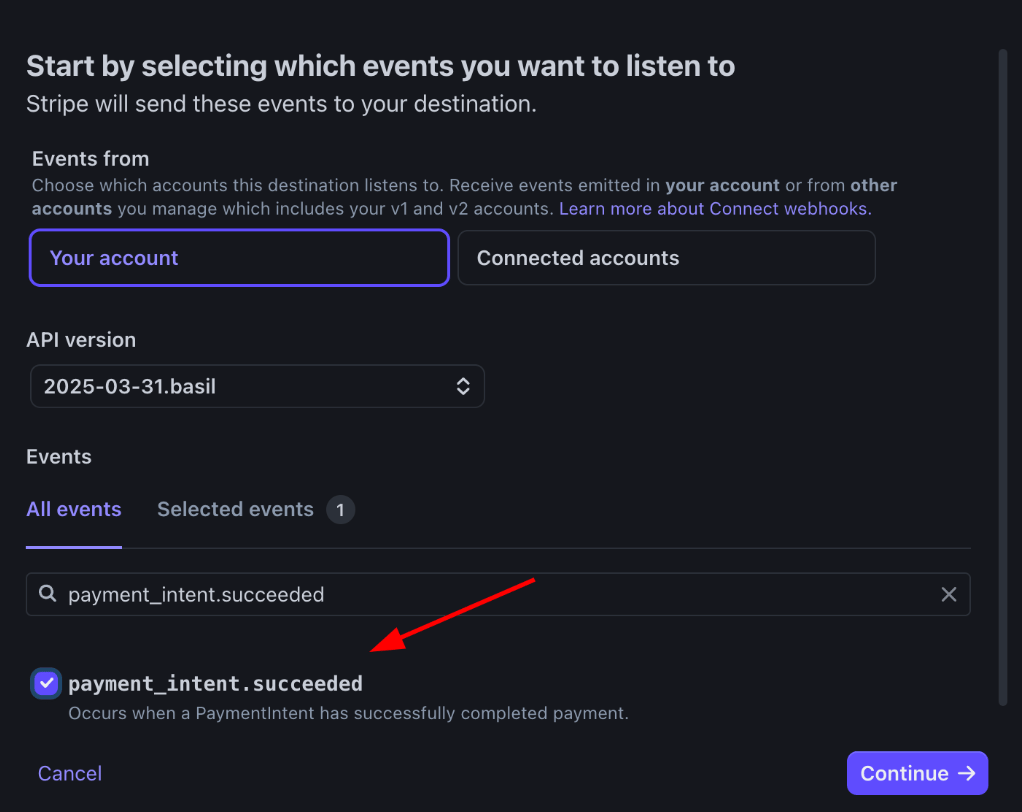
 4. Select the **Events** you want to receive.
Common recommended events for payment automation and reconciliation:
* **payment\_intent.succeeded** – Payment succeeded
* **payment\_intent.payment\_failed** – Payment attempt failed
* **invoice.payment\_succeeded** – Invoice payment completed
* **charge.refunded** – Refund processed on a charge
* **mandate.updated** - Mandate details updated
* **charge.succeeded** - Charge completed successfully
Use the search bar to quickly find specific events.
4. Select the **Events** you want to receive.
Common recommended events for payment automation and reconciliation:
* **payment\_intent.succeeded** – Payment succeeded
* **payment\_intent.payment\_failed** – Payment attempt failed
* **invoice.payment\_succeeded** – Invoice payment completed
* **charge.refunded** – Refund processed on a charge
* **mandate.updated** - Mandate details updated
* **charge.succeeded** - Charge completed successfully
Use the search bar to quickly find specific events.
 Upmind currently supports these triggers:
* charge.refunded (refund)
* mandate.updated (mandate Update)
* charge.succeeded (paid Pending)
* charge.failed (reject Pending)
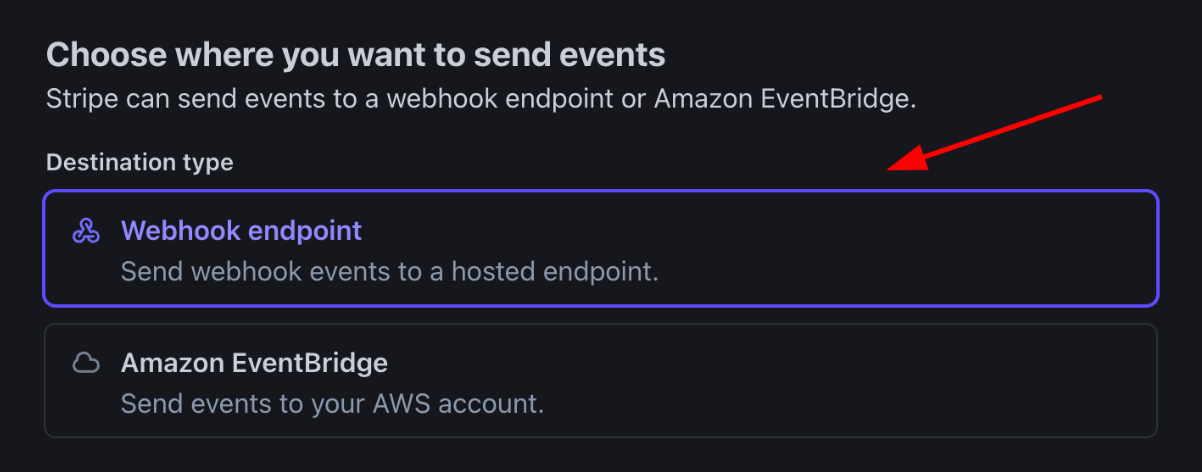
5. Choose **Webhook endpoint** as the destination type.
Upmind currently supports these triggers:
* charge.refunded (refund)
* mandate.updated (mandate Update)
* charge.succeeded (paid Pending)
* charge.failed (reject Pending)
5. Choose **Webhook endpoint** as the destination type.
 6. In the Endpoint URL field, enter your system’s webhook receiver address, which you can find under Settings > Payment Providers. Example: [https://yourdomain.com/api/stripe/webhook](https://yourdomain.com/api/stripe/webhook)
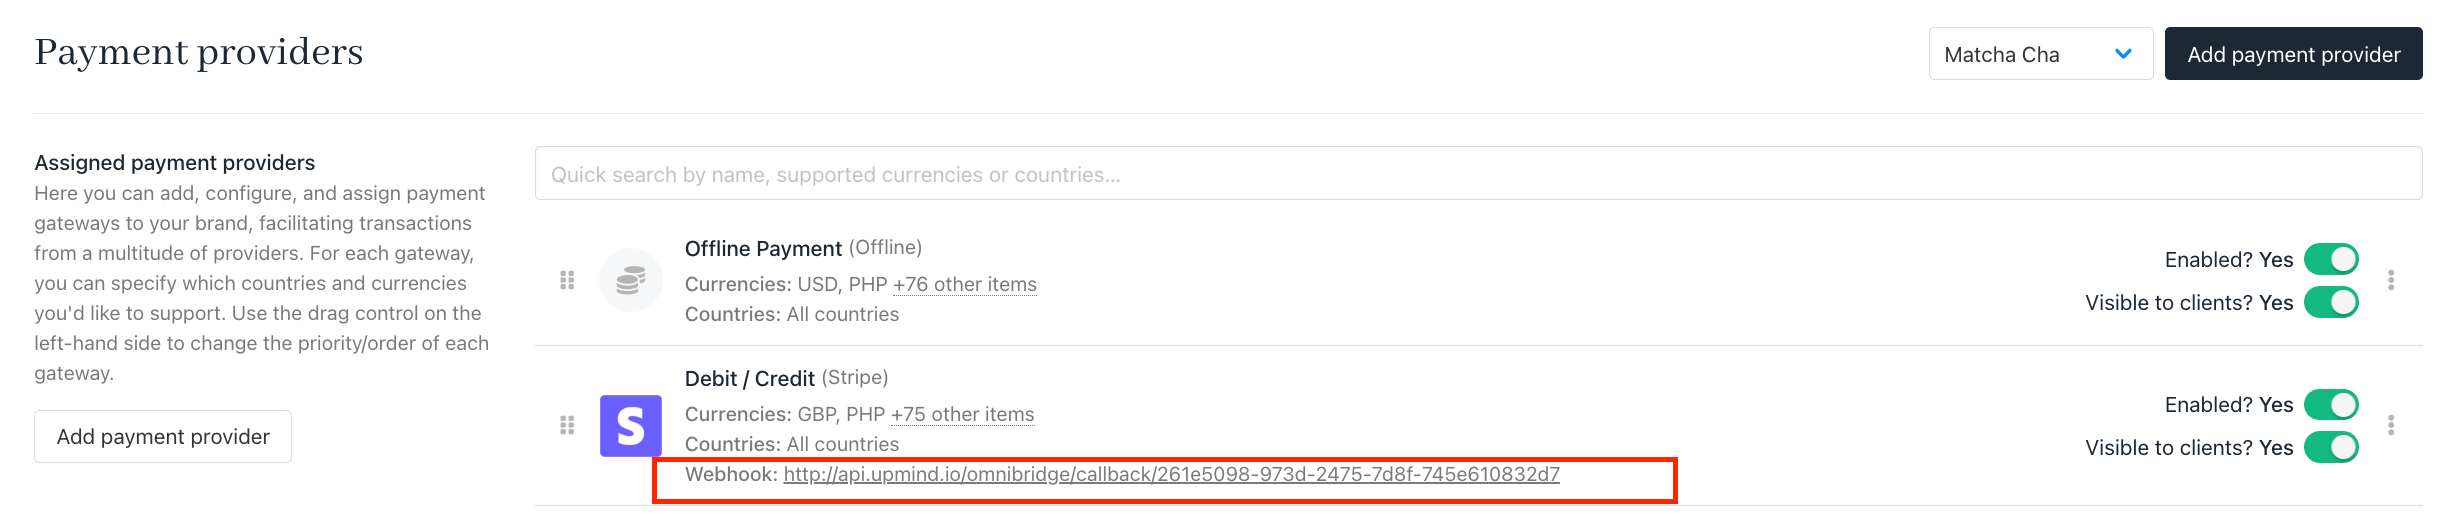 If integrating with Upmind, use the dedicated webhook route specified in the Upmind documentation or module setup.
You can also write the **Destination Name** and a **Description**.
If integrating with Upmind, use the dedicated webhook route specified in the Upmind documentation or module setup.
You can also write the **Destination Name** and a **Description**.
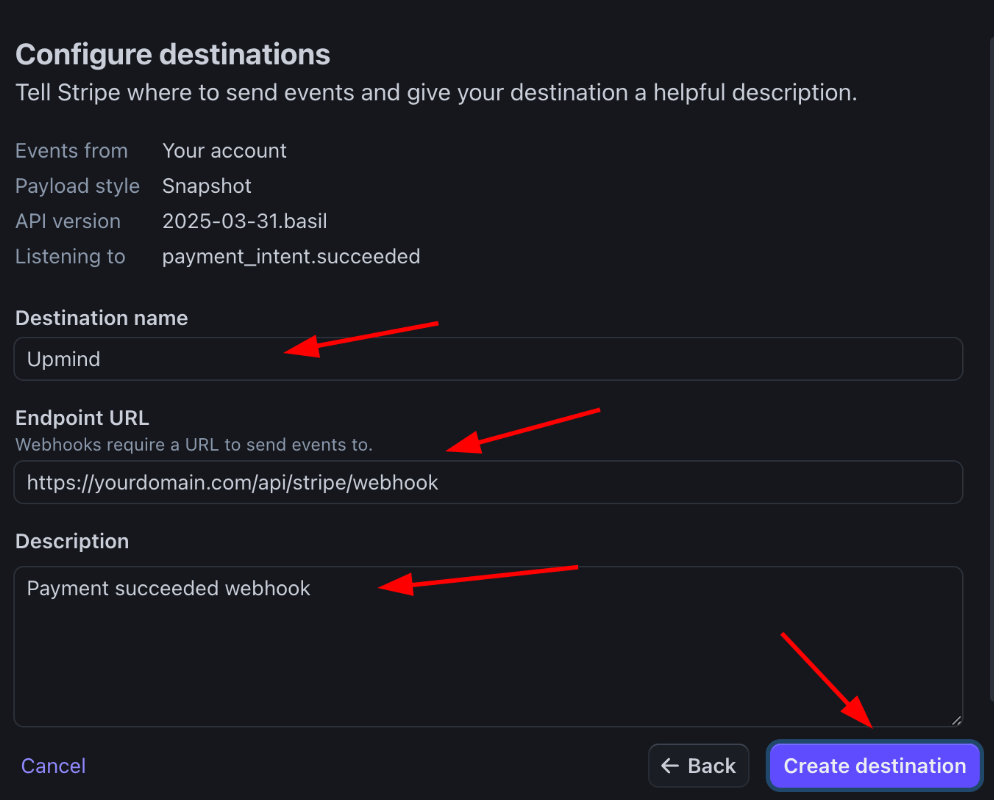 7. Finalise `Webhook Setup` by clicking **Create Destination**.
The new endpoint now appears in your Stripe dashboard, where you can review event delivery and replay events for testing.
7. Finalise `Webhook Setup` by clicking **Create Destination**.
The new endpoint now appears in your Stripe dashboard, where you can review event delivery and replay events for testing.
