> ## Documentation Index
> Fetch the complete documentation index at: https://docs.upmind.com/llms.txt
> Use this file to discover all available pages before exploring further.
# How to Add Razorpay as a Payment Method
> Set up RazorPay to take payments in Upmind.
[RazorPay](https://razorpay.com/) is a leading payment gateway in India, supporting credit/debit cards, net banking, UPI (Unified Payments Interface), wallets, and more. Razorpay is for standard payments, which are non-recurring.
A webhook must be configured between Razorpay and Upmind for payment callbacks to be received and orders to be completed automatically.
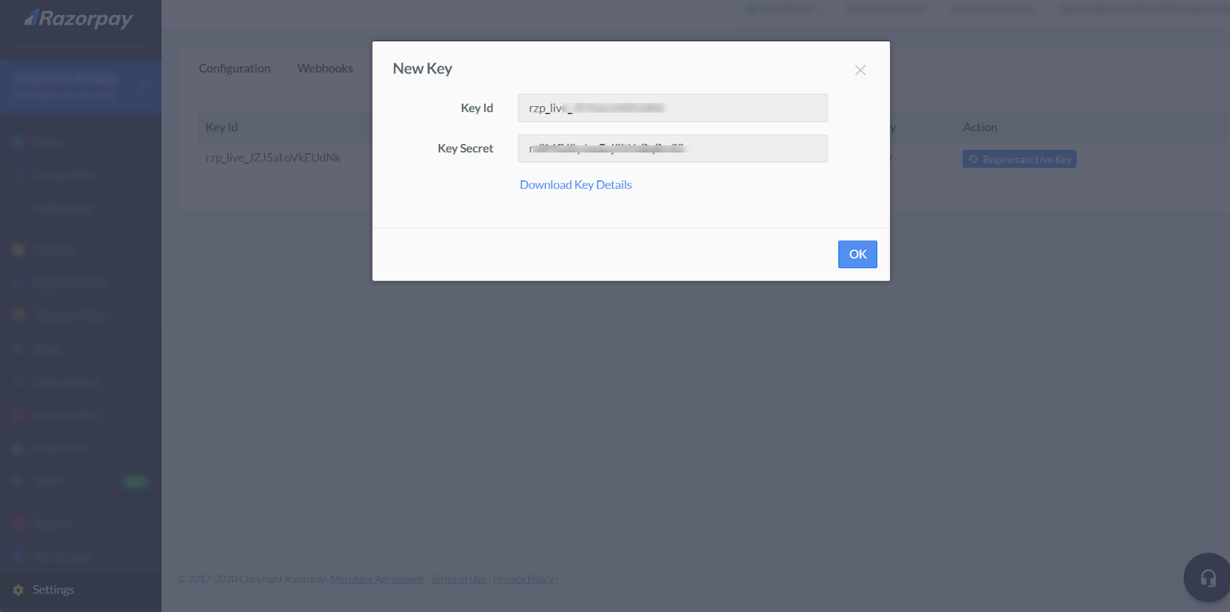
## Getting RazorPay API credentials
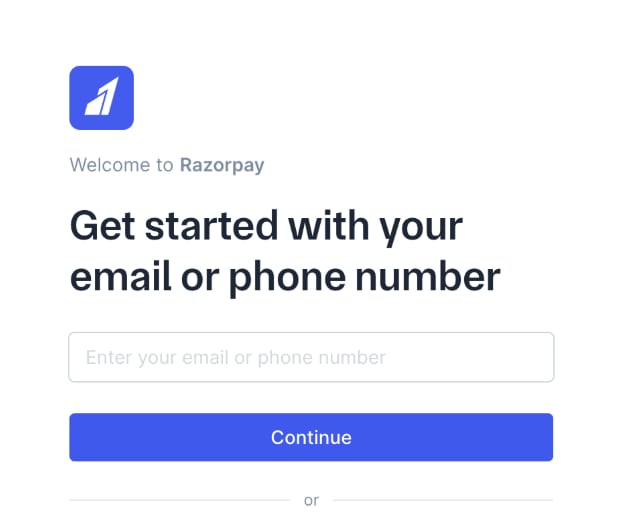
1. Log in to your **RazorPay** account.
2. Go to **Accounts & Settings** > **Settings** > **API Key** and click **Regenerate Key** to obtain your **Key ID** and **Key Secret**.
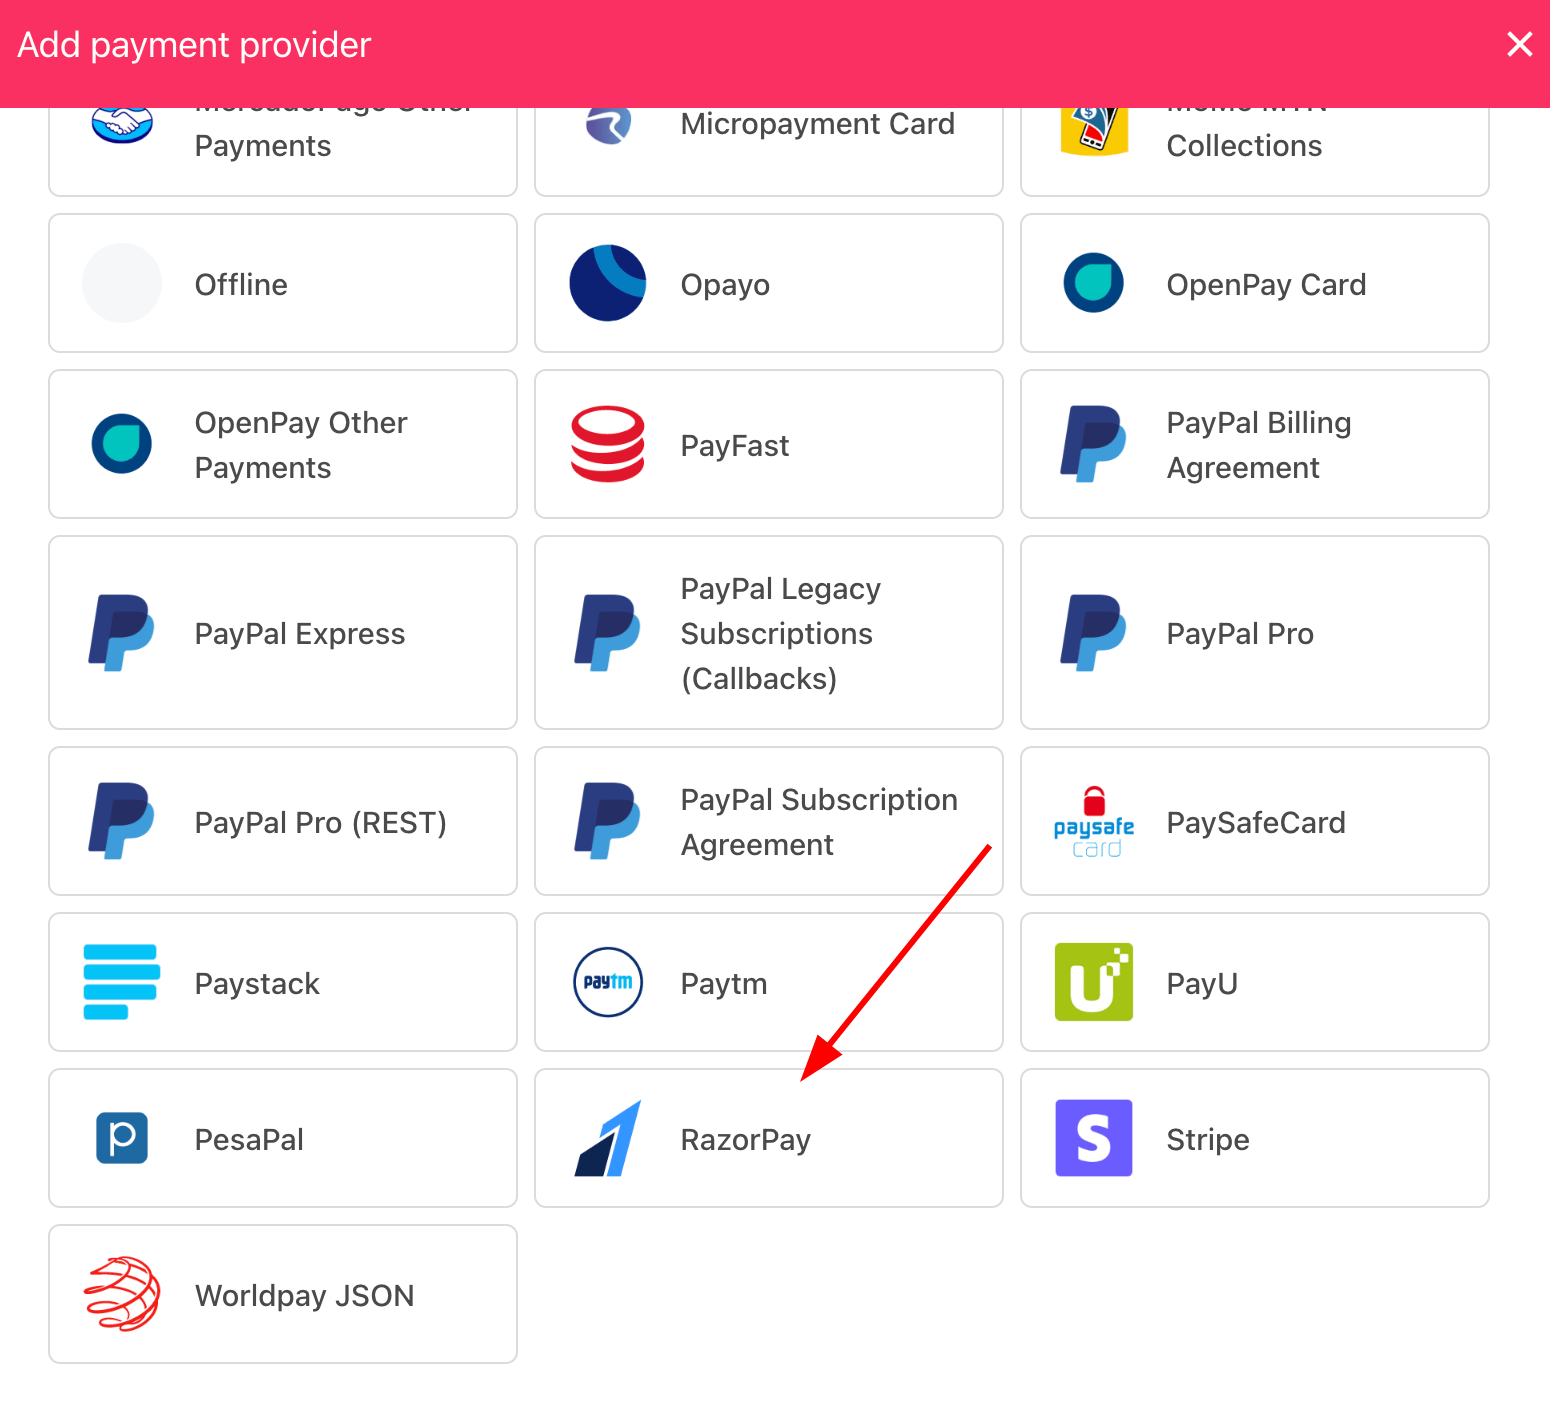
 ## Adding RazorPay in Upmind
1. Go to **Settings** > **Payment Providers** in your admin area.
2. Click **Add Payment Provider** and select **RazorPay**.
## Adding RazorPay in Upmind
1. Go to **Settings** > **Payment Providers** in your admin area.
2. Click **Add Payment Provider** and select **RazorPay**.
 ## Configuring details
1. Enter a display name. We suggest **RazorPay**.
2. Select the appropriate **Test Mode** option.
3. Enter your **Key ID** and **Key Secret**.
4. Click **Test Credentials** to verify.
5. (Optional) Add supported currencies.
6. (Optional) Enter payment instructions for your customers.
7. Click **Create**.
## Configuring details
1. Enter a display name. We suggest **RazorPay**.
2. Select the appropriate **Test Mode** option.
3. Enter your **Key ID** and **Key Secret**.
4. Click **Test Credentials** to verify.
5. (Optional) Add supported currencies.
6. (Optional) Enter payment instructions for your customers.
7. Click **Create**.
 ## Editing the payment method
To update, go to **Settings** > **Payment Providers**, click the three dots next to `RazorPay`, and select **Edit**.
## Configure RazorPay webhook
You must configure the RazorPay webhook so Upmind always receives transaction updates.
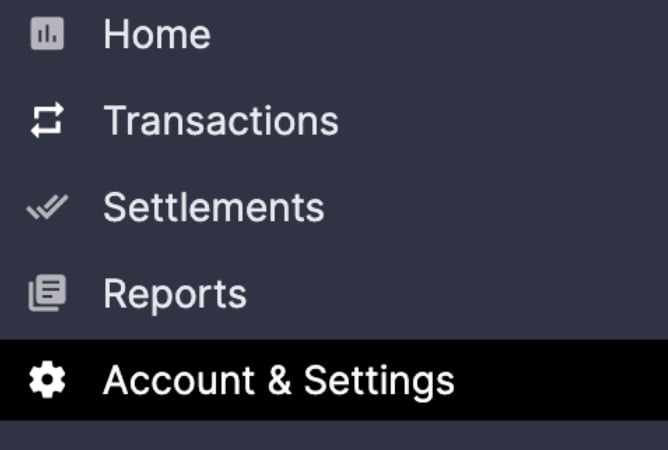
1. Log in to your **RazorPay** dashboard.
## Editing the payment method
To update, go to **Settings** > **Payment Providers**, click the three dots next to `RazorPay`, and select **Edit**.
## Configure RazorPay webhook
You must configure the RazorPay webhook so Upmind always receives transaction updates.
1. Log in to your **RazorPay** dashboard.
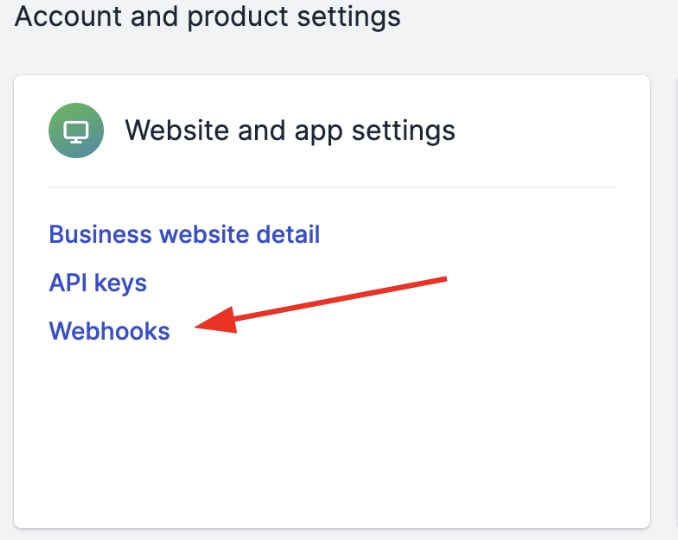
 2. Go to `Account & Settings`.
 3. Click **Webhooks** under **Website and app settings**.
 4. Click **+ Add New Webhook**.
 5. Enter the public **HTTPS URL** of your endpoint.
The webhook URL needs to be taken from the Upmind provider set up.
5. Enter the public **HTTPS URL** of your endpoint.
The webhook URL needs to be taken from the Upmind provider set up.
 6. Add a **Secret** for security on the webhook endpoint. (Optional)
7. In the **Alert Email** field, enter the address to receive webhook failure notifications, such as errors or deactivations.
8. Select the desired **Events** from the list.
6. Add a **Secret** for security on the webhook endpoint. (Optional)
7. In the **Alert Email** field, enter the address to receive webhook failure notifications, such as errors or deactivations.
8. Select the desired **Events** from the list.
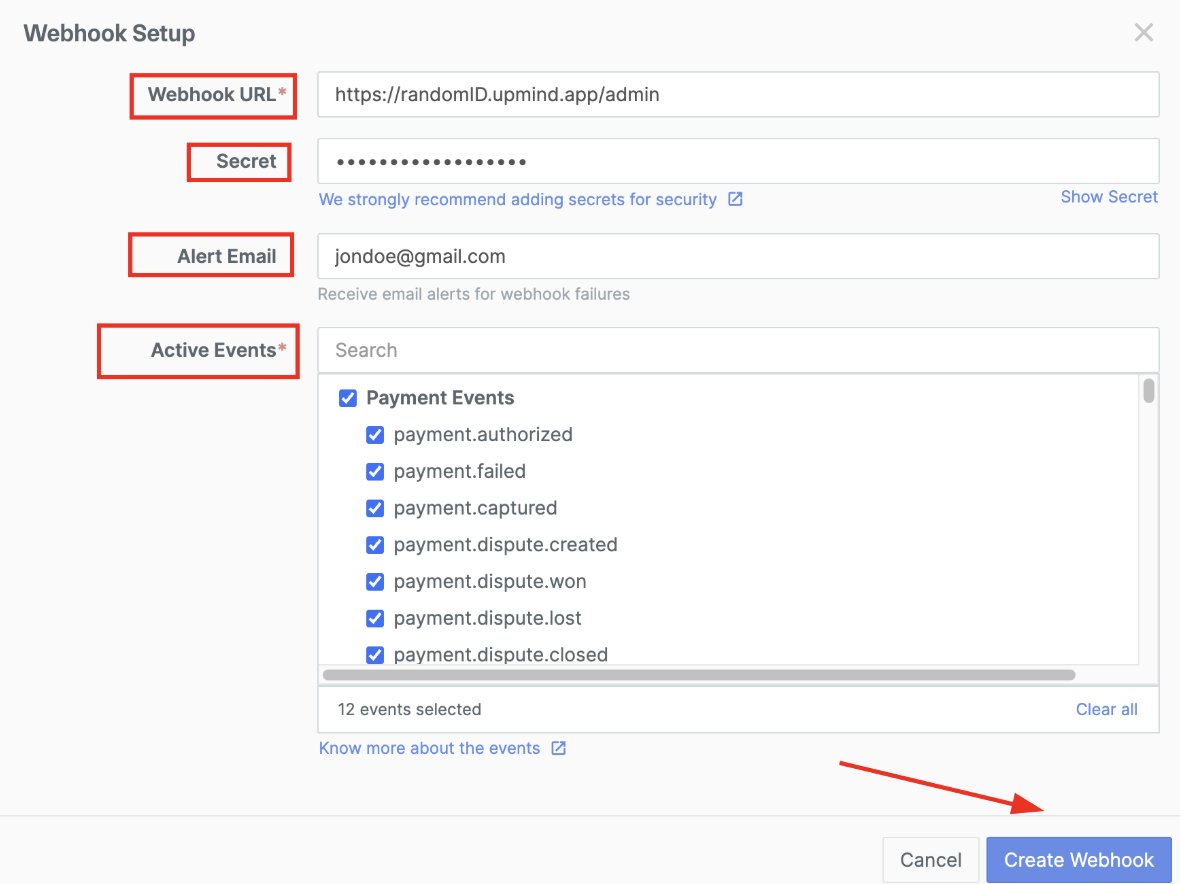 9. Click **Create Webhook**.
For more information, you can check out this [guide](https://razorpay.com/docs/webhooks/setup-edit-payments/) from RazorPay.
## How to Enable EMI payments on Razorpay
The EMI function is not enabled by default on Razorpay accounts. You need to raise a request through the Razorpay Dashboard for activation. The following EMI types are available:
* Credit Card EMI
* Debit Card EMI
* No Cost EMI
* Low Cost EMI
* Cardless EMI
Instant refunds are not supported on EMI transactions, so make sure your refund policies reflect this before going live.
### Requesting EMI for your account
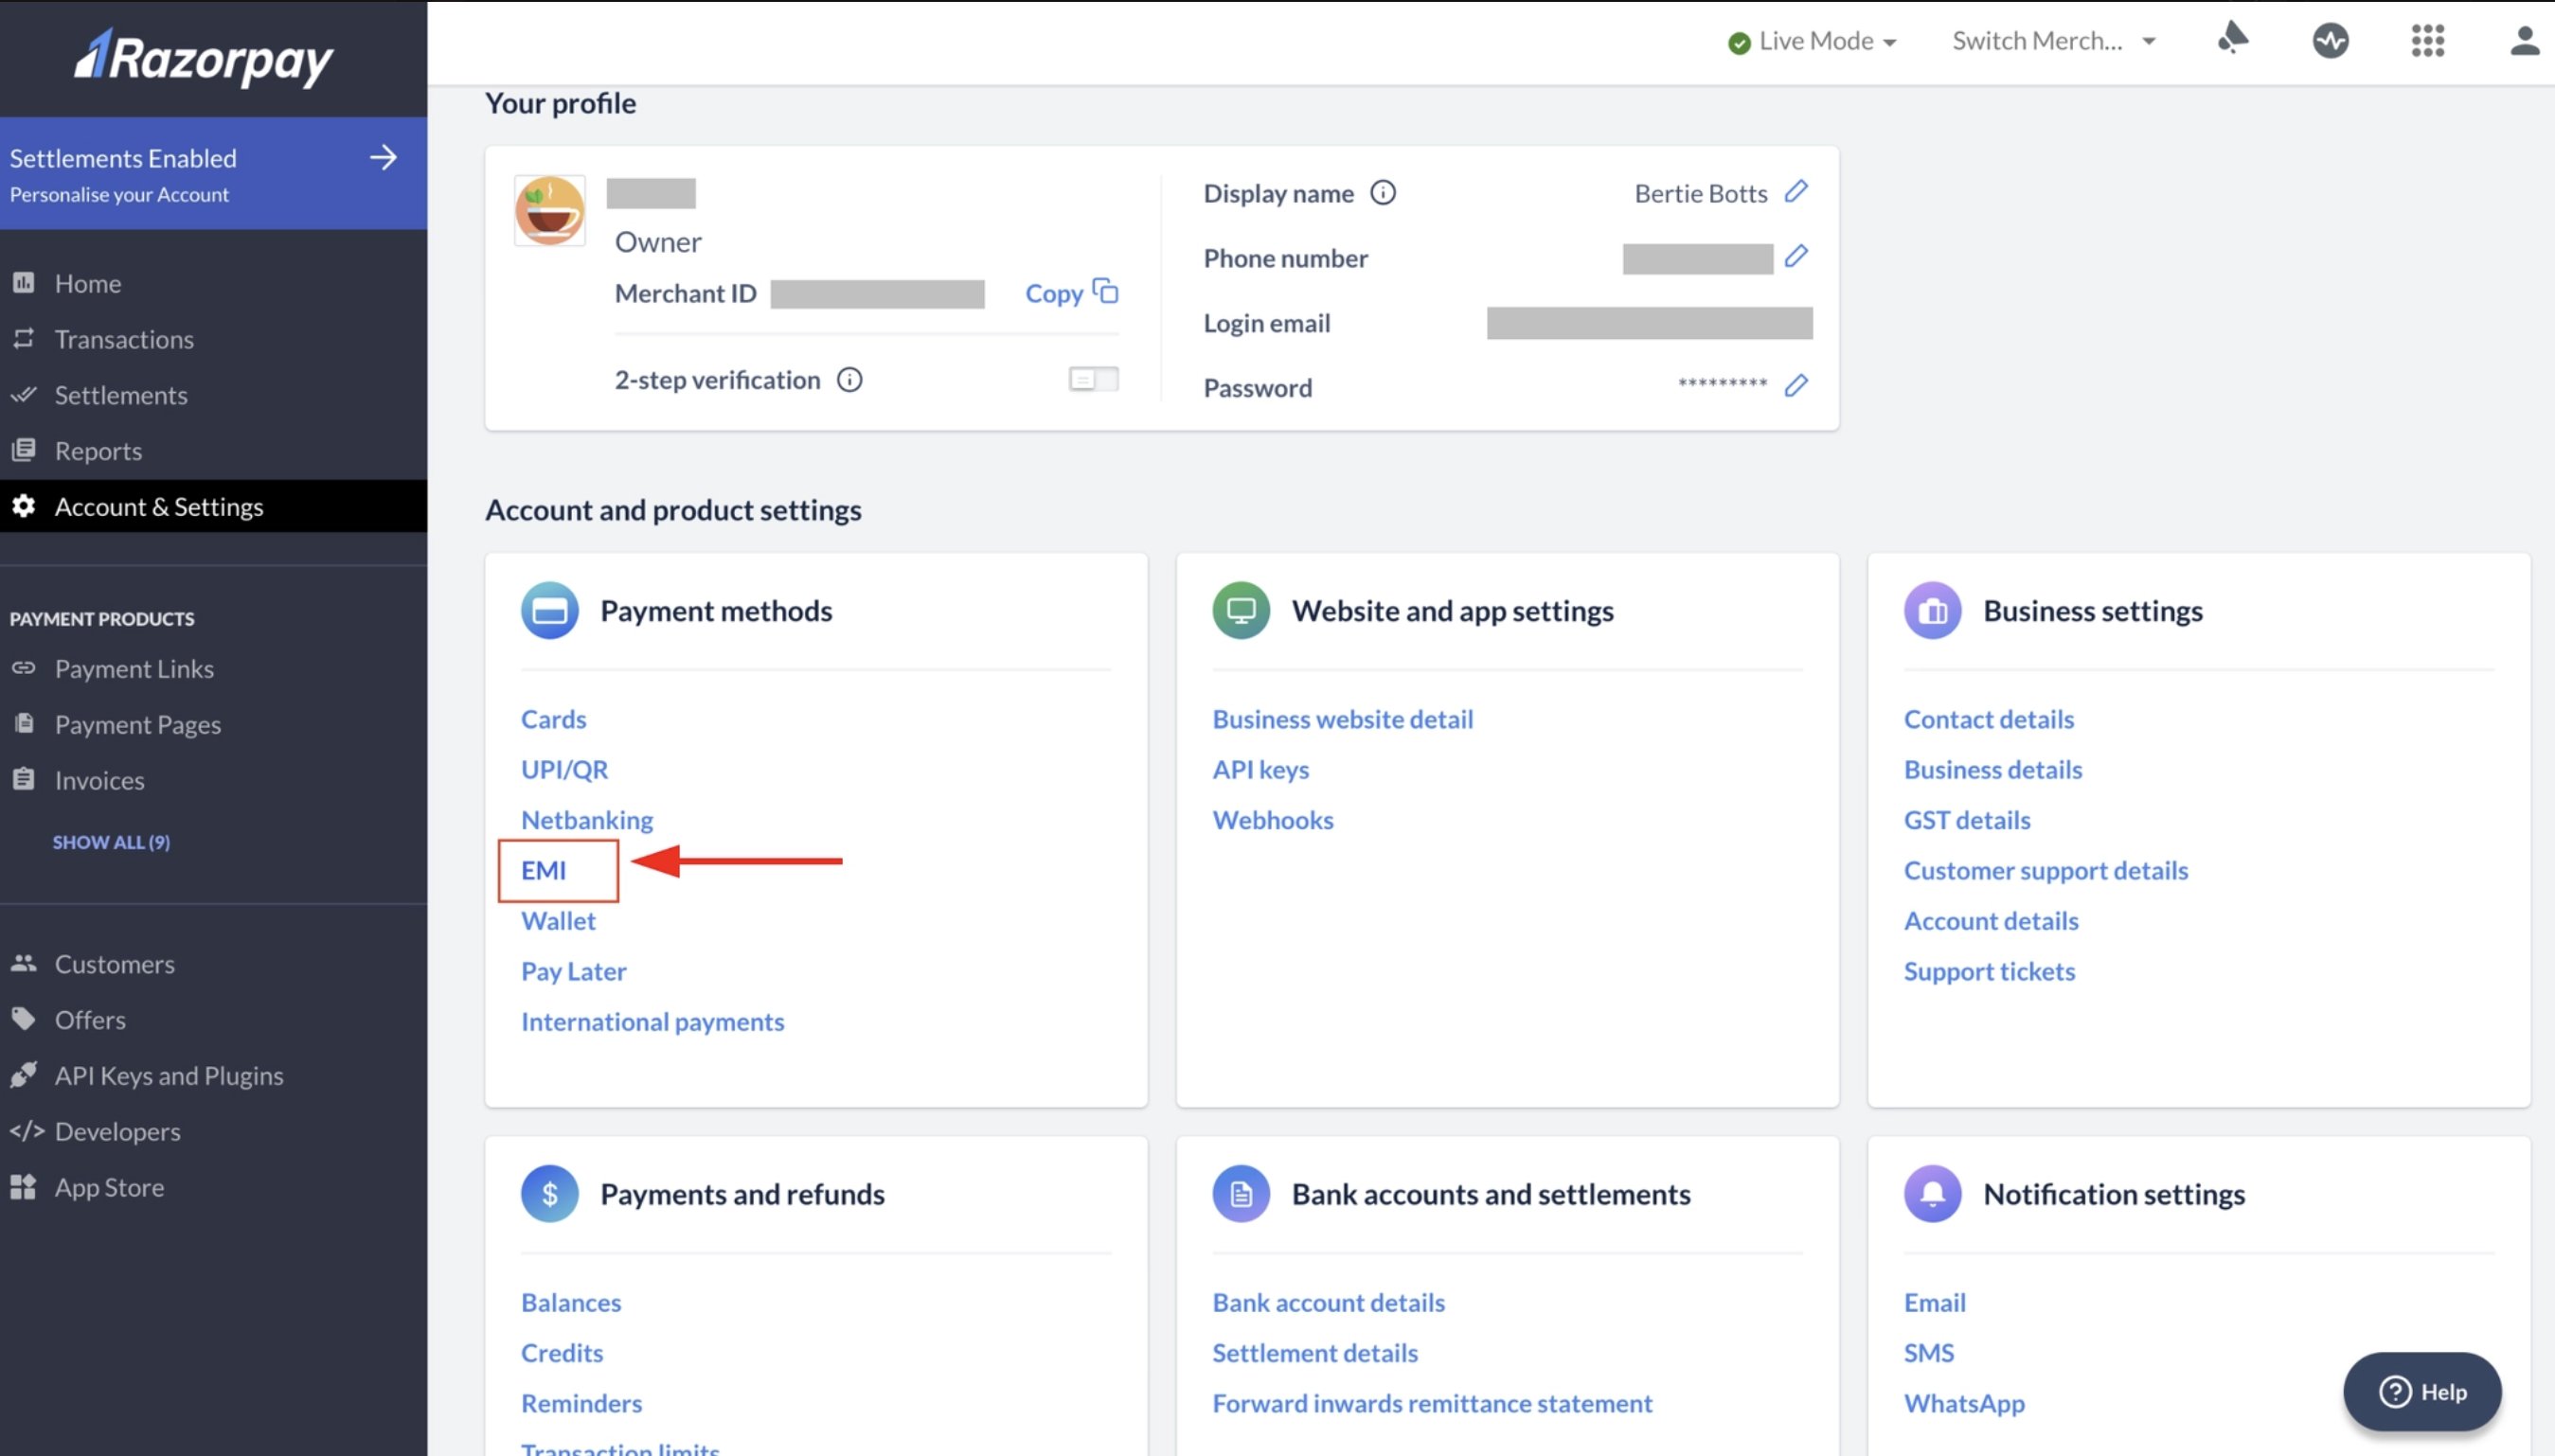
1. Log in to your **Razorpay Dashboard** in **Live mode** (this setting is only available in Live mode).
2. Go to **Account & Settings** > **Payment Methods**.
3. Click **Payment Methods**, then select **EMI** as the payment method type.
9. Click **Create Webhook**.
For more information, you can check out this [guide](https://razorpay.com/docs/webhooks/setup-edit-payments/) from RazorPay.
## How to Enable EMI payments on Razorpay
The EMI function is not enabled by default on Razorpay accounts. You need to raise a request through the Razorpay Dashboard for activation. The following EMI types are available:
* Credit Card EMI
* Debit Card EMI
* No Cost EMI
* Low Cost EMI
* Cardless EMI
Instant refunds are not supported on EMI transactions, so make sure your refund policies reflect this before going live.
### Requesting EMI for your account
1. Log in to your **Razorpay Dashboard** in **Live mode** (this setting is only available in Live mode).
2. Go to **Account & Settings** > **Payment Methods**.
3. Click **Payment Methods**, then select **EMI** as the payment method type.
 4. Find the EMI option you want to enable and click **Request**.
5. Review the activation timeline shown in the confirmation box, then click **Confirm**.
Once approved, you can verify which EMI options are active by returning to **Account & Settings** > **Payment Methods** in your Razorpay Dashboard.
For a full breakdown of supported banks, interest rates, and EMI types, refer to the [Razorpay EMI documentation](https://razorpay.com/docs/payments/payment-methods/emi/).
4. Find the EMI option you want to enable and click **Request**.
5. Review the activation timeline shown in the confirmation box, then click **Confirm**.
Once approved, you can verify which EMI options are active by returning to **Account & Settings** > **Payment Methods** in your Razorpay Dashboard.
For a full breakdown of supported banks, interest rates, and EMI types, refer to the [Razorpay EMI documentation](https://razorpay.com/docs/payments/payment-methods/emi/).