> ## Documentation Index
> Fetch the complete documentation index at: https://docs.upmind.com/llms.txt
> Use this file to discover all available pages before exploring further.
# How to Create an Advanced Promo Code
> Different codes for different products
This article shows you how to create a promotion code that applies different discounts to different products. You also learn how to create an optional mandatory product which is a required purchase before Upmind applies the promo code discount.
Upmind offers two offer types of discounts.
* For store-wide discounts, create a [single discount](/using-upmind/marketing-tools/how-to-create-a-basic-promotion-code) code for every product or service.
* For a [group discount](/using-upmind/marketing-tools/how-to-create-a-promo-code-for-a-group-of), create a single code that applies a single discount to multiple items.
## Opening the Promotions page
1. Log in to your Upmind account.
2. Click Settings.
3. Click the Promotions tile.
4. On the next page, click the Add promotion button.
## Setting promotion details
Fill fields and customise options on the Add promotion page.
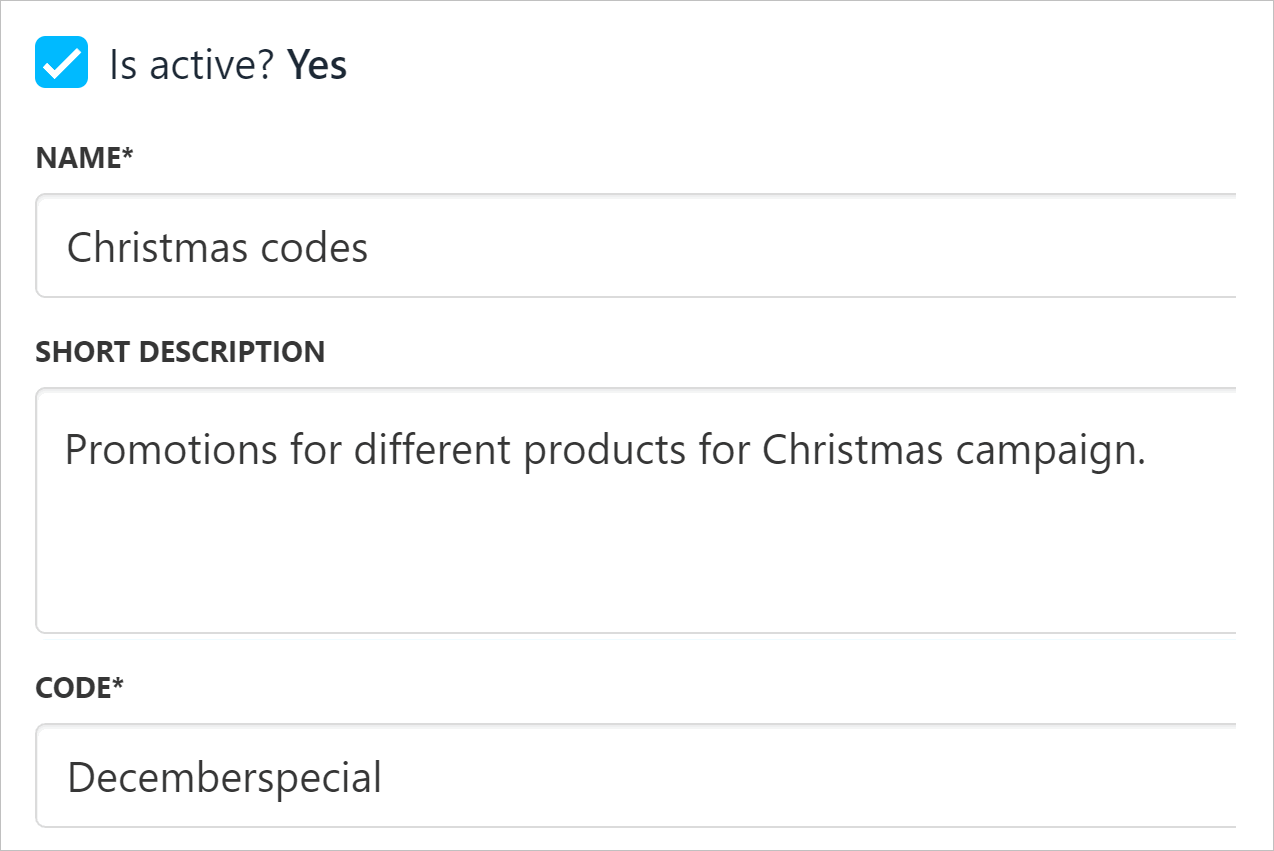
1. Check the box to activate the promotion code.
2. Enter a name for the promotion.
3. Enter a brief description.
4. Enter a code.
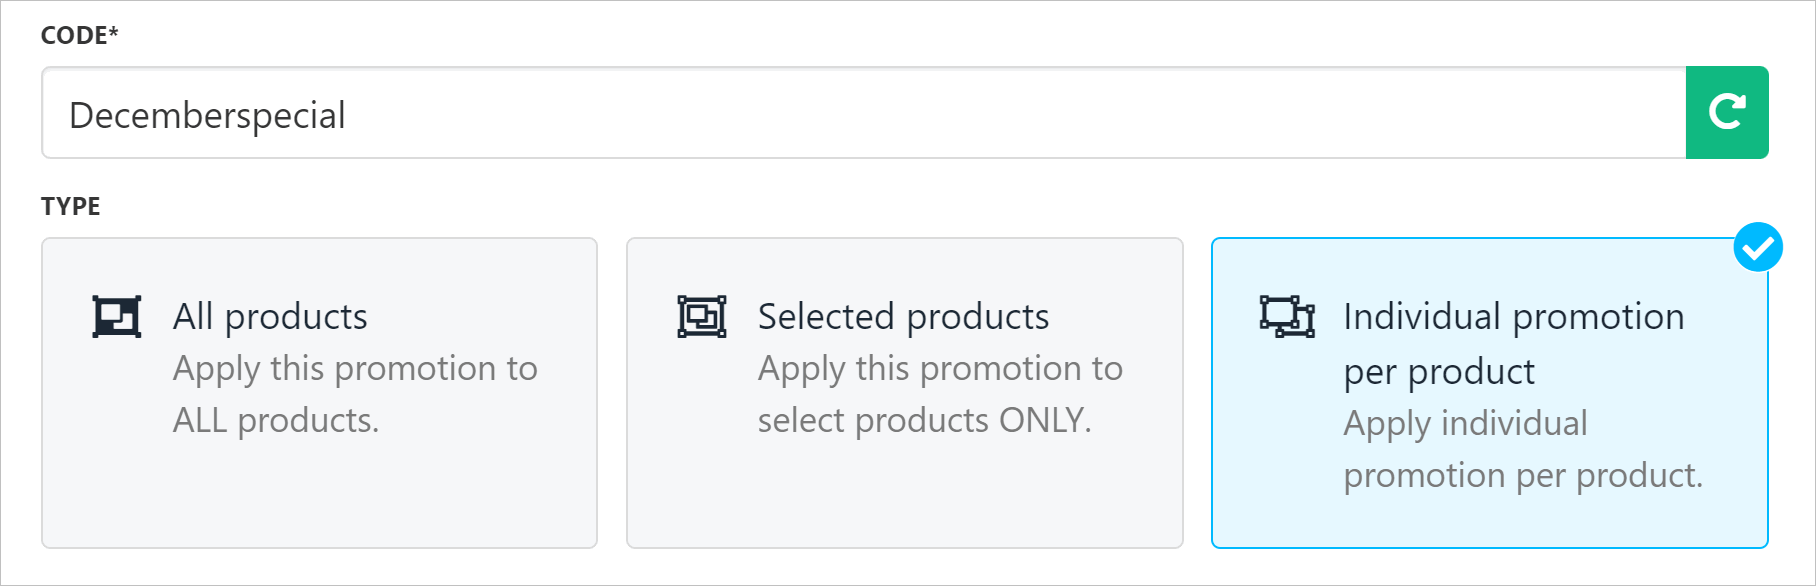
 5. Click the Individual promotion per product tile.
 ## Adding products
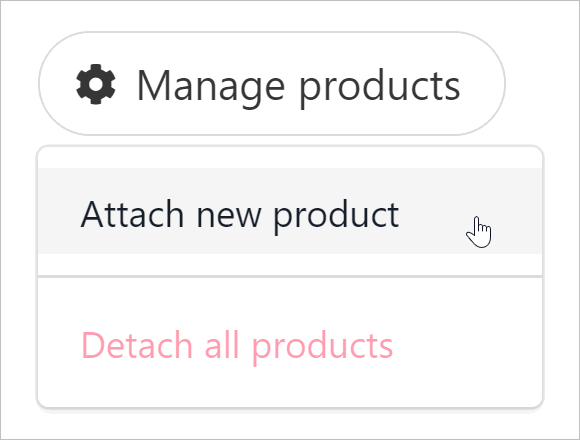
1. Click the Manage products button.
2. Click Attach new product.
## Adding products
1. Click the Manage products button.
2. Click Attach new product.
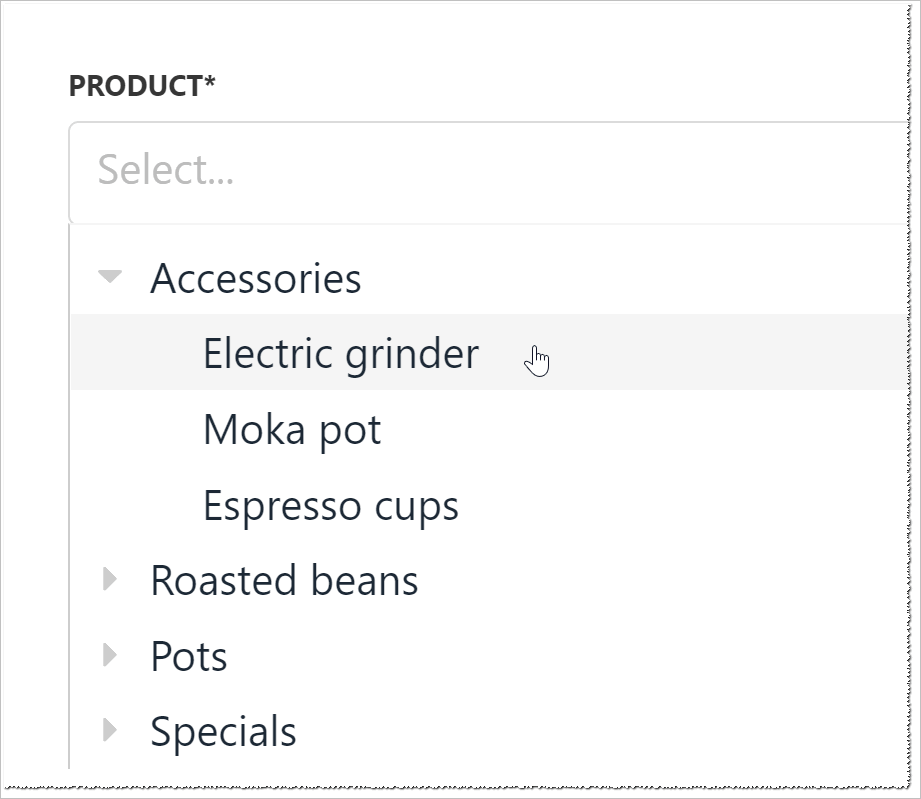
 3. On the new window, click the field and select a product.
 4. Select a discount type: fixed amount or percentage.
5. Enter a discount value.
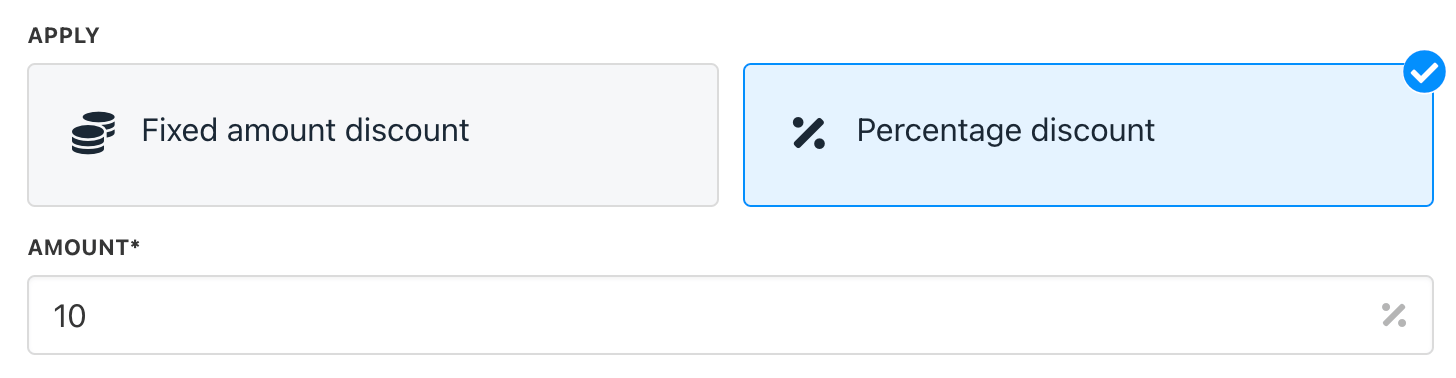
4. Select a discount type: fixed amount or percentage.
5. Enter a discount value.
 6. Scroll down the page and customise the settings.
7. Check or uncheck boxes as required.
8. Click Save.
9. Repeat steps to add another product.
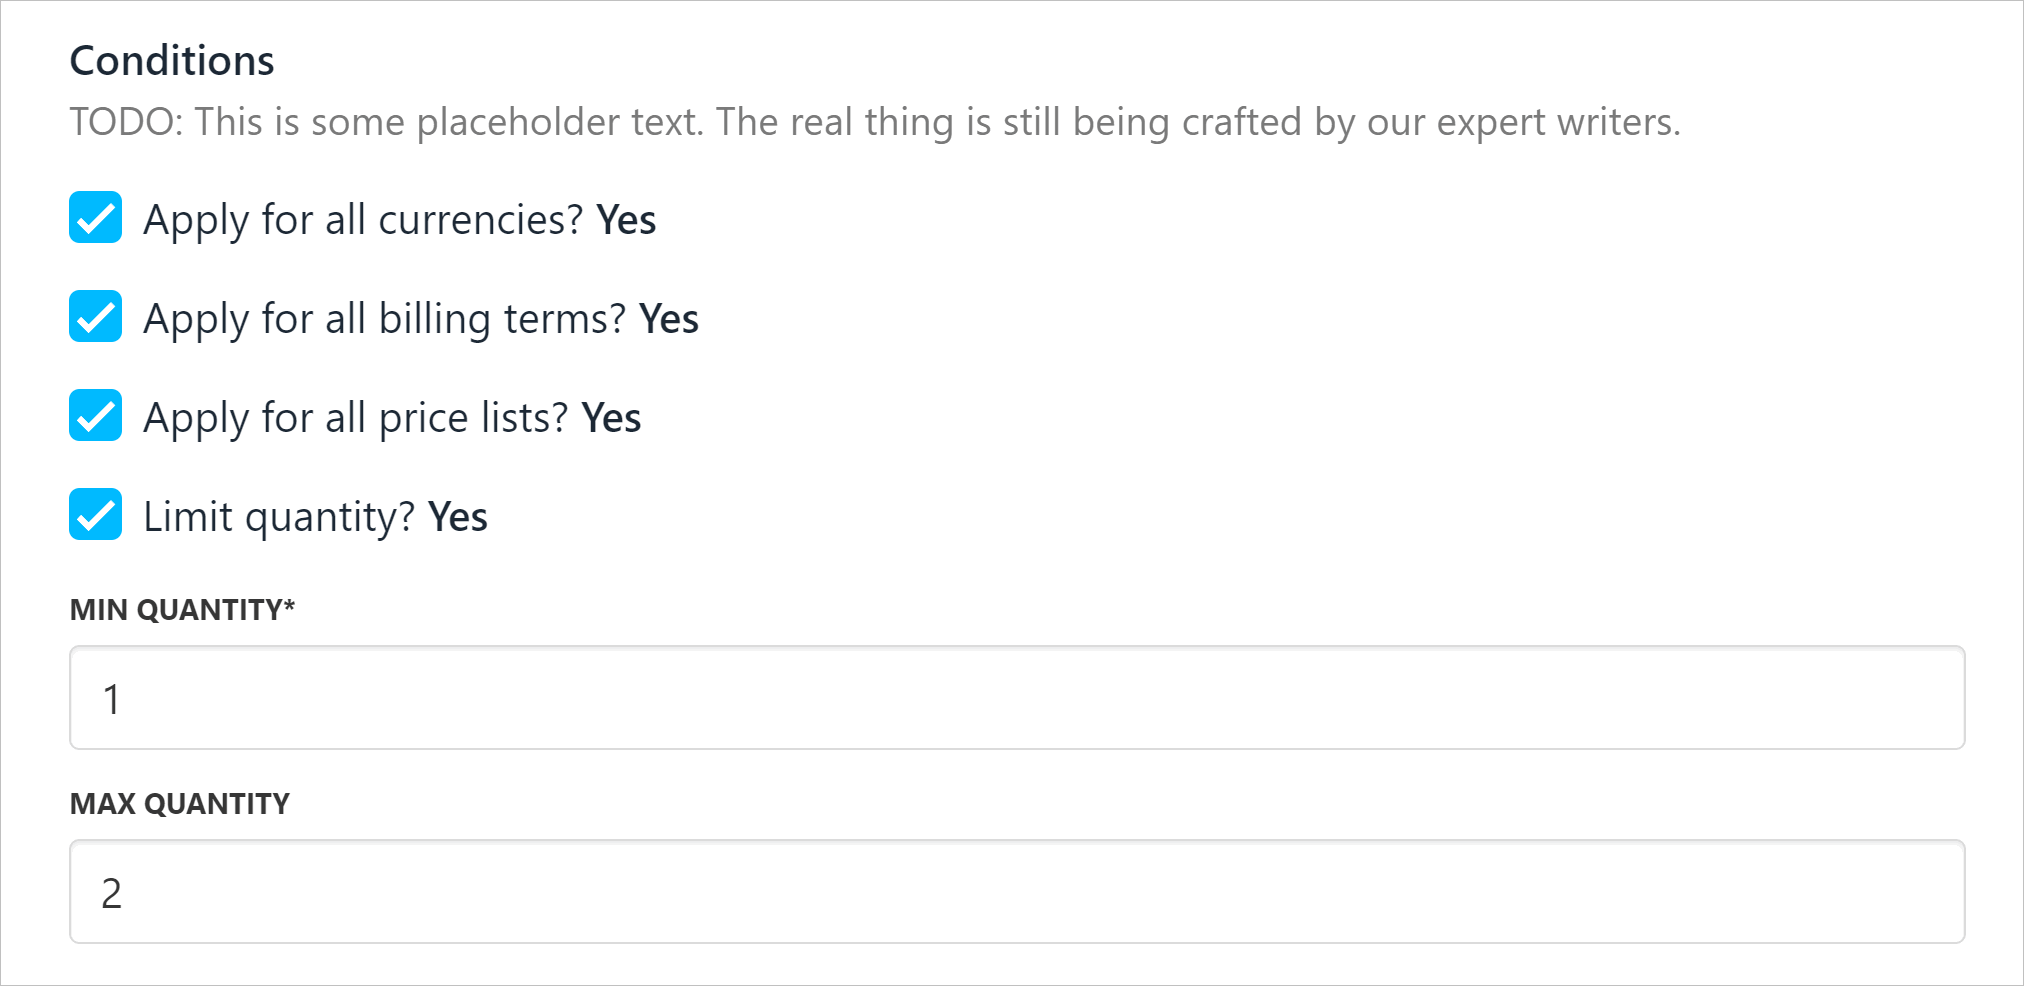
By default, the Limit quantity box is unchecked. If you check the box, add a minimum and maximum quantity.
6. Scroll down the page and customise the settings.
7. Check or uncheck boxes as required.
8. Click Save.
9. Repeat steps to add another product.
By default, the Limit quantity box is unchecked. If you check the box, add a minimum and maximum quantity.
 ## Adding a mandatory product
You can make promotion codes conditional upon the purchase of one or more mandatory products.
For example, a 10% discount on Moka coffee pots is not valid unless the customer adds a bag of coffee beans (the mandatory product) to the basket.
1. Under the Mandatory products heading, click the Manage products button.
2. Click Attach new products.
3. Complete the workflow to add a product or service.
## Setting availability and eligibility
Scroll down the page and set the conditions for all items attached to this promotion code.
1. Set the start and end dates.
2. Check the maximum number of uses (all clients). The default is Unlimited.
3. Select Single or Multiple if you want to limit the number of times this code can be used by all clients. (optional)
4. Check the maximum number of times an individual client can use the promo code. The default is Unlimited.
5. Select Single or Multiple if you want to limit the number of times this code can be used by any client. (optional)
6. Review the Recurring count option.
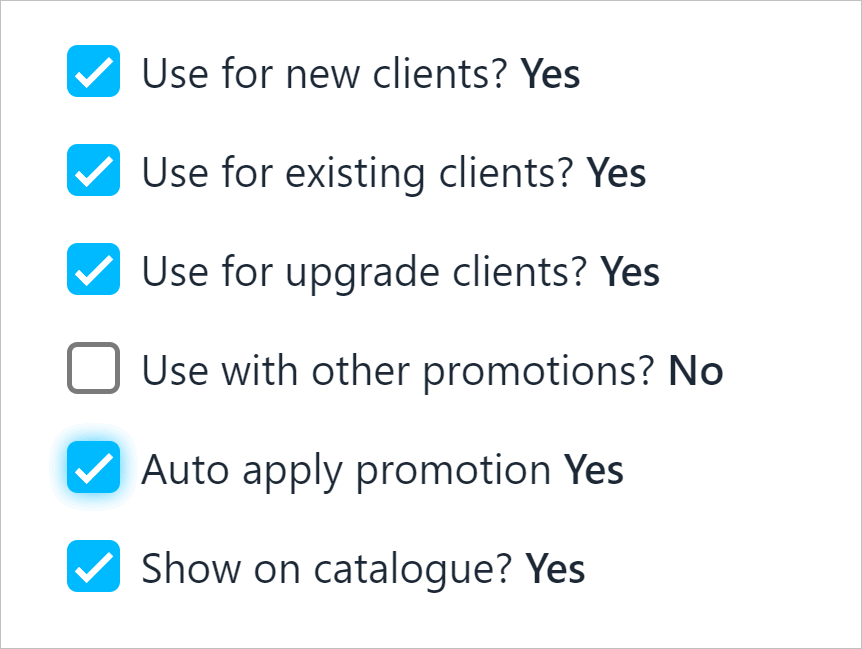
7. Review the checkboxes and customise as required.
8. Click Save.
## Adding a mandatory product
You can make promotion codes conditional upon the purchase of one or more mandatory products.
For example, a 10% discount on Moka coffee pots is not valid unless the customer adds a bag of coffee beans (the mandatory product) to the basket.
1. Under the Mandatory products heading, click the Manage products button.
2. Click Attach new products.
3. Complete the workflow to add a product or service.
## Setting availability and eligibility
Scroll down the page and set the conditions for all items attached to this promotion code.
1. Set the start and end dates.
2. Check the maximum number of uses (all clients). The default is Unlimited.
3. Select Single or Multiple if you want to limit the number of times this code can be used by all clients. (optional)
4. Check the maximum number of times an individual client can use the promo code. The default is Unlimited.
5. Select Single or Multiple if you want to limit the number of times this code can be used by any client. (optional)
6. Review the Recurring count option.
7. Review the checkboxes and customise as required.
8. Click Save.
 On the checkout page in the client area, each selected product must have one mandatory product to apply a discount. To apply discounts to two selected products, add two mandatory products to the cart.
## Editing a promotion
To modify a promotion:
1. Open the Promotions page.
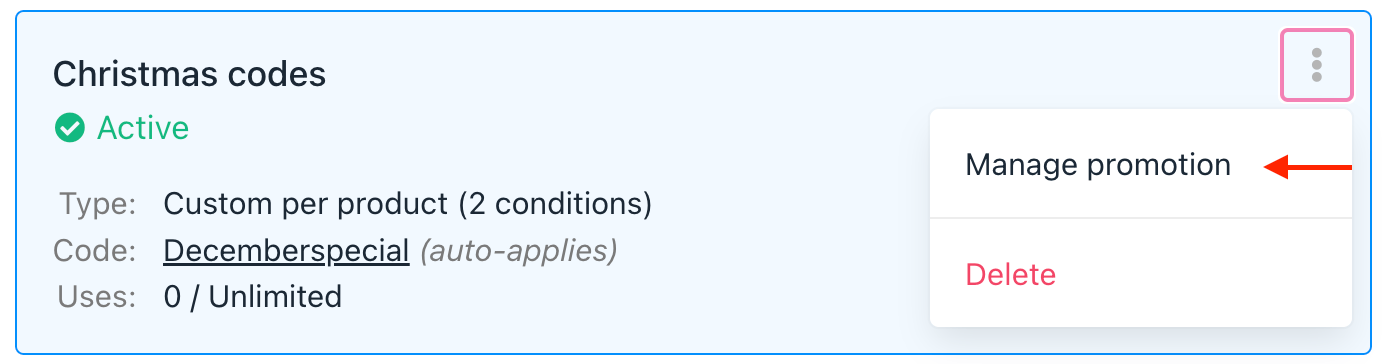
2. Click the three dots.
3. Click Manage promotion.
4. Make changes.
5. Click Save.
On the checkout page in the client area, each selected product must have one mandatory product to apply a discount. To apply discounts to two selected products, add two mandatory products to the cart.
## Editing a promotion
To modify a promotion:
1. Open the Promotions page.
2. Click the three dots.
3. Click Manage promotion.
4. Make changes.
5. Click Save.
 ## Removing a promotion
To delete a promotion:
1. Open the Promotions page.
2. Click the three dots.
3. Click Delete.
4. Enter the number in the confirmation pop-up window.
5. Click Delete.
## Tracking promo code use
1. Go to the Edit promotion page.
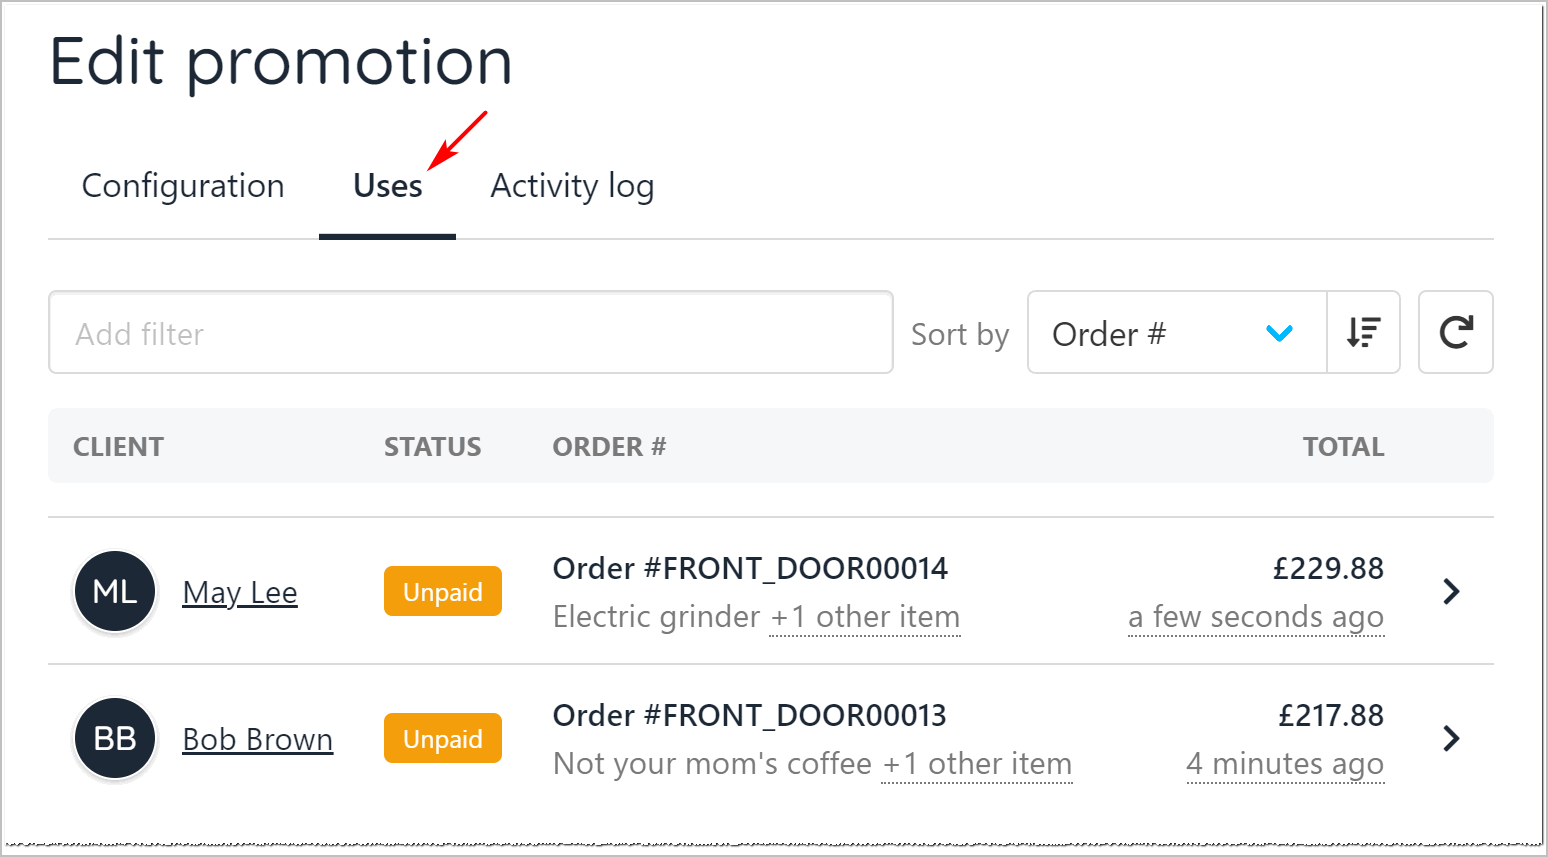
2. Click the Uses menu tab.
* Upmind shows the clients who have used the code.
## Removing a promotion
To delete a promotion:
1. Open the Promotions page.
2. Click the three dots.
3. Click Delete.
4. Enter the number in the confirmation pop-up window.
5. Click Delete.
## Tracking promo code use
1. Go to the Edit promotion page.
2. Click the Uses menu tab.
* Upmind shows the clients who have used the code.
 ## Customer view
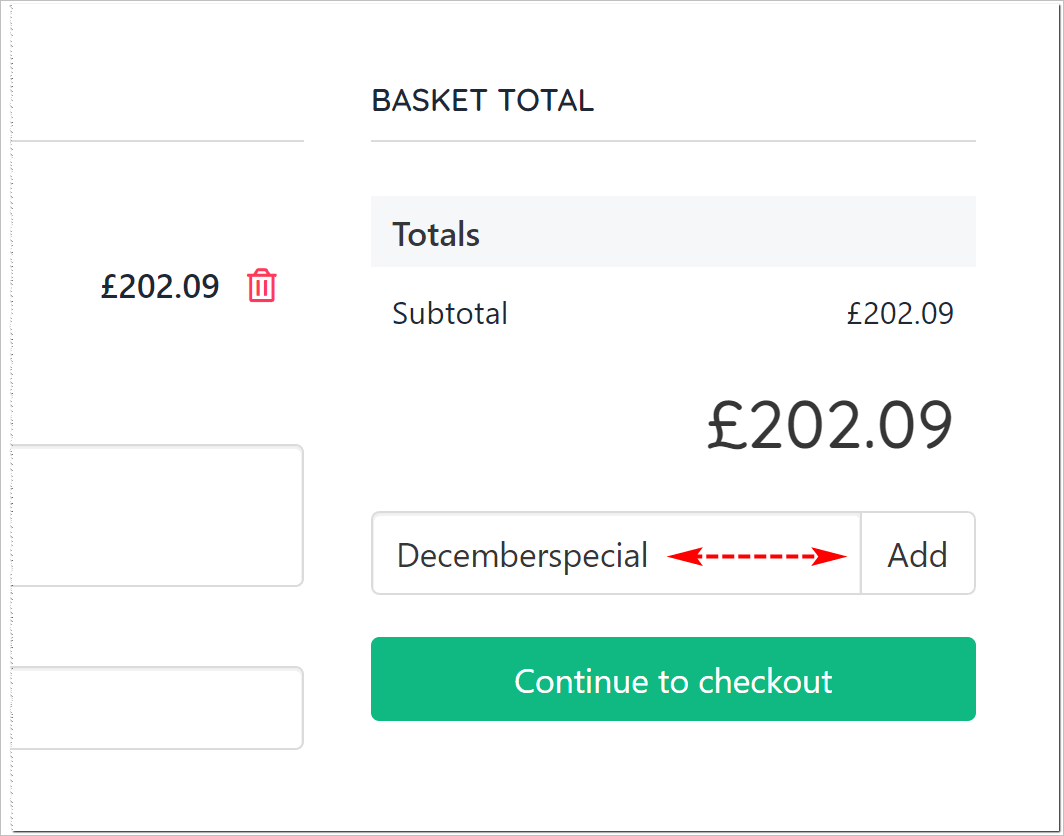
Upmind applies the discount at the checkout.
* If you enable the auto-apply option, the discount is applied automatically.
## Customer view
Upmind applies the discount at the checkout.
* If you enable the auto-apply option, the discount is applied automatically.
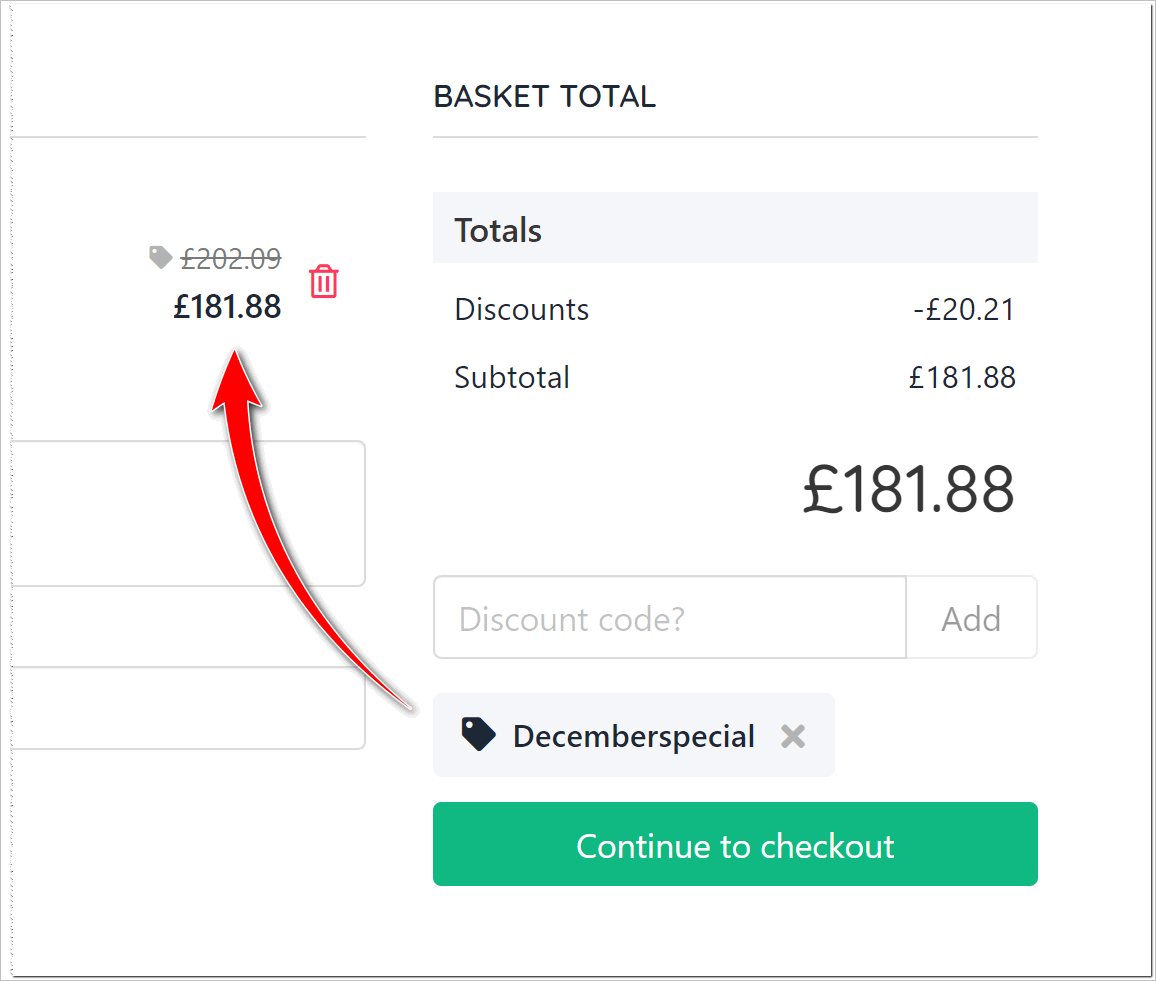 * If you disable the auto-apply option, the customer must enter the discount code and click the Add button.