> ## Documentation Index
> Fetch the complete documentation index at: https://docs.upmind.com/llms.txt
> Use this file to discover all available pages before exploring further.
# How to Use Credit Limit
> Manage prepaid balances and limits.
The **credit limit** feature lets clients use their wallet balances below zero up to a set limit, providing greater flexibility.
This guide explains how to set and manage credit limits and wallet statements at both the **Brand** and **Client** levels.
## Configuring the credit limit at the brand level
1. Go to **Settings** > **Payment Options** under Ecommerce Settings.
2. Scroll to **Client Wallet**.
3. Check the box to enable **Credit Limit** and set the maximum amount you want to allow.
4. Choose the **day of the month for generating the wallet statement**.
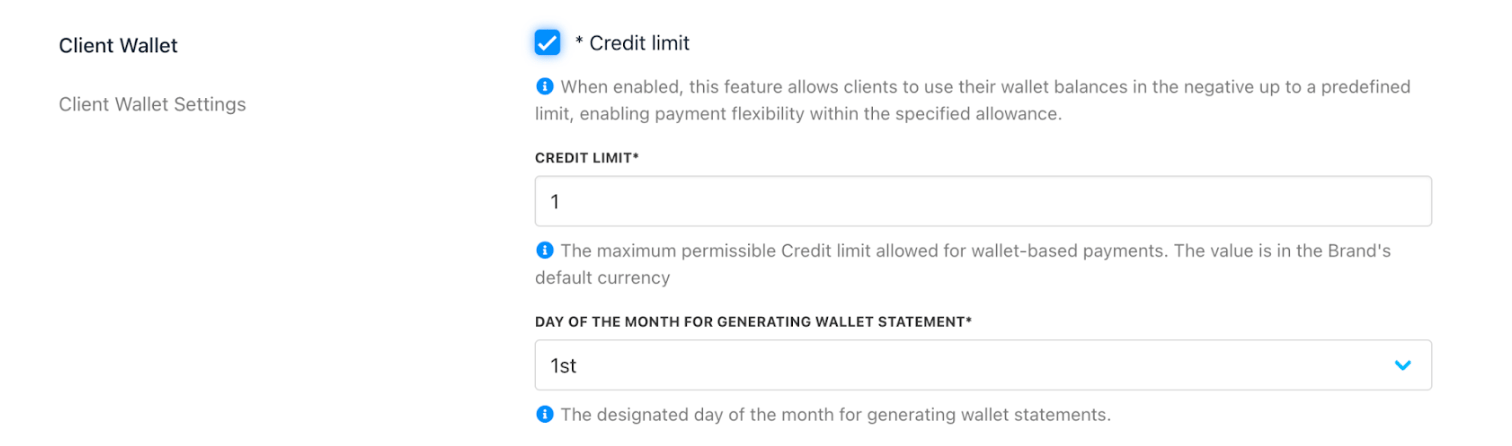 The credit limit operates in the brand's default currency.
## Setting the credit limit at the client level
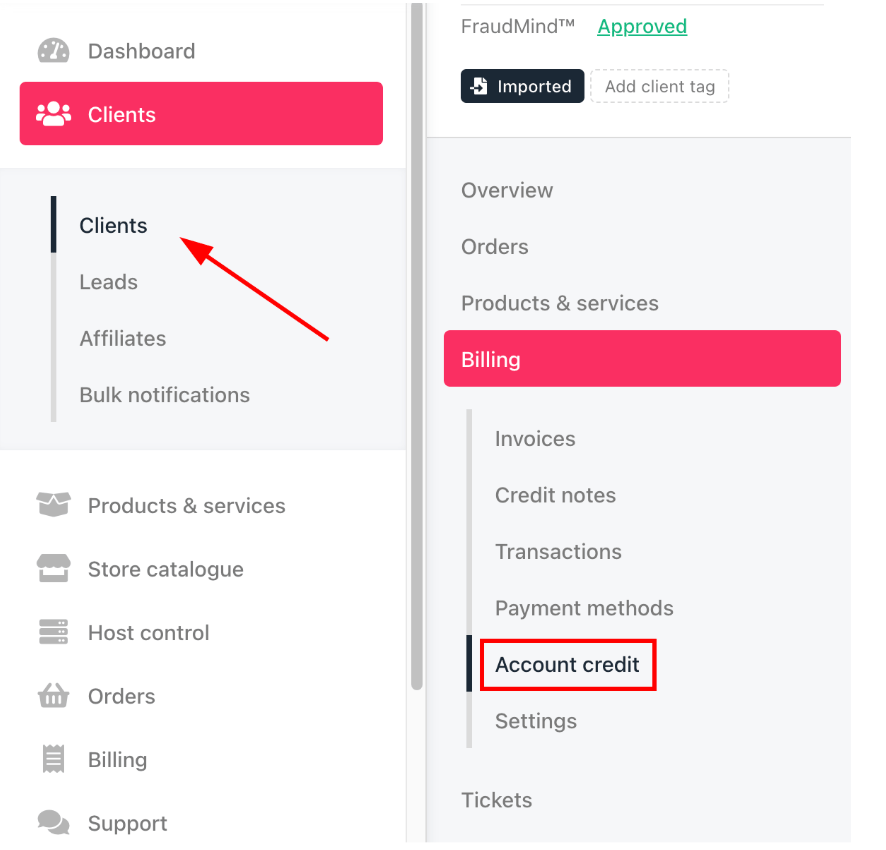
1. Go to `Clients` and select a client.
2. Click **Billing** > **Account Credit**.
The credit limit operates in the brand's default currency.
## Setting the credit limit at the client level
1. Go to `Clients` and select a client.
2. Click **Billing** > **Account Credit**.
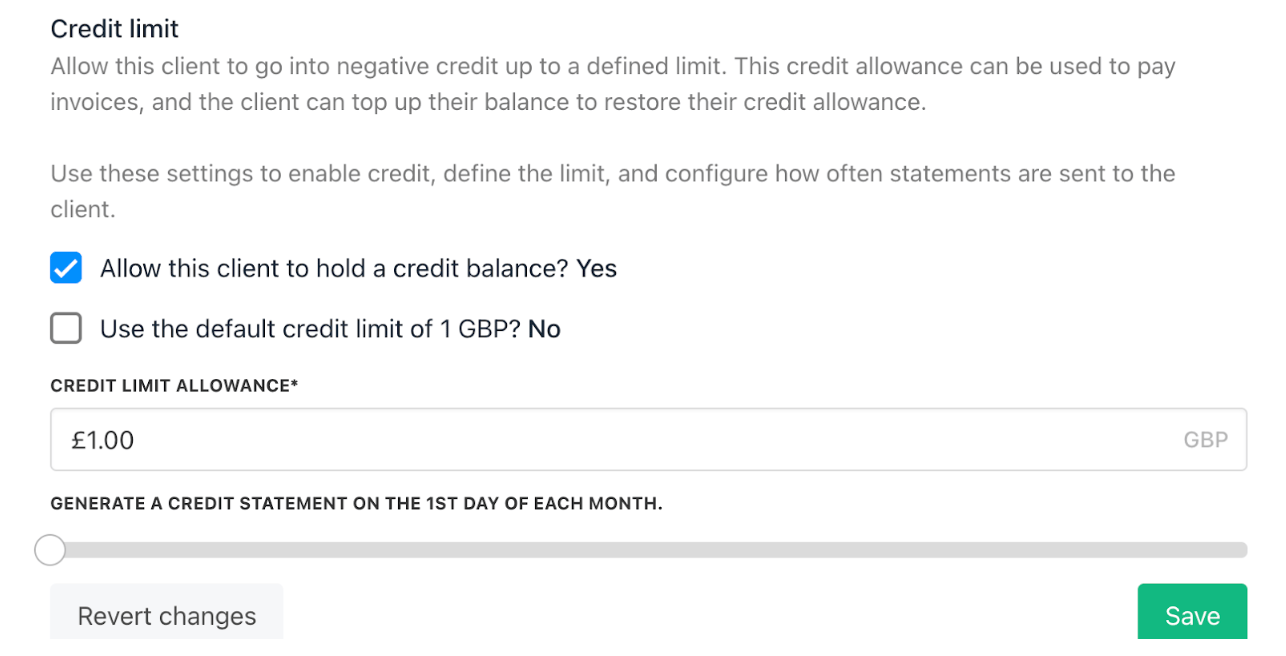
 3. Check the box to enable credit balance usage and set a specific limit or use the brand default.
4. Choose the statement generation day (optional).
3. Check the box to enable credit balance usage and set a specific limit or use the brand default.
4. Choose the statement generation day (optional).
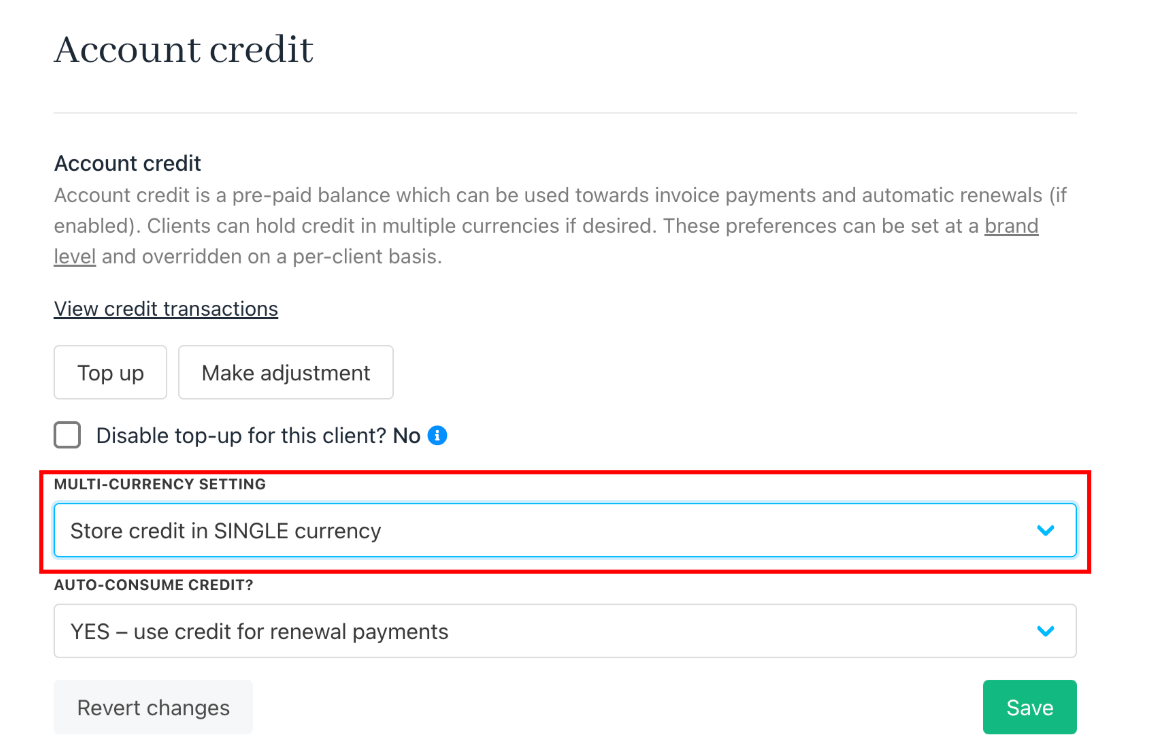
 The Credit Limit feature is only available if the multi-currency setting is store credit in single currency.
 The settings for the **Credit Limit** are described below:
## How clients see credit limits in the client area
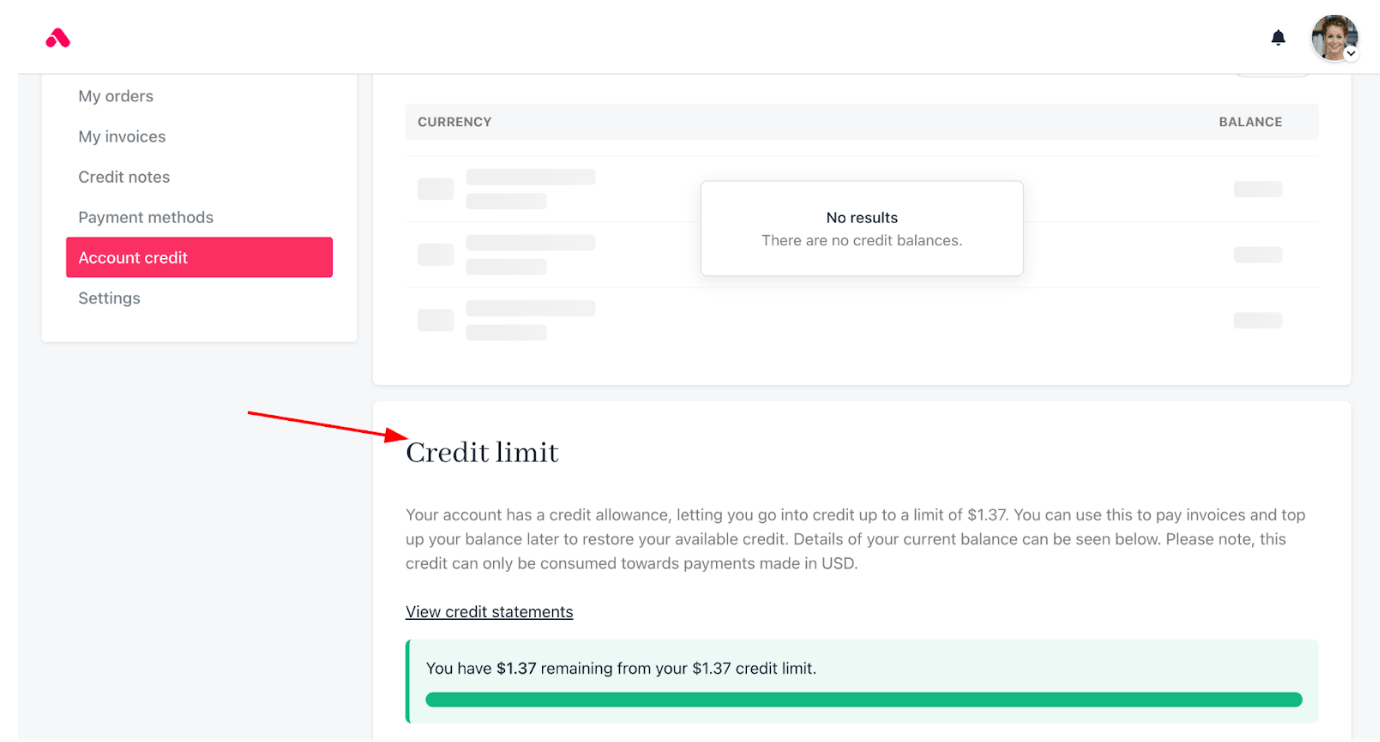
1. Clients see their credit limit in their preferred currency from **Billing** > **Account Credit** > **Credit Limit**.
The settings for the **Credit Limit** are described below:
## How clients see credit limits in the client area
1. Clients see their credit limit in their preferred currency from **Billing** > **Account Credit** > **Credit Limit**.
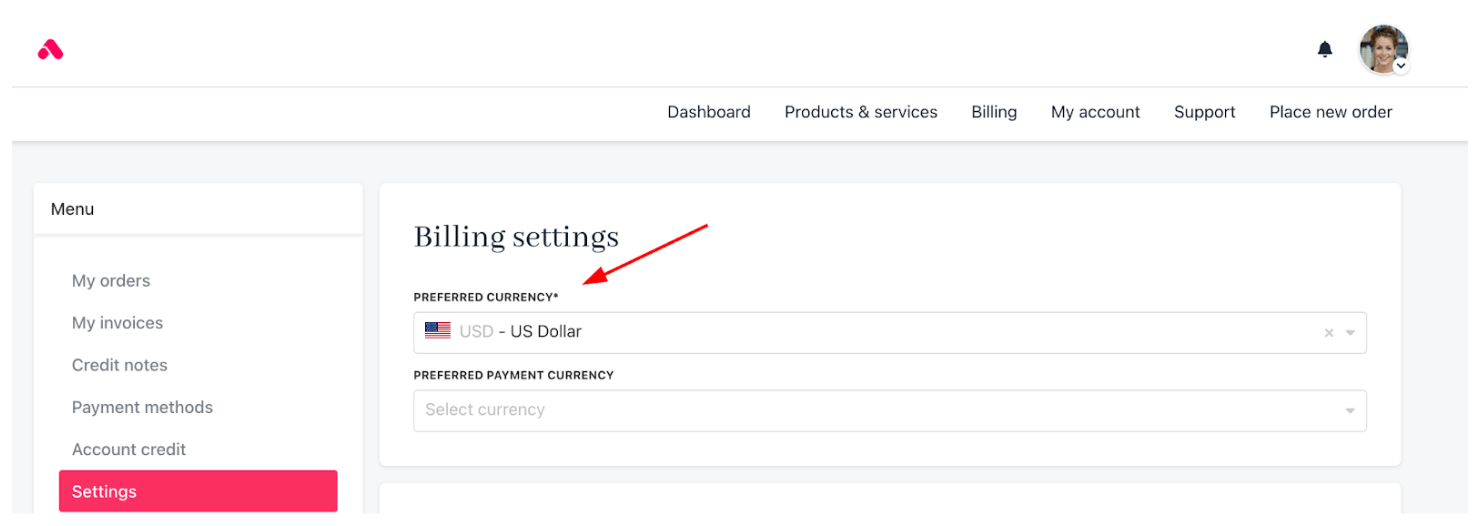 2. Once a currency is used for payment, all future credit payments must use the same currency.
**Example**: If a client makes their first payment in USD, all future credit limit payments must also be in USD.
2. Once a currency is used for payment, all future credit payments must use the same currency.
**Example**: If a client makes their first payment in USD, all future credit limit payments must also be in USD.
 ## How to enable auto consume balance on the invoice due date
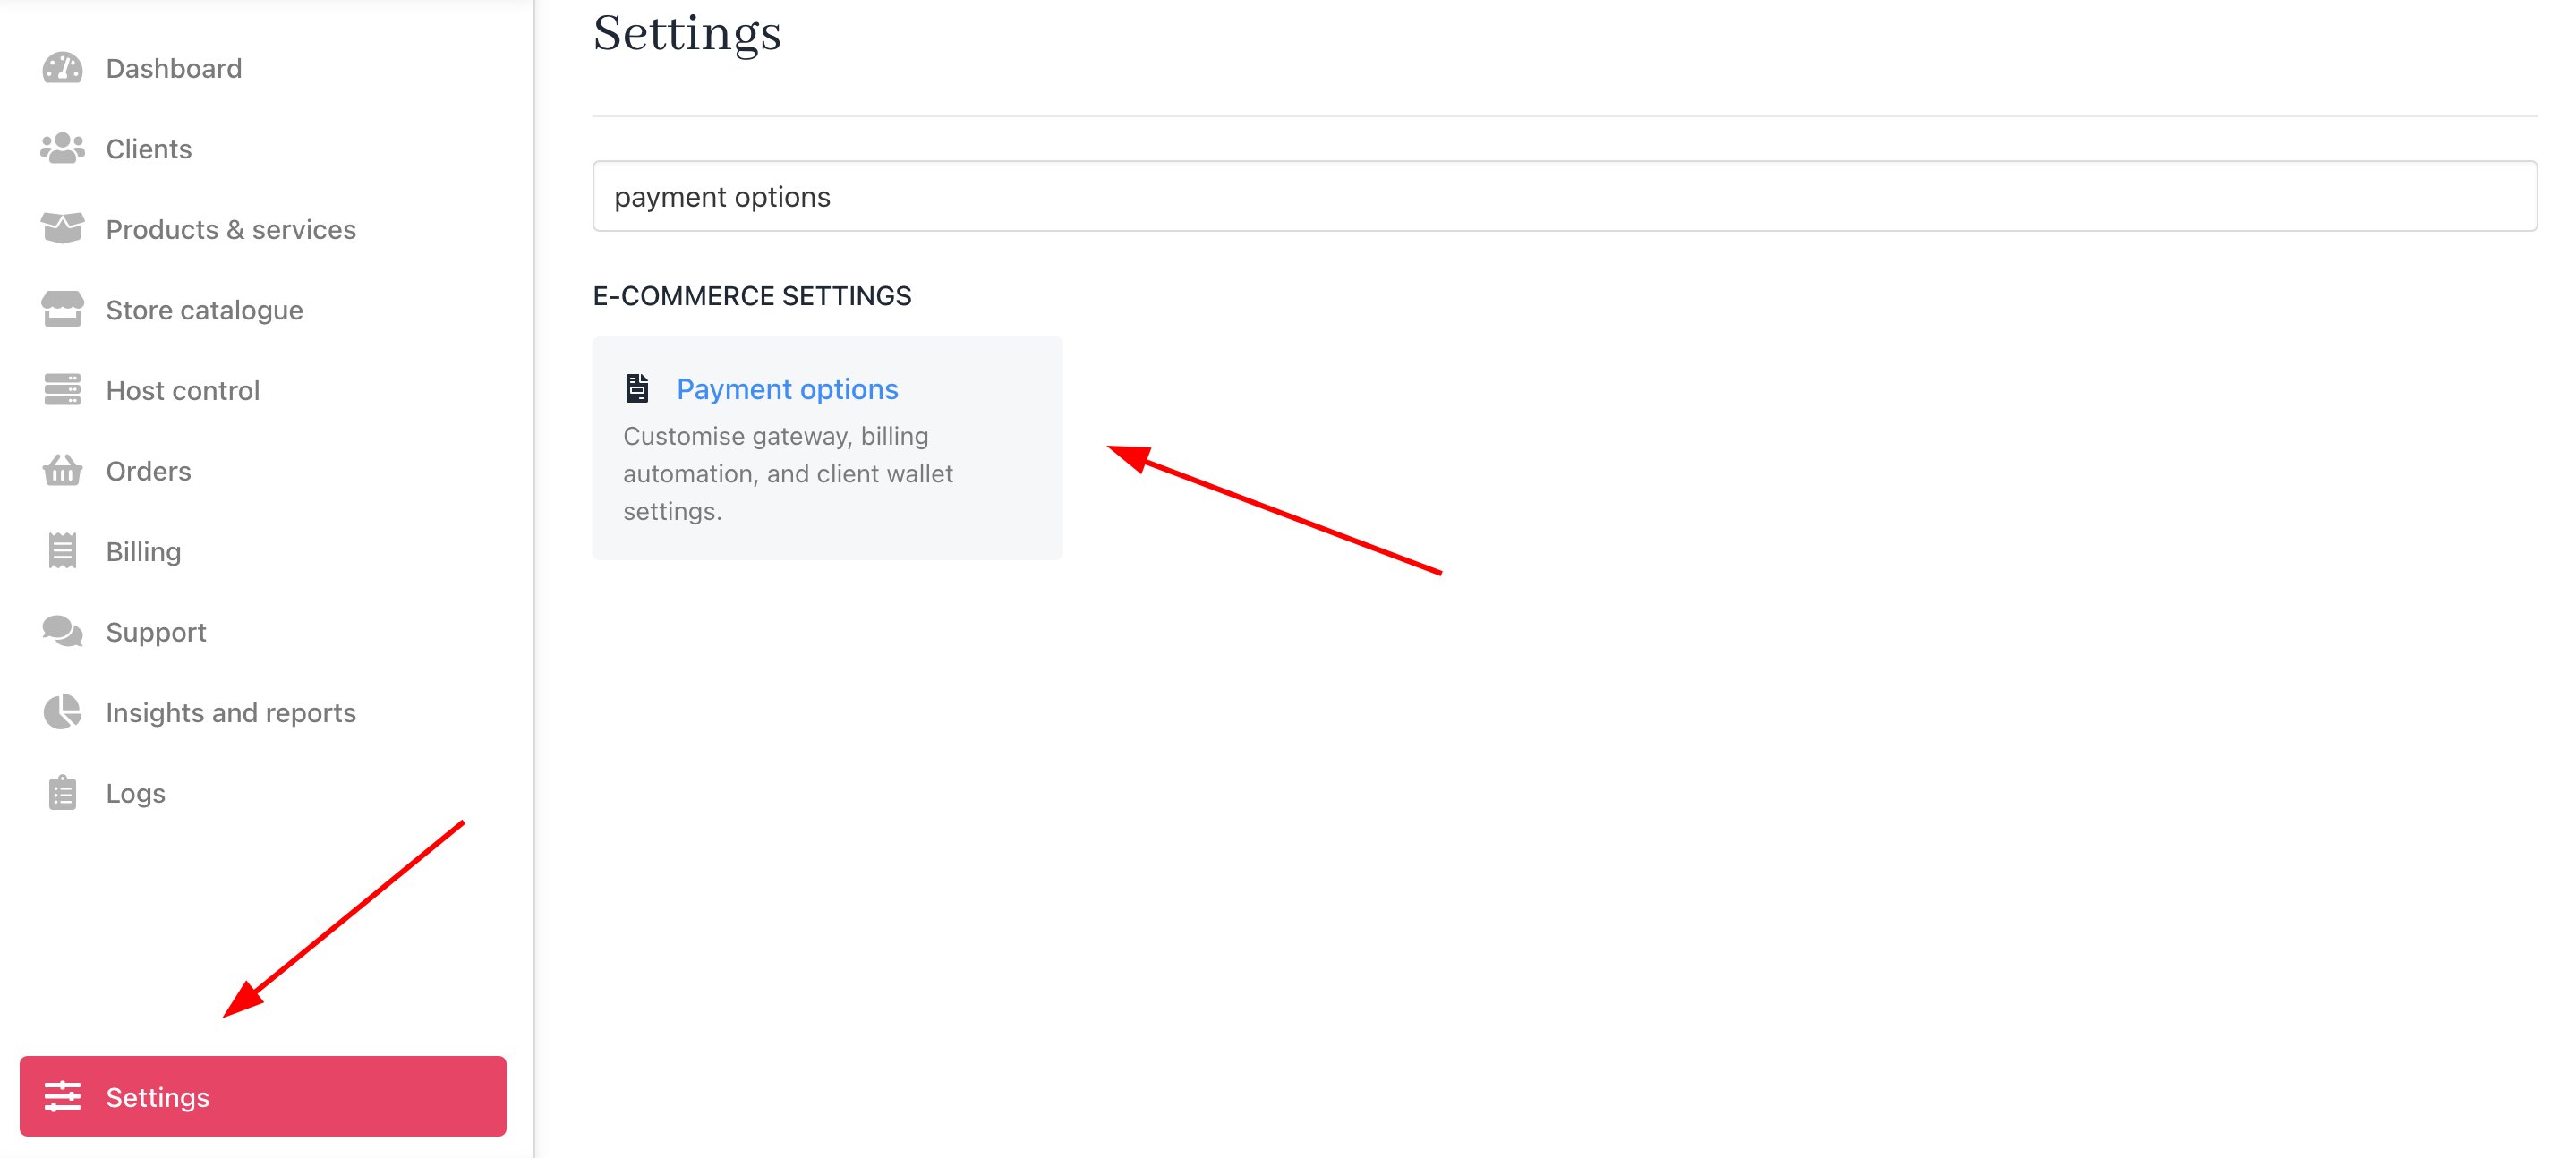
1. Go to **Settings** > **Payment Options** under **E-commerce Settings**.
2. Scroll to the **Client Wallet** section.
3. Toggle **Auto Consume Balance on Invoice Due Date** on or off as needed.
4. Save your changes.
## How to enable auto consume balance on the invoice due date
1. Go to **Settings** > **Payment Options** under **E-commerce Settings**.
2. Scroll to the **Client Wallet** section.
3. Toggle **Auto Consume Balance on Invoice Due Date** on or off as needed.
4. Save your changes.
 When enabled, Upmind draws from the client's wallet balance at the point of automatic payment collection. If the wallet balance covers the full invoice amount, the invoice is marked as paid. If it only covers part of the amount, the wallet credit is applied first, and the remaining balance is collected from the client's payment method, or left as an outstanding balance if no payment method is on file.
 This setting is enabled by default.
## Accessing and editing the wallet statement template
You can customise your brand's wallet statements.
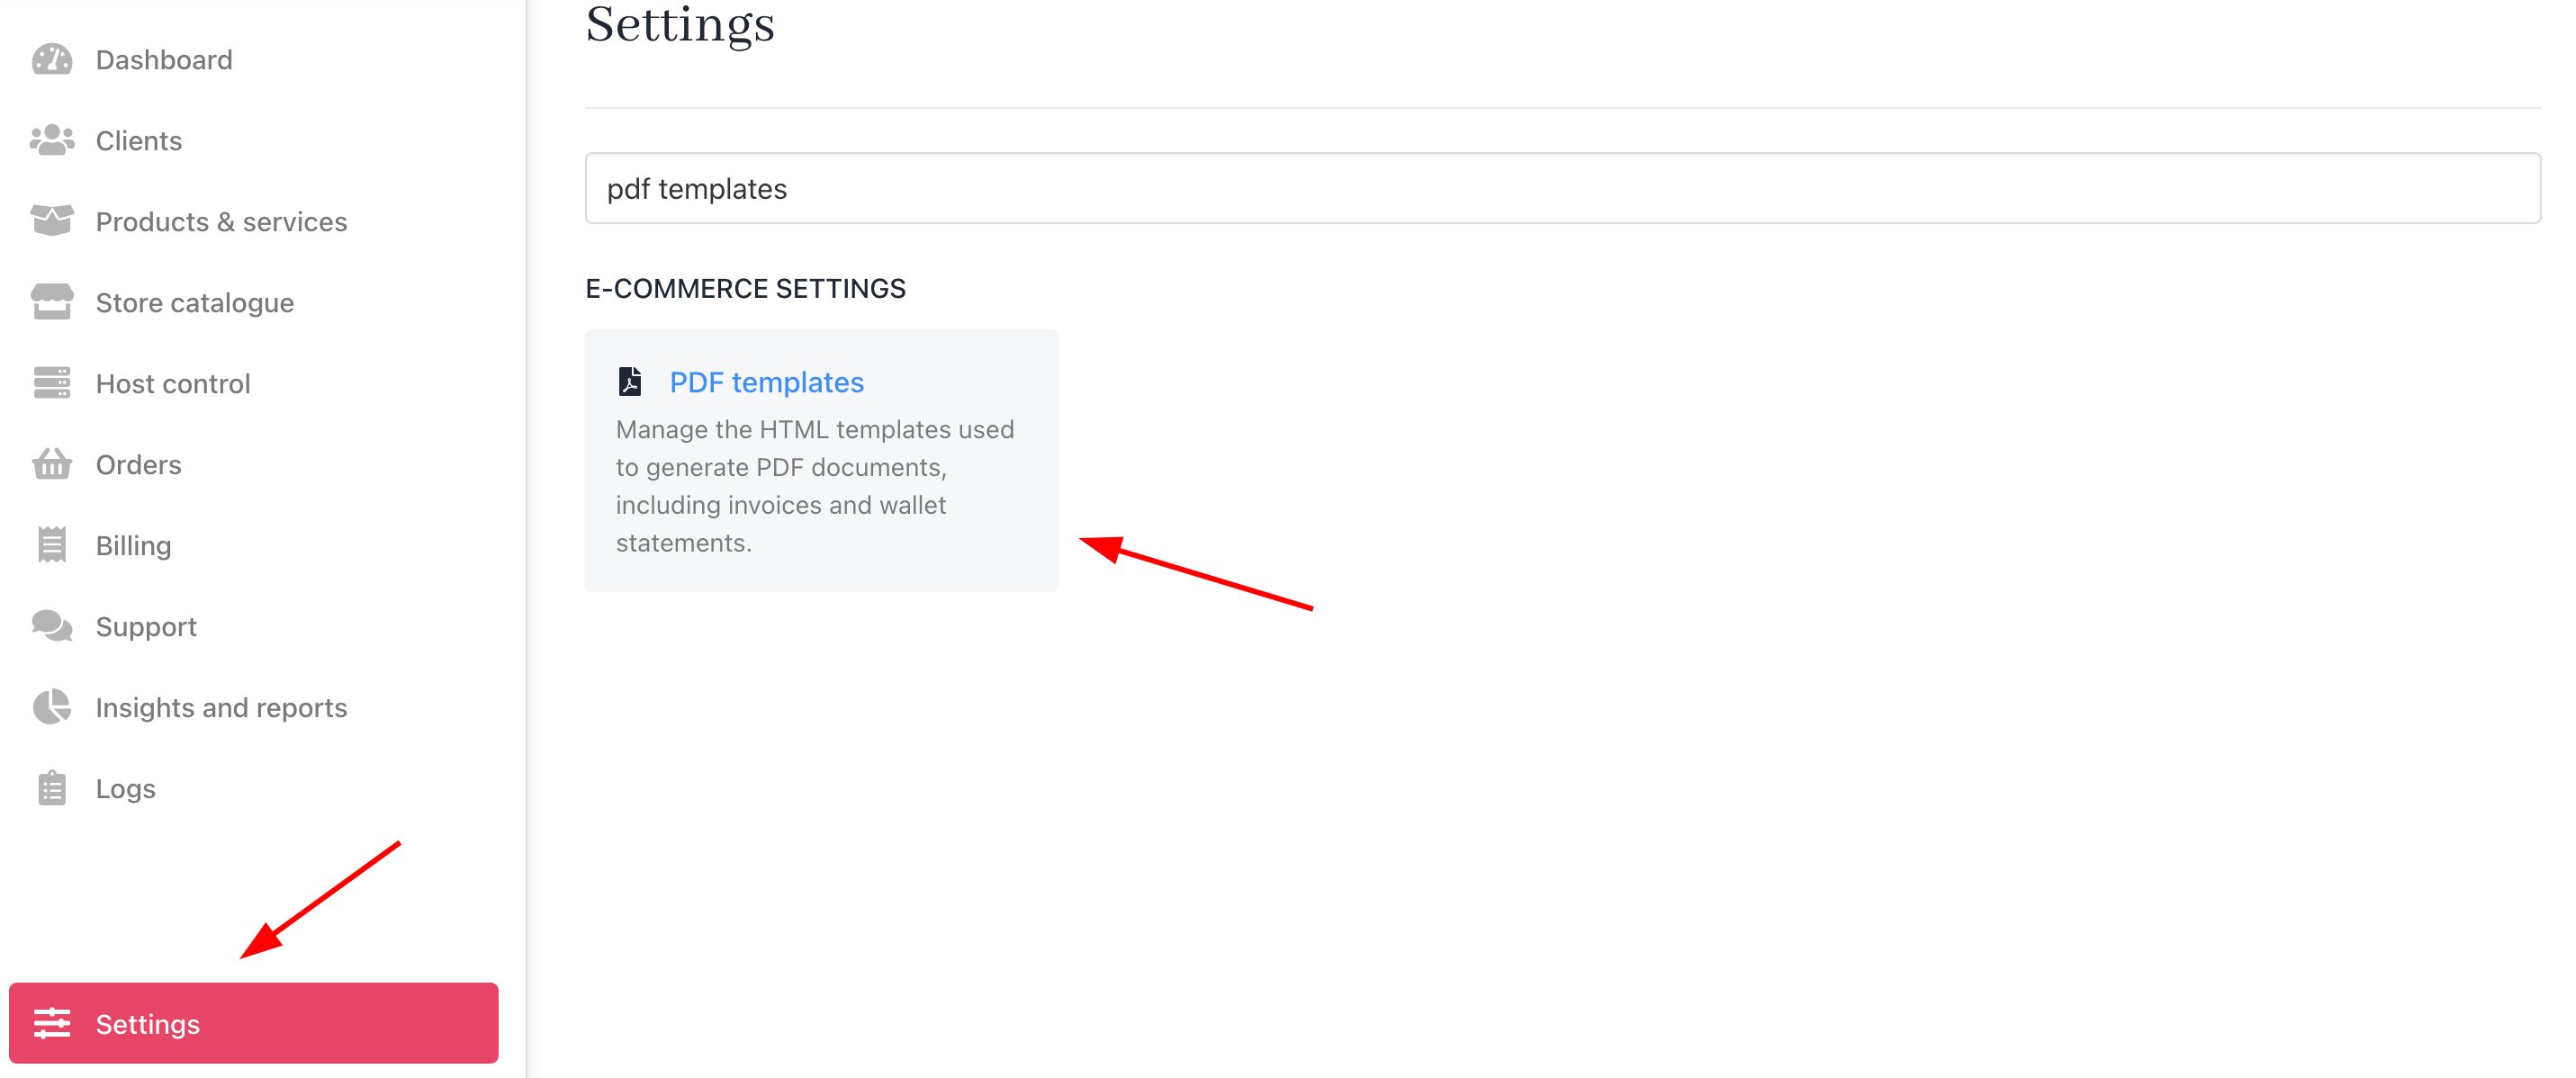
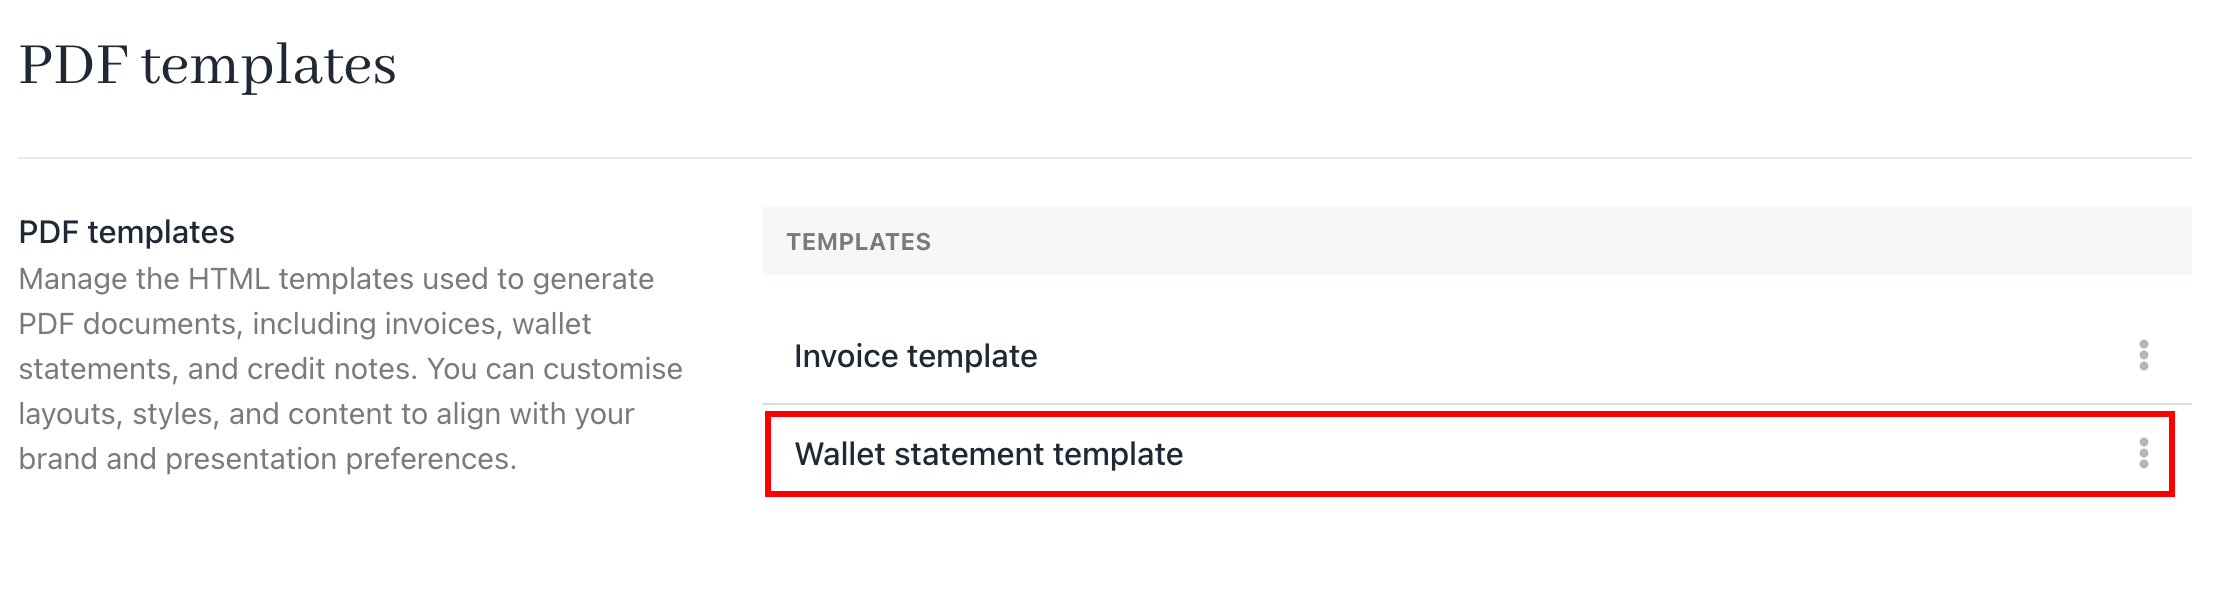
1. From **Settings**, go to **PDF Templates** under **E-commerce Settings**.
This setting is enabled by default.
## Accessing and editing the wallet statement template
You can customise your brand's wallet statements.
1. From **Settings**, go to **PDF Templates** under **E-commerce Settings**.
 2. Select **Wallet Statement Template**.
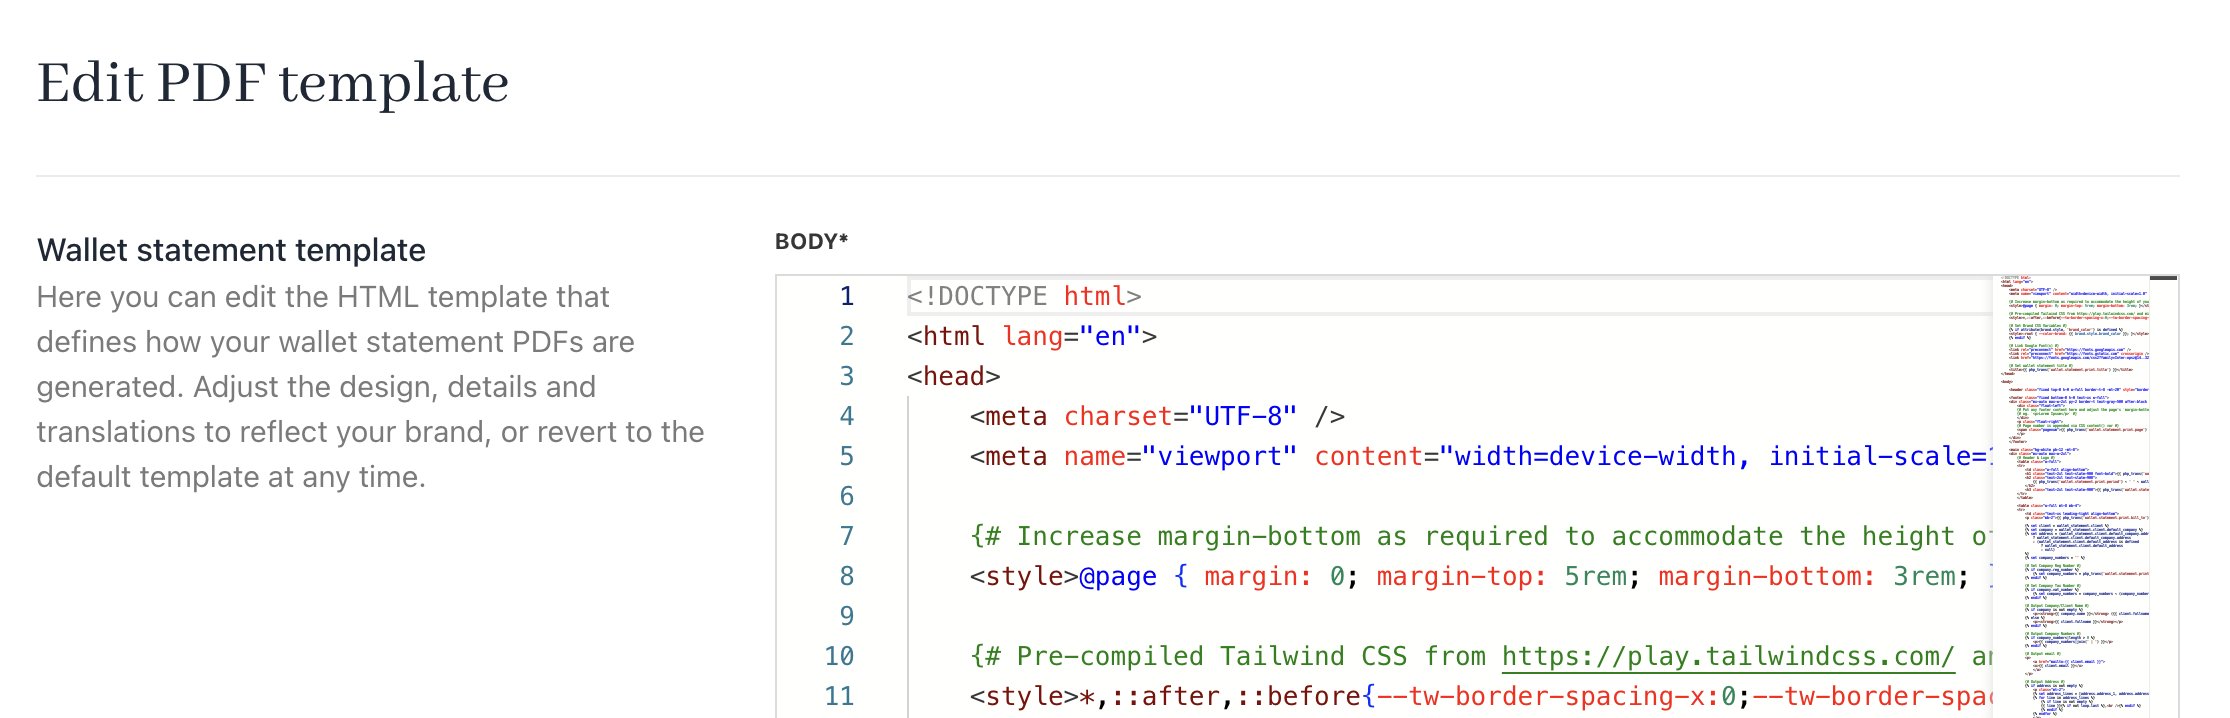
 3. Use the **HTML** editor to customise the template code.
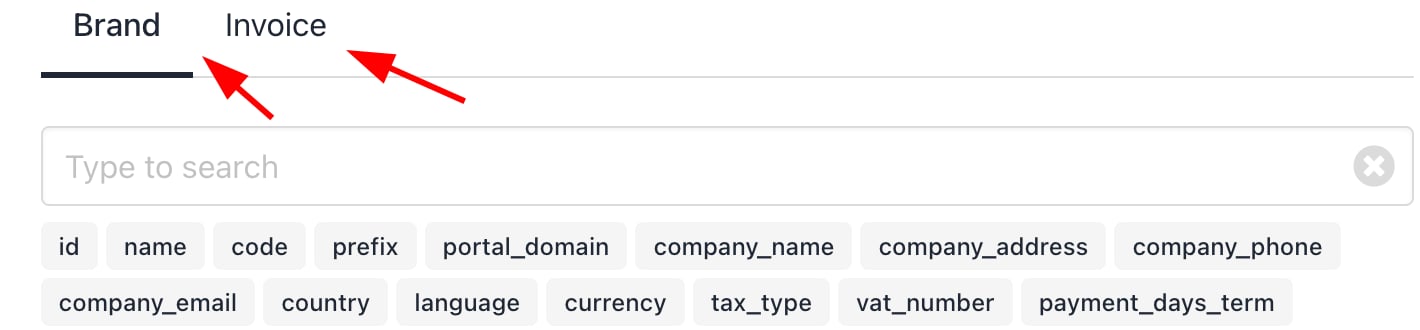
 4. Two tabs, **Brand** and **Invoice**, appear at the bottom for easy access to code snippets. Copy snippets by clicking their label and paste them where needed in the template.
 ## Download PDF or CSV credit statements
### From the admin area
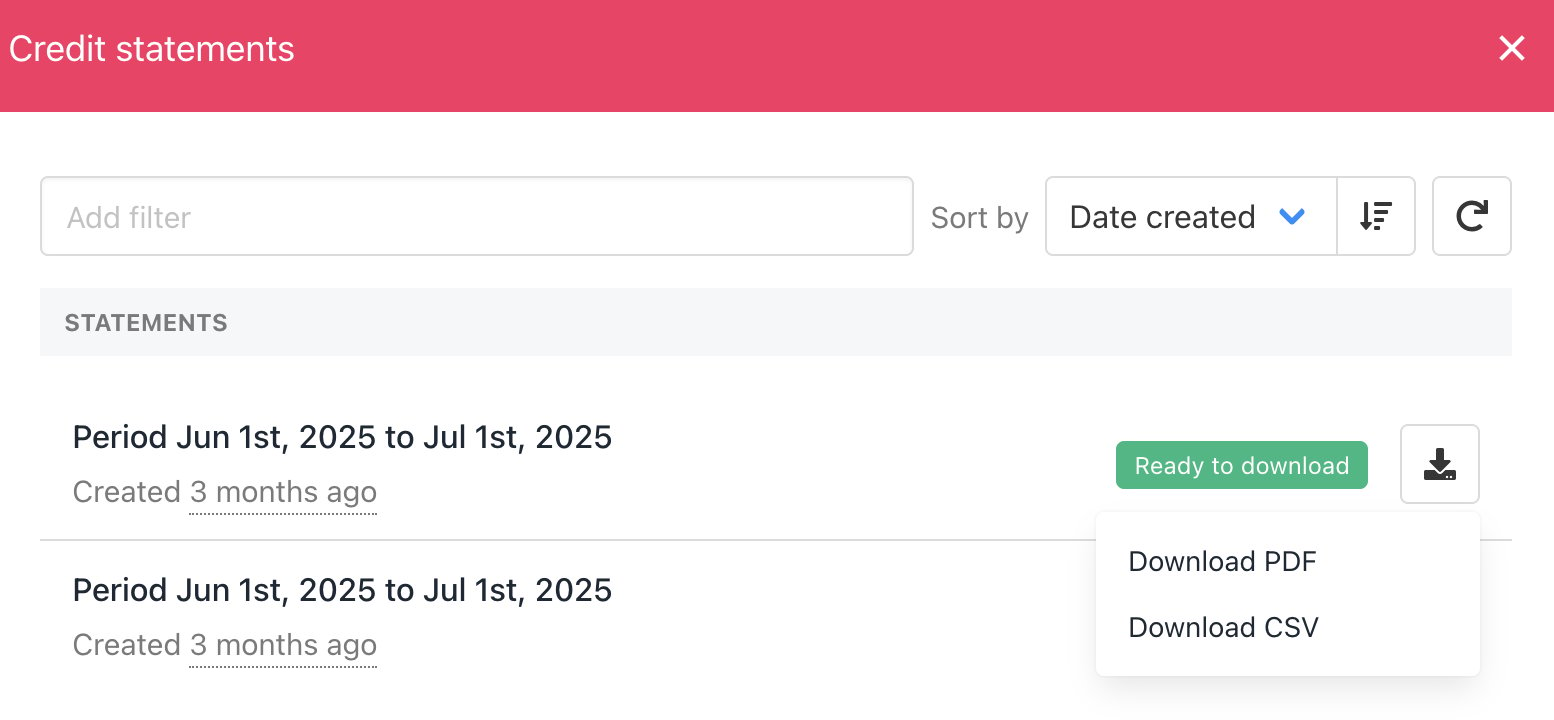
1. Go to **Clients** > **Billing** > **Account Credit**.
2. Click **View Credit Statements**.
## Download PDF or CSV credit statements
### From the admin area
1. Go to **Clients** > **Billing** > **Account Credit**.
2. Click **View Credit Statements**.
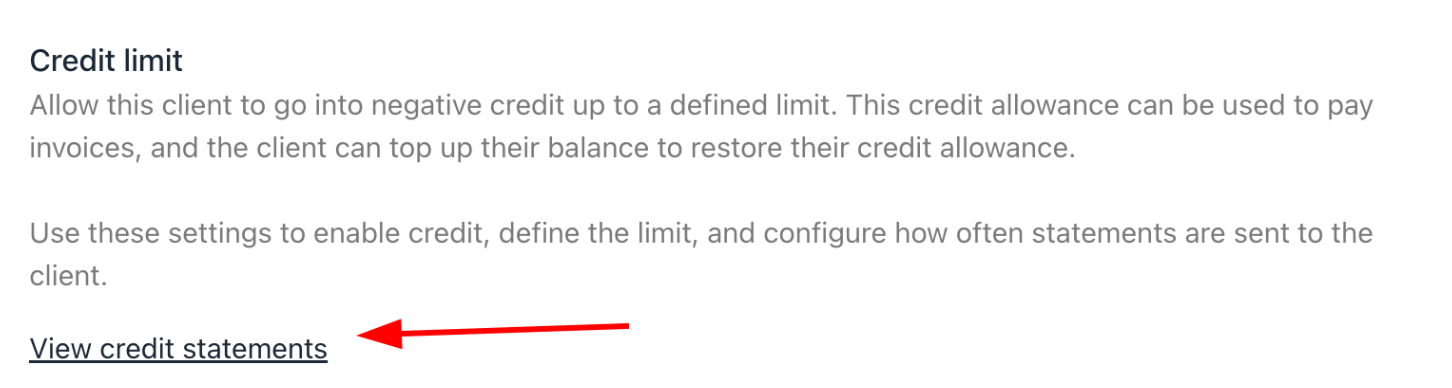 3. Select the desired statement.
4. Click to download either **PDF** or **CSV**.
3. Select the desired statement.
4. Click to download either **PDF** or **CSV**.
 ### From the client area:
1. Go to `Billing`.
2. Click **Account Credit**.
3. Click **View Credit Statements**.
### From the client area:
1. Go to `Billing`.
2. Click **Account Credit**.
3. Click **View Credit Statements**.
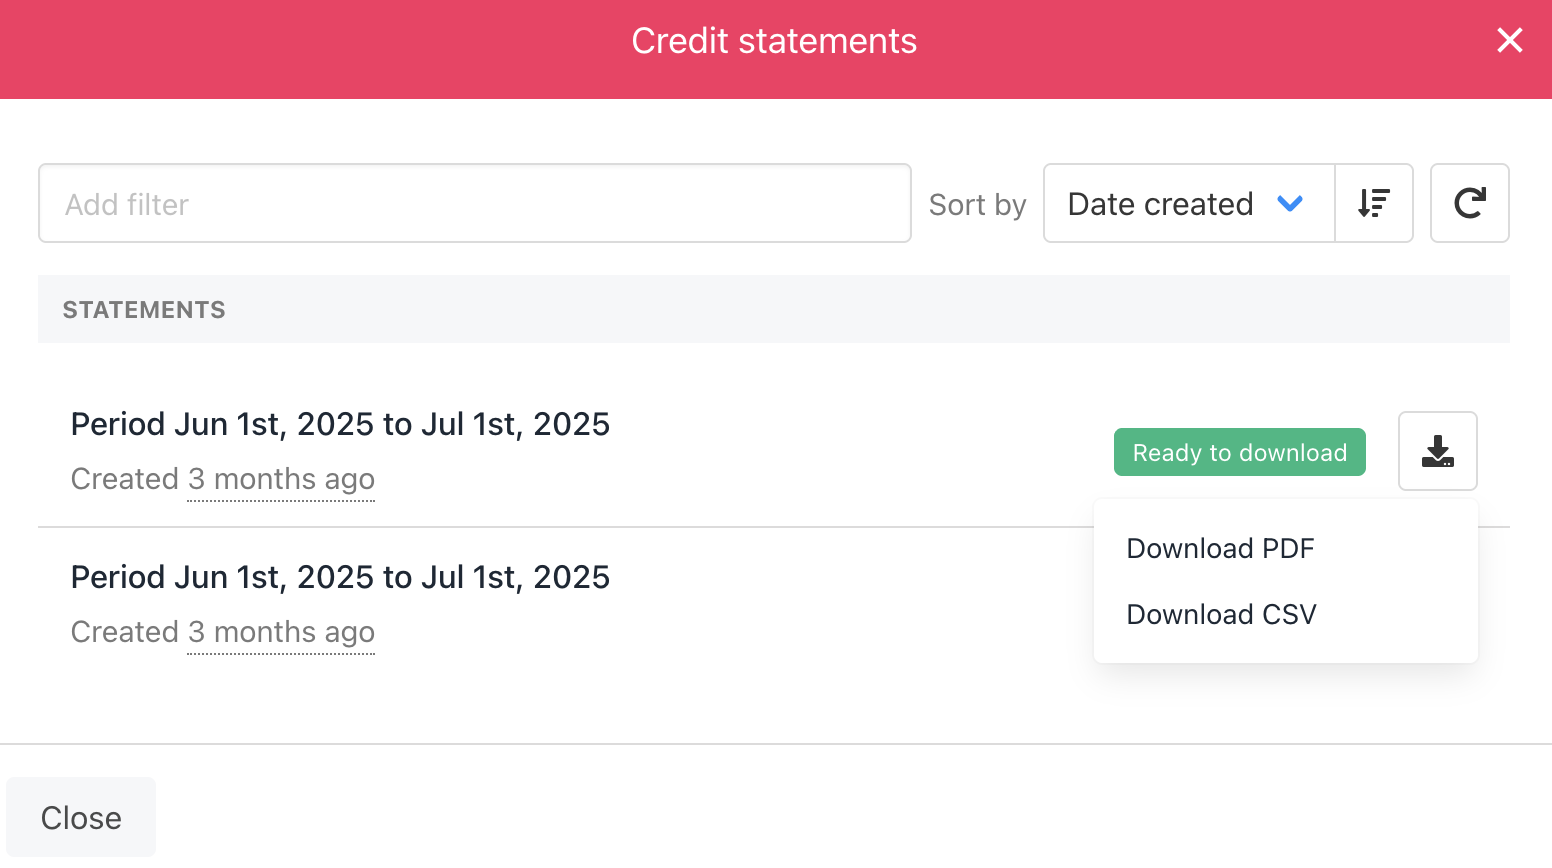
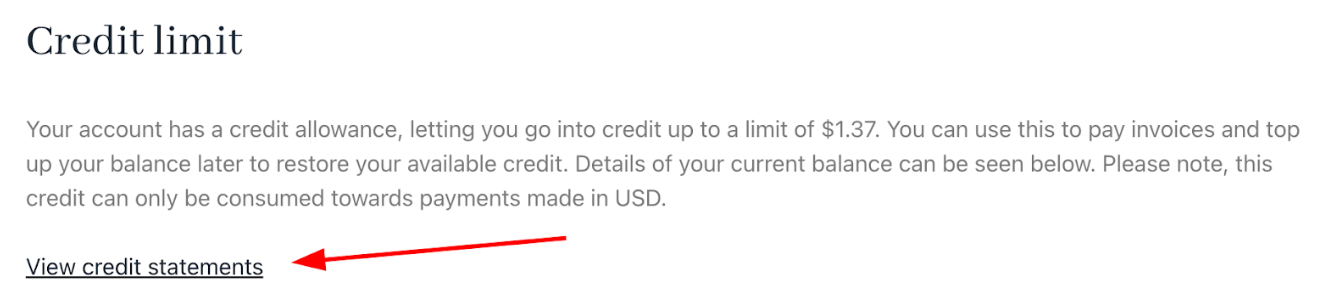 4. Select the desired statement.
5. Click to download either **PDF** or **CSV**.
4. Select the desired statement.
5. Click to download either **PDF** or **CSV**.
 ## Common scenarios
### Partial payments with account credit
Enable partial payments for clients from the following:
1. Go to **Settings** > **Payment Options** under **E-commerce Settings**.
2. Scroll to the **Gateway Settings** section.
3. Toggle **Enable partial payments for clients** on.
## Common scenarios
### Partial payments with account credit
Enable partial payments for clients from the following:
1. Go to **Settings** > **Payment Options** under **E-commerce Settings**.
2. Scroll to the **Gateway Settings** section.
3. Toggle **Enable partial payments for clients** on.
 Invoices can be partially paid using account credit, depending on the configuration.
**Behaviour:**
* Account credit may automatically apply on invoice creation or due date.
* The remaining balance stays unpaid until cleared.
**Example:**
* Invoice total: \$100
* Account credit available: \$60
Result: $60 applied automatically, with the remaining $40 still due.
Invoices that are partially paid and remain unpaid after a certain period may be cancelled automatically, depending on your settings. Two options under **Settings** > **Order Options** > **Misc** control this behaviour:
* **Auto cancel unpaid pro-rata invoices -** Automatically cancels pro-rata invoices that still have an unpaid balance after the configured period.
* **Auto cancel unpaid invoice, which have partial payments** - Automatically cancels invoices that received a partial payment but were never fully settled.
Invoices can be partially paid using account credit, depending on the configuration.
**Behaviour:**
* Account credit may automatically apply on invoice creation or due date.
* The remaining balance stays unpaid until cleared.
**Example:**
* Invoice total: \$100
* Account credit available: \$60
Result: $60 applied automatically, with the remaining $40 still due.
Invoices that are partially paid and remain unpaid after a certain period may be cancelled automatically, depending on your settings. Two options under **Settings** > **Order Options** > **Misc** control this behaviour:
* **Auto cancel unpaid pro-rata invoices -** Automatically cancels pro-rata invoices that still have an unpaid balance after the configured period.
* **Auto cancel unpaid invoice, which have partial payments** - Automatically cancels invoices that received a partial payment but were never fully settled.
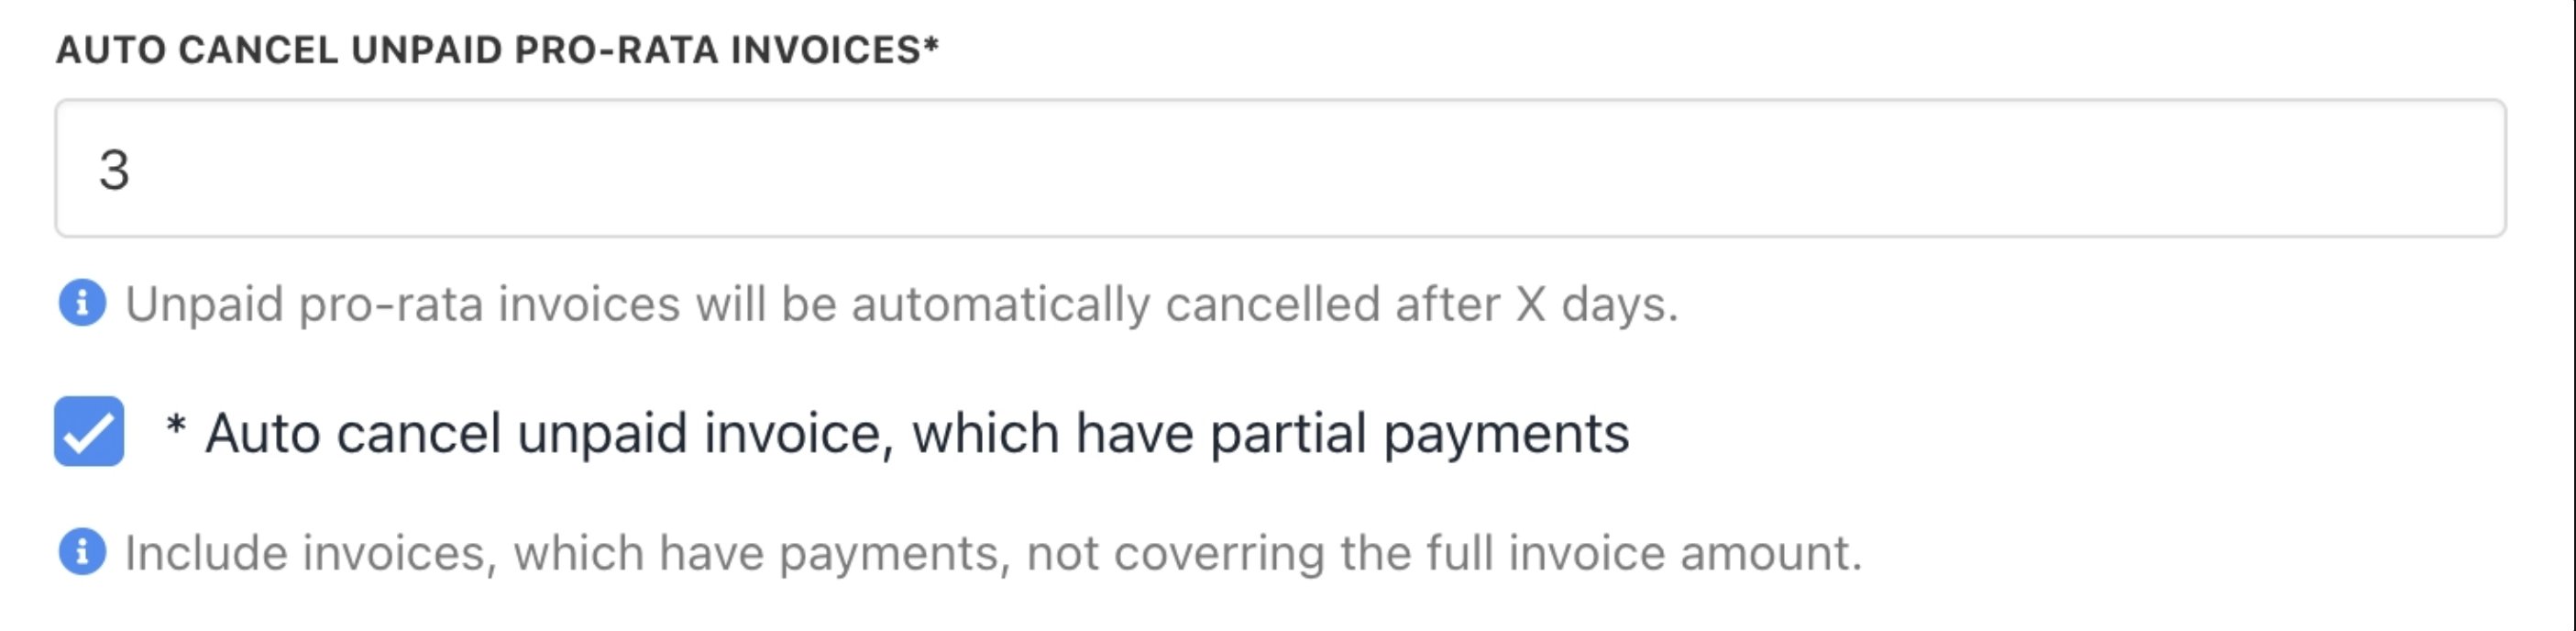 If you are using account credit as a payment method and clients regularly carry a remaining balance, review these settings to make sure partial payment invoices are not being cancelled before clients have a chance to pay the outstanding amount.