> ## Documentation Index
> Fetch the complete documentation index at: https://docs.upmind.com/llms.txt
> Use this file to discover all available pages before exploring further.
# How to Edit an Invoice PDF Template
> Customise invoice appearance.
Upmind automatically generates an invoice for every order entered into the system. You can view a digital version on-screen and access a PDF version designed for printing or sharing. The PDF layout differs slightly and is based on default template settings, which you can customise.
This guide explains how to customise your invoice template to suit your needs.
On February 10, 2025, Invoice Templates were updated. Users who had not customised their default template were automatically upgraded to the new version.
## Opening a default PDF invoice
1. Log in to your Upmind dashboard.
2. Click **Orders** in the side menu.
3. Select an order, then click **Go to order**.
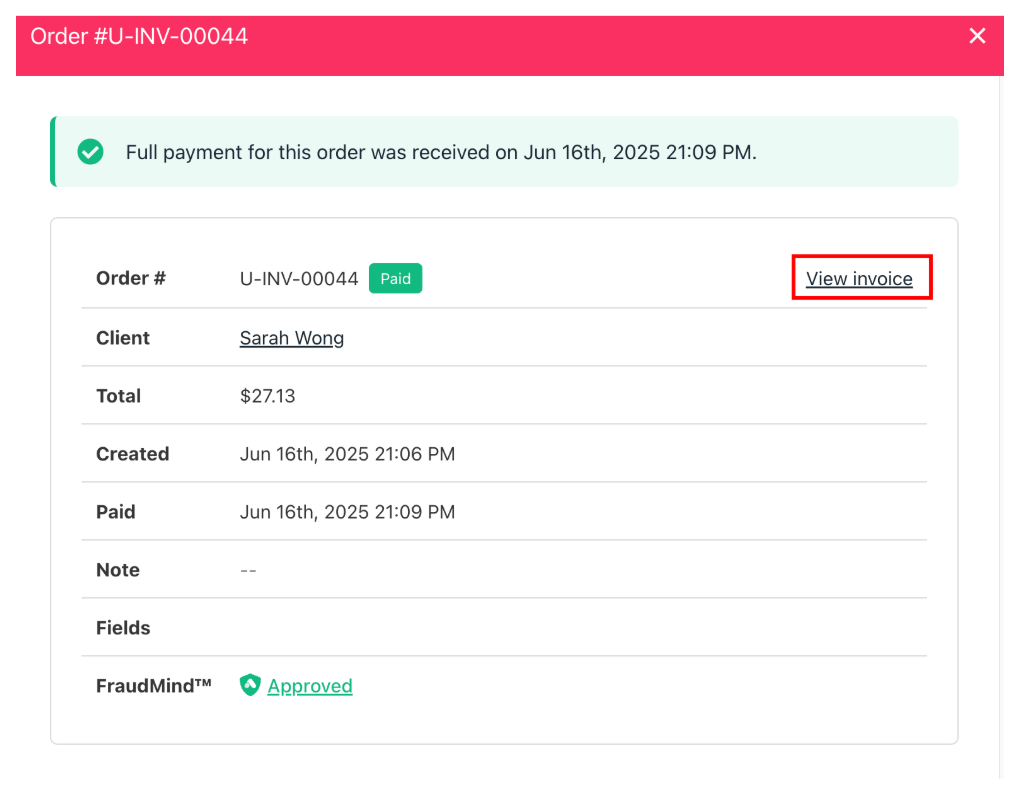
4. Click **View invoice** and then **Go to invoice**.
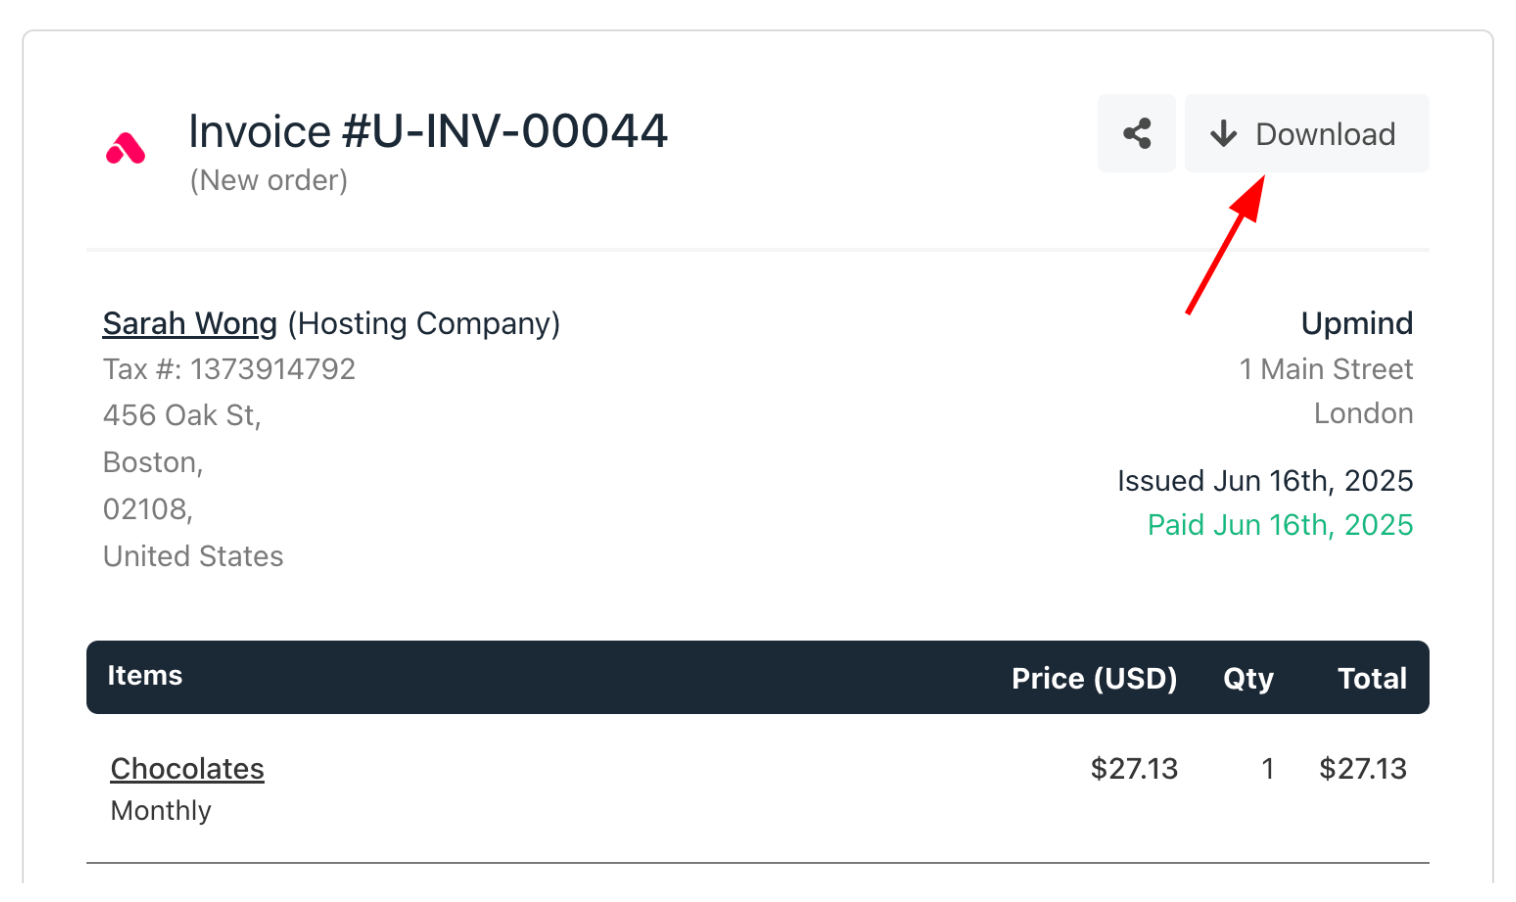
 5. Download the PDF version to review the current layout.
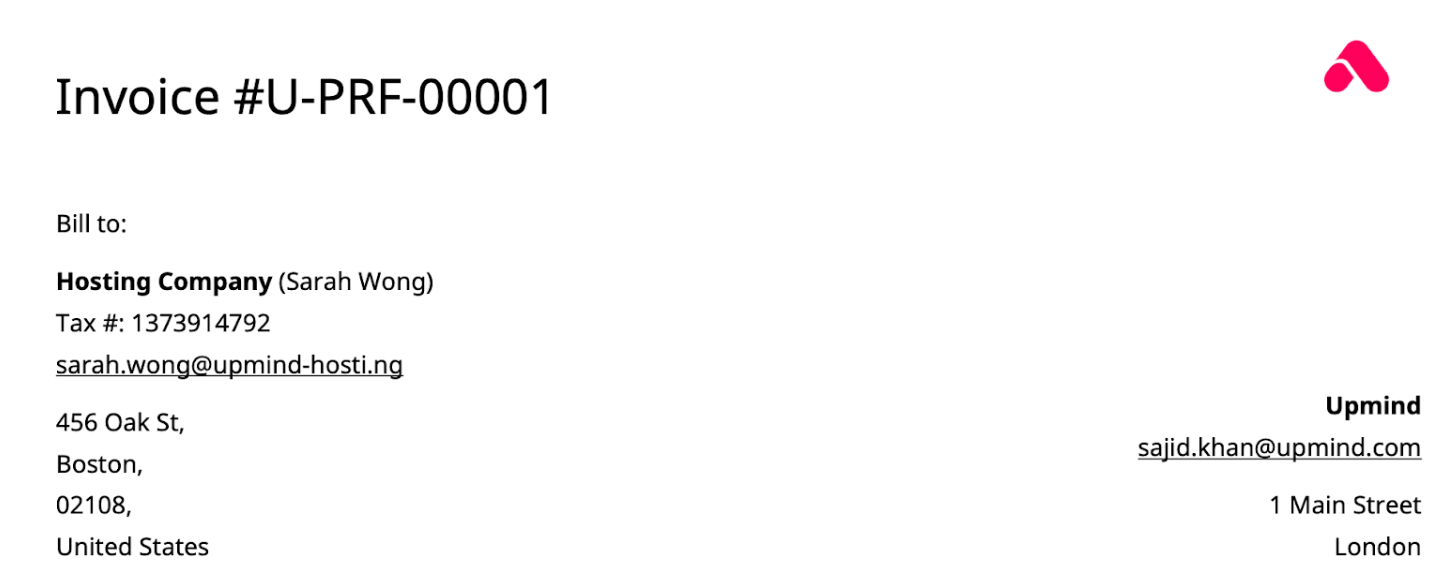
 Open the document to see the PDF invoice, which closely resembles the on-screen digital version but with minor layout and content differences.
For example, the email address appears above the mailing address, and the business phone number is omitted.
Open the document to see the PDF invoice, which closely resembles the on-screen digital version but with minor layout and content differences.
For example, the email address appears above the mailing address, and the business phone number is omitted.
 ## Accessing and editing the invoice template
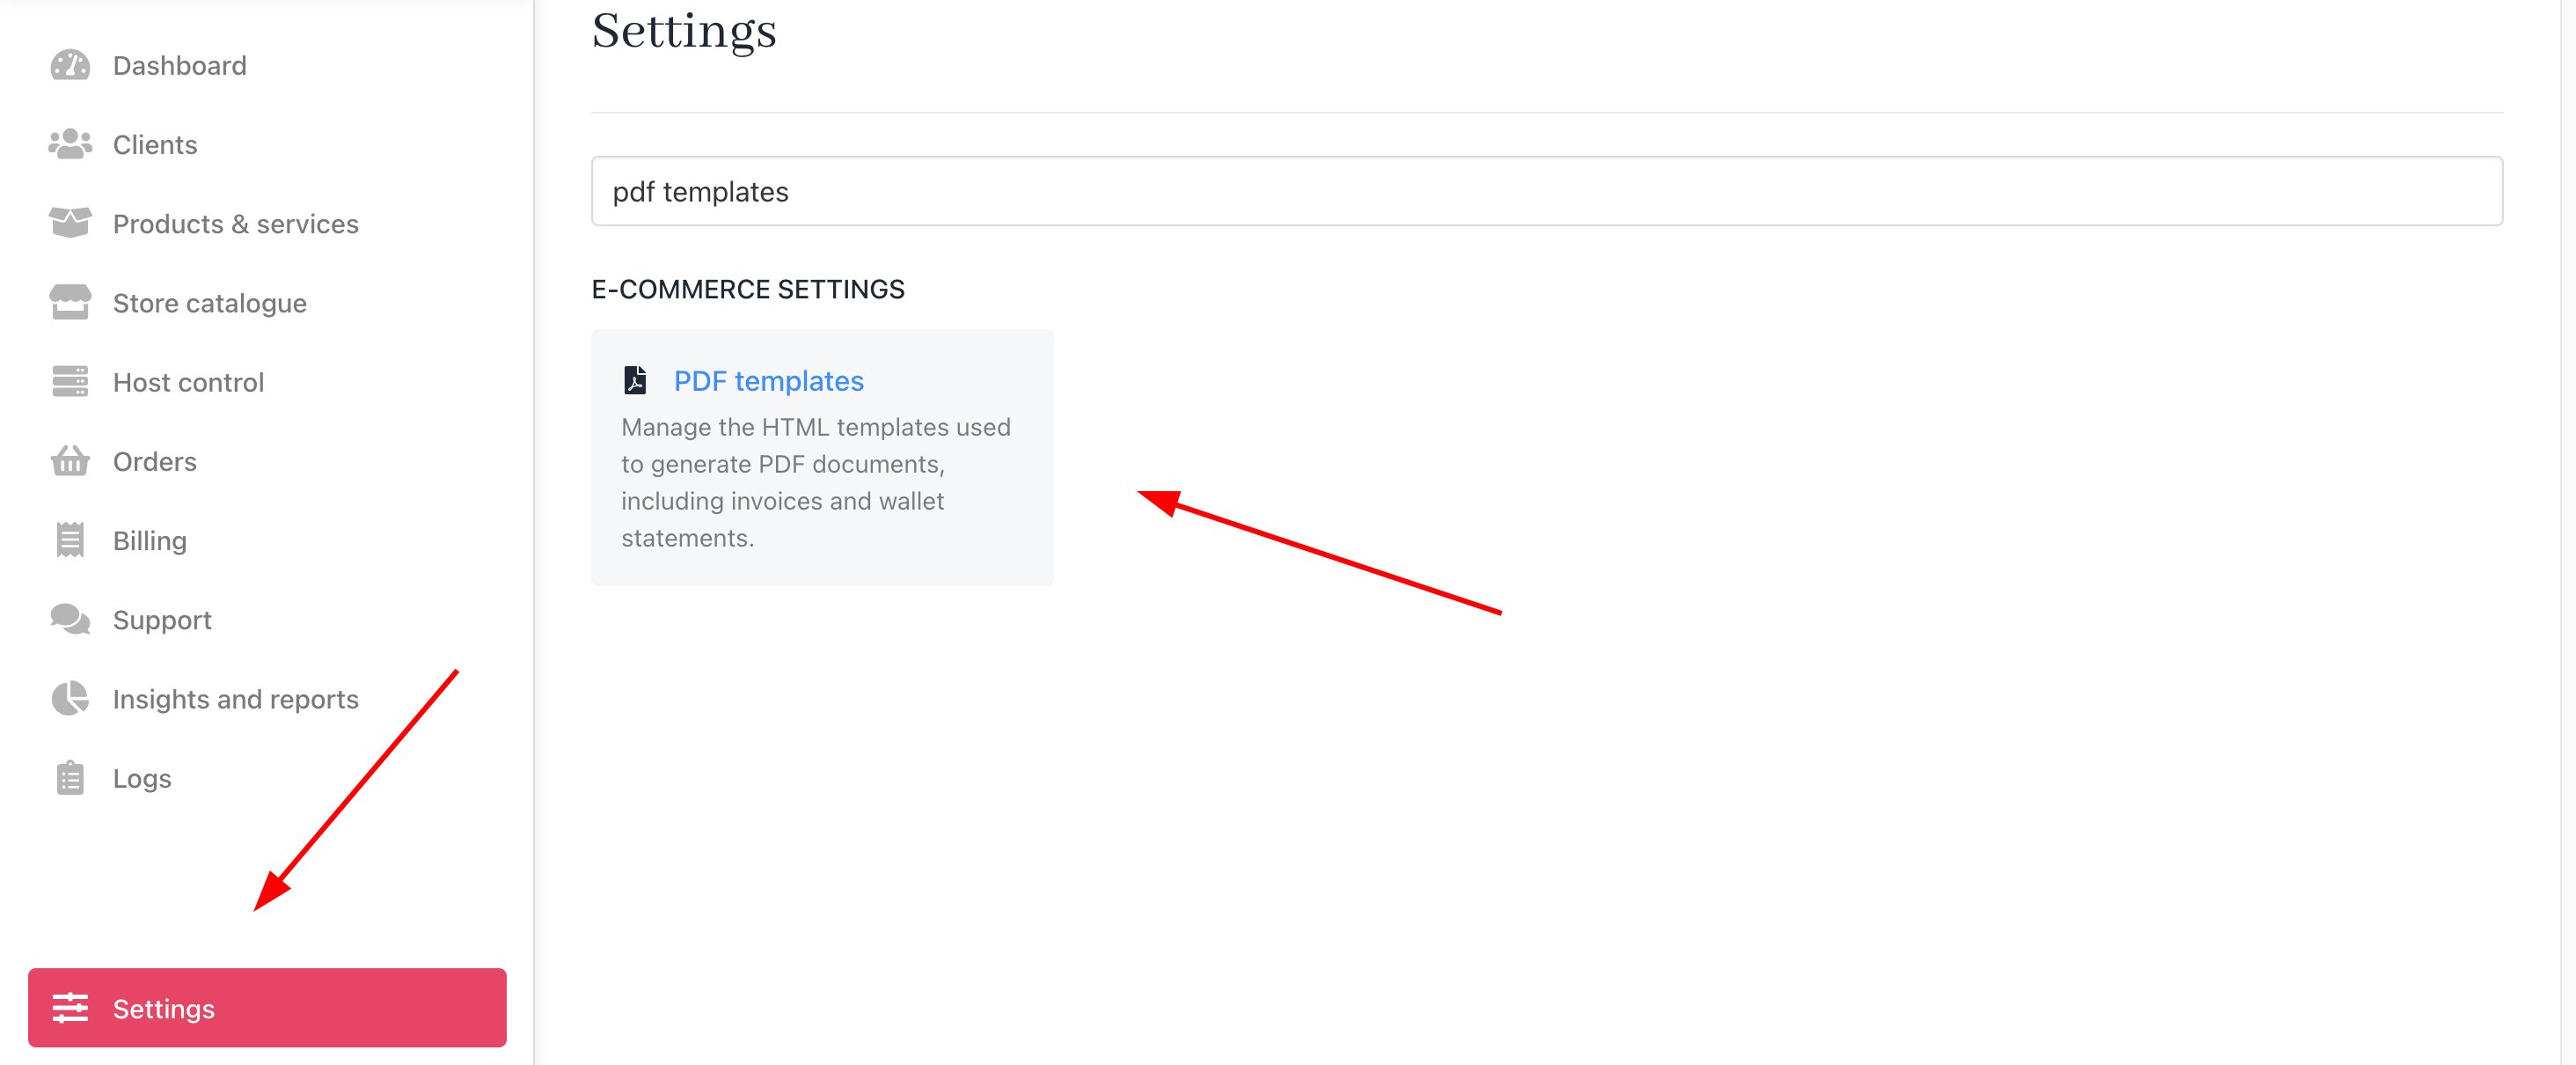
1. Go to `Settings` from the dashboard.
2. Select **PDF templates** under **E-commerce Settings**.
## Accessing and editing the invoice template
1. Go to `Settings` from the dashboard.
2. Select **PDF templates** under **E-commerce Settings**.
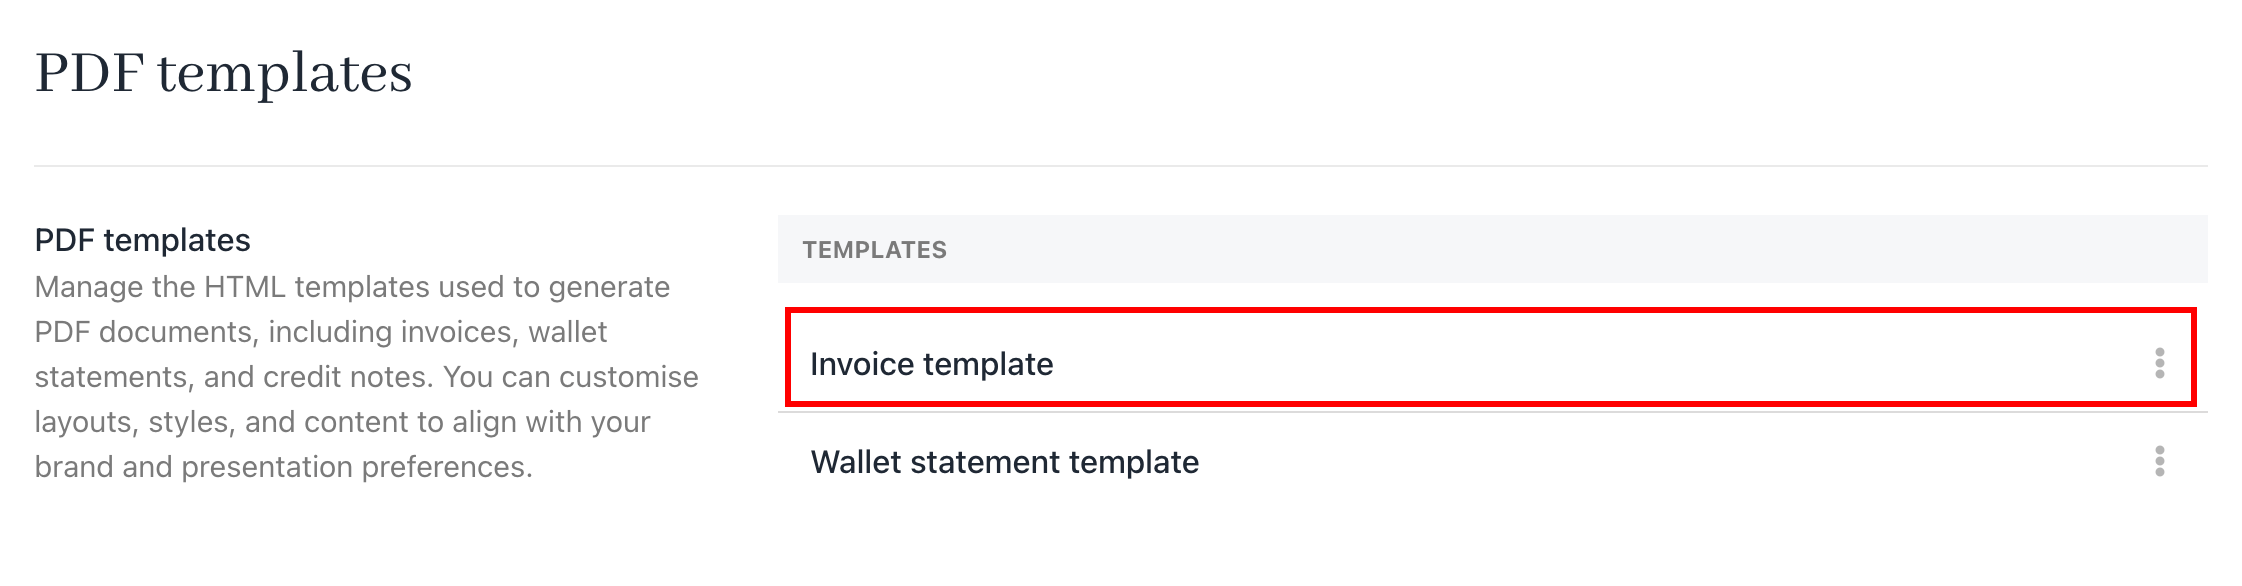
 3. Choose the **Invoice template**.
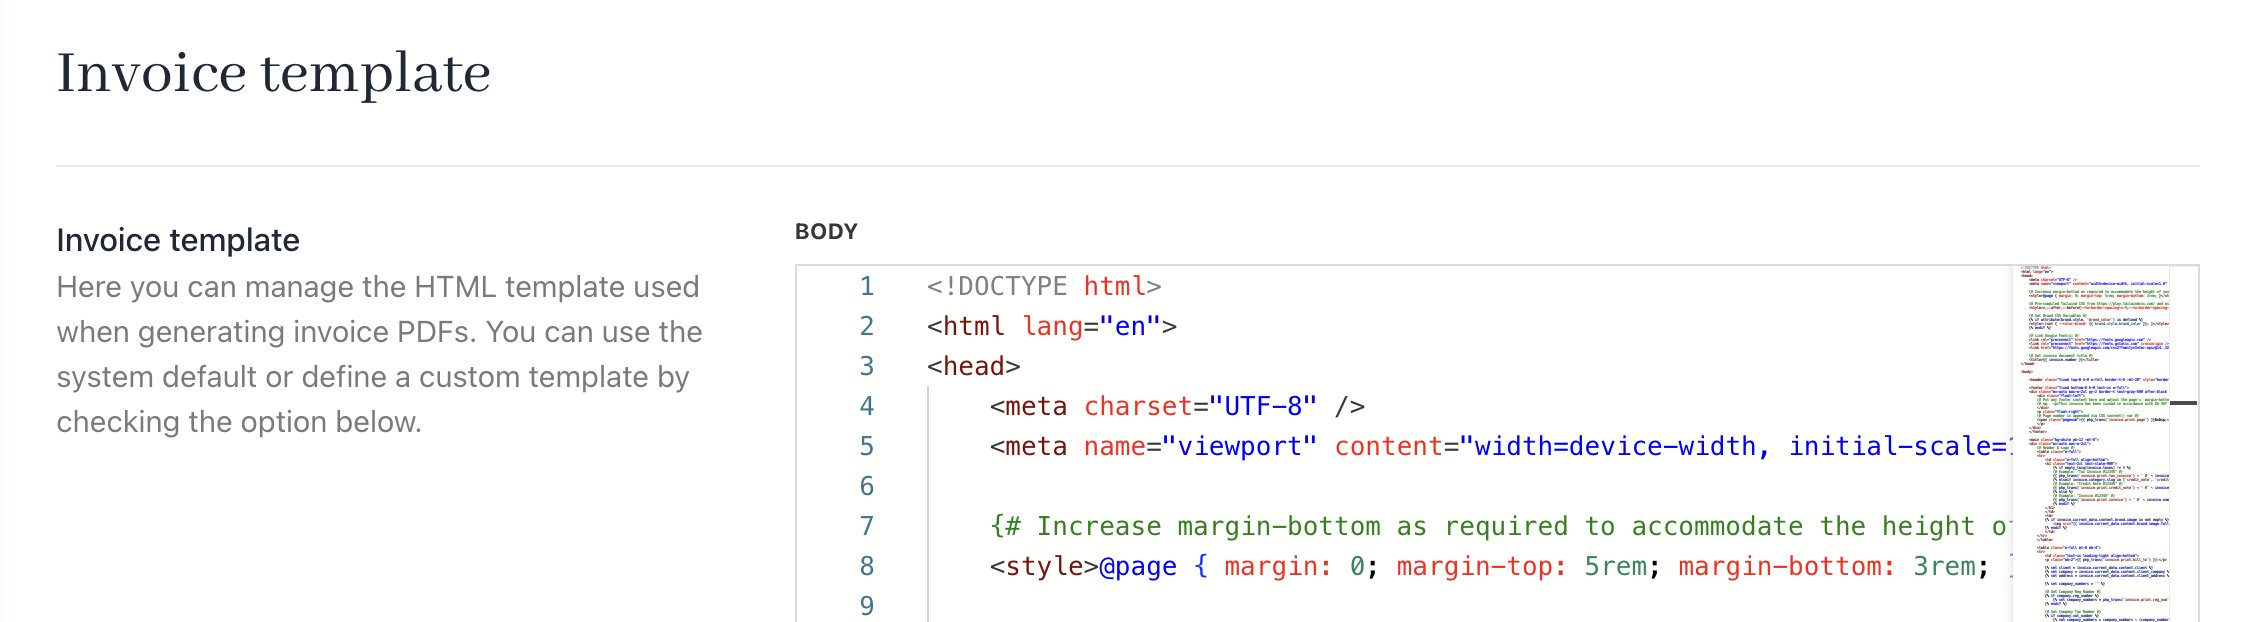
 4. Use the **HTML** editor to customise the template code.
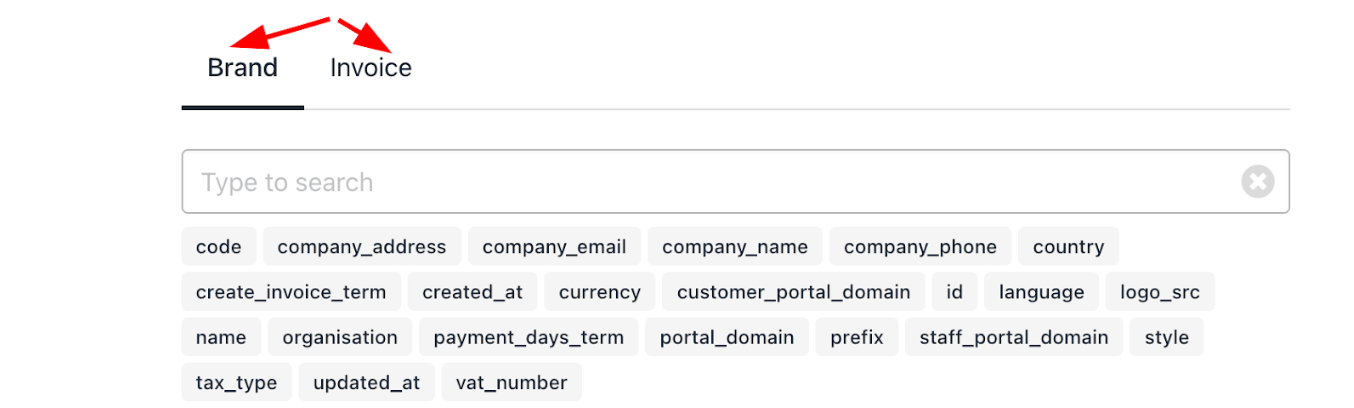
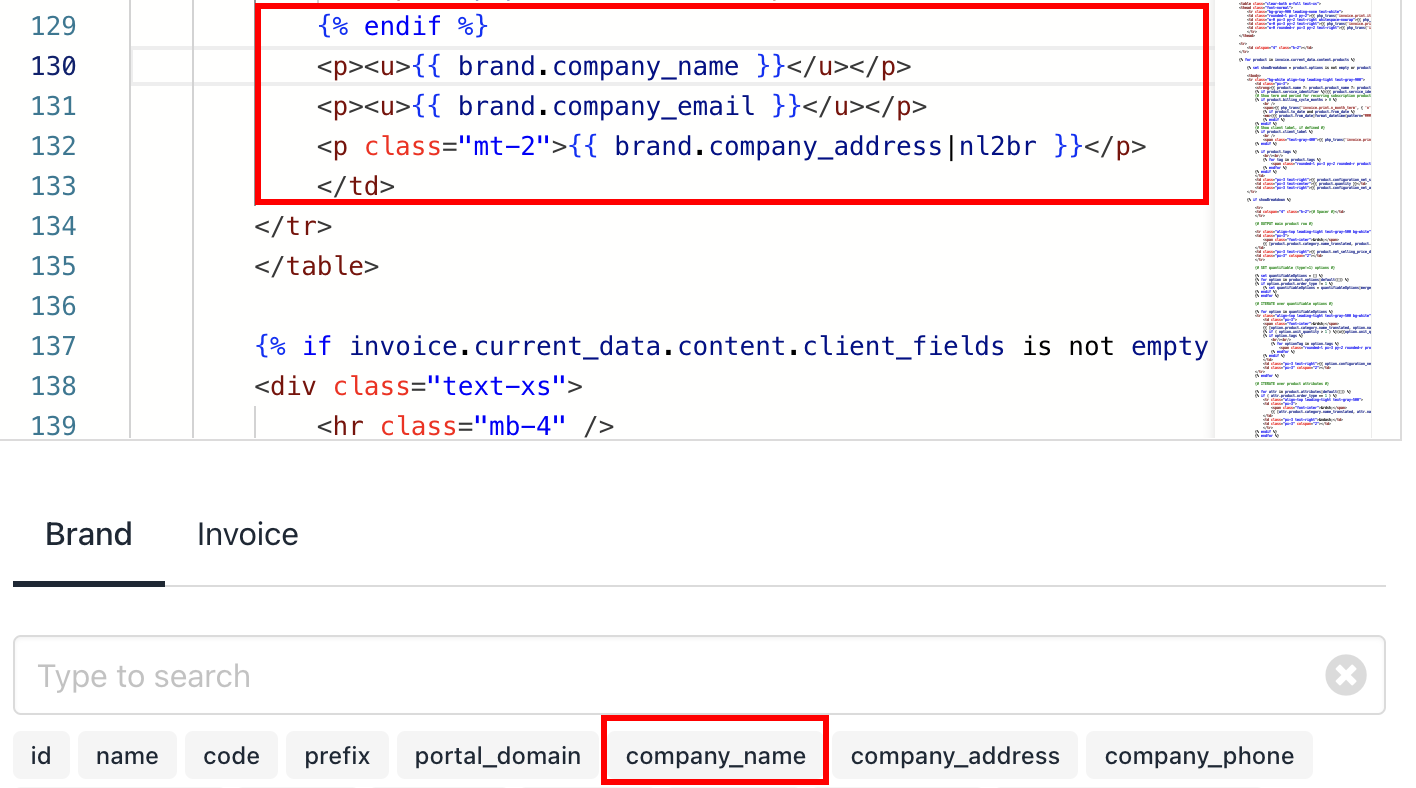
 Two tabs, **Brand** and **Invoice**, appear at the bottom for easy access to code snippets. Copy snippets by clicking their label and paste them where needed in the template.
 ## Restoring default settings
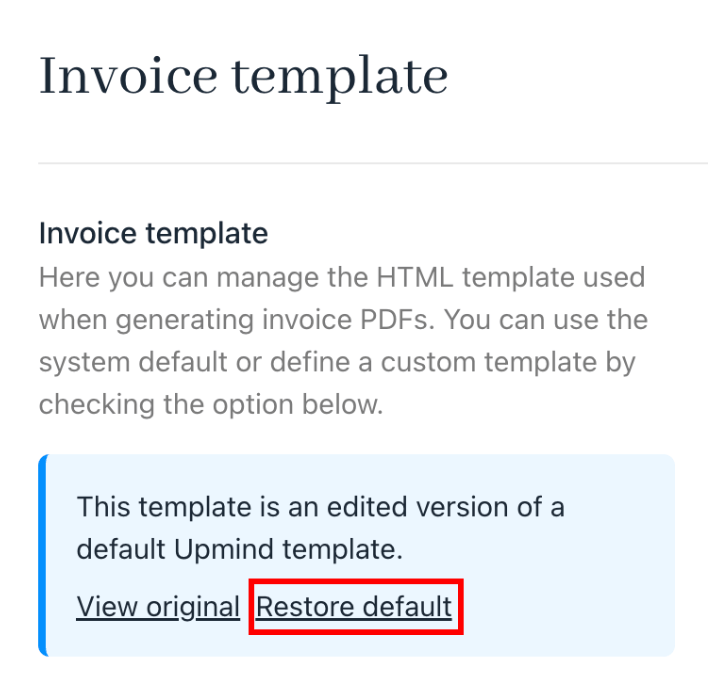
1. Click **Restore default** in the editor to revert to the original template. This is displayed after making any changes to the **Invoice Template** settings.
2. Click **Save** to apply changes.
## Restoring default settings
1. Click **Restore default** in the editor to revert to the original template. This is displayed after making any changes to the **Invoice Template** settings.
2. Click **Save** to apply changes.
 ## Editing the invoice template code
You have two options when editing the invoice code:
1. Move or delete existing lines within the editor.
2. Add content:
* Click a **menu tag** from the HTML body.
* Find the desired code snippet.
* Click the snippet label to copy it to the clipboard.
* Paste the snippet into the desired spot in the code.
* Click **Save**.
**Example**: The email address is moved below the company address, and the business phone number is inserted beneath the email address.
## Editing the invoice template code
You have two options when editing the invoice code:
1. Move or delete existing lines within the editor.
2. Add content:
* Click a **menu tag** from the HTML body.
* Find the desired code snippet.
* Click the snippet label to copy it to the clipboard.
* Paste the snippet into the desired spot in the code.
* Click **Save**.
**Example**: The email address is moved below the company address, and the business phone number is inserted beneath the email address.
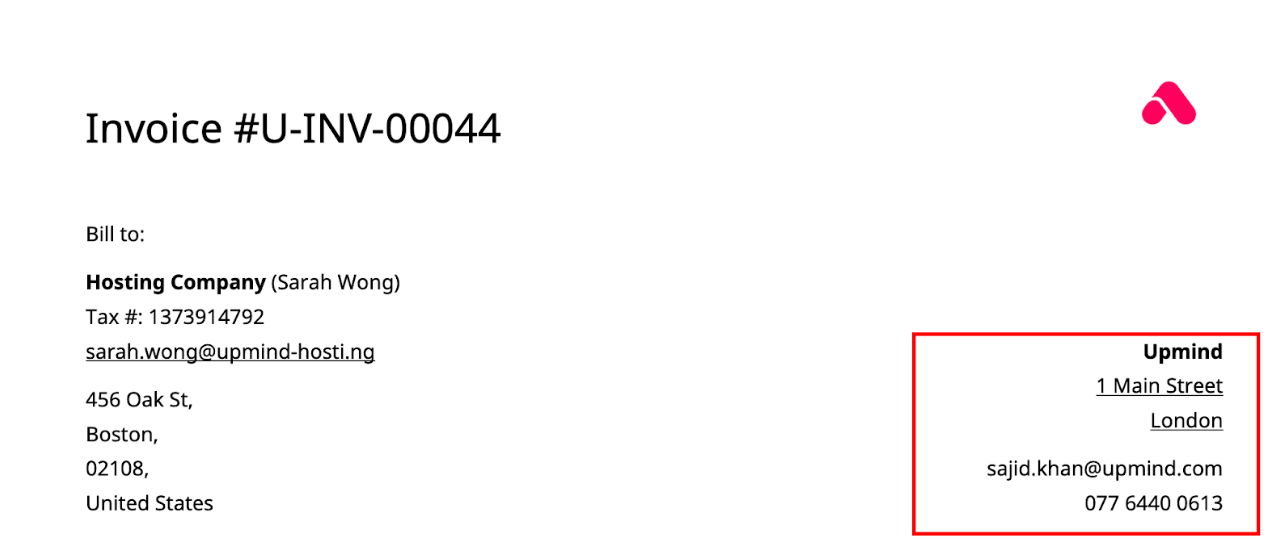
 To test the changes, open an order and regenerate the invoice. The screenshot below shows the updated template with the business phone number placed under the email address.
 ## Example case: Adjusting the date format
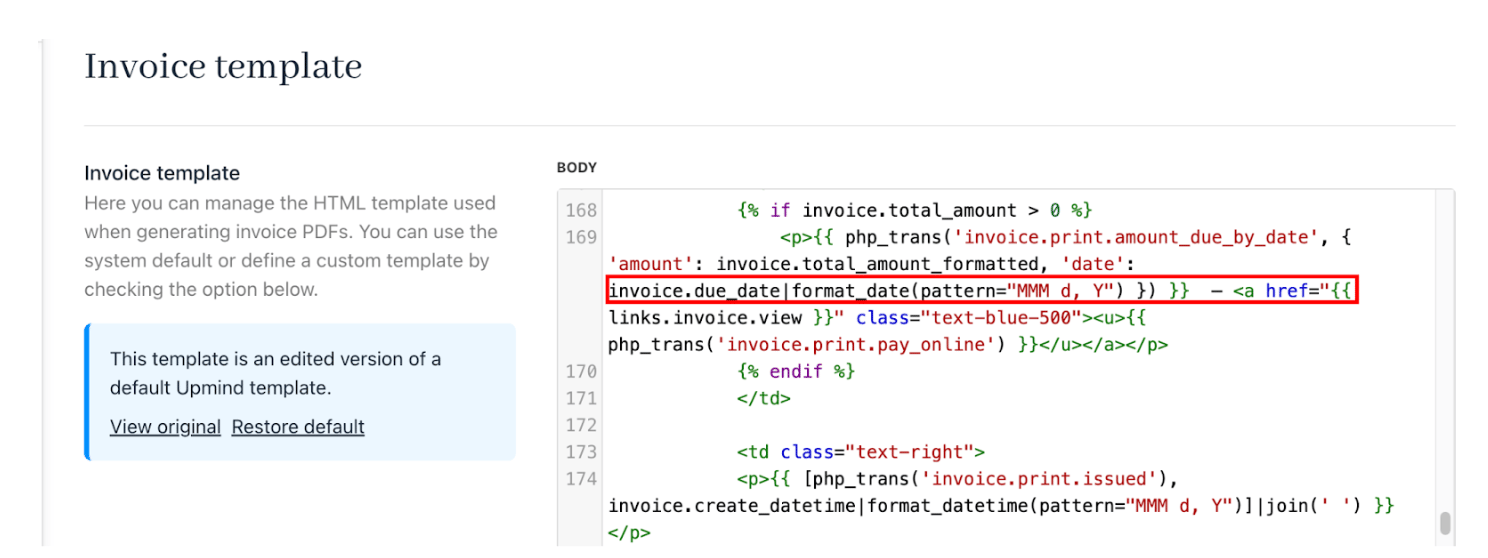
You can customise the date format in your invoice template using the code:
`format_datetime(pattern='MM/dd/yyyy')`
* MMM represents the month.
* d represents the day.
* y represents the year.
Rearrange the pattern to match your preferred format:
* Use MMM/d/y for month-first formats (e.g., 01/23/2025).
* Use d/MMM/y for day-first formats (e.g., 23/01/2025).
## Example case: Adjusting the date format
You can customise the date format in your invoice template using the code:
`format_datetime(pattern='MM/dd/yyyy')`
* MMM represents the month.
* d represents the day.
* y represents the year.
Rearrange the pattern to match your preferred format:
* Use MMM/d/y for month-first formats (e.g., 01/23/2025).
* Use d/MMM/y for day-first formats (e.g., 23/01/2025).
 ## Display invoice status on PDF
To show the invoice status on the PDF:
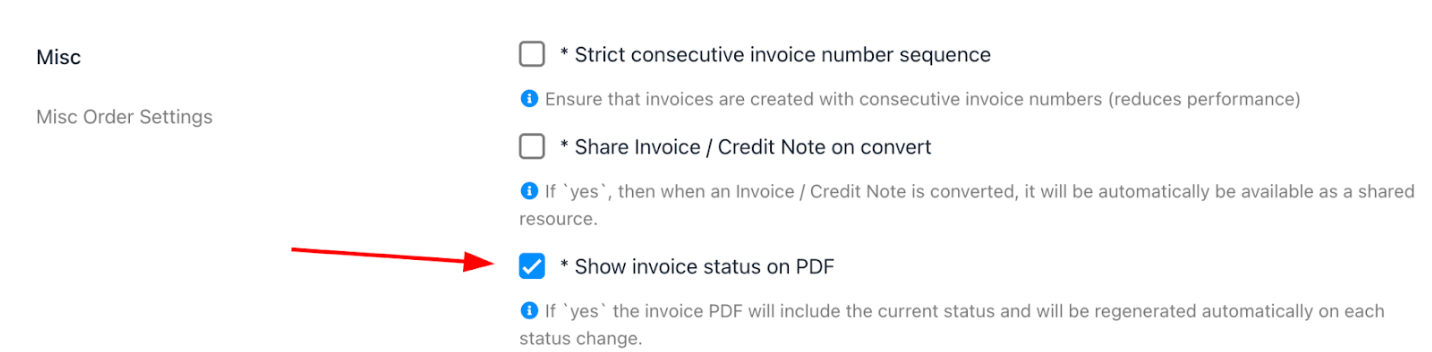
1. Go to **Settings** > **E-commerce Settings** > **Order Options** > **Misc** section.
2. Enable **Show Invoice Status on PDF**.
## Display invoice status on PDF
To show the invoice status on the PDF:
1. Go to **Settings** > **E-commerce Settings** > **Order Options** > **Misc** section.
2. Enable **Show Invoice Status on PDF**.
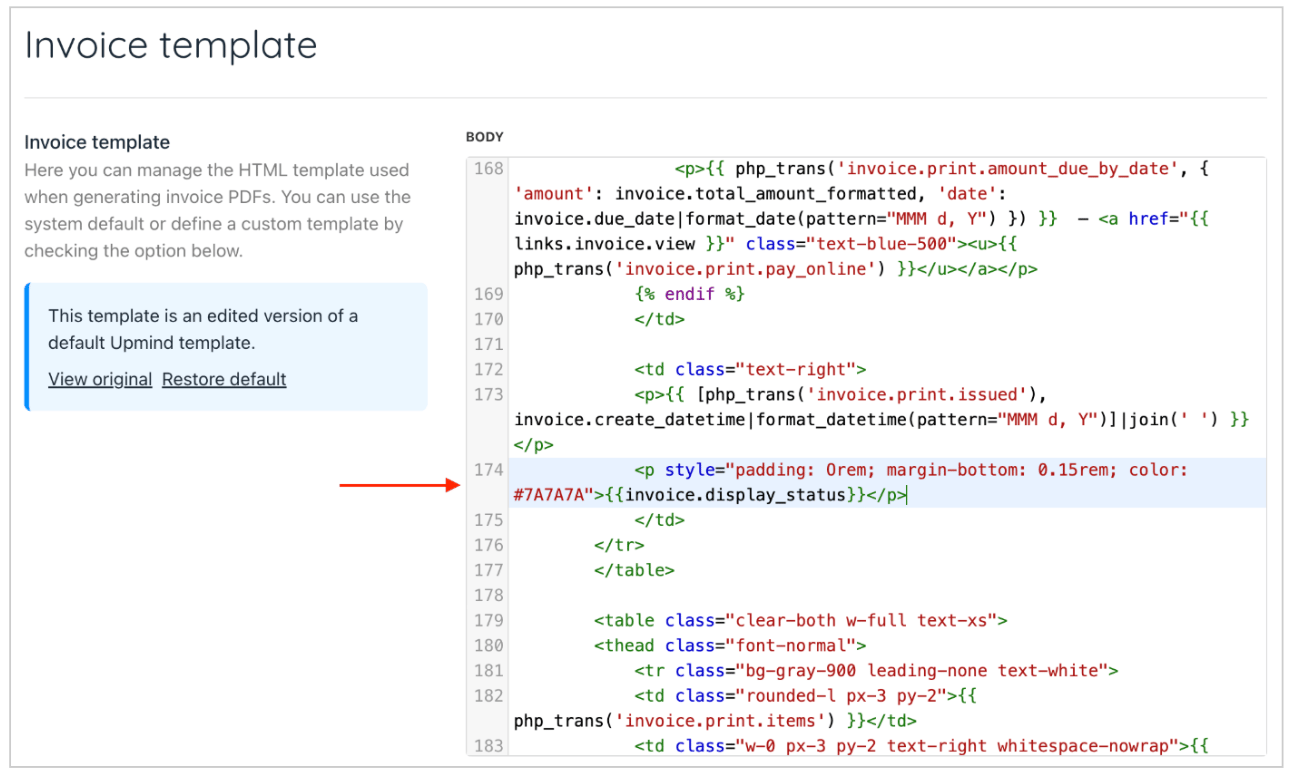
 3. Next, add the following code to line 174 of the invoice template if using the default template: `{{invoice.display_status}}`
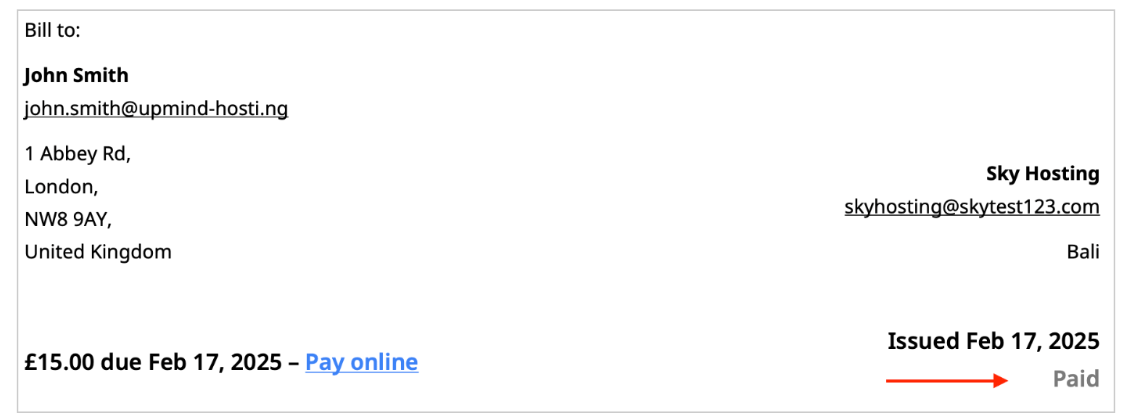
 The invoice will then display the status as shown below.