> ## Documentation Index
> Fetch the complete documentation index at: https://docs.upmind.com/llms.txt
> Use this file to discover all available pages before exploring further.
# How to Add Client Tags
> Manage client records efficiently
## What are client tags?
A tag is a short label you attach to a client record. It's an extra piece of information - one or two words usually - that you can use to quickly sort clients, create segments, and ultimately improve the way you organise information and connect with clients.
Here's an example. Bookstores use tags to classify books based on genre (e.g. mystery, computer, biography). If they didn't use tags, store staff would not know how to shelve books and customers would not know where to find them.
## Opening the tag manager
The first step is to open the tag manager. This is where you create, customise, and save tags. Upmind saves your tags, so you can quickly apply them to any client without creating the same tag over and over again.
1. Log in to your account.
2. Click Clients on the left menu.
3. On the next page, click the Clients list menu tab.
4. Scroll down the list and click a client name.
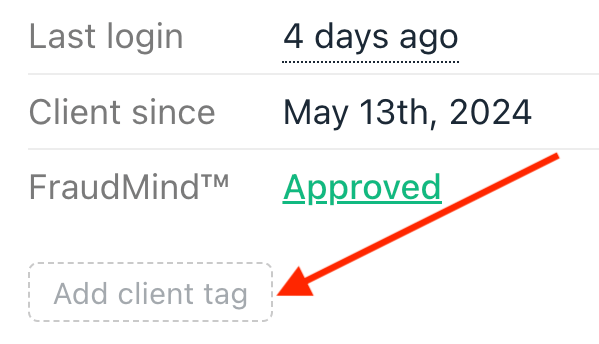
5. On the next page, click **Add client tag** under the client detail for FraudMind. A pop-up box will display.
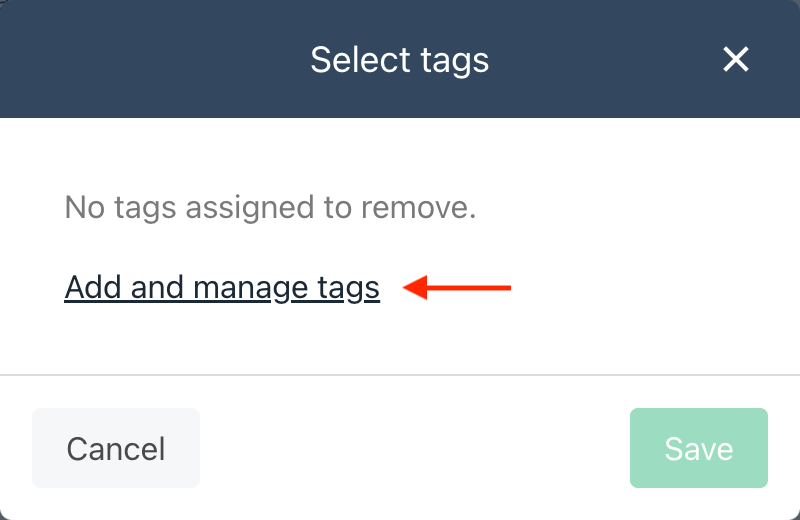
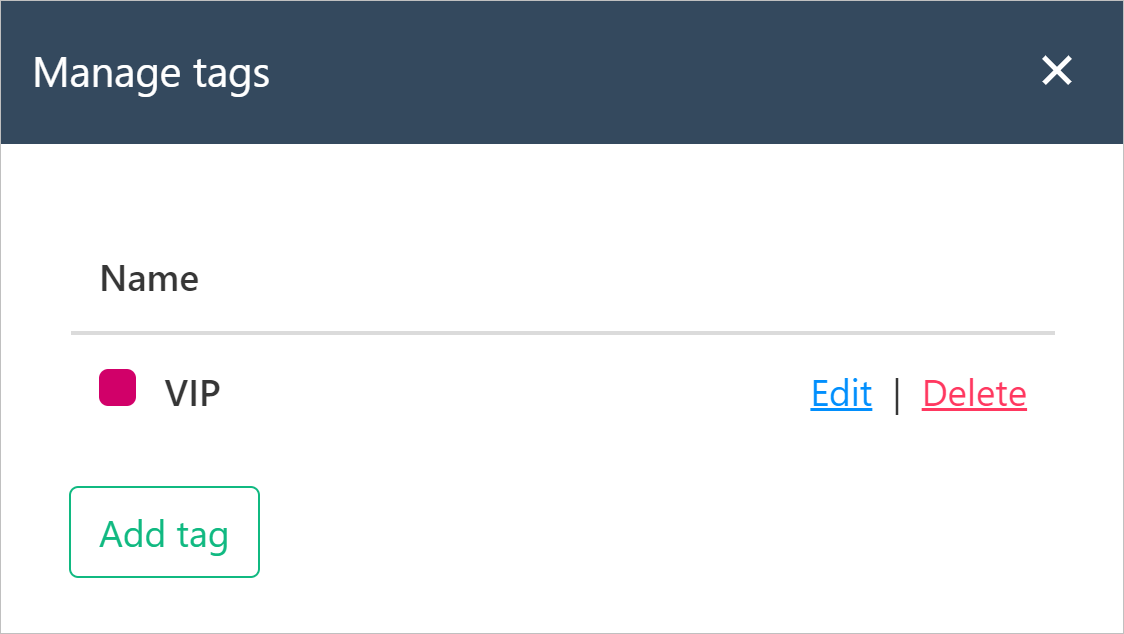
 6. Click the Add and manage tags link. The Manage tags panel displays.
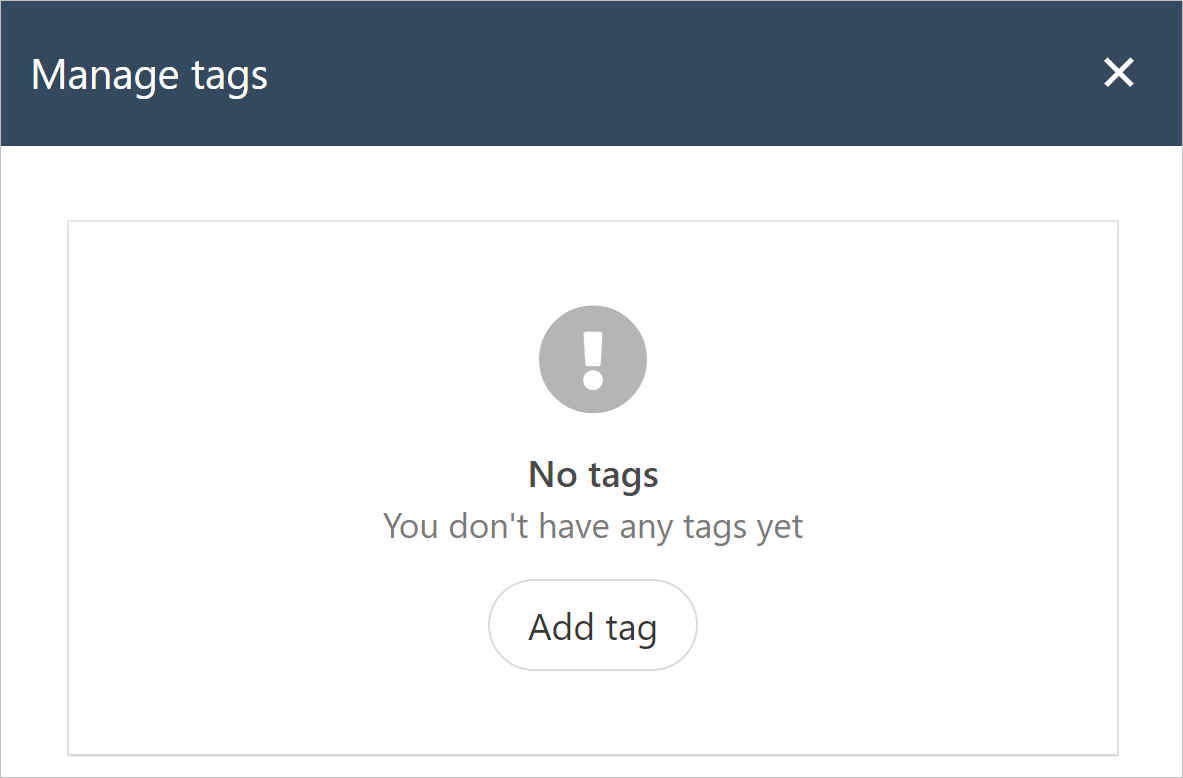
The first time you create a tag, the pop-up box is blank. As you add tags, a list of tag options displays here.
6. Click the Add and manage tags link. The Manage tags panel displays.
The first time you create a tag, the pop-up box is blank. As you add tags, a list of tag options displays here.
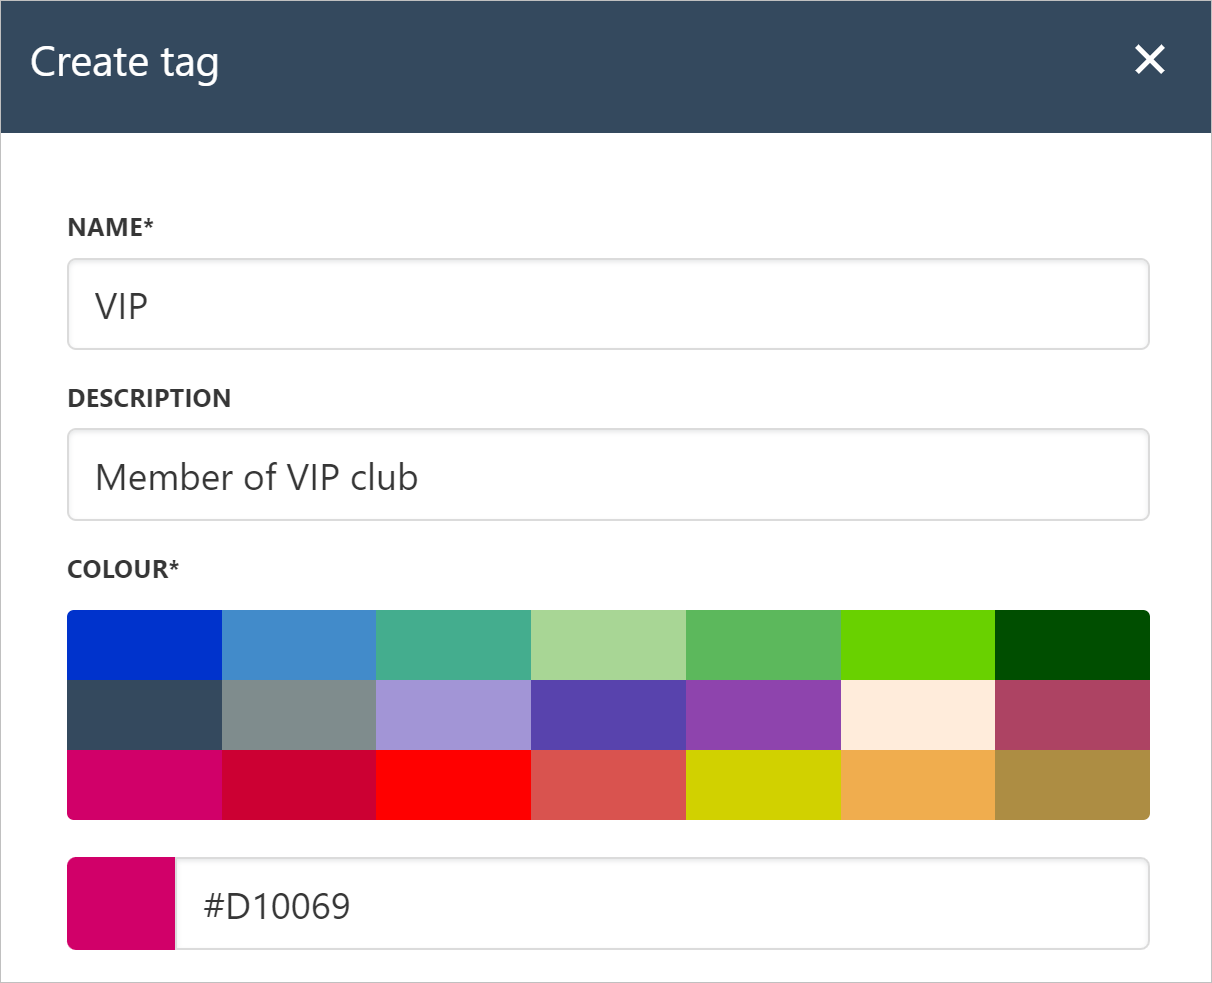
 ## Creating a tag
1. Click Add tag on the Manage tags panel.
## Creating a tag
1. Click Add tag on the Manage tags panel.
 2. Enter a tag label (only visible to admins and staff).
3. Add a brief description.
4. Choose a colour.
5. Click Create.
2. Enter a tag label (only visible to admins and staff).
3. Add a brief description.
4. Choose a colour.
5. Click Create.
 Upmind adds the tag to your library. At this point, you can close the panel, add a new tag, or edit a tag.
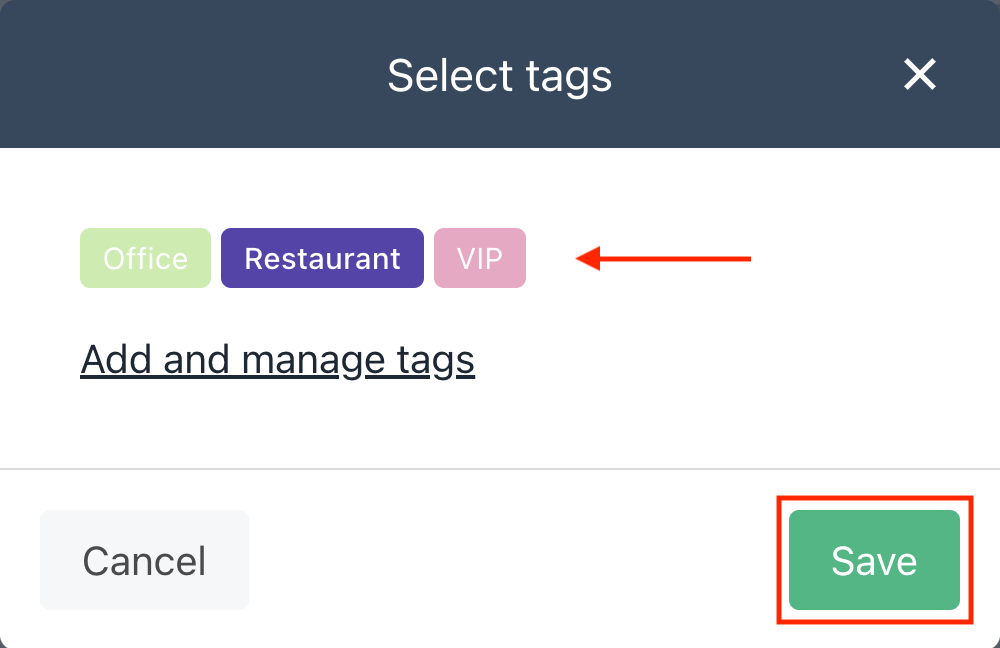
 ## Assigning a tag
So far, you have created a tag. The next step is to assign a tag to a client.
1. Go back to the Clients list.
2. Scroll through the list and click a client name.
3. Click **Add client tag** under the client detail for FraudMind. A pop-up box will display.
4. Select a tag.
5. Click Save and Upmind automatically applies that tag to this client.
## Assigning a tag
So far, you have created a tag. The next step is to assign a tag to a client.
1. Go back to the Clients list.
2. Scroll through the list and click a client name.
3. Click **Add client tag** under the client detail for FraudMind. A pop-up box will display.
4. Select a tag.
5. Click Save and Upmind automatically applies that tag to this client.
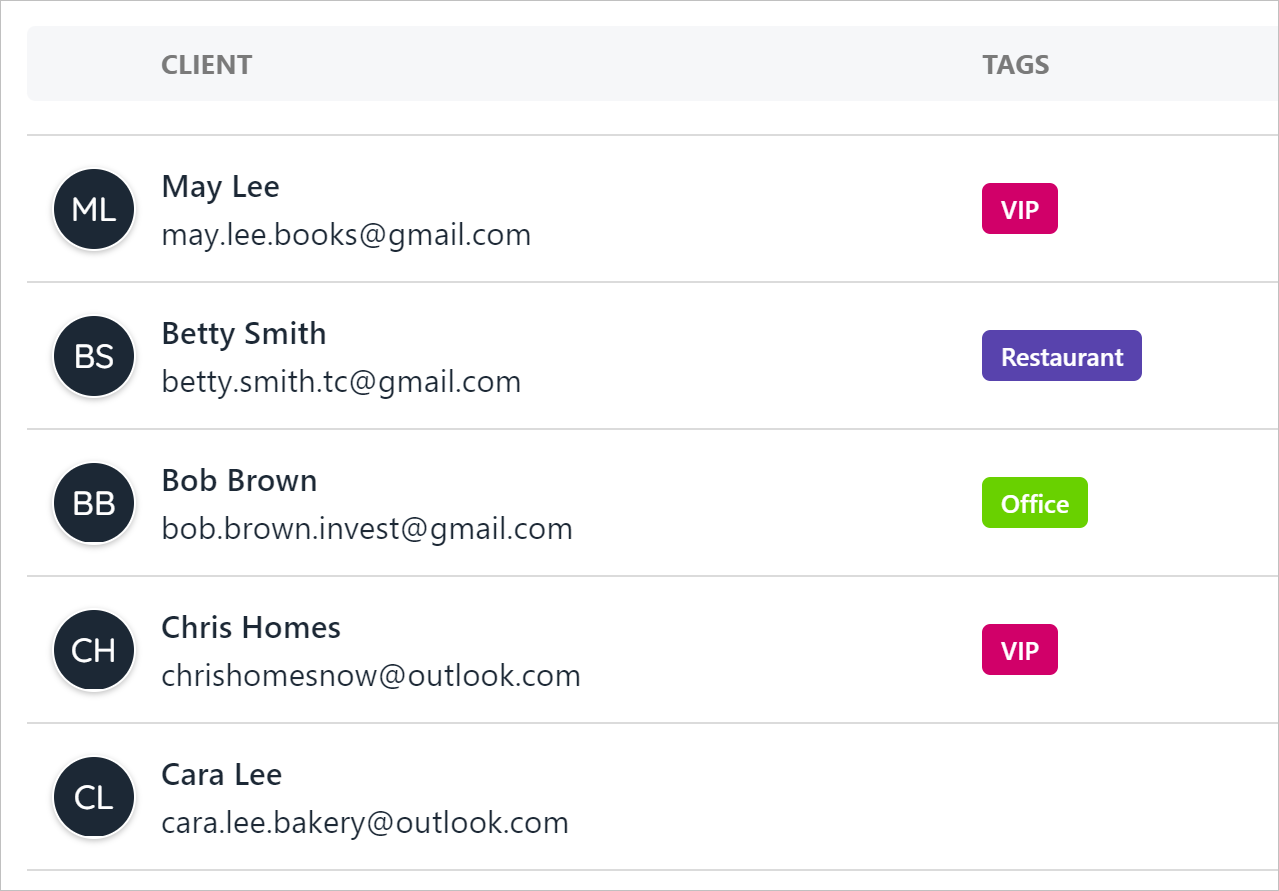
 ## Checking your tags
Go back to the Clients list page. Upmind shows the tags.
## Checking your tags
Go back to the Clients list page. Upmind shows the tags.
 ## Sorting clients with tags
You can sort the client list with one or more tags.
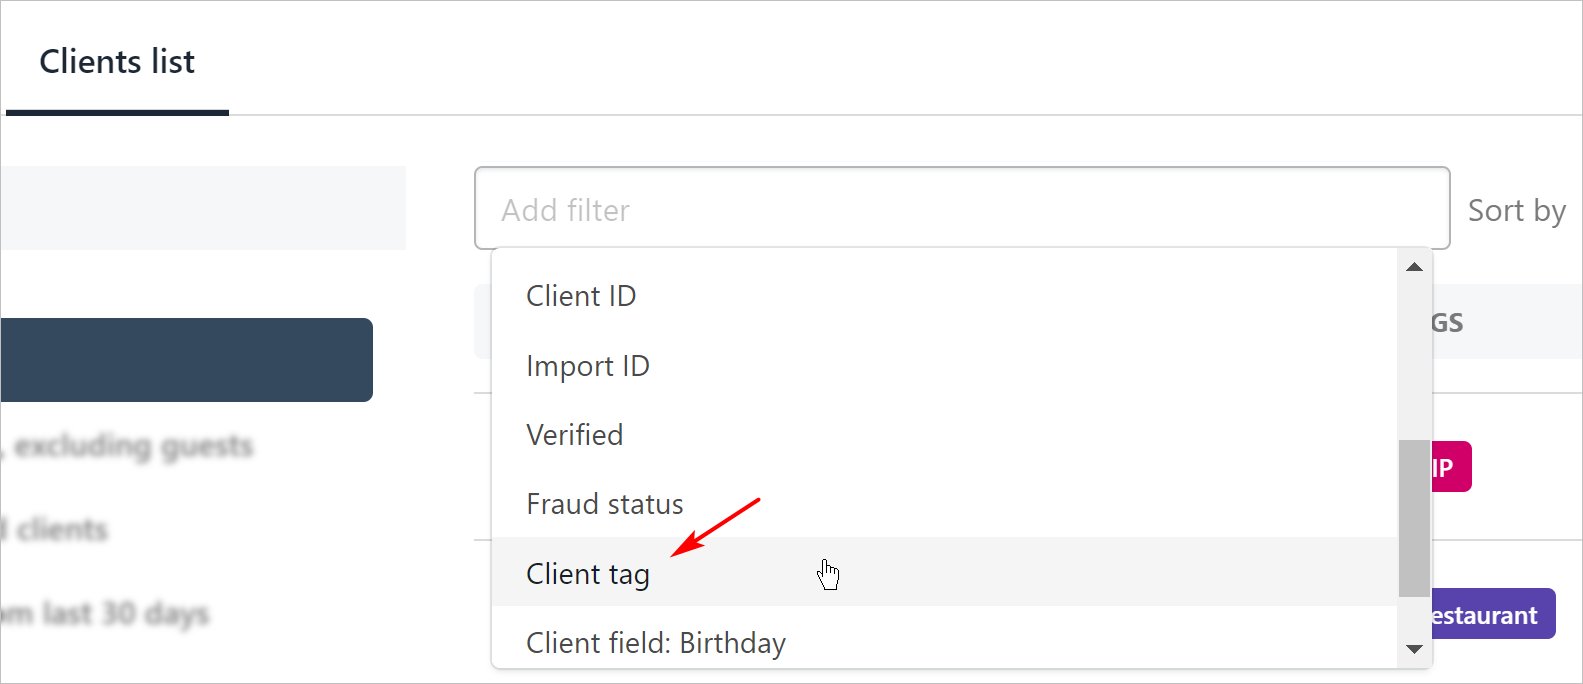
1. Go to the Clients list page.
2. Click the Add filter field at the top of the page.
3. Click Client tag on the drop-down menu.
## Sorting clients with tags
You can sort the client list with one or more tags.
1. Go to the Clients list page.
2. Click the Add filter field at the top of the page.
3. Click Client tag on the drop-down menu.
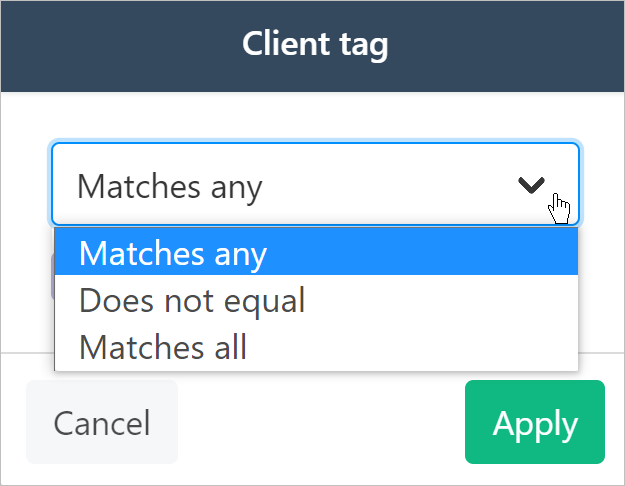
 4. On the pop-up window, select a condition.
 5. On the same window, select one or more tags.
6. Click Apply.
5. On the same window, select one or more tags.
6. Click Apply.
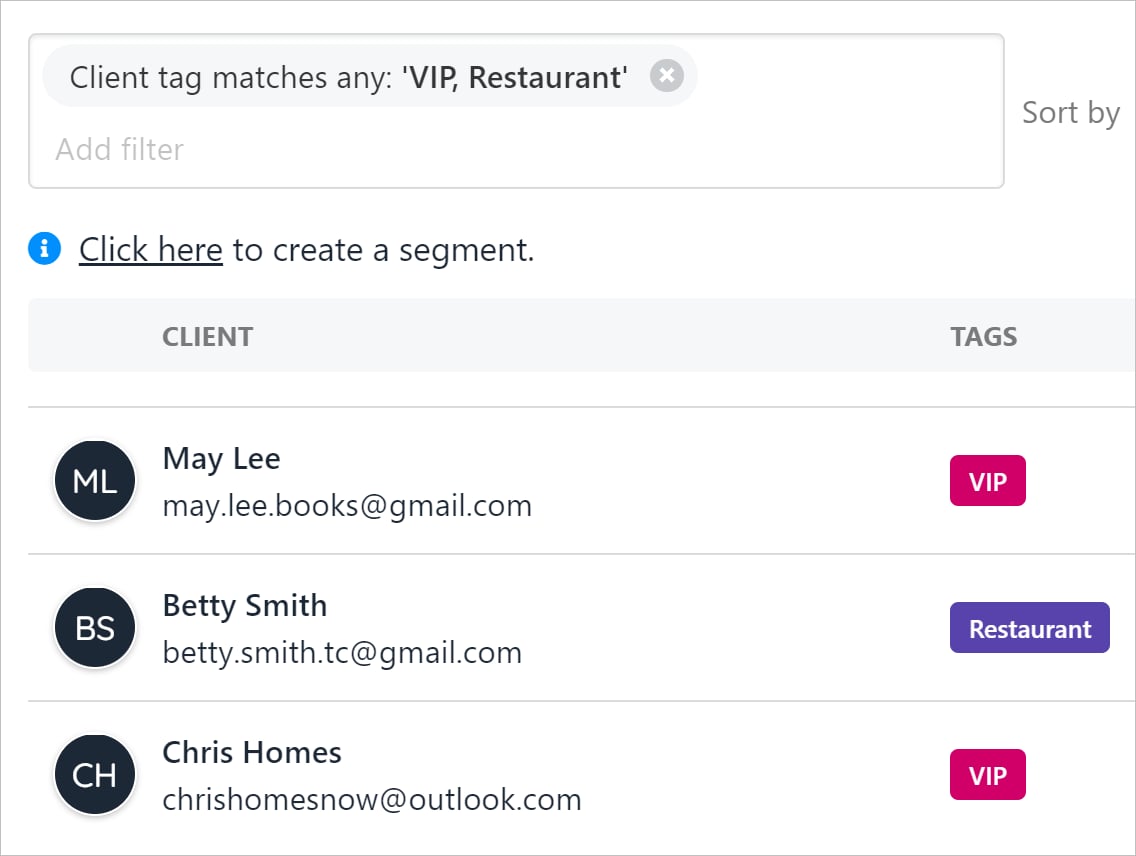
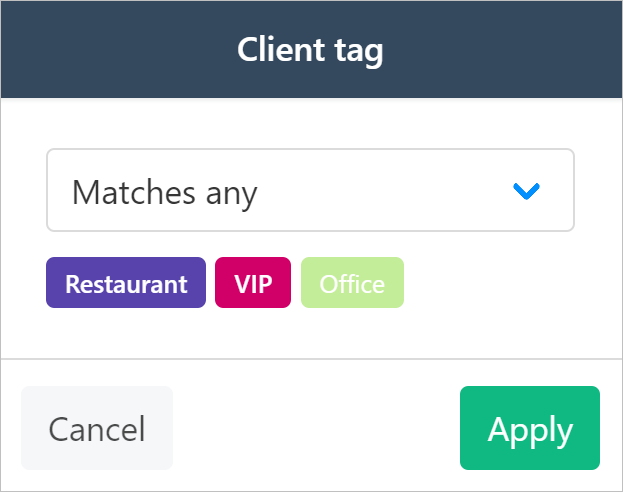 Upmind displays a list of clients that match your condition and tag selection. In this example, we want to see all clients with the VIP or Restaurant tag.
To remove the filter, go to the Add filter field at the top of the page and click the X icon next to the tag names.
Upmind displays a list of clients that match your condition and tag selection. In this example, we want to see all clients with the VIP or Restaurant tag.
To remove the filter, go to the Add filter field at the top of the page and click the X icon next to the tag names.