> ## Documentation Index
> Fetch the complete documentation index at: https://docs.upmind.com/llms.txt
> Use this file to discover all available pages before exploring further.
# Launching with the Ready-made Cart
> A step-by-step guide to getting your Upmind storefront live quickly using the hosted Cart with no custom code required.
* **Time** — 30 minutes
* **Difficulty** — Beginner
**What You'll Build:** A fully functional, production-ready storefront hosted on your own domain, with products, pricing, payment processing, and order confirmation all configured and tested, ready to accept live customer orders.
**Prerequisites:**
* An active [Upmind account](https://upmind.com/start) with Cart access.
* At least one brand configured in Upmind (see [How to Add Brands](/setup-and-configuration/branding/how-to-add-brands)).
* Products created with pricing and billing cycles defined (see [How to Create Products](/using-upmind/product-management/how-to-create-products)).
* A supported payment provider account (e.g., Stripe).
* Access to your domain's DNS management to set up a CNAME record.
* A read-through of [Using the Decision Guide](/using-cart-20/choosing-what-to-implement-for-your-business/using-the-decision-guide) to confirm the ready-made Cart is the right path for your business.
This path is designed for teams that want to launch a fully functional storefront and checkout quickly using Upmind’s hosted Cart, with minimal engineering involvement. It is the fastest route to a production-ready checkout, relying on built-in flows for catalogue browsing, product configuration, checkout, and confirmation.
The ready-made Cart provides a complete commerce experience out of the box. It allows teams to go live quickly while keeping the option open to refine branding, layout, and behaviour later through configuration or headless approaches.
You should follow these steps:
1. DNS / CNAME setup
2. Basic configuration
3. Enabling products
4. Payments
5. Testing
6. Go-live checklist
## When to choose this path
* You want a working checkout live as quickly as possible.
* You are comfortable using a standard, proven checkout flow.
* You want to customise behaviour and content through configuration rather than building UI.
* You may choose to adopt a headless setup in the future, but not immediately.
No frontend framework or custom code is required to create a fully managed, high-conversion storefront hosted on your own subdomain.
## Step 1: DNS / CNAME setup
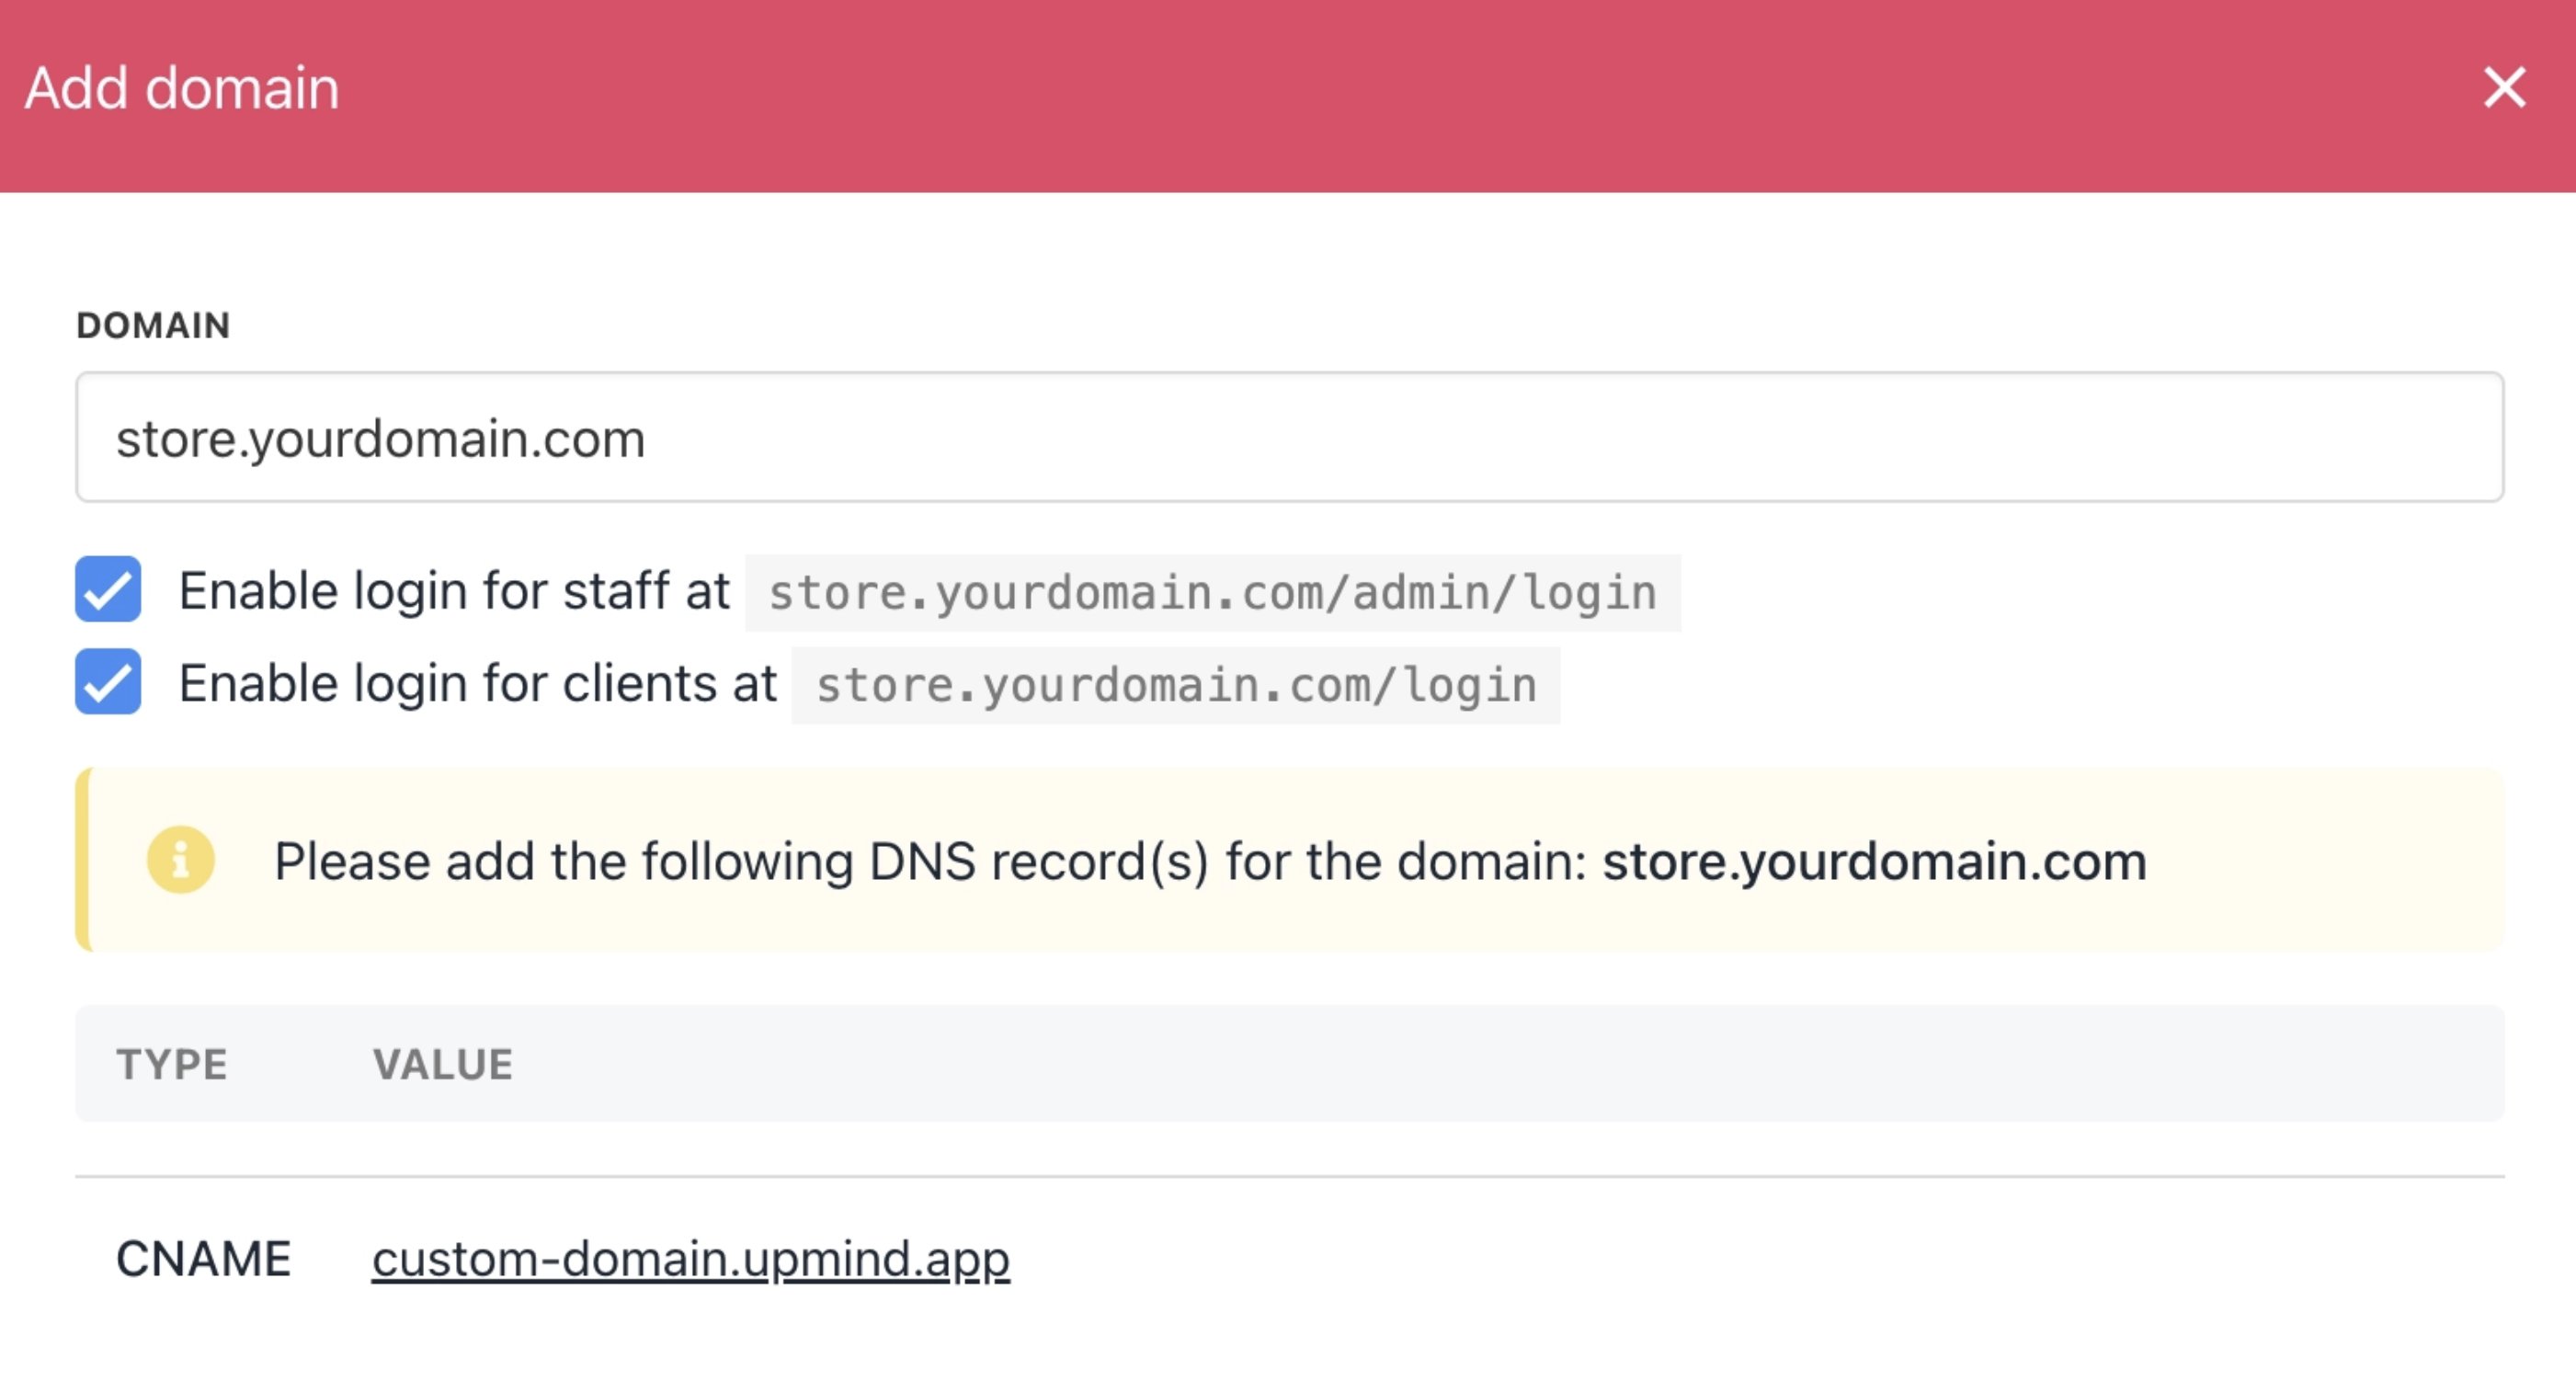
The Cart is hosted by Upmind but designed to appear as part of your own domain. To use the ready-made Cart on your domain, a DNS record must be configured.
### Choose a domain or subdomain
Decide which domain or subdomain customers will use to access the Cart. Common examples include: `store.yourdomain.com` or `checkout.yourdomain.com`.
This can be accessed from **Settings** > **Domains** under **Branding and customisation**.
 ### Create a CNAME record
* Create a **CNAME record** for your chosen domain.
* Point it to the Upmind Cart hostname (provided by Upmind).
* The TTL can usually remain at the default value.
### Verify DNS propagation
* DNS changes may take anywhere from a few minutes to several hours to propagate.
* Once propagation is complete, the Cart will be accessible through your domain.
### Confirm HTTPS
* TLS/SSL is handled automatically by Upmind once the domain resolves correctly.
* No manual certificate setup or management is required.
For more details, follow this [guide](/setup-and-configuration/branding/how-to-add-a-custom-domain-name).
## Step 2: Basic configuration
This stage focuses on enabling **core commerce behaviour only**. You can change brand settings from **Settings** > **Brand Settings** under **Branding and customisation,** and business settings from **Settings** > **Business Settings** under **E-commerce settings**.
### Brand and business settings
Review and confirm key brand-level settings, including:
* Company name and contact details.
* Business logo, colour, and font.
* Multiple language options.
* Default currency.
* Locale and regional settings.
* Business location and contact details.
### Create a CNAME record
* Create a **CNAME record** for your chosen domain.
* Point it to the Upmind Cart hostname (provided by Upmind).
* The TTL can usually remain at the default value.
### Verify DNS propagation
* DNS changes may take anywhere from a few minutes to several hours to propagate.
* Once propagation is complete, the Cart will be accessible through your domain.
### Confirm HTTPS
* TLS/SSL is handled automatically by Upmind once the domain resolves correctly.
* No manual certificate setup or management is required.
For more details, follow this [guide](/setup-and-configuration/branding/how-to-add-a-custom-domain-name).
## Step 2: Basic configuration
This stage focuses on enabling **core commerce behaviour only**. You can change brand settings from **Settings** > **Brand Settings** under **Branding and customisation,** and business settings from **Settings** > **Business Settings** under **E-commerce settings**.
### Brand and business settings
Review and confirm key brand-level settings, including:
* Company name and contact details.
* Business logo, colour, and font.
* Multiple language options.
* Default currency.
* Locale and regional settings.
* Business location and contact details.
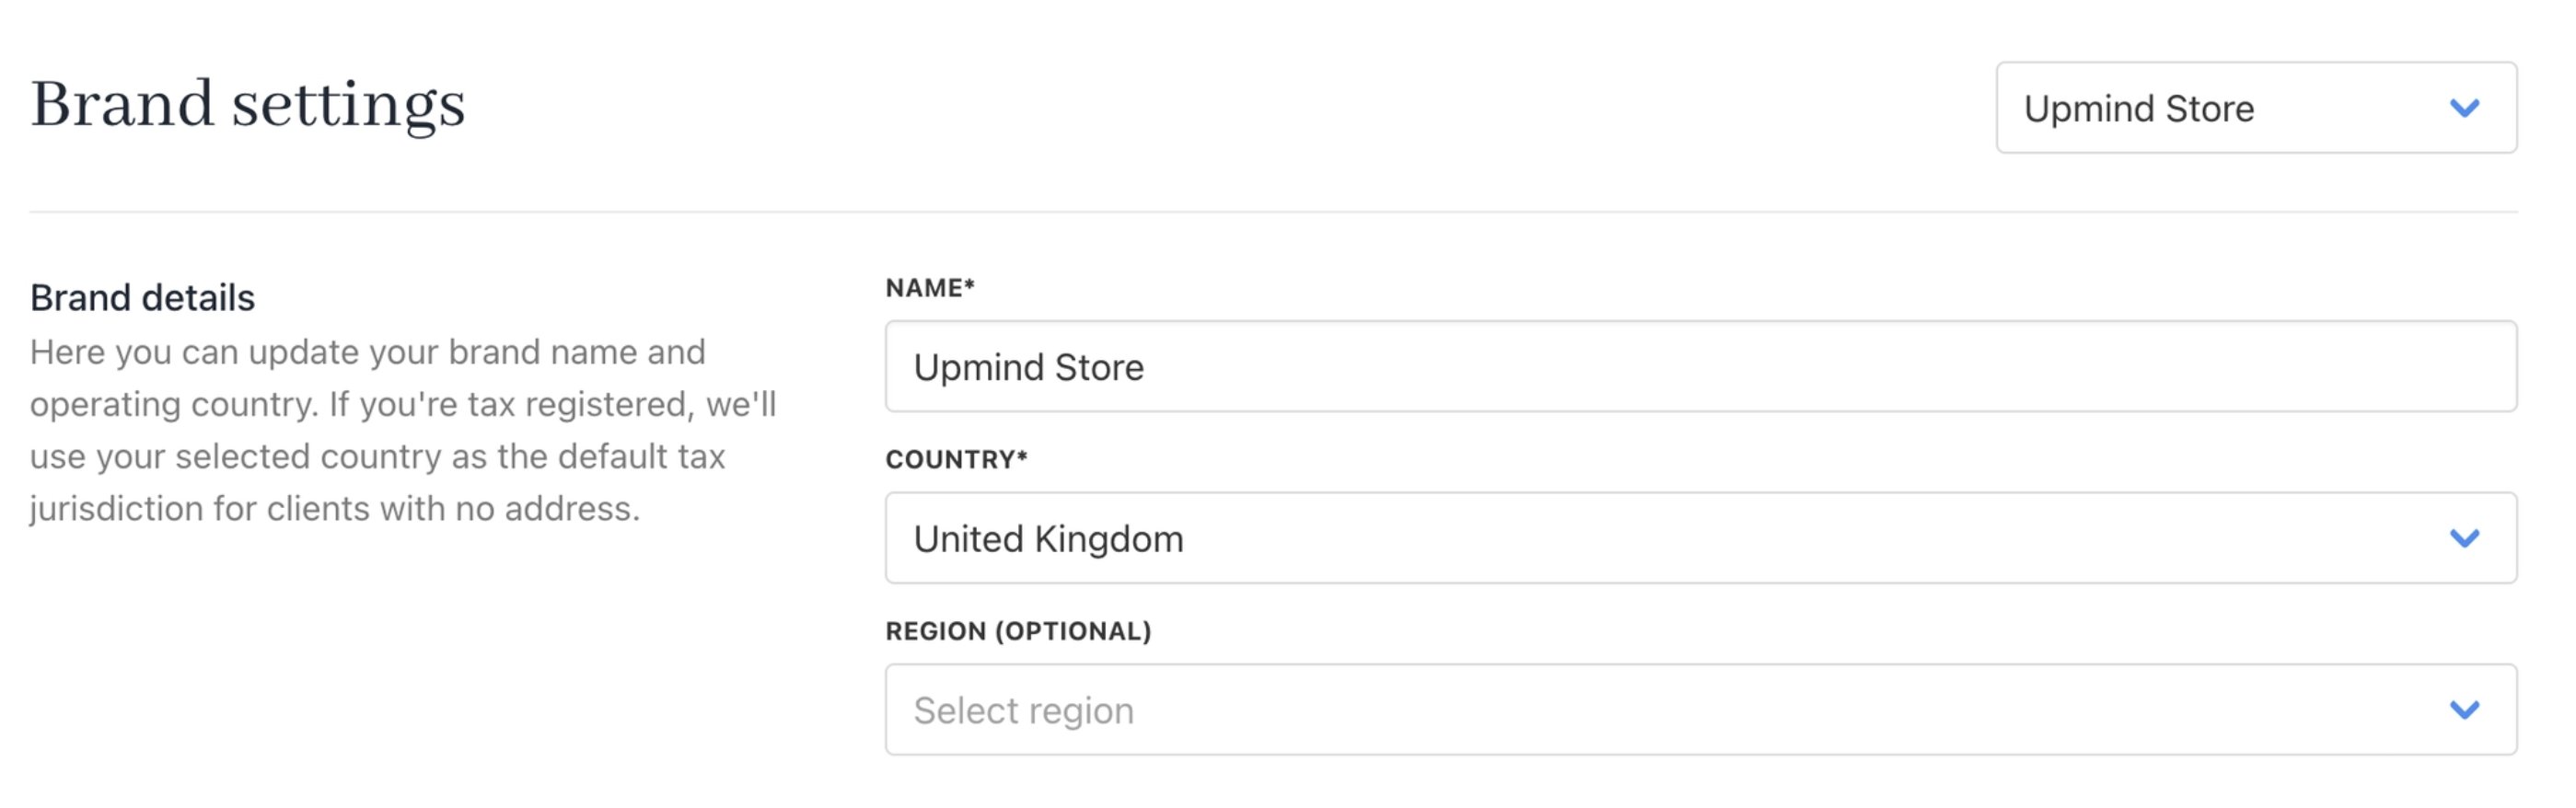
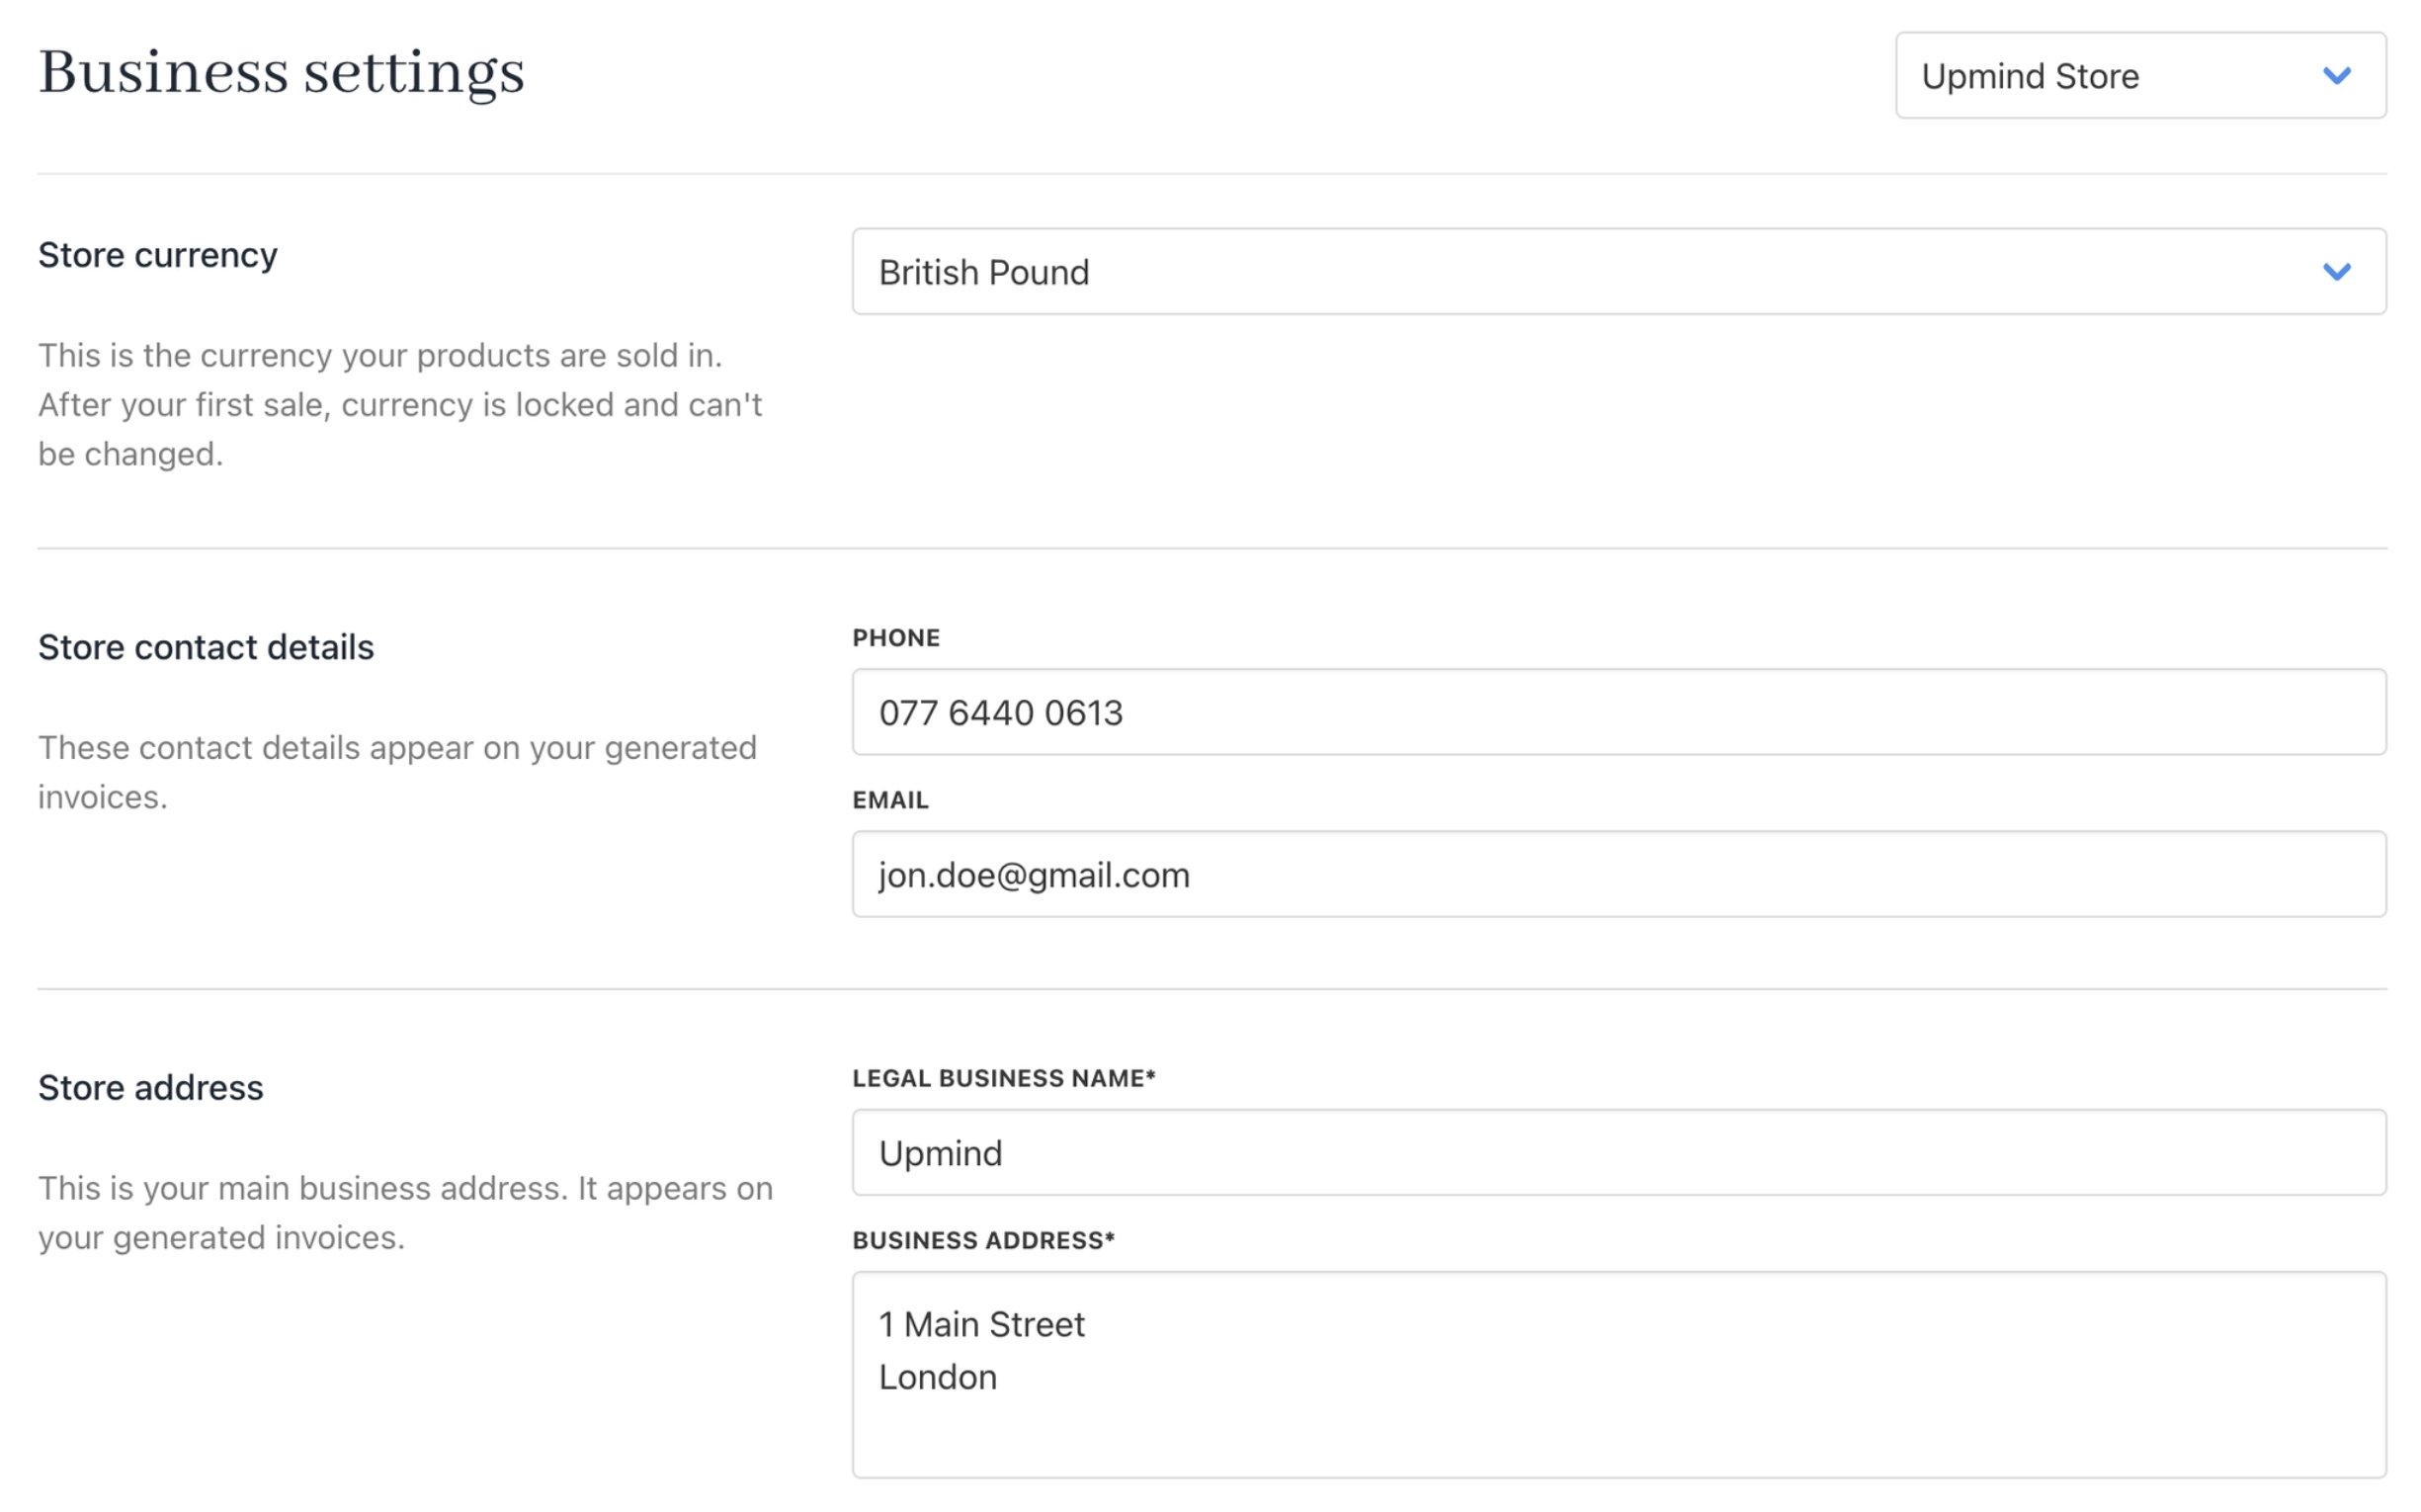 These settings ensure proper branding and communications behave correctly. For more information, follow this [guide](/setup-and-configuration/branding/how-to-configure-your-brand-settings) for brand settings and this [guide](/setup-and-configuration/branding/how-to-configure-business-settings) for business settings.
### Checkout behaviour
Confirm the default checkout rules, such as:
* Whether checkout allows [guest users](/setup-and-configuration/orders-services/how-to-enable-guest-checkout) or requires account creation (**Settings** > **Order Options**).
* Which [customer details](https://docs.upmind.com/using-upmind/how-subscription-cancellation-works/cancellation-fields) are required at checkout.
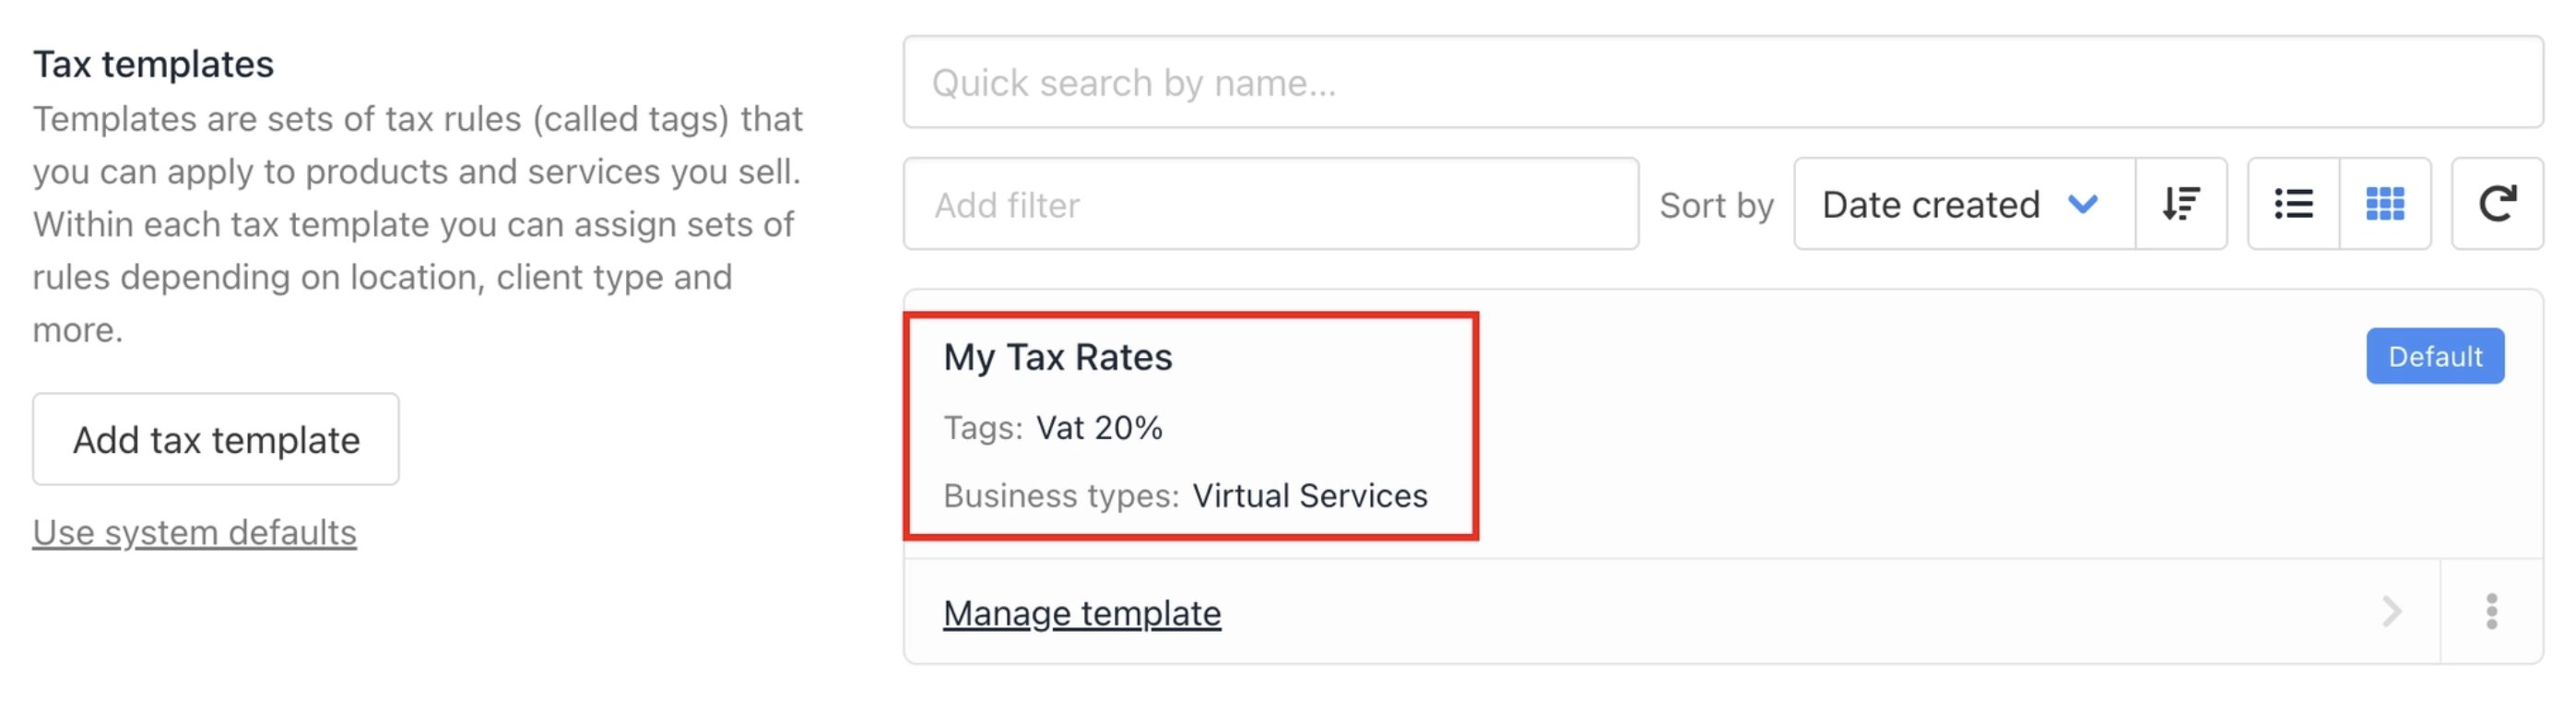
* [Tax configurations](/using-upmind/invoicing-and-taxes/how-to-set-sales-taxes-eg-vat-gst) for products (**Settings** > **Tax Settings**).
* [Billing and invoicing](/using-upmind/invoicing-and-taxes/how-to-configure-invoice-settings) preferences (for example, invoice generation or payment timing).
These defaults define how customers move through checkout.
These settings ensure proper branding and communications behave correctly. For more information, follow this [guide](/setup-and-configuration/branding/how-to-configure-your-brand-settings) for brand settings and this [guide](/setup-and-configuration/branding/how-to-configure-business-settings) for business settings.
### Checkout behaviour
Confirm the default checkout rules, such as:
* Whether checkout allows [guest users](/setup-and-configuration/orders-services/how-to-enable-guest-checkout) or requires account creation (**Settings** > **Order Options**).
* Which [customer details](https://docs.upmind.com/using-upmind/how-subscription-cancellation-works/cancellation-fields) are required at checkout.
* [Tax configurations](/using-upmind/invoicing-and-taxes/how-to-set-sales-taxes-eg-vat-gst) for products (**Settings** > **Tax Settings**).
* [Billing and invoicing](/using-upmind/invoicing-and-taxes/how-to-configure-invoice-settings) preferences (for example, invoice generation or payment timing).
These defaults define how customers move through checkout.

 ### Email and notification basics
To receive order notifications and provide support through email, set up the following:
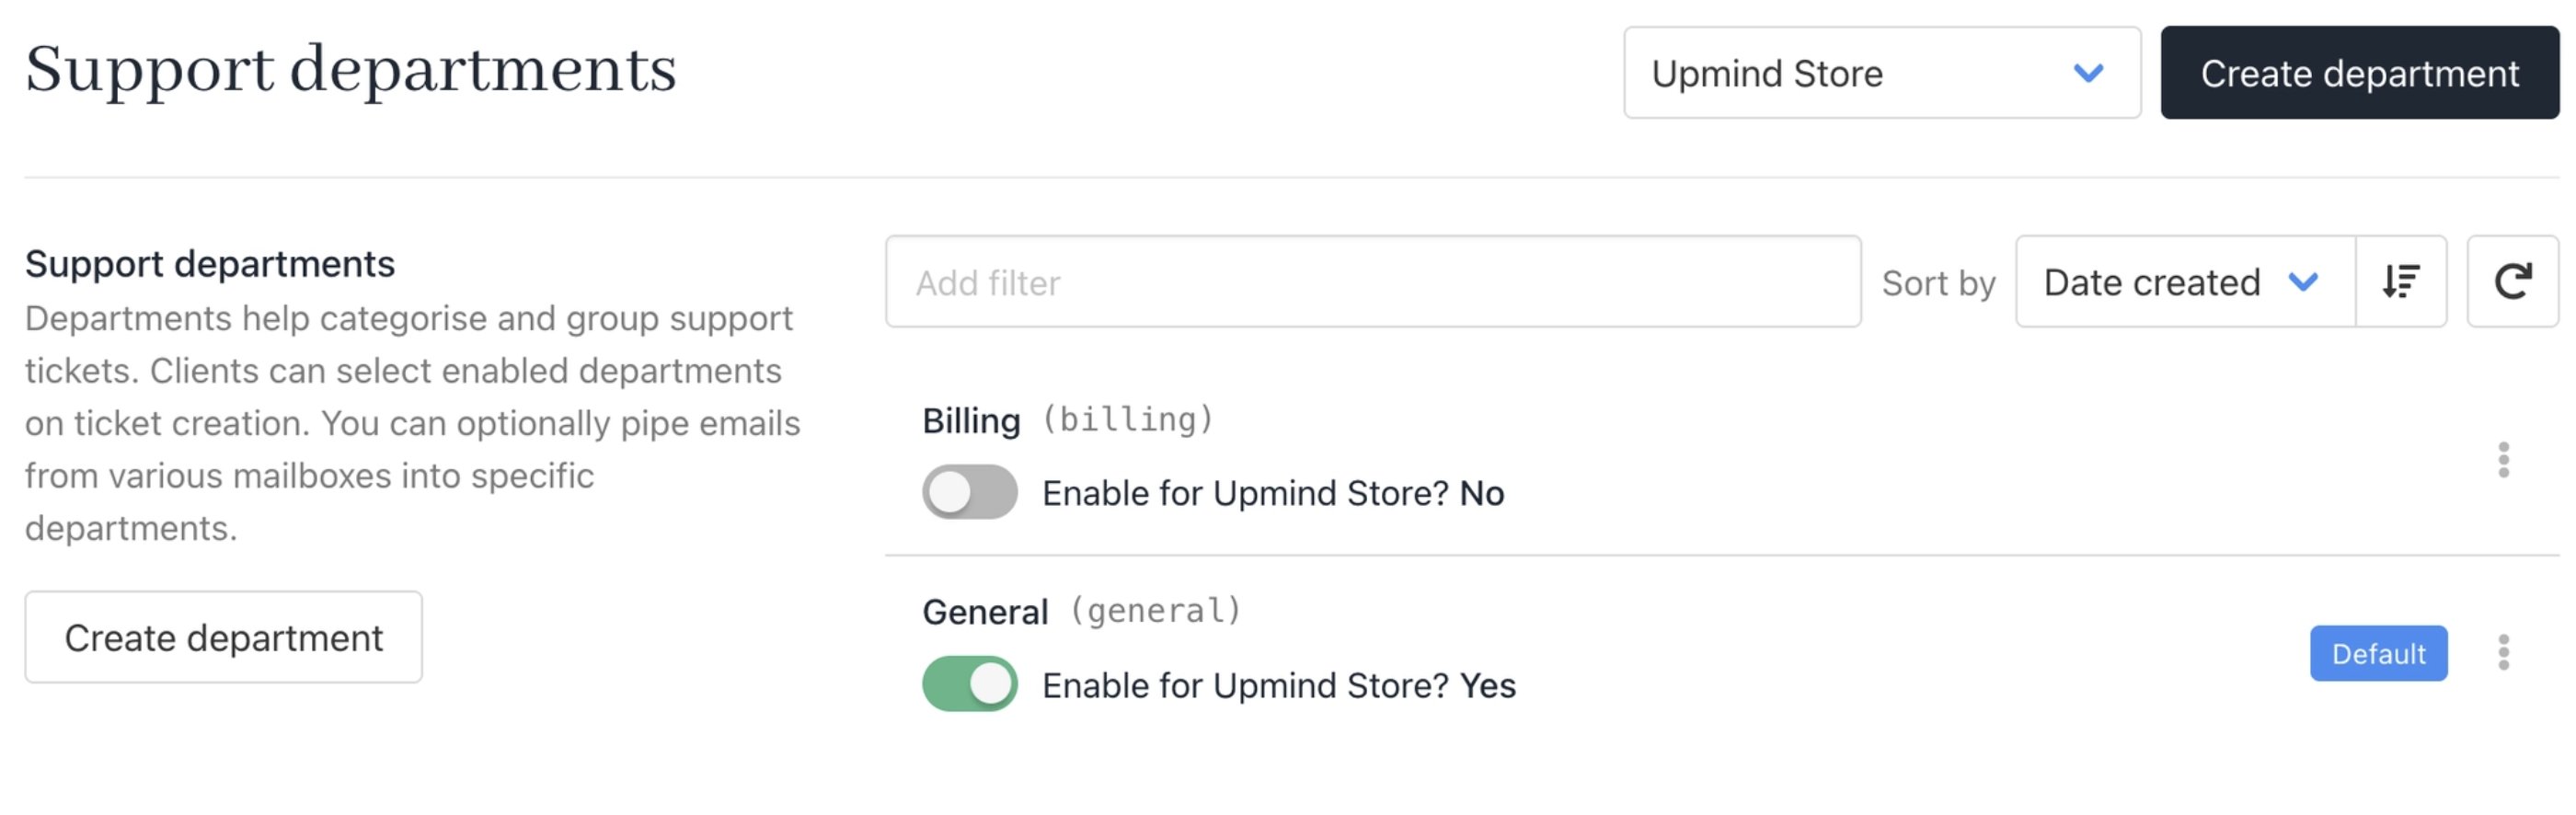
* Set up your support department (**Settings** > **Support Department**).
* Ensure order confirmation emails are enabled.
* Verify sender name, sender address, and reply-to address.
* Confirm any required system notifications are active. For more on notifications, follow this [guide](/setup-and-configuration/notifications/notifications-overview).
At this stage, the Cart will function using default email layouts and behaviour. For more details, follow this [guide](/setup-and-configuration/email-configuring-and-sending/how-does-email-work-in-upmind).
### Email and notification basics
To receive order notifications and provide support through email, set up the following:
* Set up your support department (**Settings** > **Support Department**).
* Ensure order confirmation emails are enabled.
* Verify sender name, sender address, and reply-to address.
* Confirm any required system notifications are active. For more on notifications, follow this [guide](/setup-and-configuration/notifications/notifications-overview).
At this stage, the Cart will function using default email layouts and behaviour. For more details, follow this [guide](/setup-and-configuration/email-configuring-and-sending/how-does-email-work-in-upmind).
 ## Step 3: Enabling products
To make products available in the Cart:
### Create or review products
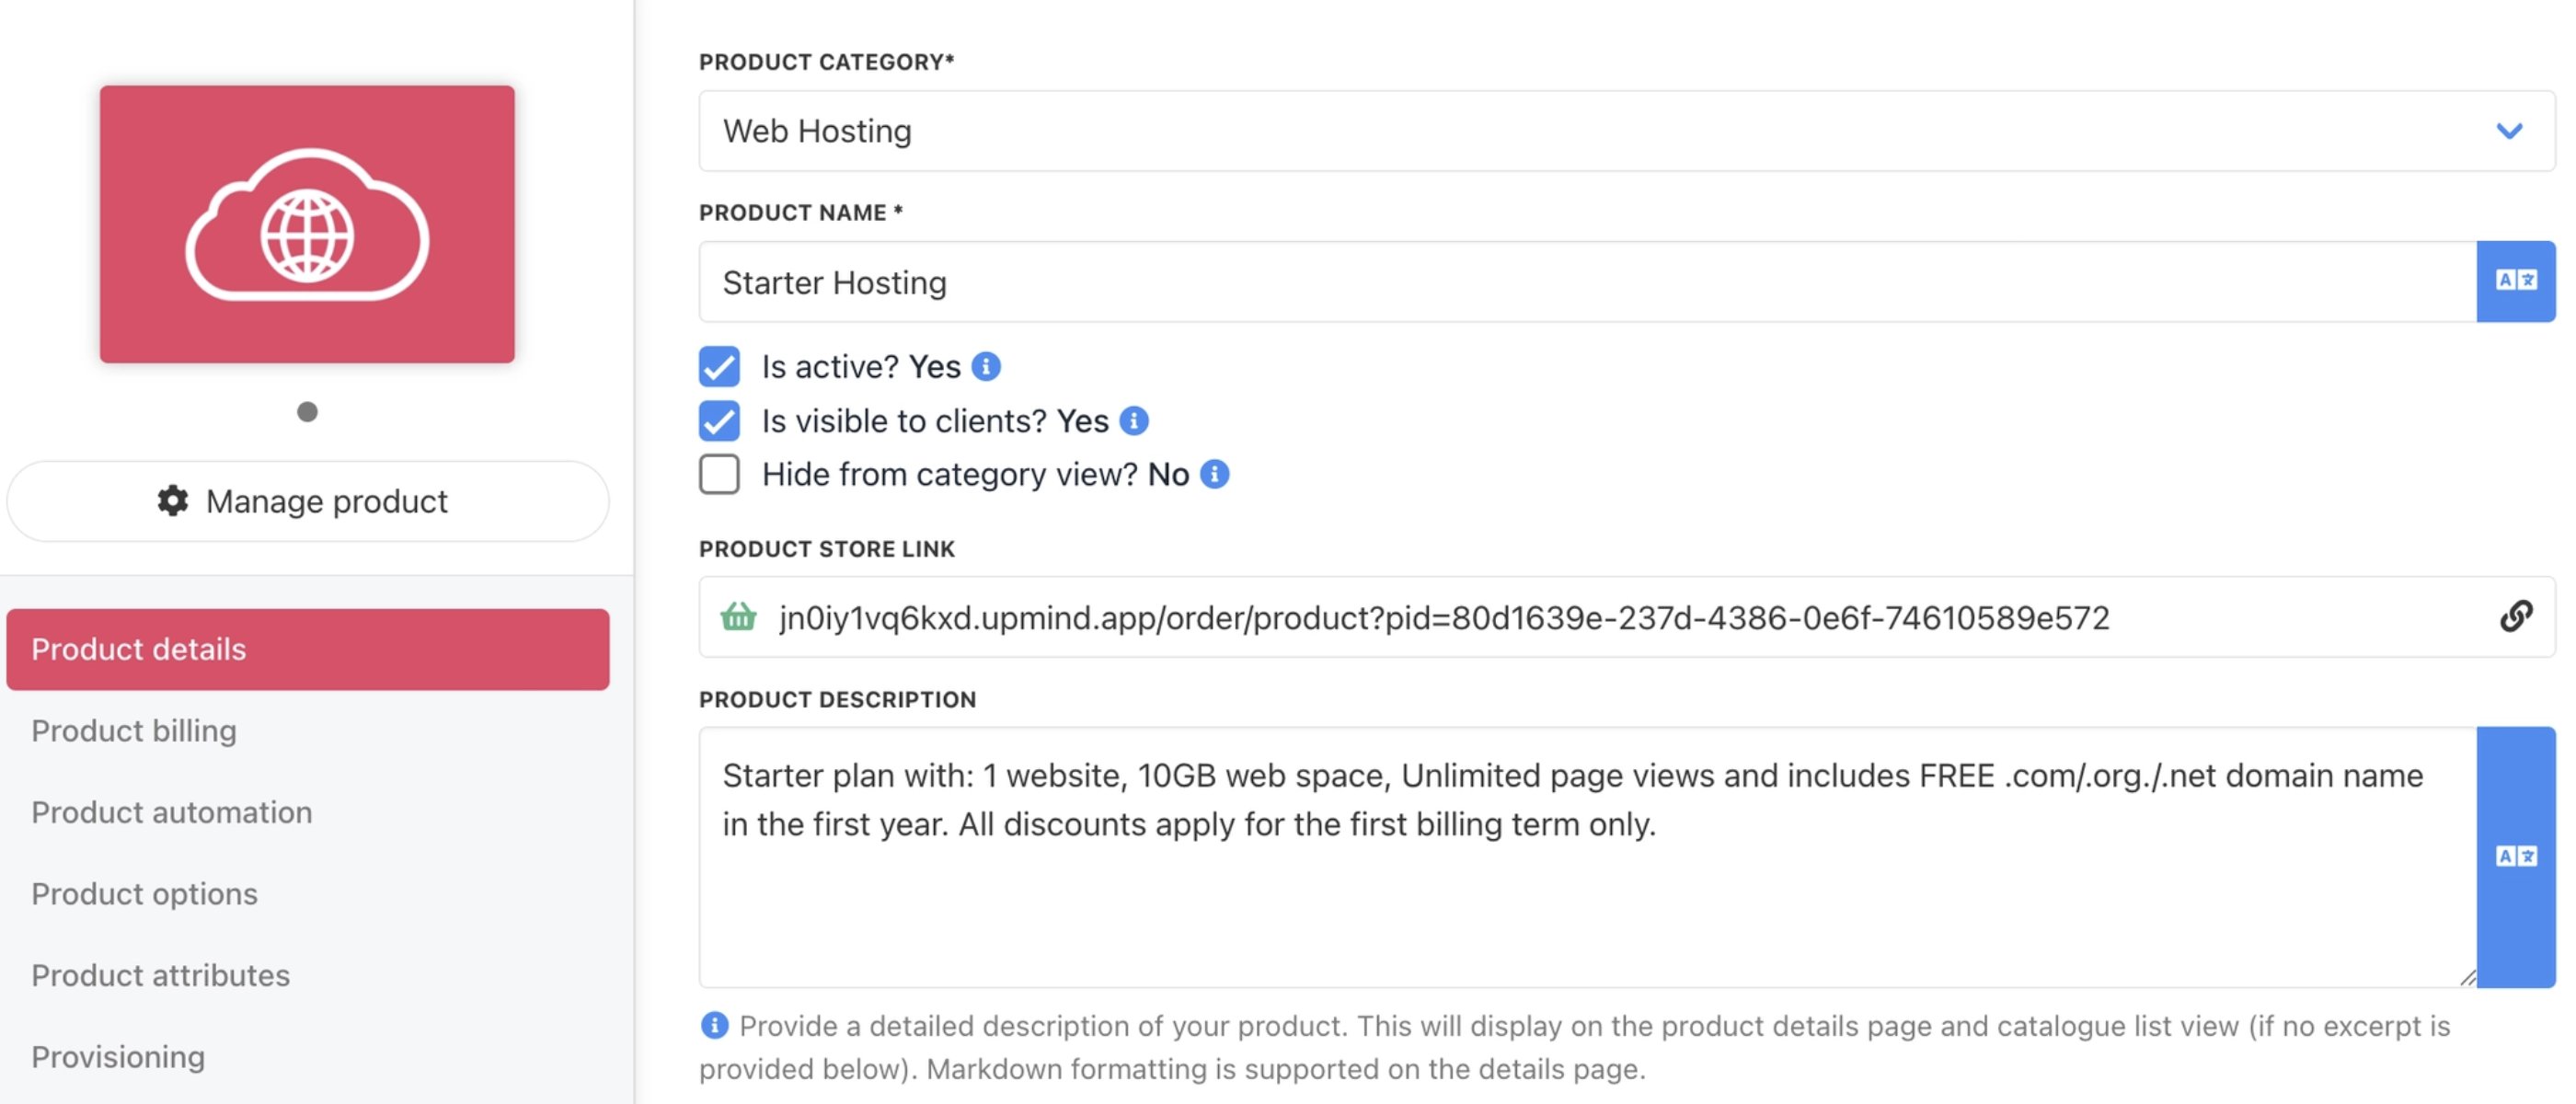
* Ensure [products](/using-upmind/product-management/how-to-create-products) exist in Upmind by creating product categories and products (**Settings** > **Product Catalogue** or **Dashboard** > **Store Catalogue)**.
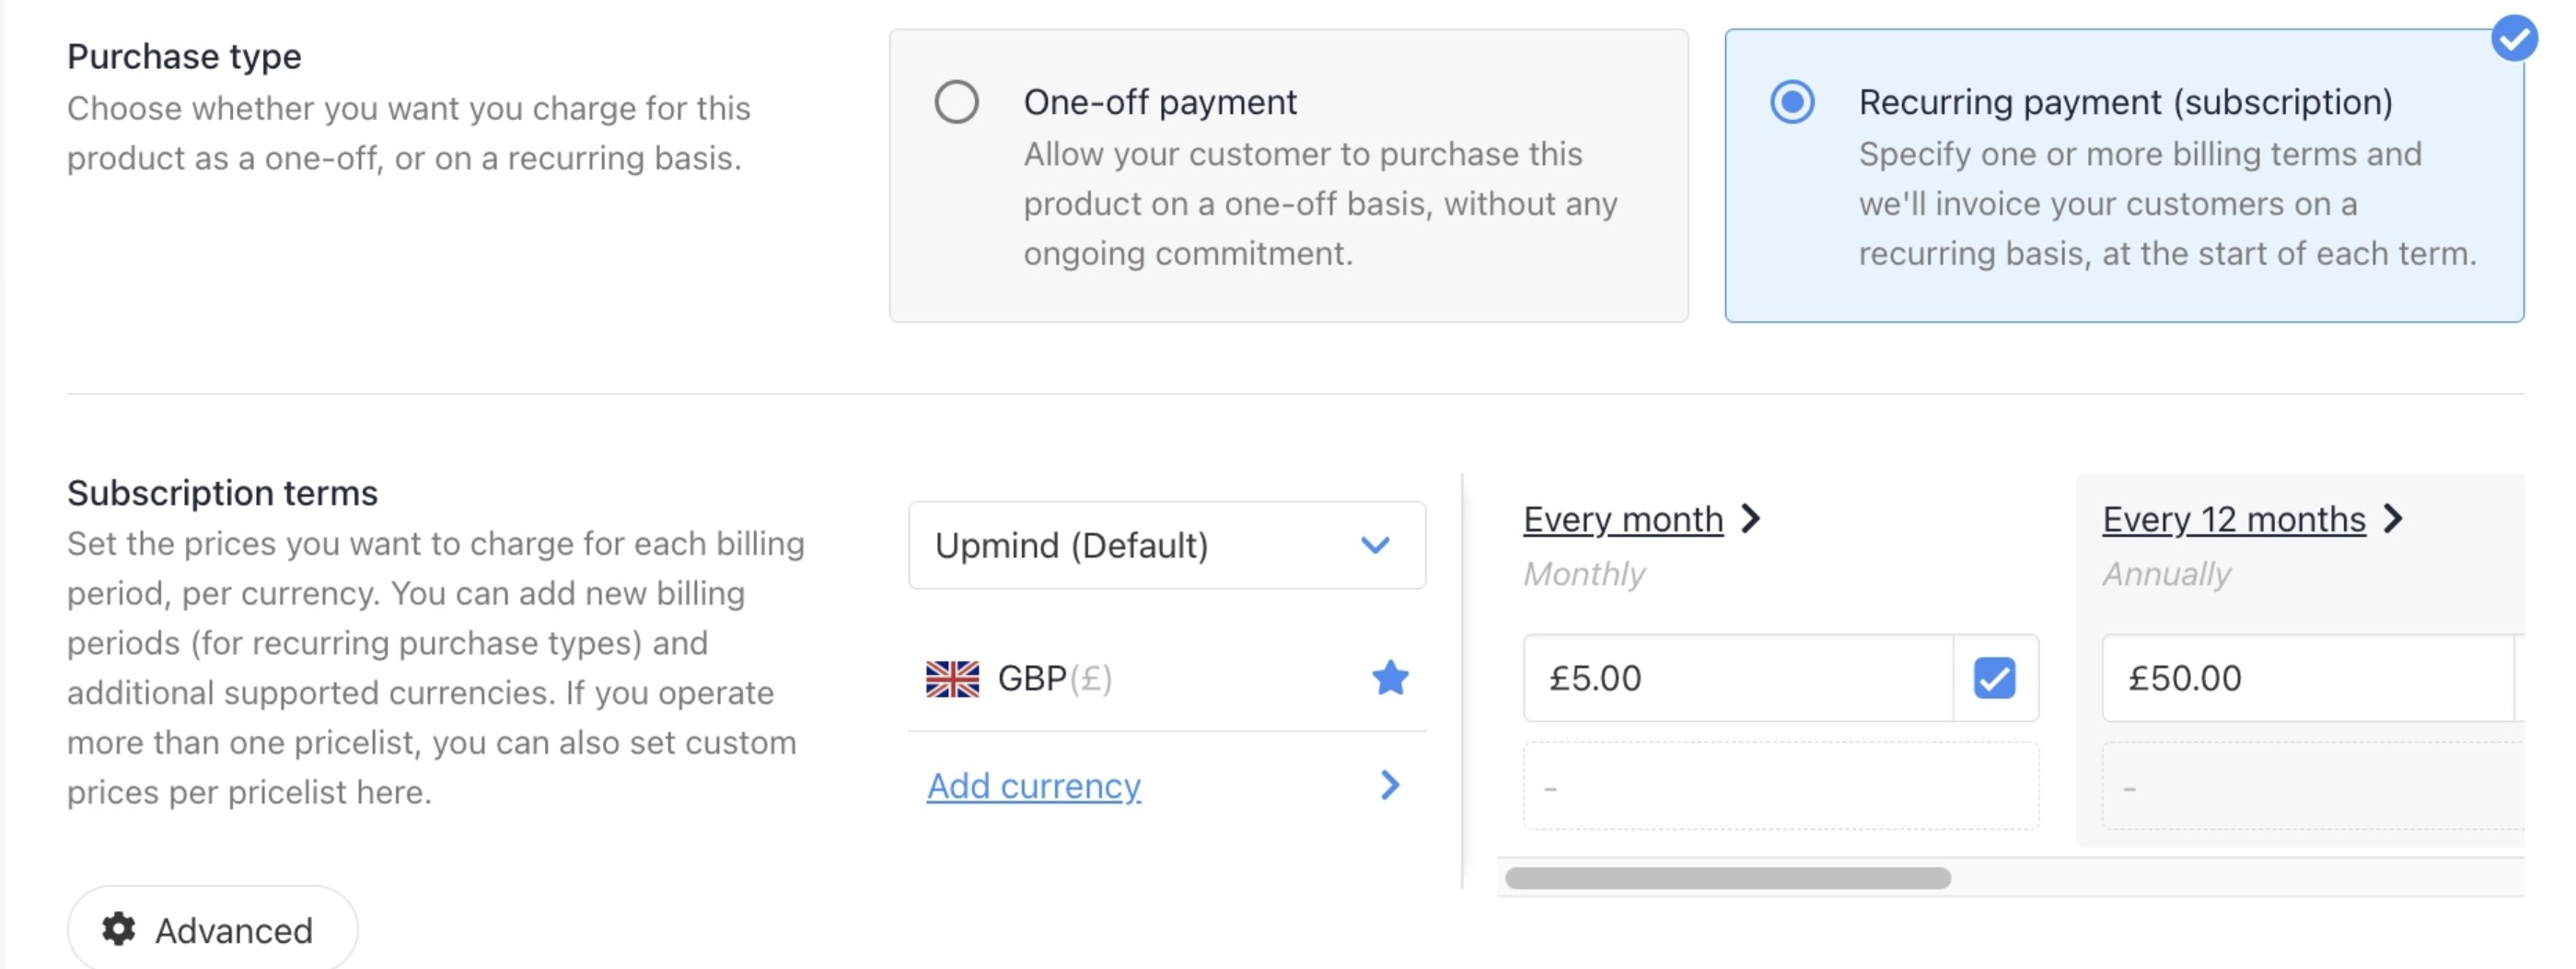
* Confirm [pricing](/using-upmind/product-management/how-to-add-product-billing), billing cycles, and availability are correctly defined.
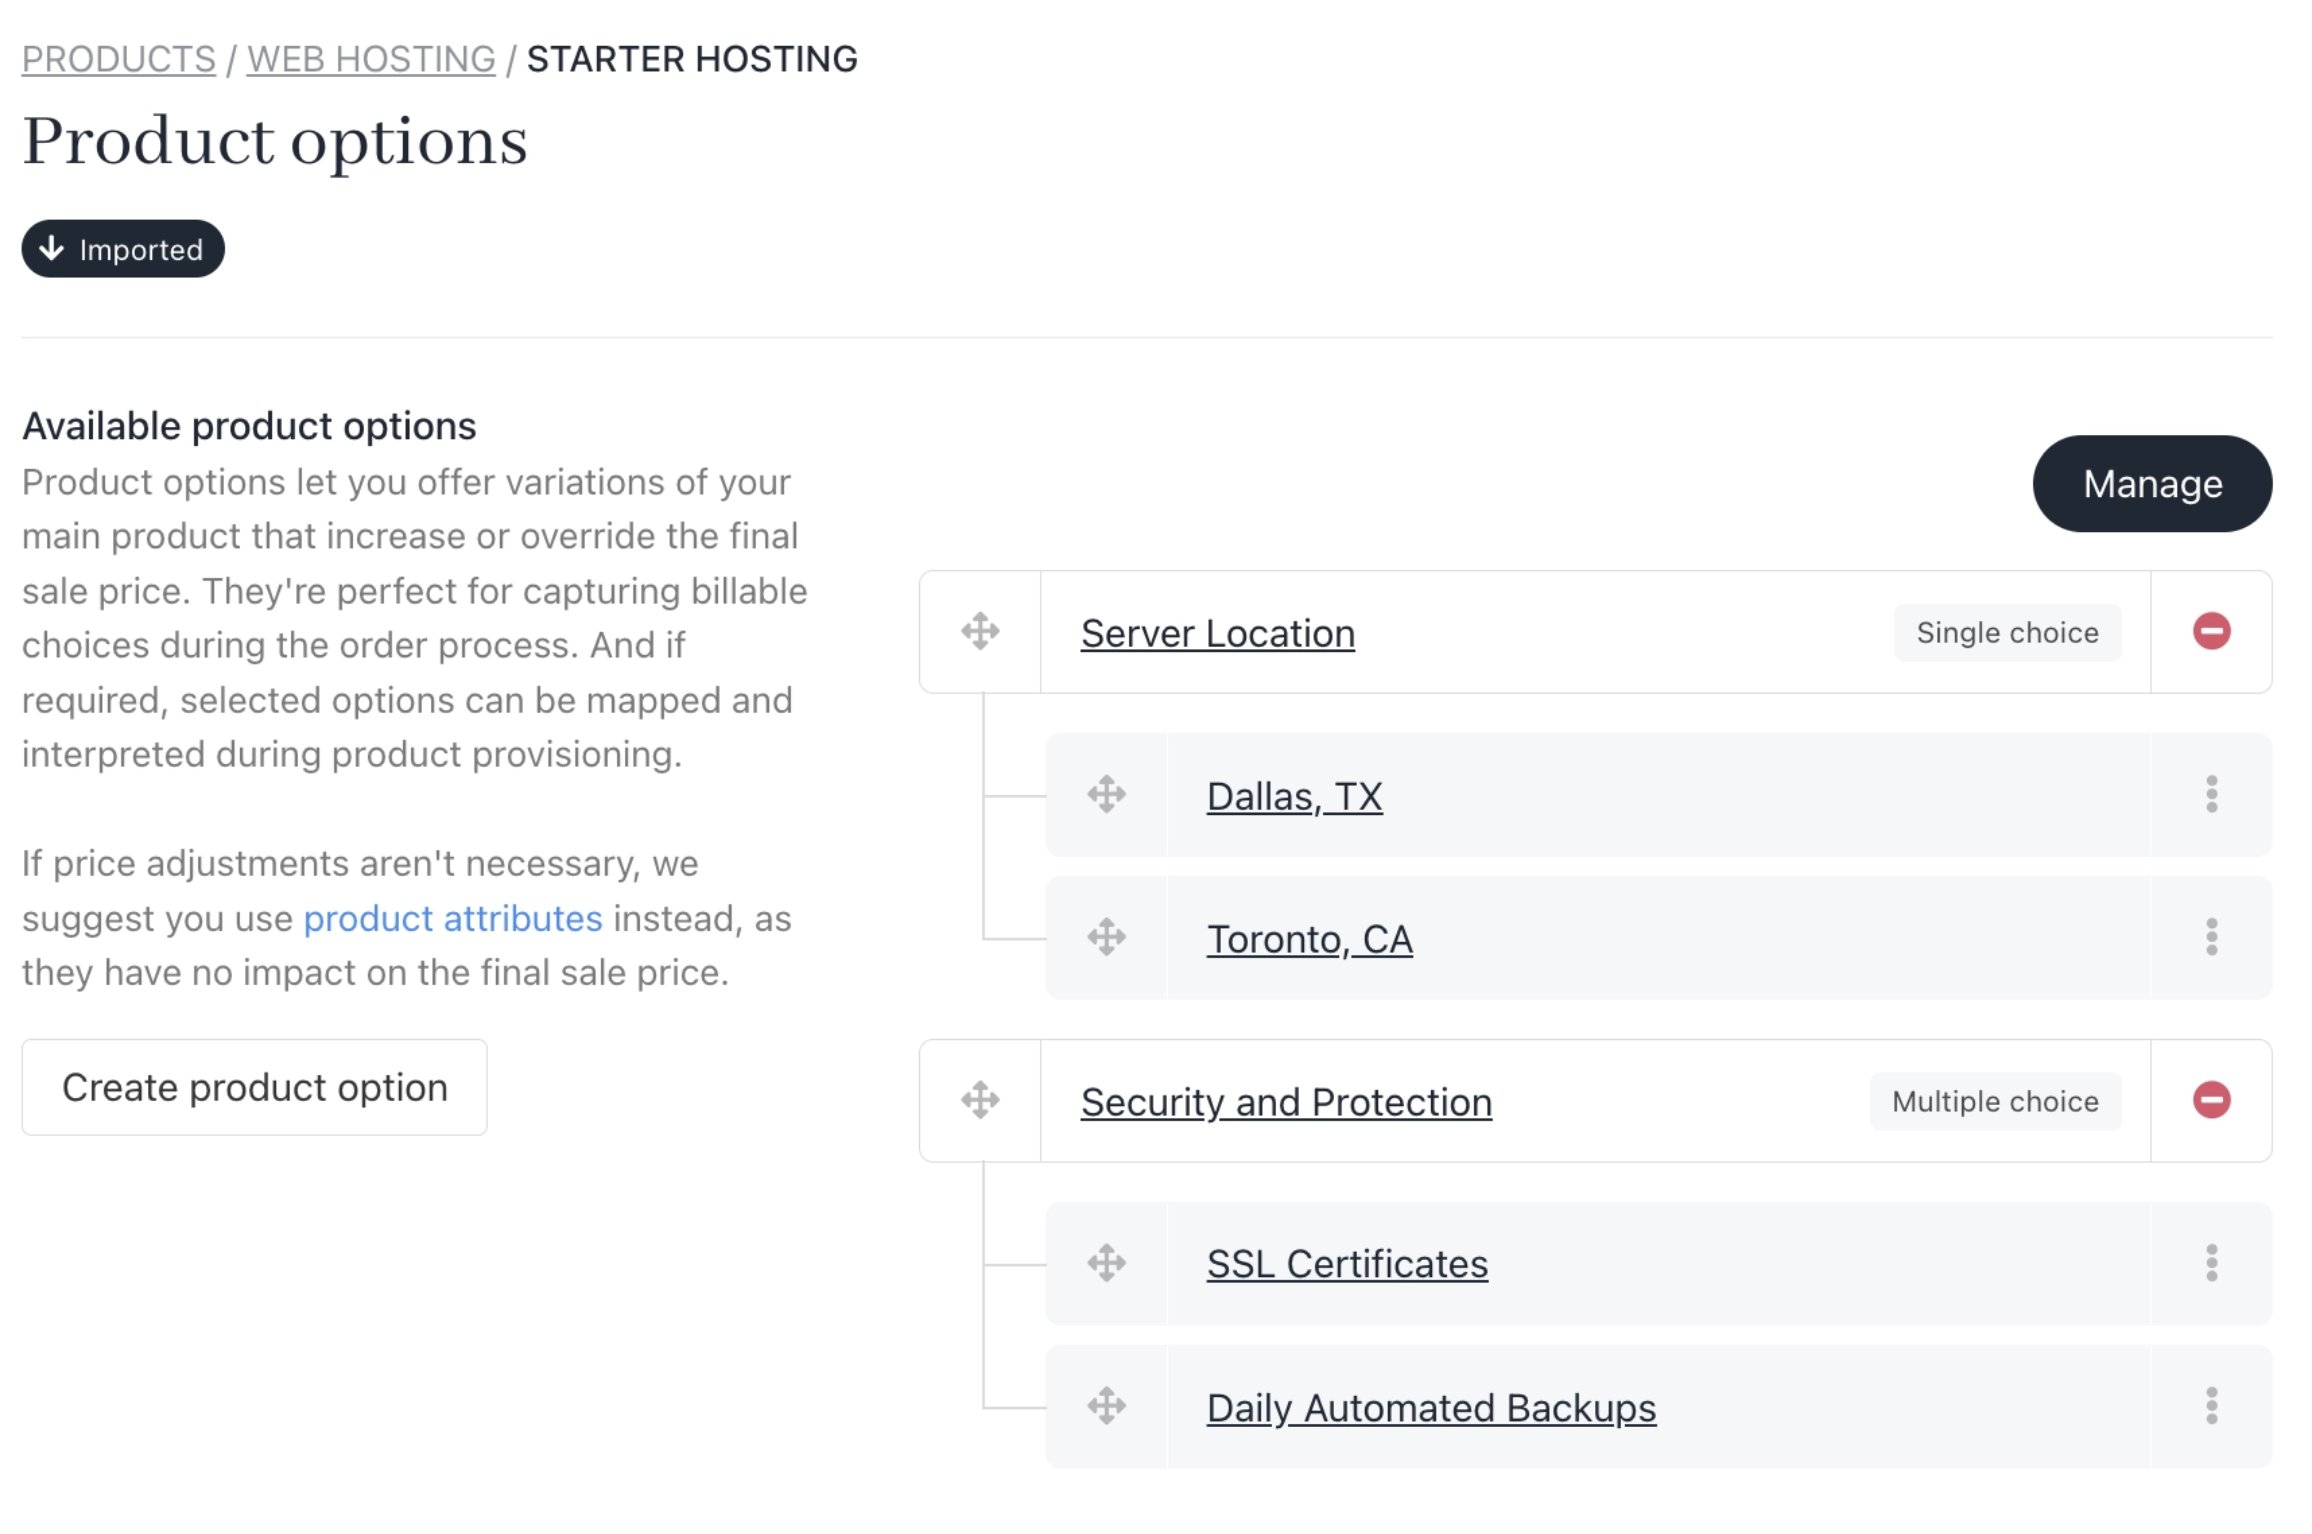
* Review any required configuration [options](/using-upmind/product-management/how-to-add-product-options) for configurable products.
## Step 3: Enabling products
To make products available in the Cart:
### Create or review products
* Ensure [products](/using-upmind/product-management/how-to-create-products) exist in Upmind by creating product categories and products (**Settings** > **Product Catalogue** or **Dashboard** > **Store Catalogue)**.
* Confirm [pricing](/using-upmind/product-management/how-to-add-product-billing), billing cycles, and availability are correctly defined.
* Review any required configuration [options](/using-upmind/product-management/how-to-add-product-options) for configurable products.
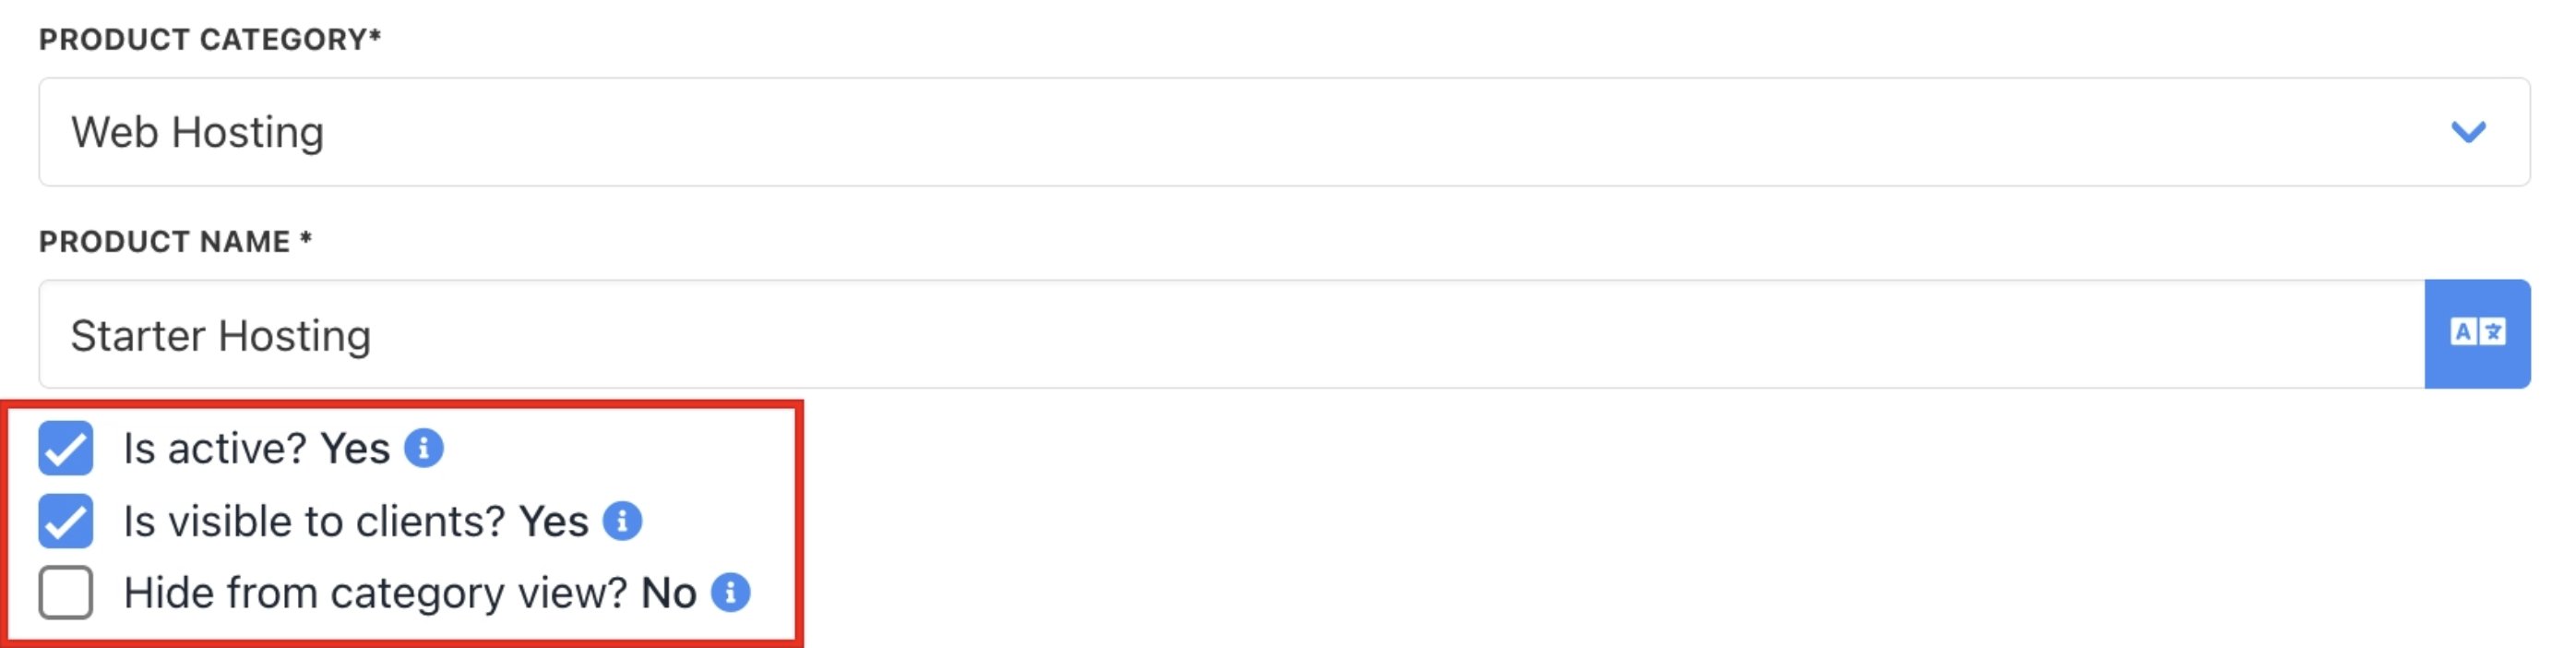
 ### Assign products to the Cart
* Mark products as available for storefront purchase.
* Apply visibility rules to control whether products appear in the catalogue.
### Assign products to the Cart
* Mark products as available for storefront purchase.
* Apply visibility rules to control whether products appear in the catalogue.
 ### Validate product behaviour
* Add products to the cart in a sandbox environment.
* Confirm configuration steps, pricing updates, and validation behave as expected.
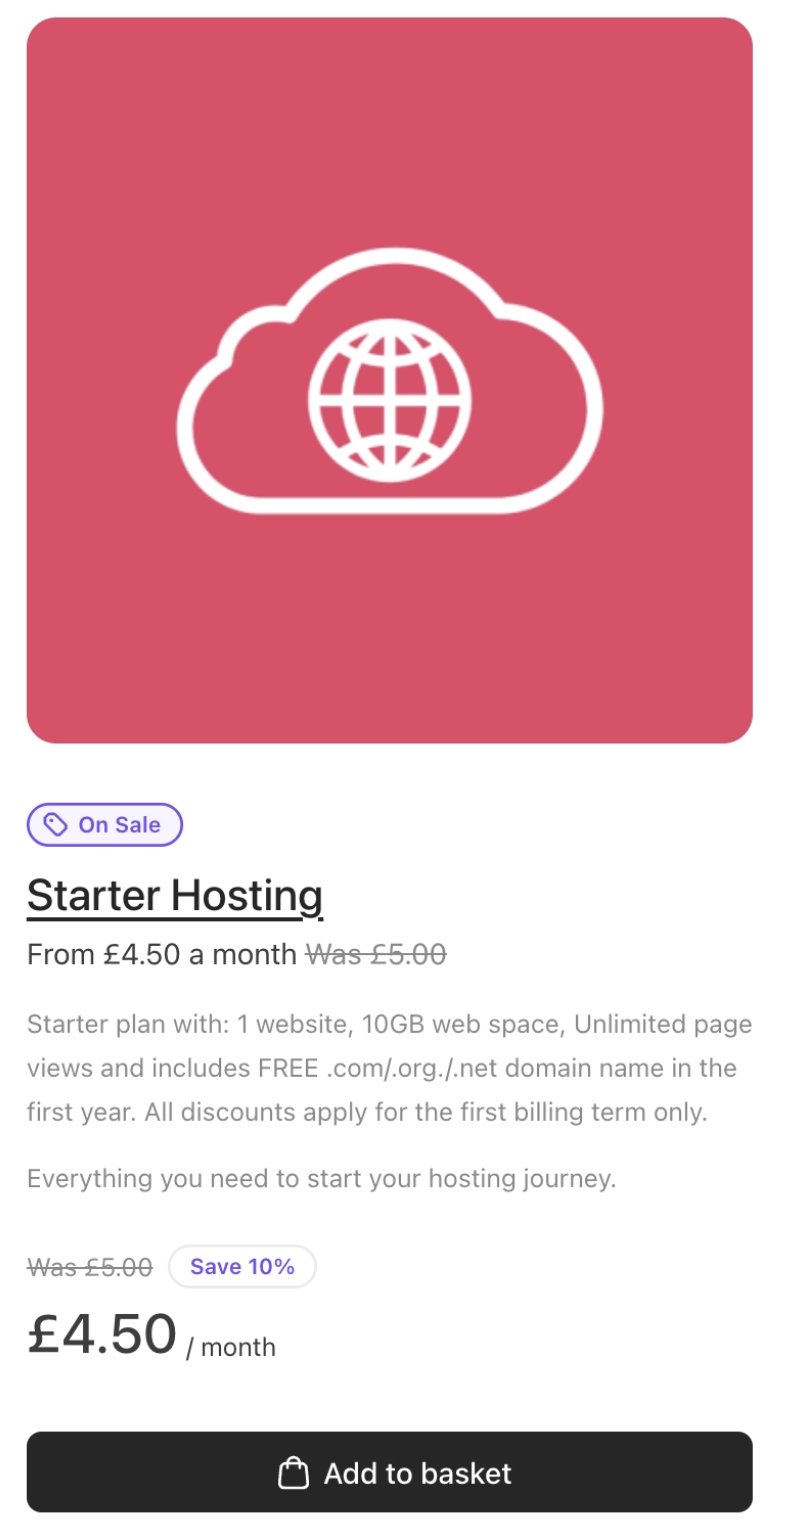
Once enabled, products will automatically appear in the Cart catalogue.
### Validate product behaviour
* Add products to the cart in a sandbox environment.
* Confirm configuration steps, pricing updates, and validation behave as expected.
Once enabled, products will automatically appear in the Cart catalogue.
 ## Step 4: Payments
Configure payment in Upmind for your cart.
### Connect a payment provider
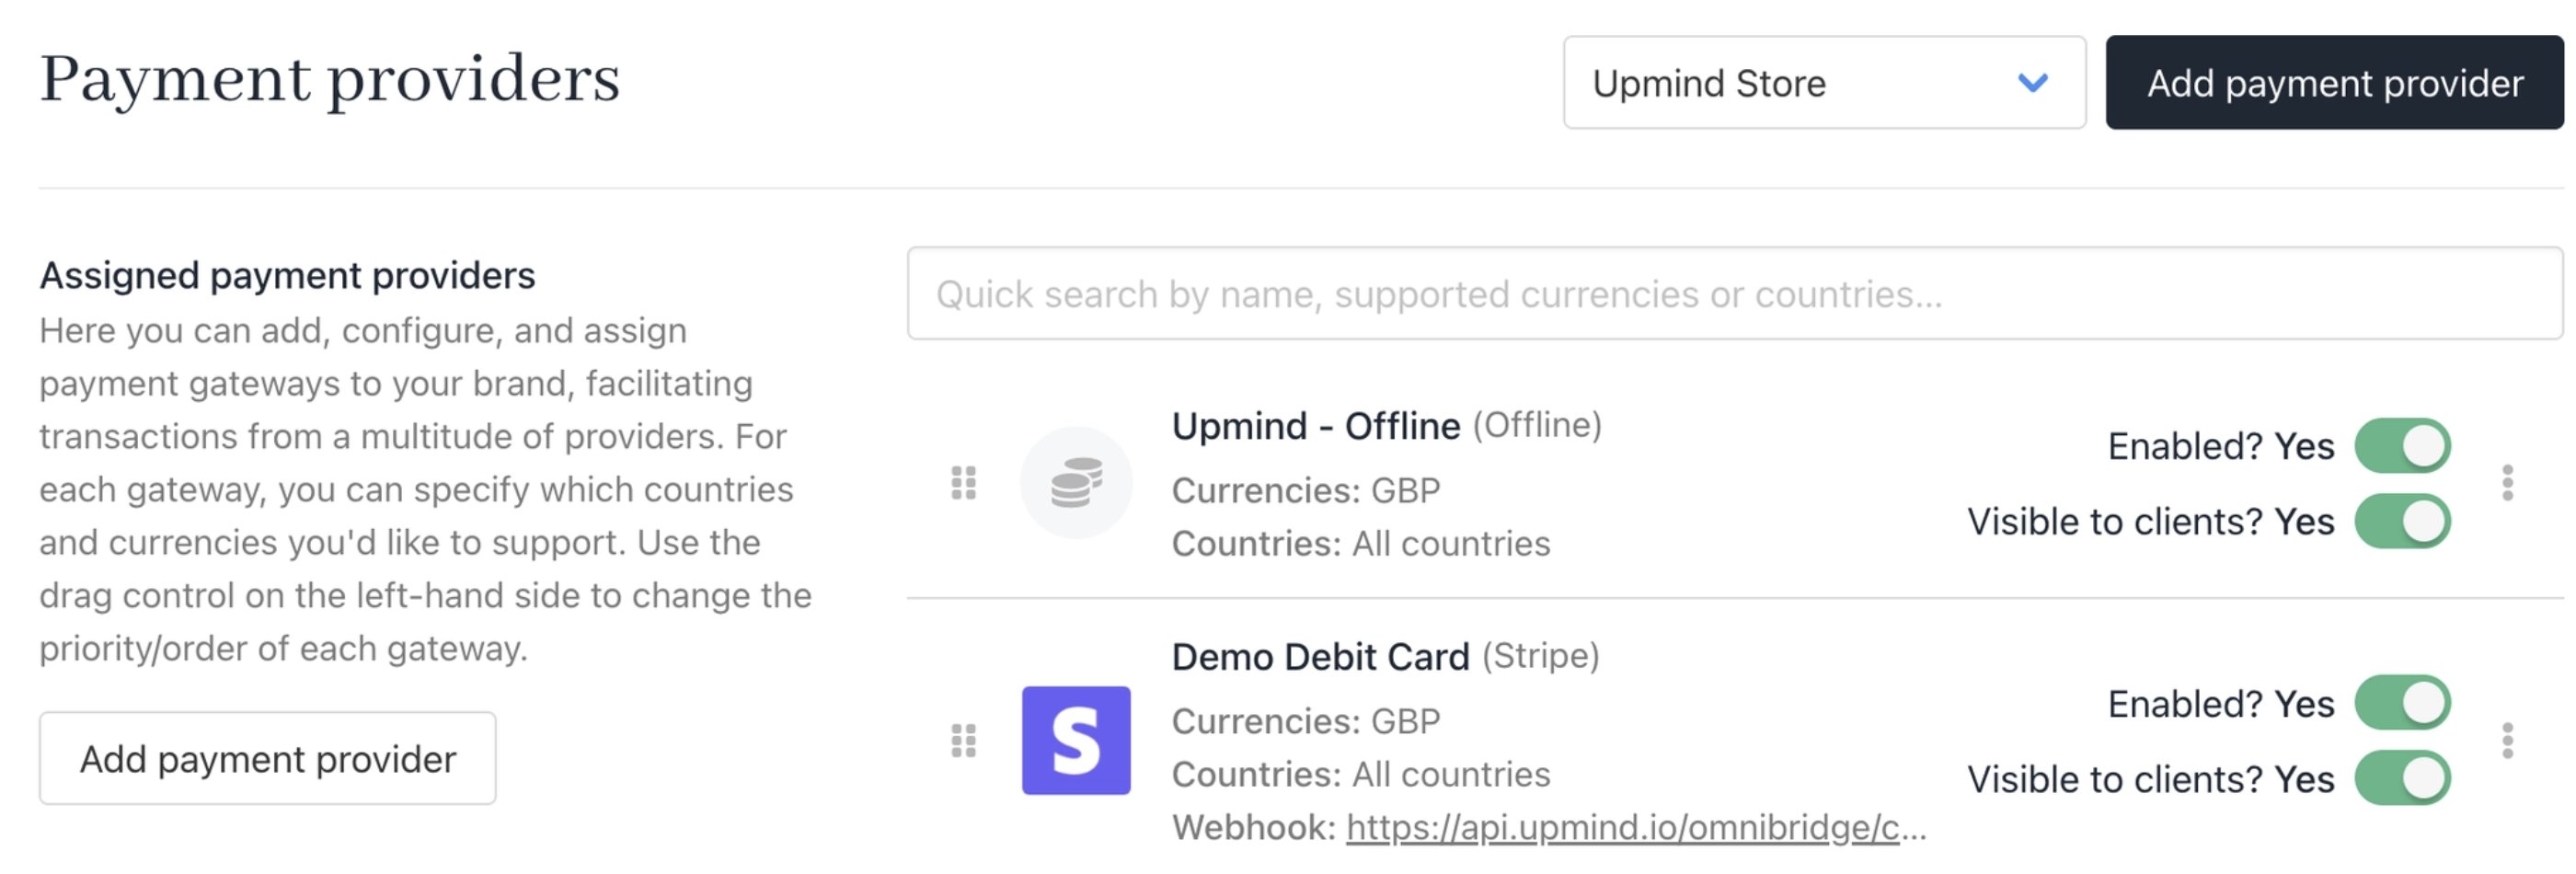
* Configure a [supported payment gateway](/using-upmind/payment-methods/how-to-add-payment-gateways/adding-payment-gateways-in-upmind) in Upmind (**Settings** > **Payment providers**).
* Use test credentials while working in the sandbox.
## Step 4: Payments
Configure payment in Upmind for your cart.
### Connect a payment provider
* Configure a [supported payment gateway](/using-upmind/payment-methods/how-to-add-payment-gateways/adding-payment-gateways-in-upmind) in Upmind (**Settings** > **Payment providers**).
* Use test credentials while working in the sandbox.
 ### Configure payment methods
* Enable supported payment methods (for example, cards or wallets).
* Apply any restrictions by currency or region if needed.
For more details on payment options, follow this [guide](/using-upmind/payment-methods/payment-options-overview).
### Test payment flows
* Complete test transactions using sandbox payment methods.
* Verify successful payments, failures, and retry behaviour.
### Verify post-payment actions
* Confirm orders are created correctly.
* Ensure confirmation pages and emails are sent as expected.
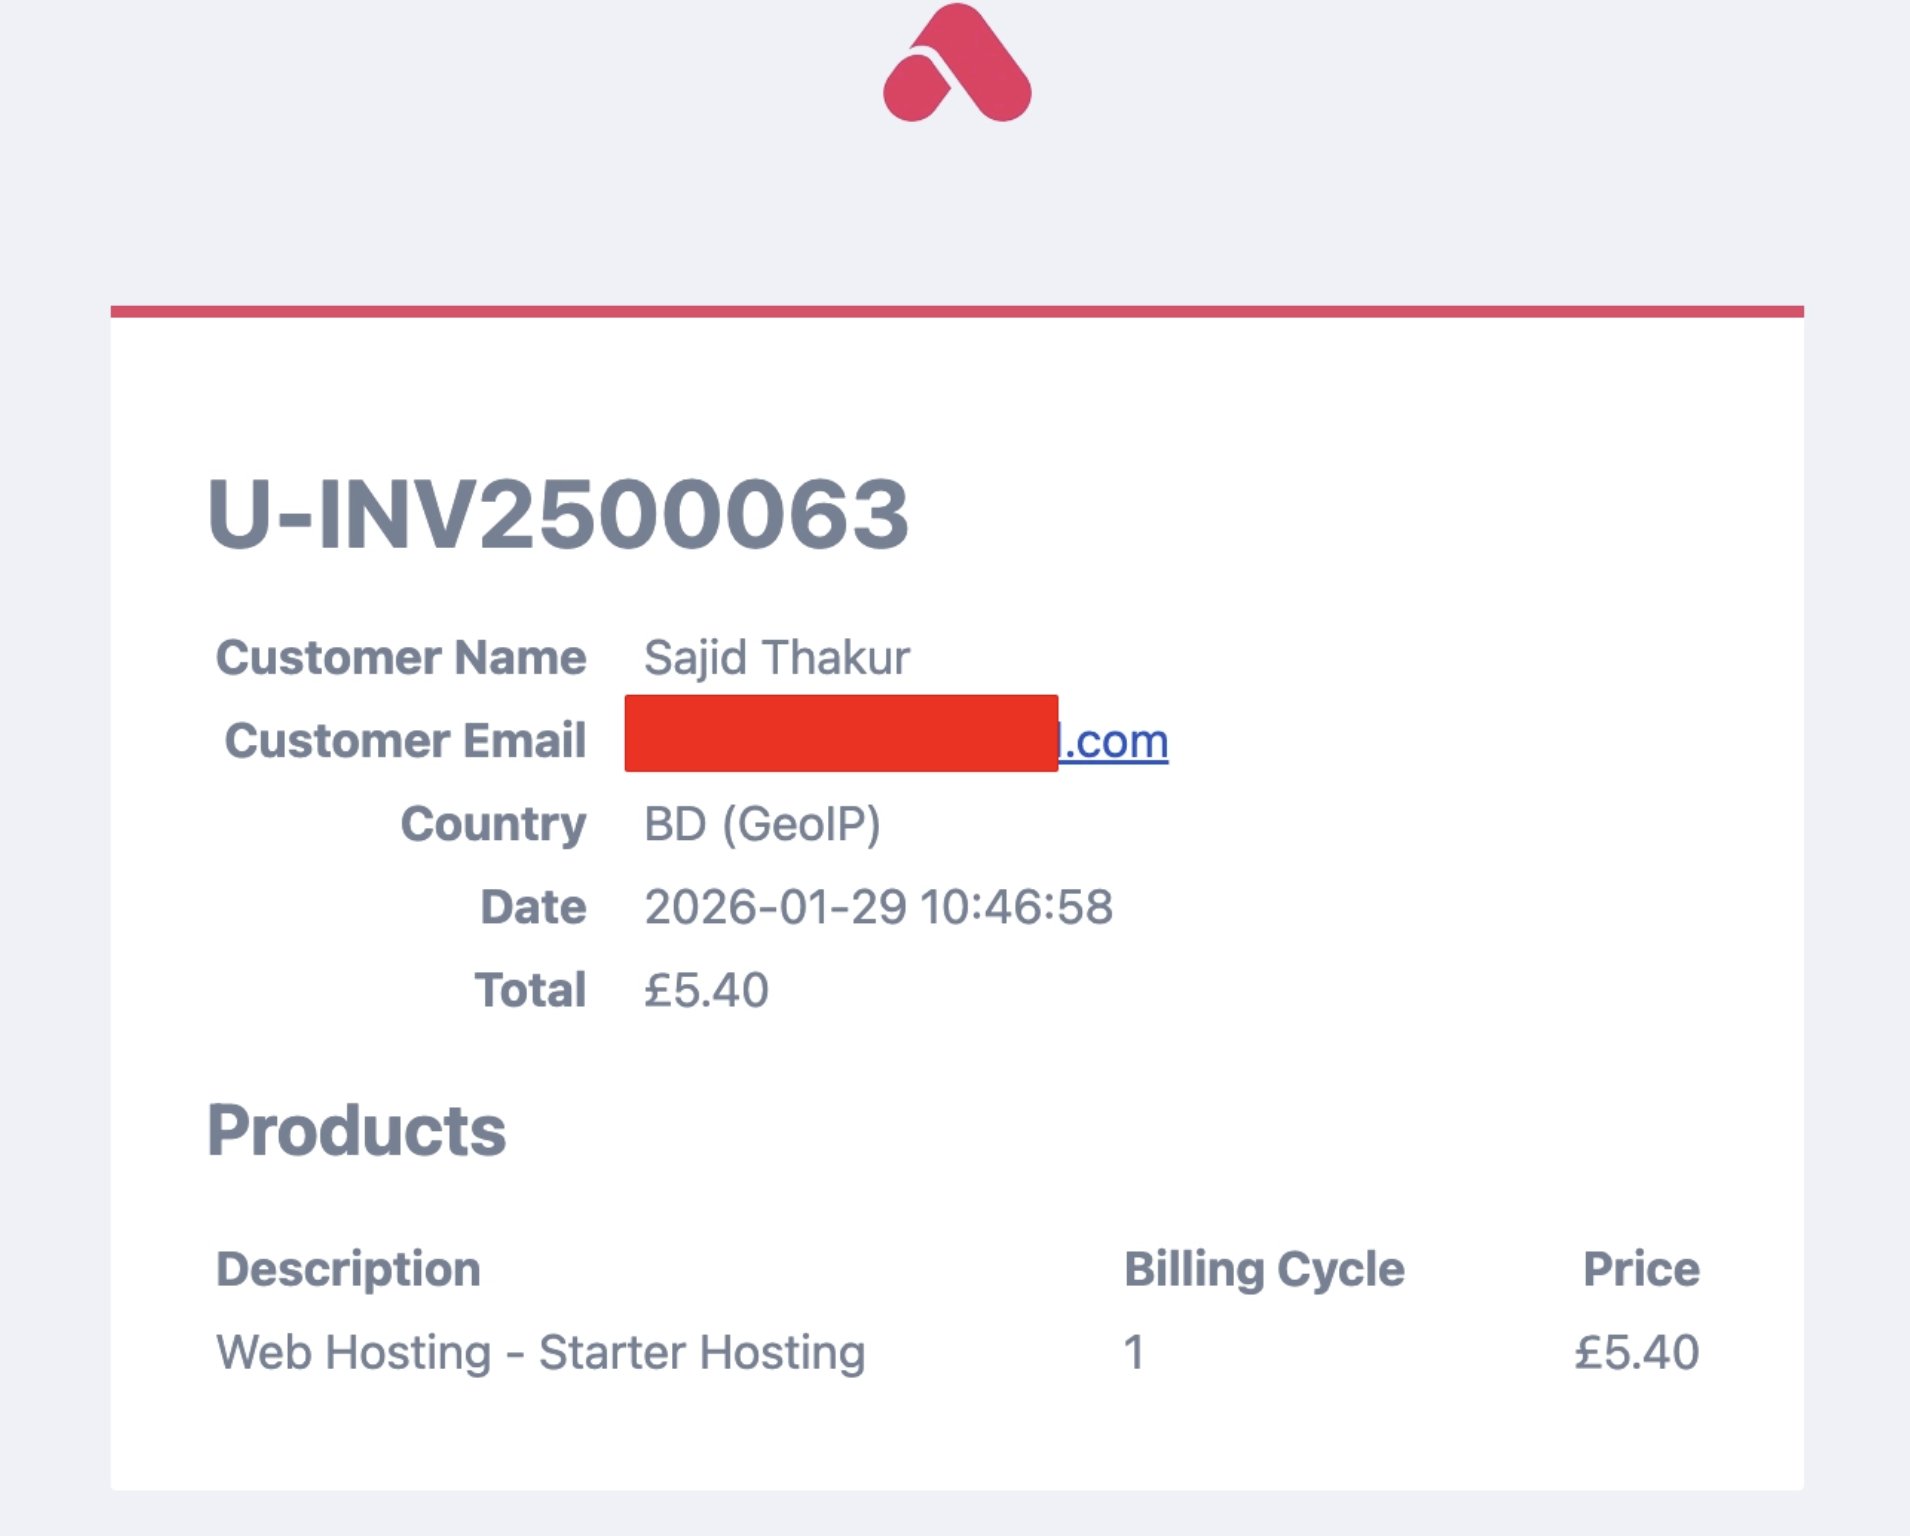
## Step 5: Testing
Before going live, complete end-to-end testing in the sandbox environment:
* Browse the catalogue and add products to the cart.
* Complete checkout using test payment methods.
* Validate:
* Pricing accuracy.
* Tax calculation.
* Order creation.
* Confirmation messaging.
### Configure payment methods
* Enable supported payment methods (for example, cards or wallets).
* Apply any restrictions by currency or region if needed.
For more details on payment options, follow this [guide](/using-upmind/payment-methods/payment-options-overview).
### Test payment flows
* Complete test transactions using sandbox payment methods.
* Verify successful payments, failures, and retry behaviour.
### Verify post-payment actions
* Confirm orders are created correctly.
* Ensure confirmation pages and emails are sent as expected.
## Step 5: Testing
Before going live, complete end-to-end testing in the sandbox environment:
* Browse the catalogue and add products to the cart.
* Complete checkout using test payment methods.
* Validate:
* Pricing accuracy.
* Tax calculation.
* Order creation.
* Confirmation messaging.
 * Test across devices.
* Review common edge cases, such as:
* Invalid or missing input
* Abandoned checkouts
* Payment failures
Thorough testing ensures confidence without impacting live customers.
## Step 6: Go-live checklist
Before switching traffic to the live Cart, confirm the following:
* DNS and the domain are correctly configured and resolving.
* Live payment credentials are enabled.
* Products are visible and purchasable.
* Order confirmation pages and emails are working.
* [Internal teams](/setup-and-configuration/staff-users/how-to-create-staff-users) can access order and customer data.
* A rollback plan exists (for example, reverting DNS if needed).
Once these steps are complete, the ready-made Cart is fully live and operational.
* Test across devices.
* Review common edge cases, such as:
* Invalid or missing input
* Abandoned checkouts
* Payment failures
Thorough testing ensures confidence without impacting live customers.
## Step 6: Go-live checklist
Before switching traffic to the live Cart, confirm the following:
* DNS and the domain are correctly configured and resolving.
* Live payment credentials are enabled.
* Products are visible and purchasable.
* Order confirmation pages and emails are working.
* [Internal teams](/setup-and-configuration/staff-users/how-to-create-staff-users) can access order and customer data.
* A rollback plan exists (for example, reverting DNS if needed).
Once these steps are complete, the ready-made Cart is fully live and operational.