> ## Documentation Index
> Fetch the complete documentation index at: https://docs.upmind.com/llms.txt
> Use this file to discover all available pages before exploring further.

# How to Create User Groups

> Control what happens on an e-commerce store by setting user permissions. Create a user group with specific permissions and assign a user to the group.

Upmind lets you manage staff permissions through **Staff Groups**. We’ve provided a set of predefined groups to make setup easier. These include default permissions for general roles:

* **Finance**
* **Fraud**
* **Marketing**
* **Product**
* **Support**

You can assign staff to any of these predefined groups directly or customise them as needed.
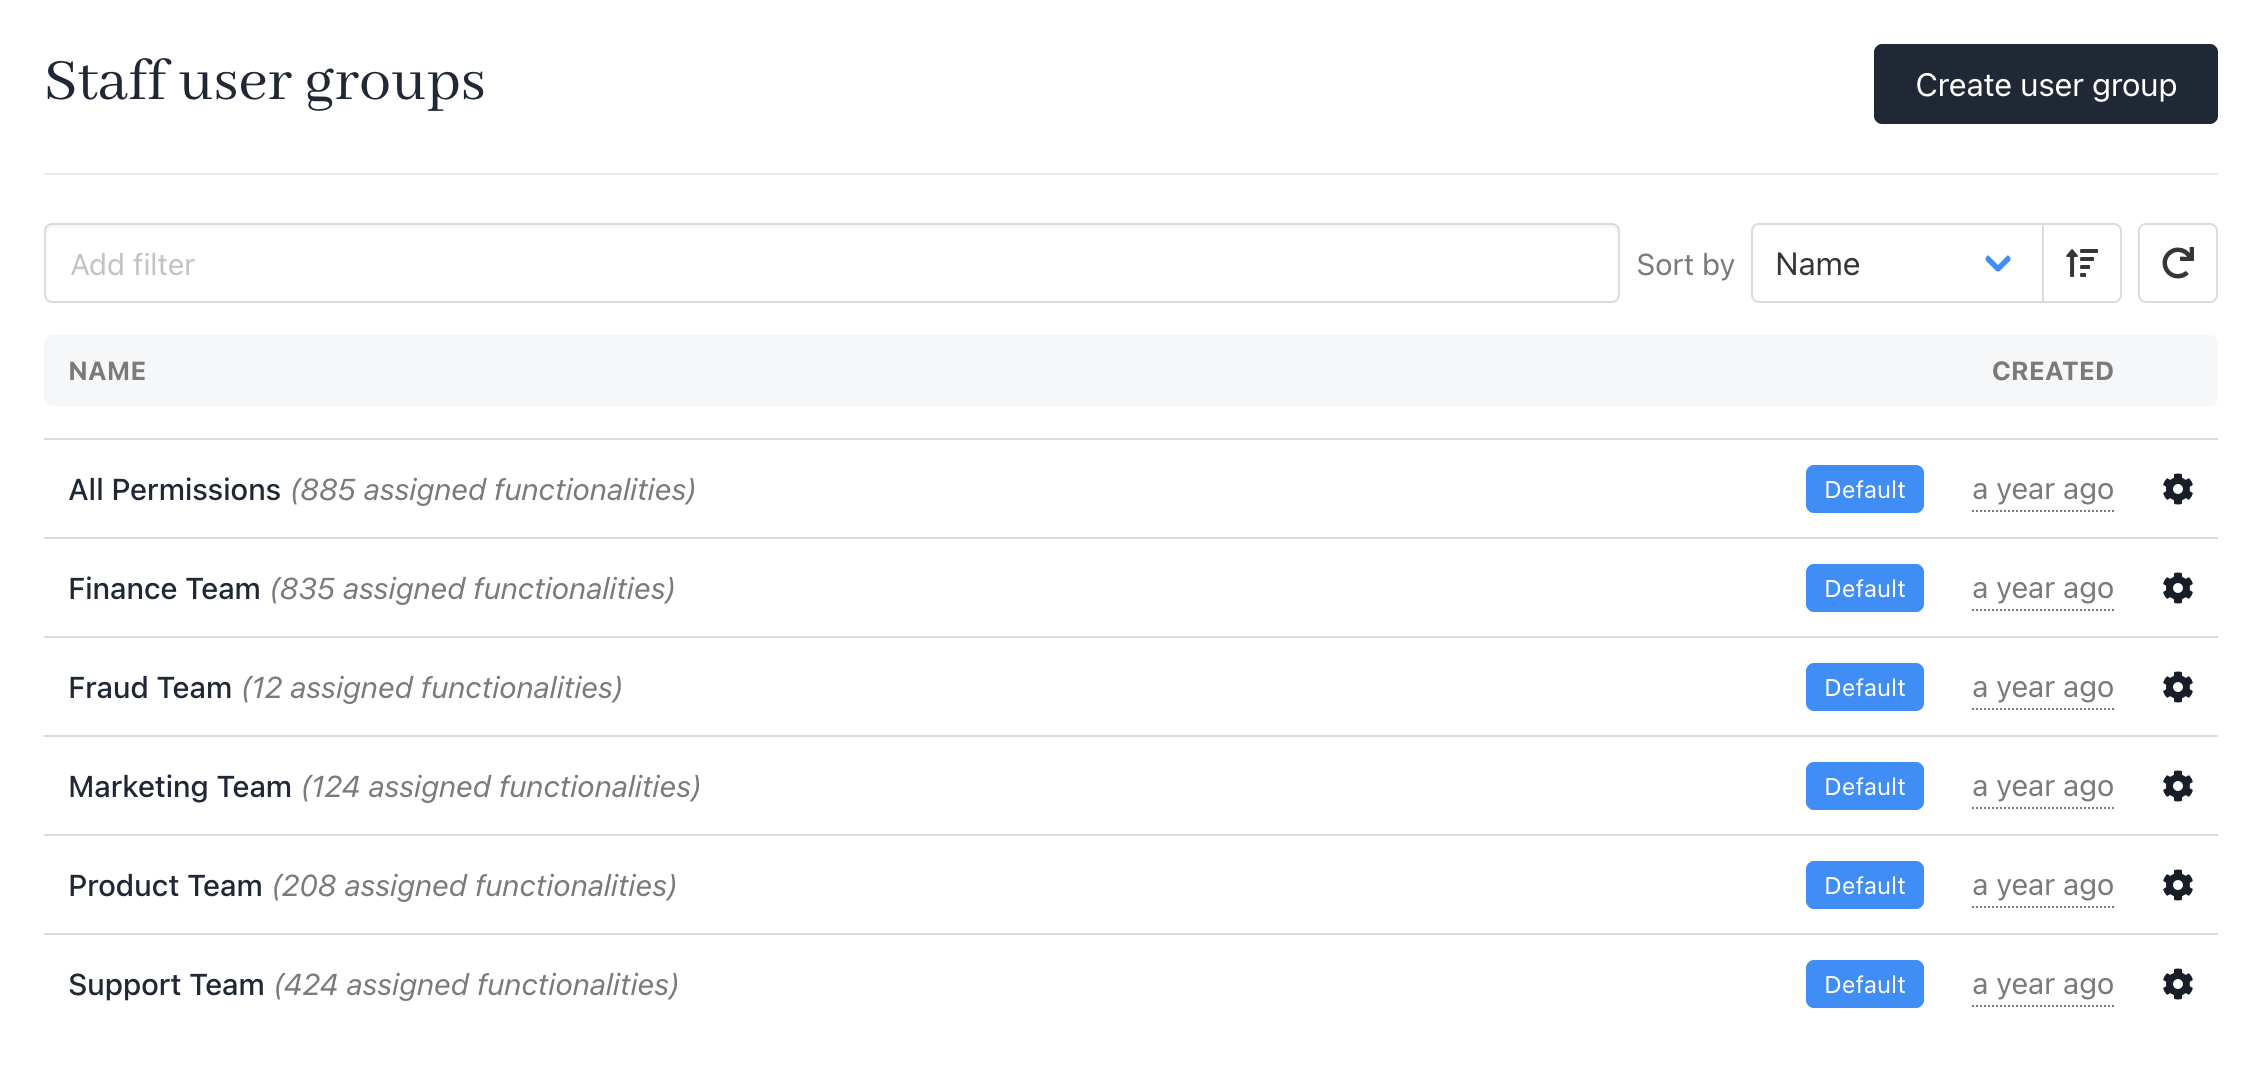
<Frame caption="Predefined staff user groups">
  <img src="https://mintcdn.com/upmind/ObllJJl59DabnmMn/images/fb/ce8d38615243b9fd.png?fit=max&auto=format&n=ObllJJl59DabnmMn&q=85&s=02f5f6c10a6012a548280666ffdcde36" alt="Predefined staff user groups" className="mx-auto" style={{ width:"98%" }} width="2258" height="1082" data-path="images/fb/ce8d38615243b9fd.png" />
</Frame>

You can also create your own staff user groups with access to specific functions. Upmind does not assign permissions directly to staff users. Instead, users inherit the permissions of the group they’re assigned to. To change the level of access that a user has, simply reassign that person to a different **User Group**.

You can assign a staff user to more than one User Group.

**Example**: Joe Bloggs could be Account Staff on Brand A, and Support Staff on Brand B.

## Creating a user group

1. On the Upmind dashboard, go to **Settings** > **Staff Groups** under **Users and Permissions**.
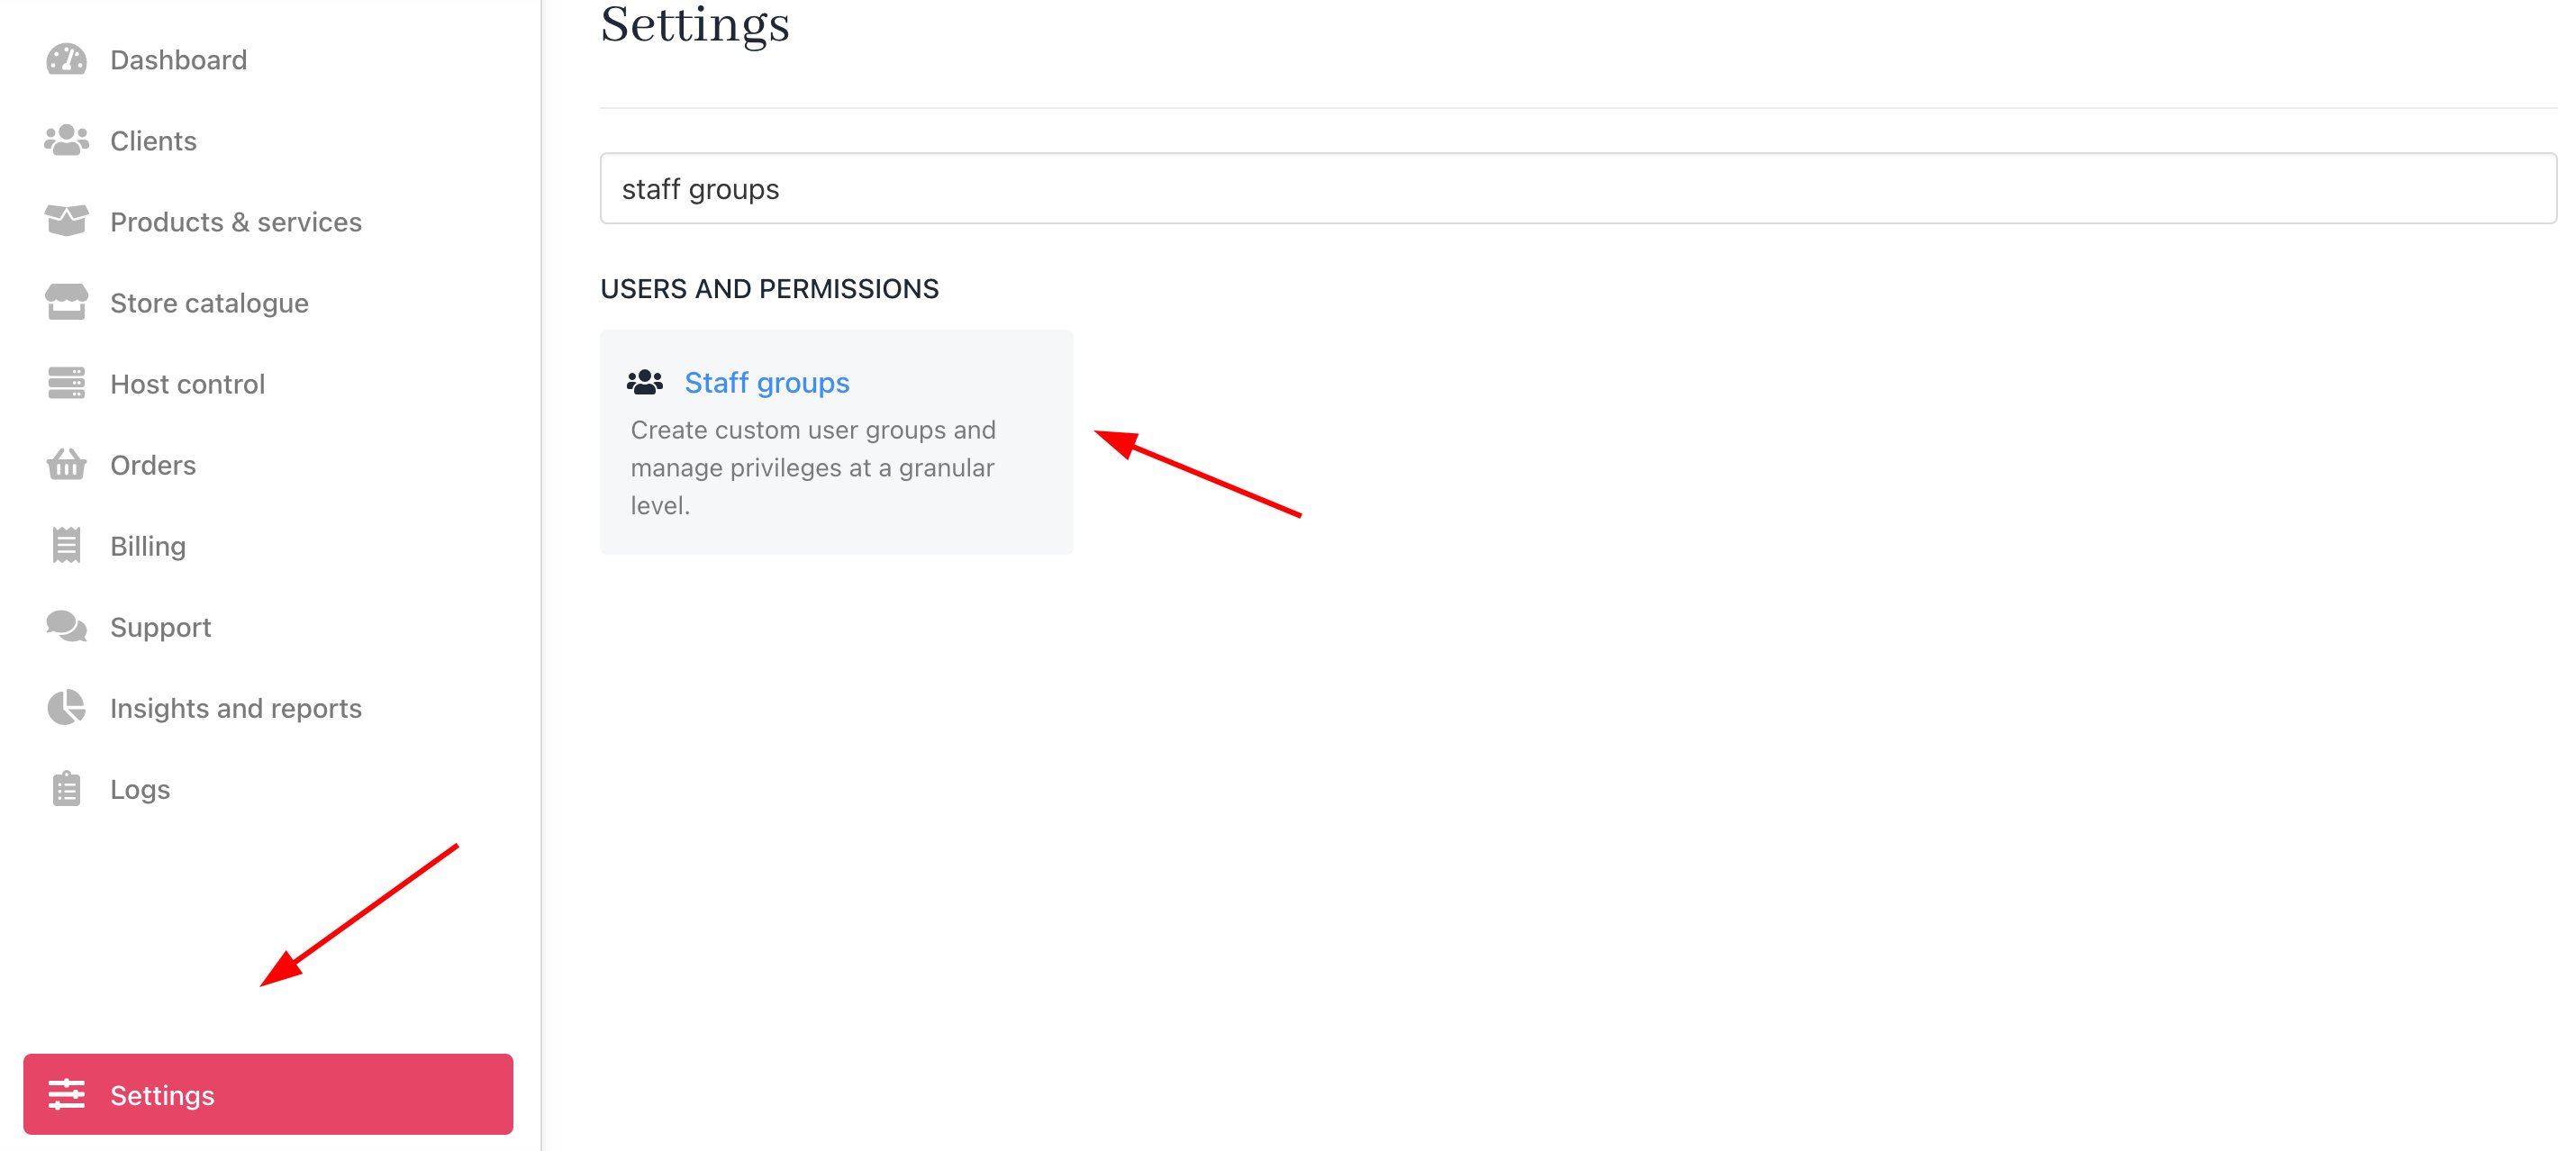
<Frame caption="Settings > Users and Permissions > Staff Groups">
  <img src="https://mintcdn.com/upmind/ZsIo0APxdVb_gFS-/images/fb/291b9a2366313883.png?fit=max&auto=format&n=ZsIo0APxdVb_gFS-&q=85&s=e4c50ff6039eb4e59ff27c24bea696da" alt="Settings > Users and Permissions > Staff Groups" className="mx-auto" style={{ width:"99%" }} data-og-width="2860" width="2860" data-og-height="1278" height="1278" data-path="images/fb/291b9a2366313883.png" data-optimize="true" data-opv="3" srcset="https://mintcdn.com/upmind/ZsIo0APxdVb_gFS-/images/fb/291b9a2366313883.png?w=280&fit=max&auto=format&n=ZsIo0APxdVb_gFS-&q=85&s=005810e7ba4cba82cb5e7e38b32a5a2b 280w, https://mintcdn.com/upmind/ZsIo0APxdVb_gFS-/images/fb/291b9a2366313883.png?w=560&fit=max&auto=format&n=ZsIo0APxdVb_gFS-&q=85&s=4de6a429658151e3958a0fa910d47f2d 560w, https://mintcdn.com/upmind/ZsIo0APxdVb_gFS-/images/fb/291b9a2366313883.png?w=840&fit=max&auto=format&n=ZsIo0APxdVb_gFS-&q=85&s=576241476a63b657b514402b98541bd8 840w, https://mintcdn.com/upmind/ZsIo0APxdVb_gFS-/images/fb/291b9a2366313883.png?w=1100&fit=max&auto=format&n=ZsIo0APxdVb_gFS-&q=85&s=9c11c8bb5410c42c0204723bac253afa 1100w, https://mintcdn.com/upmind/ZsIo0APxdVb_gFS-/images/fb/291b9a2366313883.png?w=1650&fit=max&auto=format&n=ZsIo0APxdVb_gFS-&q=85&s=ca471392147adbb970ff167a9d46771b 1650w, https://mintcdn.com/upmind/ZsIo0APxdVb_gFS-/images/fb/291b9a2366313883.png?w=2500&fit=max&auto=format&n=ZsIo0APxdVb_gFS-&q=85&s=ecc1f0e461aa74943238ef4b0bee591b 2500w" />
</Frame>

2. Click the **Create user group** button.
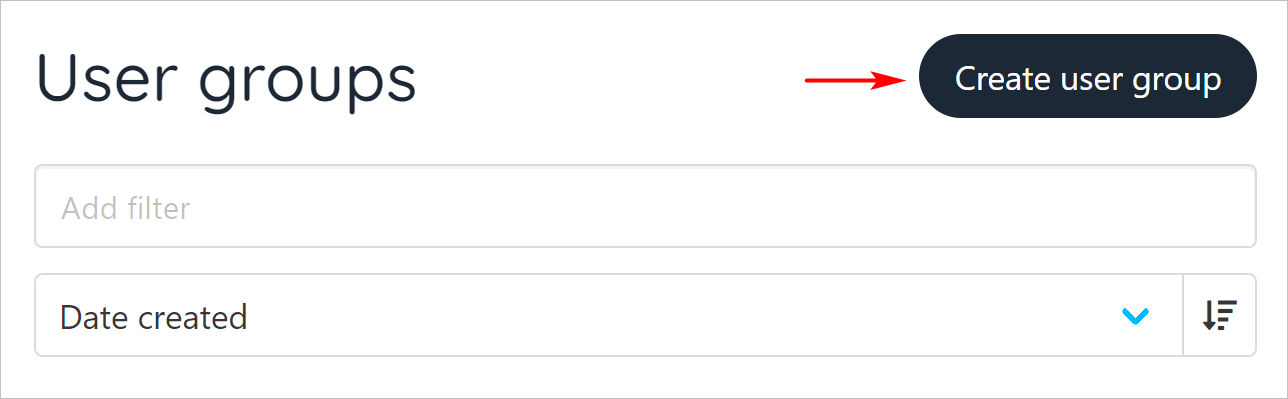
<Frame caption="Create user group button">
  <img src="https://mintcdn.com/upmind/wRuKrNY12tQZY8Rr/images/fb/325497e129743a76.png?fit=max&auto=format&n=wRuKrNY12tQZY8Rr&q=85&s=9bfed248b93355a9a4deb74c2feb0fda" alt="Create user group button" className="mx-auto" style={{ width:"91%" }} width="1288" height="399" data-path="images/fb/325497e129743a76.png" />
</Frame>

3. Enter a group name.

<Frame caption="User group name">
  <img src="https://mintcdn.com/upmind/ZsIo0APxdVb_gFS-/images/fb/2d35b6a1f0fb2c61.png?fit=max&auto=format&n=ZsIo0APxdVb_gFS-&q=85&s=9efaf1942a9cc2be3cfe07011c0cc42a" alt="User group name" className="mx-auto" style={{ width:"95%" }} width="1311" height="742" data-path="images/fb/2d35b6a1f0fb2c61.png" />
</Frame>

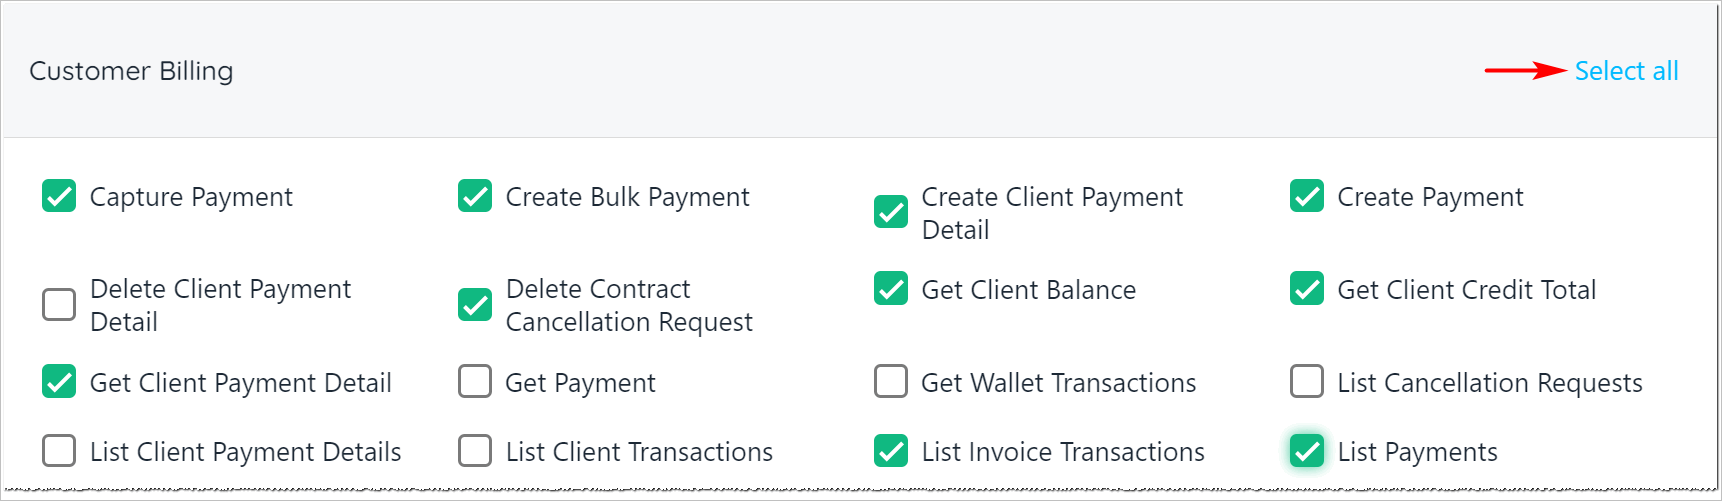
4. Scroll through the **Functionalities** page and check the relevant boxes to assign group permissions.
5. Click the **Select all** button to check all boxes in a subcategory. (optional)
6. Click **Save**.
<Frame caption="User group subcategories">
  <img src="https://mintcdn.com/upmind/Lh8hC132BWHpvRbz/images/fb/492727d7da214f07.png?fit=max&auto=format&n=Lh8hC132BWHpvRbz&q=85&s=0bcf06f9495a52bf48fe3fa689bead16" alt="User group subcategories" className="mx-auto" style={{ width:"98%" }} width="1722" height="501" data-path="images/fb/492727d7da214f07.png" />
</Frame>

## Assigning staff users to a user group

The next step is to assign staff users to one or more User Groups.

1. Go to the **Admin** dashboard.
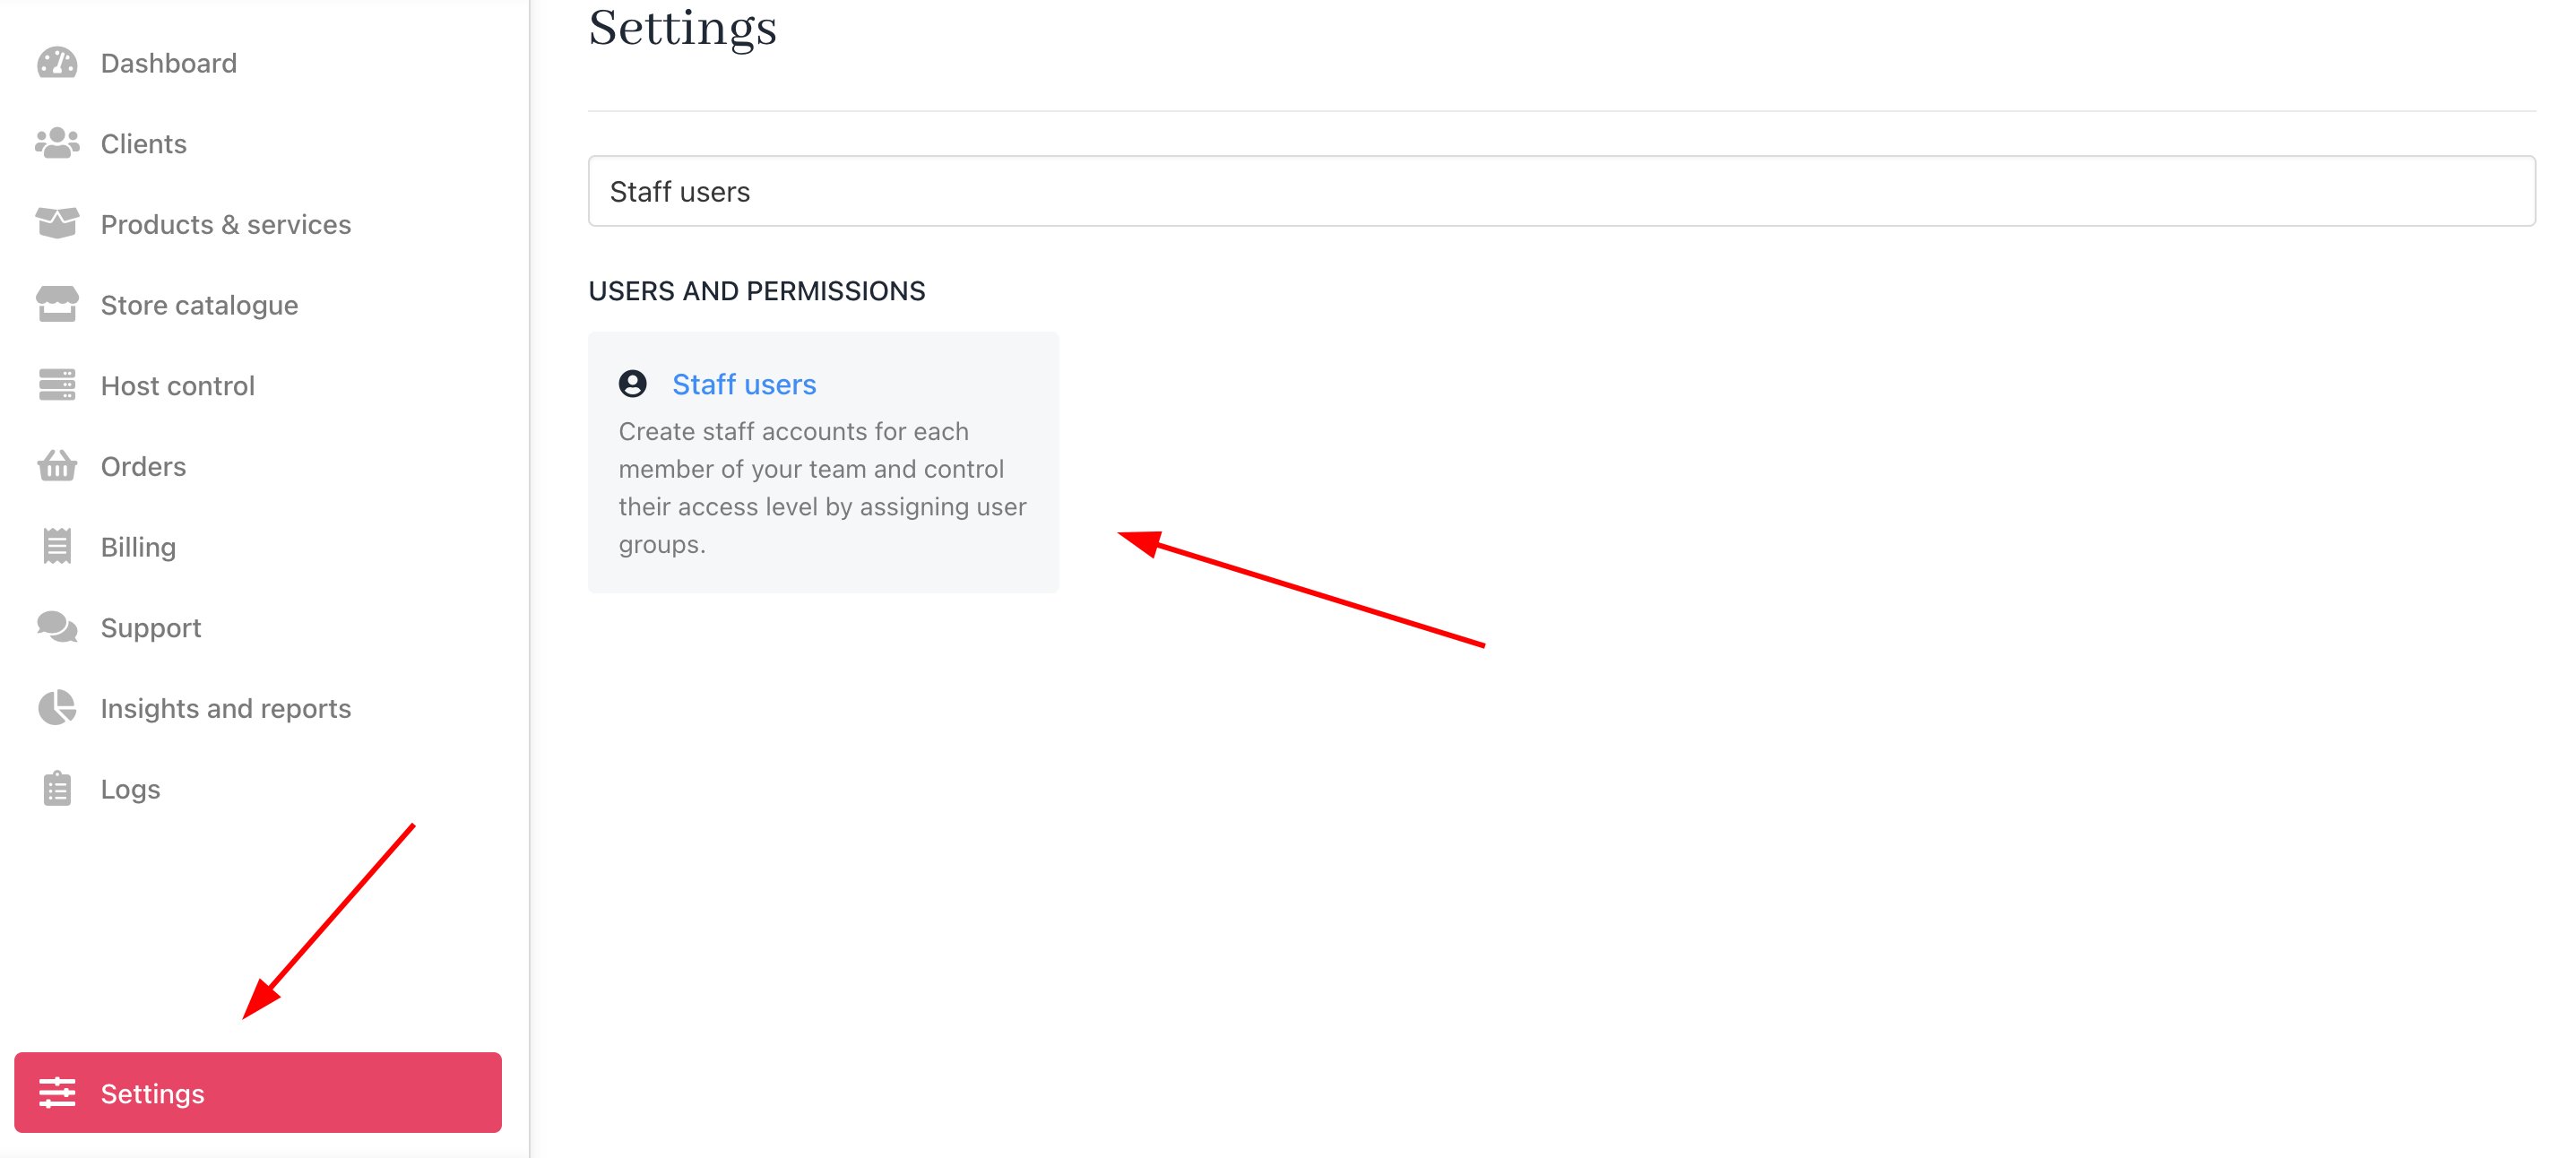
2. Click **Settings** > **Staff users** under **Users and Permissions**.
<Frame caption="Settings > Users and Permissions > Staff users">
  <img src="https://mintcdn.com/upmind/VnCXiz5rboywDnvn/images/fb/da13f68e77c4cc60.png?fit=max&auto=format&n=VnCXiz5rboywDnvn&q=85&s=0fe5c65d889c1f535a90571bc8519629" alt="Settings > Users and Permissions > Staff users" className="mx-auto" style={{ width:"98%" }} data-og-width="2874" width="2874" data-og-height="1292" height="1292" data-path="images/fb/da13f68e77c4cc60.png" data-optimize="true" data-opv="3" srcset="https://mintcdn.com/upmind/VnCXiz5rboywDnvn/images/fb/da13f68e77c4cc60.png?w=280&fit=max&auto=format&n=VnCXiz5rboywDnvn&q=85&s=d03405e1623fdeac9c58cef2fc5d6026 280w, https://mintcdn.com/upmind/VnCXiz5rboywDnvn/images/fb/da13f68e77c4cc60.png?w=560&fit=max&auto=format&n=VnCXiz5rboywDnvn&q=85&s=bb43daf80a74023f43c15086d3b4f122 560w, https://mintcdn.com/upmind/VnCXiz5rboywDnvn/images/fb/da13f68e77c4cc60.png?w=840&fit=max&auto=format&n=VnCXiz5rboywDnvn&q=85&s=231d6431fd6193bca656f8445f272395 840w, https://mintcdn.com/upmind/VnCXiz5rboywDnvn/images/fb/da13f68e77c4cc60.png?w=1100&fit=max&auto=format&n=VnCXiz5rboywDnvn&q=85&s=208b19ff2c677d8251df1d42256becdd 1100w, https://mintcdn.com/upmind/VnCXiz5rboywDnvn/images/fb/da13f68e77c4cc60.png?w=1650&fit=max&auto=format&n=VnCXiz5rboywDnvn&q=85&s=07b50f0ff802a70414fed58560184d1c 1650w, https://mintcdn.com/upmind/VnCXiz5rboywDnvn/images/fb/da13f68e77c4cc60.png?w=2500&fit=max&auto=format&n=VnCXiz5rboywDnvn&q=85&s=6e7057ac4c1f652e9c1aab9d5e961d58 2500w" />
</Frame>

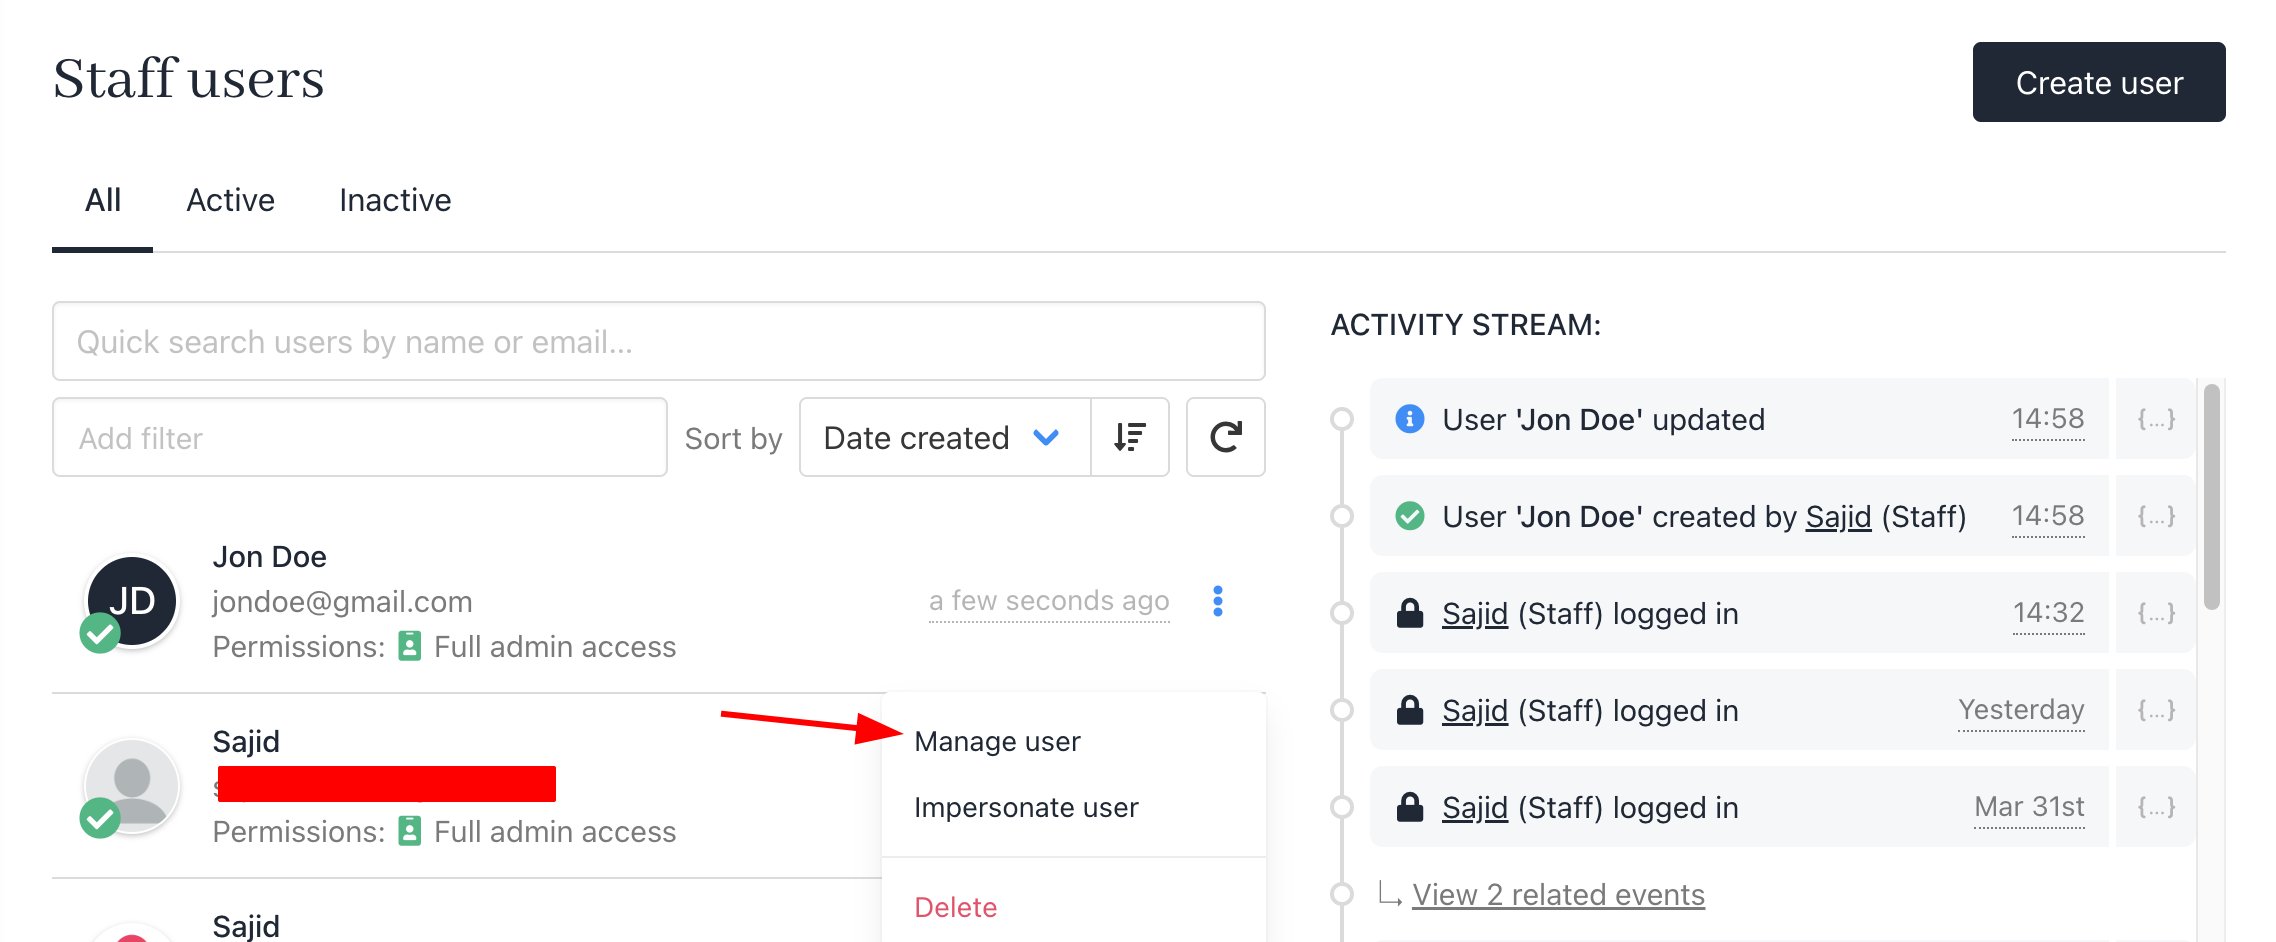
3. Locate a staff user, click the gear icon, and select **Manage user**.
<Frame caption="Manage user">
  <img src="https://mintcdn.com/upmind/A-RwNPXmK_xnEEqe/images/fb/76be18770fb4c338.png?fit=max&auto=format&n=A-RwNPXmK_xnEEqe&q=85&s=4e52351b99524d2d562f6ada6de55b40" alt="Manage user" className="mx-auto" style={{ width:"98%" }} width="2276" height="942" data-path="images/fb/76be18770fb4c338.png" />
</Frame>

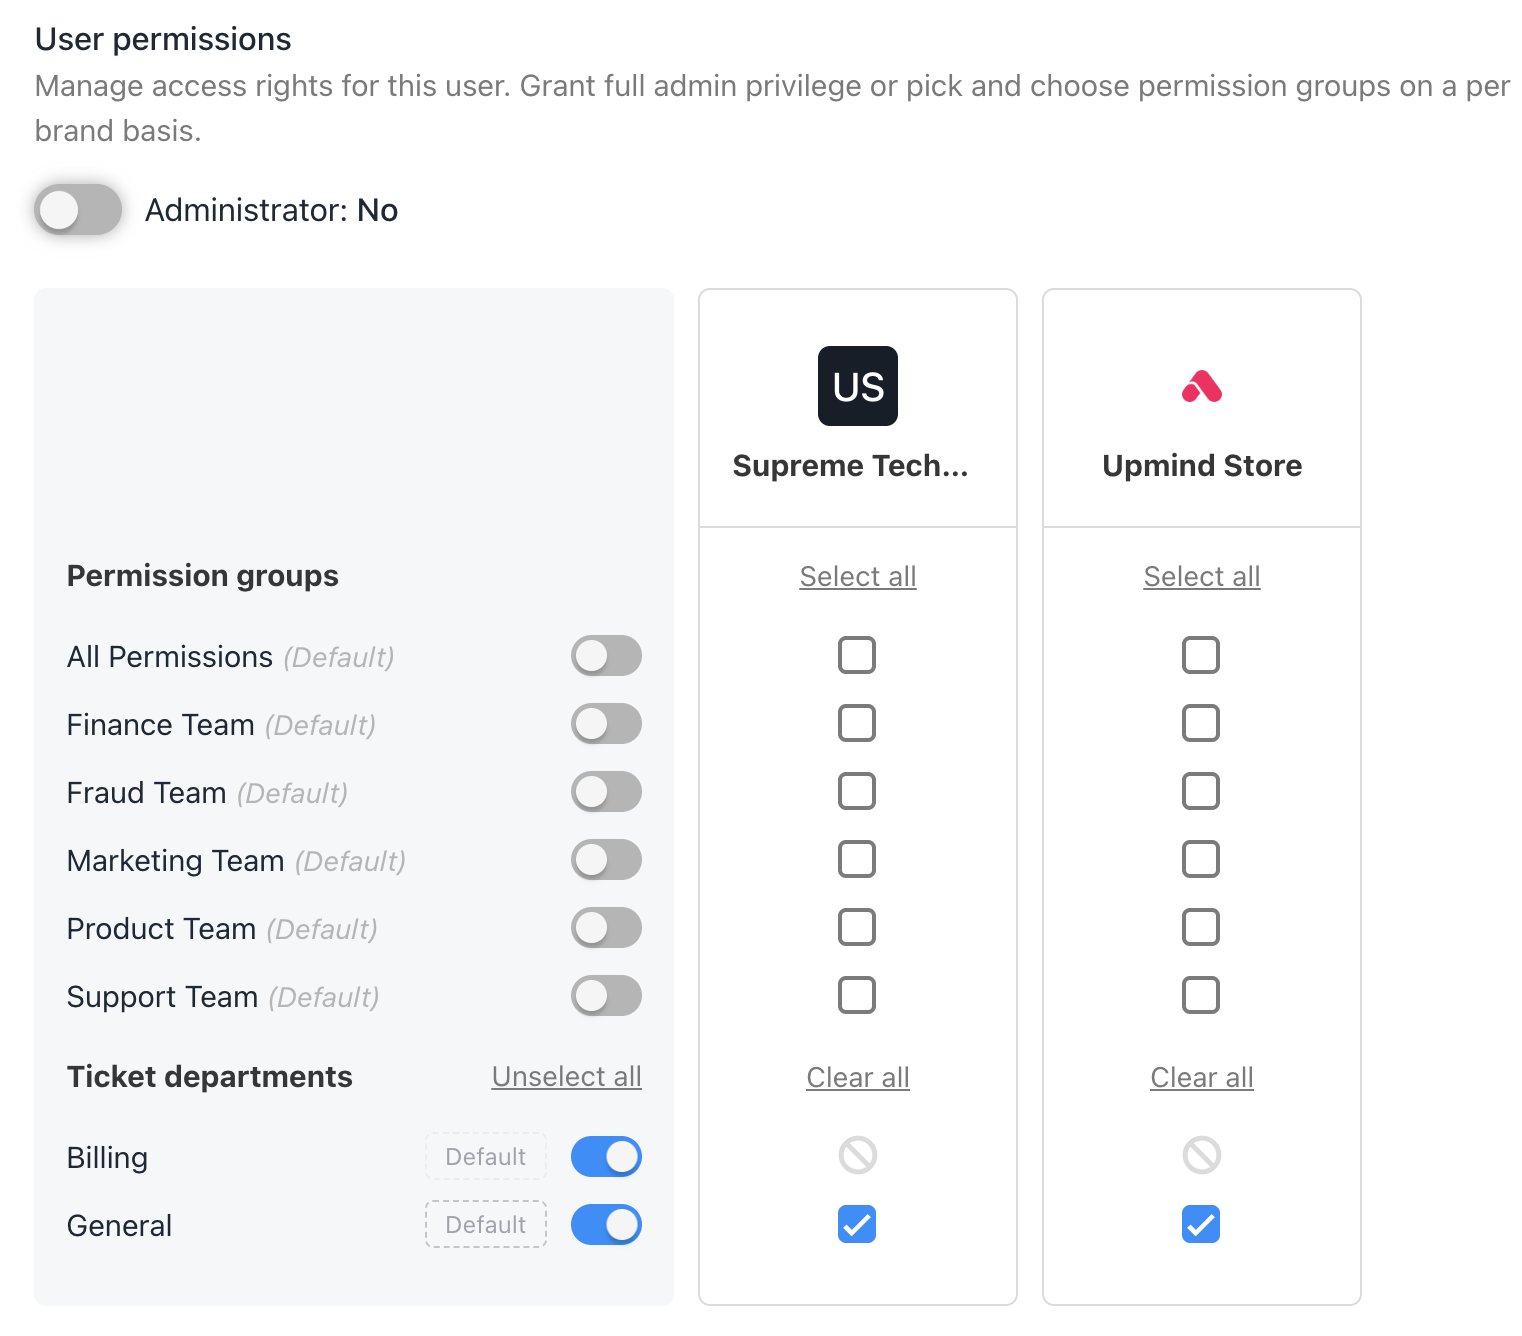
4. Scroll down the **Staff** overview page and set **User Group** permissions.

<Warning>
  If you have [multiple brands](/setup-and-configuration/branding/how-to-add-brands), grant access to each brand separately.
</Warning>

<Frame caption="Set user permissions">
  <img src="https://mintcdn.com/upmind/5gi4DQpw4X76kT6T/images/fb/ba1c65582f89d969.png?fit=max&auto=format&n=5gi4DQpw4X76kT6T&q=85&s=512ed6000f8c1431f2741e613d8f16da" alt="Set user permissions" className="mx-auto" style={{ width:"95%" }} width="1522" height="1336" data-path="images/fb/ba1c65582f89d969.png" />
</Frame>

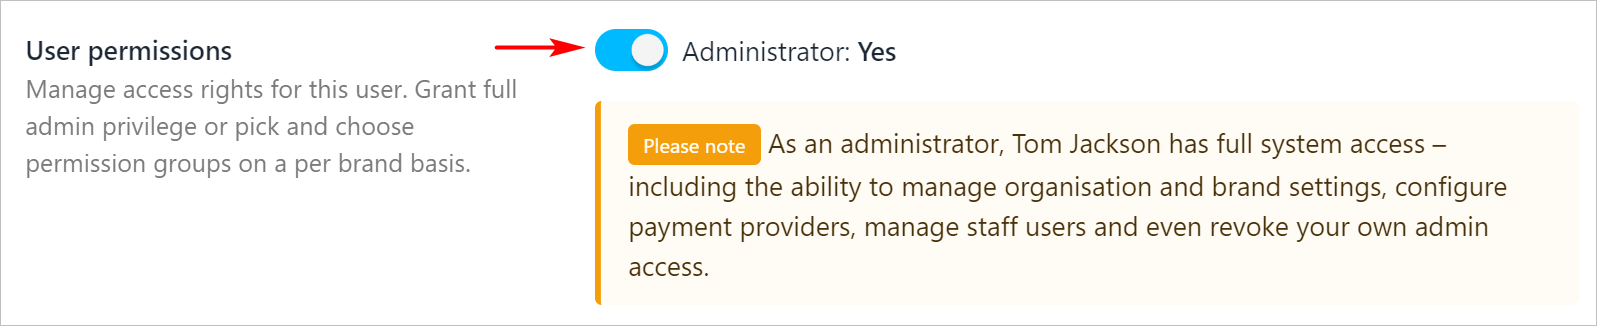
5. Select Administrator to grant the staff user full access to all User Groups and all brands.

* We suggest granting Admin permissions to a maximum of two staff users.
<Frame caption="Assign admin permissions">
  <img src="https://mintcdn.com/upmind/JUoAg6onJmXk_-rR/images/fb/e53b473a5bf8bd28.png?fit=max&auto=format&n=JUoAg6onJmXk_-rR&q=85&s=809af8e96d219a73cf0642a6d43fbddb" alt="Assign Admin permissions" className="mx-auto" style={{ width:"98%" }} width="1597" height="326" data-path="images/fb/e53b473a5bf8bd28.png" />
</Frame>