> ## Documentation Index
> Fetch the complete documentation index at: https://docs.upmind.com/llms.txt
> Use this file to discover all available pages before exploring further.
# How to Create Staff Users
> Add unlimited team members to your organisation and manage what they can do. You can also impersonate them when needed.
You can add an unlimited number of staff users to your organisation. Each staff user has their own login, and all activity is logged forever in Upmind.
Assign different permissions and access rights to each staff user if you like. For example, you can have specific accounts, staff, support staff, or product managers. You can also give full access or limit their access (for example, by IP address).
Only admins can manage staff permissions and impersonate another staff member. Any staff member can be made an administrator by another Admin.
## Review current users
To see a list of current users:
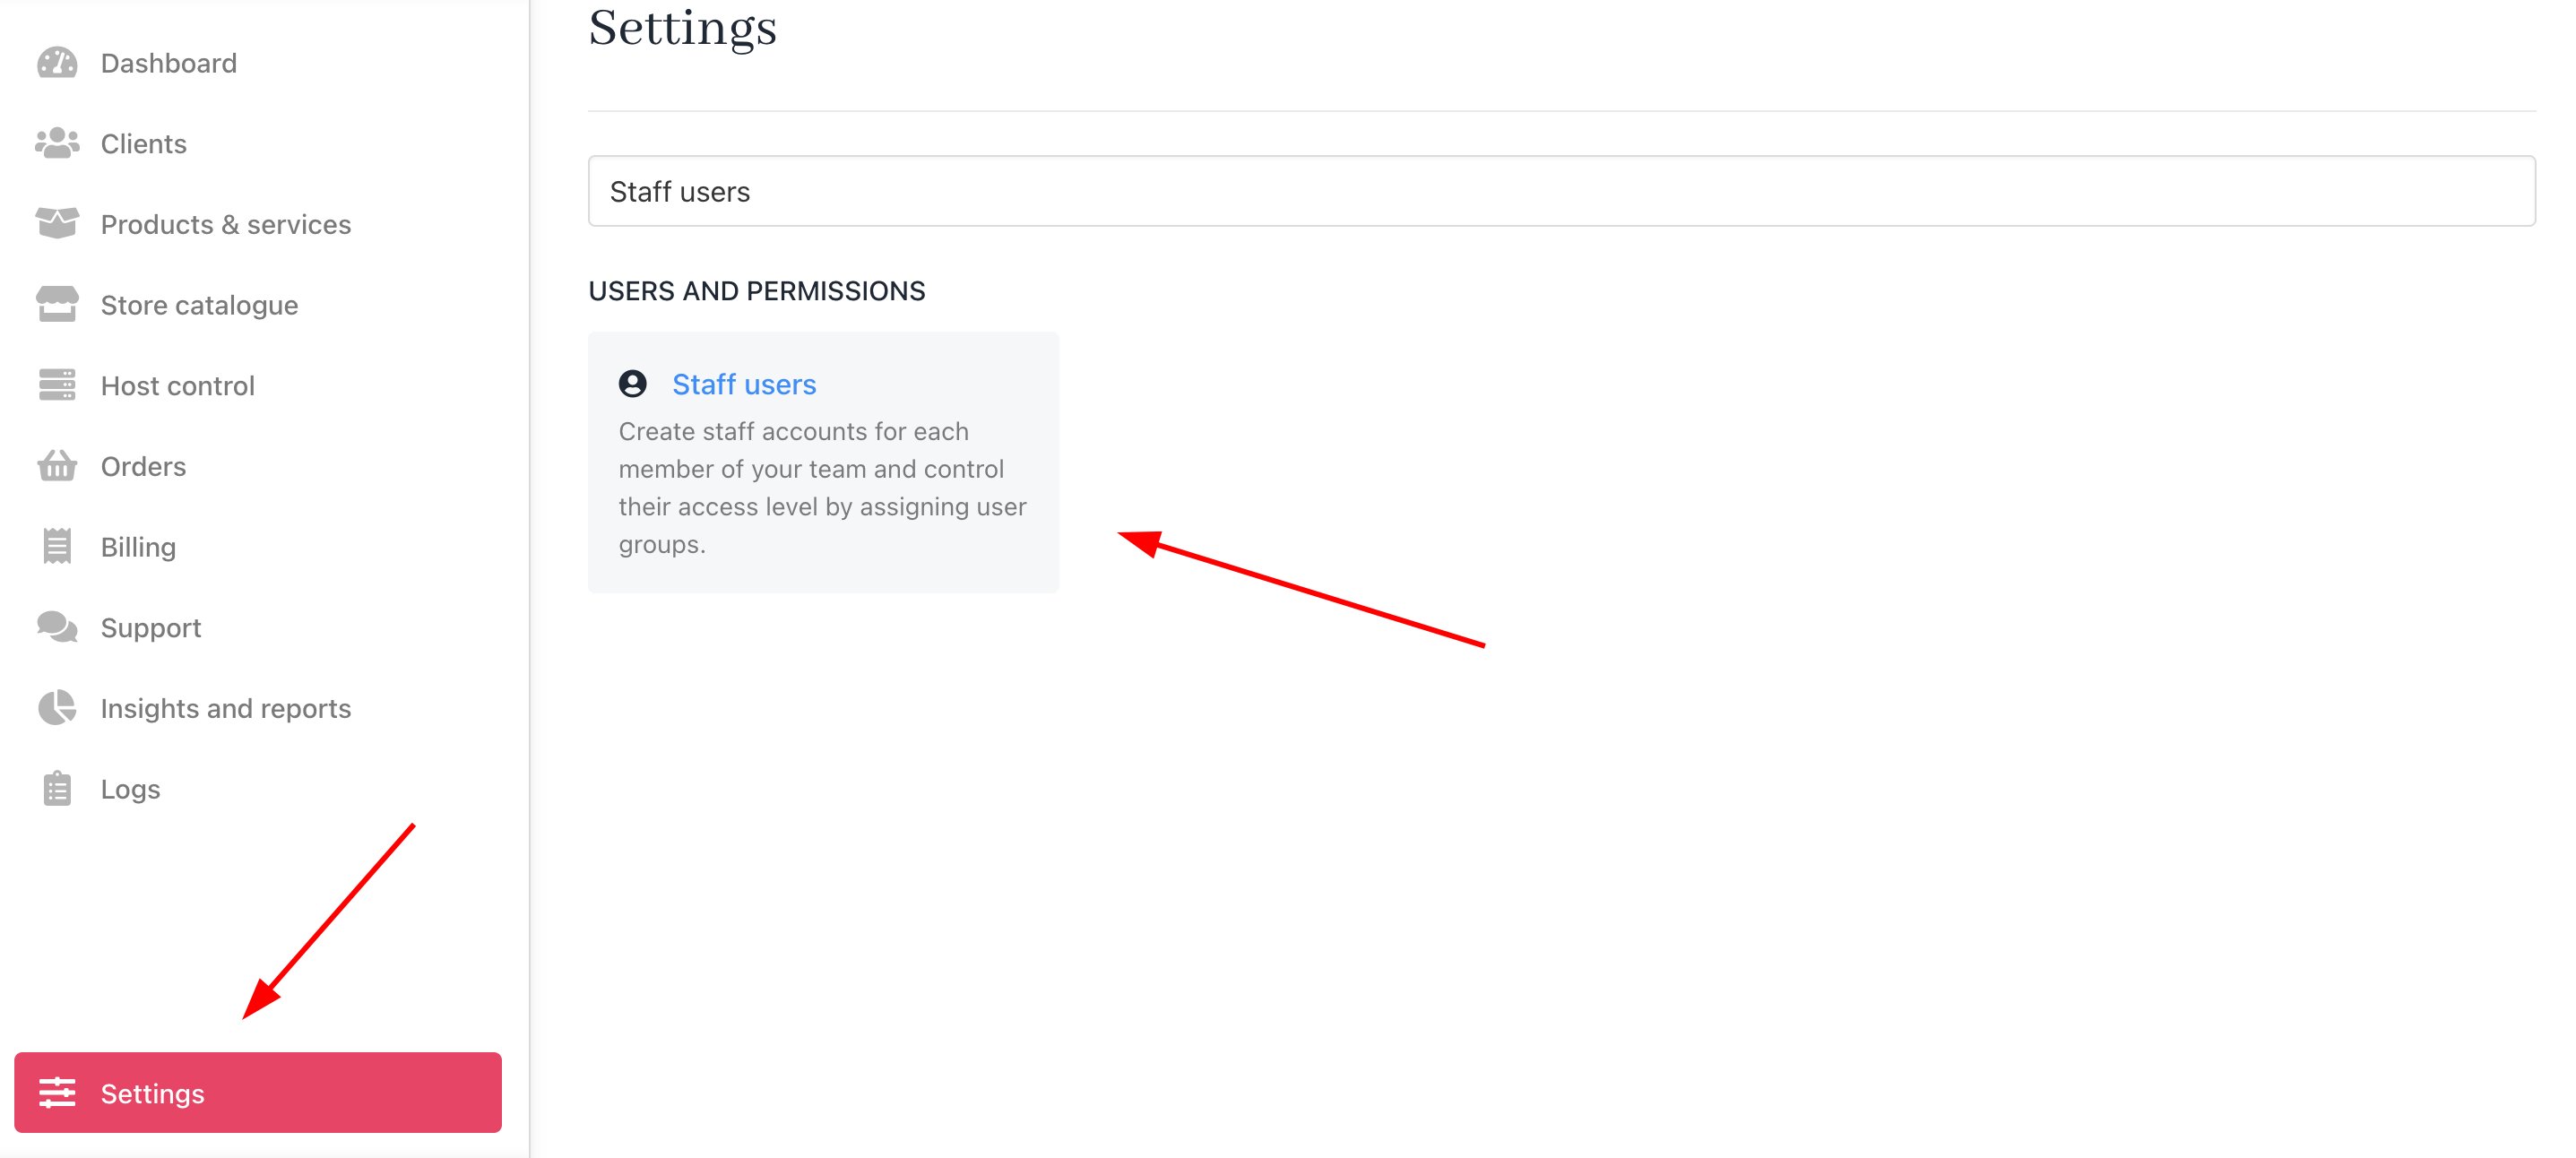
1. Go to the **Admin** dashboard.
2. Click **Settings** > **Staff users** under **Users and Permissions**.
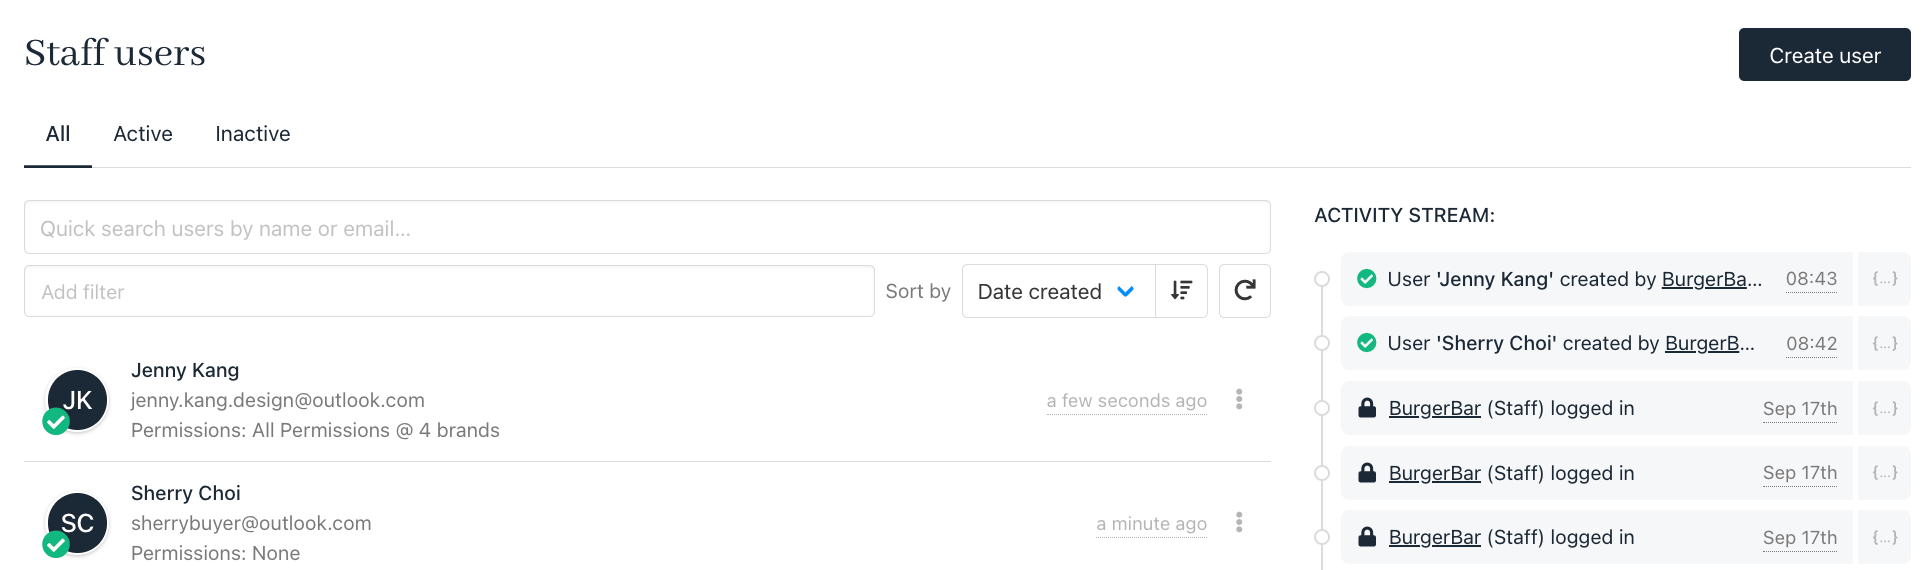
 Upmind displays a list of names on the Staff users page.
 ## Creating staff users
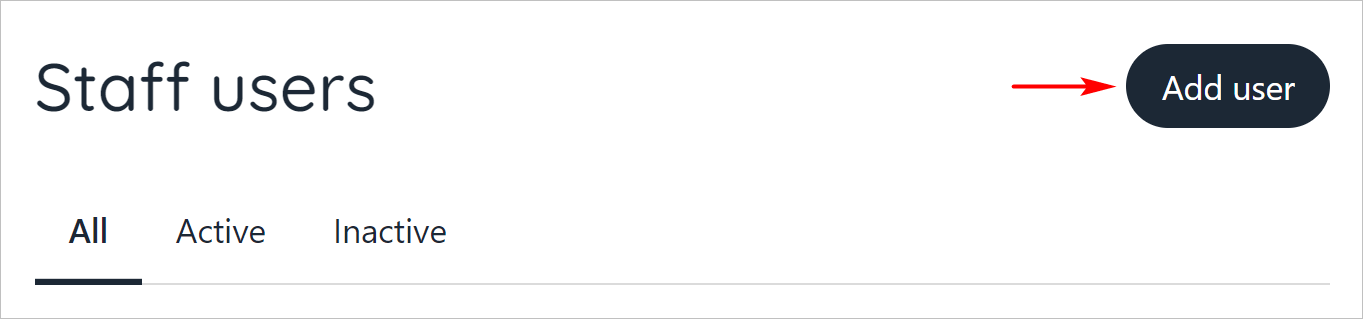
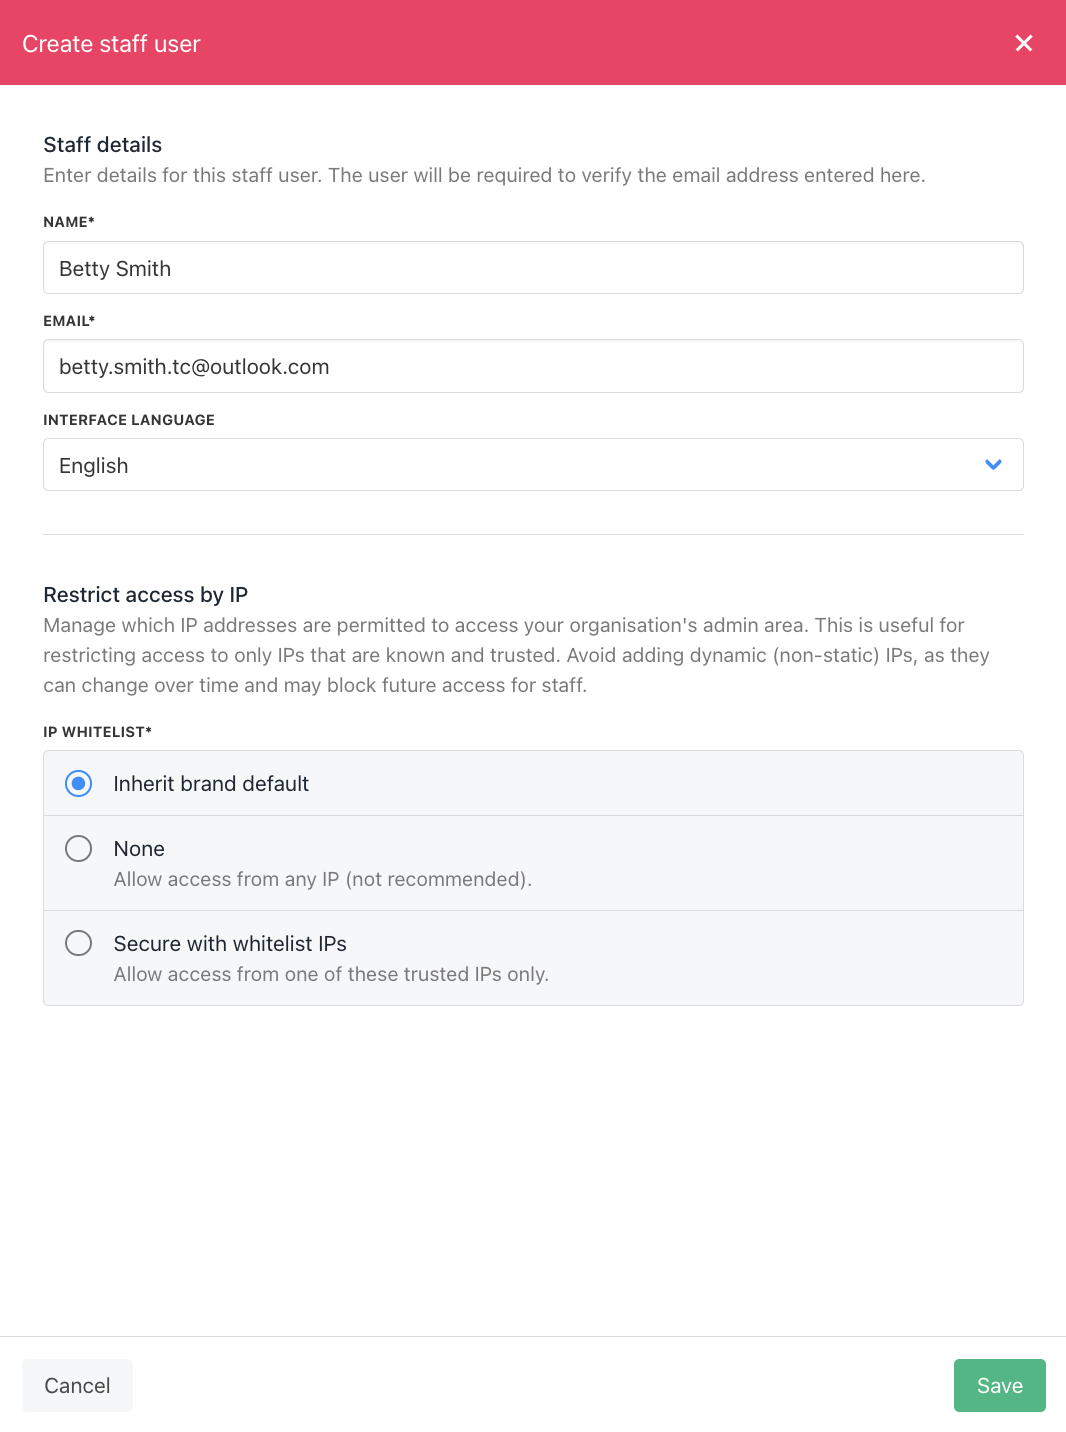
1. Click the **Add user** button on the **Staff users** page.
## Creating staff users
1. Click the **Add user** button on the **Staff users** page.
 2. Fill in the fields.
3. Click **Save**.
2. Fill in the fields.
3. Click **Save**.
 ## Managing a user
After you create a user, Upmind displays the Staff Overview page. Here you can manage user information and set brand access.
* You can also click a name on the Staff users page to open the Staff overview page.
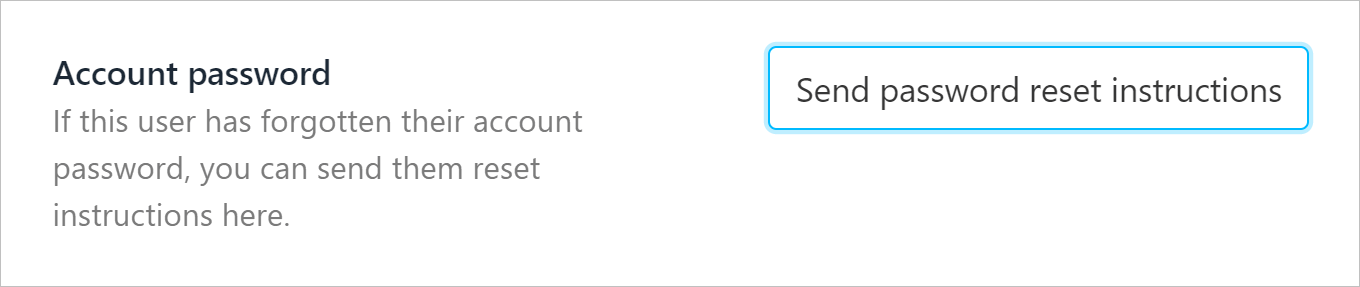
### Account password
Click this account button to force the user to change their password. Upmind sends the user an email with a link to change their password.
## Managing a user
After you create a user, Upmind displays the Staff Overview page. Here you can manage user information and set brand access.
* You can also click a name on the Staff users page to open the Staff overview page.
### Account password
Click this account button to force the user to change their password. Upmind sends the user an email with a link to change their password.
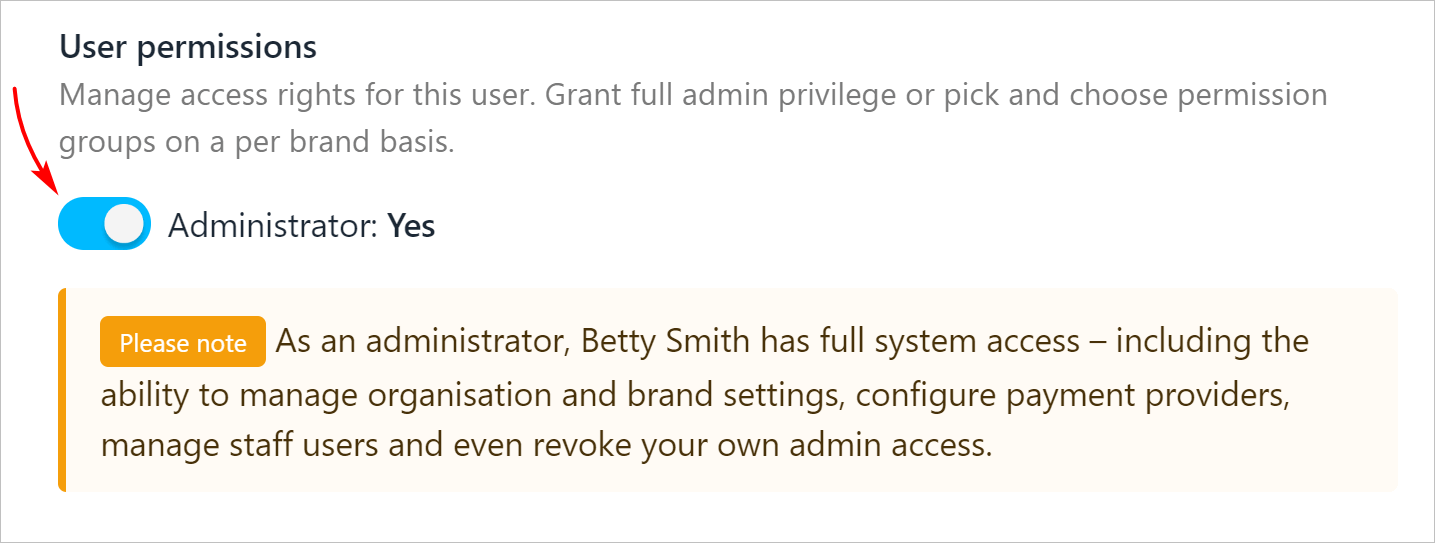
 ### User permissions
1. Click a toggle switch to enable or disable user access to a brand. By default, the toggle is in the `OFF` position.
### User permissions
1. Click a toggle switch to enable or disable user access to a brand. By default, the toggle is in the `OFF` position.
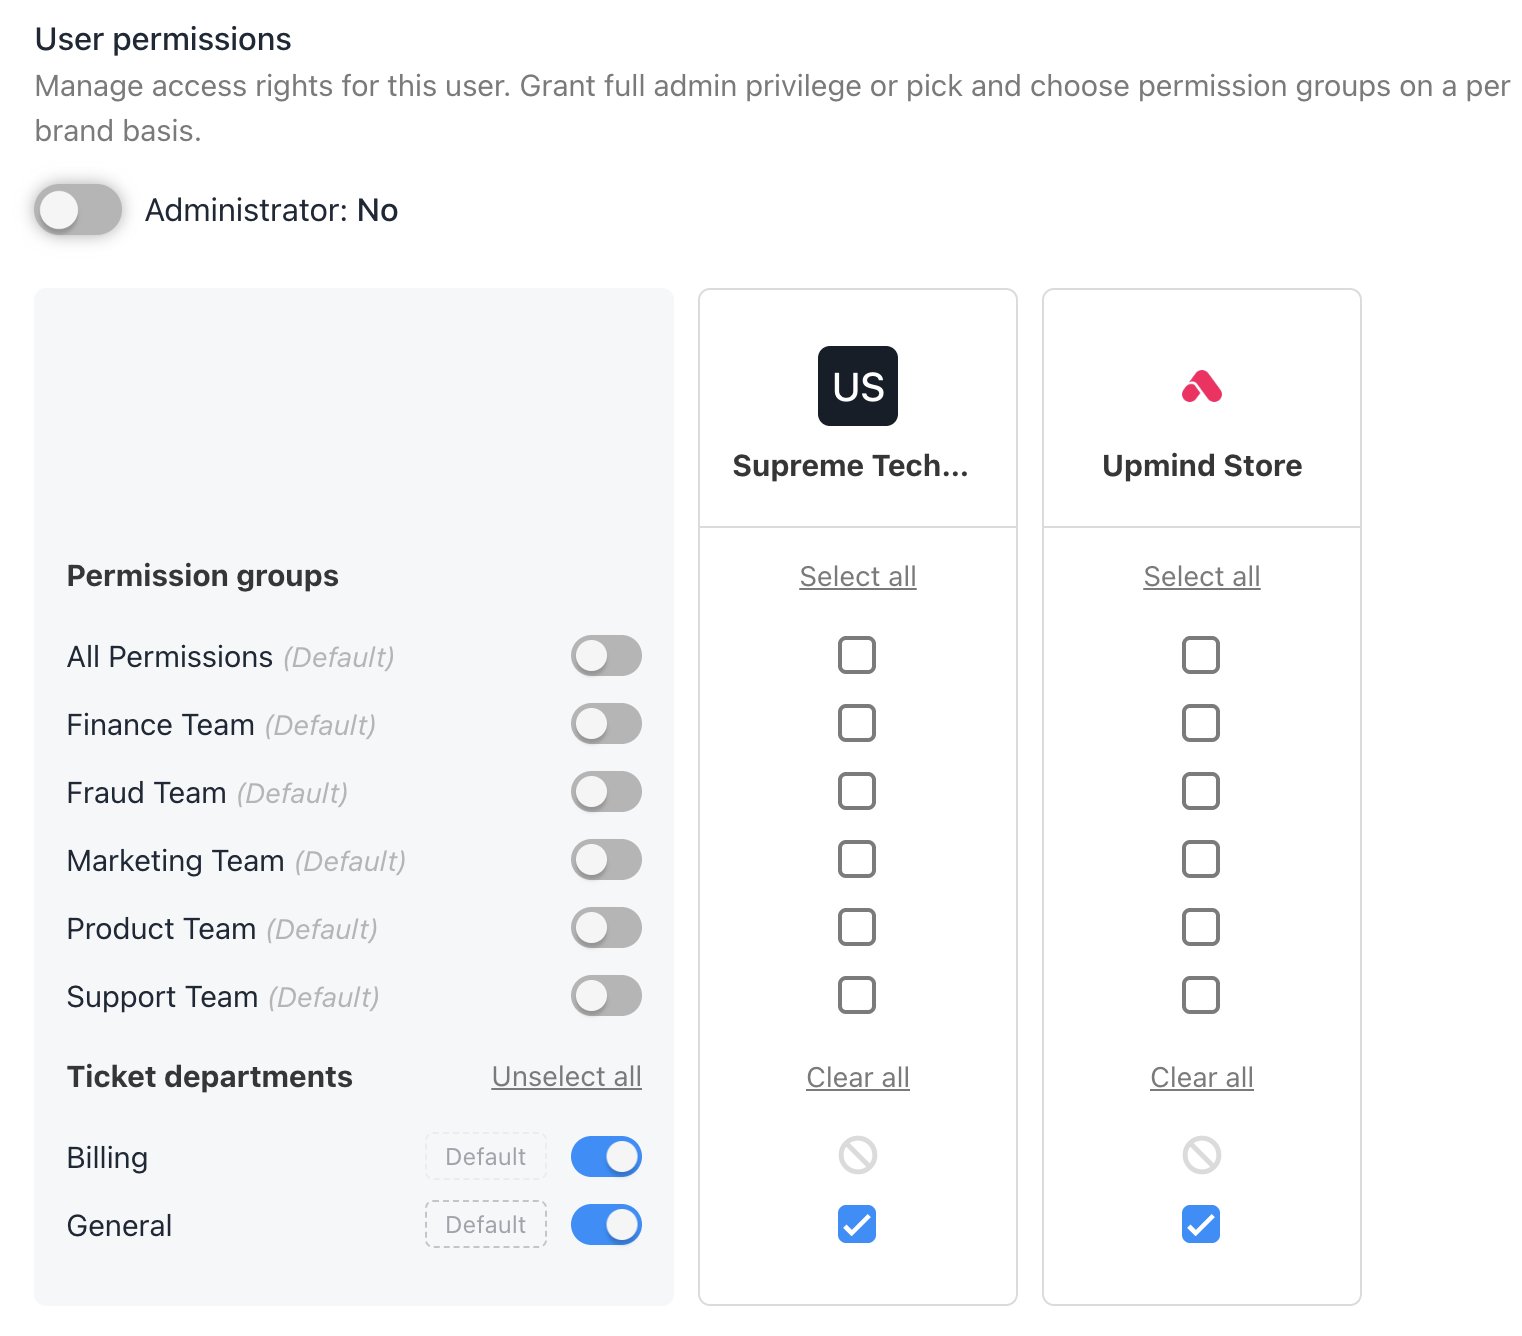 Upmind displays a separate toggle switch for [each brand](/setup-and-configuration/branding/how-to-add-brands) if the organisation has multiple brands.
* If you created one or more [user groups](/setup-and-configuration/staff-users/how-to-create-user-groups), use the checkboxes to control access at a granular level.
2. Click the **Administrator** toggle switch to the `Yes` (blue) position and assign admin permissions. That means full access to all brands. By default, the toggle is in the `No` position.
Upmind displays a separate toggle switch for [each brand](/setup-and-configuration/branding/how-to-add-brands) if the organisation has multiple brands.
* If you created one or more [user groups](/setup-and-configuration/staff-users/how-to-create-user-groups), use the checkboxes to control access at a granular level.
2. Click the **Administrator** toggle switch to the `Yes` (blue) position and assign admin permissions. That means full access to all brands. By default, the toggle is in the `No` position.
 3. Click **Save**.
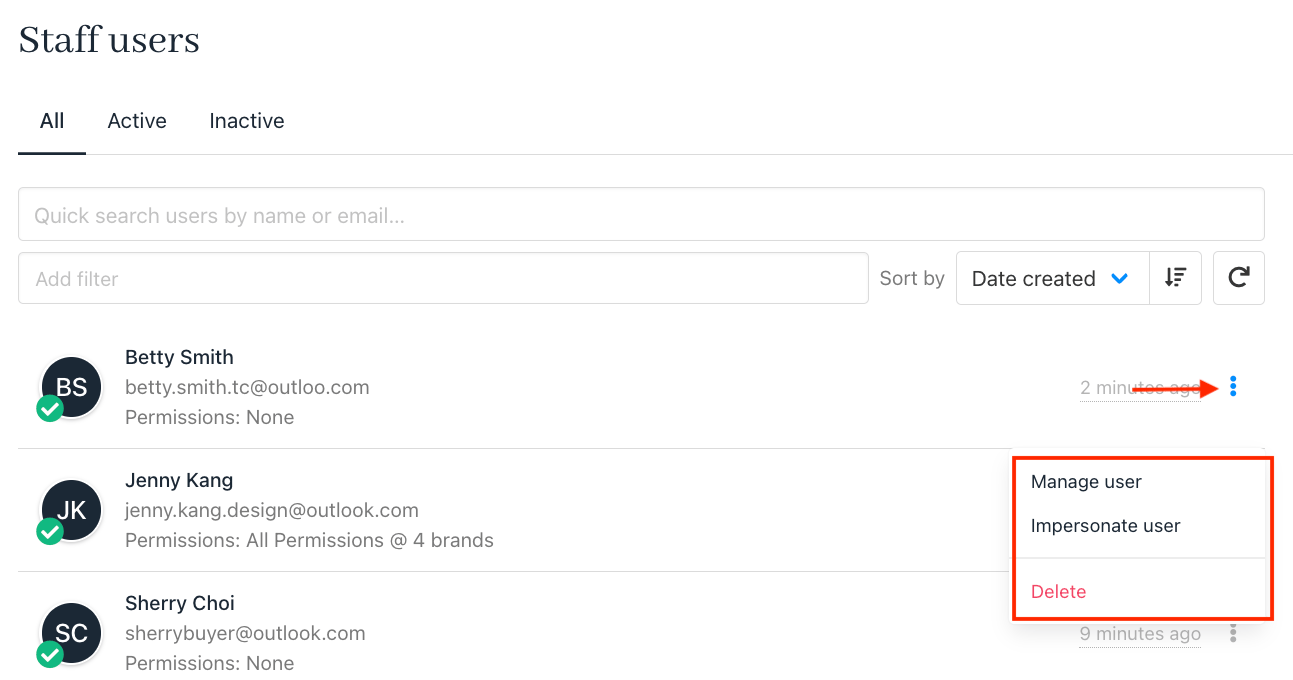
## User gear icon options
1. Open the **Staff users** page.
2. Click the **three dots icon**.
3. When you click the gear icon next to a staff user, you’ll see these options:
* **Manage User:** Edit the user’s permissions and access.
* **Impersonate User:** Log in as this staff member (Admins only).
* **Delete:** Remove the staff user from the organisation.
3. Click **Save**.
## User gear icon options
1. Open the **Staff users** page.
2. Click the **three dots icon**.
3. When you click the gear icon next to a staff user, you’ll see these options:
* **Manage User:** Edit the user’s permissions and access.
* **Impersonate User:** Log in as this staff member (Admins only).
* **Delete:** Remove the staff user from the organisation.
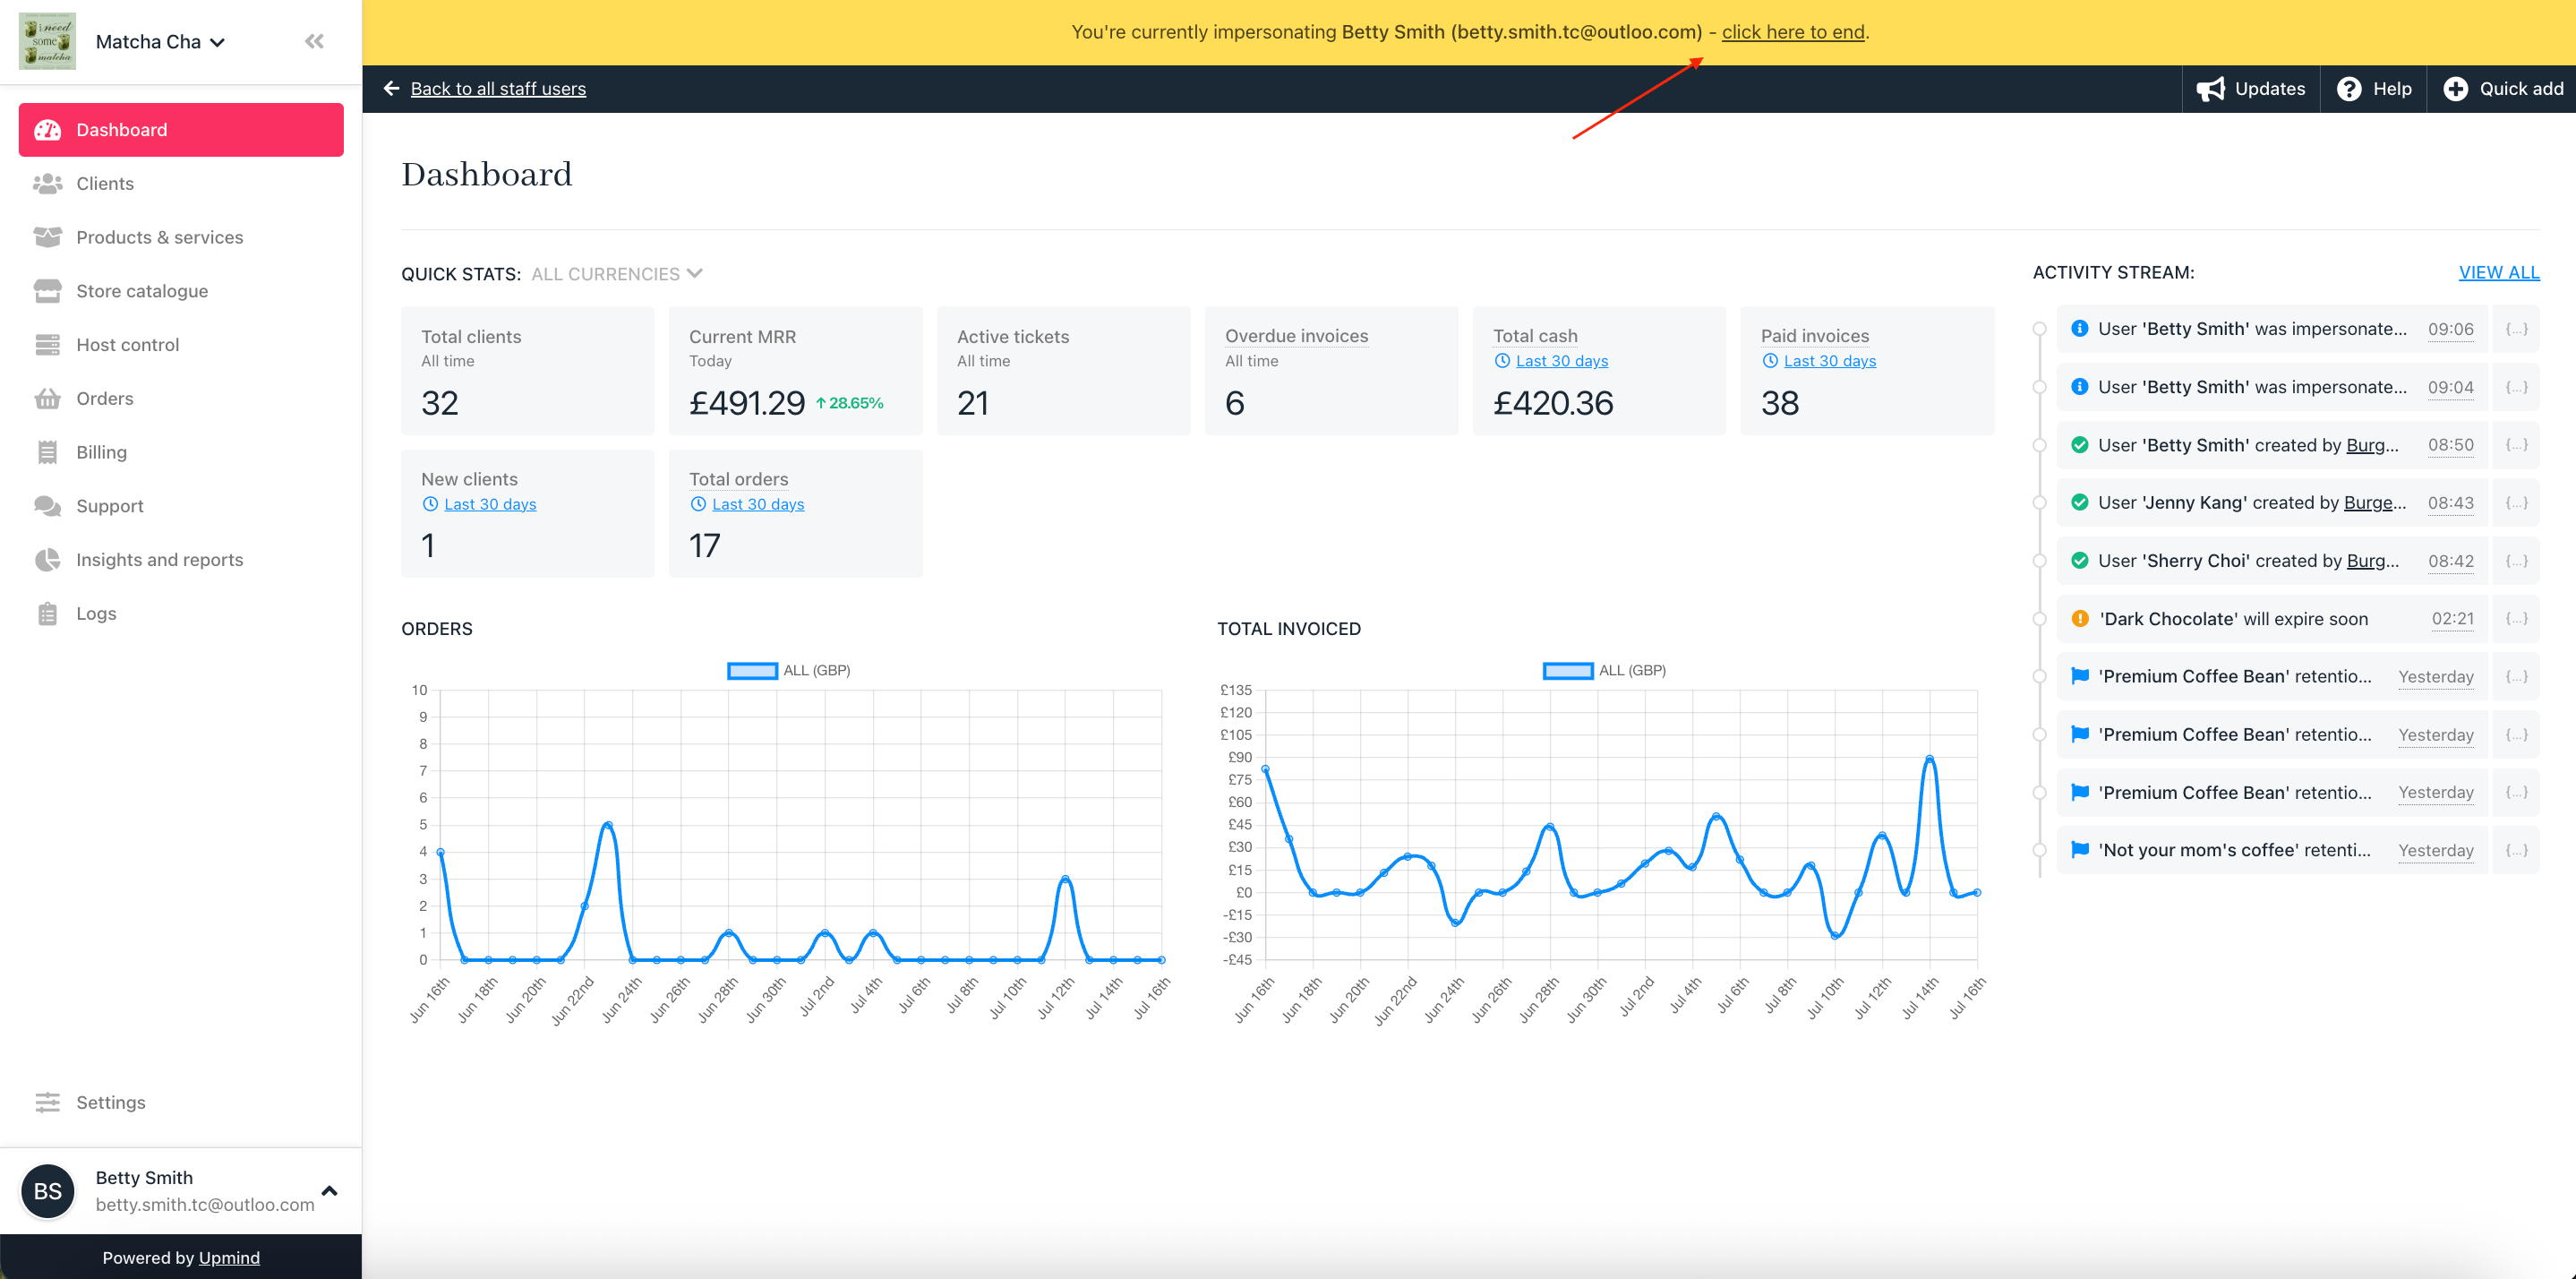
 4. When you impersonate a staff member, you’ll see the system from their point of view, based on the permissions you've given them. To stop impersonating, just click **End Impersonation** at the top of the screen.