> ## Documentation Index
> Fetch the complete documentation index at: https://docs.upmind.com/llms.txt
> Use this file to discover all available pages before exploring further.
# Importing from WHMCS
> Import your WHMCS data, files, and all other necessary information.
## **What is WHMCS?**
[WHMCS](https://www.whmcs.com/) is a self-hosted billing and automation platform for hosting businesses. If you are planning to move your billing, client management, and support data from WHMCS to Upmind, this guide will walk you through the process.
Note that WHMCS installations often include customisations such as database adjustments or third-party modules, which may not be imported. Upmind focuses on importing core data necessary for client management and billing effectively.
## **What can be imported?**
Upmind supports importing most core WHMCS data, including:
* Staff users
* Products and services
* Promotions
* Clients
* Support tickets
* Invoices
* Payment methods
* Affiliate accounts
* Domains and servers
If Upmind cannot automatically map certain data (e.g., servers, domains), you will be prompted to create manual mappings during import.
## **Preparing for the import**
Before starting the import, verify and configure these settings in Upmind:
| **Setting** | **Description** |
| ------------------------------ | ----------------------------------------------------------------------------------------------- |
| Brand Settings | Set your brand name and contact details. |
| Tax Settings | Configure tax rates relevant to your region. |
| Web Servers & Domain Providers | Add shared web servers and domain registrars under **Settings** > **Provision Configurations**. |
| Payment Gateways | Set up payment gateways under **Settings** > **Payment Providers**. |
## **Setting up WHMCS access for Upmind**
Create API Credentials in WHMCS.
1. In WHMCS admin, go to **Setup** > **API Credentials**.
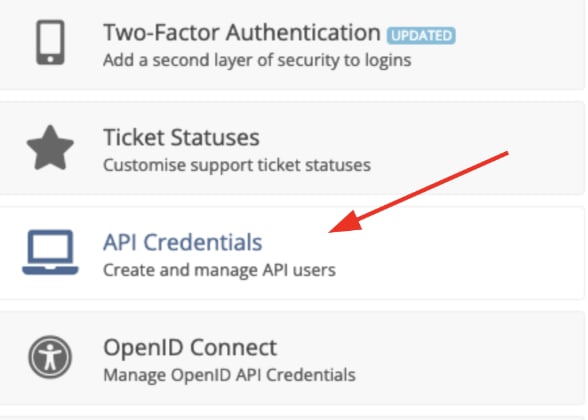 2. Under **API Roles**, create a new **API Role**.
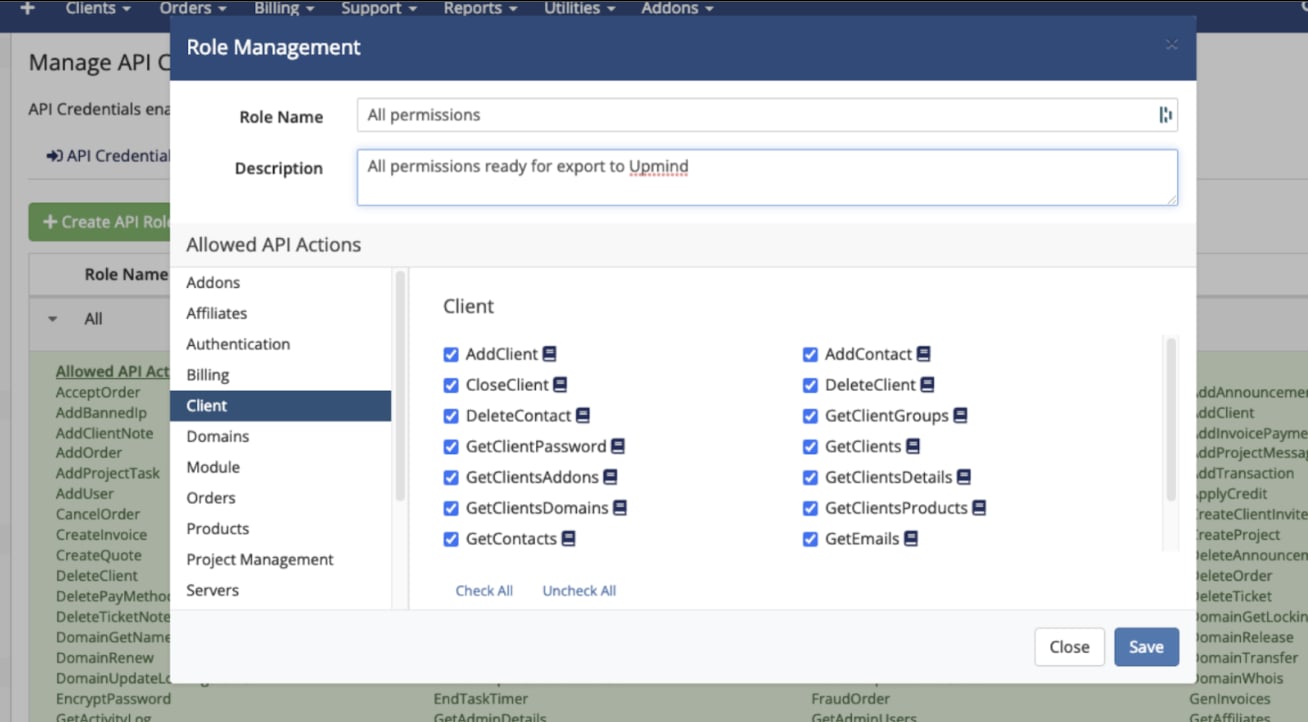
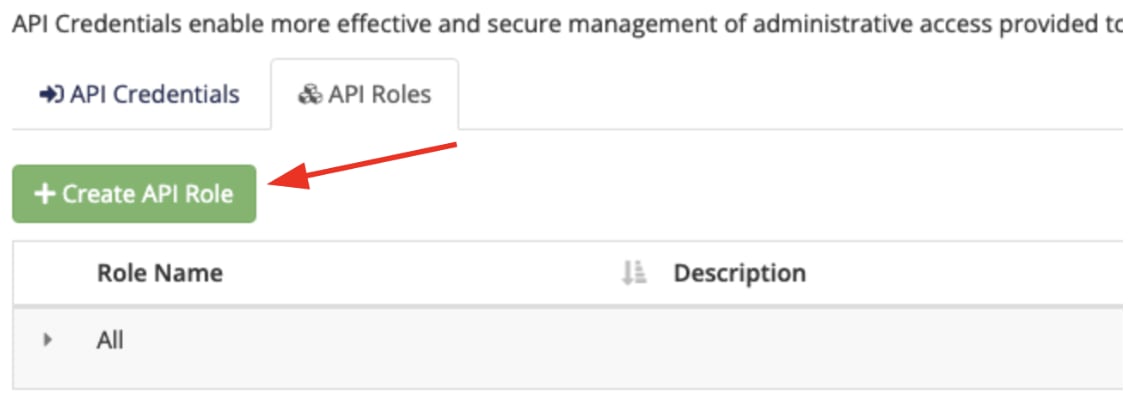 3. Create an API role with full permissions by selecting all checkboxes or by allowing only specific API commands:
* GetTicketUsers
* GetClients
* GetClientsDetails
* GetAffiliates
* GetAdminUsers (special steps below)
* GetTickets
* GetInvoices
* GetCurrencies
* GetProducts
* GetOrders
* GetTLDPricing
* GetClientsDomains
* GetClientsProducts
* GetInvoice
* GetTicket
* GetPayMethods
* GetClientGroups
* GetSupportDepartments
* GetConfigurationValue
4. **Save** the API Role.
3. Create an API role with full permissions by selecting all checkboxes or by allowing only specific API commands:
* GetTicketUsers
* GetClients
* GetClientsDetails
* GetAffiliates
* GetAdminUsers (special steps below)
* GetTickets
* GetInvoices
* GetCurrencies
* GetProducts
* GetOrders
* GetTLDPricing
* GetClientsDomains
* GetClientsProducts
* GetInvoice
* GetTicket
* GetPayMethods
* GetClientGroups
* GetSupportDepartments
* GetConfigurationValue
4. **Save** the API Role.
 ## **GetAdminUsers API functionality**
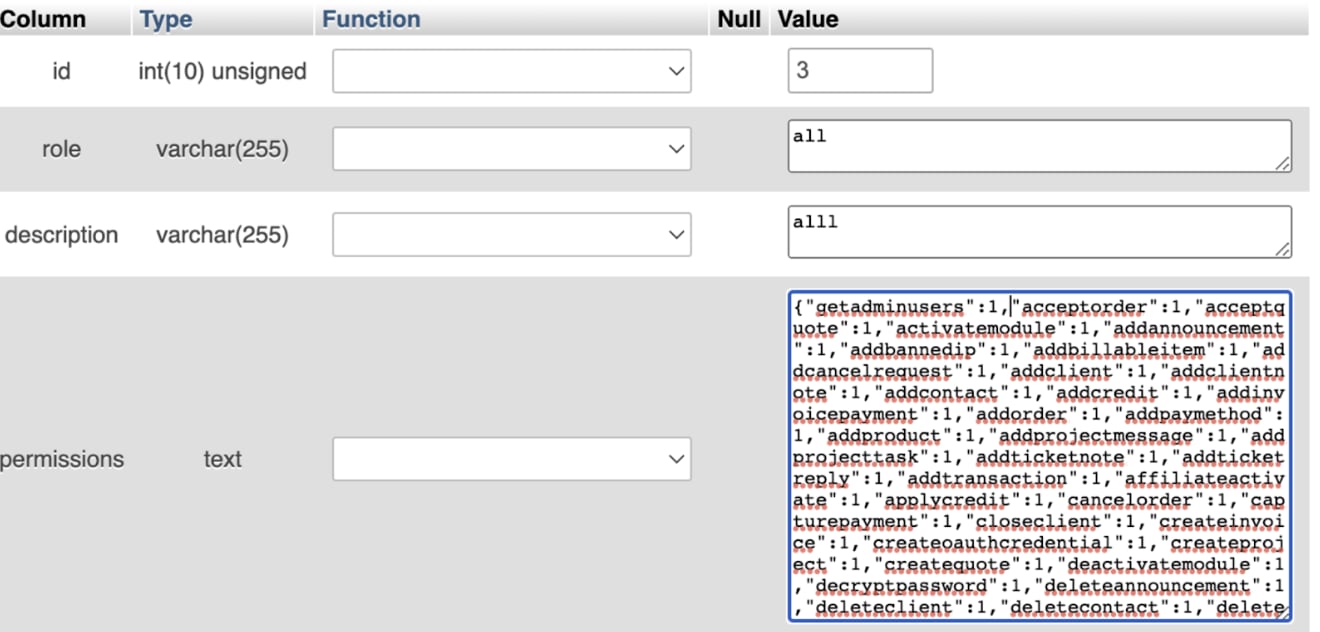
If the **GetAdminUsers** command does not appear or returns errors, manually add **getadminusers** to the **tblapiroles** table in your WHMCS database.
## **GetAdminUsers API functionality**
If the **GetAdminUsers** command does not appear or returns errors, manually add **getadminusers** to the **tblapiroles** table in your WHMCS database.
 ## **Creating API credentials**
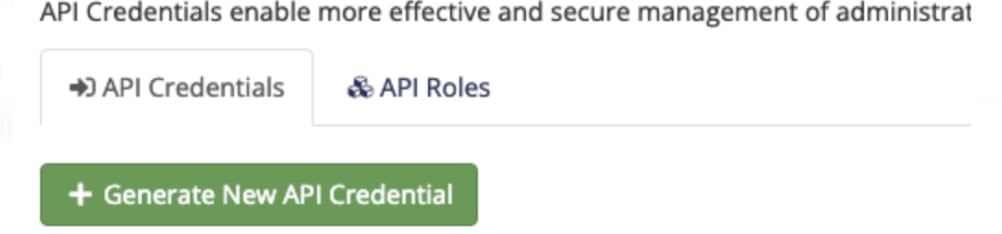
1. Return to **API Credentials**.
2. Click **Generate New API Credential**.
## **Creating API credentials**
1. Return to **API Credentials**.
2. Click **Generate New API Credential**.
 3. Select the **API Role** created and assign an admin user.
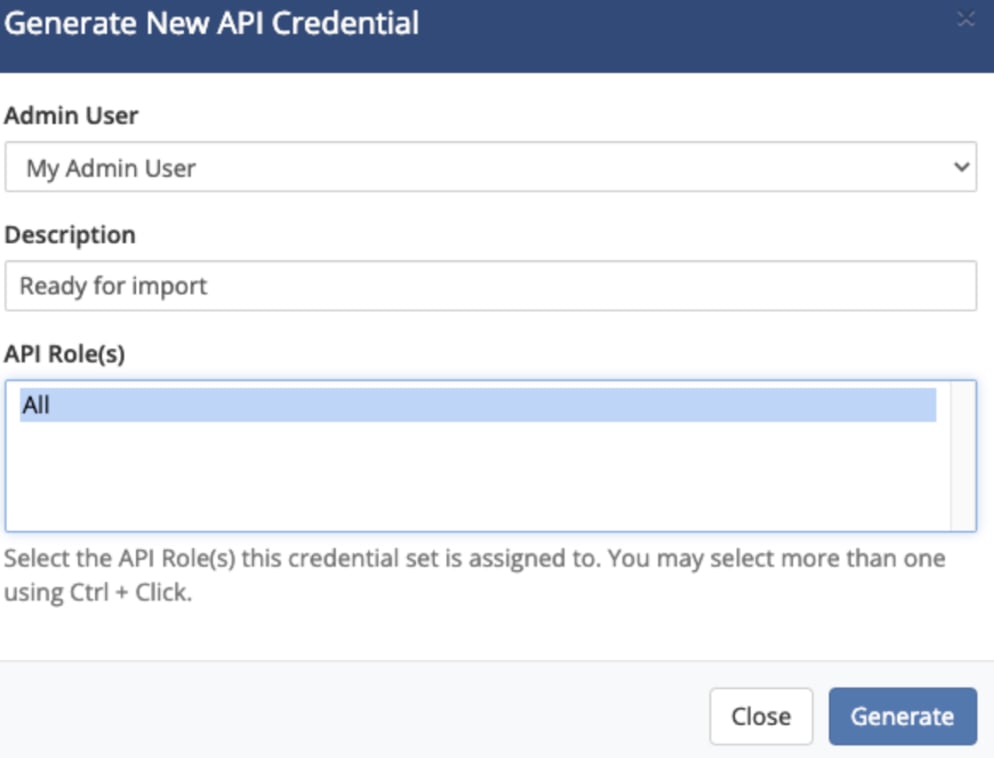 4. Generate credentials and copy the **Service Identifier** and **Secret**.
### **Whitelist Upmind IP addresses in WHMCS**
Add these IPs to **Settings** > **General Settings** > **Security** > **API IP Access Restriction**:
* 91.240.229.1
* 91.240.229.2
* 91.240.229.3
### **Proxy or Load Balancer configuration**
If WHMCS is behind proxies like Cloudflare or load balancers, follow WHMCS’s trusted proxy setup at:
[https://docs.whmcs.com/Trusted\_Proxy\_Settings](https://docs.whmcs.com/Trusted_Proxy_Settings)
## **Configuring the import in Upmind from WHMCS**
1. Go to **Settings** > **Imports** in Upmind.
4. Generate credentials and copy the **Service Identifier** and **Secret**.
### **Whitelist Upmind IP addresses in WHMCS**
Add these IPs to **Settings** > **General Settings** > **Security** > **API IP Access Restriction**:
* 91.240.229.1
* 91.240.229.2
* 91.240.229.3
### **Proxy or Load Balancer configuration**
If WHMCS is behind proxies like Cloudflare or load balancers, follow WHMCS’s trusted proxy setup at:
[https://docs.whmcs.com/Trusted\_Proxy\_Settings](https://docs.whmcs.com/Trusted_Proxy_Settings)
## **Configuring the import in Upmind from WHMCS**
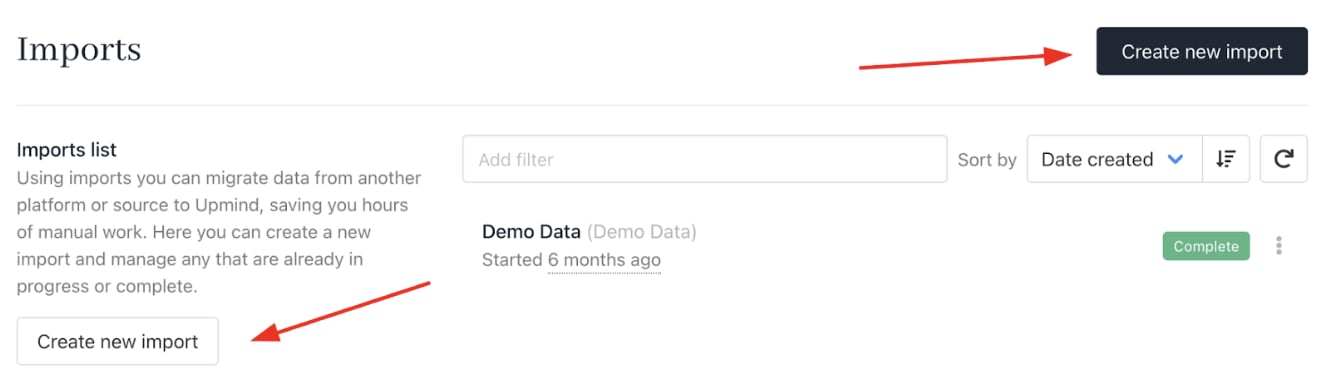
1. Go to **Settings** > **Imports** in Upmind.
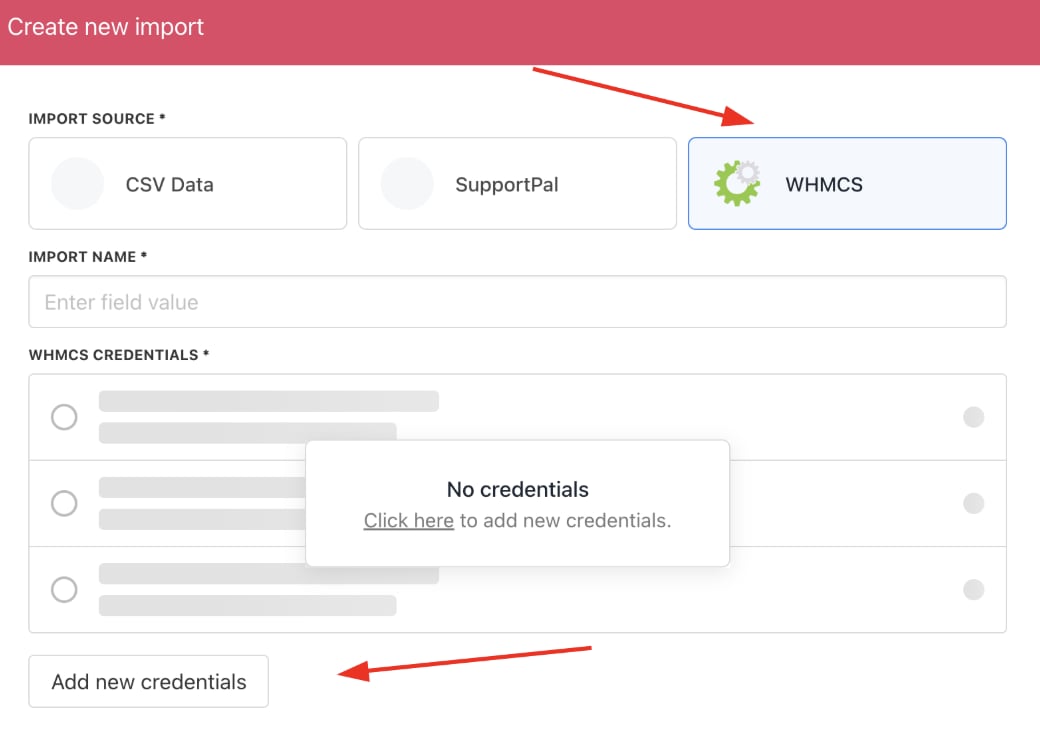
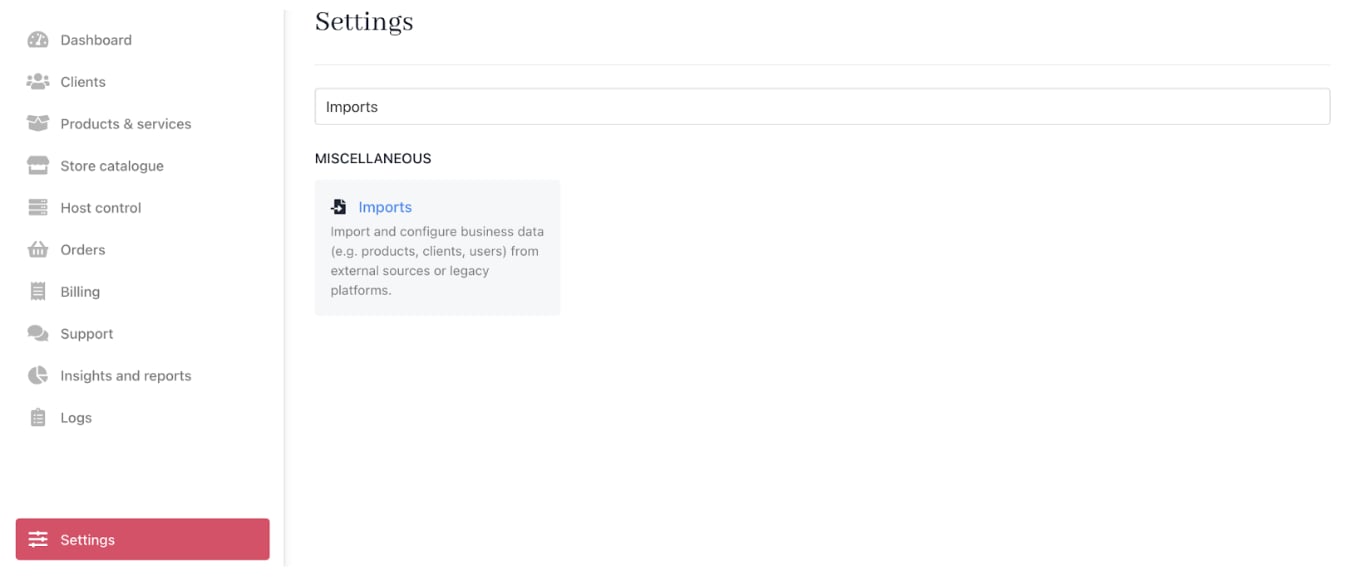 2. Click **Create New Import** and select **WHMCS**.
 3. Click on **Add New Credentials**.
 4. Add the **URL**, **Username** (API Username), **Password** (API Password), **Admin Dashboard URL**, and choose the **Tax Setting** collected from WHMCS.
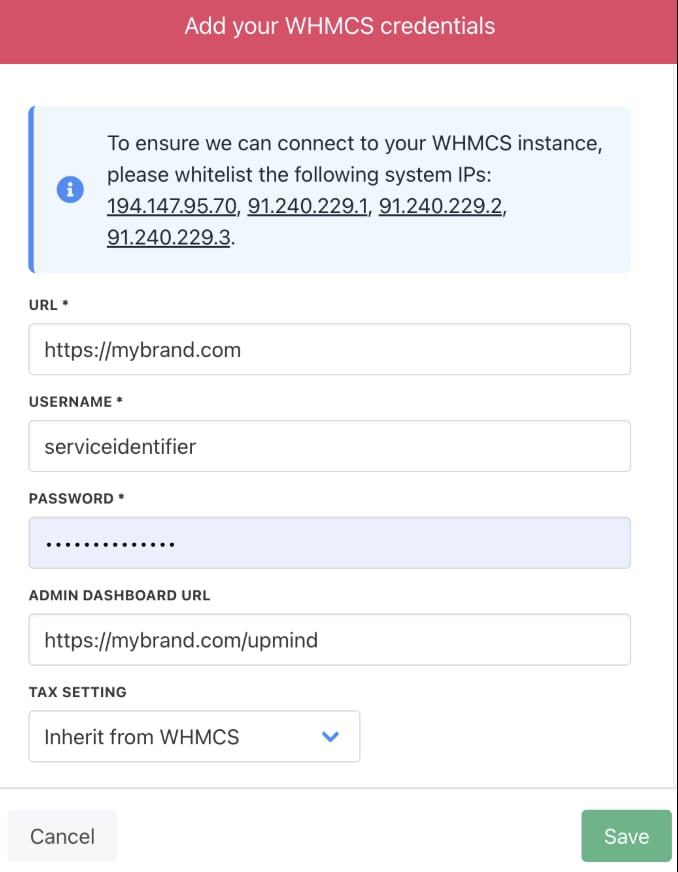 The username and password are provided by WHMCS when generating your API credentials.
5. **Save** and test credentials. You can correct any errors.
6. Once validated, click **Create import**.
## **Running the Import**
You can leave the import running and return anytime. No data will be lost or interrupted.
You will now see a screen that looks as follows. Click **Start Import**.
The username and password are provided by WHMCS when generating your API credentials.
5. **Save** and test credentials. You can correct any errors.
6. Once validated, click **Create import**.
## **Running the Import**
You can leave the import running and return anytime. No data will be lost or interrupted.
You will now see a screen that looks as follows. Click **Start Import**.
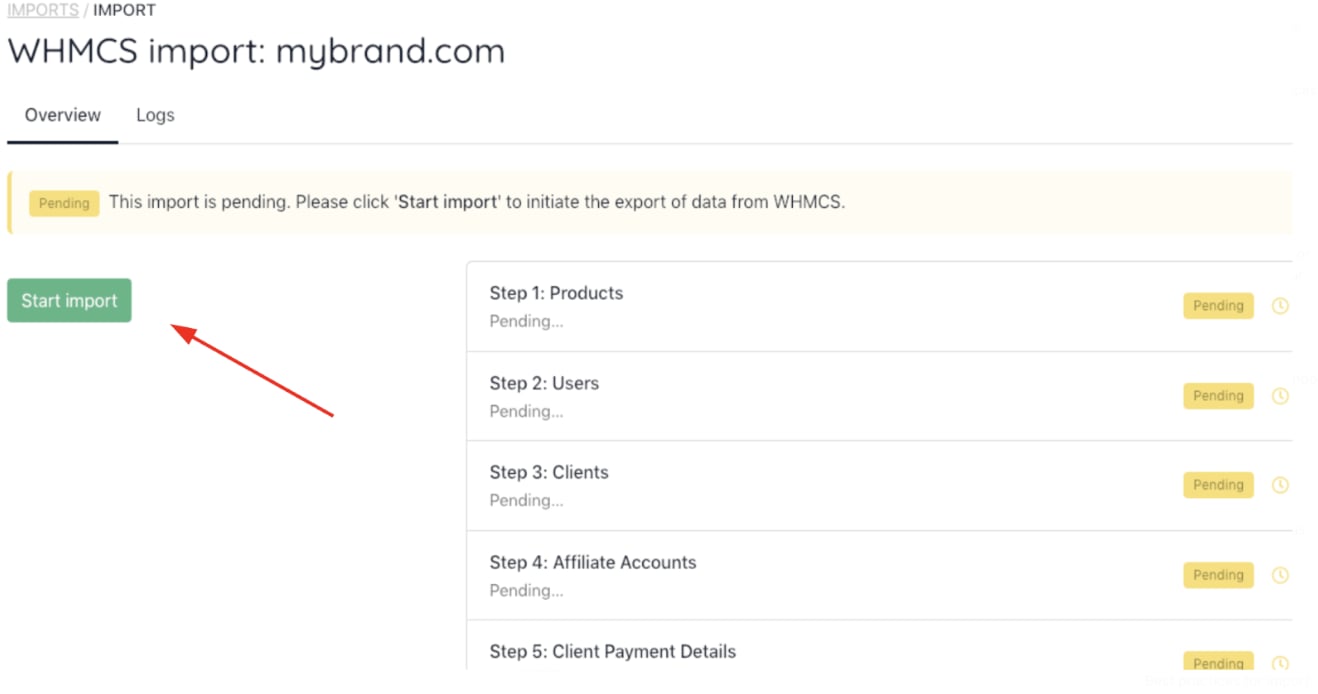 The import starts immediately, runs in the background, and imports data in order.
### **Products**
Upmind treats both domains and products as types of products. However, it stores only one record for each top-level domain (TLD), like ".com." This means if a TLD such as "com" is already in the system, any new imports that include this TLD won't create a duplicate record.
Instead, the new data will be linked or mapped to the existing ".com" record. This approach keeps the system organised and avoids unnecessary duplicates while allowing all related data to connect properly under the existing TLD entry.
After the first import, you'll see an orange **Mappings required** notification.
The import starts immediately, runs in the background, and imports data in order.
### **Products**
Upmind treats both domains and products as types of products. However, it stores only one record for each top-level domain (TLD), like ".com." This means if a TLD such as "com" is already in the system, any new imports that include this TLD won't create a duplicate record.
Instead, the new data will be linked or mapped to the existing ".com" record. This approach keeps the system organised and avoids unnecessary duplicates while allowing all related data to connect properly under the existing TLD entry.
After the first import, you'll see an orange **Mappings required** notification.
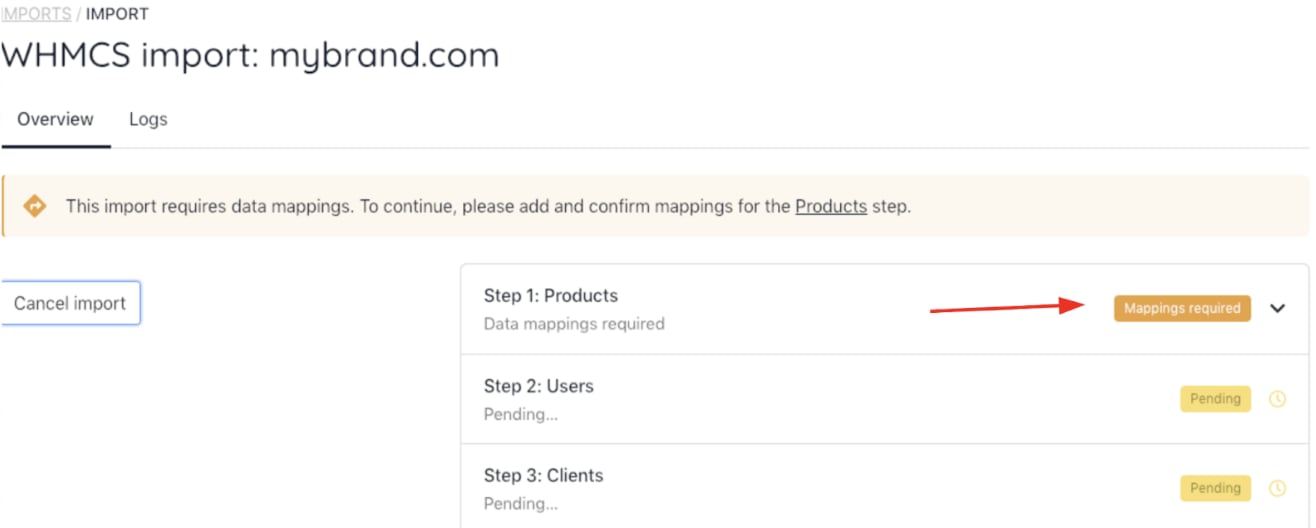
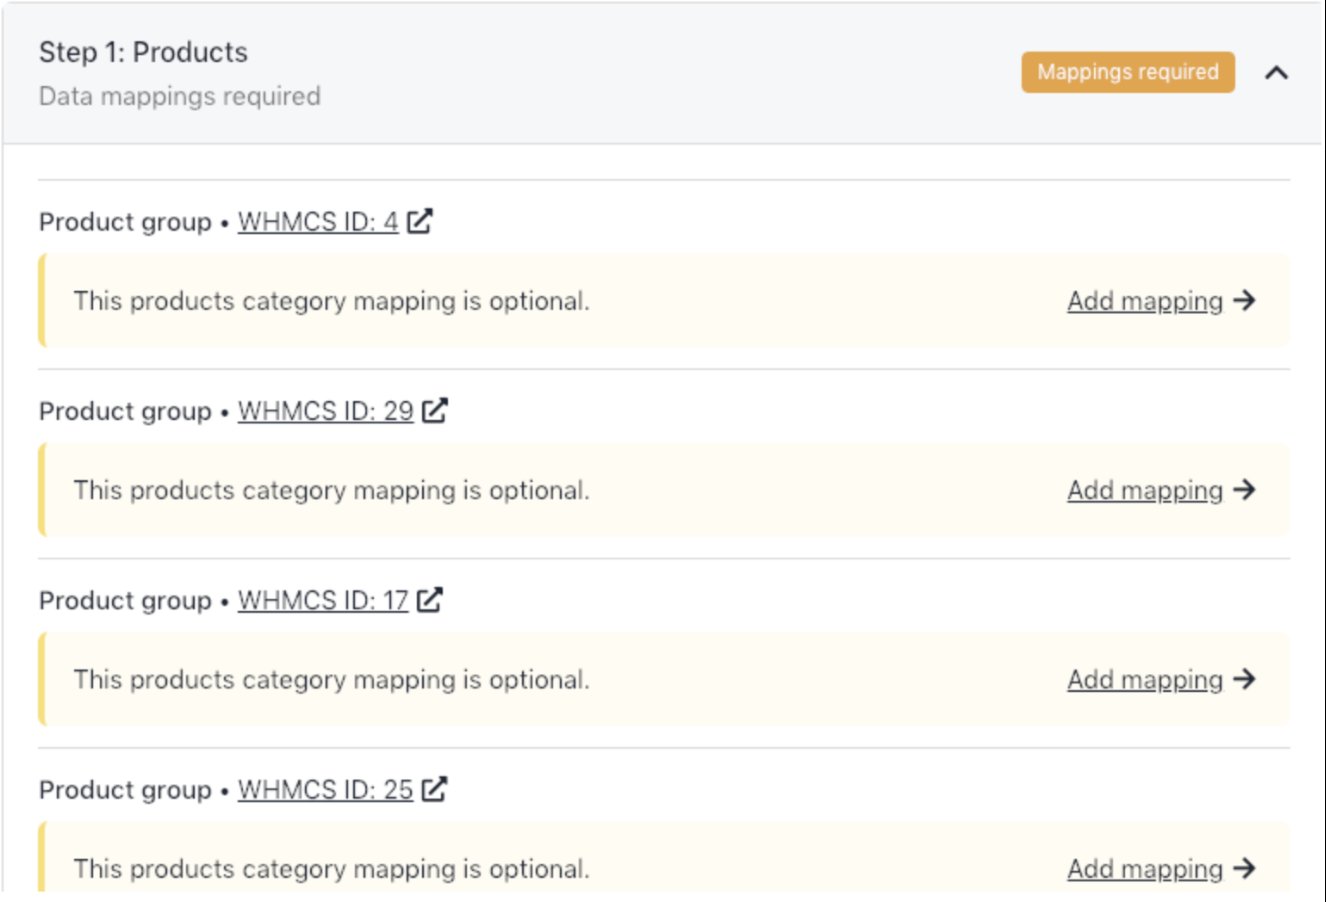 1. Map categories if set up on **Store Catalogue** from the dashboard or from under **Settings** > **Products Catalogue**. (optional)
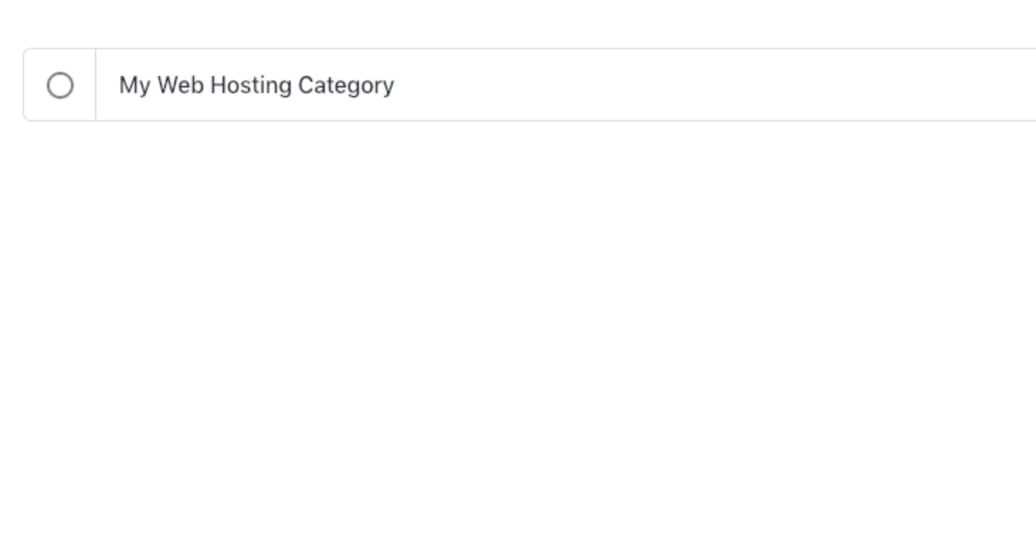 2. Click **Confirm mapping(s) and continue**.
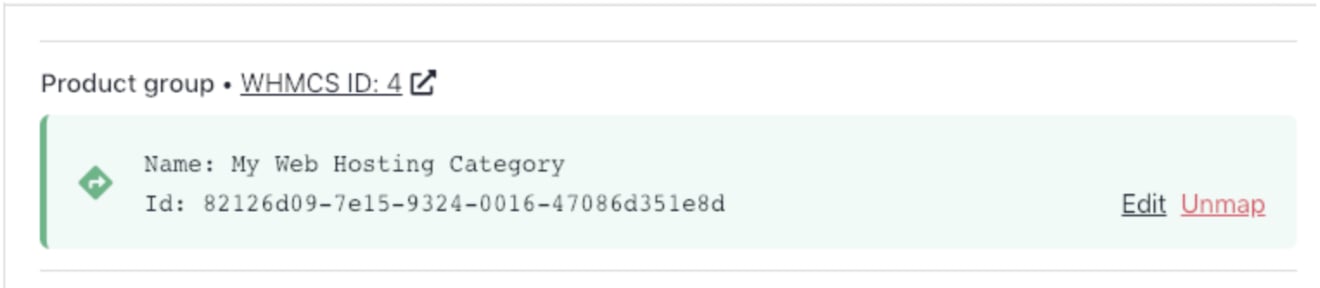
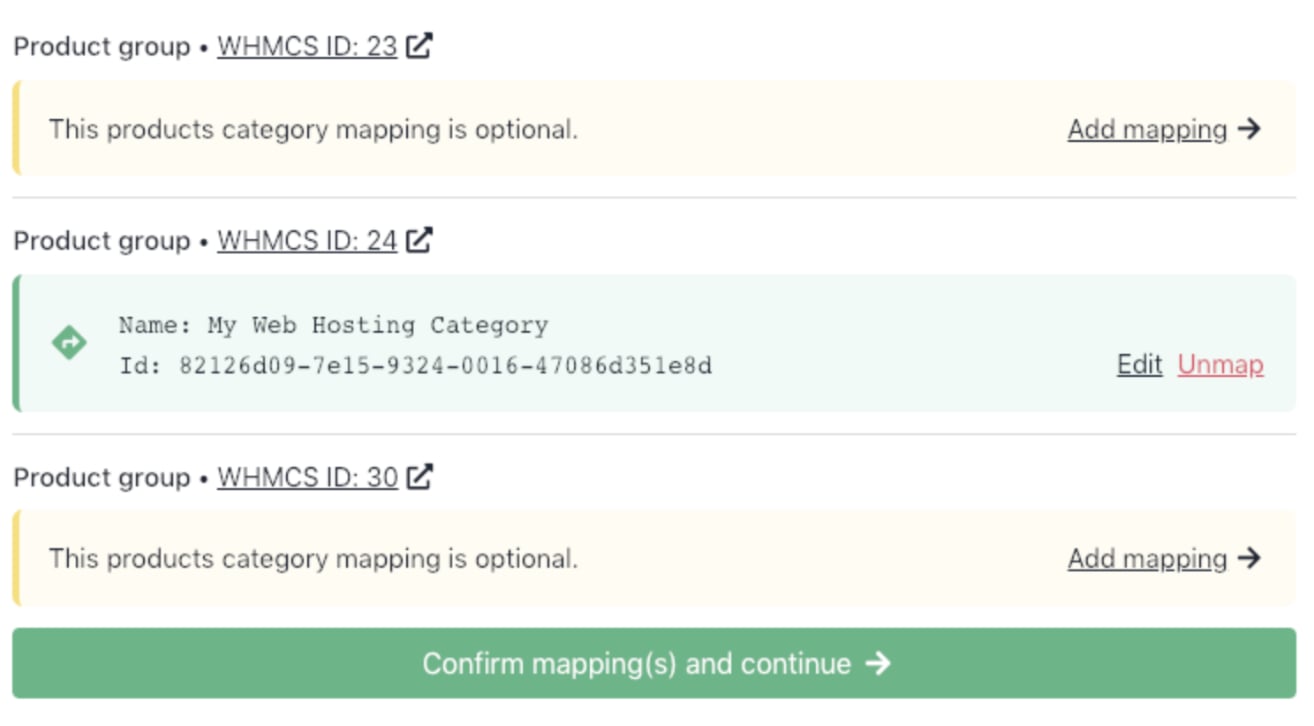 3. Products will begin importing.
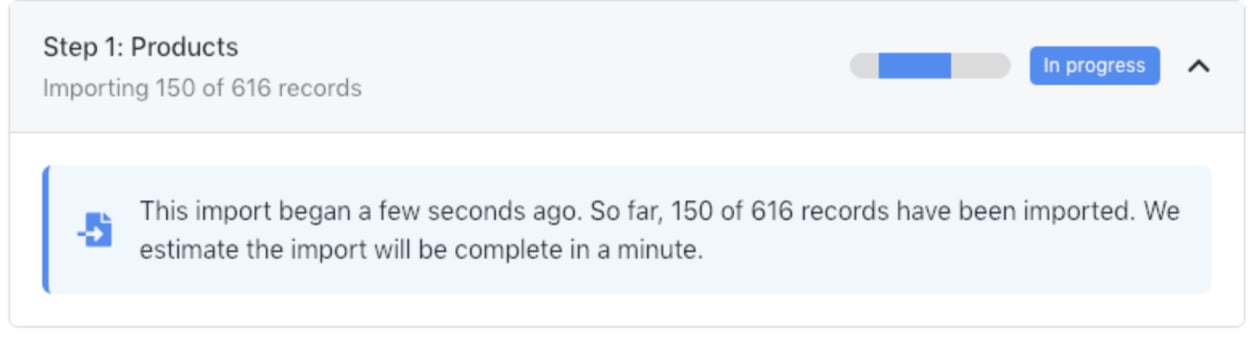 4. After import, view the data list, which you can preview but not edit **staged** data.
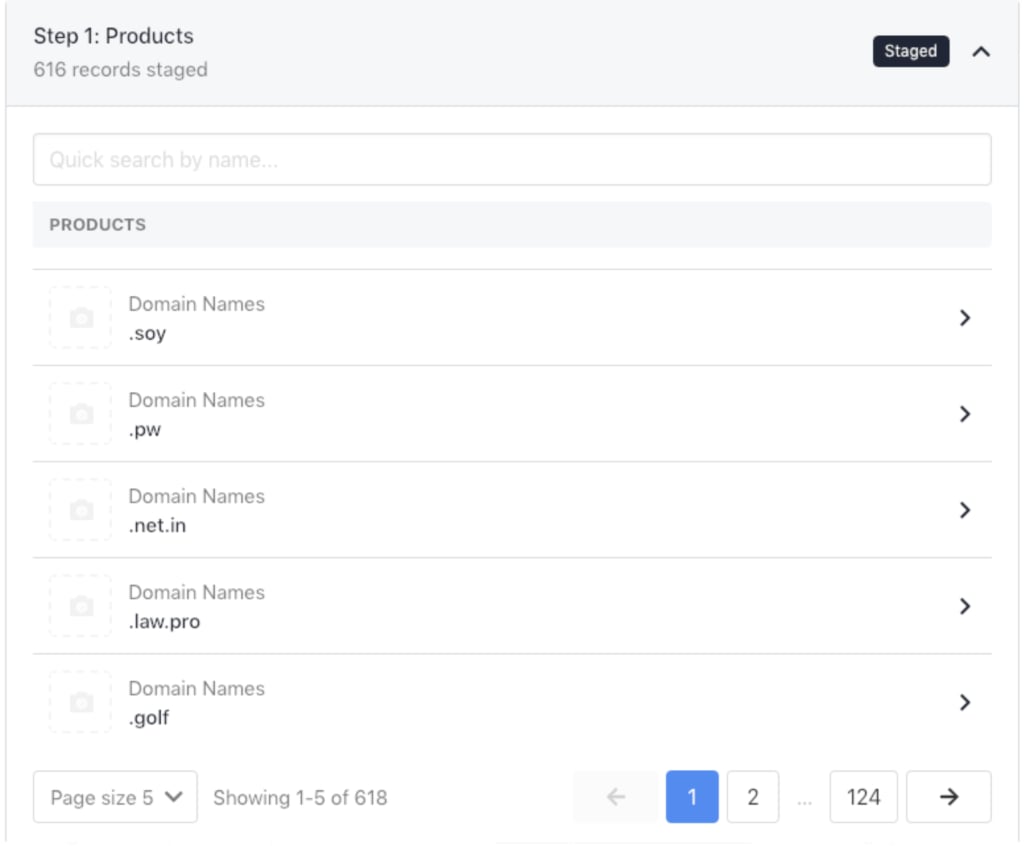
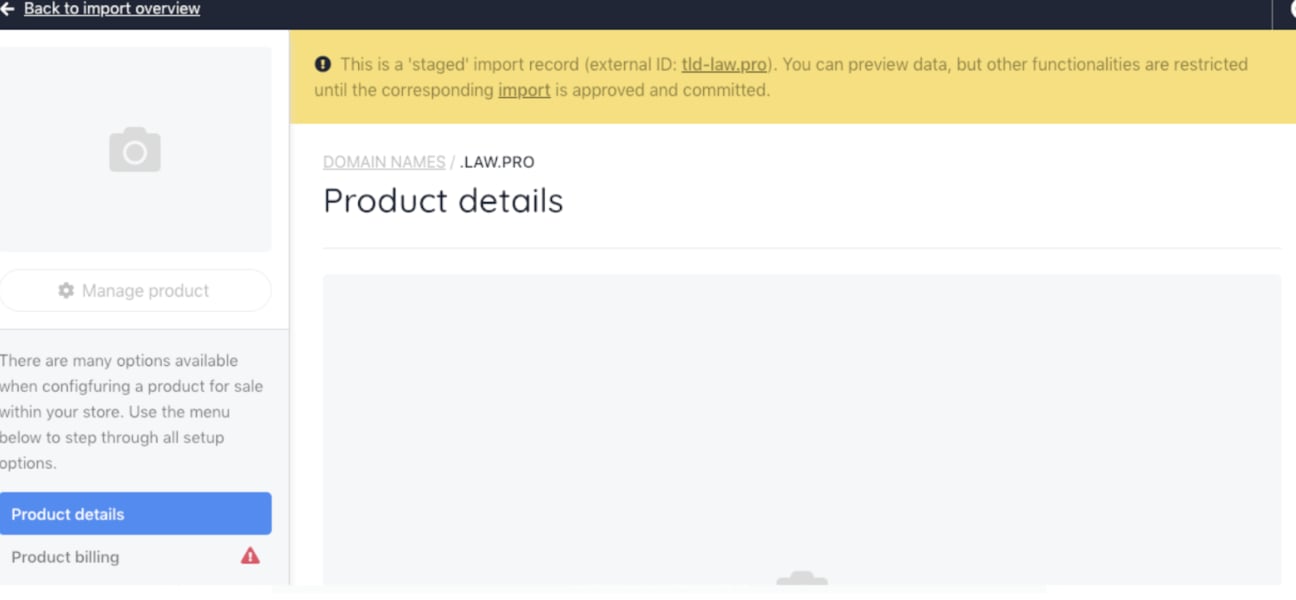 5. Repeat this process for the remaining import sections.
### **Users**
Users with the same email are automatically mapped. Permission levels for these mappings are set up under **User Roles**.
### **Clients**
Your client database will be exported to Upmind and may take time, but you can leave it running in the background.
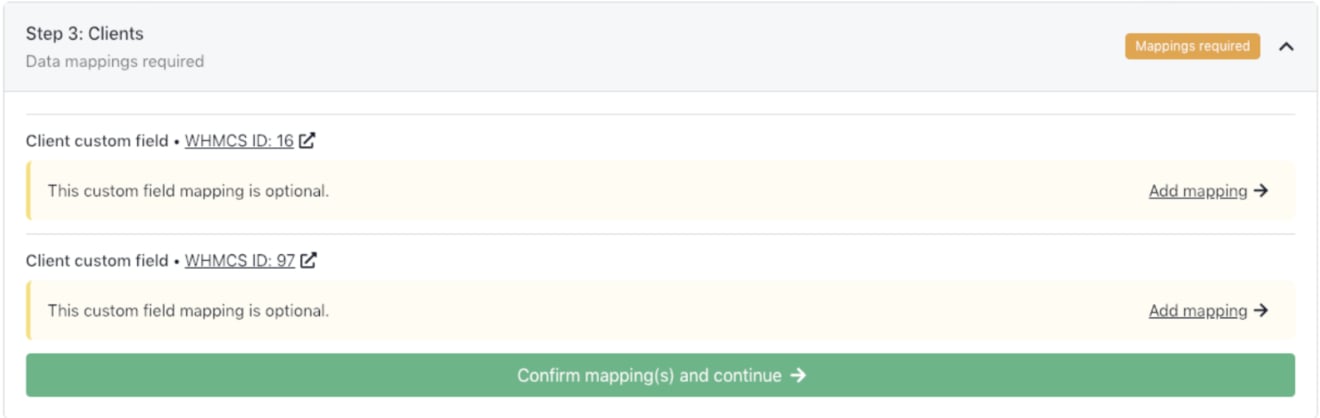
You will be given the option to map custom fields. You can [create Upmind custom fields](https://docs.upmind.com/using-upmind/client-management/how-to-add-client-custom-fields) in the settings panel.
5. Repeat this process for the remaining import sections.
### **Users**
Users with the same email are automatically mapped. Permission levels for these mappings are set up under **User Roles**.
### **Clients**
Your client database will be exported to Upmind and may take time, but you can leave it running in the background.
You will be given the option to map custom fields. You can [create Upmind custom fields](https://docs.upmind.com/using-upmind/client-management/how-to-add-client-custom-fields) in the settings panel.
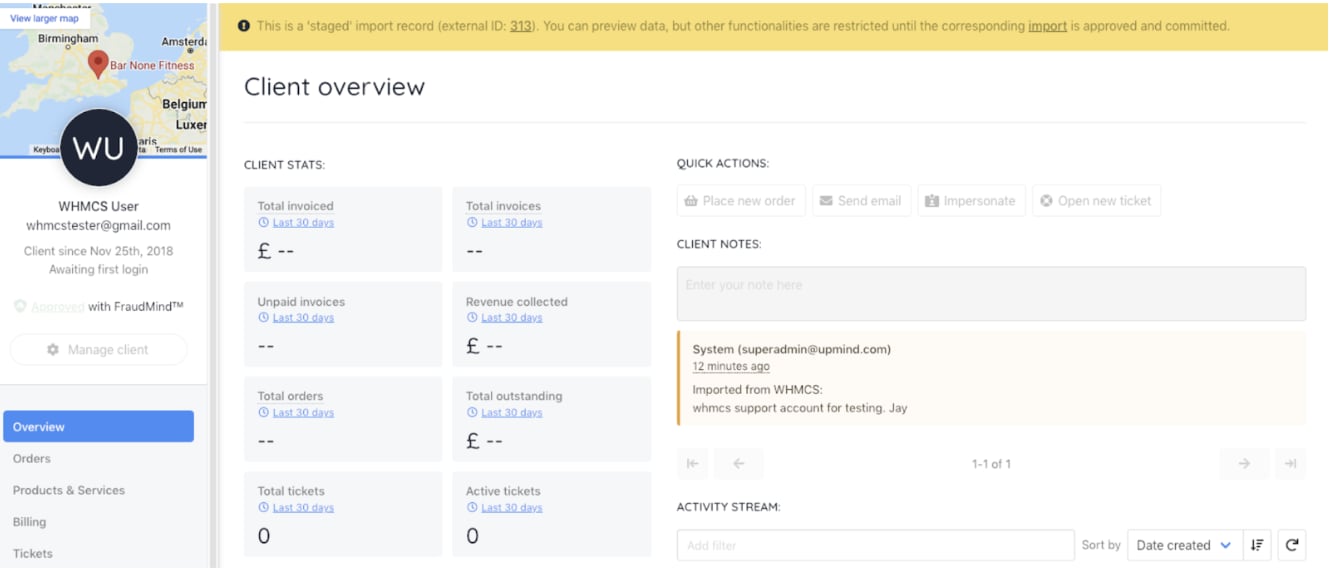
 Once the client's records are imported, you can go to a client profile and view their staged information.
 ### **Affiliate accounts**
Imports activate affiliate accounts, including activations and balances. Affiliate links and referrals must be added manually.
### **Client payment details**
Requires mapping payment providers to those added in the system.
### **Contracts**
Imports current subscriptions and client products. Map provision configurations like servers, suppliers, and domain registrars.
### **Tickets**
Imports WHMCS support tickets. You can optionally map support ticket departments.
## **Previewing and committing data**
After mapping data, you can preview it, but cannot edit or allow client login. Preview helps verify data before committing. If errors appear, cancel the import.
You can commit data once you are happy with the staged import.
## **Best practices**
* Add servers, domain providers, and payment gateways in Upmind before importing to match your current setup and ensure smooth data mapping.
* Always back up your WHMCS database before importing to protect against data loss.
* Disable WHMCS cron jobs and enable maintenance mode during import to avoid conflicts or data changes.
* Keep WHMCS offline after import until you confirm all data is correct in Upmind.
## **Troubleshooting**
| **Issue** | **Solution** |
| ----------------------------------------------------------- | --------------------------------------------------------------------------------------------------------------------------------------------------------------------------------------------------------------------------------------------- |
| My username and password are not correct. | Use the WHMCS Service Identifier and Secret, not the admin password. |
| Why does the import fail with "Malformed UTF-8 characters"? | This usually happens due to bad characters in the hosting account passwords. After backing up, you can remove passwords from the accounts. Upmind doesn't need or store them. This can be done via the interface or directly in the database. |
### **Affiliate accounts**
Imports activate affiliate accounts, including activations and balances. Affiliate links and referrals must be added manually.
### **Client payment details**
Requires mapping payment providers to those added in the system.
### **Contracts**
Imports current subscriptions and client products. Map provision configurations like servers, suppliers, and domain registrars.
### **Tickets**
Imports WHMCS support tickets. You can optionally map support ticket departments.
## **Previewing and committing data**
After mapping data, you can preview it, but cannot edit or allow client login. Preview helps verify data before committing. If errors appear, cancel the import.
You can commit data once you are happy with the staged import.
## **Best practices**
* Add servers, domain providers, and payment gateways in Upmind before importing to match your current setup and ensure smooth data mapping.
* Always back up your WHMCS database before importing to protect against data loss.
* Disable WHMCS cron jobs and enable maintenance mode during import to avoid conflicts or data changes.
* Keep WHMCS offline after import until you confirm all data is correct in Upmind.
## **Troubleshooting**
| **Issue** | **Solution** |
| ----------------------------------------------------------- | --------------------------------------------------------------------------------------------------------------------------------------------------------------------------------------------------------------------------------------------- |
| My username and password are not correct. | Use the WHMCS Service Identifier and Secret, not the admin password. |
| Why does the import fail with "Malformed UTF-8 characters"? | This usually happens due to bad characters in the hosting account passwords. After backing up, you can remove passwords from the accounts. Upmind doesn't need or store them. This can be done via the interface or directly in the database. |