> ## Documentation Index
> Fetch the complete documentation index at: https://docs.upmind.com/llms.txt
> Use this file to discover all available pages before exploring further.
# How to Email a Client
> With a few clicks, you can now send organised and informative emails to your clients easily.
You can send a personalised email to a single client directly from their invoice or order. This is useful for sharing updates, reminders, or custom messages related to a specific transaction.
This guide shows you how to [send a bulk message](https://docs.upmind.com/setup-and-configuration/email-configuring-and-sending/how-to-create-and-send-client-bulk-email-messages) to all or a segment of your contacts.
To select a message recipient, first open an invoice using the **Clients** or **Orders** link from the left-side menu.
## Sending an email from the clients section
1. Log in to your Upmind admin account.
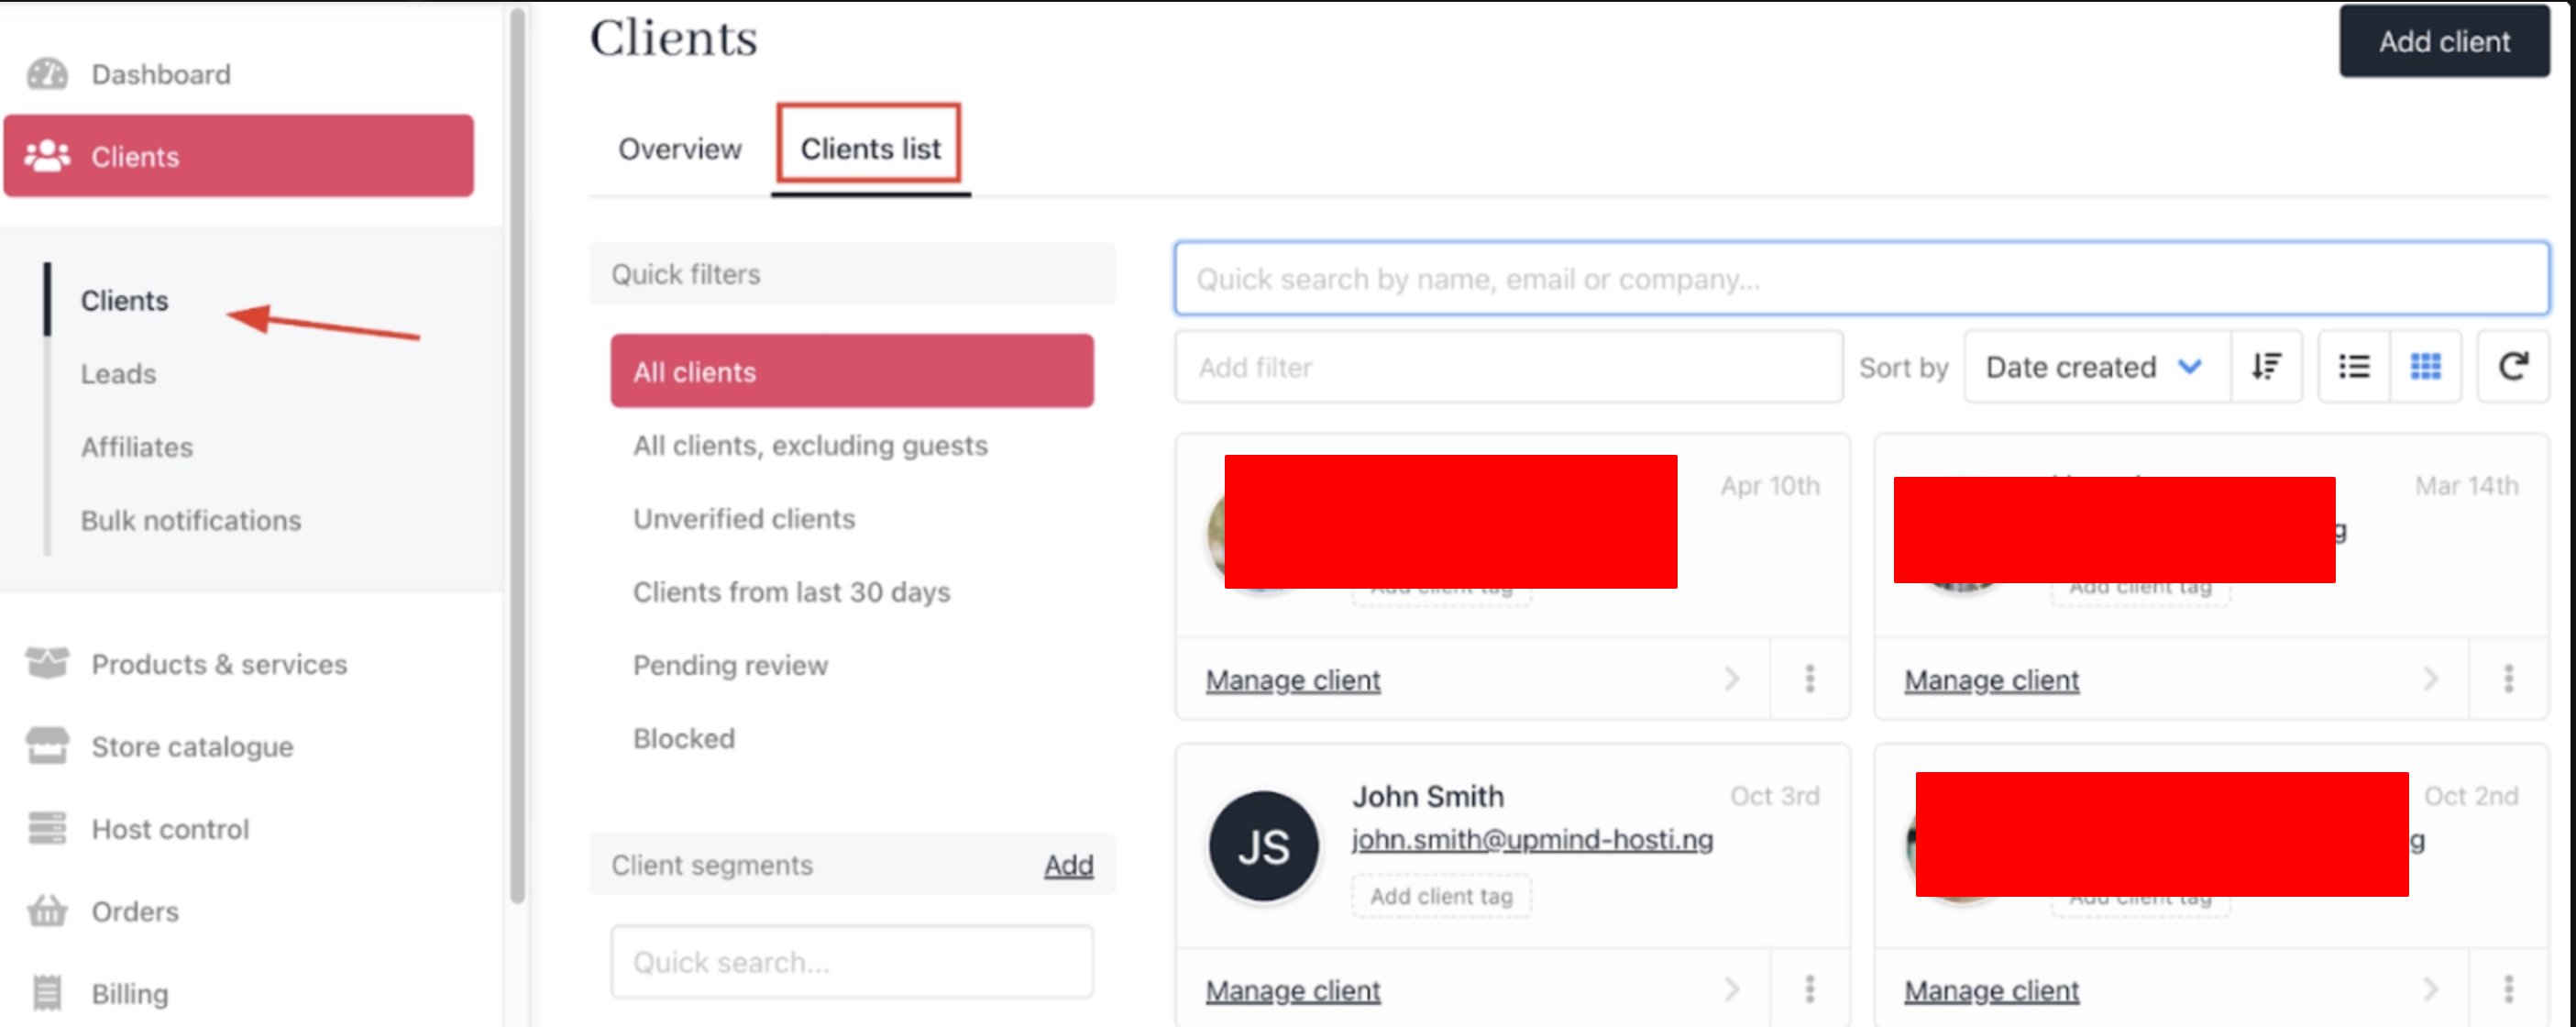
2. Click **Clients** in the left menu.
3. Select the **Clients List** tab.
4. Find and click the client’s name to open their profile.
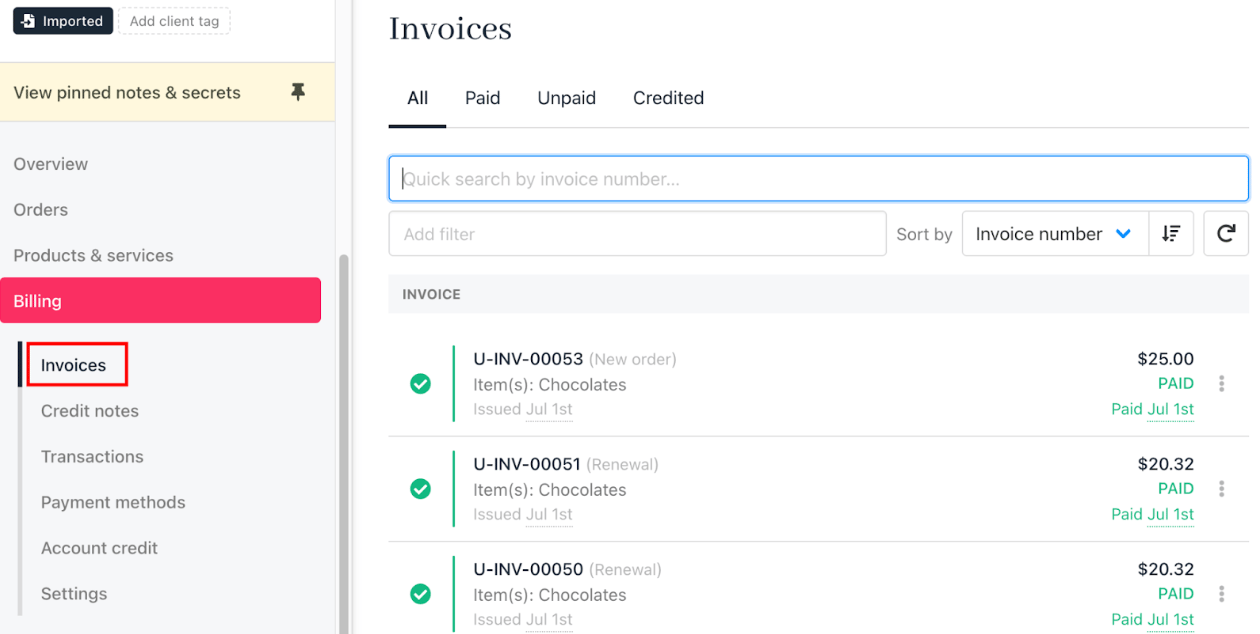
 5. Go to the **Invoices** section and select the relevant invoice.
 6. Scroll down to **Quick Actions** and click **Send email**.
 7. Choose an existing one or create a [new template](https://docs.upmind.com/setup-and-configuration/email-configuring-and-sending/how-to-format-email-templates) for your message. Edit the subject and body as needed, using dynamic fields for personalisation.
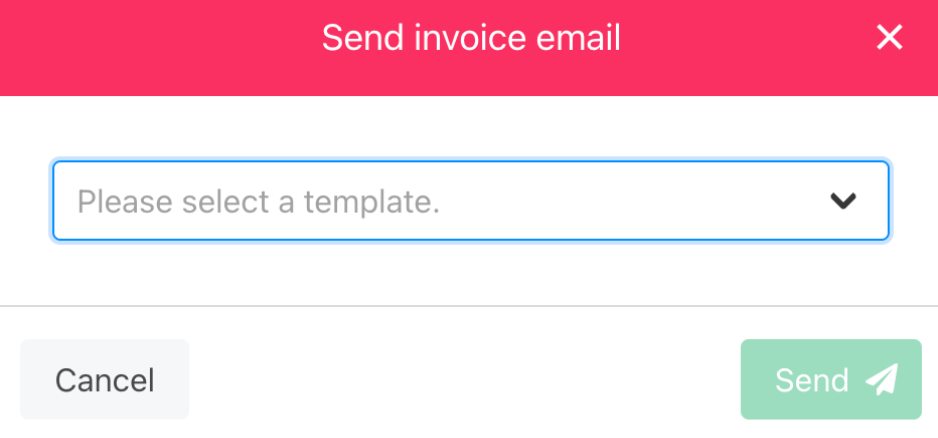 8. Click **Send** to deliver the message.
## Sending an email from the orders section
1. Log in to your Upmind admin account.
2. Click **Orders** in the left menu.
3. Select the **Orders List** tab.
8. Click **Send** to deliver the message.
## Sending an email from the orders section
1. Log in to your Upmind admin account.
2. Click **Orders** in the left menu.
3. Select the **Orders List** tab.
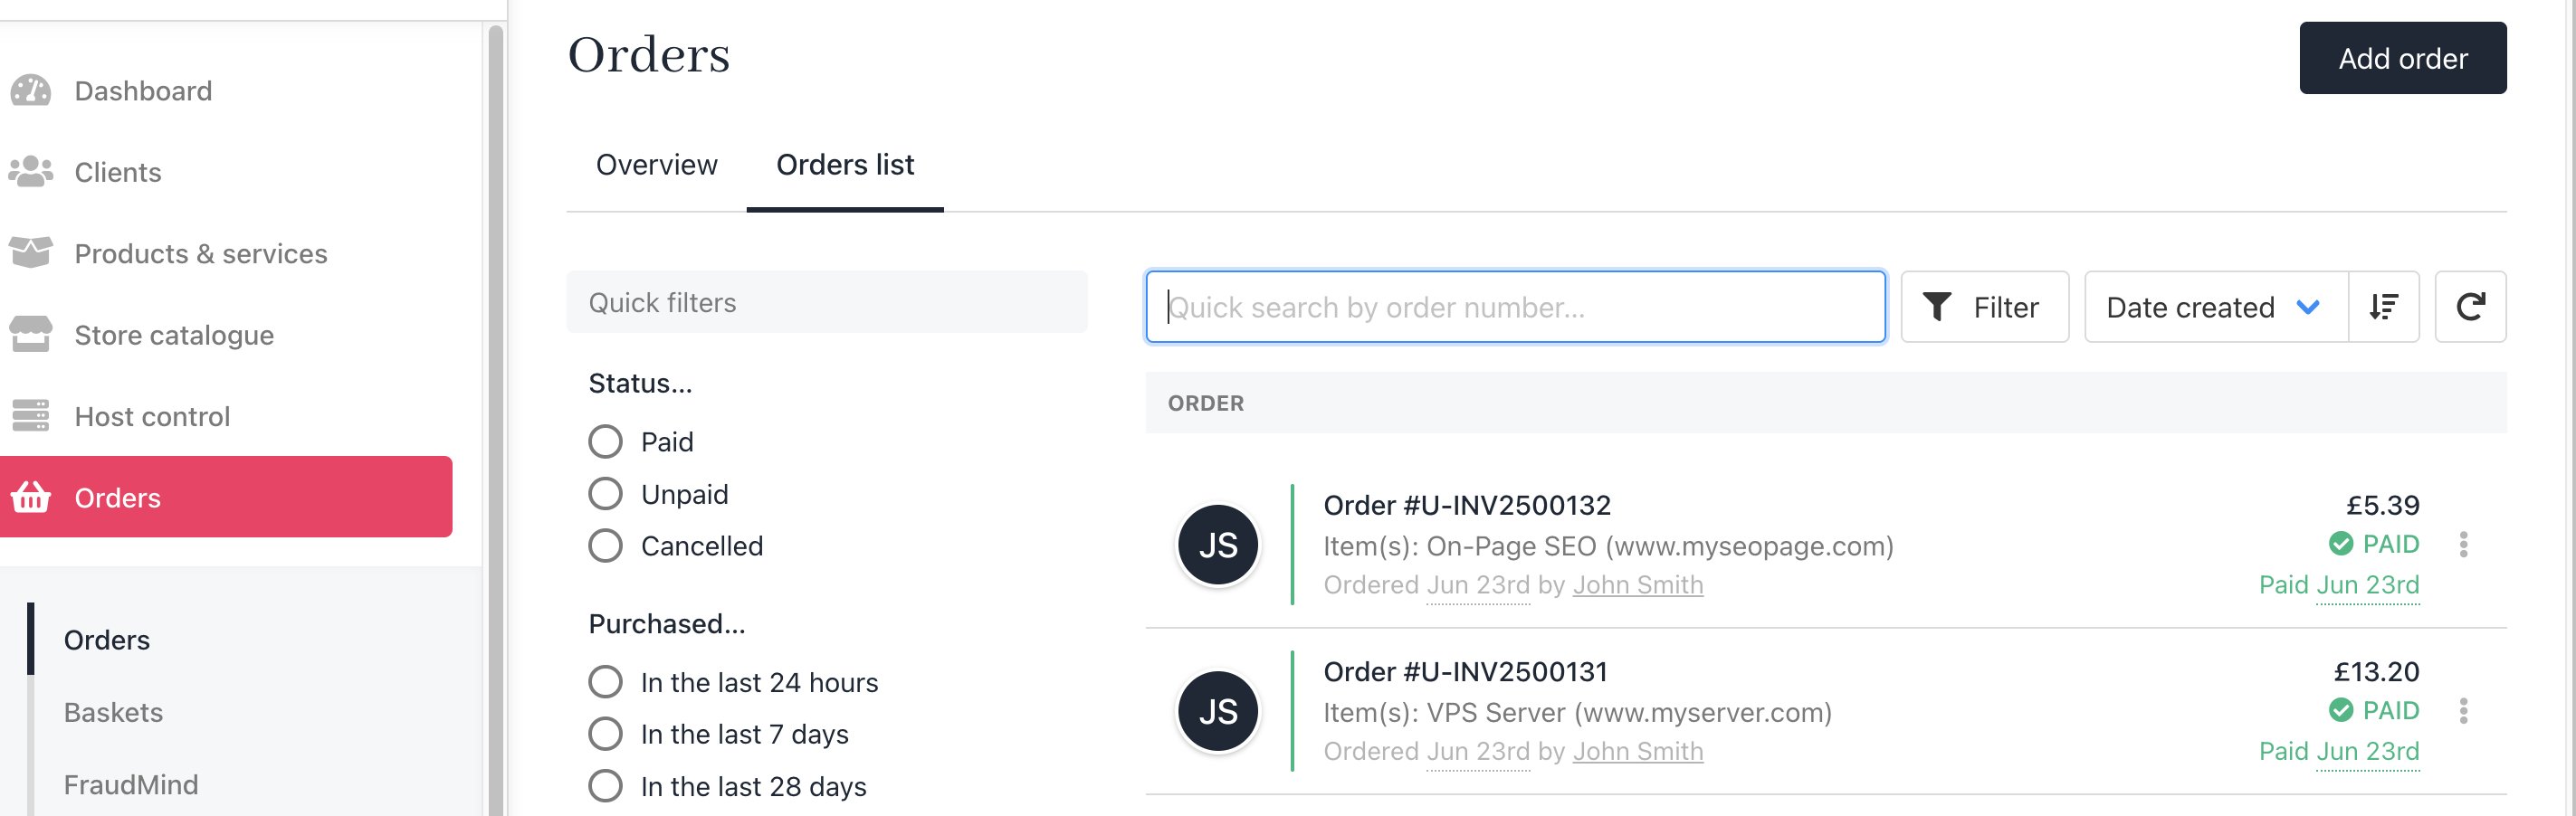 4. Use filters to locate the specific order.
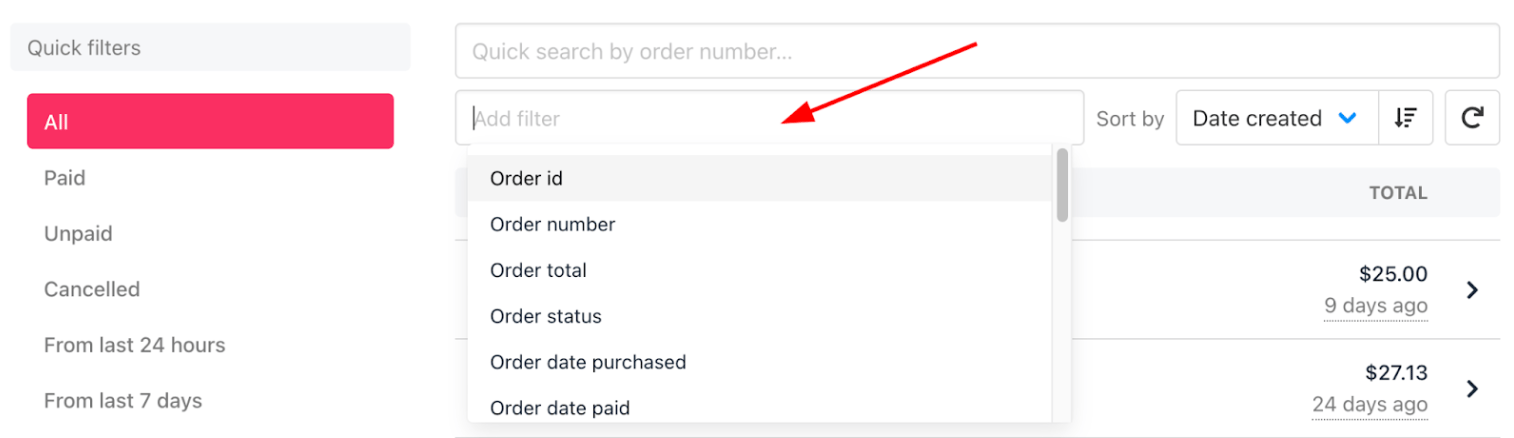 5. Click the order to open its details.
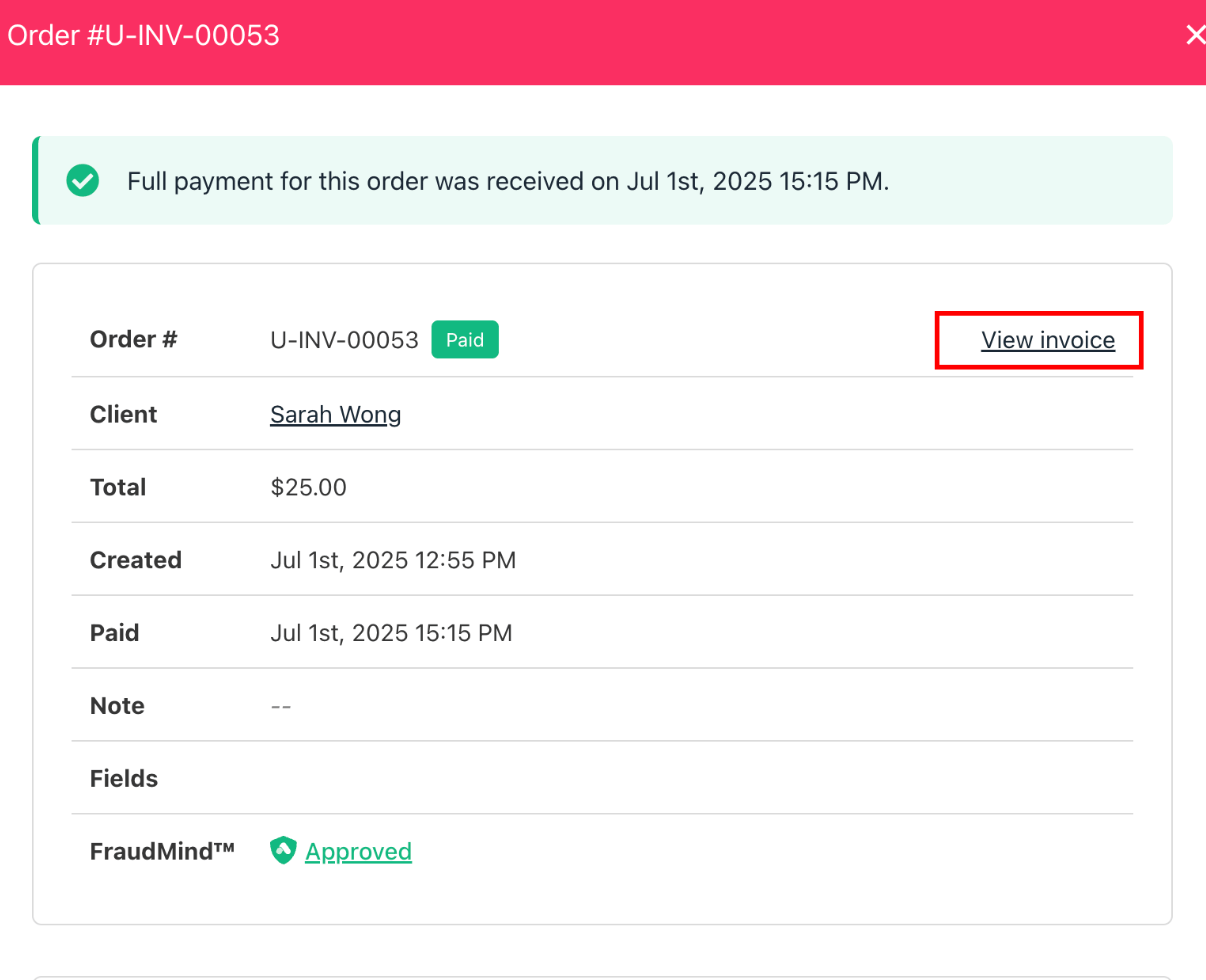
6. Click **View Invoice**.
5. Click the order to open its details.
6. Click **View Invoice**.
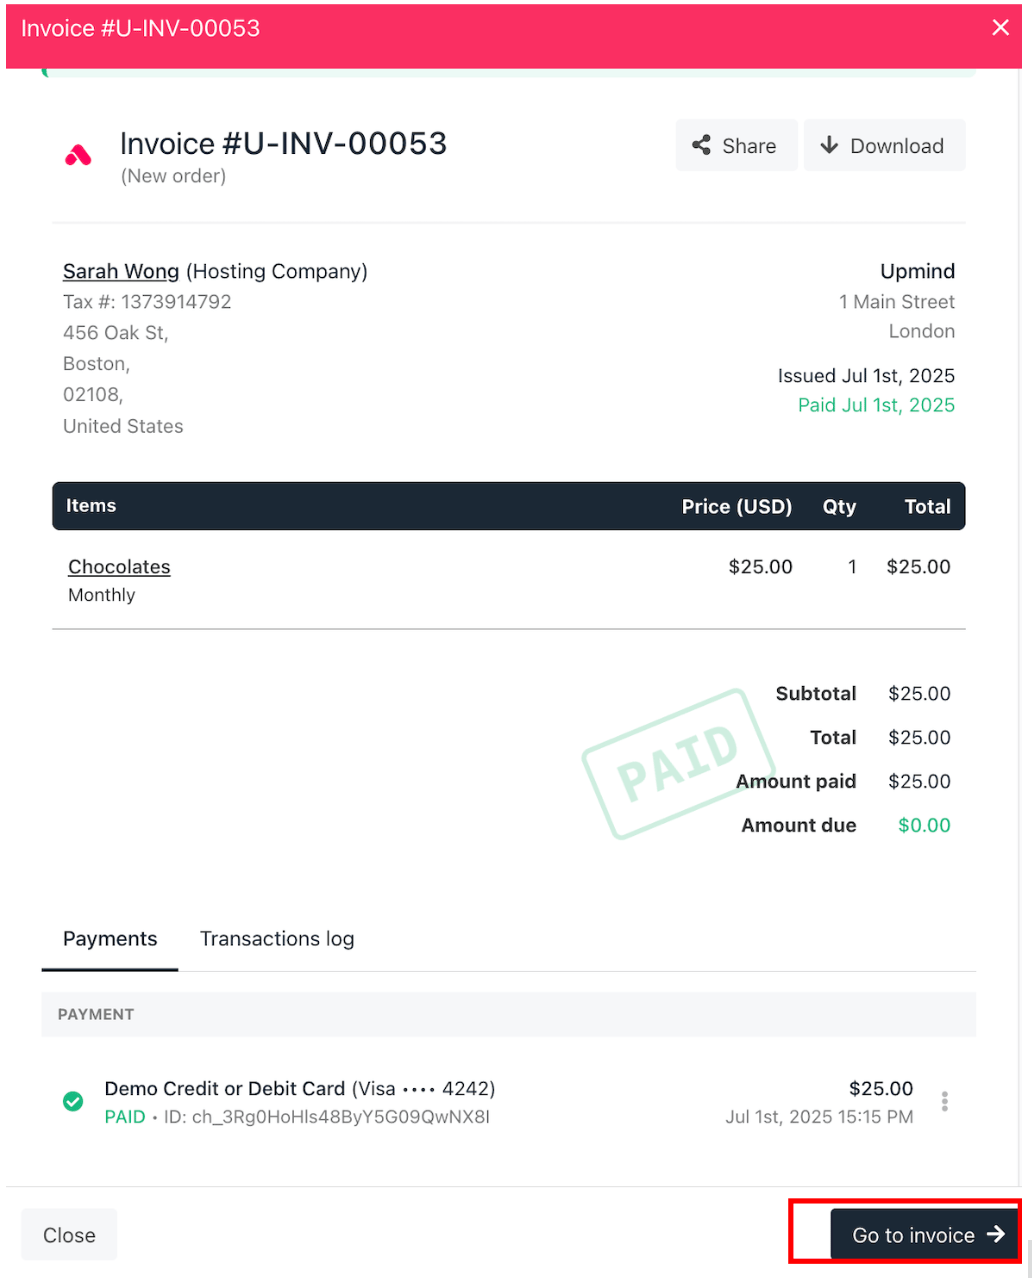
 7. Click **Go to the invoice**.
 8. Scroll down to **Quick Actions** and click **Send email**.
9. Select a template or create a new one, customise as needed, and send.
8. Scroll down to **Quick Actions** and click **Send email**.
9. Select a template or create a new one, customise as needed, and send.