> ## Documentation Index
> Fetch the complete documentation index at: https://docs.upmind.com/llms.txt
> Use this file to discover all available pages before exploring further.

# How to Create and Send Client Bulk Email Messages

> Save time by reusing templates or creating new ones.

You can create and customise email templates to send bulk notifications to all or specific client segments based on parameters like verified account status, guest client, or [<u>fraud status</u>](https://docs.upmind.com/setup-and-configuration/orders-services/fraudmindtm-fraud-prevention-and-security).

Quickly duplicate templates for new messages and use this feature for announcements, marketing, or important updates. For bulk notifications about clients' products and services, refer to the separate [<u>guide</u>](https://docs.upmind.com/setup-and-configuration/email-configuring-and-sending/how-to-create-and-send-product-and-service-bulk-email).

## **Define message recipients**

1. Log in to Upmind Admin.
2. Go to **Clients** in the left menu.
3. Select **Bulk Notifications**.
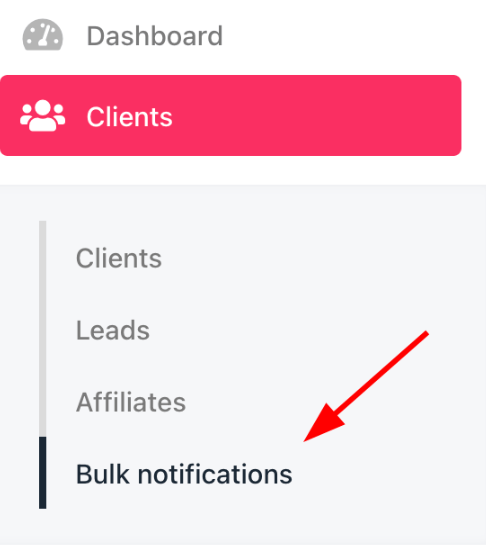
<Frame caption="Bulk notifications">
  <img src="https://mintcdn.com/upmind/FQ1NhxALxjSHvvWW/images/fb/aca8538097e2c40b.png?fit=max&auto=format&n=FQ1NhxALxjSHvvWW&q=85&s=1086b8f9dac60d99033f6a838c8687d3" alt="Bulk notifications" className="mx-auto" style={{ width:"68%" }} width="486" height="550" data-path="images/fb/aca8538097e2c40b.png" />

  <img src="https://mintcdn.com/upmind/FQ1NhxALxjSHvvWW/images/fb/aca8538097e2c40b.png?fit=max&auto=format&n=FQ1NhxALxjSHvvWW&q=85&s=1086b8f9dac60d99033f6a838c8687d3" alt="Bulk notifications" className="mx-auto" style={{ width:"68%" }} width="486" height="550" data-path="images/fb/aca8538097e2c40b.png" />
</Frame>

4. Click **Add Bulk Action**.
5. Enter a name for the bulk action.
6. Click the **Segment** field to choose:
   1. All clients (default)
   2. An existing segment
   3. Create a new segment
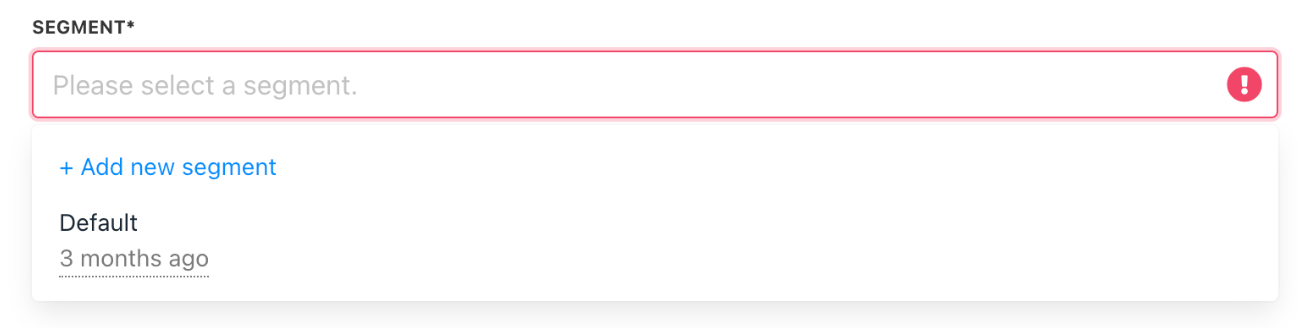
<Frame caption="Choose a segment">
  <img src="https://mintcdn.com/upmind/wRuKrNY12tQZY8Rr/images/fb/374a06f4aabc3e7e.png?fit=max&auto=format&n=wRuKrNY12tQZY8Rr&q=85&s=7ea45e8faca3459368fe5f52421c7bea" alt="Choose a segment" className="mx-auto" style={{ width:"98%" }} width="1298" height="328" data-path="images/fb/374a06f4aabc3e7e.png" />

  <img src="https://mintcdn.com/upmind/wRuKrNY12tQZY8Rr/images/fb/374a06f4aabc3e7e.png?fit=max&auto=format&n=wRuKrNY12tQZY8Rr&q=85&s=7ea45e8faca3459368fe5f52421c7bea" alt="Choose a segment" className="mx-auto" style={{ width:"98%" }} width="1298" height="328" data-path="images/fb/374a06f4aabc3e7e.png" />
</Frame>

## **Creating a new segment**

1. Select **Add New Segment**.

<Frame caption="Add new segment">
  <img src="https://mintcdn.com/upmind/ZsIo0APxdVb_gFS-/images/fb/240dd8f1e92aef8f.png?fit=max&auto=format&n=ZsIo0APxdVb_gFS-&q=85&s=5ceaeddd5e955d72c751d6be2ba7bf8b" alt="Add new segment" className="mx-auto" style={{ width:"99%" }} width="1376" height="212" data-path="images/fb/240dd8f1e92aef8f.png" />

  <img src="https://mintcdn.com/upmind/ZsIo0APxdVb_gFS-/images/fb/240dd8f1e92aef8f.png?fit=max&auto=format&n=ZsIo0APxdVb_gFS-&q=85&s=5ceaeddd5e955d72c751d6be2ba7bf8b" alt="Add new segment" className="mx-auto" style={{ width:"99%" }} width="1376" height="212" data-path="images/fb/240dd8f1e92aef8f.png" />
</Frame>

2. Enter a segment name.
3. Set **Segment Parameters** (e.g., Verified, Guest, Fraud status).
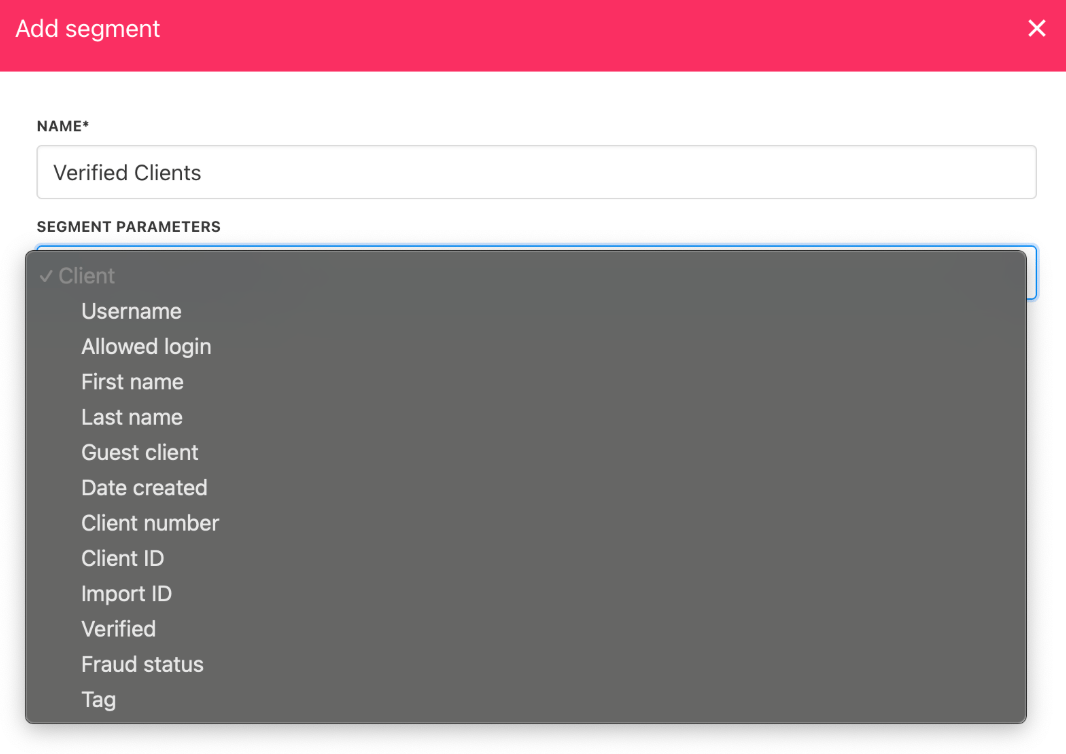
<Frame caption="Segment parameters">
  <img src="https://mintcdn.com/upmind/Dgjmf3QWYVBR40cE/images/fb/5f6375ecbfe1516c.png?fit=max&auto=format&n=Dgjmf3QWYVBR40cE&q=85&s=a29521c3694d4bf24b96003883d41793" alt="Segment parameters" className="mx-auto" style={{ width:"97%" }} width="1066" height="754" data-path="images/fb/5f6375ecbfe1516c.png" />

  <img src="https://mintcdn.com/upmind/Dgjmf3QWYVBR40cE/images/fb/5f6375ecbfe1516c.png?fit=max&auto=format&n=Dgjmf3QWYVBR40cE&q=85&s=a29521c3694d4bf24b96003883d41793" alt="Segment parameters" className="mx-auto" style={{ width:"97%" }} width="1066" height="754" data-path="images/fb/5f6375ecbfe1516c.png" />
</Frame>

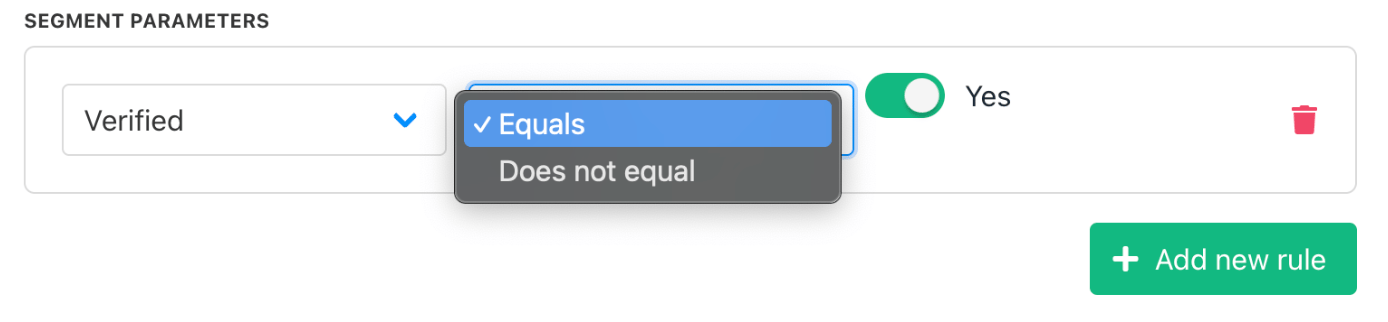
<Frame caption="Add rules">
  <img src="https://mintcdn.com/upmind/kXD0Ya8PpcxxNm6Q/images/fb/3dbbb8e73c52ea99.png?fit=max&auto=format&n=kXD0Ya8PpcxxNm6Q&q=85&s=62f67723519ed9b5d5344ba9ec012dac" alt="Add rules" className="mx-auto" style={{ width:"95%" }} width="1388" height="322" data-path="images/fb/3dbbb8e73c52ea99.png" />

  <img src="https://mintcdn.com/upmind/kXD0Ya8PpcxxNm6Q/images/fb/3dbbb8e73c52ea99.png?fit=max&auto=format&n=kXD0Ya8PpcxxNm6Q&q=85&s=62f67723519ed9b5d5344ba9ec012dac" alt="Add rules" className="mx-auto" style={{ width:"95%" }} width="1388" height="322" data-path="images/fb/3dbbb8e73c52ea99.png" />
</Frame>

4. Add rules to refine your segment.
5. Click **Create**.

## **Attach an existing template**

1. Click the template field.
2. Select a template.
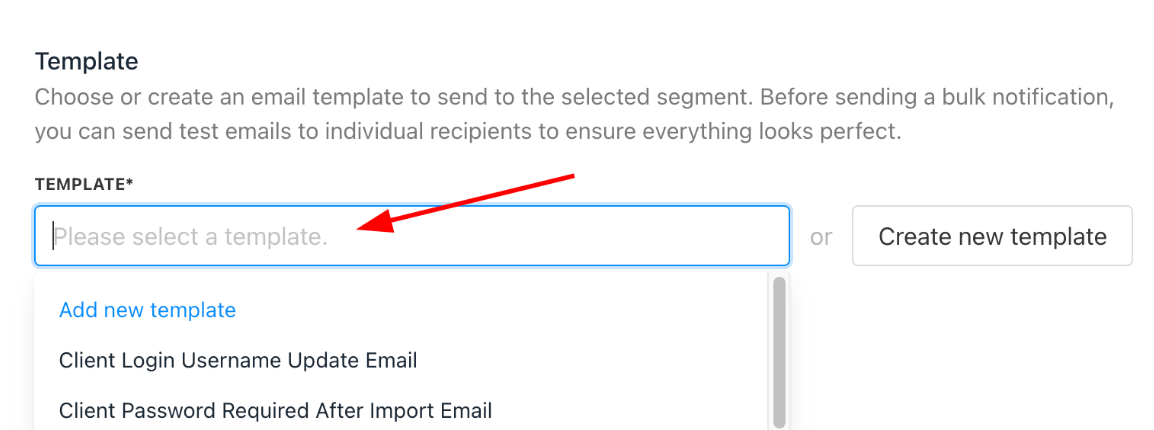
<Frame caption="Add existing template">
  <img src="https://mintcdn.com/upmind/6knUVC8F1nK4E5CY/images/fb/c6e34291f72df76f.png?fit=max&auto=format&n=6knUVC8F1nK4E5CY&q=85&s=81ffb8d03bb78b98d0343160f4151d59" alt="Add existing template" className="mx-auto" style={{ width:"97%" }} width="1154" height="430" data-path="images/fb/c6e34291f72df76f.png" />

  <img src="https://mintcdn.com/upmind/6knUVC8F1nK4E5CY/images/fb/c6e34291f72df76f.png?fit=max&auto=format&n=6knUVC8F1nK4E5CY&q=85&s=81ffb8d03bb78b98d0343160f4151d59" alt="Add existing template" className="mx-auto" style={{ width:"97%" }} width="1154" height="430" data-path="images/fb/c6e34291f72df76f.png" />
</Frame>

3. Modify text or code snippets if needed.
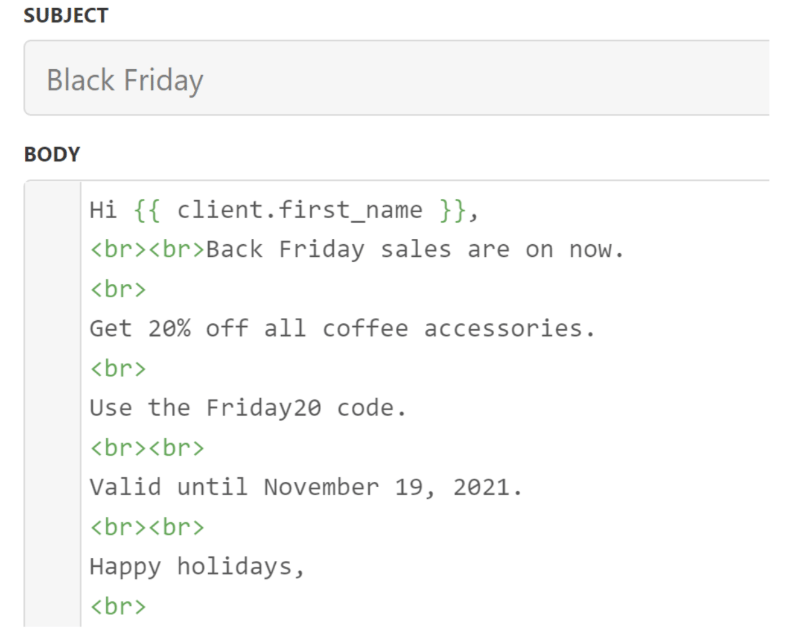
<Frame caption="Modify existing text">
  <img src="https://mintcdn.com/upmind/bPO2bBzOxYQR4tYr/images/fb/fd792f16a05abbe9.png?fit=max&auto=format&n=bPO2bBzOxYQR4tYr&q=85&s=e6198d55affe647978ac0b8d233702f1" alt="Modify existing text" className="mx-auto" style={{ width:"75%" }} width="790" height="634" data-path="images/fb/fd792f16a05abbe9.png" />

  <img src="https://mintcdn.com/upmind/bPO2bBzOxYQR4tYr/images/fb/fd792f16a05abbe9.png?fit=max&auto=format&n=bPO2bBzOxYQR4tYr&q=85&s=e6198d55affe647978ac0b8d233702f1" alt="Modify existing text" className="mx-auto" style={{ width:"75%" }} width="790" height="634" data-path="images/fb/fd792f16a05abbe9.png" />
</Frame>

4. Click **Save**.

Upmind displays the message on the `Client bulk notifications` page.
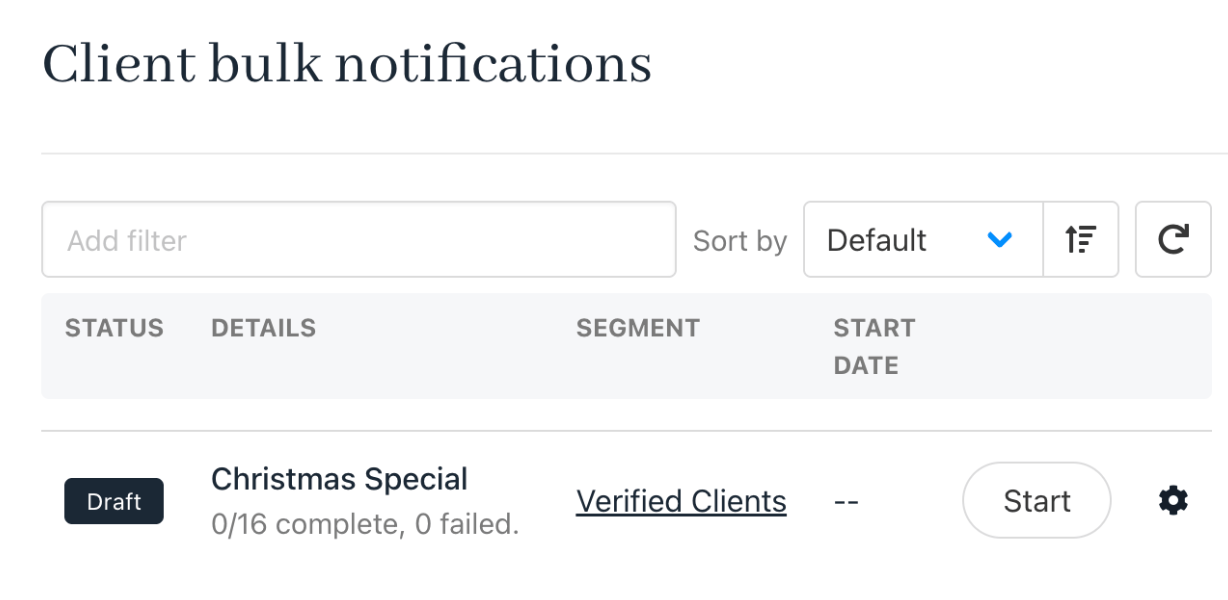
<Frame caption="Client bulk notifications">
  <img src="https://mintcdn.com/upmind/VnCXiz5rboywDnvn/images/fb/d8986d713753214f.png?fit=max&auto=format&n=VnCXiz5rboywDnvn&q=85&s=49a8b80a78ec4974c74ce367540c9881" alt="Client bulk notifications" className="mx-auto" style={{ width:"89%" }} width="1228" height="600" data-path="images/fb/d8986d713753214f.png" />

  <img src="https://mintcdn.com/upmind/VnCXiz5rboywDnvn/images/fb/d8986d713753214f.png?fit=max&auto=format&n=VnCXiz5rboywDnvn&q=85&s=49a8b80a78ec4974c74ce367540c9881" alt="Client bulk notifications" className="mx-auto" style={{ width:"89%" }} width="1228" height="600" data-path="images/fb/d8986d713753214f.png" />
</Frame>

## **Create a new template**

1. Click **Create Template**.
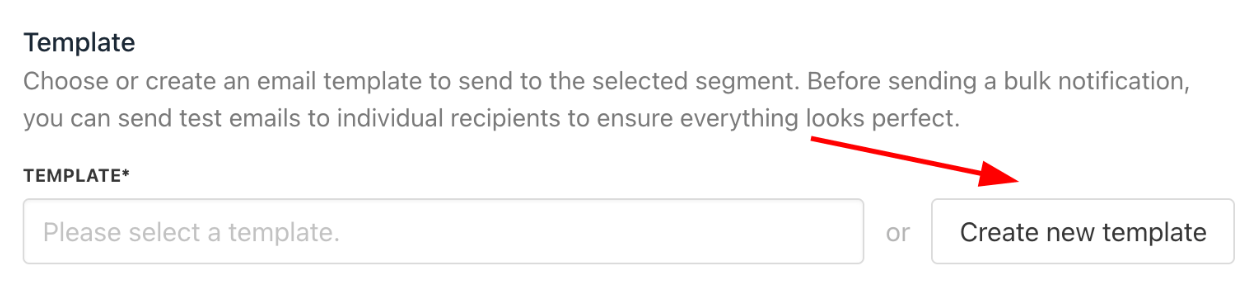
<Frame caption="Create new template">
  <img src="https://mintcdn.com/upmind/kXD0Ya8PpcxxNm6Q/images/fb/3da2b58c5a9ec0a3.png?fit=max&auto=format&n=kXD0Ya8PpcxxNm6Q&q=85&s=8991b6f9ddfa4ff9aeb16f5485abcbf7" alt="Create new template" className="mx-auto" style={{ width:"98%" }} width="1260" height="302" data-path="images/fb/3da2b58c5a9ec0a3.png" />

  <img src="https://mintcdn.com/upmind/kXD0Ya8PpcxxNm6Q/images/fb/3da2b58c5a9ec0a3.png?fit=max&auto=format&n=kXD0Ya8PpcxxNm6Q&q=85&s=8991b6f9ddfa4ff9aeb16f5485abcbf7" alt="Create new template" className="mx-auto" style={{ width:"98%" }} width="1260" height="302" data-path="images/fb/3da2b58c5a9ec0a3.png" />
</Frame>

2. Enter a template name.
3. Choose the recipient type.
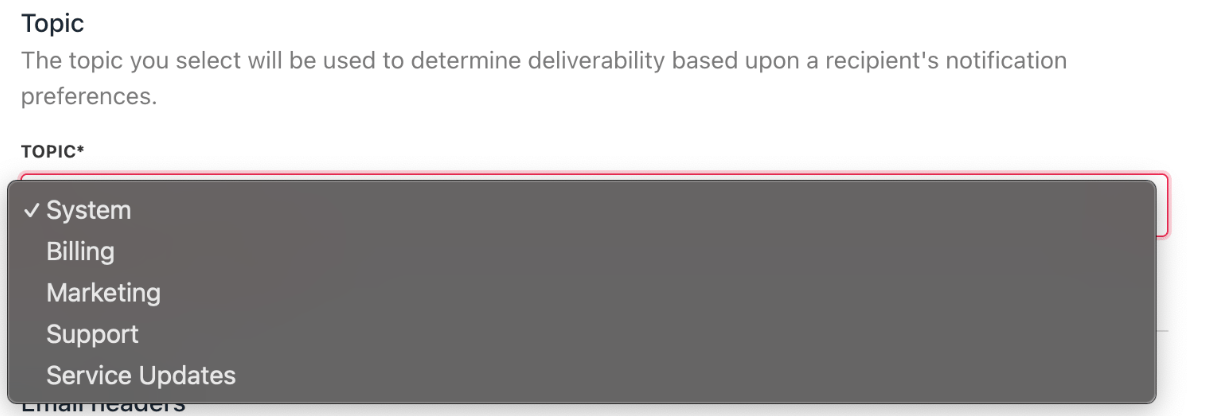
<Frame caption="Choose the recipient type to notify">
  <img src="https://mintcdn.com/upmind/kXD0Ya8PpcxxNm6Q/images/fb/3d762e9072e7c936.png?fit=max&auto=format&n=kXD0Ya8PpcxxNm6Q&q=85&s=1dc92b09b478ae59bb19e57a86a02612" alt="Choose the recipient type to notify" className="mx-auto" style={{ width:"98%" }} width="1218" height="416" data-path="images/fb/3d762e9072e7c936.png" />

  <img src="https://mintcdn.com/upmind/kXD0Ya8PpcxxNm6Q/images/fb/3d762e9072e7c936.png?fit=max&auto=format&n=kXD0Ya8PpcxxNm6Q&q=85&s=1dc92b09b478ae59bb19e57a86a02612" alt="Choose the recipient type to notify" className="mx-auto" style={{ width:"98%" }} width="1218" height="416" data-path="images/fb/3d762e9072e7c936.png" />
</Frame>

4. Fill in the **Subject** and **Body** fields.

## **Adding dynamic fields**

Code snippets dynamically insert content into emails when opened by the recipient.

To insert a snippet:

1. Click a menu tab to view available snippets. Each tab contains a distinct collection of related code snippets.
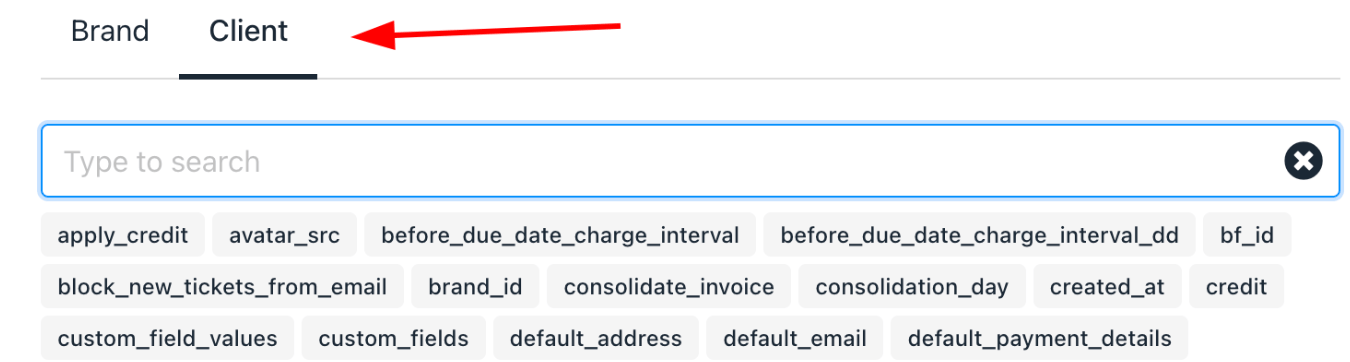
<Frame caption="Click a menu tab">
  <img src="https://mintcdn.com/upmind/z5ofg3t7by4uN44v/images/fb/ed21abc3684c8100.png?fit=max&auto=format&n=z5ofg3t7by4uN44v&q=85&s=9a27295744f35db9977def19f241cb95" alt="Click a menu tab" className="mx-auto" style={{ width:"98%" }} width="1350" height="362" data-path="images/fb/ed21abc3684c8100.png" />

  <img src="https://mintcdn.com/upmind/z5ofg3t7by4uN44v/images/fb/ed21abc3684c8100.png?fit=max&auto=format&n=z5ofg3t7by4uN44v&q=85&s=9a27295744f35db9977def19f241cb95" alt="Click a menu tab" className="mx-auto" style={{ width:"98%" }} width="1350" height="362" data-path="images/fb/ed21abc3684c8100.png" />
</Frame>

<Note>
  Learn more about [<u>template syntax</u>](https://upmind.featurebase.app/help/articles/5591991-how-to-format-email-templates).
</Note>

2. Copy and paste snippets into the template.
3. Use HTML for formatting.
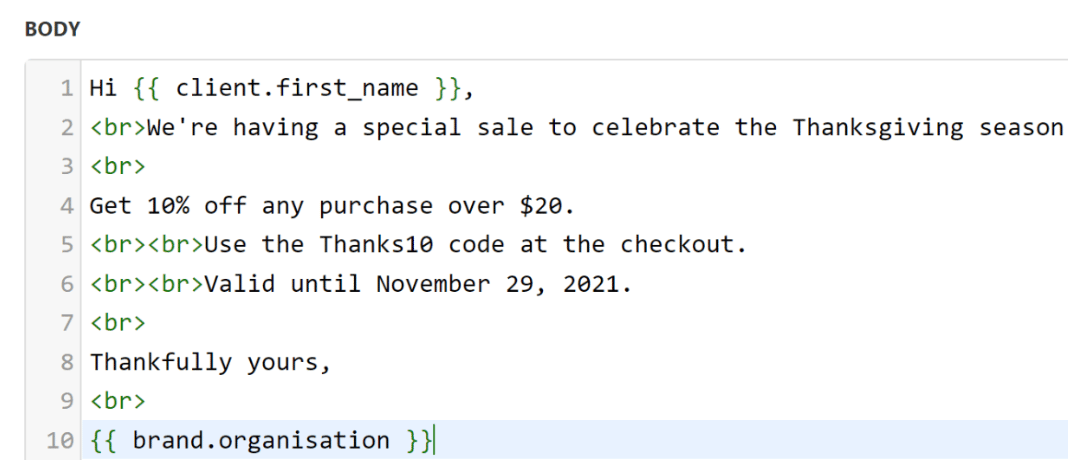
<Frame caption="Paste the code into the template">
  <img src="https://mintcdn.com/upmind/92wYnpdR_k6AjH3x/images/fb/59a1c60754736e3e.png?fit=max&auto=format&n=92wYnpdR_k6AjH3x&q=85&s=070fb9045ab12d3ed957923774bd477d" alt="Paste the code into the template" className="mx-auto" style={{ width:"98%" }} width="1068" height="460" data-path="images/fb/59a1c60754736e3e.png" />

  <img src="https://mintcdn.com/upmind/92wYnpdR_k6AjH3x/images/fb/59a1c60754736e3e.png?fit=max&auto=format&n=92wYnpdR_k6AjH3x&q=85&s=070fb9045ab12d3ed957923774bd477d" alt="Paste the code into the template" className="mx-auto" style={{ width:"98%" }} width="1068" height="460" data-path="images/fb/59a1c60754736e3e.png" />
</Frame>

<Note>
  Email templates are built with [<u>Twig code</u>](https://twig.symfony.com/).
</Note>

4. Click **Save**.

## **Edit bulk messages**

1. Go to the **Client Bulk Actions** page
2. Select a message
3. Update as needed.
4. Click **Save**.

## **Delete bulk messages**

1. Click the gear icon next to the message.
2. Select **Delete**.
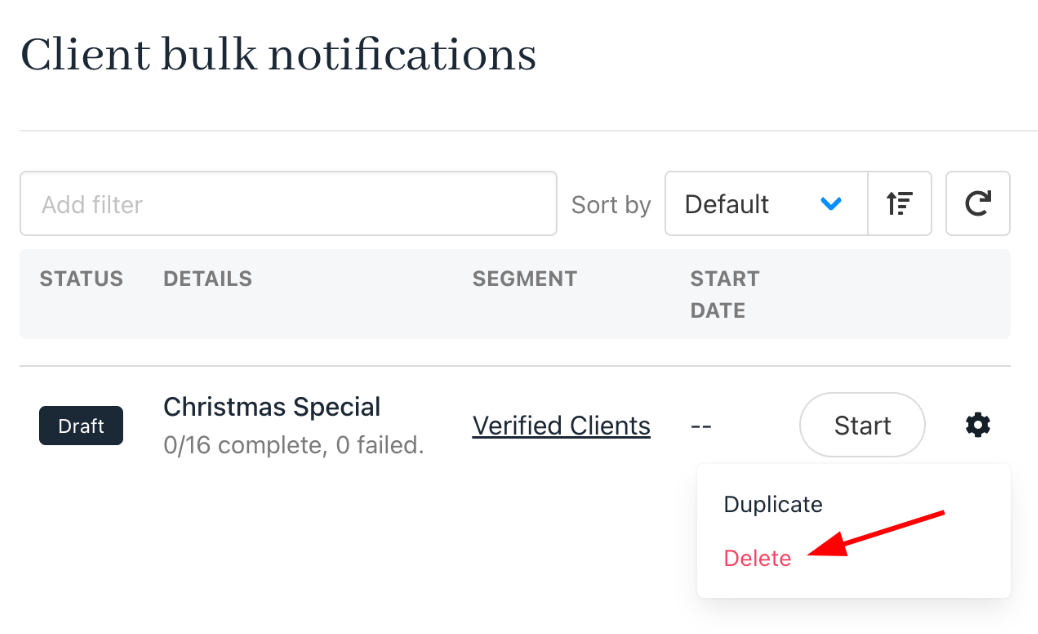
<Frame caption="Delete a message">
  <img src="https://mintcdn.com/upmind/A-RwNPXmK_xnEEqe/images/fb/7a486de167a86c50.png?fit=max&auto=format&n=A-RwNPXmK_xnEEqe&q=85&s=c19de97a9e0a54eab119a2171685af80" alt="Delete a message" className="mx-auto" style={{ width:"90%" }} width="1038" height="634" data-path="images/fb/7a486de167a86c50.png" />

  <img src="https://mintcdn.com/upmind/A-RwNPXmK_xnEEqe/images/fb/7a486de167a86c50.png?fit=max&auto=format&n=A-RwNPXmK_xnEEqe&q=85&s=c19de97a9e0a54eab119a2171685af80" alt="Delete a message" className="mx-auto" style={{ width:"90%" }} width="1038" height="634" data-path="images/fb/7a486de167a86c50.png" />
</Frame>

## **Send or schedule bulk messages**

1. On the **Client Bulk Actions** page
2. Find your message.
3. Click **Start**.

<Frame caption="Click start">
  <img src="https://mintcdn.com/upmind/pcUdSuxUJ6LgBXnd/images/fb/a2e243d20bc9c686.png?fit=max&auto=format&n=pcUdSuxUJ6LgBXnd&q=85&s=e7df595de87cbac1d0ab90c5c6583896" alt="Click start" className="mx-auto" style={{ width:"97%" }} width="1378" height="222" data-path="images/fb/a2e243d20bc9c686.png" />

  <img src="https://mintcdn.com/upmind/pcUdSuxUJ6LgBXnd/images/fb/a2e243d20bc9c686.png?fit=max&auto=format&n=pcUdSuxUJ6LgBXnd&q=85&s=e7df595de87cbac1d0ab90c5c6583896" alt="Click start" className="mx-auto" style={{ width:"97%" }} width="1378" height="222" data-path="images/fb/a2e243d20bc9c686.png" />
</Frame>

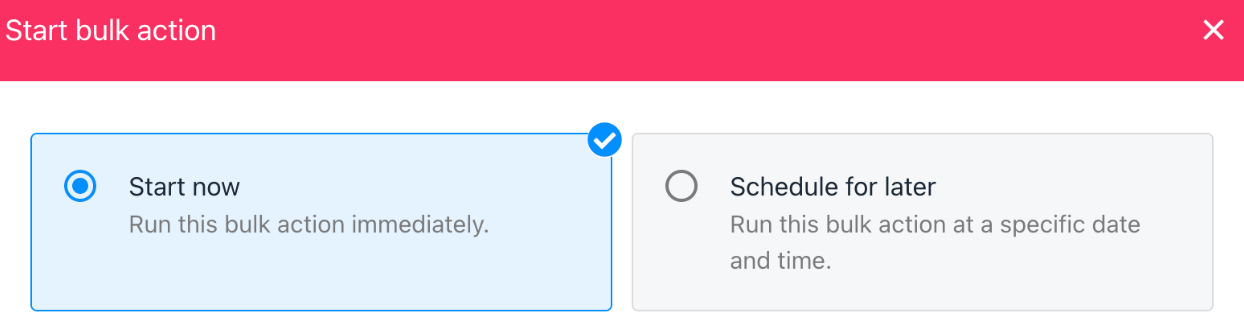
4. Choose **Start Now** to send immediately, or **Schedule for Later** to pick a date and time.
<Frame caption="Choose start now or schedule for later">
  <img src="https://mintcdn.com/upmind/JUoAg6onJmXk_-rR/images/fb/e7f7f92d14a48957.png?fit=max&auto=format&n=JUoAg6onJmXk_-rR&q=85&s=325d47f1b320d449e508e94b2769c42b" alt="Choose start now or schedule for later" className="mx-auto" style={{ width:"97%" }} width="1244" height="334" data-path="images/fb/e7f7f92d14a48957.png" />

  <img src="https://mintcdn.com/upmind/JUoAg6onJmXk_-rR/images/fb/e7f7f92d14a48957.png?fit=max&auto=format&n=JUoAg6onJmXk_-rR&q=85&s=325d47f1b320d449e508e94b2769c42b" alt="Choose start now or schedule for later" className="mx-auto" style={{ width:"97%" }} width="1244" height="334" data-path="images/fb/e7f7f92d14a48957.png" />
</Frame>

## **Review results**

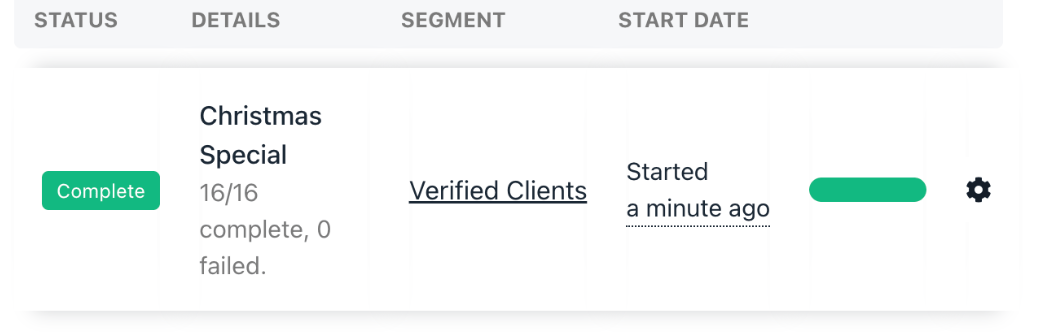
Upmind displays email results on the `Client bulk actions` page. You can view delivery statistics, segment info, and template details when you click on a bulk message.
<Frame caption="Email results displayed">
  <img src="https://mintcdn.com/upmind/JUoAg6onJmXk_-rR/images/fb/e795ac5b58e7e2ca.png?fit=max&auto=format&n=JUoAg6onJmXk_-rR&q=85&s=36582c5e8ac4022a3a905813e1a96825" alt="Email results displayed" className="mx-auto" style={{ width:"96%" }} width="1042" height="332" data-path="images/fb/e795ac5b58e7e2ca.png" />

  <img src="https://mintcdn.com/upmind/JUoAg6onJmXk_-rR/images/fb/e795ac5b58e7e2ca.png?fit=max&auto=format&n=JUoAg6onJmXk_-rR&q=85&s=36582c5e8ac4022a3a905813e1a96825" alt="Email results displayed" className="mx-auto" style={{ width:"96%" }} width="1042" height="332" data-path="images/fb/e795ac5b58e7e2ca.png" />
</Frame>