> ## Documentation Index
> Fetch the complete documentation index at: https://docs.upmind.com/llms.txt
> Use this file to discover all available pages before exploring further.
# How does Email work in Upmind
> How incoming/outgoing email works in Upmind to configure your web host to send email messages with the Upmind name and branding.
Upmind provides integrated email management for handling both outgoing communications and incoming support requests. This guide covers how to:
1. **Set up default and custom outbound email**
2. **Connect your own external SMTP mailbox**
3. **Send bulk email through Upmind**
4. **Configure incoming email piping**
You can learn how to format your email templates in text, HTML, and snippets of Twig code from this [guide](https://docs.upmind.com/setup-and-configuration/email-configuring-and-sending/how-to-format-email-templates).
## Outgoing email
This section covers all transactional, bulk, and manual emails sent from Upmind to customers, leads, and staff.
### Default email configuration
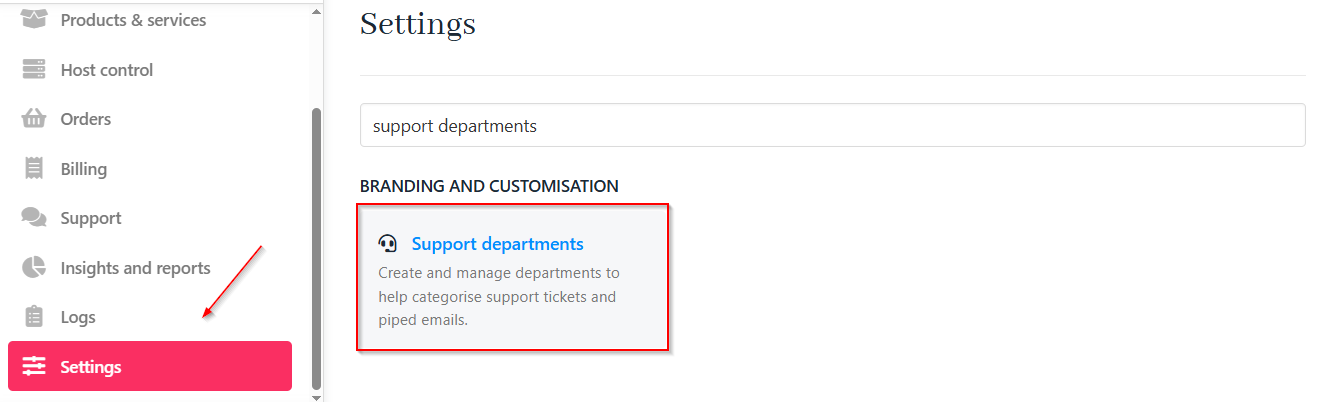
Once registered, you can create a default `support department email` (e.g., `support@randomstring.upmind.app`). This can be accessed from **Settings** > **Support Departments** under **Branding and Customisation**.
 Upmind utilises **Amazon SES** to send all transactional, event-based, and manual emails, including invoices, password resets, and ticket notifications, ensuring excellent deliverability.
New accounts have sending limits to protect sender reputation, which gradually increase as activity grows. You can also create additional support department emails, such as `support@randomstring.upmind.app`, if needed.
### Adding a custom SMTP server
Upmind can send emails through your own SMTP-enabled mail server, including third-party providers like **Mailgun**, **MailChannels**, or **SpamXperts**.
To configure your custom mailserver:
1. Navigate to **Settings** > **Notification Channels** under **Automation**.
Upmind utilises **Amazon SES** to send all transactional, event-based, and manual emails, including invoices, password resets, and ticket notifications, ensuring excellent deliverability.
New accounts have sending limits to protect sender reputation, which gradually increase as activity grows. You can also create additional support department emails, such as `support@randomstring.upmind.app`, if needed.
### Adding a custom SMTP server
Upmind can send emails through your own SMTP-enabled mail server, including third-party providers like **Mailgun**, **MailChannels**, or **SpamXperts**.
To configure your custom mailserver:
1. Navigate to **Settings** > **Notification Channels** under **Automation**.
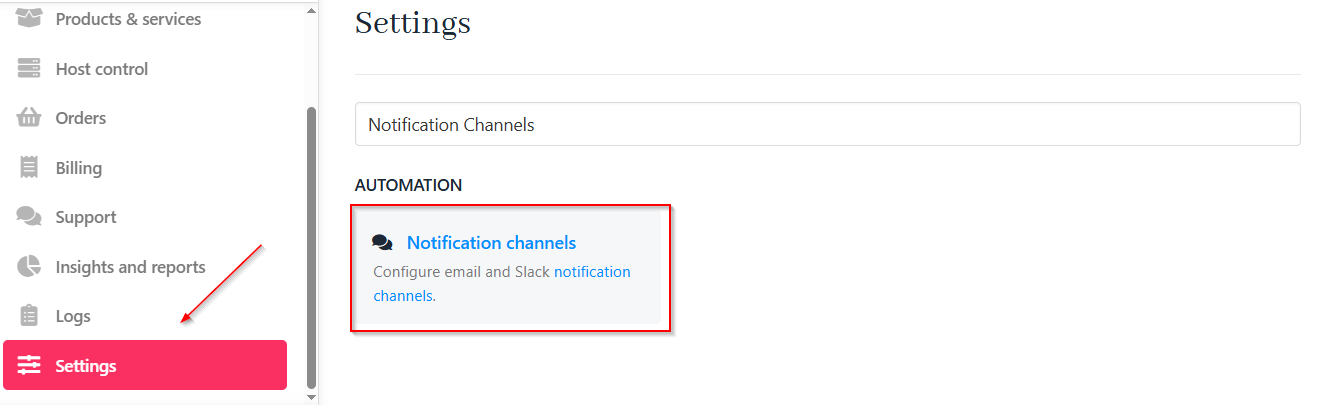 2. Under `Email Channel`, select **Use Custom SMTP**.
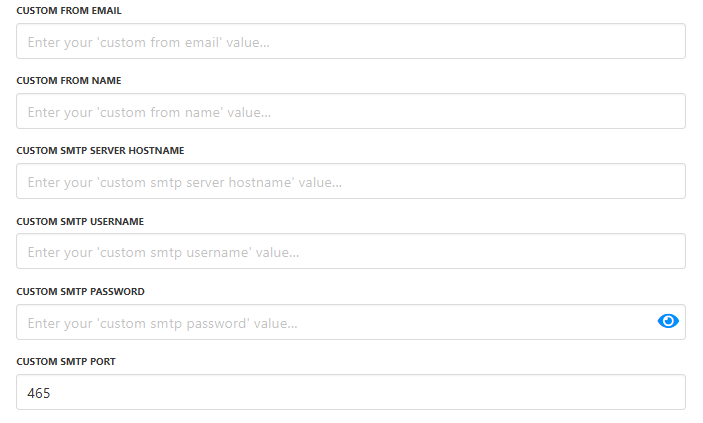
 3. You must specify a **From Email** and **From Name**. While these don’t require authentication and can be any name or email, it’s best to use the email linked to your SMTP server.
4. Fill in the information as needed, which can usually be obtained from your email provider (e.g., cPanel, Microsoft 365):
1. **SMTP Server Hostname**
2. **Username**
3. **Password**
4. **Port**
3. You must specify a **From Email** and **From Name**. While these don’t require authentication and can be any name or email, it’s best to use the email linked to your SMTP server.
4. Fill in the information as needed, which can usually be obtained from your email provider (e.g., cPanel, Microsoft 365):
1. **SMTP Server Hostname**
2. **Username**
3. **Password**
4. **Port**
 5. **Save** the changes.
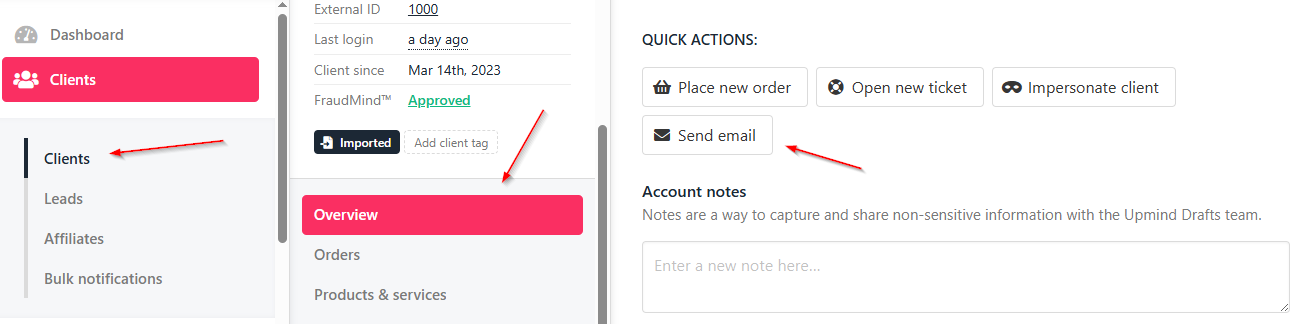
6. If you want to send a test email to a client, you can do it manually by choosing the client first.
7. Then go to **Overview** > **Quick Actions** and click on **Send Email**.
5. **Save** the changes.
6. If you want to send a test email to a client, you can do it manually by choosing the client first.
7. Then go to **Overview** > **Quick Actions** and click on **Send Email**.
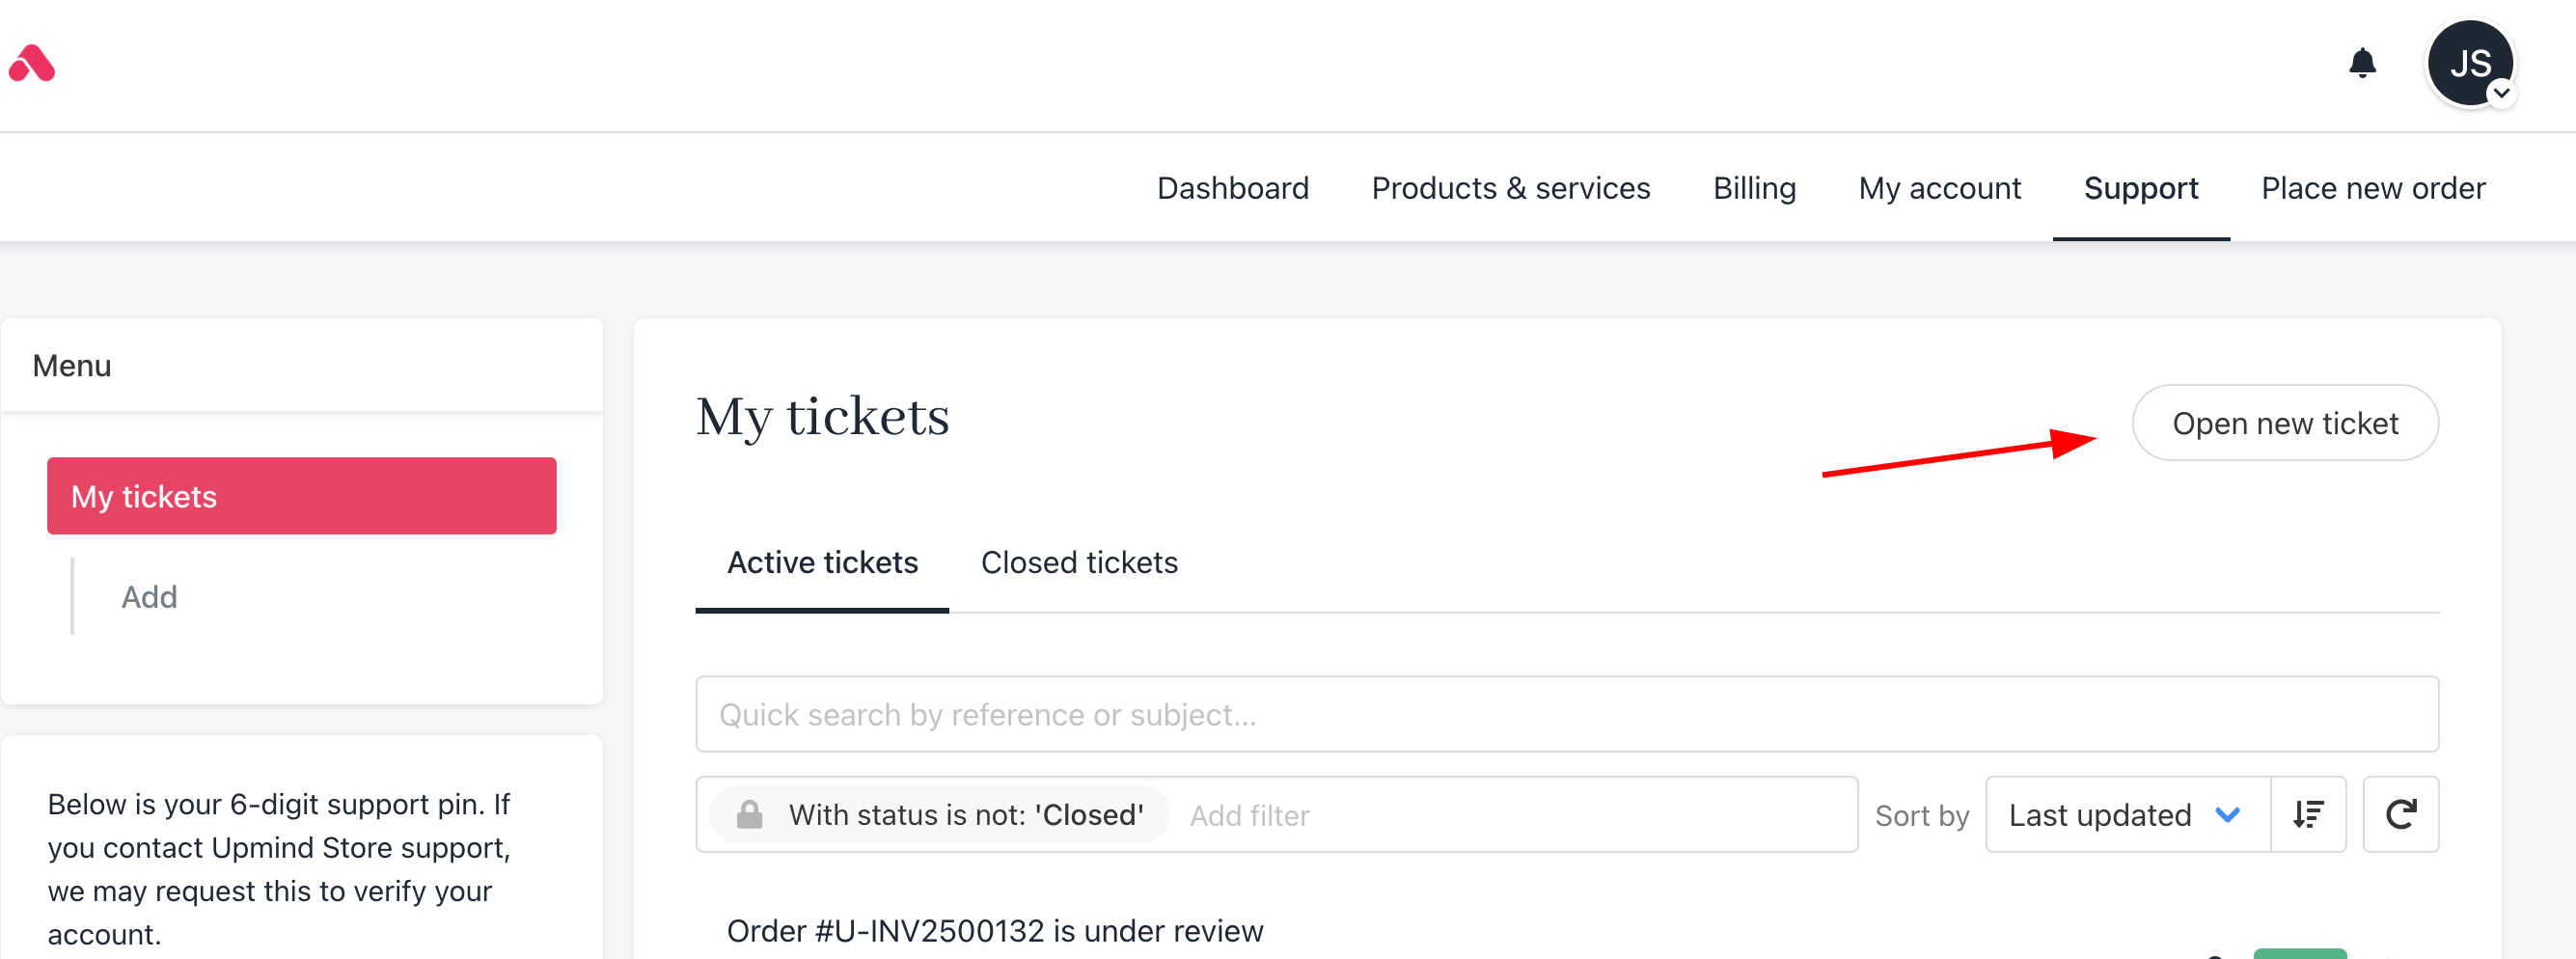
 By impersonating a client, you can also test it from the client’s profile by clicking on **Open New Ticket** under `Support`.
 ### Sending bulk email through Upmind
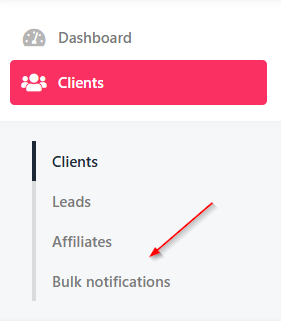
Announcements and newsletters can be sent through Upmind under **Client** > **Bulk Notifications**. This feature is meant for quick client updates, not as a full replacement for tools like **Mailchimp** or **CampaignMonitor**.
### Sending bulk email through Upmind
Announcements and newsletters can be sent through Upmind under **Client** > **Bulk Notifications**. This feature is meant for quick client updates, not as a full replacement for tools like **Mailchimp** or **CampaignMonitor**.
 Newsletters will be sent through either Upmind’s Amazon SES or your custom SMTP server. If using a custom SMTP, remove mailing limits for high-volume sends.
For more information on how to send bulk emails to clients, follow this [guide](https://docs.upmind.com/setup-and-configuration/email-configuring-and-sending/how-to-create-and-send-client-bulk-email-messages).
## Incoming email
This section covers emails from customers and leads to Upmind, including new sales or support inquiries and replies to support tickets.
### Incoming email piping
Clients can reply to Upmind-generated emails using the default outbound SMTP configuration or send new messages to any address at your Upmind dashboard domain (e.g., `support@randomstring.upmind.app`). Incoming emails are automatically converted into support tickets.
You can configure the process in the following way:
1. Create a support department and a support department email from **Settings** > **Support Department**. You can follow this [guide](https://docs.upmind.com/using-upmind/service-desk/how-to-create-support-department).
2. With your domain provider, configure and set up an email forwarder from your branded address (e.g., `support@yourcompany.com`) to the Upmind destination mailbox (`support@randomstring.upmind.app`).
3. To pipe emails from a custom SMTP, set up an email forwarder that relays messages from your address (e.g., `support@yourcompany.com`) to the matching Upmind mailbox (e.g., `support@randomstring.upmind.app`).
Newsletters will be sent through either Upmind’s Amazon SES or your custom SMTP server. If using a custom SMTP, remove mailing limits for high-volume sends.
For more information on how to send bulk emails to clients, follow this [guide](https://docs.upmind.com/setup-and-configuration/email-configuring-and-sending/how-to-create-and-send-client-bulk-email-messages).
## Incoming email
This section covers emails from customers and leads to Upmind, including new sales or support inquiries and replies to support tickets.
### Incoming email piping
Clients can reply to Upmind-generated emails using the default outbound SMTP configuration or send new messages to any address at your Upmind dashboard domain (e.g., `support@randomstring.upmind.app`). Incoming emails are automatically converted into support tickets.
You can configure the process in the following way:
1. Create a support department and a support department email from **Settings** > **Support Department**. You can follow this [guide](https://docs.upmind.com/using-upmind/service-desk/how-to-create-support-department).
2. With your domain provider, configure and set up an email forwarder from your branded address (e.g., `support@yourcompany.com`) to the Upmind destination mailbox (`support@randomstring.upmind.app`).
3. To pipe emails from a custom SMTP, set up an email forwarder that relays messages from your address (e.g., `support@yourcompany.com`) to the matching Upmind mailbox (e.g., `support@randomstring.upmind.app`).
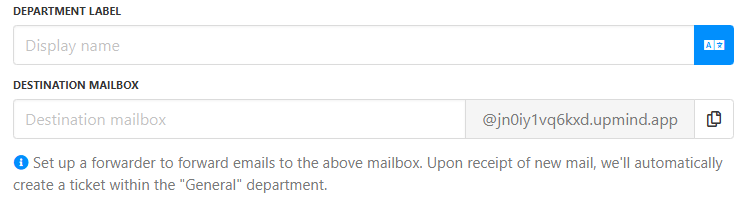 You can follow this [guide](https://docs.upmind.com/using-upmind/service-desk/how-to-create-support-department) to create a forwarded message mailbox.
### Website contact forms
If your website’s contact form creates support tickets by sending emails, you can make sure that replies to those emails go directly to the client’s email address, not just a generic support address.
You can do this by setting it to use the client’s email as the reply-to address.
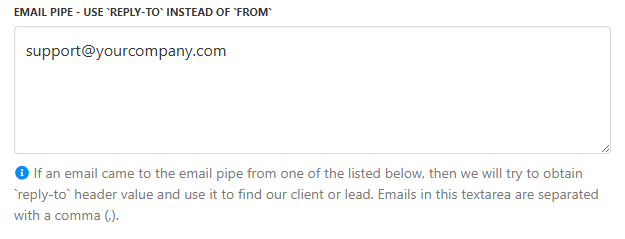
To achieve this in Upmind, enable the setting **Use ‘Reply-To’ Instead Of ‘From’** by navigating to **Settings** > **Branding and Customisation** > **Service Desk** > **Tickets**.
This setting ensures that when your support team replies to a ticket email, their response is sent to the client’s email address (the reply-to), making communication more direct and efficient.
You can follow this [guide](https://docs.upmind.com/using-upmind/service-desk/how-to-create-support-department) to create a forwarded message mailbox.
### Website contact forms
If your website’s contact form creates support tickets by sending emails, you can make sure that replies to those emails go directly to the client’s email address, not just a generic support address.
You can do this by setting it to use the client’s email as the reply-to address.
To achieve this in Upmind, enable the setting **Use ‘Reply-To’ Instead Of ‘From’** by navigating to **Settings** > **Branding and Customisation** > **Service Desk** > **Tickets**.
This setting ensures that when your support team replies to a ticket email, their response is sent to the client’s email address (the reply-to), making communication more direct and efficient.
 ### Support department routing
You can route emails to specific support departments based on the mailbox address.
In **Settings** > **Support Departments**, [assign destination mailboxes for each department](https://docs.upmind.com/using-upmind/service-desk/how-to-create-support-department) (e.g., billing, sales). Then forward relevant emails from your custom domain to these addresses.
### Support department routing
You can route emails to specific support departments based on the mailbox address.
In **Settings** > **Support Departments**, [assign destination mailboxes for each department](https://docs.upmind.com/using-upmind/service-desk/how-to-create-support-department) (e.g., billing, sales). Then forward relevant emails from your custom domain to these addresses.