> ## Documentation Index
> Fetch the complete documentation index at: https://docs.upmind.com/llms.txt
> Use this file to discover all available pages before exploring further.

# How to Add Brands

> Upmind makes it easy to add, manage, and customise brand settings on an e-commerce platform.

When you create an Upmind account, you start an organisation that subscribes to an Upmind plan and sells products or services. Typically, one organisation manages a single brand with multiple products or services.

Adding brands allows you to create separate identities under one organisation, sharing resources like products, the same or different staff users, and payment methods, while customising brand-specific settings.

<Warning>
  Users must have administrative permissions to add brands.
</Warning>

## **Steps to add a brand**

1. In the Upmind dashboard, click **Settings** > **Brands** under **Branding and customisation**.
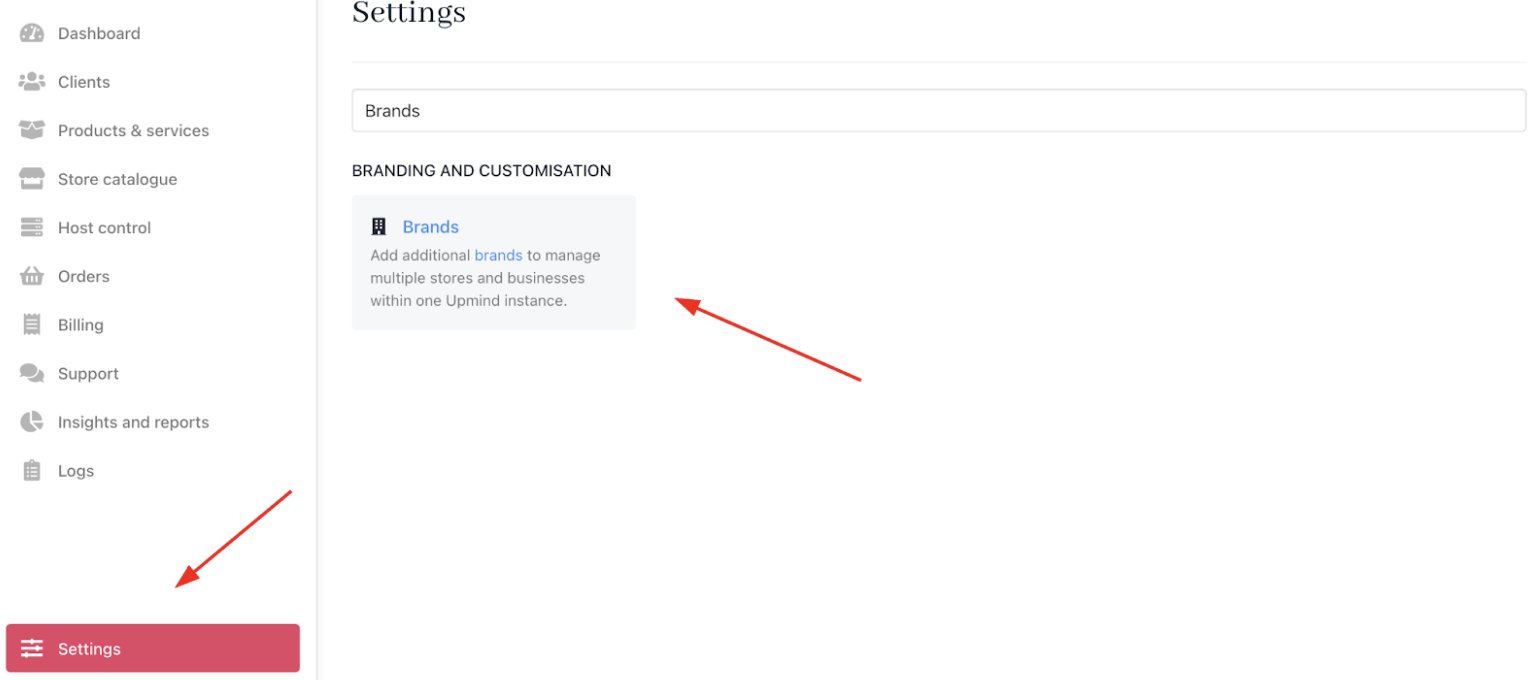
<Frame caption="Settings > Branding and customisation > Brands">
  <img src="https://mintcdn.com/upmind/FQ1NhxALxjSHvvWW/images/fb/b334842d93005623.png?fit=max&auto=format&n=FQ1NhxALxjSHvvWW&q=85&s=93760220b4ddef53156d199340a156cb" alt="Settings > Branding and customisation > Brands" className="mx-auto" style={{ width:"98%" }} data-og-width="1540" width="1540" data-og-height="680" height="680" data-path="images/fb/b334842d93005623.png" data-optimize="true" data-opv="3" srcset="https://mintcdn.com/upmind/FQ1NhxALxjSHvvWW/images/fb/b334842d93005623.png?w=280&fit=max&auto=format&n=FQ1NhxALxjSHvvWW&q=85&s=84c3eb4d3d405af2b7e31a39105e47df 280w, https://mintcdn.com/upmind/FQ1NhxALxjSHvvWW/images/fb/b334842d93005623.png?w=560&fit=max&auto=format&n=FQ1NhxALxjSHvvWW&q=85&s=98ab16bfea134fab898b9de9236c5d5f 560w, https://mintcdn.com/upmind/FQ1NhxALxjSHvvWW/images/fb/b334842d93005623.png?w=840&fit=max&auto=format&n=FQ1NhxALxjSHvvWW&q=85&s=3043248ff408e0295448c6b01ca15985 840w, https://mintcdn.com/upmind/FQ1NhxALxjSHvvWW/images/fb/b334842d93005623.png?w=1100&fit=max&auto=format&n=FQ1NhxALxjSHvvWW&q=85&s=0d8d1992ecd8f07e40d96c346294c25a 1100w, https://mintcdn.com/upmind/FQ1NhxALxjSHvvWW/images/fb/b334842d93005623.png?w=1650&fit=max&auto=format&n=FQ1NhxALxjSHvvWW&q=85&s=5b48924152ecc4d0b63dd8411a158f9a 1650w, https://mintcdn.com/upmind/FQ1NhxALxjSHvvWW/images/fb/b334842d93005623.png?w=2500&fit=max&auto=format&n=FQ1NhxALxjSHvvWW&q=85&s=69ba855f0bf3e5b26cdd7084461e1661 2500w" />
</Frame>

2. Click **Create brand**.

<Frame caption="Create brand">
  <img src="https://mintcdn.com/upmind/92wYnpdR_k6AjH3x/images/fb/51fe550abc2c68fb.png?fit=max&auto=format&n=92wYnpdR_k6AjH3x&q=85&s=c5548fa97d081296c03e5f9e08b83894" alt="Create brand" className="mx-auto" style={{ width:"97%" }} width="1598" height="250" data-path="images/fb/51fe550abc2c68fb.png" />
</Frame>

3. Fill in brand details:

* **Name**: Visible to clients and on invoices.
* **Company Email**: Default sender for email notification that can match the organisation's email.
* **Company Address & Phone**: Displayed on invoices.
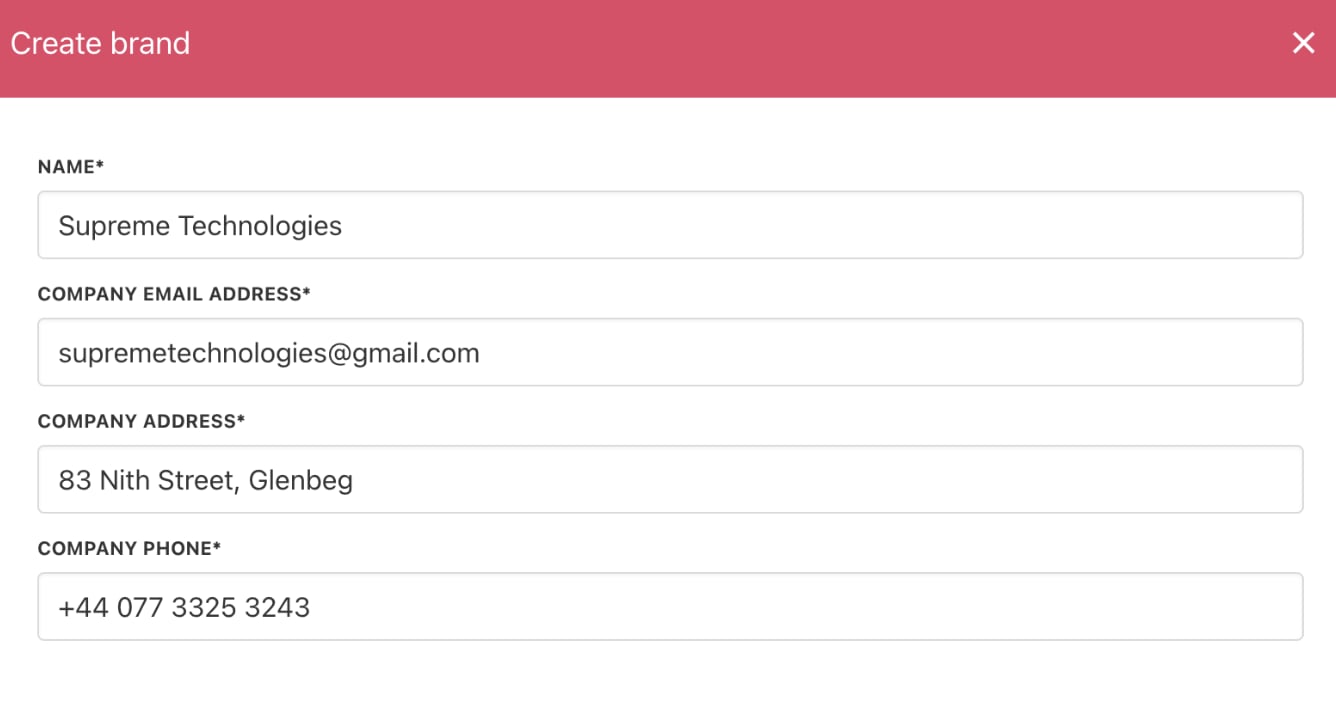
<Frame caption="Fill in brand details">
  <img src="https://mintcdn.com/upmind/5gi4DQpw4X76kT6T/images/fb/bf3f89601f54b656.png?fit=max&auto=format&n=5gi4DQpw4X76kT6T&q=85&s=d5055f96d391466952cce824b24c3c96" alt="Fill in brand details" className="mx-auto" style={{ width:"97%" }} width="1336" height="714" data-path="images/fb/bf3f89601f54b656.png" />
</Frame>

4. Click **Save** to open the brand’s settings page.
5. Configure [<u>brand settings</u>](/setup-and-configuration/branding/how-to-configure-your-brand-settings) as needed.

## **Switching brands**

When multiple brands exist, a dropdown menu lets you switch views quickly.

<Frame caption="Switch brand from brand settings">
  <img src="https://mintcdn.com/upmind/kAlrCUxI2nwYz4_i/images/fb/1f3abd7db7228dfd.png?fit=max&auto=format&n=kAlrCUxI2nwYz4_i&q=85&s=527ae6b22c4c302fe5035fb38c596d40" alt="Switch brand from brand settings" className="mx-auto" style={{ width:"98%" }} width="2210" height="182" data-path="images/fb/1f3abd7db7228dfd.png" />
</Frame>

You can also switch brands from the dashboard icon in the top right corner.
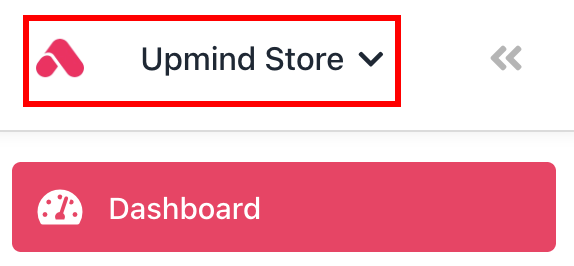
<Frame caption="Switch brand from dashboard icon">
  <img src="https://mintcdn.com/upmind/92wYnpdR_k6AjH3x/images/fb/5258cdaa24c63d53.png?fit=max&auto=format&n=92wYnpdR_k6AjH3x&q=85&s=74d98d515f8b080e415f38976cdcd54b" alt="Switch brand from dashboard icon" className="mx-auto" style={{ width:"85%" }} width="574" height="266" data-path="images/fb/5258cdaa24c63d53.png" />
</Frame>

## **Copy brand's UUID**

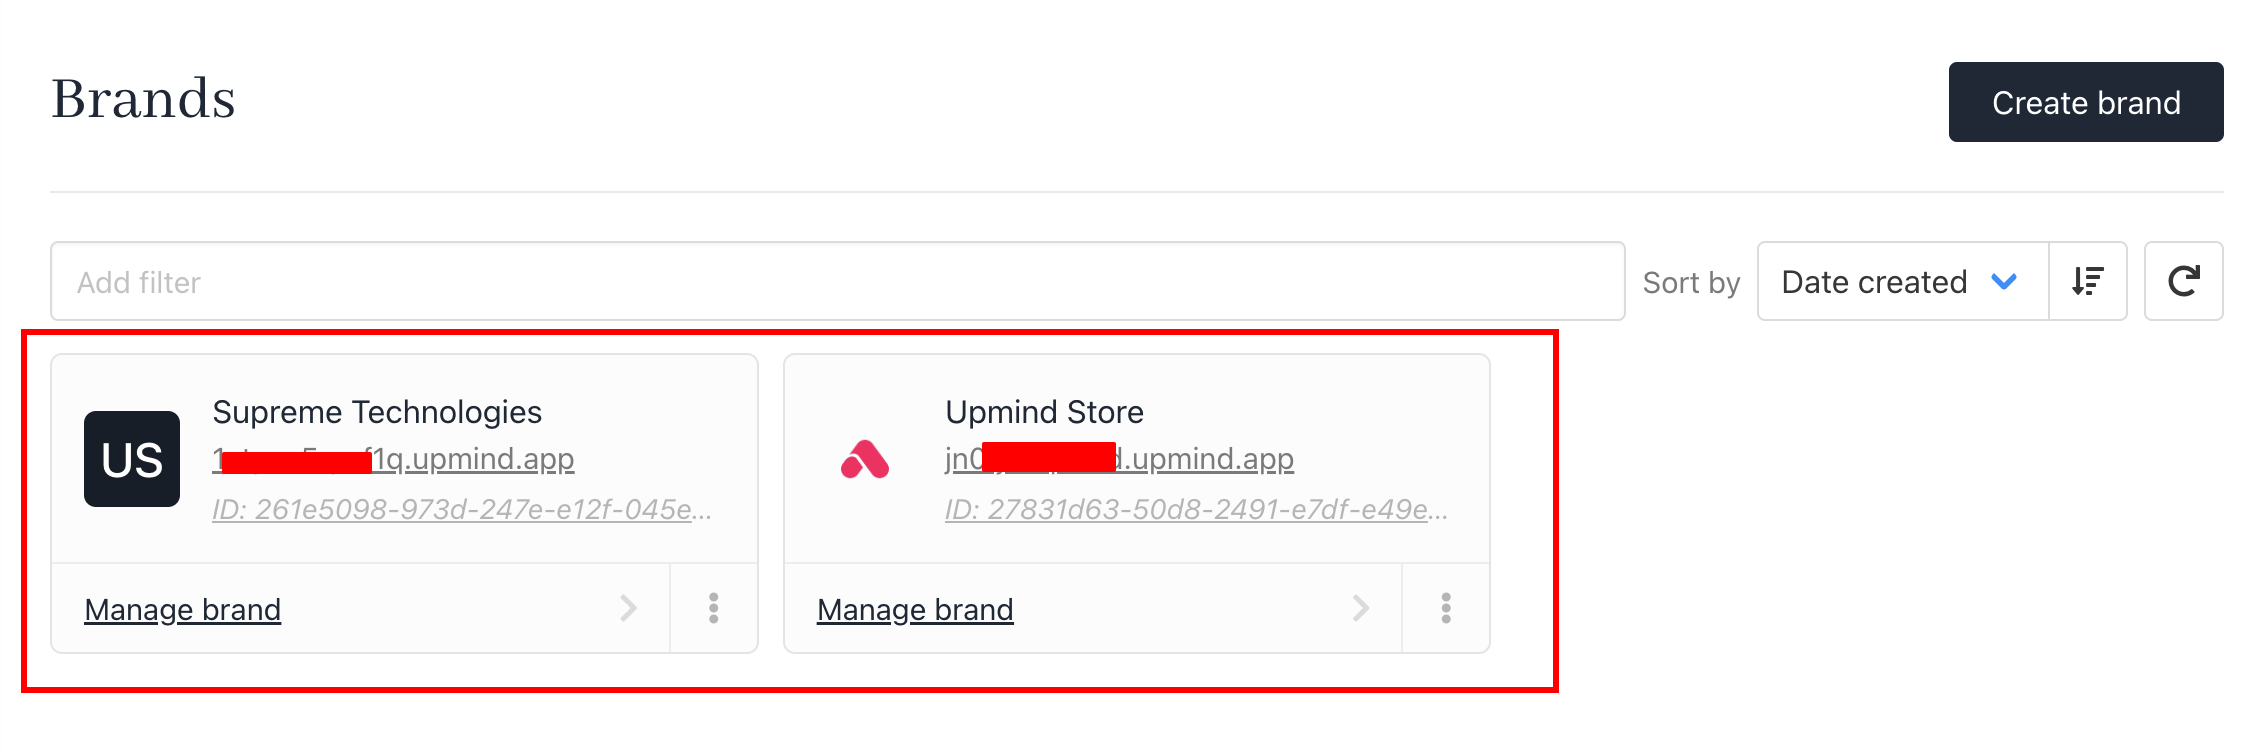
You can also copy your brand's UUID (Universally Unique Identifier) from the admin brand's list view.
<img src="https://mintcdn.com/upmind/6knUVC8F1nK4E5CY/images/fb/c22ae61df43fb5bc.png?fit=max&auto=format&n=6knUVC8F1nK4E5CY&q=85&s=19a19bc0952d57fc96ca48b693b1dc21" className="mx-auto" style={{ width:"98%" }} width="2250" height="752" data-path="images/fb/c22ae61df43fb5bc.png" />
