> ## Documentation Index
> Fetch the complete documentation index at: https://docs.upmind.com/llms.txt
> Use this file to discover all available pages before exploring further.
# Link a WHM Account to Upmind
> Manage reseller account with Upmind.
This article shows resellers how to link a WHM account to an Upmind account. After linking accounts, the next step is to create a hosting package on Upmind. That is where you name the package, configure details, and set billing terms.
We describe hosting package details in a different article. [Learn more](/guides-for-web-hosting-accounts/create-a-hosting-package).
## Adding a new provision
The first step is to configure a new provision. This is how you add web servers and domain providers via APIs.
1. Log in to your Upmind account.
2. Go to **Settings** > **Provision Configurations**.
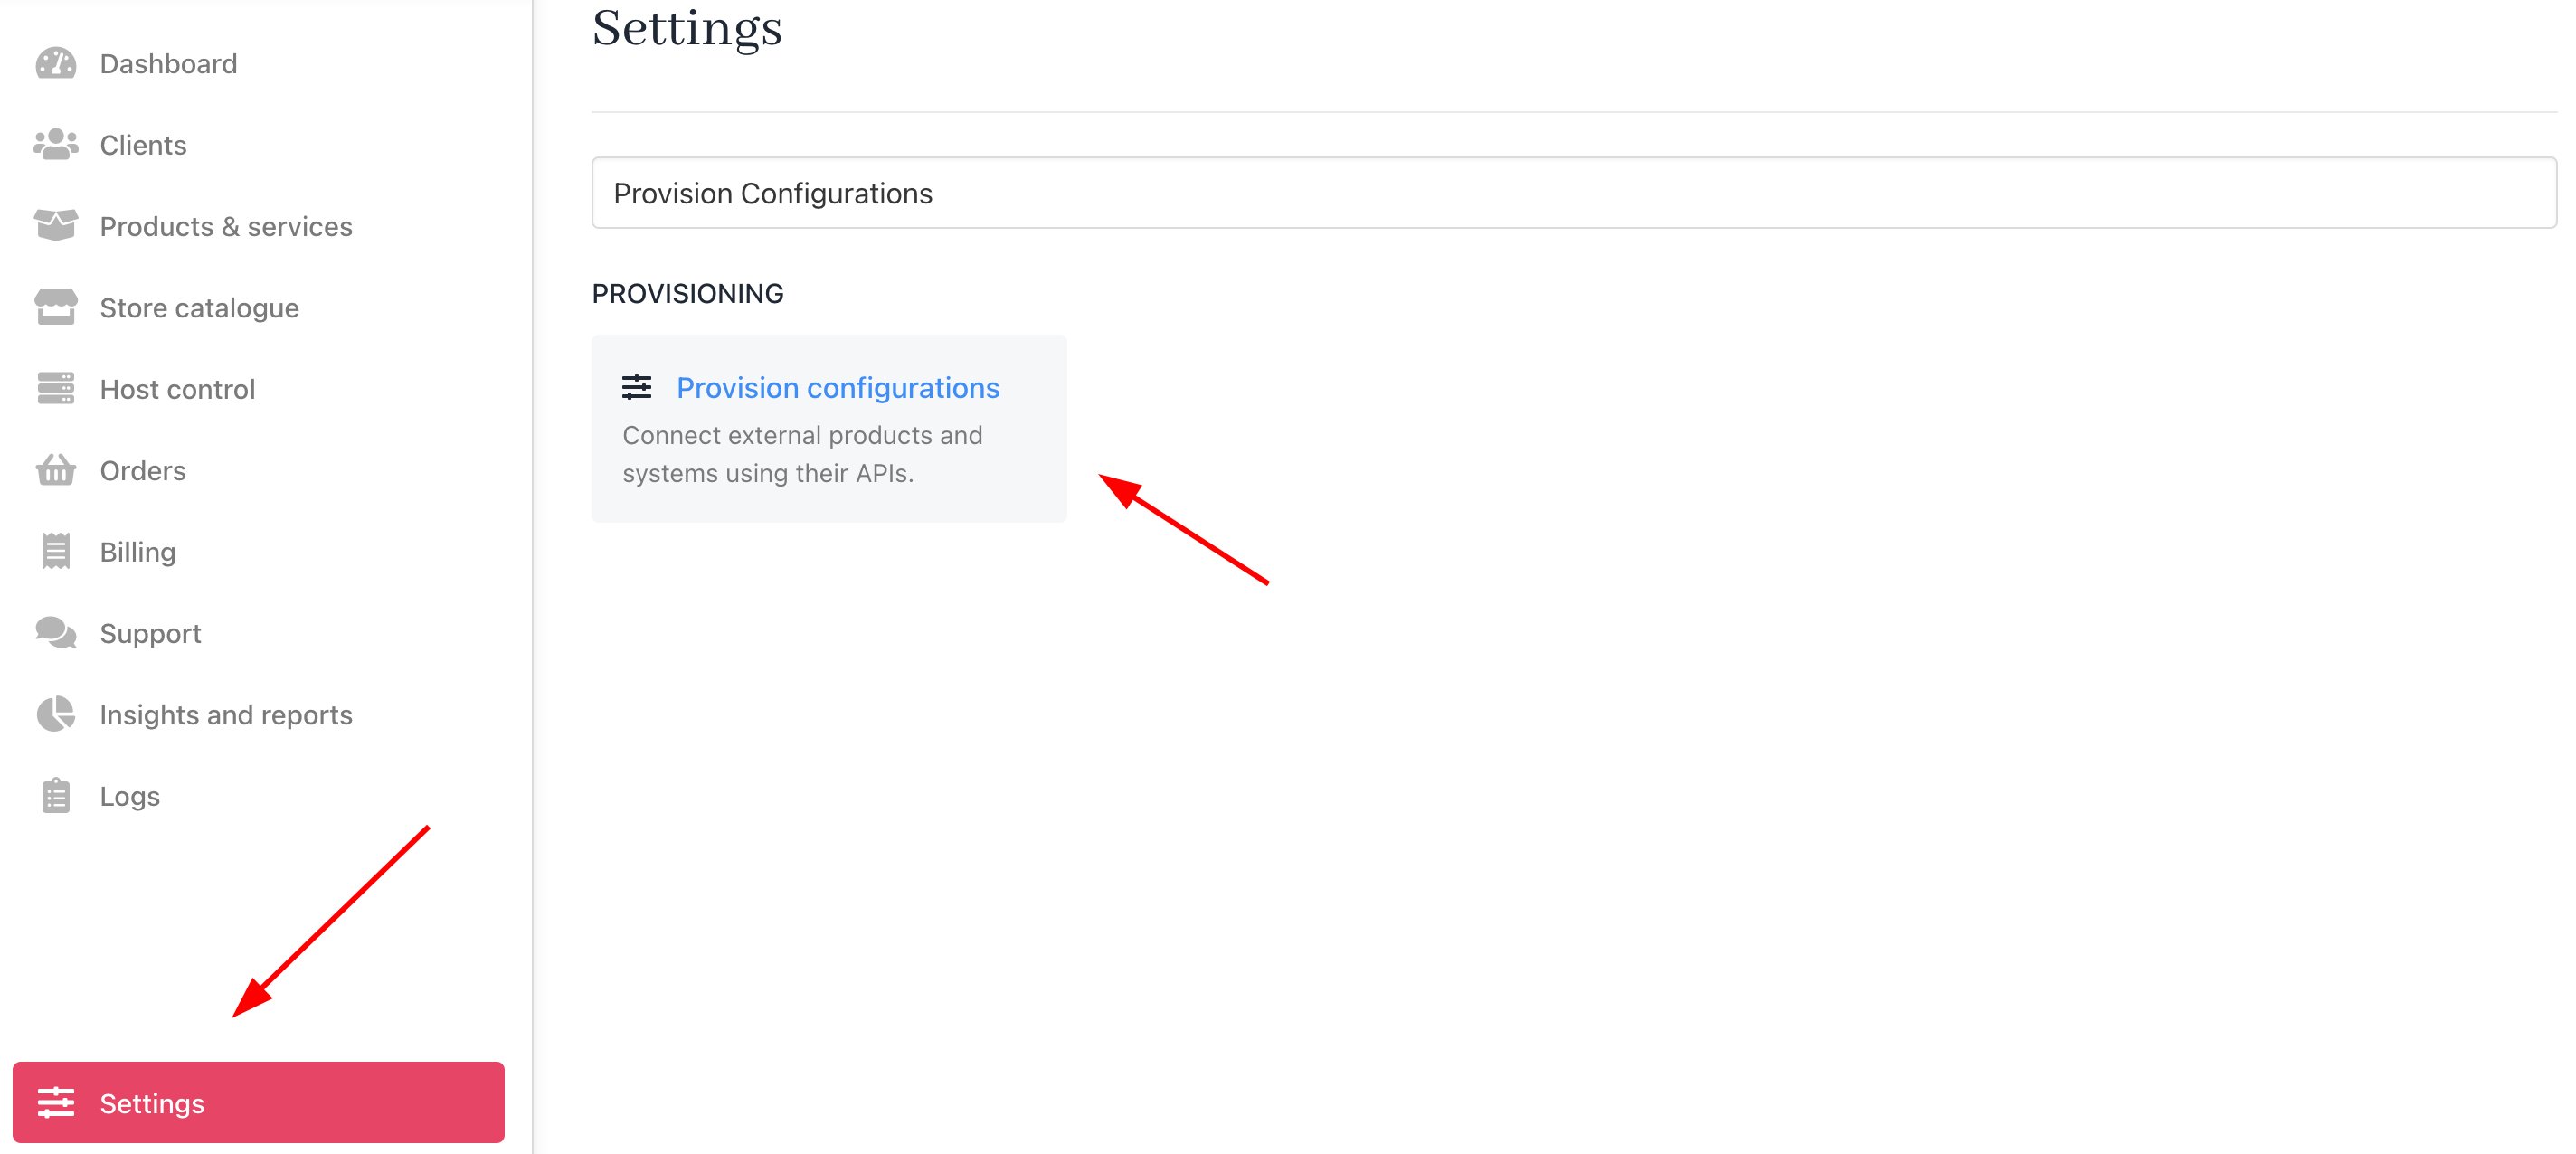 3. Click the **Add new configuration** button to add a WHM server account. A new panel displays.
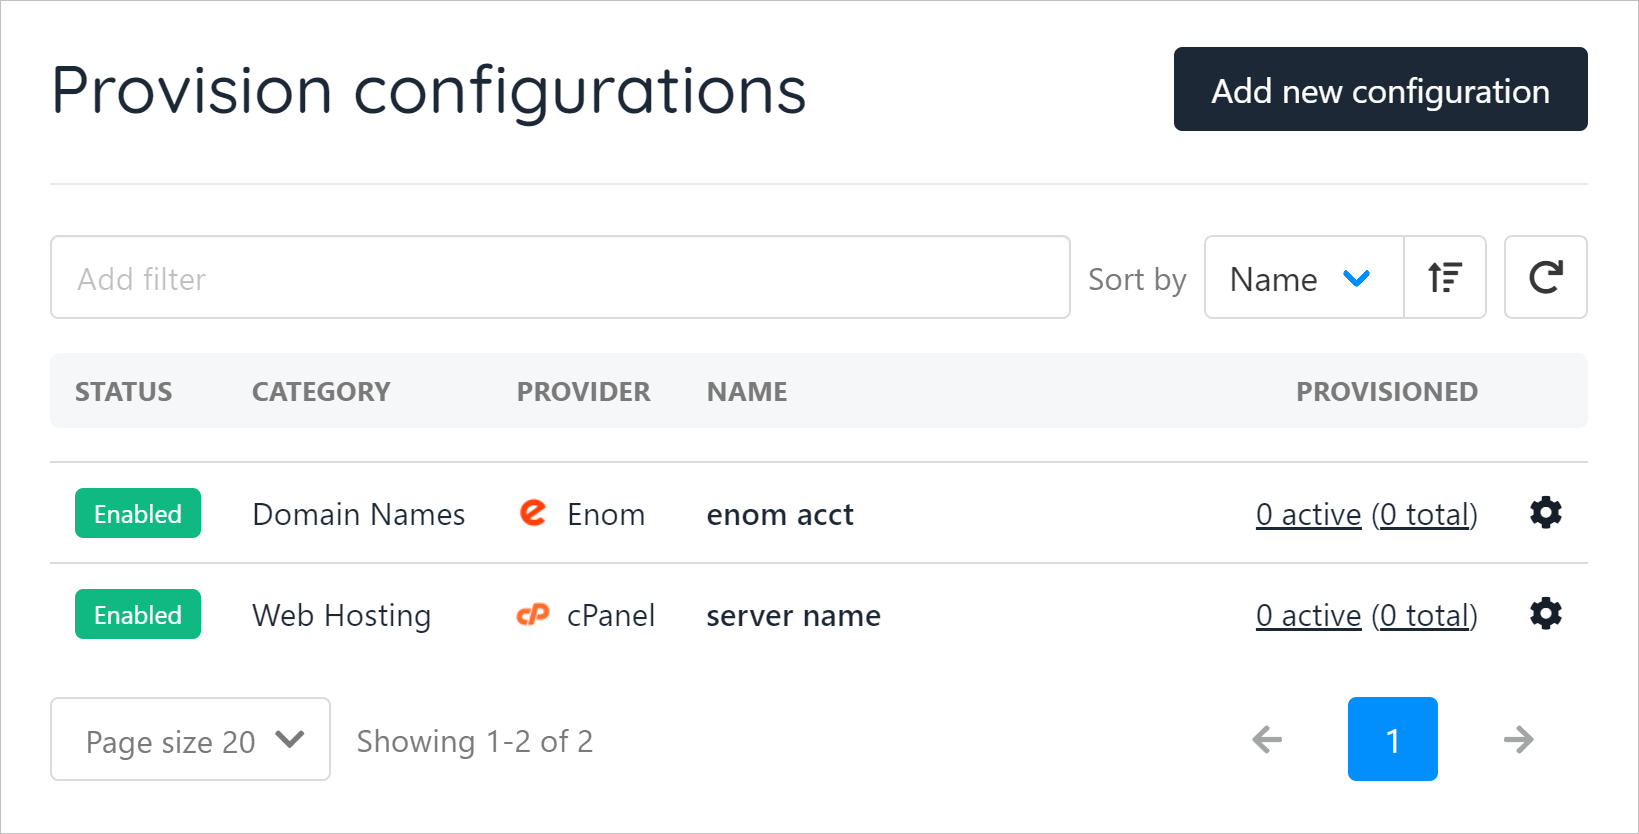
The screenshot below shows two active services (domain hosting and web hosting).
3. Click the **Add new configuration** button to add a WHM server account. A new panel displays.
The screenshot below shows two active services (domain hosting and web hosting).
 ## Creating a provision
On the new panel:
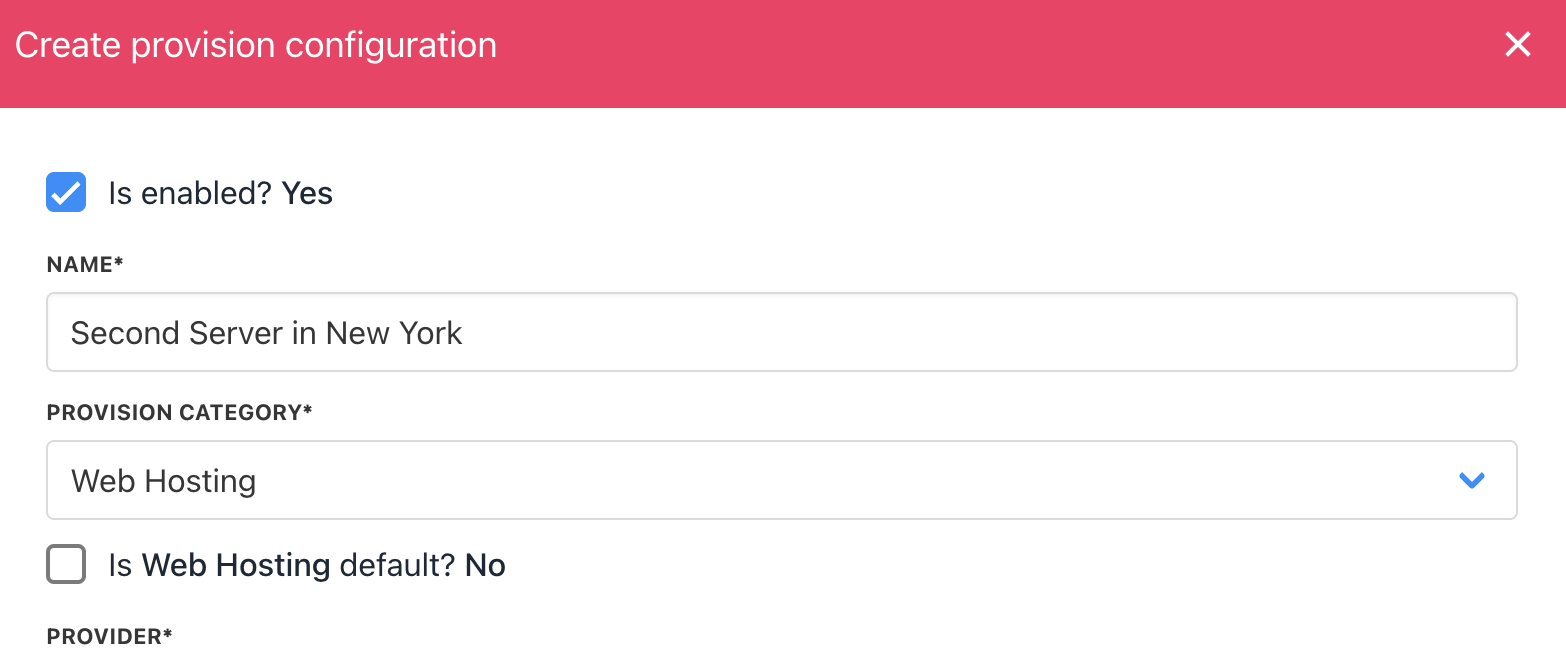
1. Enter a unique name for the service.
2. Click the **Provision Category** field and select Web Hosting.
## Creating a provision
On the new panel:
1. Enter a unique name for the service.
2. Click the **Provision Category** field and select Web Hosting.
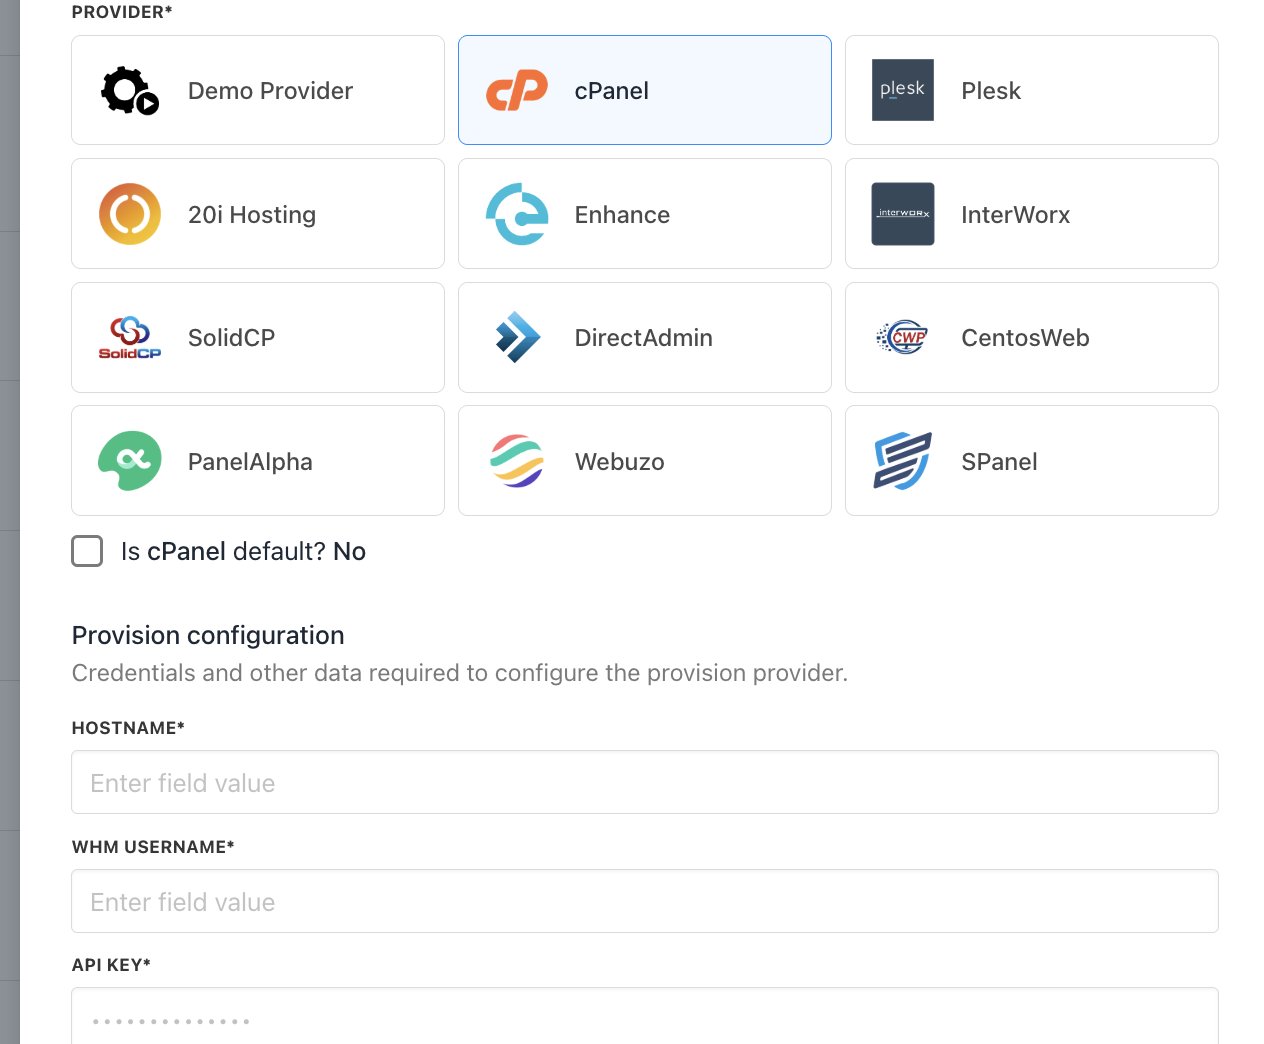
 3. Select a provider (e.g., cPanel, PLESK, or 20i Hosting). In this example, we select cPanel.
4. Enter the hostname.
5. Enter the WHM username.
6. Enter the WHM API key.
3. Select a provider (e.g., cPanel, PLESK, or 20i Hosting). In this example, we select cPanel.
4. Enter the hostname.
5. Enter the WHM username.
6. Enter the WHM API key.
 7. Click **Create**.
## Copying WHM information
To complete all the fields in the panel described above, you need to find and copy three pieces of information on your WHM account:
* Hostname
* WHM Username
* API key
To quickly locate the correct information:
1. Open your reseller account.
2. Select the package you want to add to Upmind.
7. Click **Create**.
## Copying WHM information
To complete all the fields in the panel described above, you need to find and copy three pieces of information on your WHM account:
* Hostname
* WHM Username
* API key
To quickly locate the correct information:
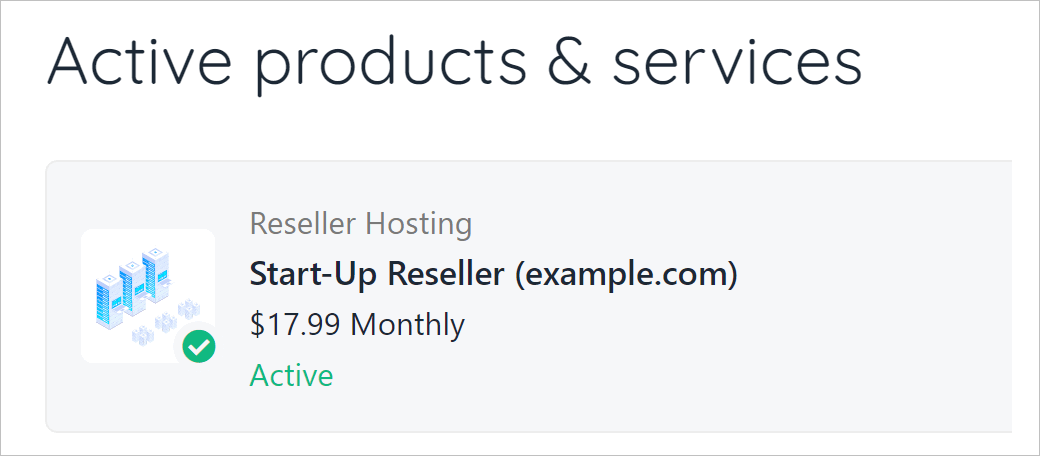
1. Open your reseller account.
2. Select the package you want to add to Upmind.
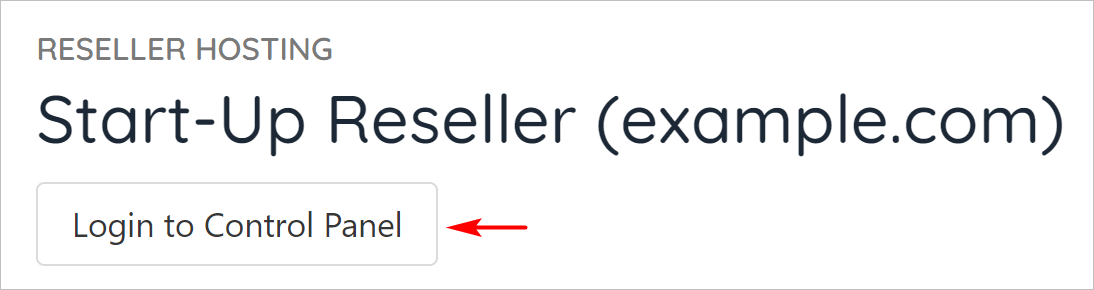
 3. On the next page, click the button that logs in to your WHM control panel.
The screenshot below shows a WHM control panel login button for one reseller website. The button on your site will likely look a bit different.
3. On the next page, click the button that logs in to your WHM control panel.
The screenshot below shows a WHM control panel login button for one reseller website. The button on your site will likely look a bit different.
 ### Hostname
1. Go to the browser tab with the WHM control panel.
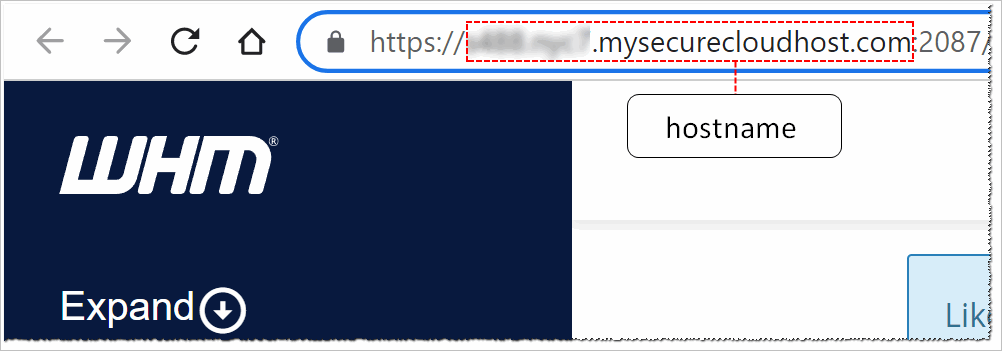
2. Copy a section of the URL. This is the hostname. Do not copy HTTPS://. Do not copy any characters after **.com.**
### Hostname
1. Go to the browser tab with the WHM control panel.
2. Copy a section of the URL. This is the hostname. Do not copy HTTPS://. Do not copy any characters after **.com.**
 3. Go to the Upmind page and paste the value into the Hostname field.
4. Go back to the WHM page.
### WHM Username
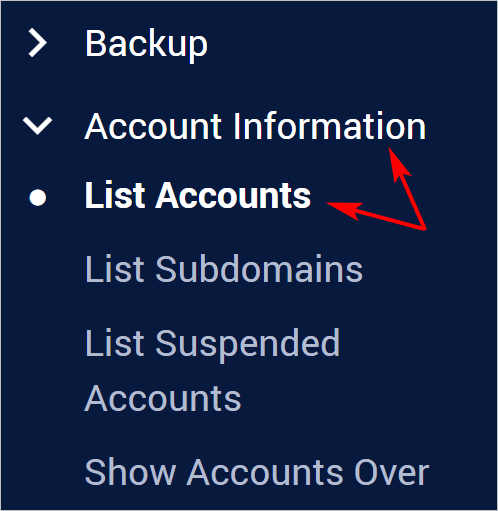
1. On the side menu, expand the Account Information folder and click **List Accounts**.
3. Go to the Upmind page and paste the value into the Hostname field.
4. Go back to the WHM page.
### WHM Username
1. On the side menu, expand the Account Information folder and click **List Accounts**.
 2. On the List Accounts page, locate the Username column.
3. Copy the WHM Username of your reseller account.
2. On the List Accounts page, locate the Username column.
3. Copy the WHM Username of your reseller account.
 4. Go back to the Upmind page and paste the value into the WHM Username field.
5. Go back to the WHM page.
### API key
1. Enter **Manage API Tokens** in the search field.
2. Click the best search result.
3. On the **Manage API Tokens** page, click **Generate Token**.
4. Go back to the Upmind page and paste the value into the WHM Username field.
5. Go back to the WHM page.
### API key
1. Enter **Manage API Tokens** in the search field.
2. Click the best search result.
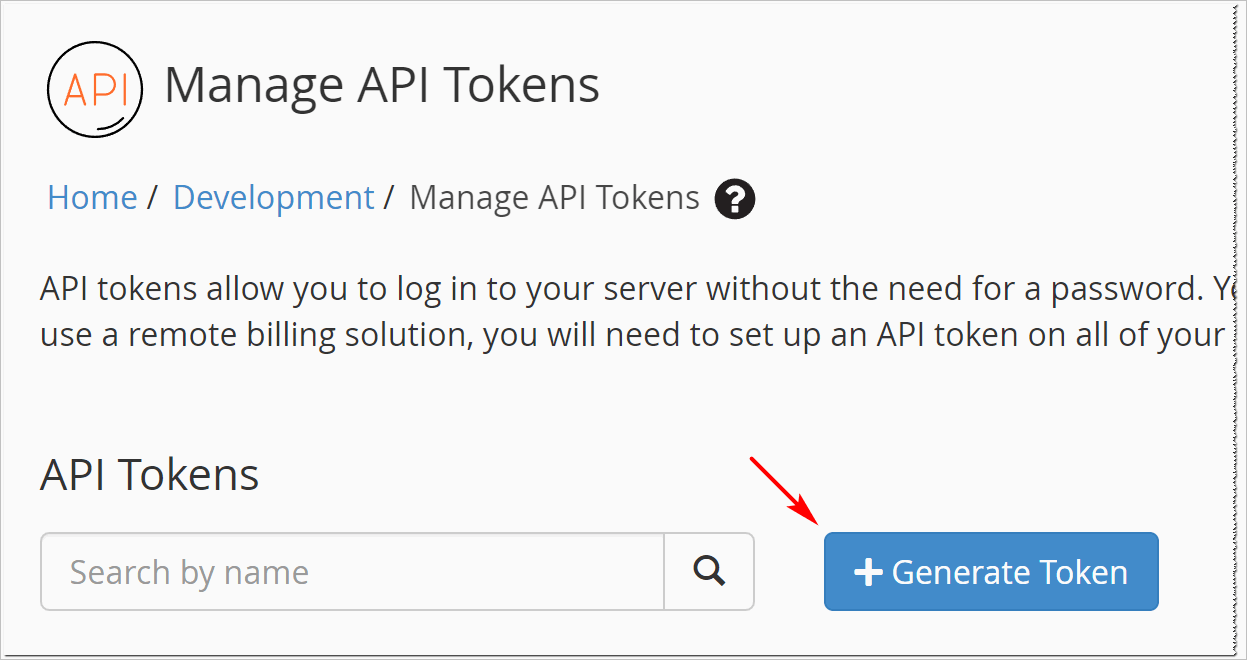
3. On the **Manage API Tokens** page, click **Generate Token**.
 4. On the next page, enter a token name.
5. Click **Save**.
6. Go back to the Upmind page and paste the value into the API Key field.
### Troubleshooting
| Question | Answer |
| ------------------------------------------------------------------------------ | --------------------------------------------------------------------------------------------------------------------------------------------------------------- |
| When logging into cPanel, my users get diverted to a different server hostname | This is a WHM setting for the default hostname. If you have a reseller account it is likely set by your provider. Root owners can set it under 'tweak settings' |
4. On the next page, enter a token name.
5. Click **Save**.
6. Go back to the Upmind page and paste the value into the API Key field.
### Troubleshooting
| Question | Answer |
| ------------------------------------------------------------------------------ | --------------------------------------------------------------------------------------------------------------------------------------------------------------- |
| When logging into cPanel, my users get diverted to a different server hostname | This is a WHM setting for the default hostname. If you have a reseller account it is likely set by your provider. Root owners can set it under 'tweak settings' |