> ## Documentation Index
> Fetch the complete documentation index at: https://docs.upmind.com/llms.txt
> Use this file to discover all available pages before exploring further.
# Create a Hosting Package
> You can map Upmind products to WHM packages and then create products.
In a [previous guide](/guides-for-web-hosting-accounts/link-a-whm-account-to-upmind), we showed you how to link a WHM reseller account to your Upmind account. The next step is to create a product on Upmind. By bringing the product to the Upmind platform, you can centralise all aspects of product management, from billing to support tickets.
The first step is to create a product.
## **Access the product catalogue**
1. Log in to the Upmind dashboard.
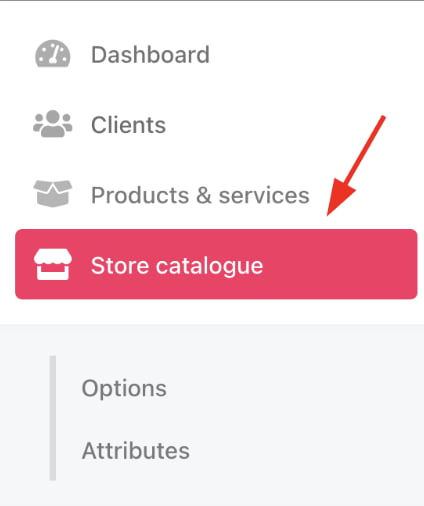
2. Access it from the dashboard by clicking on **Store Catalogue**.
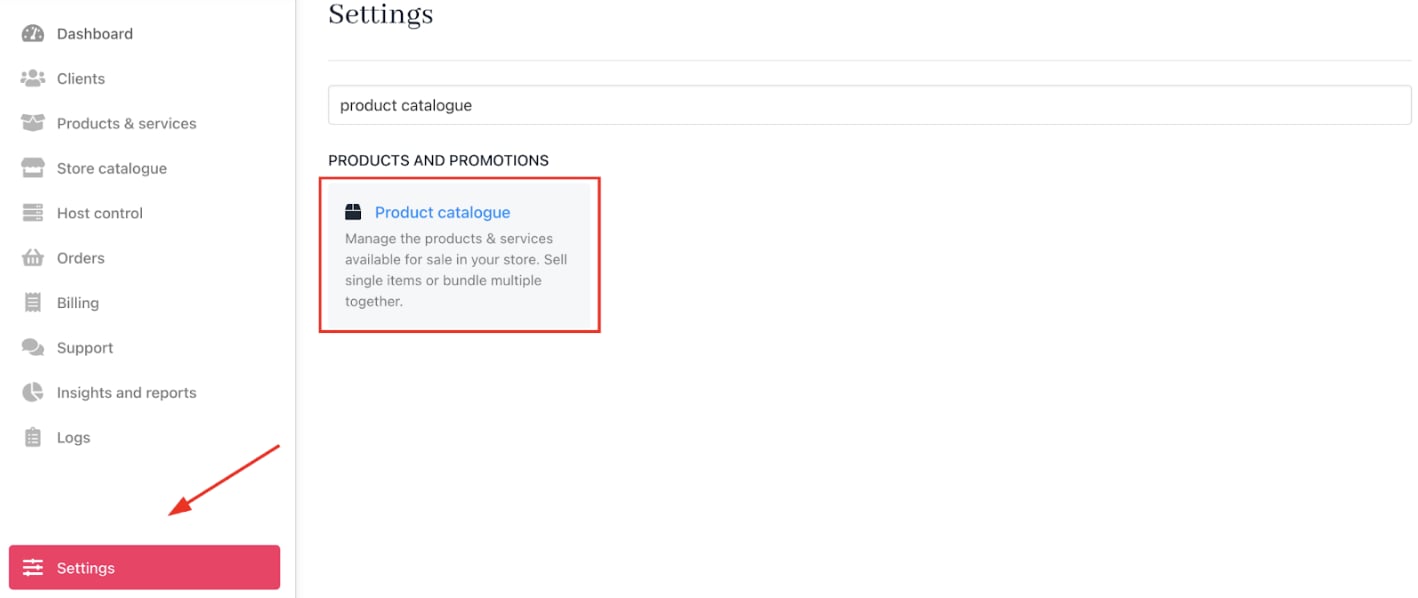
 3. You can also click **Settings** and select the **Product Catalogue** tile under **Products and Promotions**.
 ## Creating a product
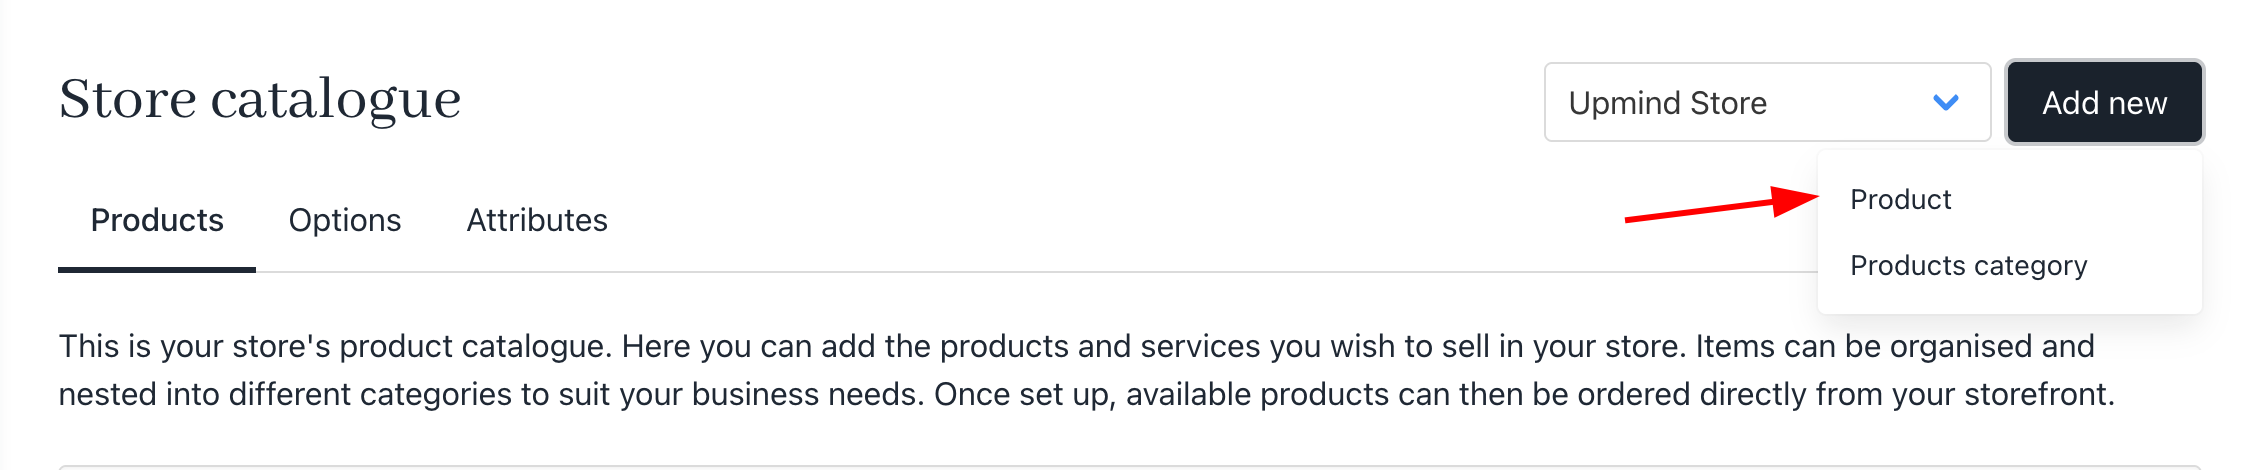
1. On the Product catalogue page, click **Add new**.
2. Click **Product** in the menu. A new panel displays.
## Creating a product
1. On the Product catalogue page, click **Add new**.
2. Click **Product** in the menu. A new panel displays.
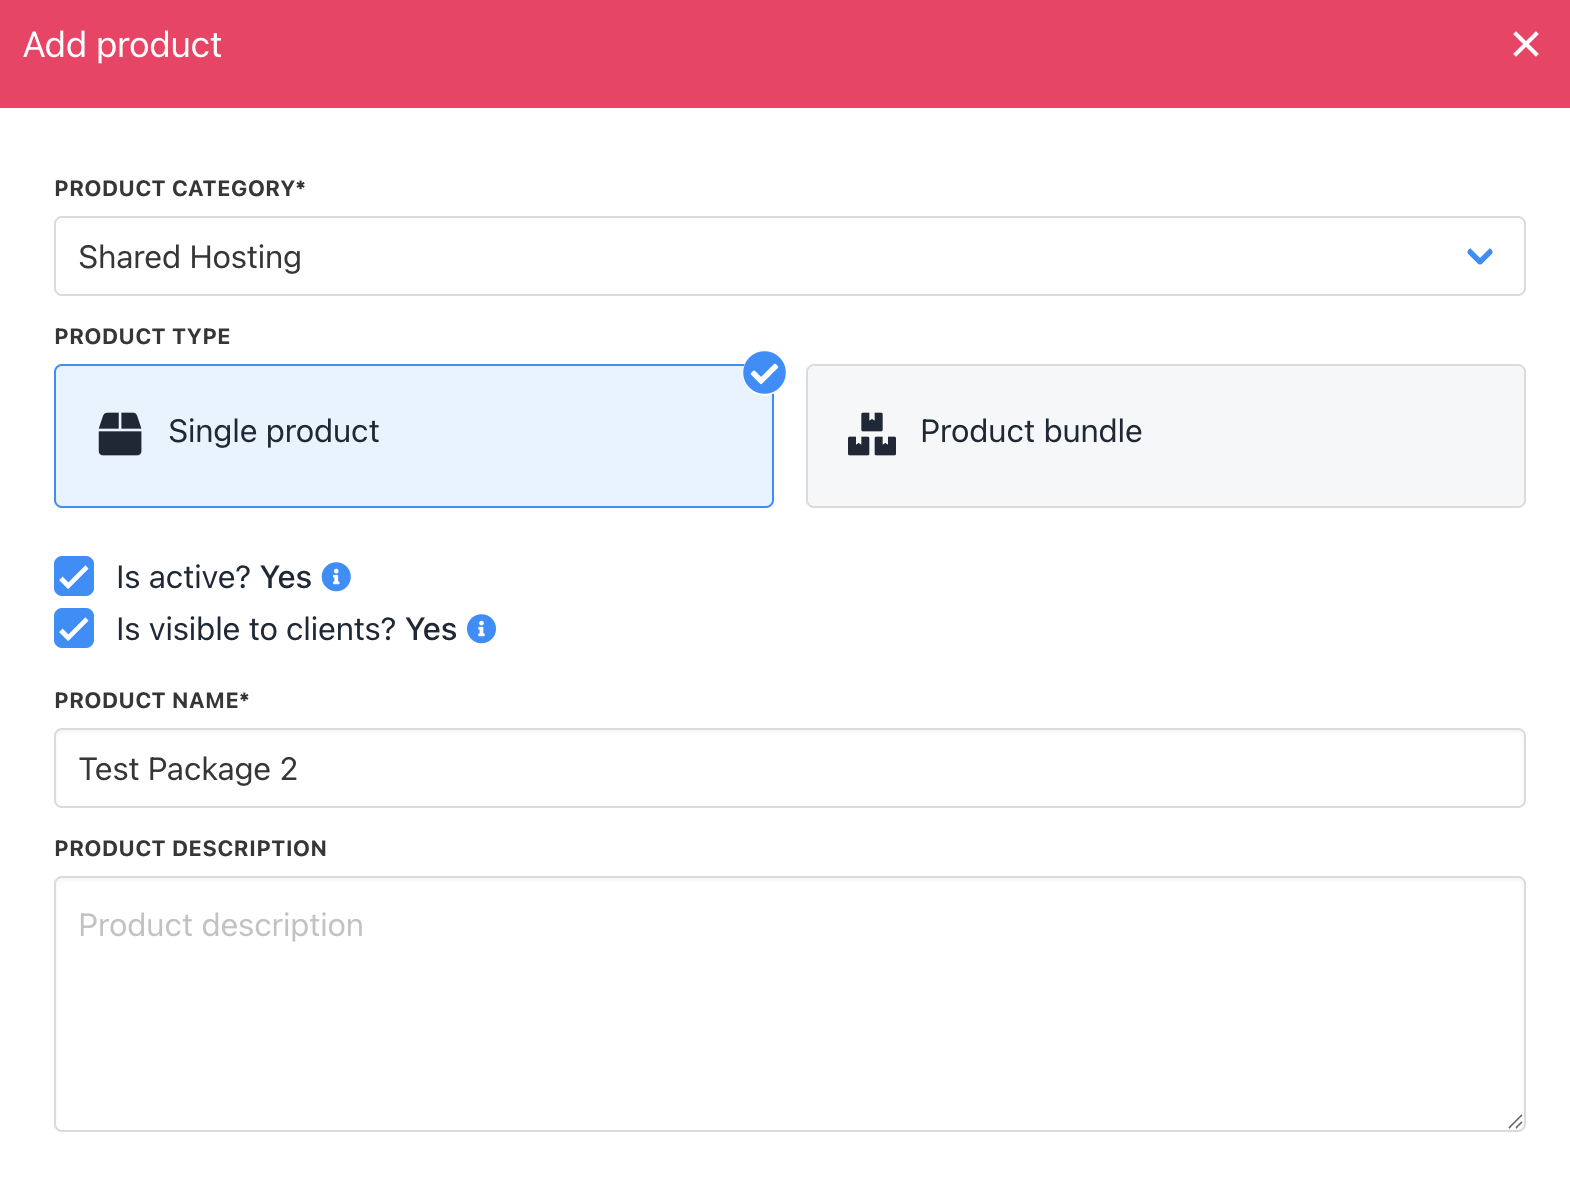
 3. On the **Add Product** panel, click the category field.
4. Select **Shared Hosting** ([Create this category](/using-upmind/product-management/how-to-create-products) if you do not have it).
5. Click **Single product**.
6. Enter a unique product name.
7. Leave the boxes checked.
8. Add a product description. (optional)
9. Click **Create**. Upmind creates a basic product. Now it's time to add details, like billing and provisioning.
3. On the **Add Product** panel, click the category field.
4. Select **Shared Hosting** ([Create this category](/using-upmind/product-management/how-to-create-products) if you do not have it).
5. Click **Single product**.
6. Enter a unique product name.
7. Leave the boxes checked.
8. Add a product description. (optional)
9. Click **Create**. Upmind creates a basic product. Now it's time to add details, like billing and provisioning.
 ## Adding product details
You can customise the design and appearance of your package on the **Product details** page by clicking any of the menu tabs under the Manage product heading. Some tabs are optional. In this article, we show you two sections that you must complete.
* Product billing
* Product provisioning
### Product billing
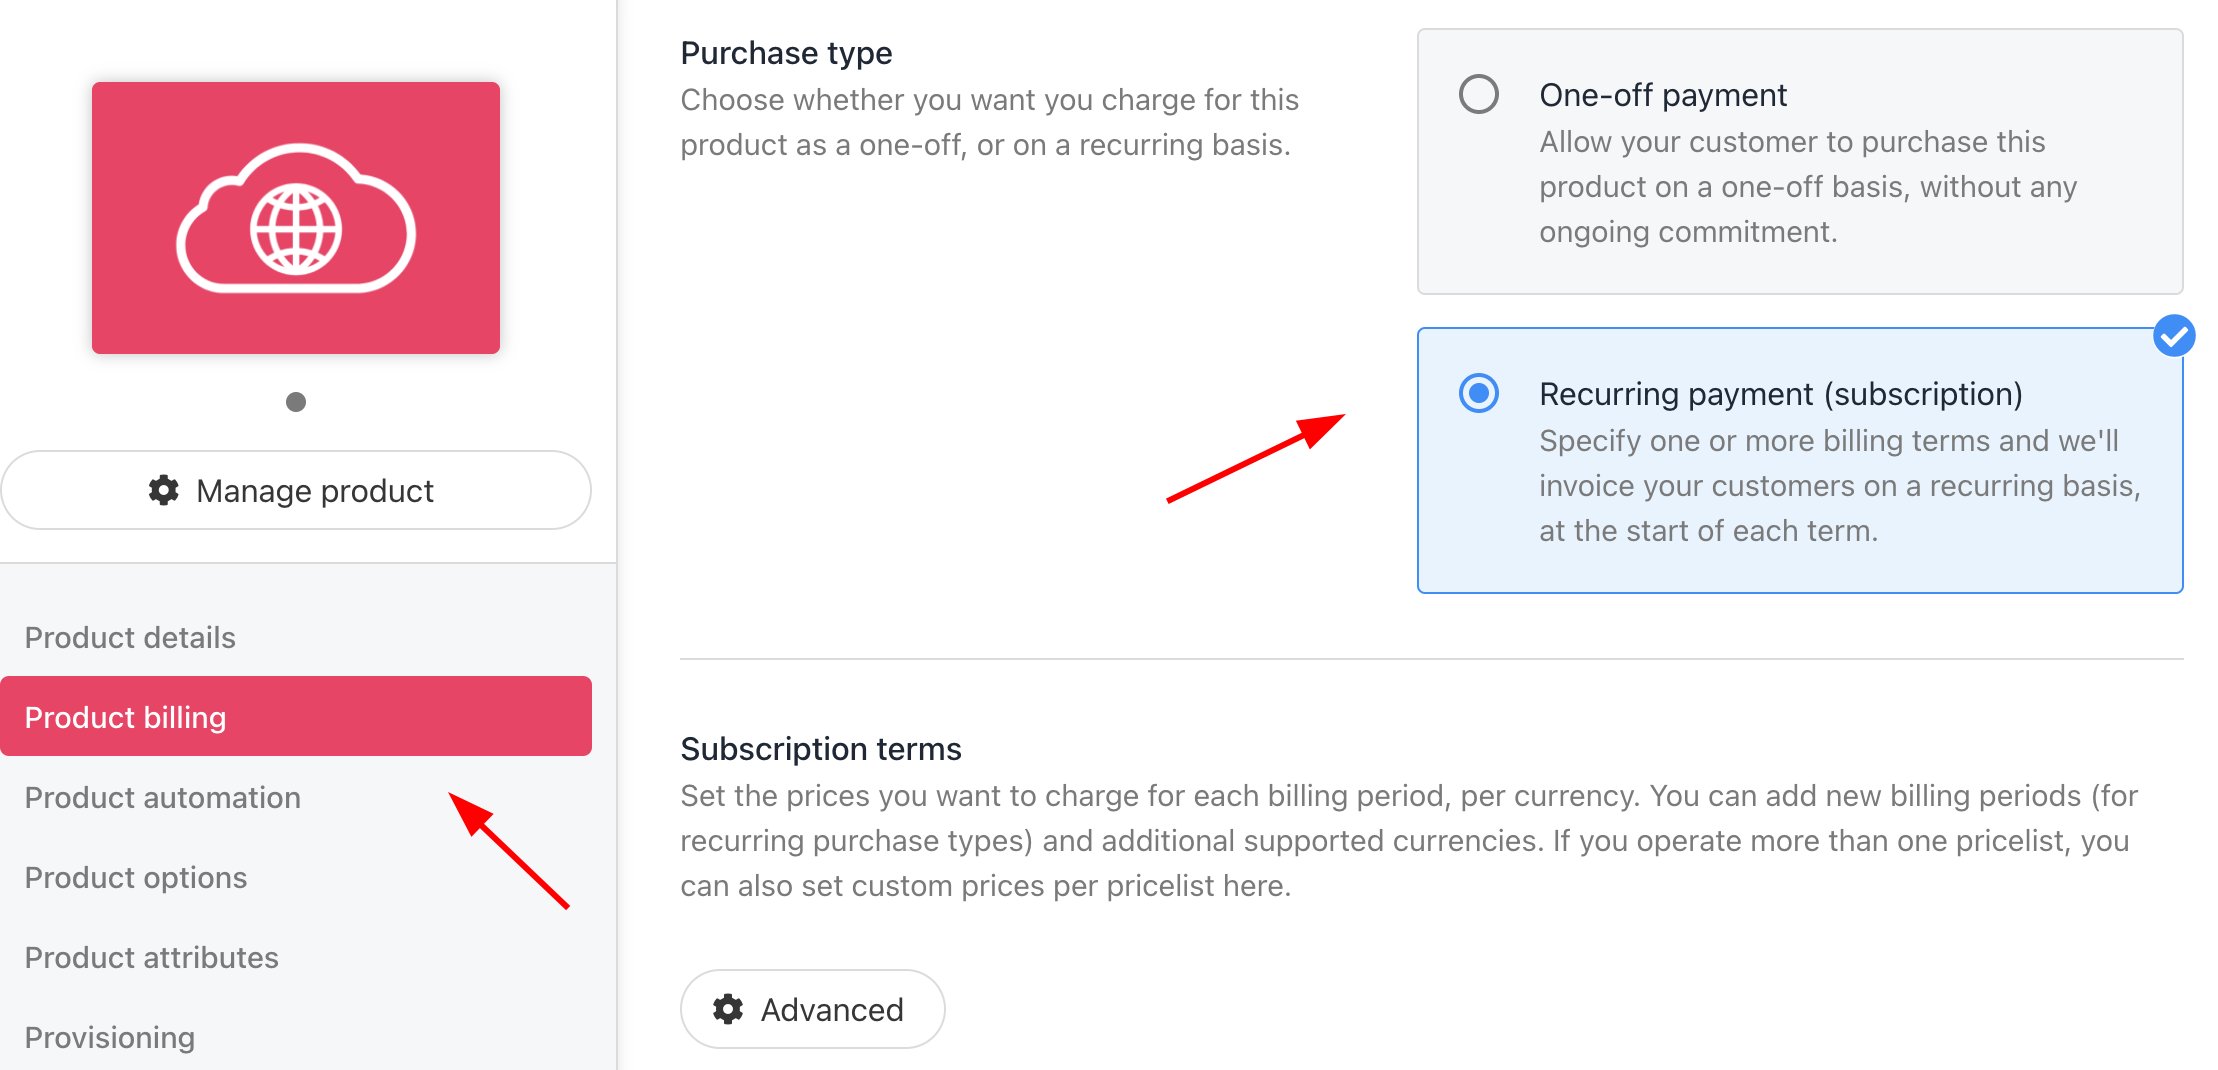
1. Click the **Product billing** menu tab.
2. Next to the Product type heading, click the **Recurring payment** tile.
## Adding product details
You can customise the design and appearance of your package on the **Product details** page by clicking any of the menu tabs under the Manage product heading. Some tabs are optional. In this article, we show you two sections that you must complete.
* Product billing
* Product provisioning
### Product billing
1. Click the **Product billing** menu tab.
2. Next to the Product type heading, click the **Recurring payment** tile.
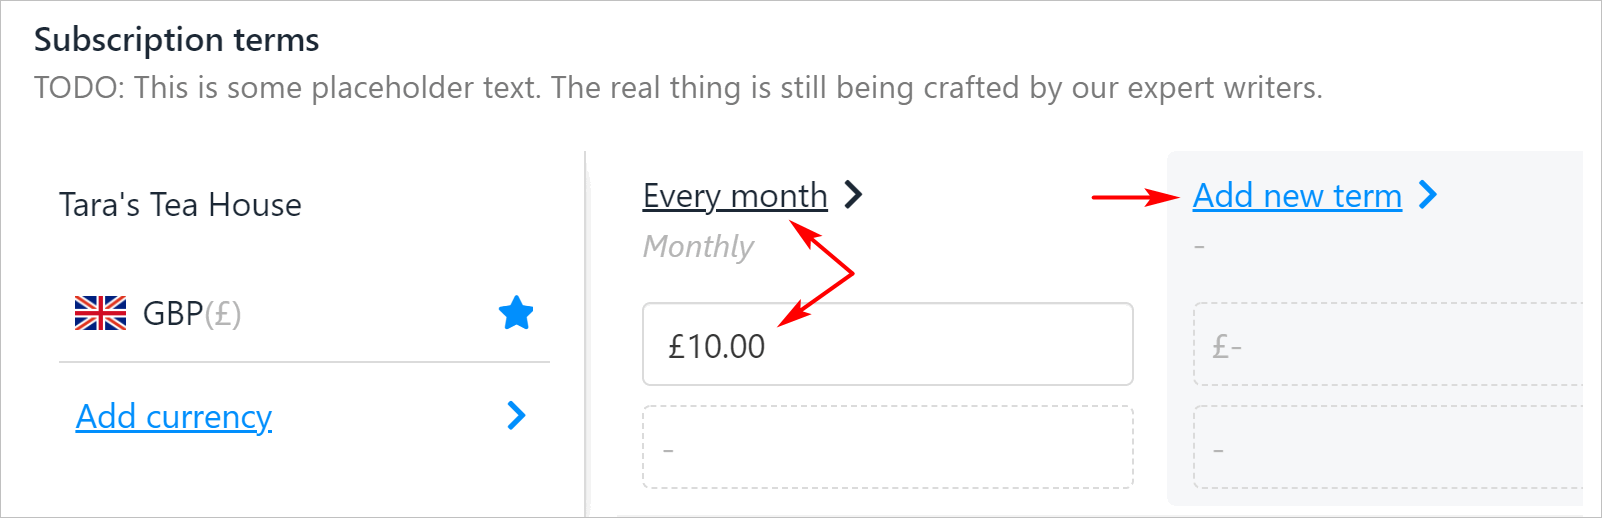
 3. In the **Subscription Terms** section, click **Add new term**.
4. Select a period in the drop-down menu. In this example, we select monthly.
5. Enter a billing total in the blank field.
6. Click **Save**.
3. In the **Subscription Terms** section, click **Add new term**.
4. Select a period in the drop-down menu. In this example, we select monthly.
5. Enter a billing total in the blank field.
6. Click **Save**.
 ### Provisioning
Provisioning is a pointing tool. When a user orders a web hosting package on your site, Upmind sends the order to a reseller package that you manage.
1. Click the Provisioning menu tab.
2. In the new panel, click the field under the BLUEPRINT heading.
3. Select Web Hosting in the drop-down menu.
### Provisioning
Provisioning is a pointing tool. When a user orders a web hosting package on your site, Upmind sends the order to a reseller package that you manage.
1. Click the Provisioning menu tab.
2. In the new panel, click the field under the BLUEPRINT heading.
3. Select Web Hosting in the drop-down menu.
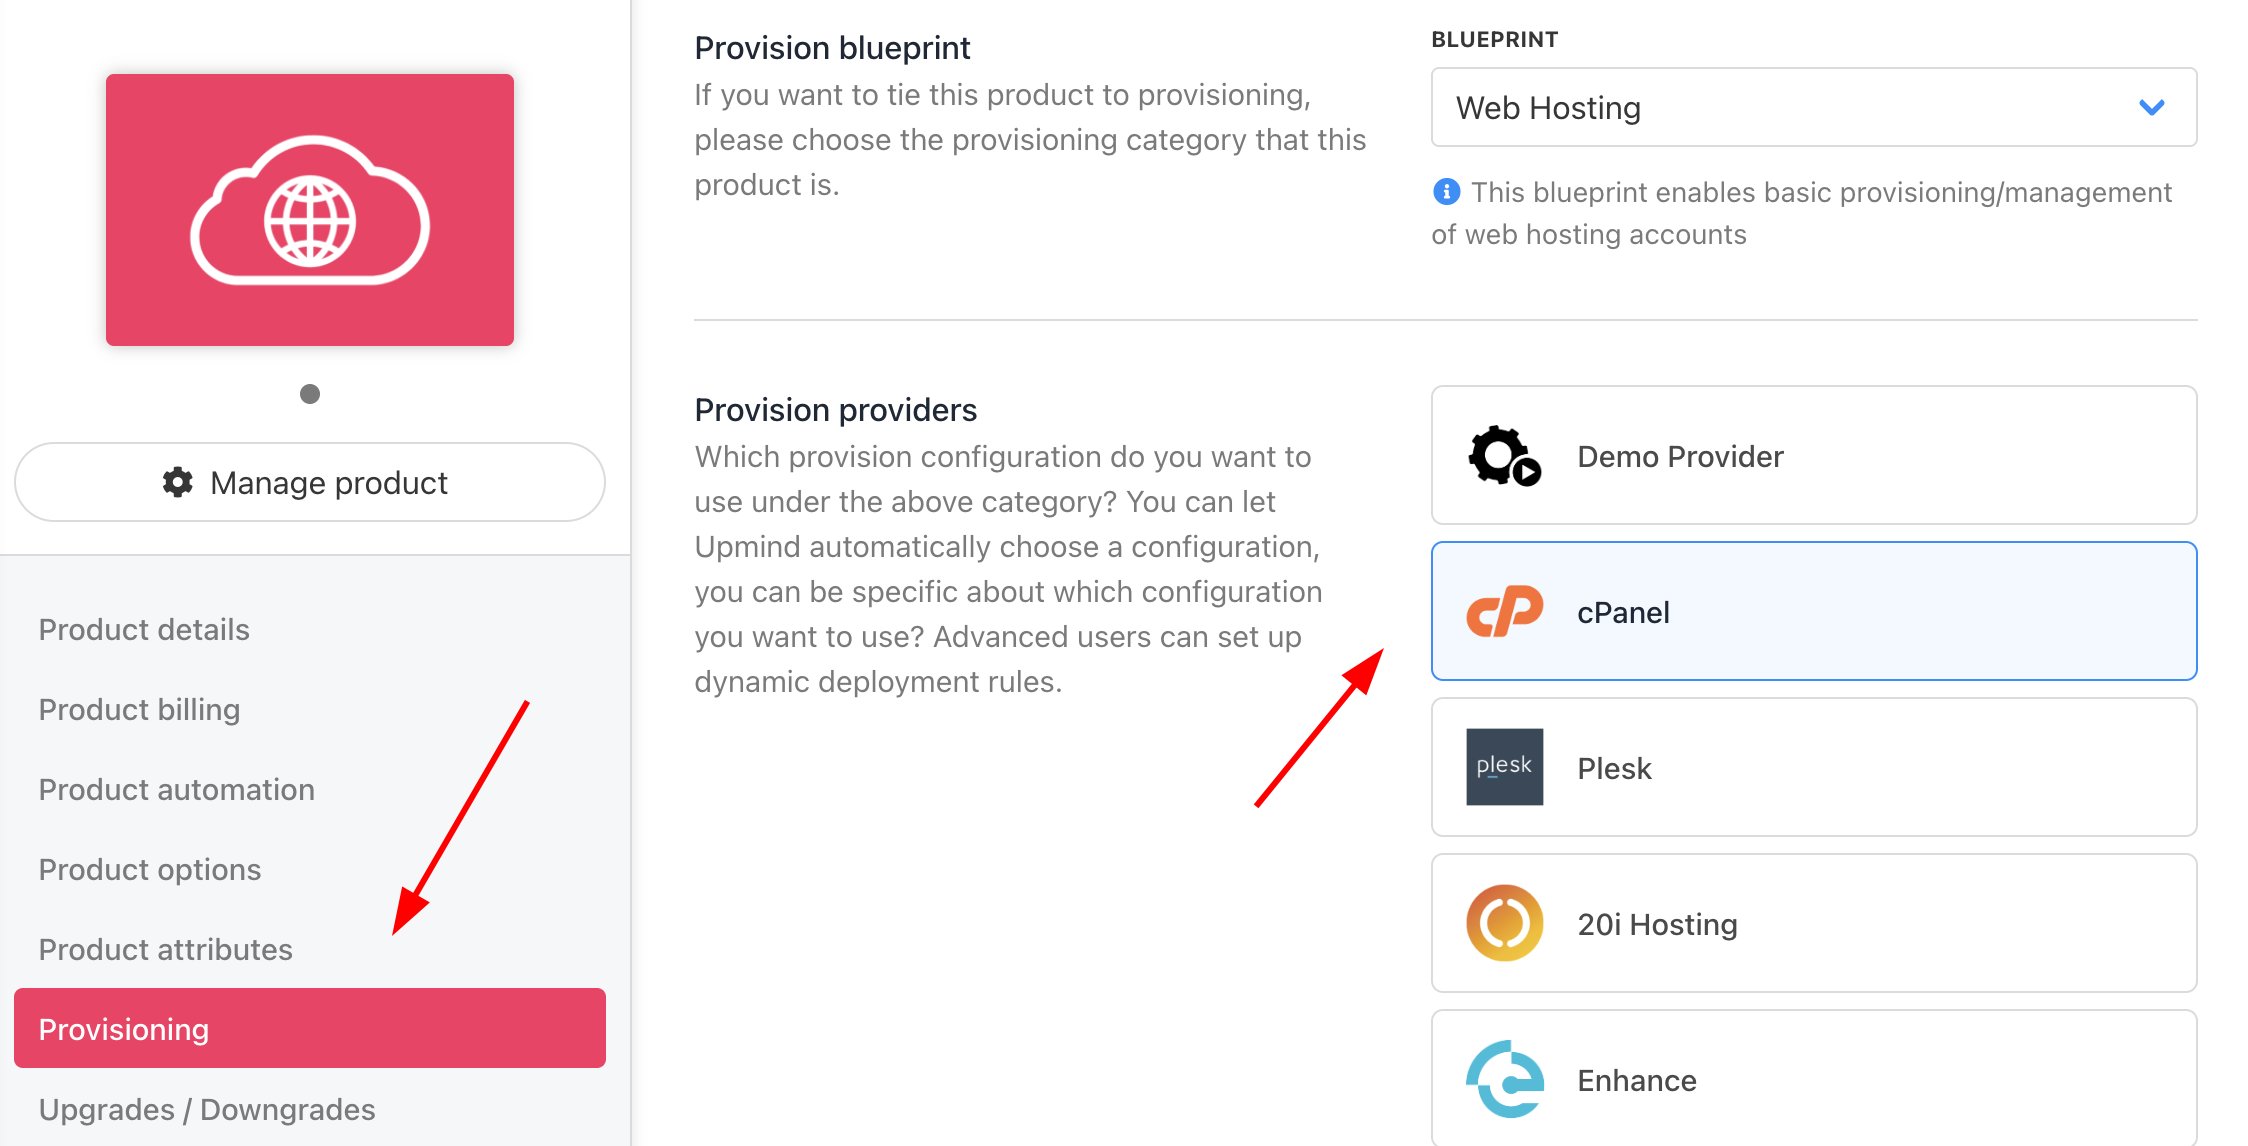 4. Choose the **Provider Configuration** and **Configuration Mode**.
## Package mapping
The next step is to map the Upmind product to a WHM package.
Scroll down the page to the Provision fields heading. There are many fields that you can customise (optional). There is one field - Package Identifier - that you must configure.
1. Click **Package Identifier**.
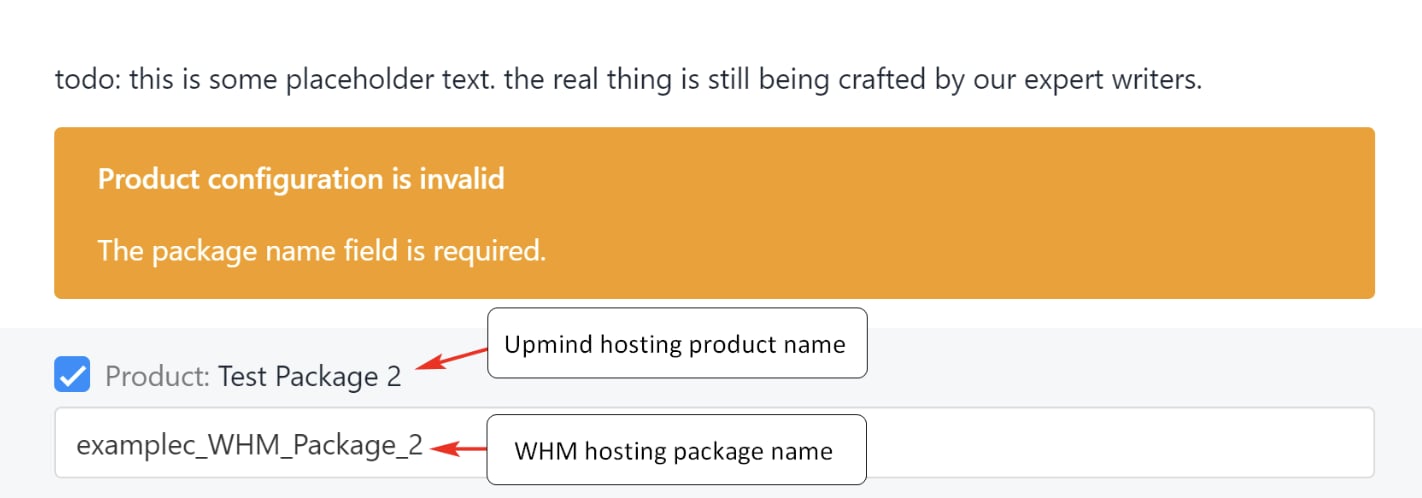
2. On the next page, check the box next to the Upmind hosting package.
3. Paste the name of the WHM package you are mapping.
4. Click **Save**.
4. Choose the **Provider Configuration** and **Configuration Mode**.
## Package mapping
The next step is to map the Upmind product to a WHM package.
Scroll down the page to the Provision fields heading. There are many fields that you can customise (optional). There is one field - Package Identifier - that you must configure.
1. Click **Package Identifier**.
2. On the next page, check the box next to the Upmind hosting package.
3. Paste the name of the WHM package you are mapping.
4. Click **Save**.
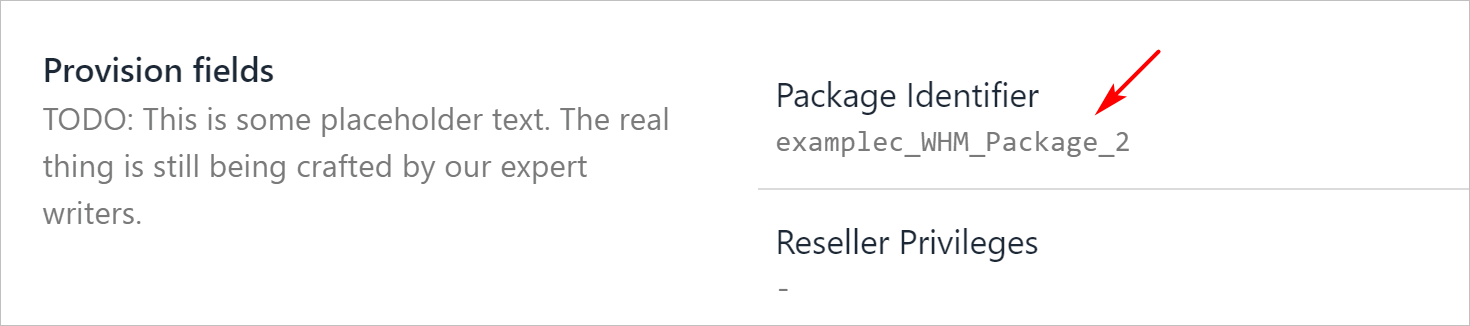
 Upmind adds the package name to the **Package Identifier** field.
 ## WHM package name
If you don't already have a WHM package name, follow these steps to create a package and copy the name.
1. Log in to your WHM account.
2. On the left menu, expand the Packages folder.
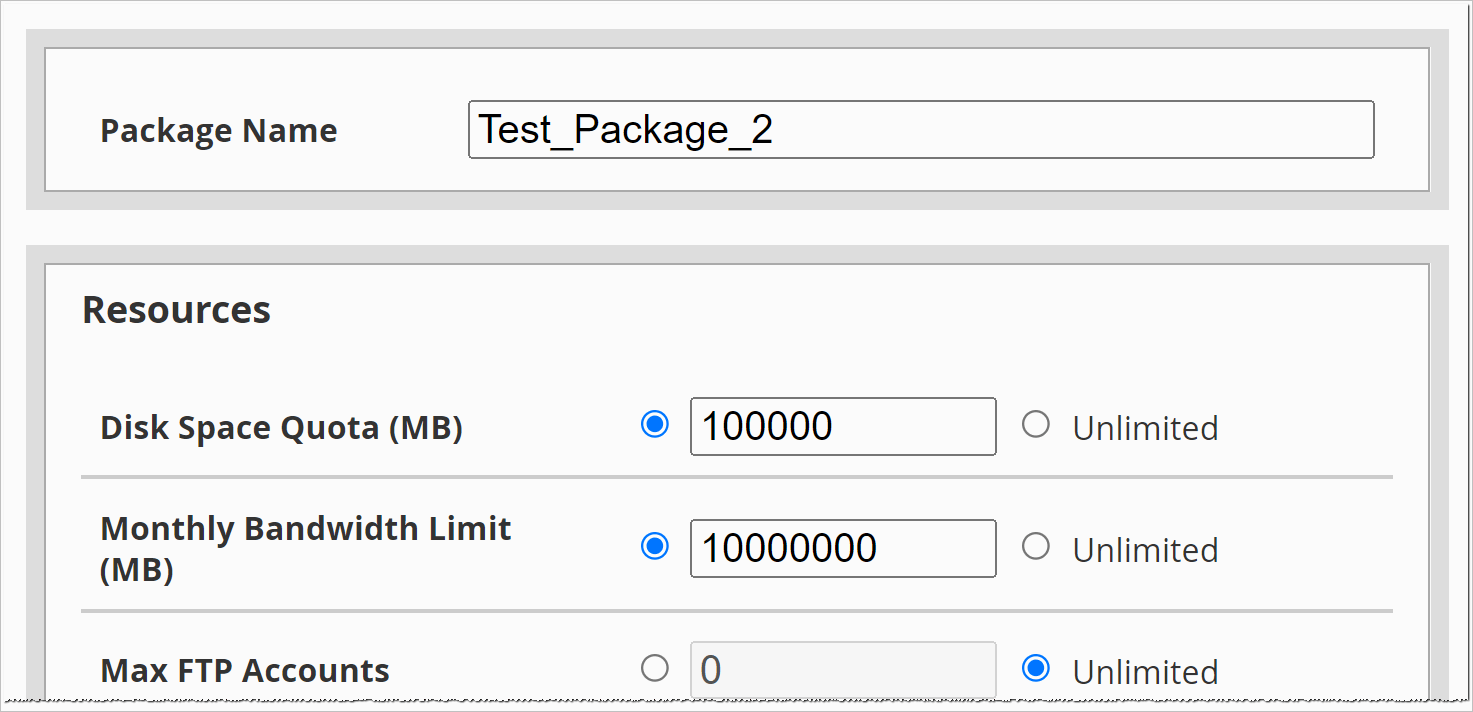
3. Click **Add Package**.
4. Enter a unique name.
5. Scroll through the list and the options that apply.
6. Click **Add**.
## WHM package name
If you don't already have a WHM package name, follow these steps to create a package and copy the name.
1. Log in to your WHM account.
2. On the left menu, expand the Packages folder.
3. Click **Add Package**.
4. Enter a unique name.
5. Scroll through the list and the options that apply.
6. Click **Add**.
 ### Copying package name
1. On the left menu, click **Edit**.
2. In the list of options, select the package you want to map to Upmind.
3. Click **Edit**.
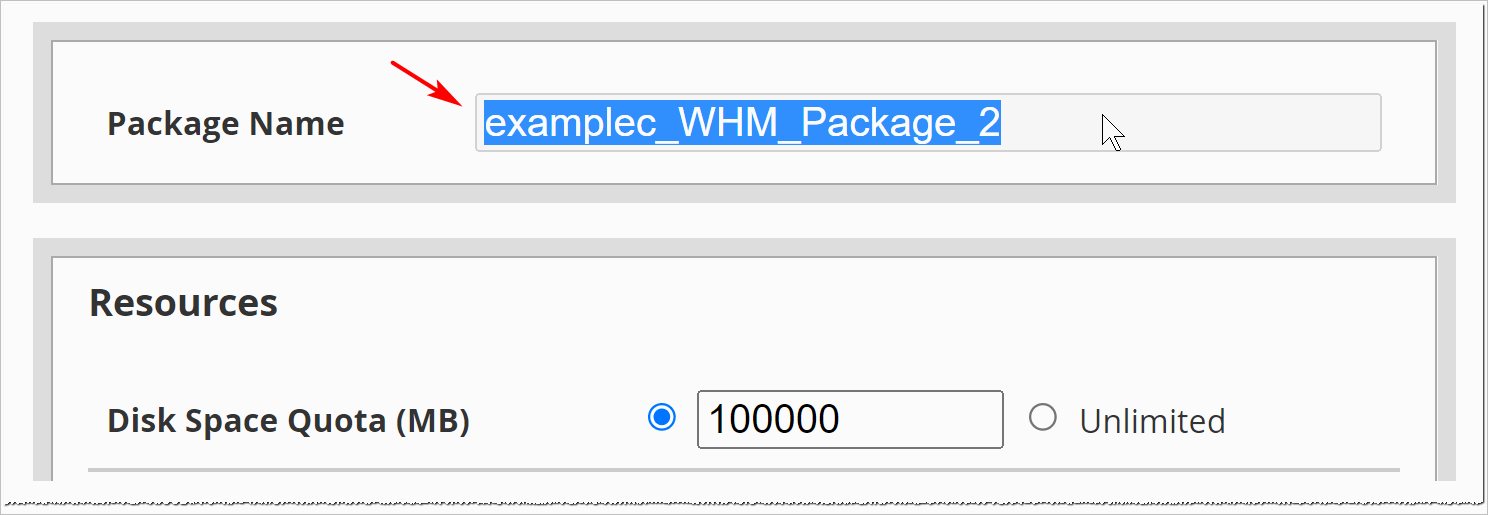
4. In the new window, copy the package name.
5. Go to the Upmind page and paste the name into the Package Identifier field.
WHM automatically adds your account Username to package names.
### Copying package name
1. On the left menu, click **Edit**.
2. In the list of options, select the package you want to map to Upmind.
3. Click **Edit**.
4. In the new window, copy the package name.
5. Go to the Upmind page and paste the name into the Package Identifier field.
WHM automatically adds your account Username to package names.
 ## Customer view
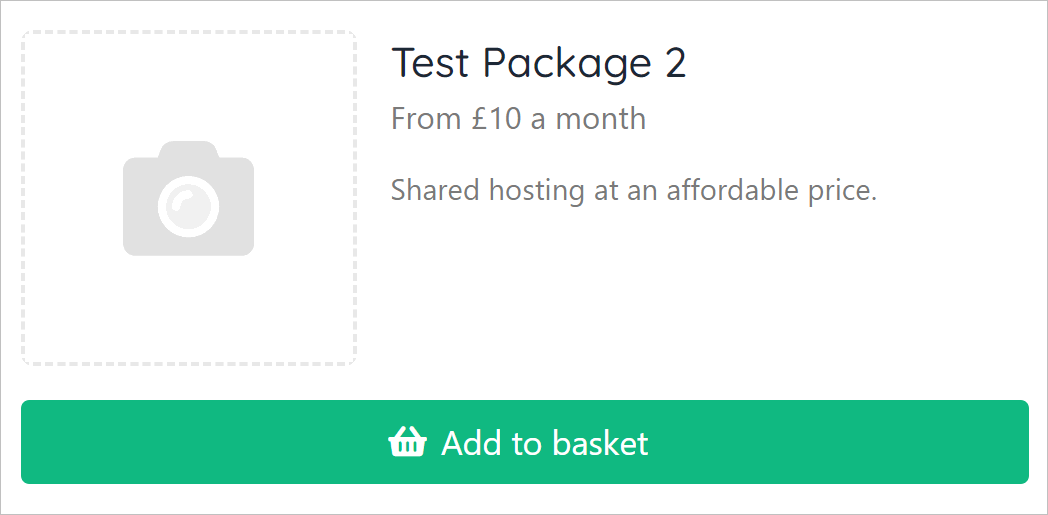
The web hosting product is now live.
## Customer view
The web hosting product is now live.