> ## Documentation Index
> Fetch the complete documentation index at: https://docs.upmind.com/llms.txt
> Use this file to discover all available pages before exploring further.
# How to sell Enhance hosting
> Add Enhance web server to sell hosting products through Upmind.
[Enhance](https://enhance.com/) is a hosting control panel software that lets you run a shared or dedicated hosting platform.
The Enhance integration on Upmind allows you to provision, manage, suspend, and terminate Enhance accounts. This lets you sell Enhance web hosting.
## What you will need
* A server running Enhance. This can either be a server you run yourself, or a reseller account running the Enhance control panel.
* An [Upmind account](https://upmind.com/start).
## Create a provision configuration
### Generate an Access Token in Enhance
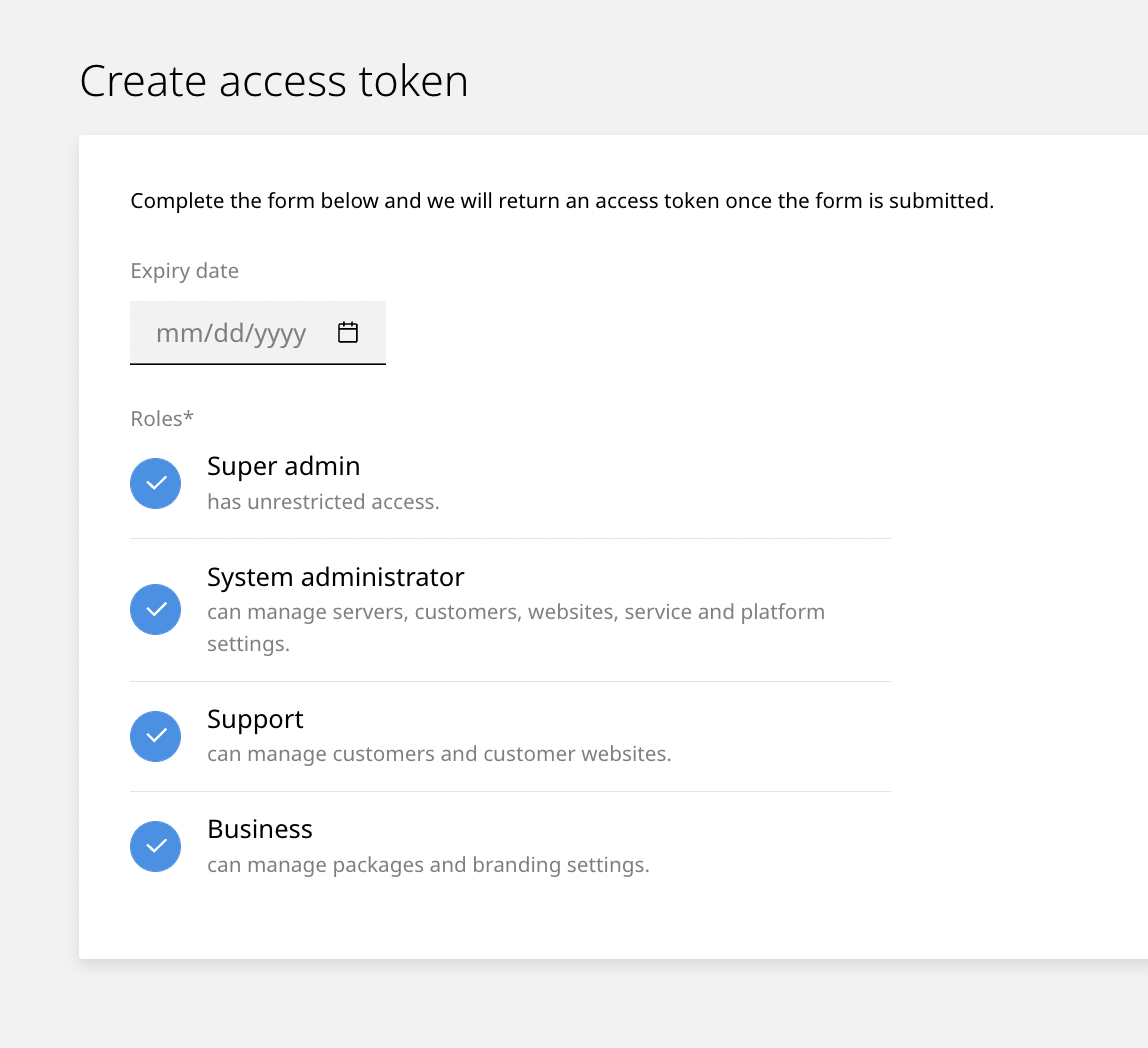
In Enhance, you need to generate an Access token. This is done in your Enhance control panel under **Settings**> **Access Token**.
When creating an access token, for now, you need to grant **Super admin** permissions. We recommend not setting an expiry date. We understand Enhance will be making more suitable granular permissions in the near future.
 Once the token is created, make a note of the org-id and the access token itself.
### Linking Enhance to Upmind
In Upmind, you should add Enhance as a provision configuration. You can either do this
* On the sidebar, click **Host Control** > **Web Servers**> **Add New.** You can also select it from below.
Once the token is created, make a note of the org-id and the access token itself.
### Linking Enhance to Upmind
In Upmind, you should add Enhance as a provision configuration. You can either do this
* On the sidebar, click **Host Control** > **Web Servers**> **Add New.** You can also select it from below.
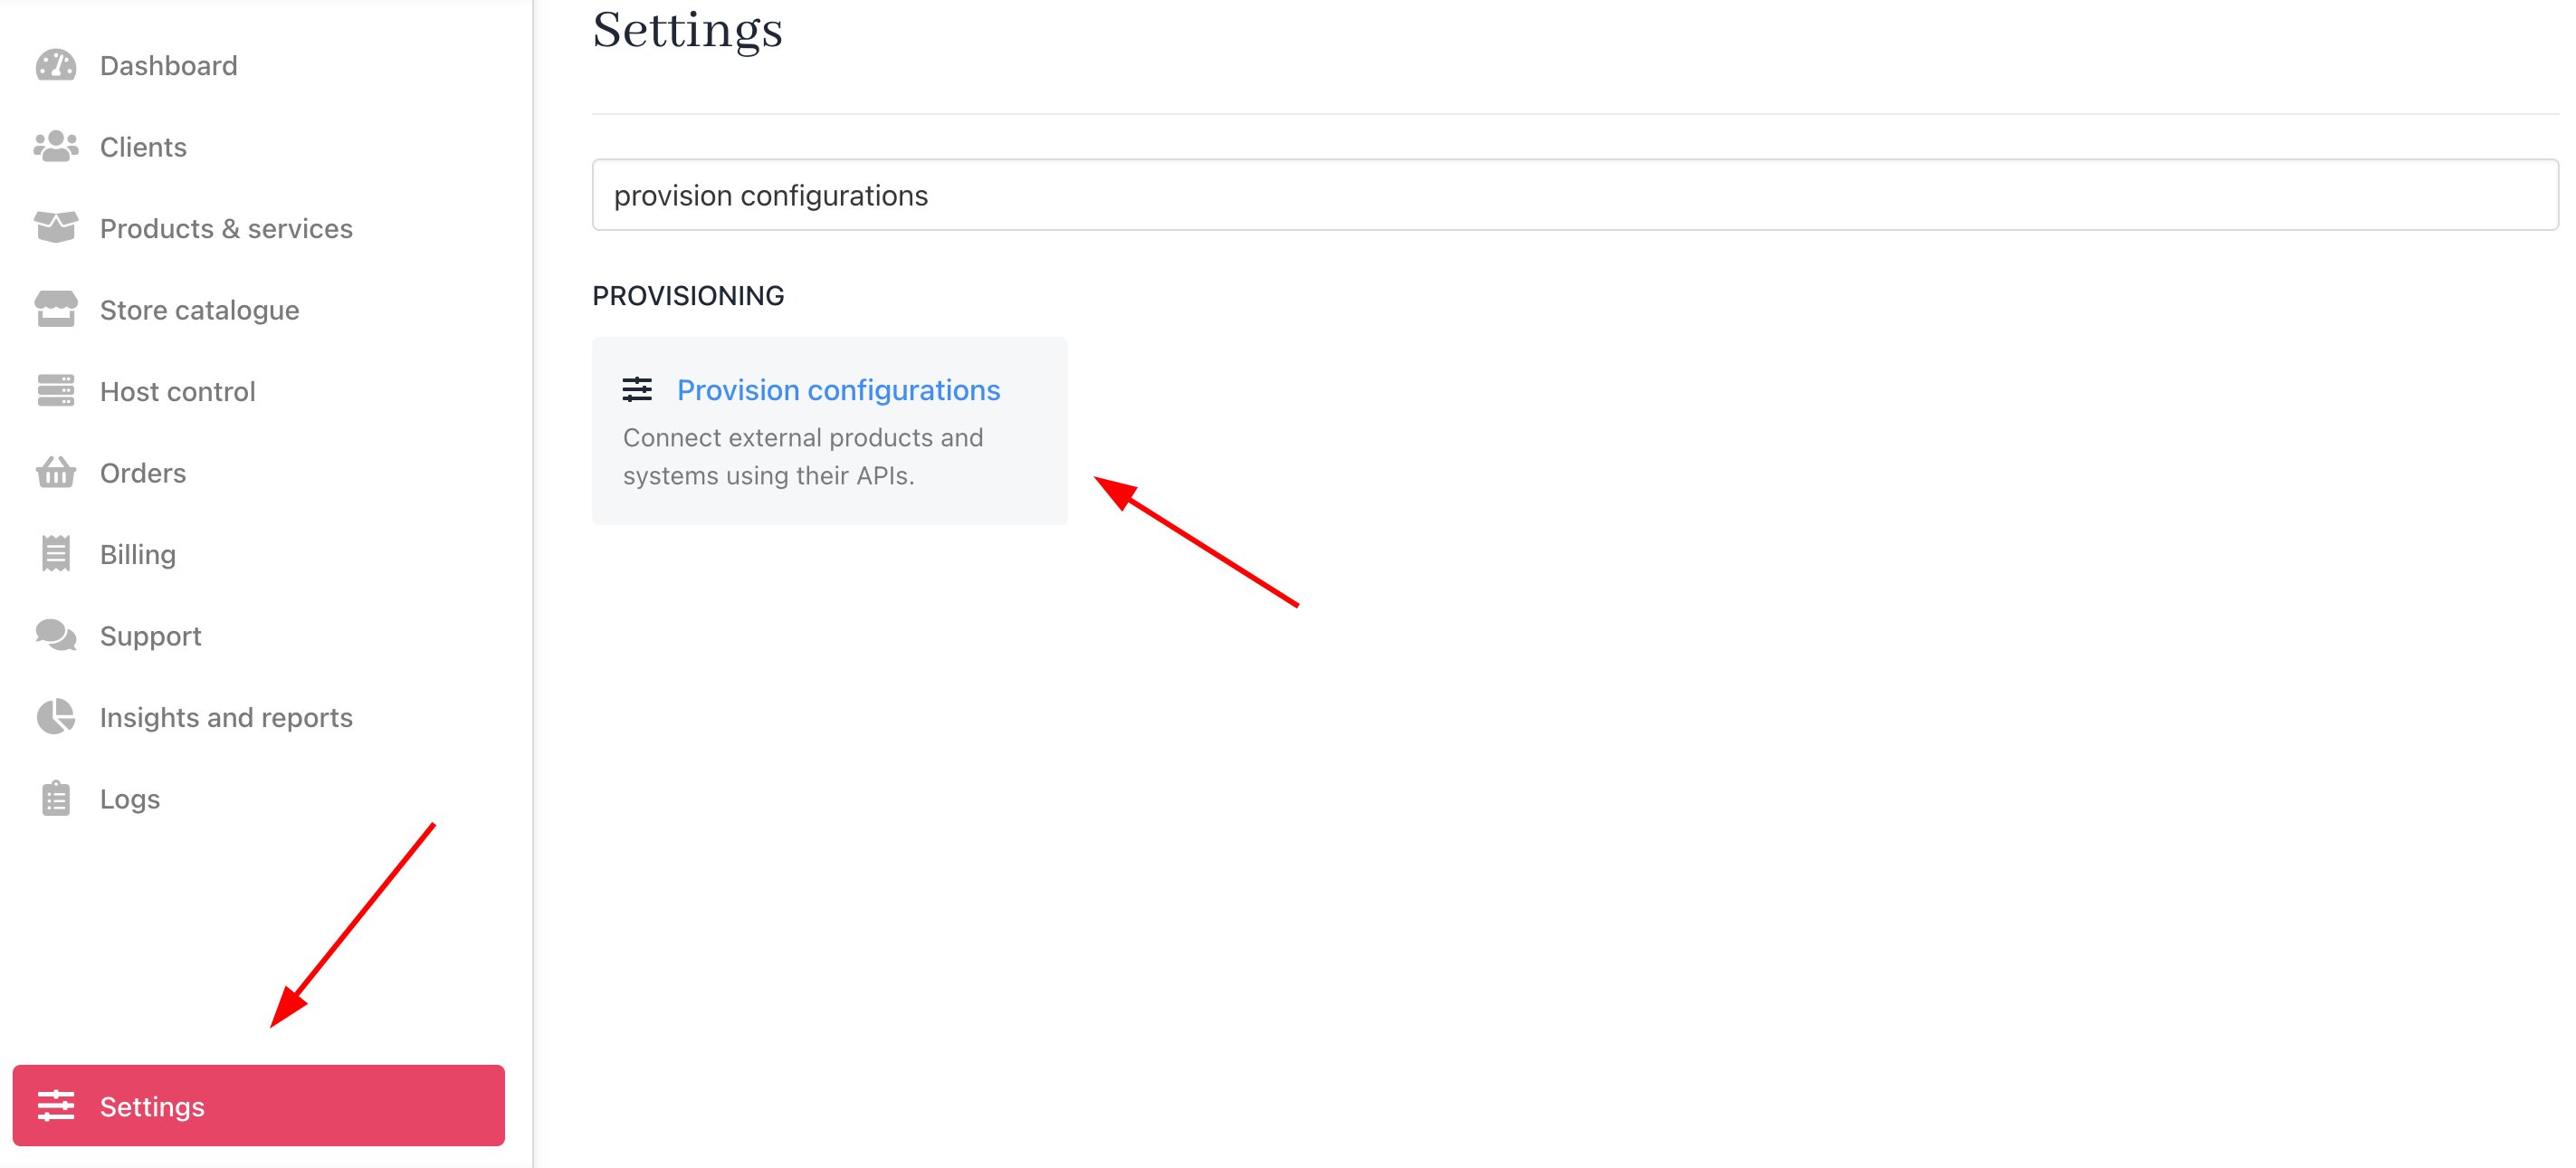
 * On the sidebar, go to **Settings** > **Provision Configurations** > **Add New Configuration.**
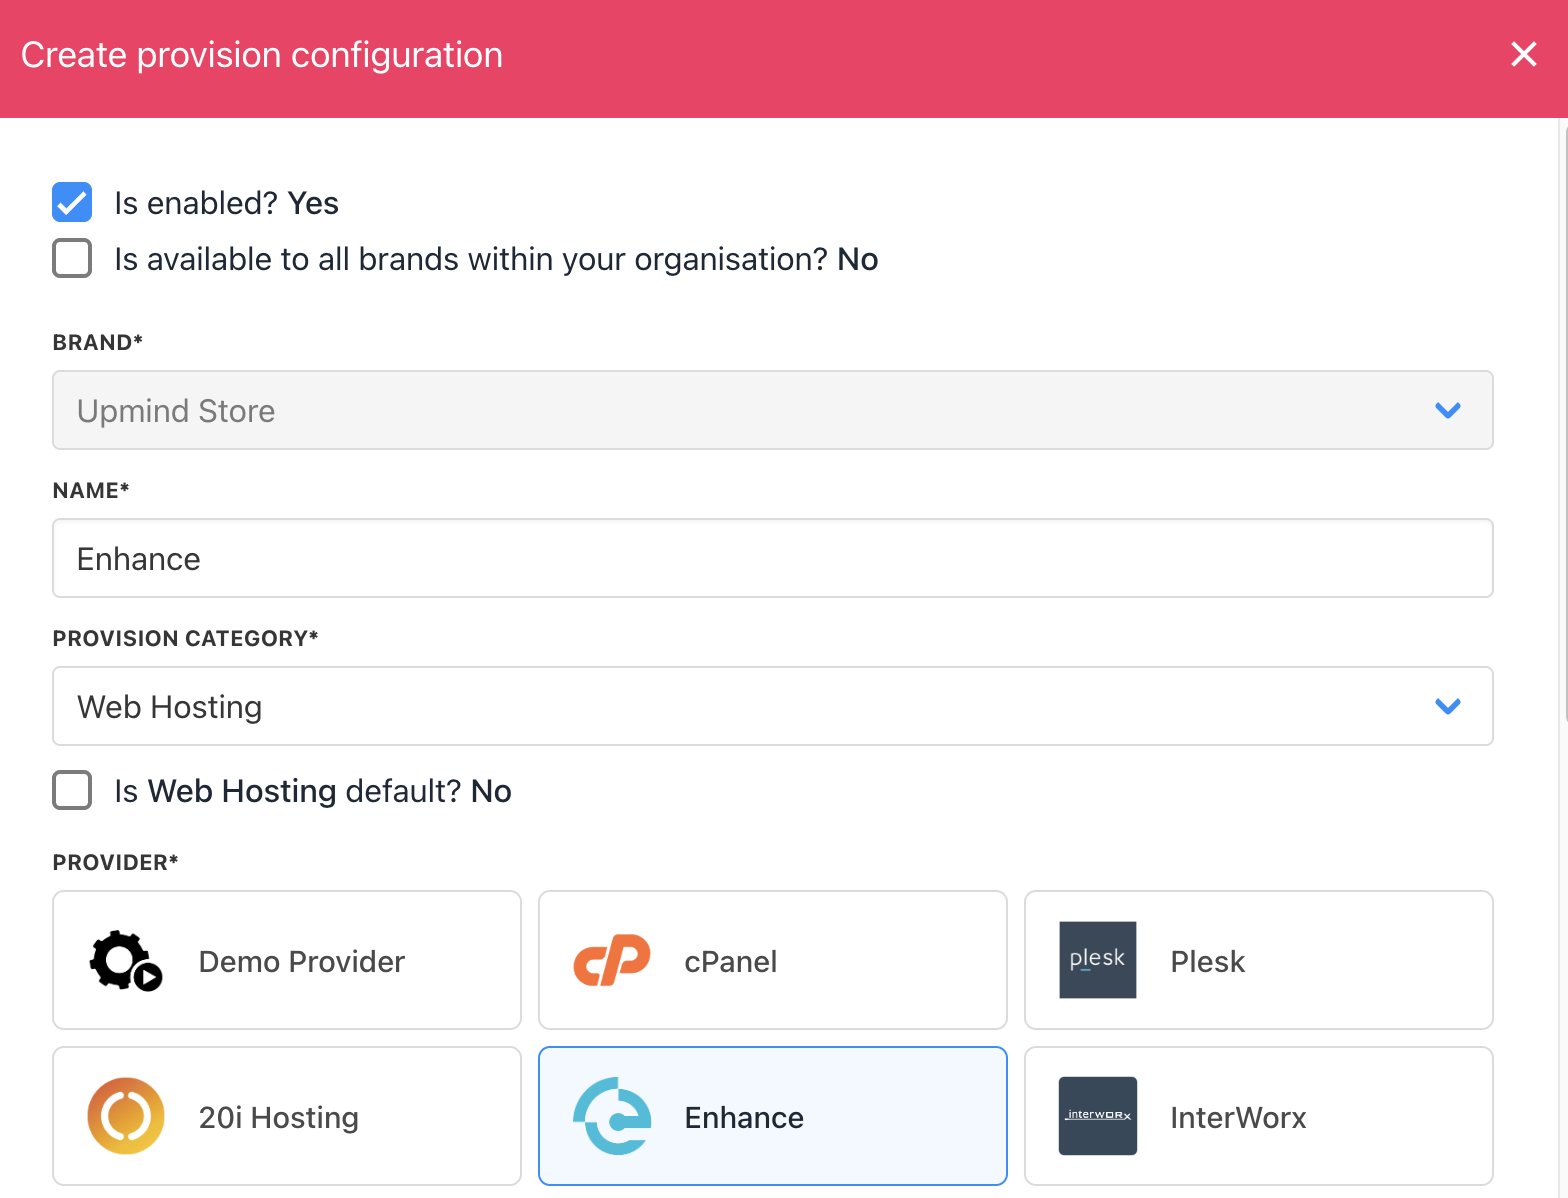
 You should fill it out as follows:
1. Enter a server name. You may just want to use the Enhance control server name or give it a more familiar name.
2. Under the Provision Category of **Web Hosting**, choose Enhance as the hosting panel type.
You should fill it out as follows:
1. Enter a server name. You may just want to use the Enhance control server name or give it a more familiar name.
2. Under the Provision Category of **Web Hosting**, choose Enhance as the hosting panel type.
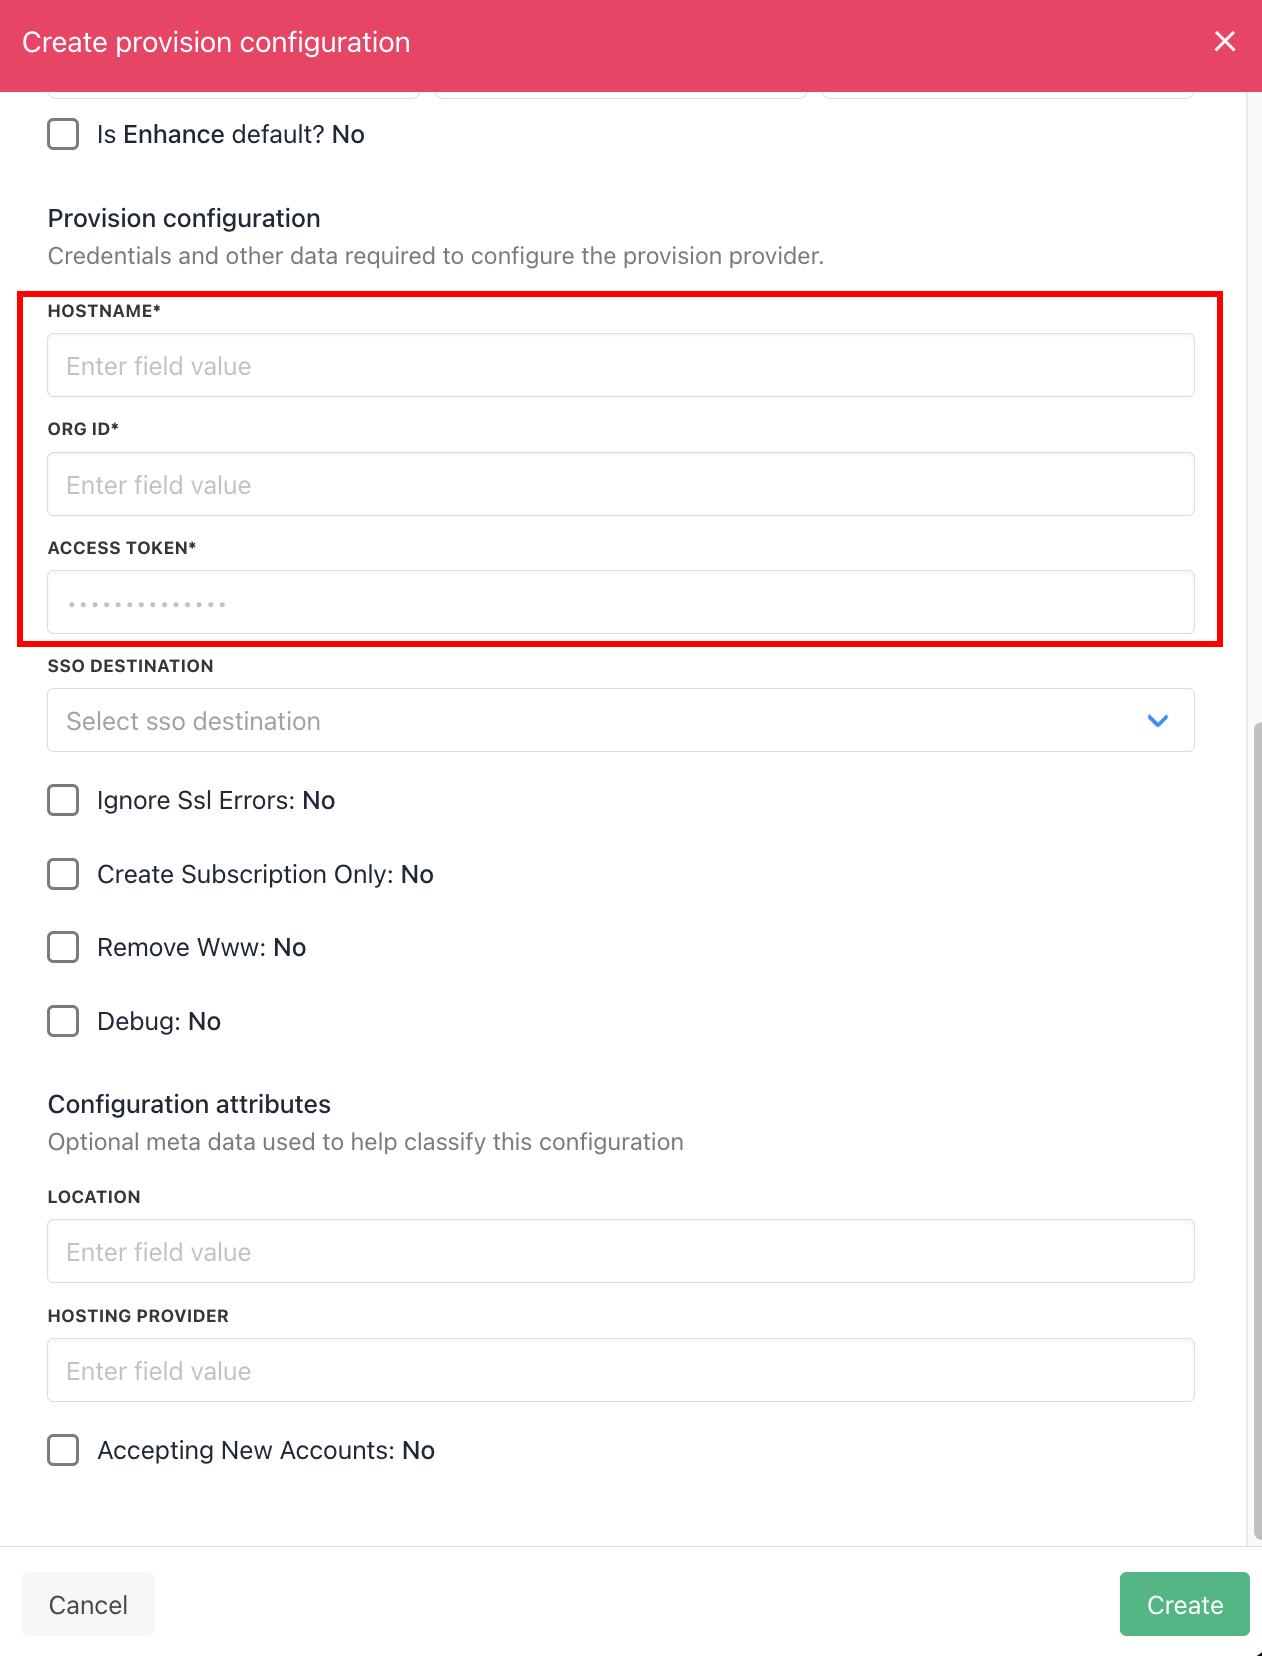
 3. Enter your **Hostname**, **Org ID,** and **Access Token.**
4. Click **Create**.
3. Enter your **Hostname**, **Org ID,** and **Access Token.**
4. Click **Create**.
 That's it! Enhance is added as a web server.
## Create packages
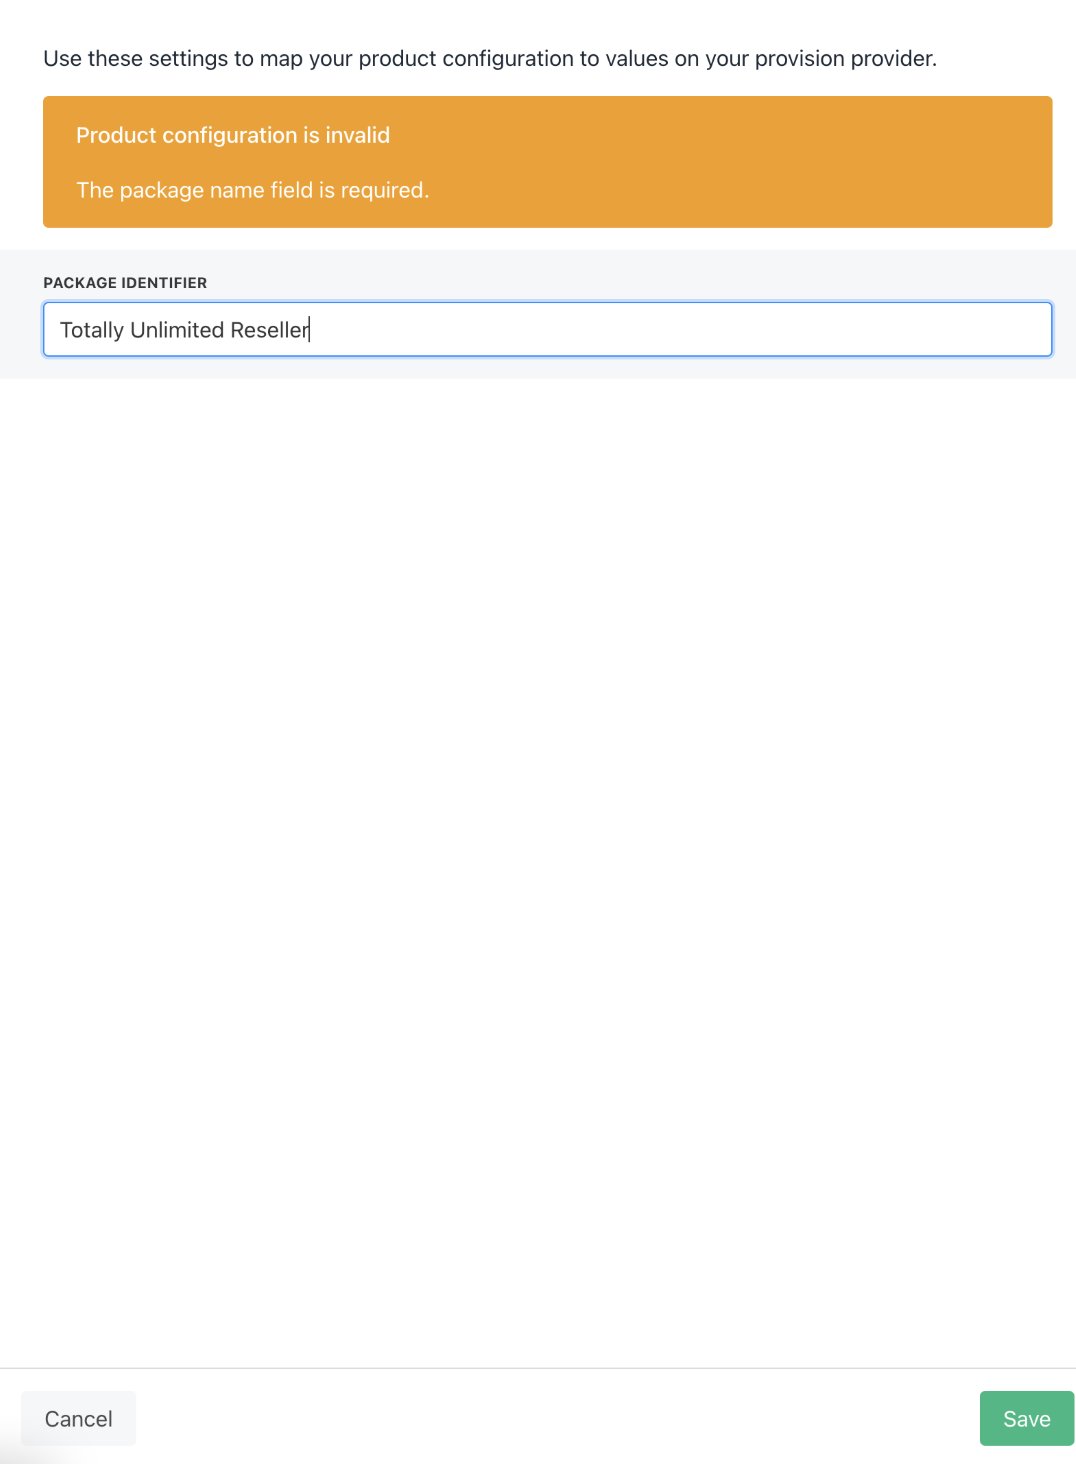
When you create hosting packages in Upmind, you can now choose Enhance as a provision provider. You will be asked for the **Package Identifier**. It's recommended to use the Enhance package **name** (case sensitive), but if you need to change your package names in Enhance or if their names aren't unique, you should instead use the Enhance package **ID**.
### Get Enhance package identifier
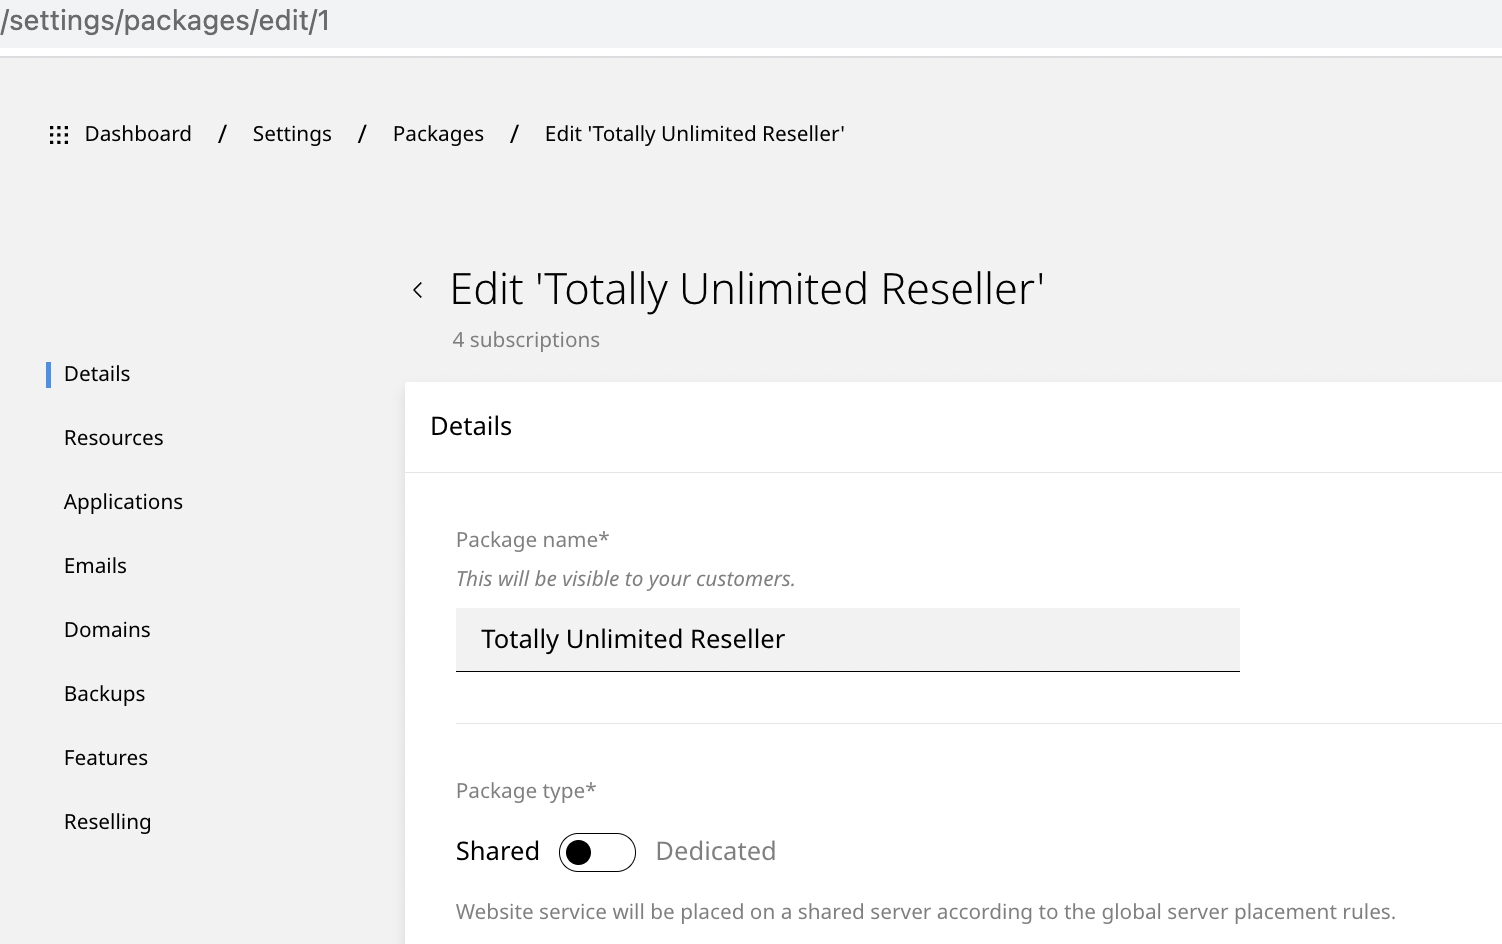
In your Enhance control panel, go to **Settings**> **Packages** and click to edit the package you want to configure in Upmind.
* The package **name** is the one you set when you created the package in Enhance and can be copied from the **Details** section.
* The package **ID** can be seen in the URL.
That's it! Enhance is added as a web server.
## Create packages
When you create hosting packages in Upmind, you can now choose Enhance as a provision provider. You will be asked for the **Package Identifier**. It's recommended to use the Enhance package **name** (case sensitive), but if you need to change your package names in Enhance or if their names aren't unique, you should instead use the Enhance package **ID**.
### Get Enhance package identifier
In your Enhance control panel, go to **Settings**> **Packages** and click to edit the package you want to configure in Upmind.
* The package **name** is the one you set when you created the package in Enhance and can be copied from the **Details** section.
* The package **ID** can be seen in the URL.
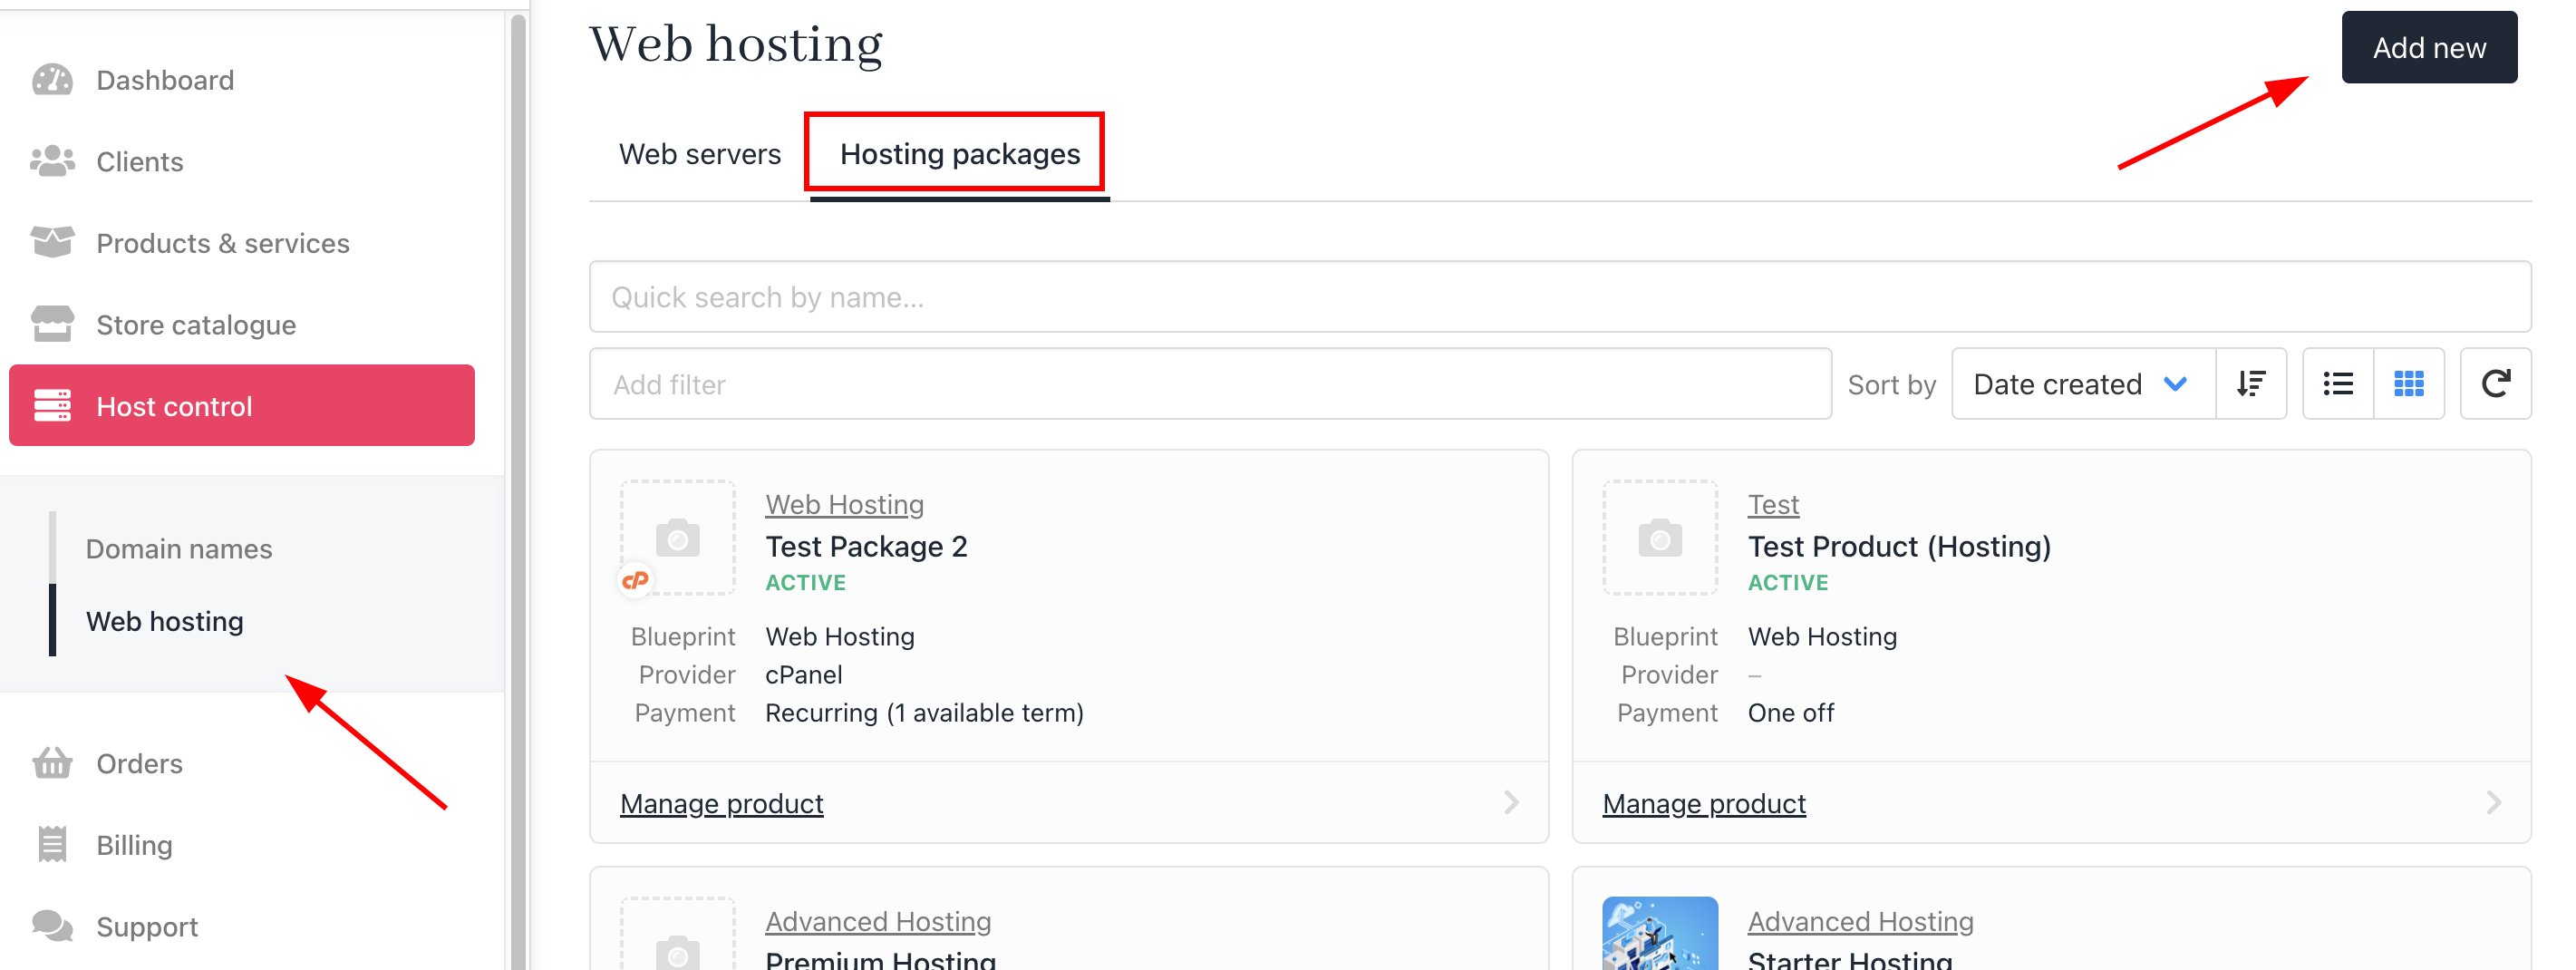
 ### Configure Upmind products
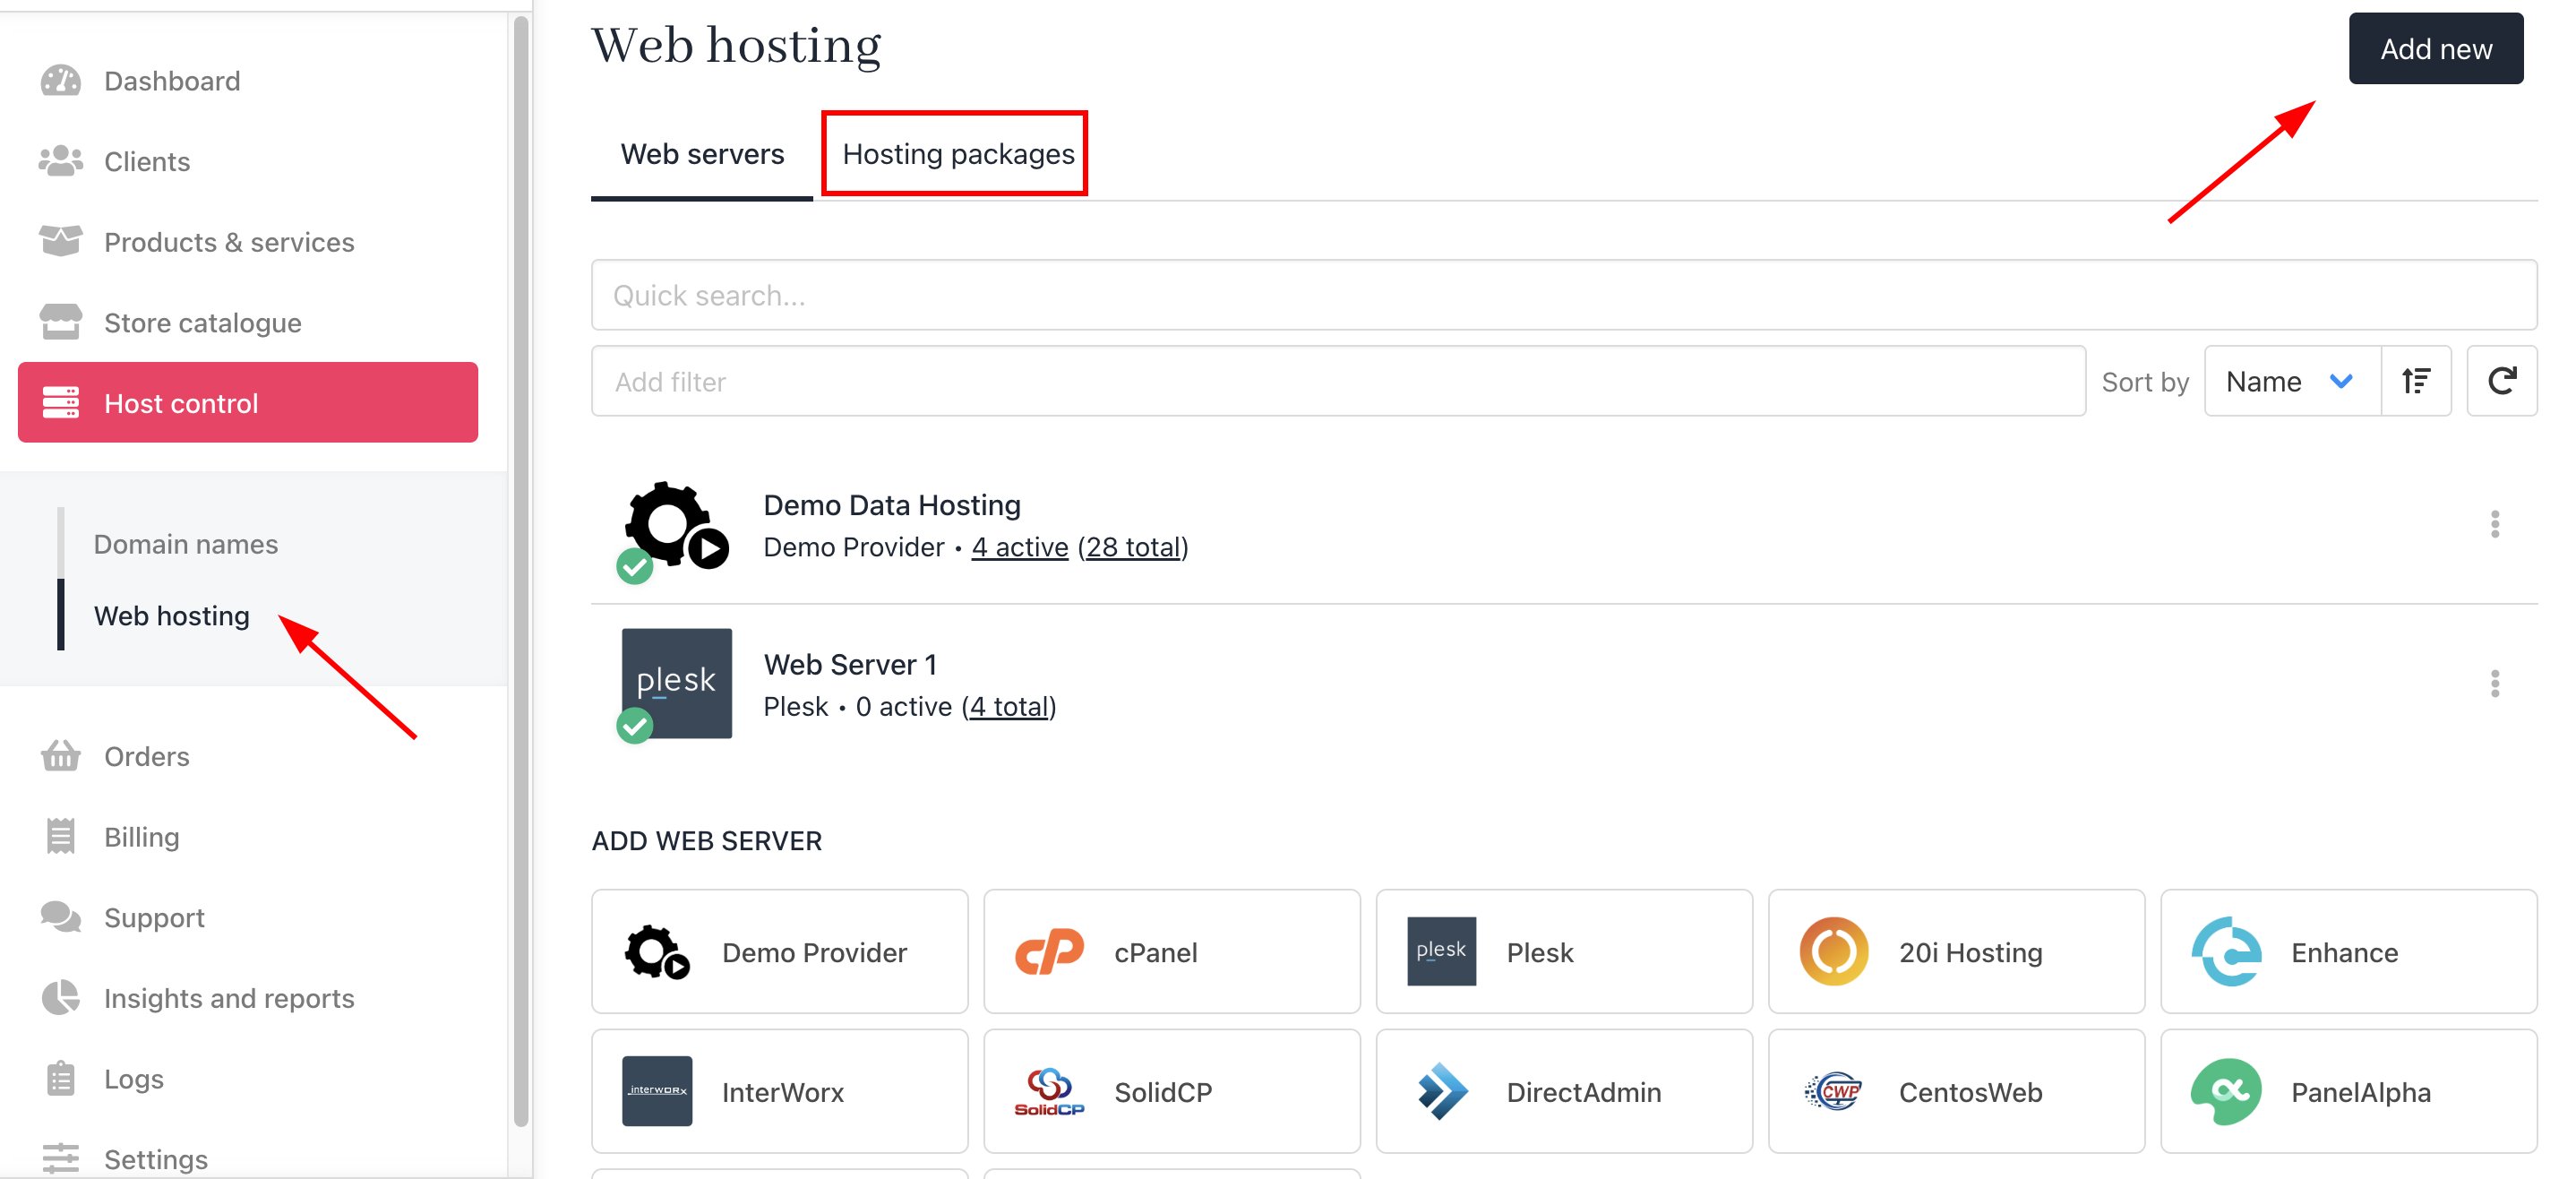
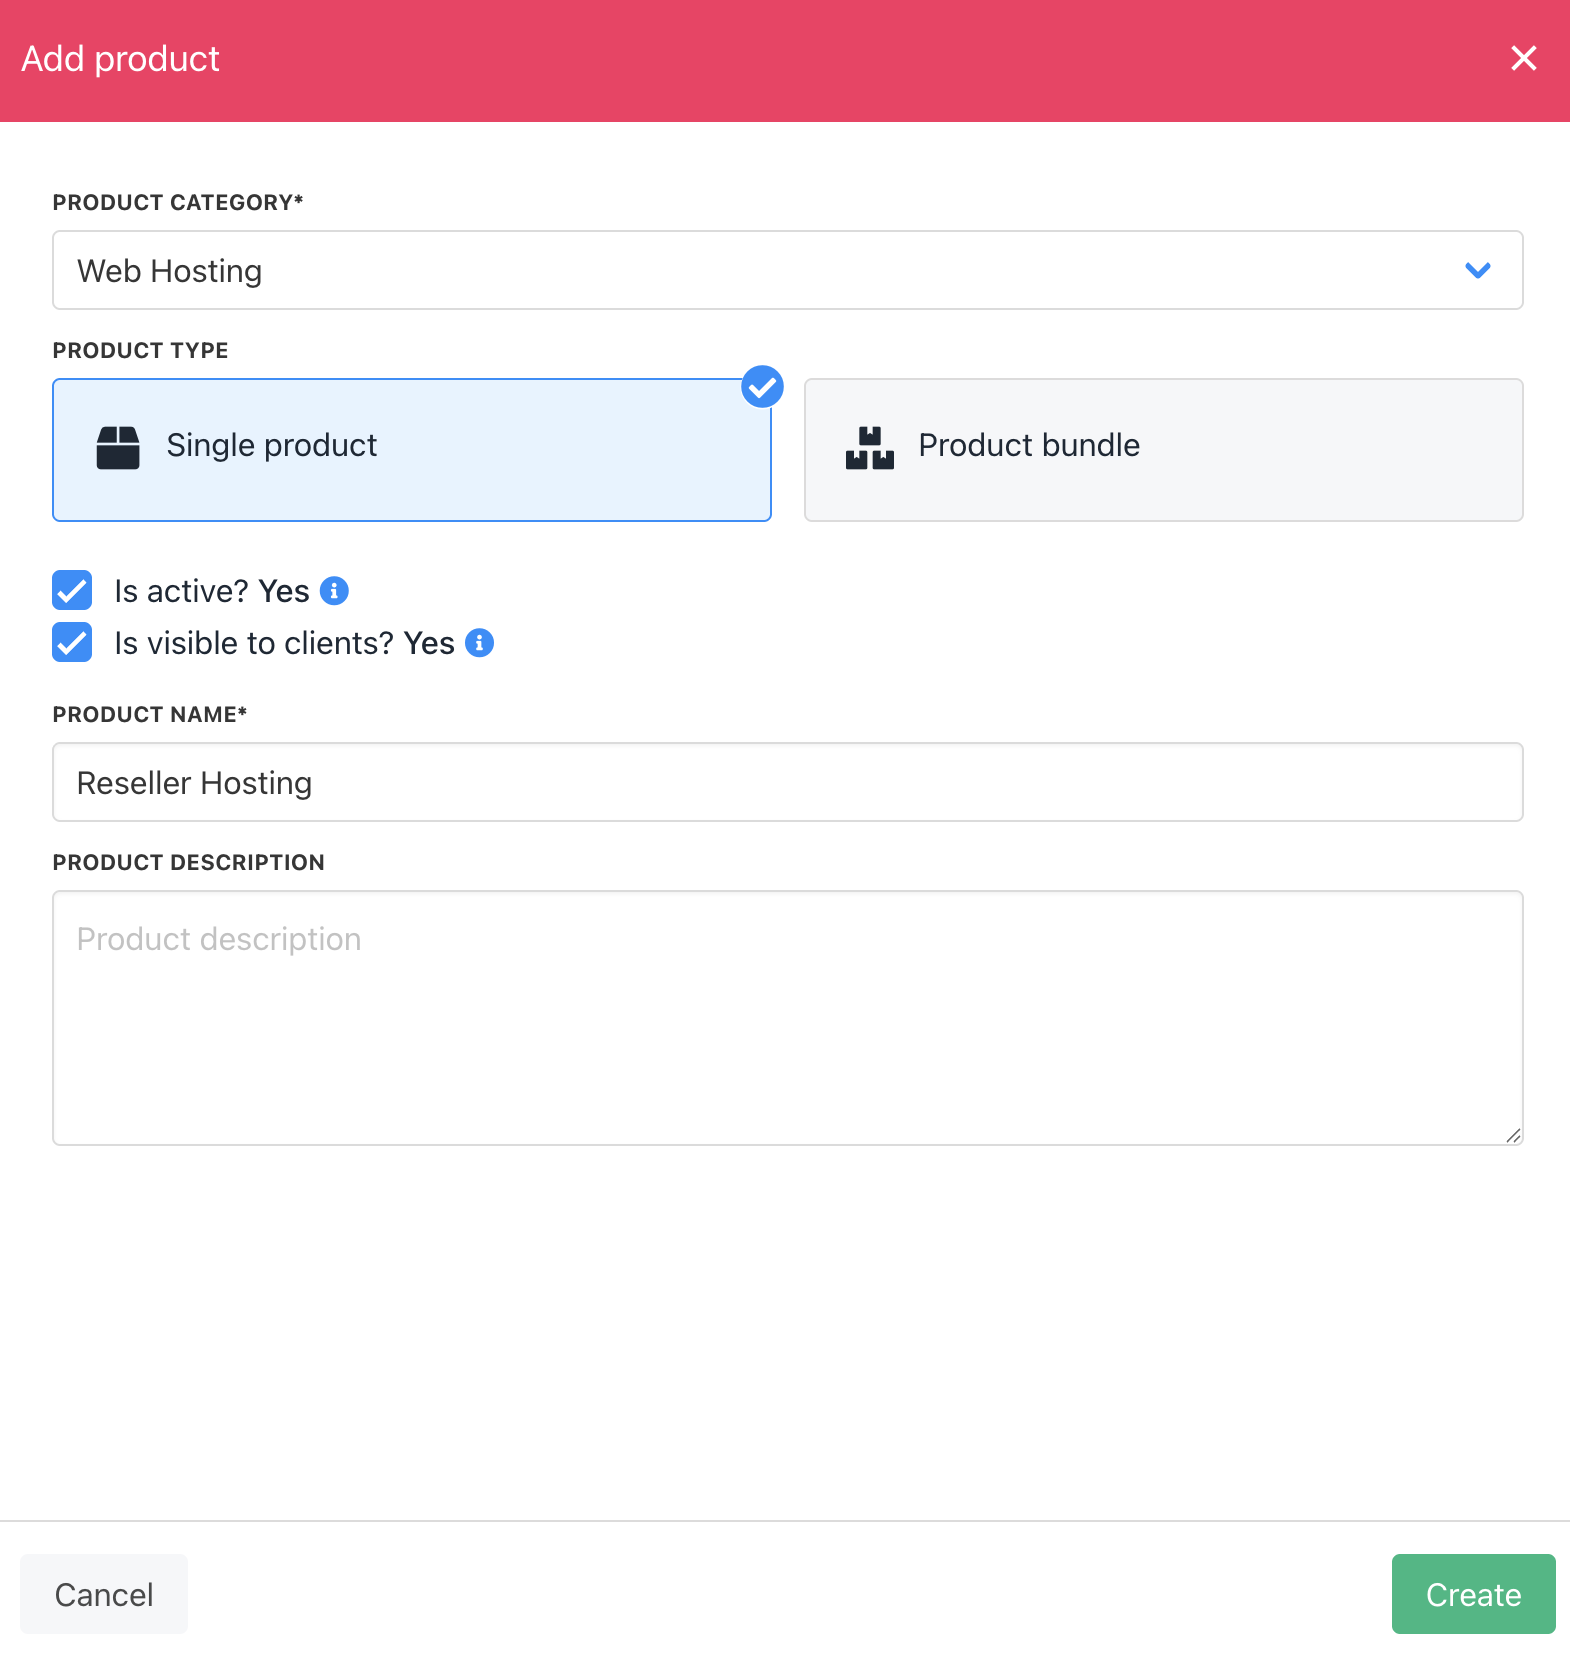
In your Upmind admin area, under **Host control** > **Web hosting,** click on the **Hosting packages** tab and click the **Add new** button to start configuring a new hosting package.
### Configure Upmind products
In your Upmind admin area, under **Host control** > **Web hosting,** click on the **Hosting packages** tab and click the **Add new** button to start configuring a new hosting package.
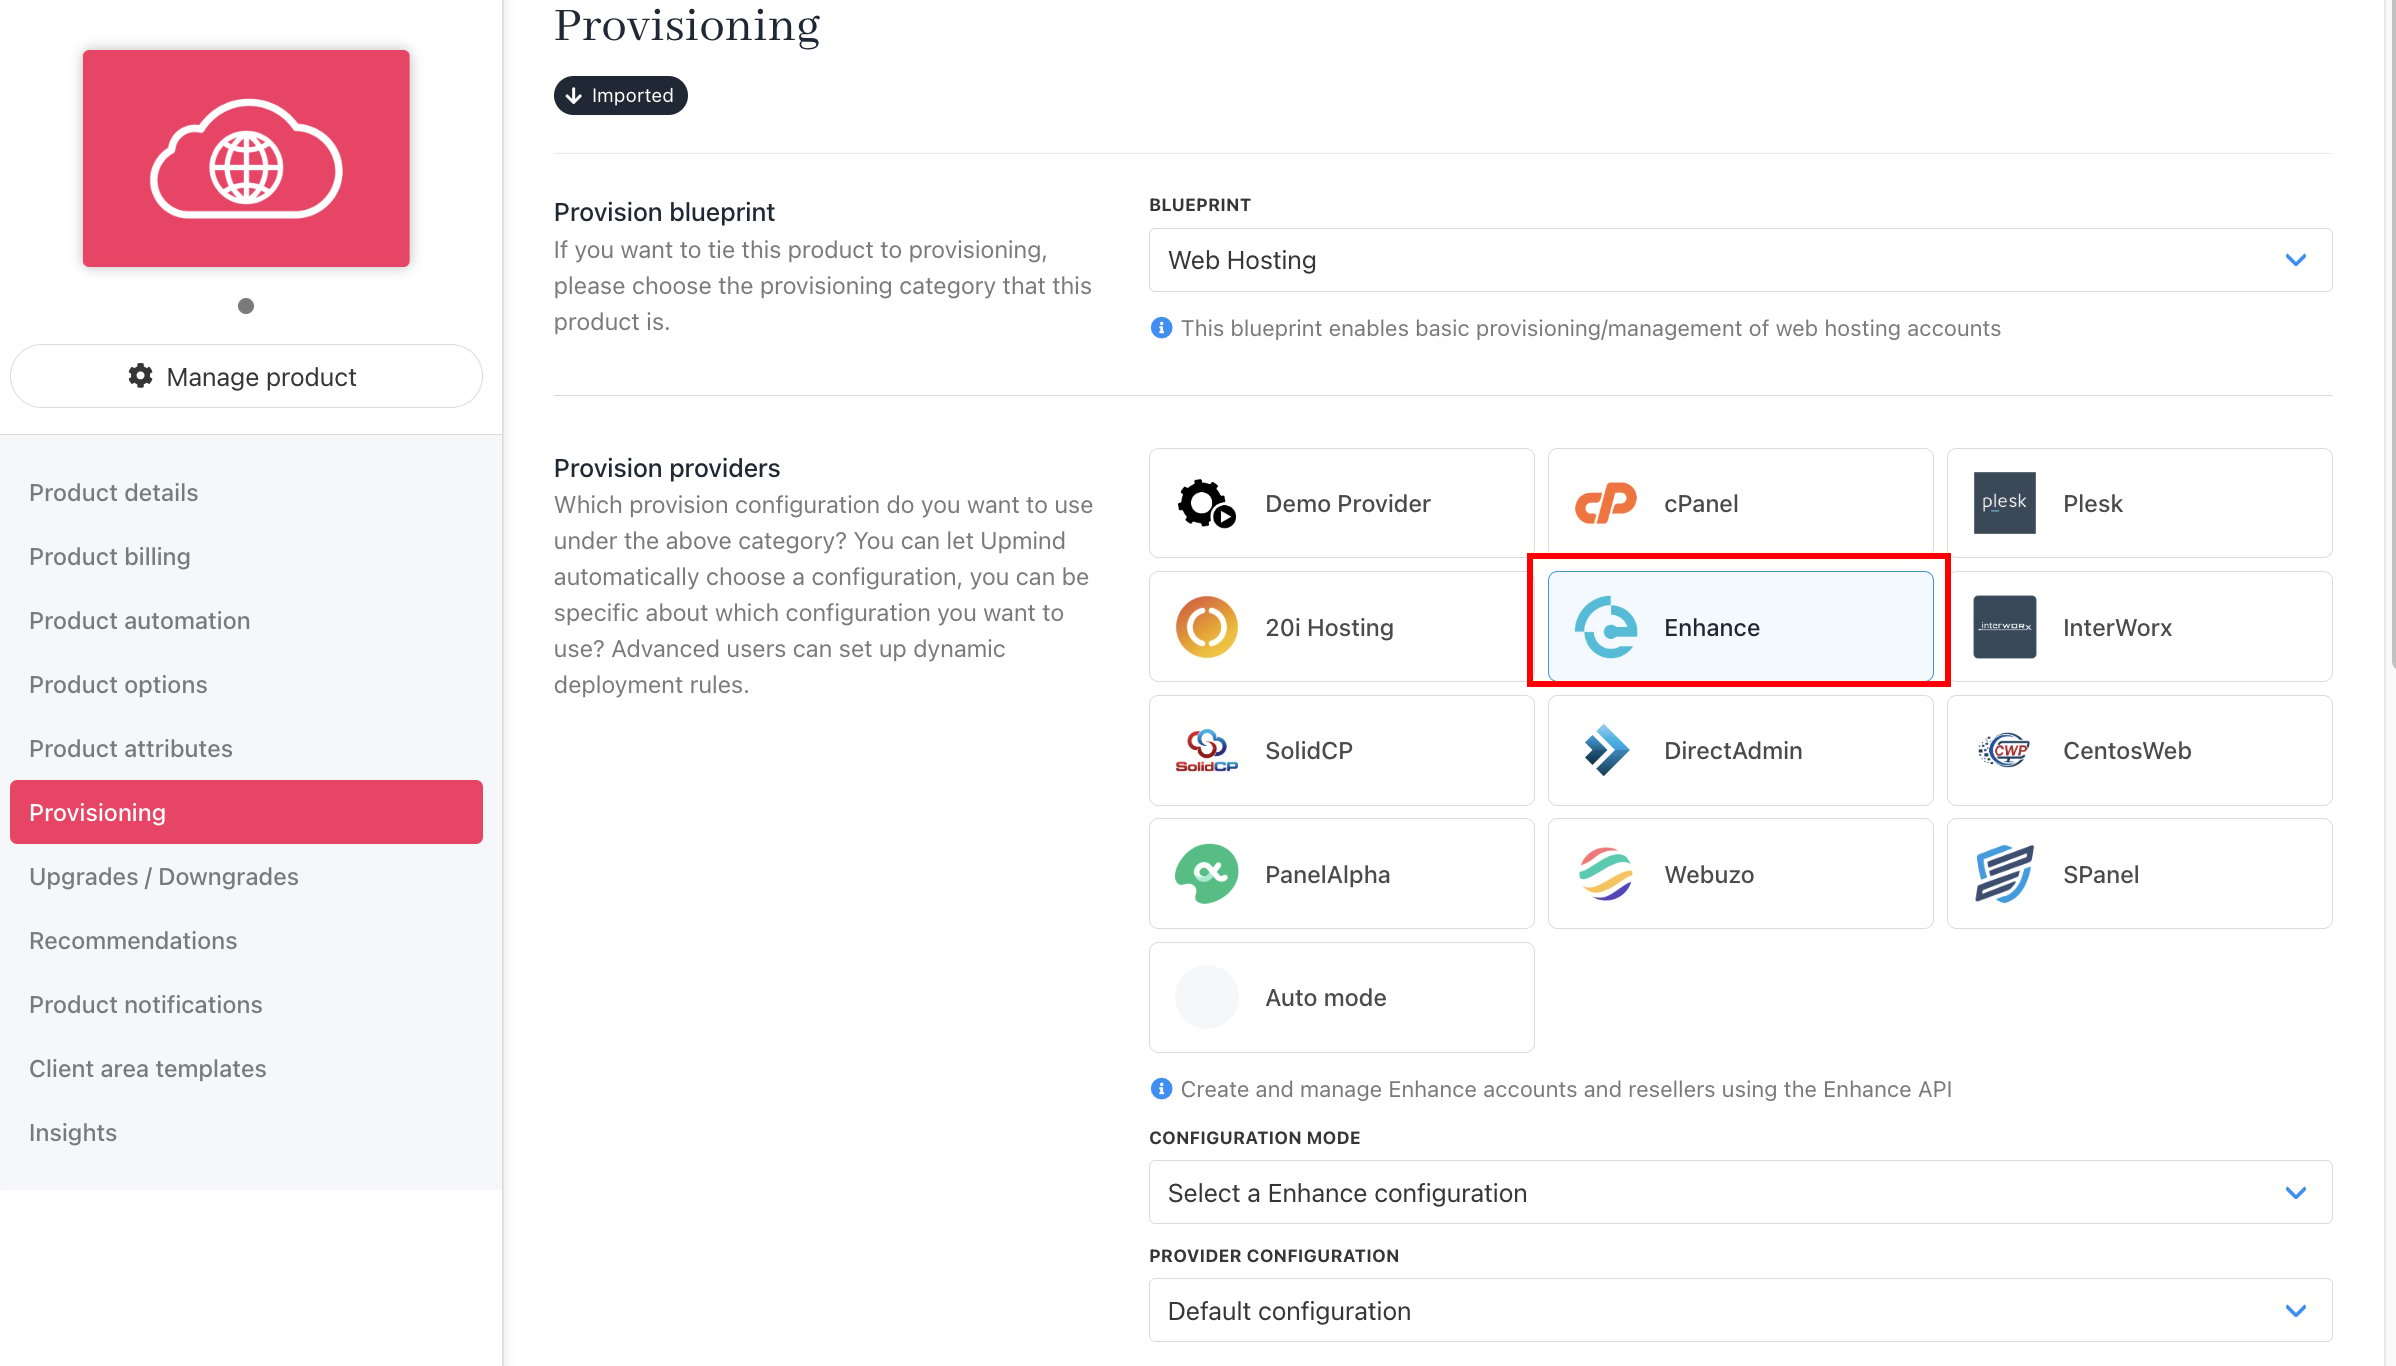
 Now go to the product's Provisioning page and set the **Provision provider** to Enhance, and set the **Package Identifier** provision field to match your Enhance package **name** or **ID**.
 At this point, your Enhance product provisioning is all set up and ready to go. For more information on setting up and selling hosting products in Upmind, refer to our first step and [Web Hosting Quick Start](/for-web-hosts/quick-start-guide-for-hosting-companies-or-resellers) guides.
### Website locations
If you have multiple servers configured in Enhance, customers can have the option to choose the server location for new websites, according to your Enhance **Server Group** configuration.
For more information on setting up server groups in Enhance, refer to their guide [Add Location Based Hosting Packages](https://enhance.com/docs/packages/create-location-based-hosting-packages.html).
When Upmind creates an Enhance subscription for a new order, a website gets created for the domain name the customer provided in their order details. By default, this website will be automatically allocated to a server group according to your settings in Enhance.
If you want to let your customers choose their server location for new orders, there are 2 options:
1. Skip website creation for new orders.
2. Configure server groups in Upmind.
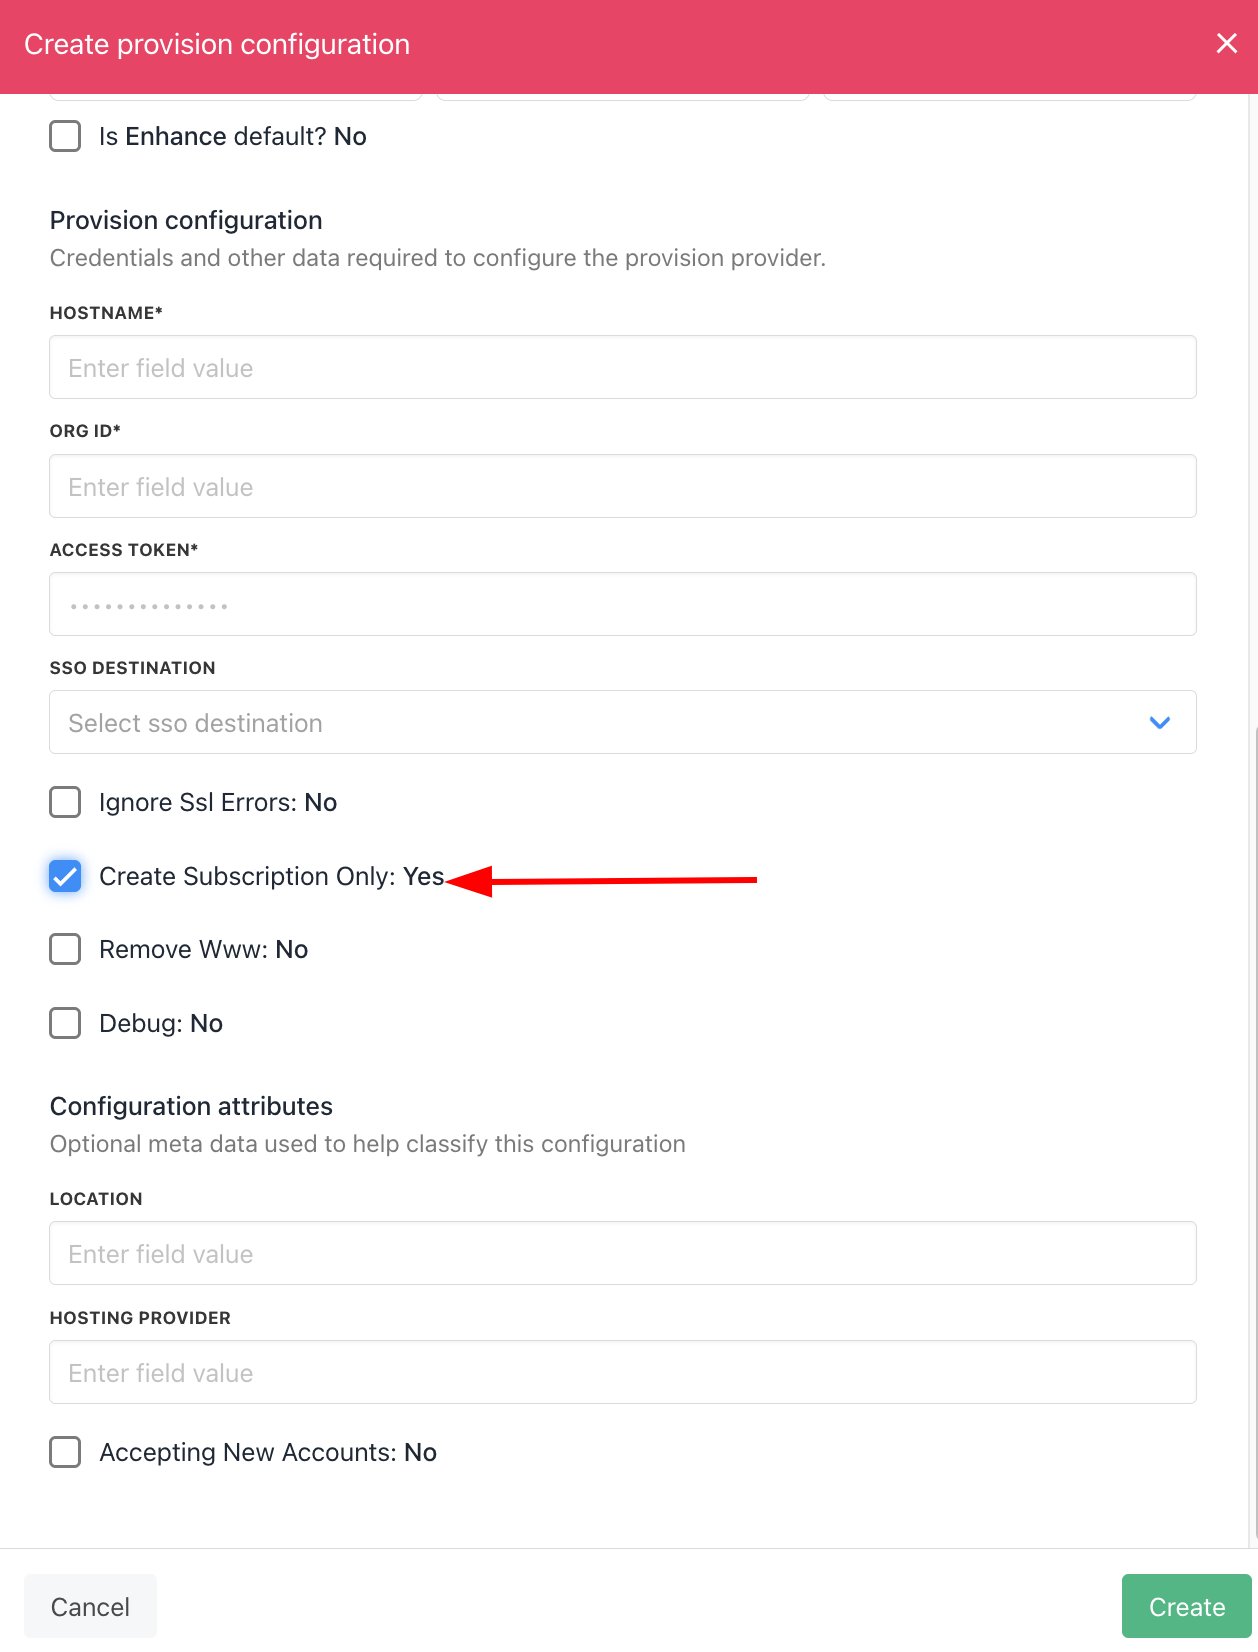
**Skip website creation for new orders**
With this approach, Upmind will only create the Enhance subscription when provisioning a new order, which allows customers to log in to their Enhance account and create their first website through the Enhance UI, according to its package and server group settings.
In Upmind, go to **Settings** > **Provision configurations** and click to edit your Enhance configuration.
At this point, your Enhance product provisioning is all set up and ready to go. For more information on setting up and selling hosting products in Upmind, refer to our first step and [Web Hosting Quick Start](/for-web-hosts/quick-start-guide-for-hosting-companies-or-resellers) guides.
### Website locations
If you have multiple servers configured in Enhance, customers can have the option to choose the server location for new websites, according to your Enhance **Server Group** configuration.
For more information on setting up server groups in Enhance, refer to their guide [Add Location Based Hosting Packages](https://enhance.com/docs/packages/create-location-based-hosting-packages.html).
When Upmind creates an Enhance subscription for a new order, a website gets created for the domain name the customer provided in their order details. By default, this website will be automatically allocated to a server group according to your settings in Enhance.
If you want to let your customers choose their server location for new orders, there are 2 options:
1. Skip website creation for new orders.
2. Configure server groups in Upmind.
**Skip website creation for new orders**
With this approach, Upmind will only create the Enhance subscription when provisioning a new order, which allows customers to log in to their Enhance account and create their first website through the Enhance UI, according to its package and server group settings.
In Upmind, go to **Settings** > **Provision configurations** and click to edit your Enhance configuration.
 **Configure server groups in Upmind**
With this approach, you will configure your Upmind products to have Location options or attributes for the customer to choose from when configuring the product in their basket. The location they select will be linked to a corresponding server group in Enhance.
For the purpose of this guide, we will assume you have set up your locations as product attributes. For more information on setting these up, refer to our [Product Attributes](/using-upmind/product-management/how-to-add-product-attributes) guide. If you want your different server groups to add to the price of newly ordered hosting products, refer to our [Product Options](/using-upmind/product-management/how-to-add-product-options) guide. Regardless of whether you choose options or attributes, you'll configure your product provisioning in the same way.
In the example below, we assume that you have set up server groups with the names **London**, **New Mexico,** **Dallas**, and **Toronto** in your Enhance control panel.
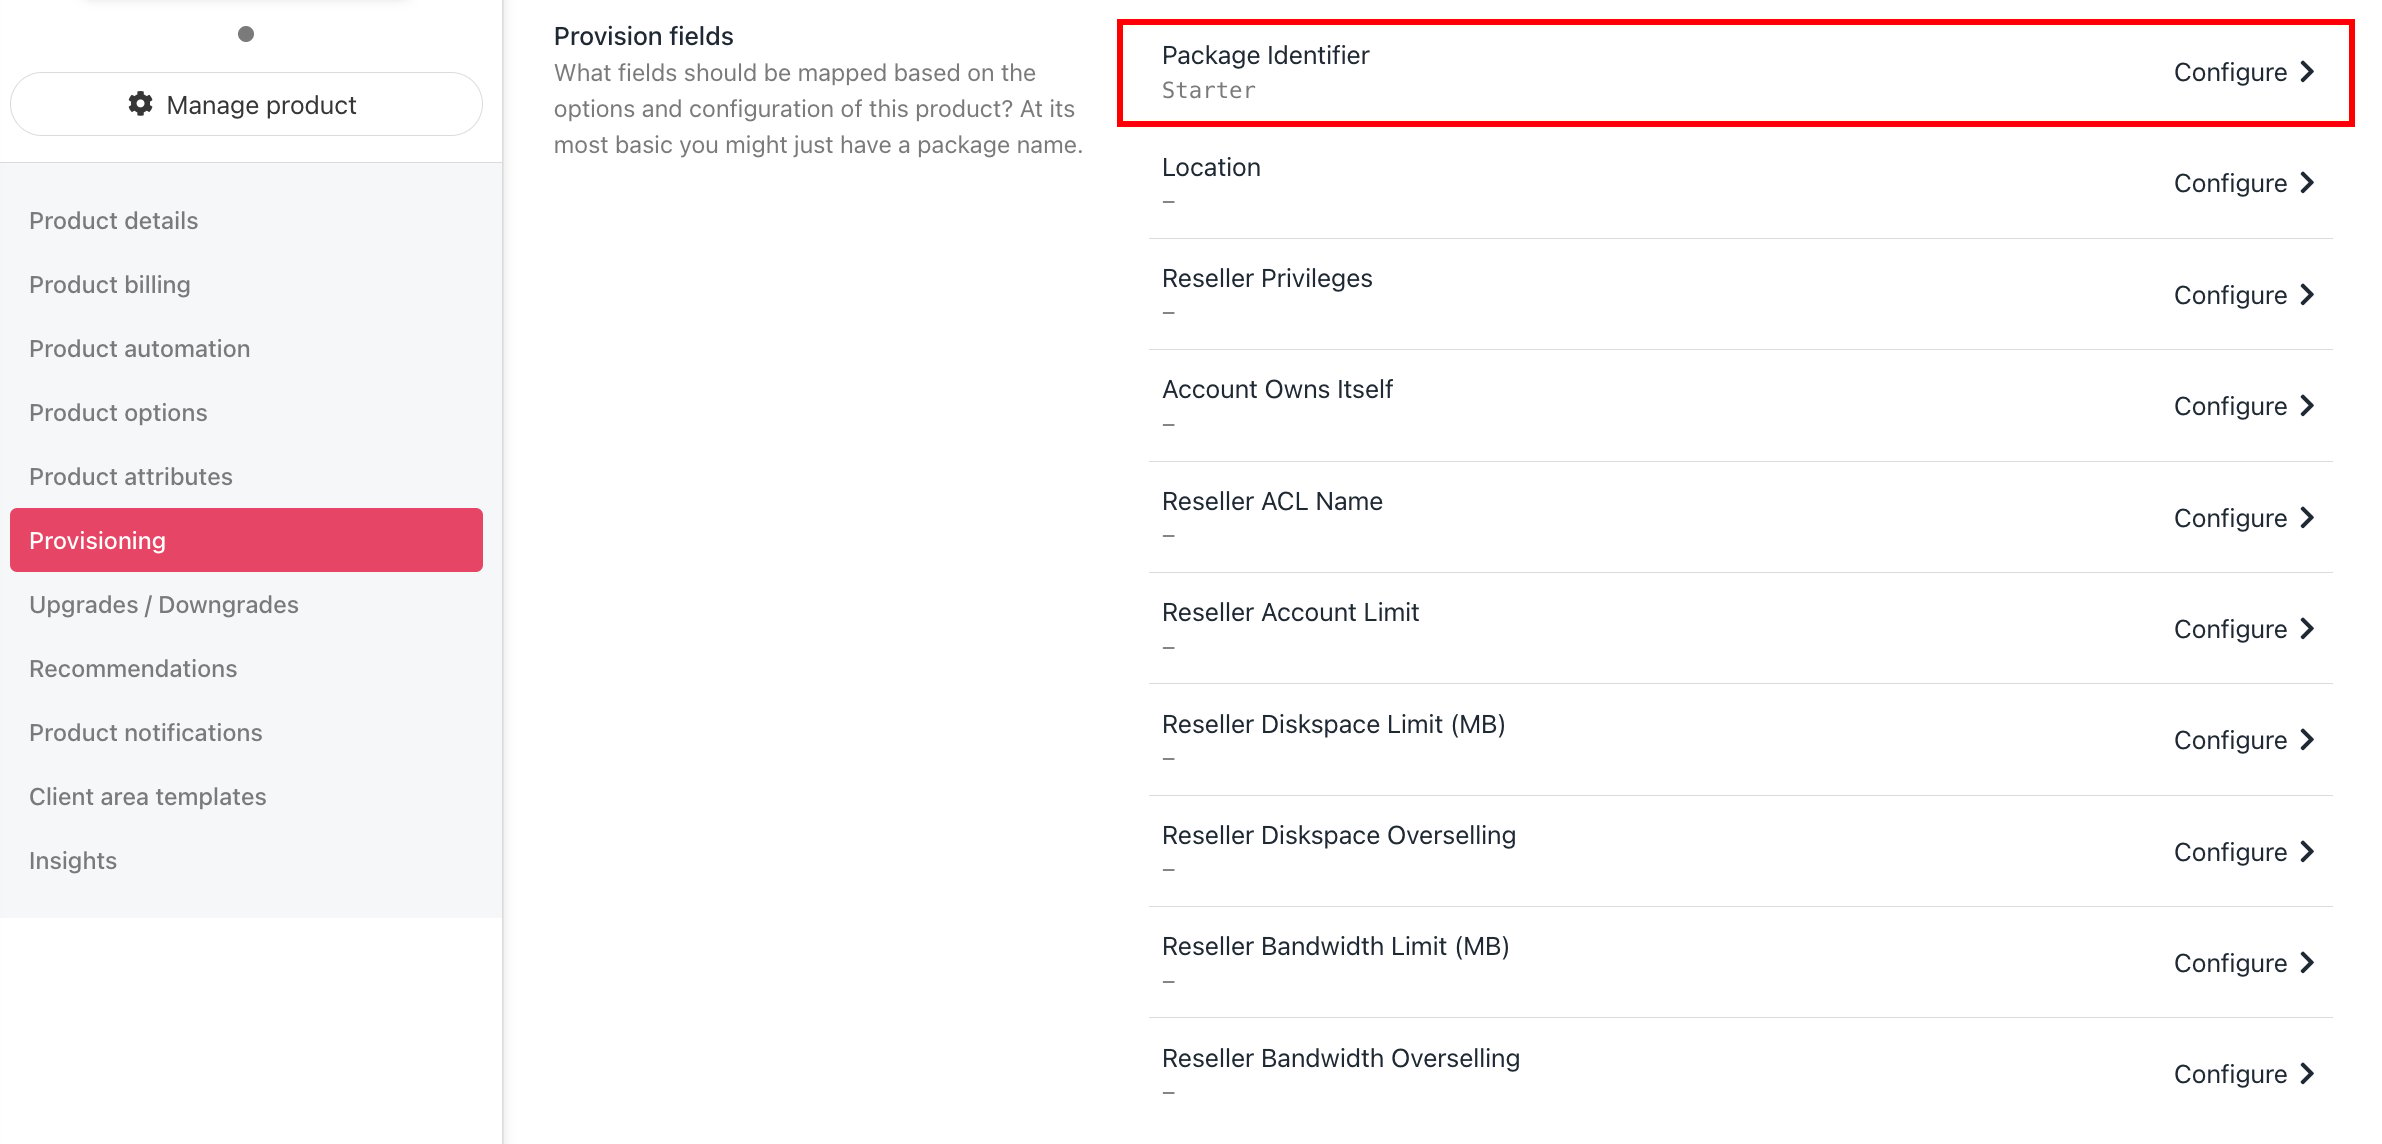
In Upmind, once you have set up a product attribute for each server group you want customers to choose from, go to **Settings** > **Product catalogue**, click to edit your hosting package, and on its **Provisioning** page scroll down to the **Provision fields** section.
**Configure server groups in Upmind**
With this approach, you will configure your Upmind products to have Location options or attributes for the customer to choose from when configuring the product in their basket. The location they select will be linked to a corresponding server group in Enhance.
For the purpose of this guide, we will assume you have set up your locations as product attributes. For more information on setting these up, refer to our [Product Attributes](/using-upmind/product-management/how-to-add-product-attributes) guide. If you want your different server groups to add to the price of newly ordered hosting products, refer to our [Product Options](/using-upmind/product-management/how-to-add-product-options) guide. Regardless of whether you choose options or attributes, you'll configure your product provisioning in the same way.
In the example below, we assume that you have set up server groups with the names **London**, **New Mexico,** **Dallas**, and **Toronto** in your Enhance control panel.
In Upmind, once you have set up a product attribute for each server group you want customers to choose from, go to **Settings** > **Product catalogue**, click to edit your hosting package, and on its **Provisioning** page scroll down to the **Provision fields** section.
 Now, when Upmind provisions new Enhance orders of this product, the first website will be allocated to the server group corresponding to the attribute the customer chose when configuring the product in their basket.
## Add existing subscription
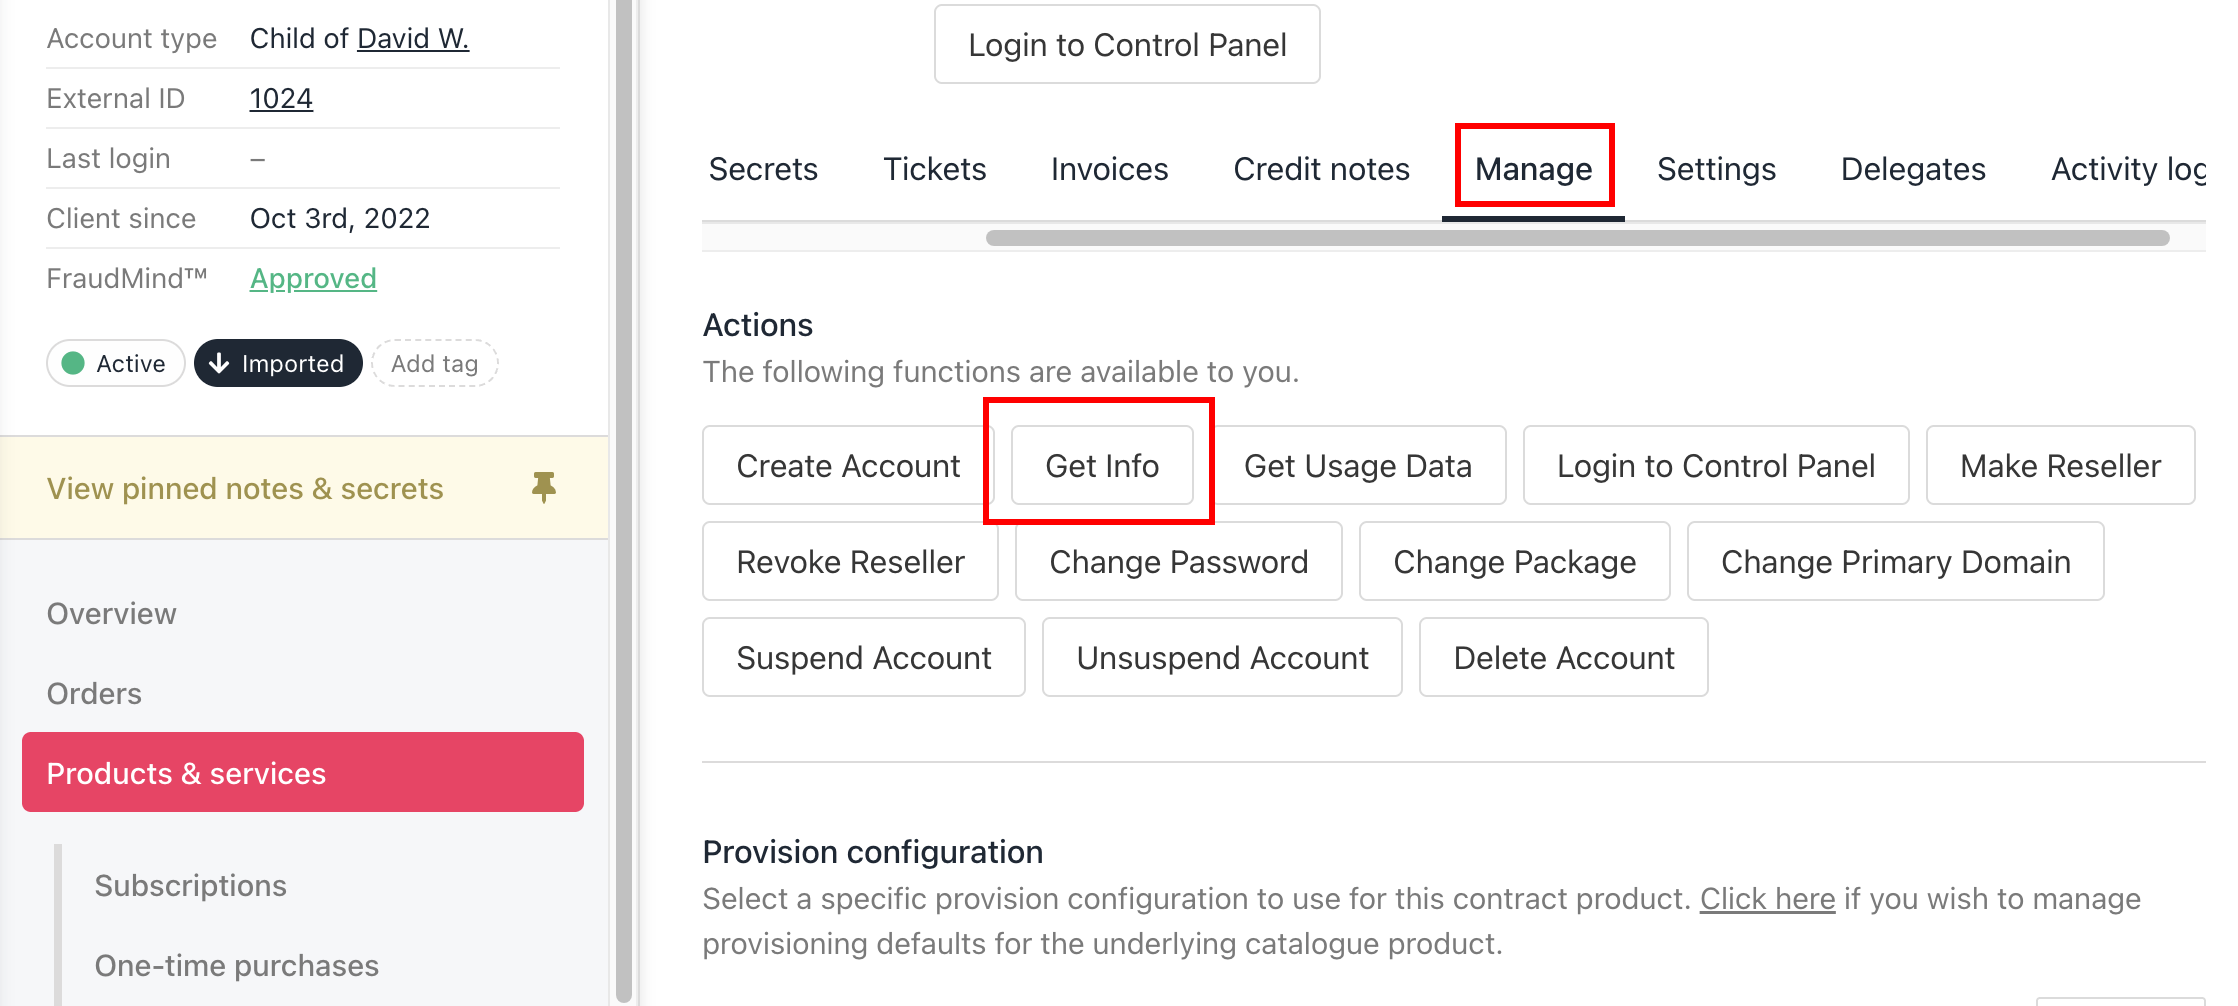
1. If you need to link an existing Enhance subscription with an order in Upmind, go to the order product's Manage tab and run the **Get Info** function.
Now, when Upmind provisions new Enhance orders of this product, the first website will be allocated to the server group corresponding to the attribute the customer chose when configuring the product in their basket.
## Add existing subscription
1. If you need to link an existing Enhance subscription with an order in Upmind, go to the order product's Manage tab and run the **Get Info** function.
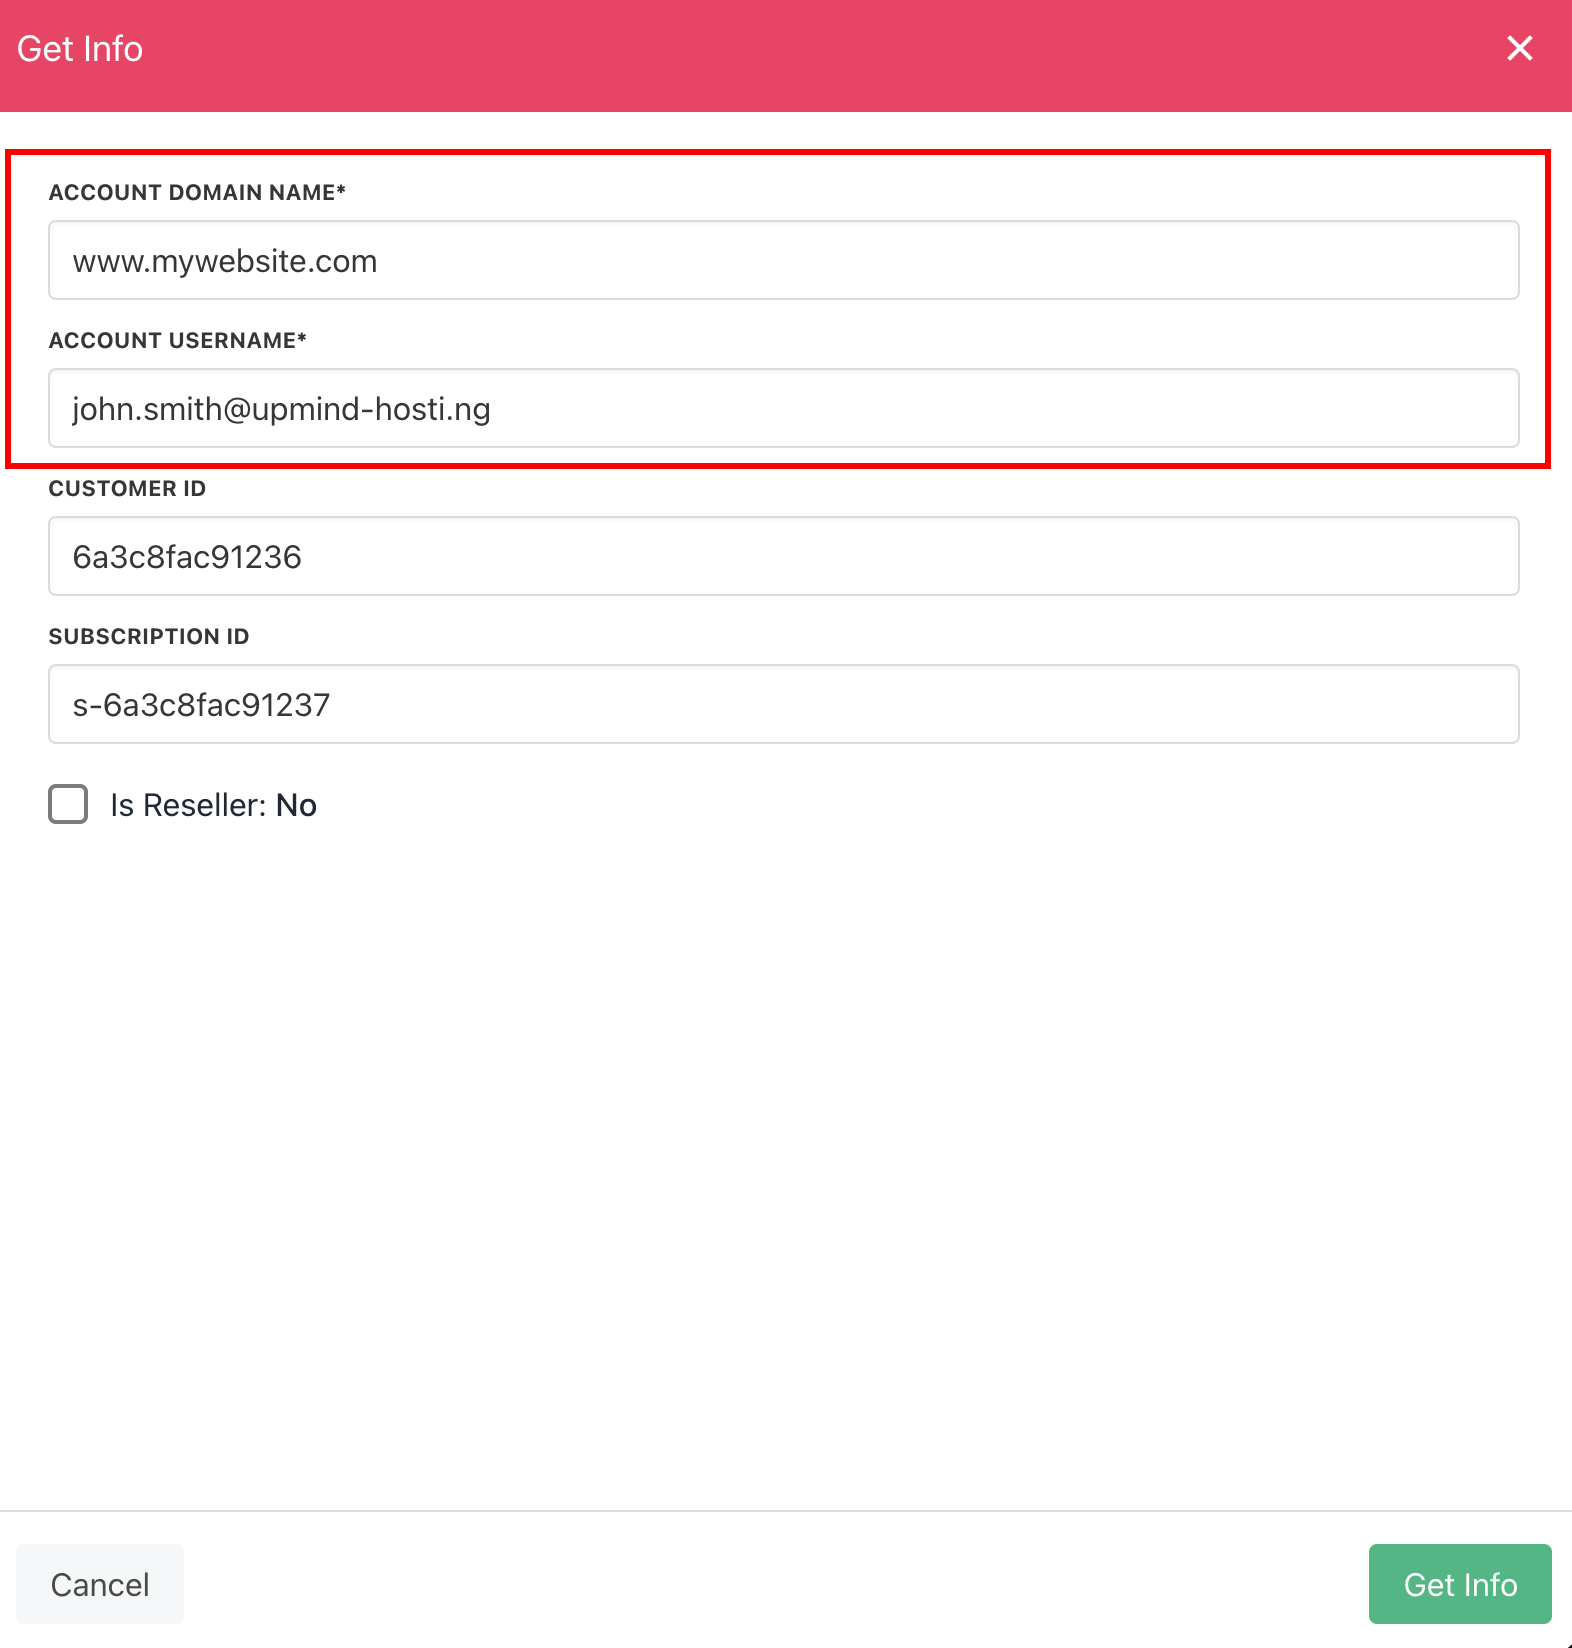
 2. Fill in the **Account Domain Name** and **Account Username** (the Enhance customer's email address) when prompted.
 If the order's status is `Awaiting Activation`, don't forget to also press **Activate** on the summary tab to commence recurring billing.
### Create new order for existing customer
The first time you try to create a new subscription/website for a customer that already exists in Enhance, you will likely get an error stating the customer's email already exists.
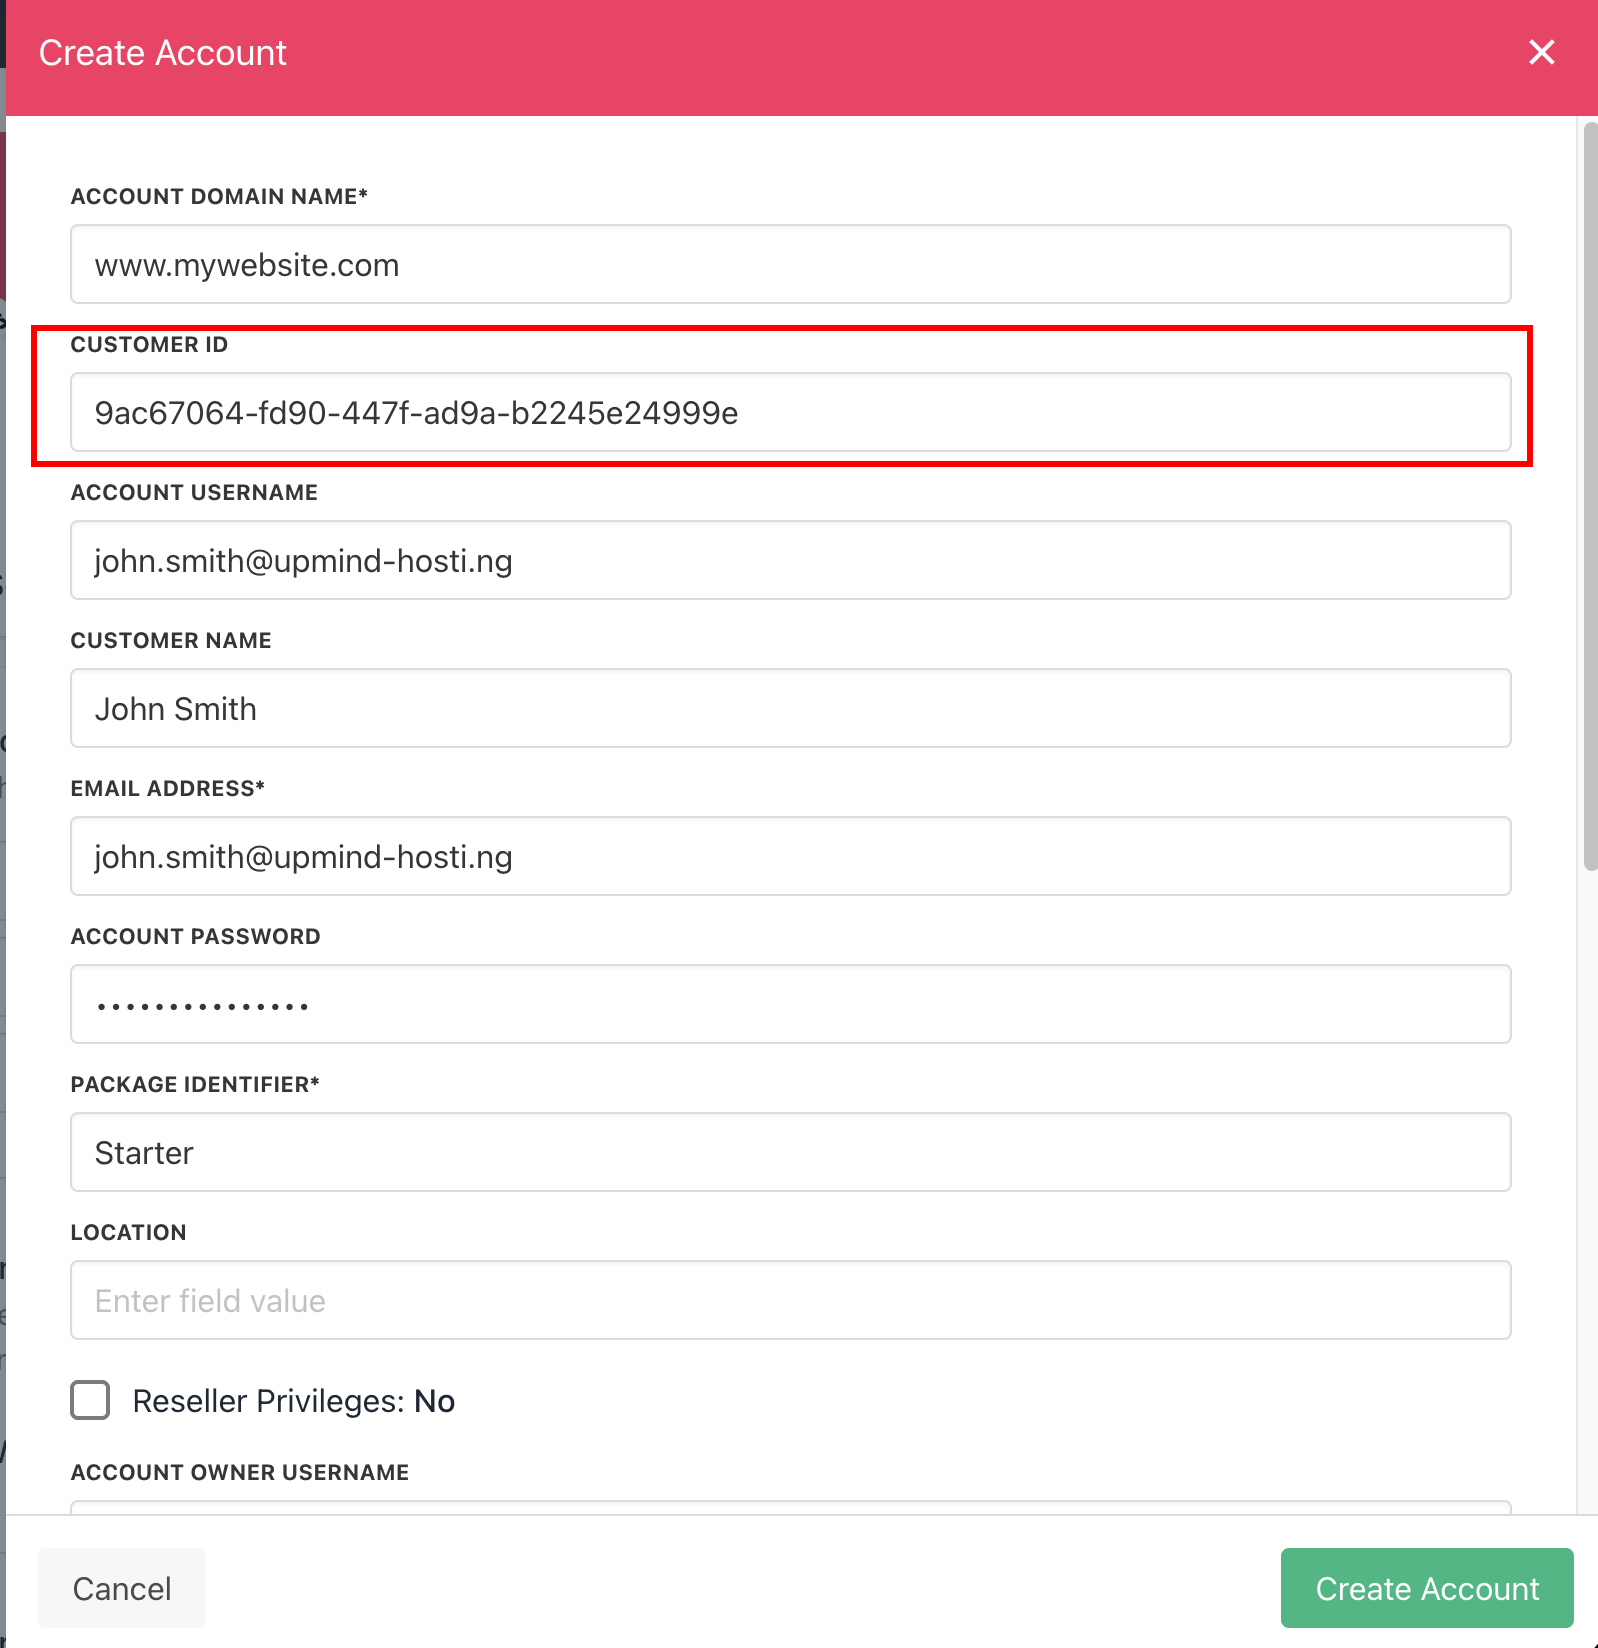
To solve this, click **Create Account** and paste in the ID of the Enhance customer. You can get their ID by taking it from the URL when viewing the customer in your Enhance panel.
If the order's status is `Awaiting Activation`, don't forget to also press **Activate** on the summary tab to commence recurring billing.
### Create new order for existing customer
The first time you try to create a new subscription/website for a customer that already exists in Enhance, you will likely get an error stating the customer's email already exists.
To solve this, click **Create Account** and paste in the ID of the Enhance customer. You can get their ID by taking it from the URL when viewing the customer in your Enhance panel.
 When the Create Account function succeeds, it will store the Enhance customer ID against the Client in Upmind so that you don't need to do this for future orders from this Upmind Client. In the example below, this customer's ID is `9ac67064-fd90-447f-ad9a-b2245e24999e`.