> ## Documentation Index
> Fetch the complete documentation index at: https://docs.upmind.com/llms.txt
> Use this file to discover all available pages before exploring further.
# Webhooks Overview
> How to use webhooks for real-time notifications to automate workflows and integrate with third-party software.
Webhooks enable your Upmind instance to automatically notify external services of key events, such as invoice payments, order updates, or client changes, by sending detailed event data through HTTP POST.
This allows smooth integration with automation tools, custom applications, or external APIs, letting you automate workflows through custom code or no-code platforms like Zapier.
## **Configuring webhooks**
### **Create a webhook endpoint**
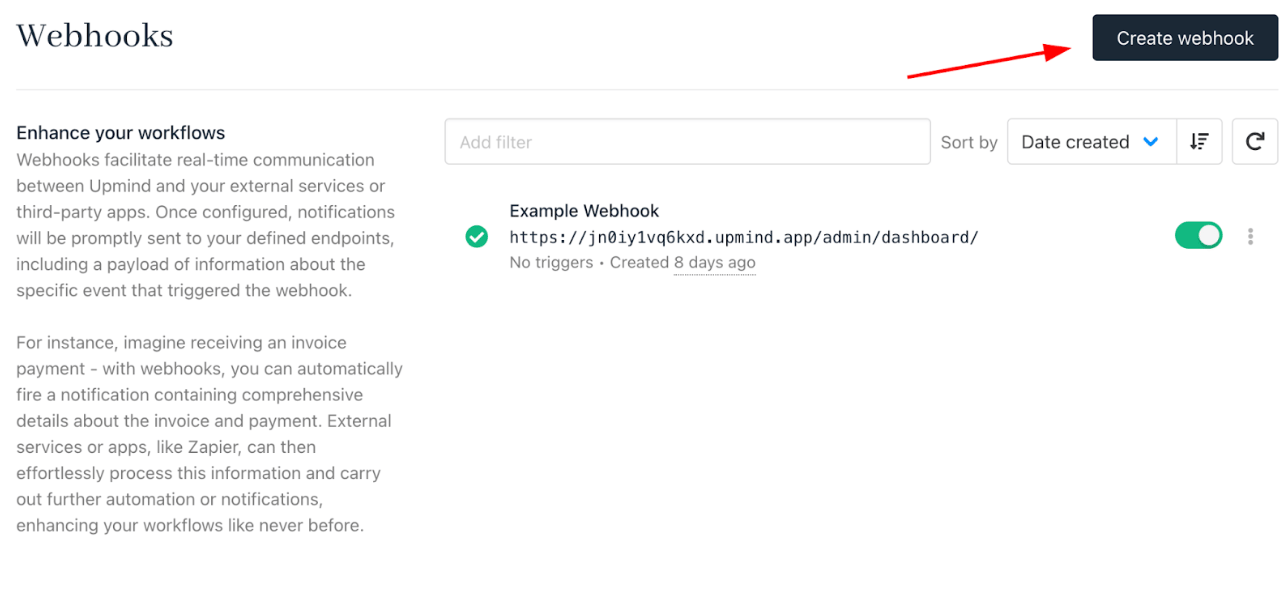
1. Go to **Settings** > **Webhooks** in the admin area.
2. Click **Create Webhook**.
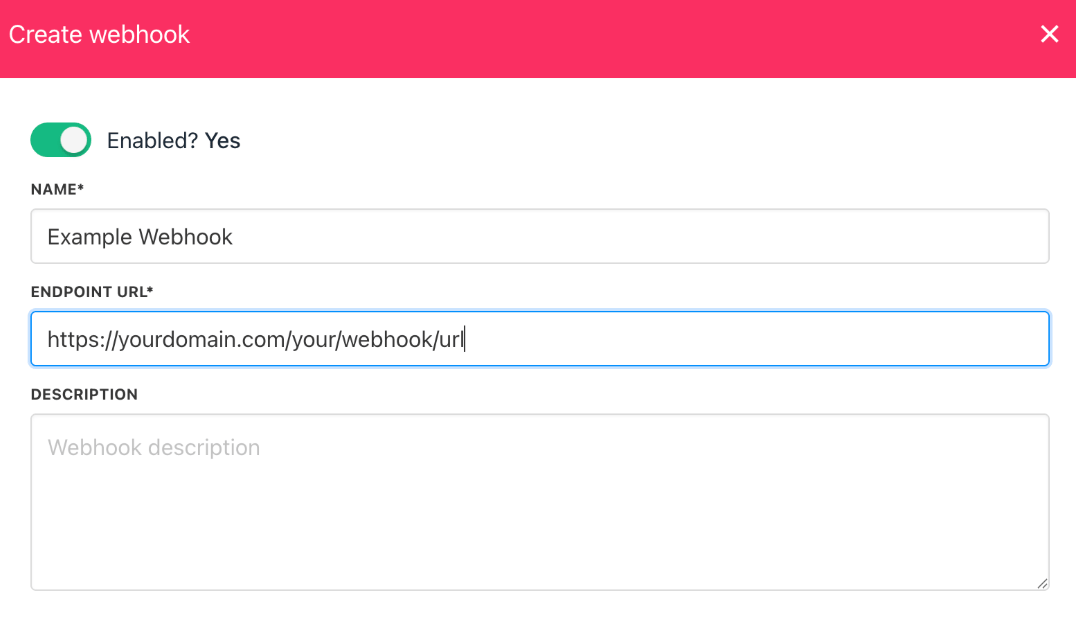
 3. Enter a name and the endpoint URL where notifications should be delivered (for example, your app, middleware, or Zapier webhook URL). Multiple endpoints can be configured for different workflows or third-party services.
 ### **Set up event triggers**
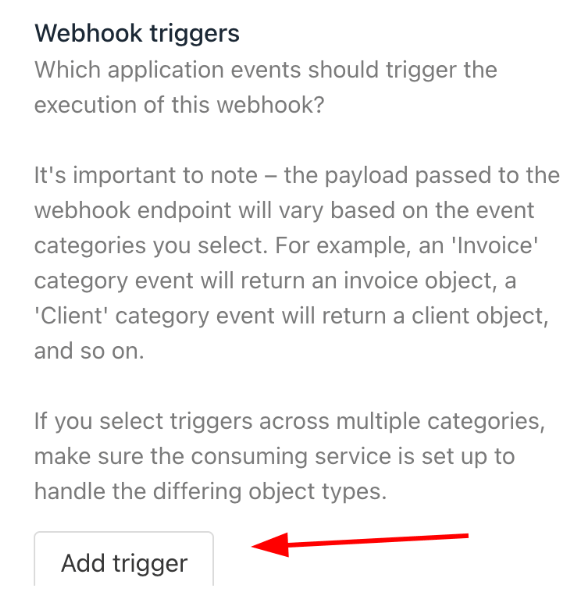
1. In your webhook settings, select **Add trigger**.
### **Set up event triggers**
1. In your webhook settings, select **Add trigger**.
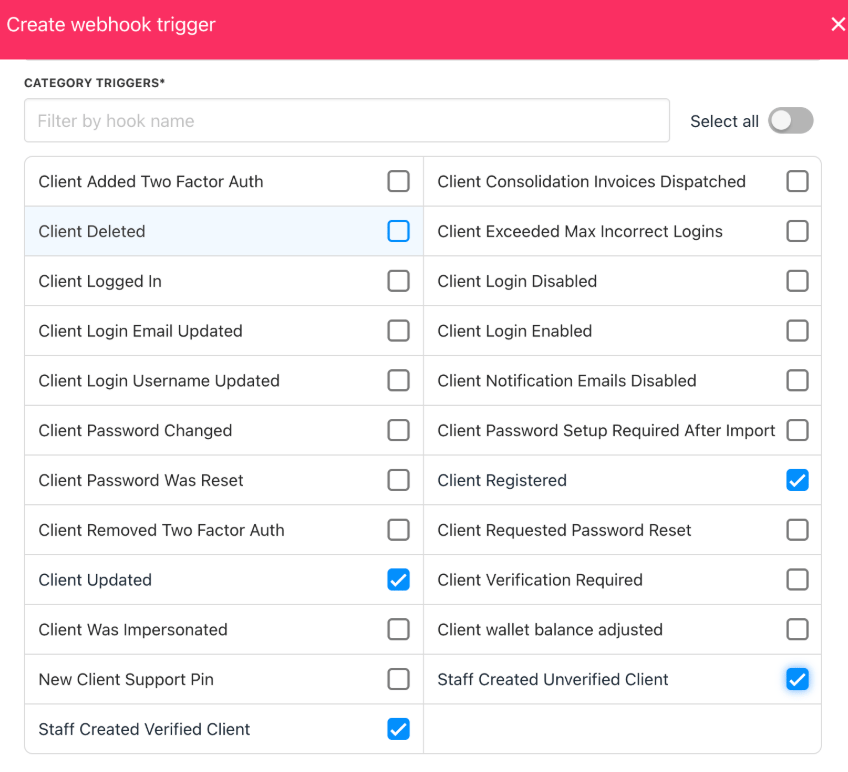
 2. Choose the specific events (e.g., client registered, order paid, invoice refunded) you want this endpoint to listen for.
3. To enable triggers across multiple event categories, save your selections in one category, then repeat for others. Each trigger activates a webhook when its related action occurs in Upmind.
2. Choose the specific events (e.g., client registered, order paid, invoice refunded) you want this endpoint to listen for.
3. To enable triggers across multiple event categories, save your selections in one category, then repeat for others. Each trigger activates a webhook when its related action occurs in Upmind.
 ### **Test webhook delivery**
1. Go to **Clients** > **Add Client** in your admin area.
2. Add a new test client or edit an existing one (e.g., change their name or update any field tied to a webhook trigger).
### **Test webhook delivery**
1. Go to **Clients** > **Add Client** in your admin area.
2. Add a new test client or edit an existing one (e.g., change their name or update any field tied to a webhook trigger).
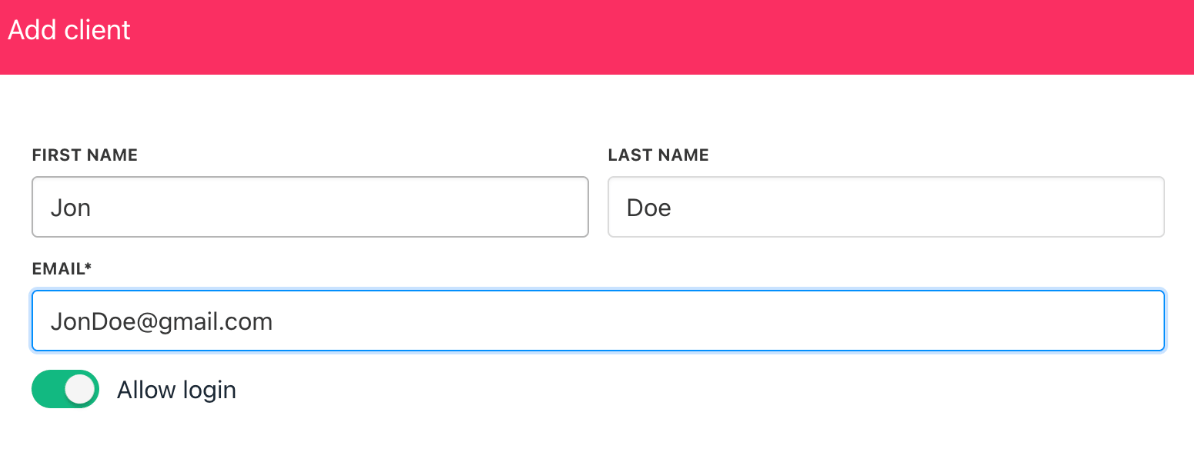 3. View the webhook log under **Logs** > **Webhook** events log to confirm reception.
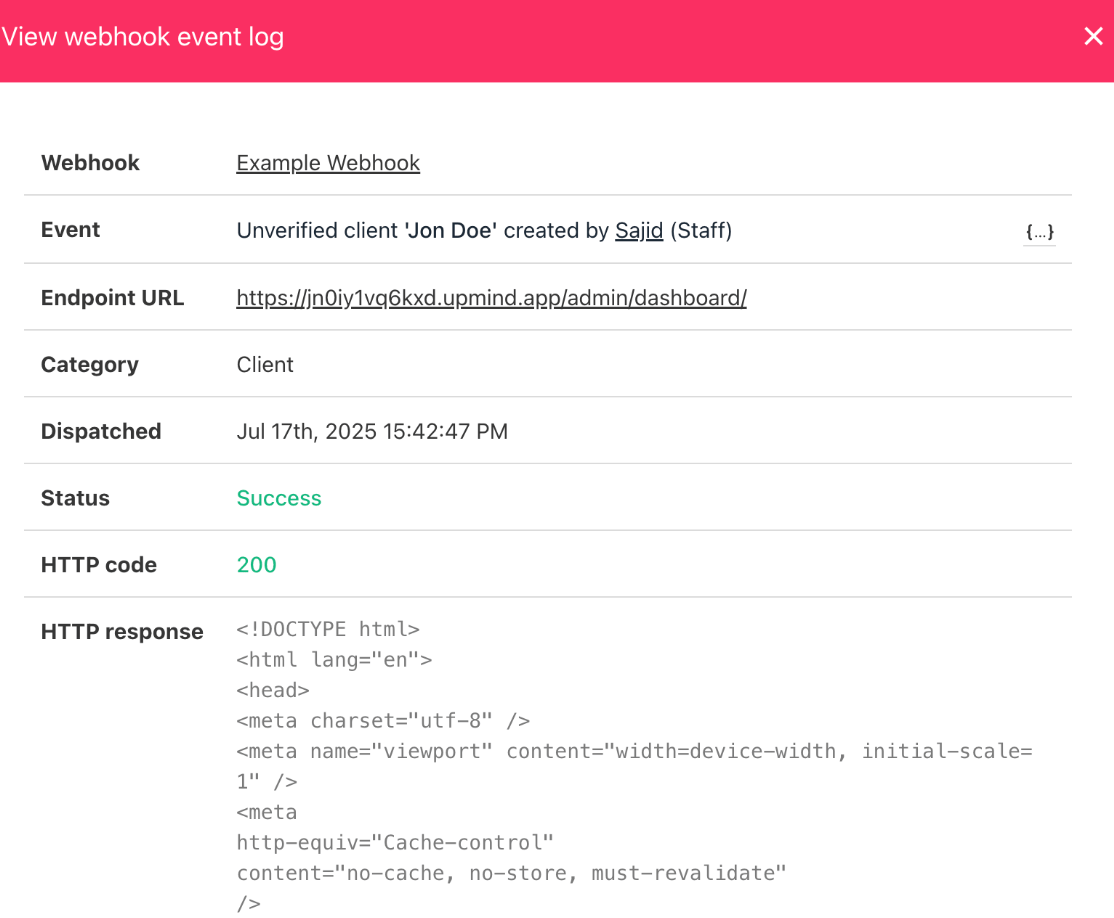
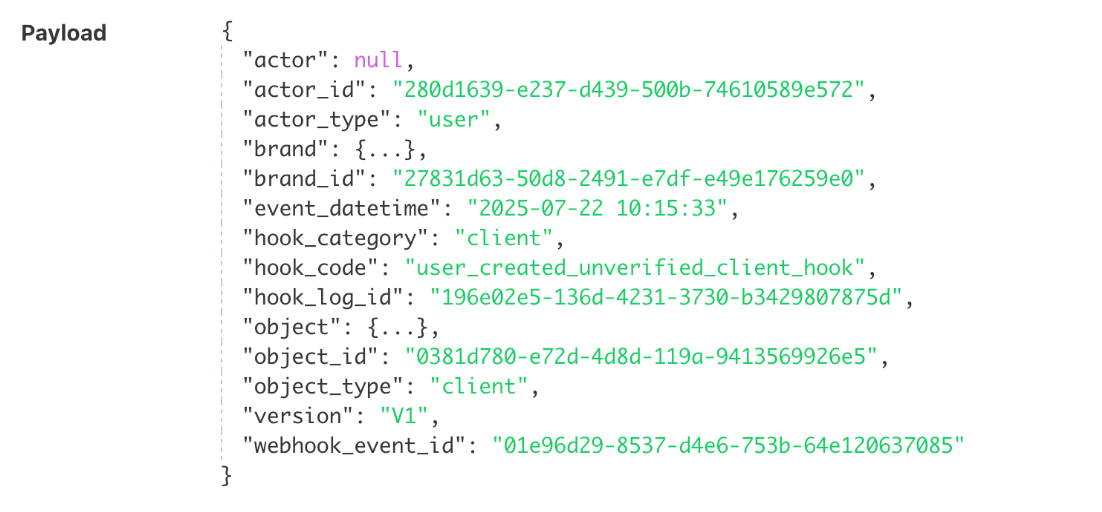 Each event displays payload details, the response from your endpoint, and HTTP status codes. Use the logs to troubleshoot or verify that your integration is working as intended.
For advanced details on payloads, authentication, and consuming webhooks, see [Consuming Webhooks](/developers/webhooks/consuming-webhooks).
Each event displays payload details, the response from your endpoint, and HTTP status codes. Use the logs to troubleshoot or verify that your integration is working as intended.
For advanced details on payloads, authentication, and consuming webhooks, see [Consuming Webhooks](/developers/webhooks/consuming-webhooks).